Using the Micro Nikkor 55mm f3.5 lens on my Leica SL2 camera for general photography

When you think of a general purpose lens, your mind normally doesn’t wander to a macro lens.

I have found over the years that there are a couple of Nikkor lenses in this family that work really well for the task of general purpose photography lens and this is one of them. This particular copy is an Ai variant made somewhere in the late 1976 to early 1977 time frame so this lens is almost 50 years old and just look at the image quality it produces… Lens manufactures were on their A game at this point and Nikon was a force to be reckoned with in this area. This lens isn’t even their best macro lens either… That is something that to this day surprises me a little. It has an external aperture ring that is detented in whole stops…except the very first one where it goes from f3.5 to f4 for some reason… Who knows why they did this, but they did so it is there if you want to use it.

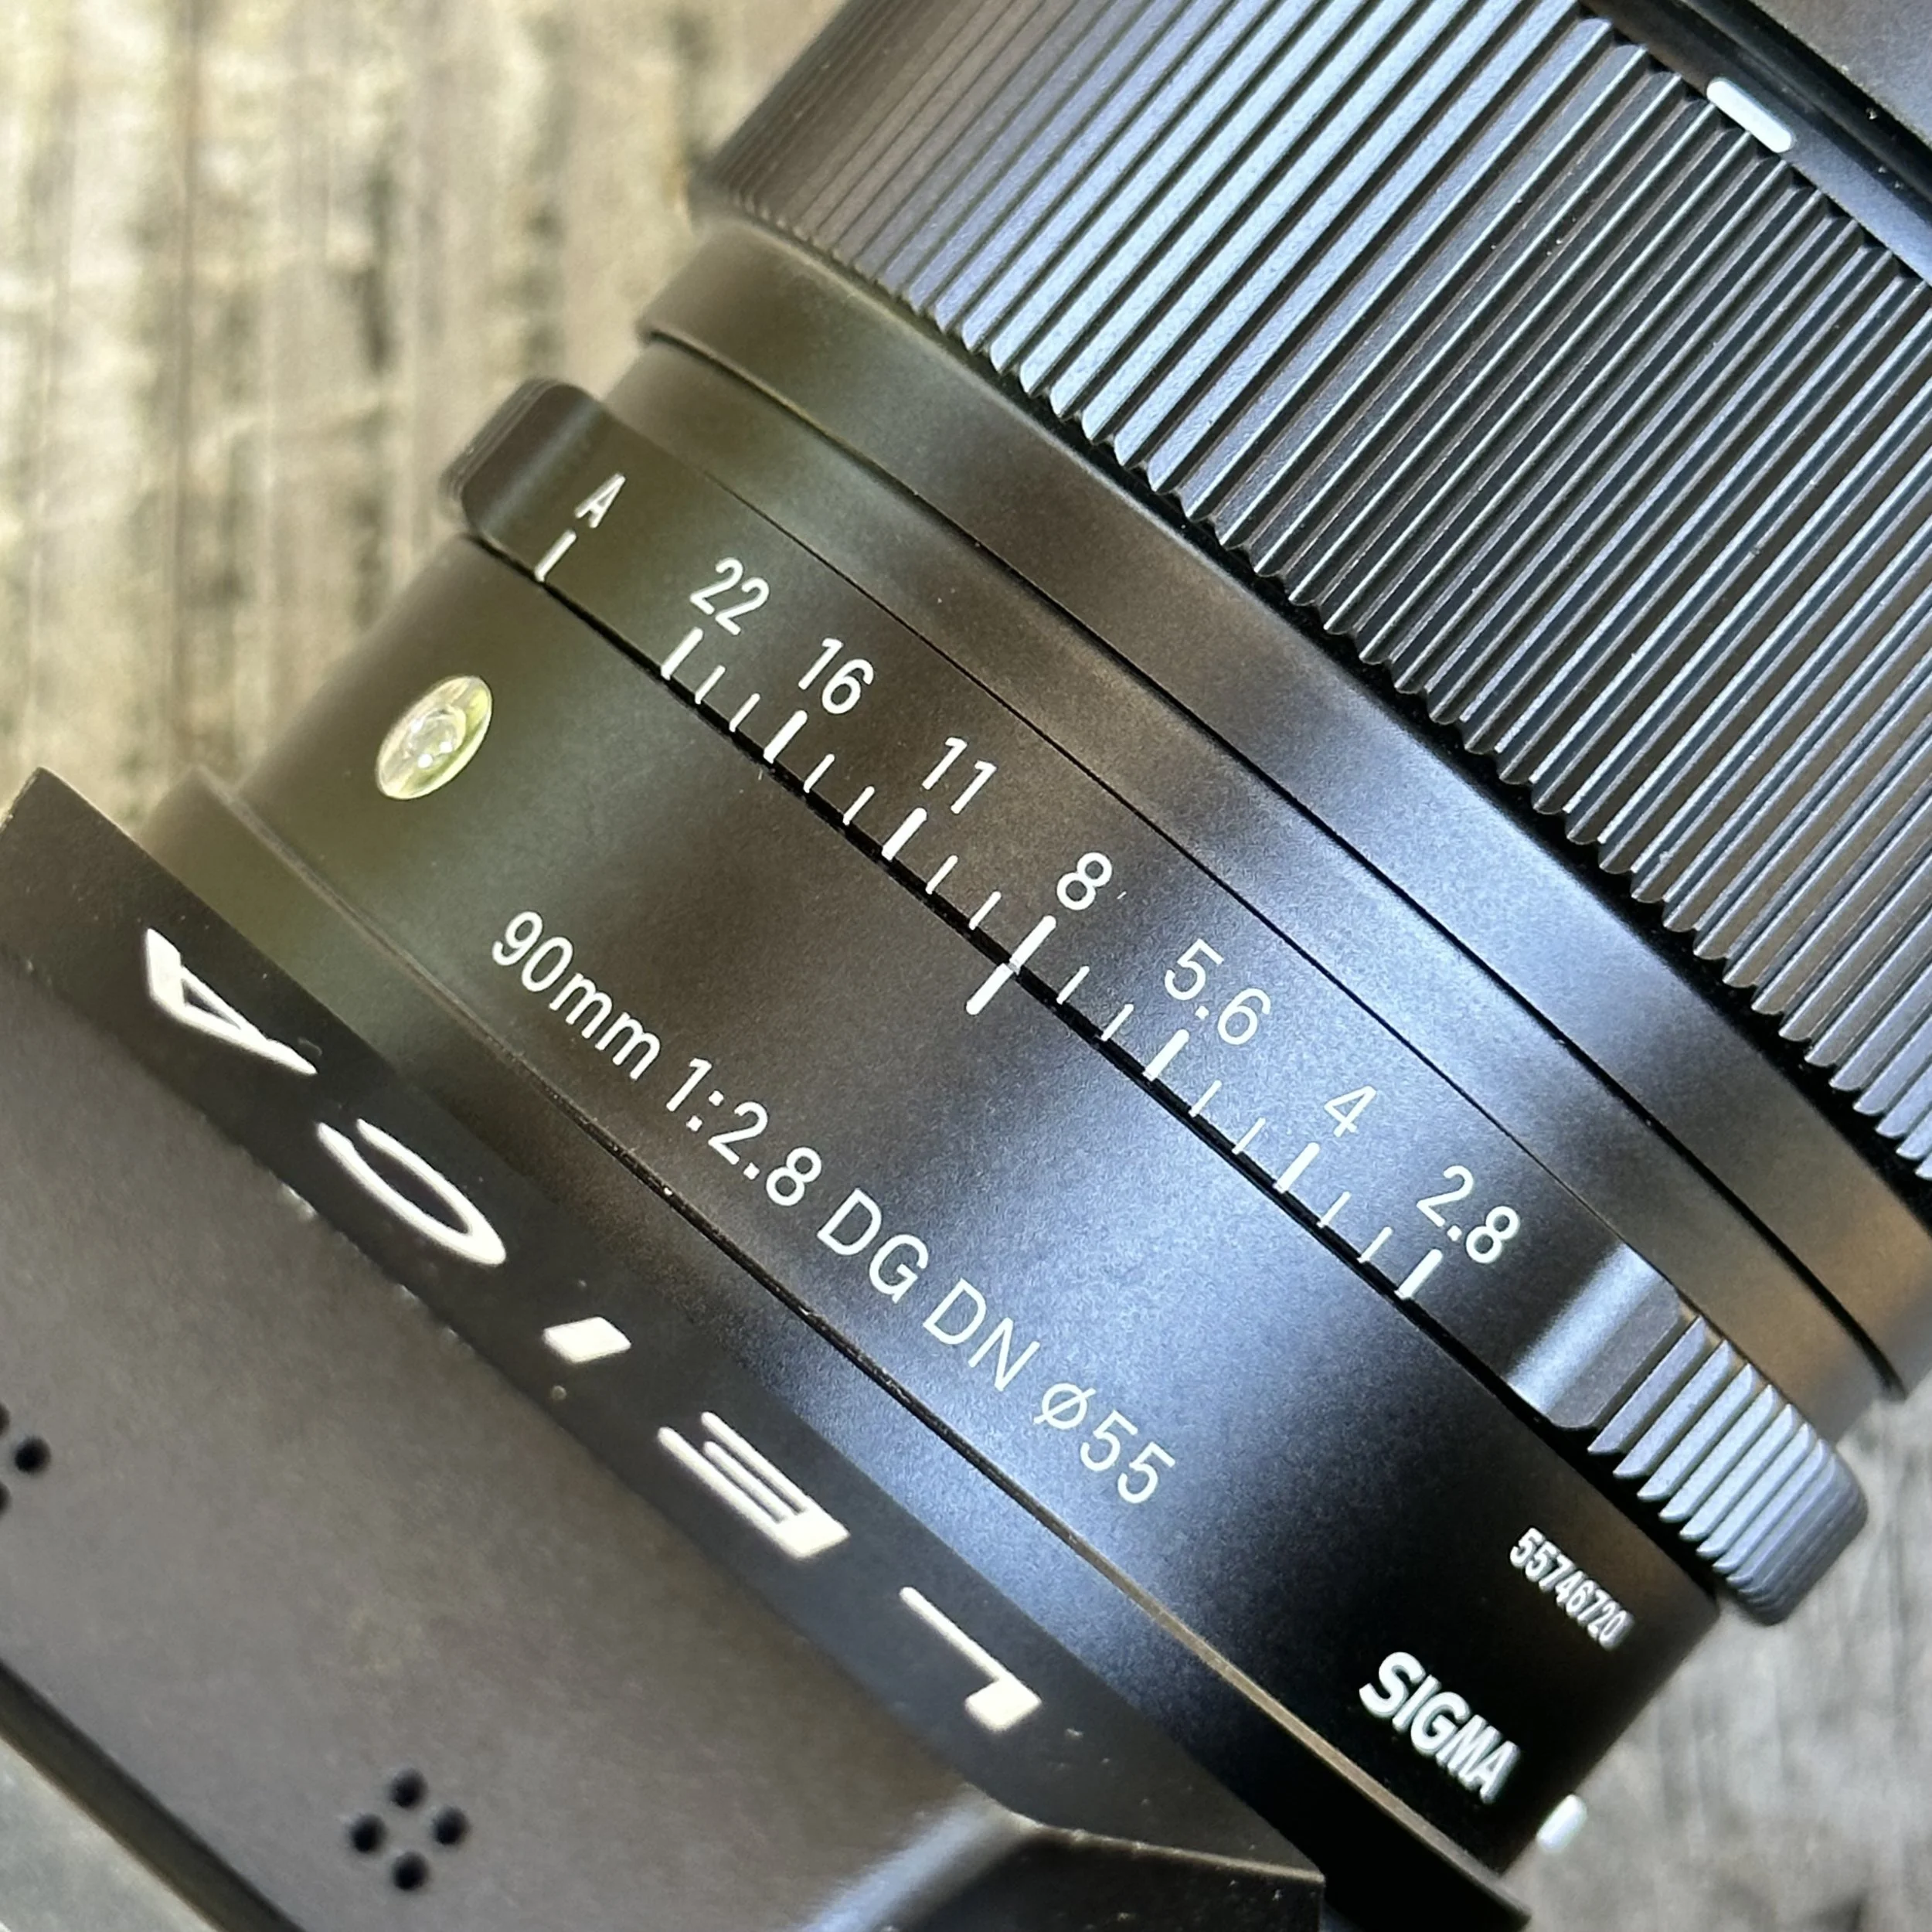
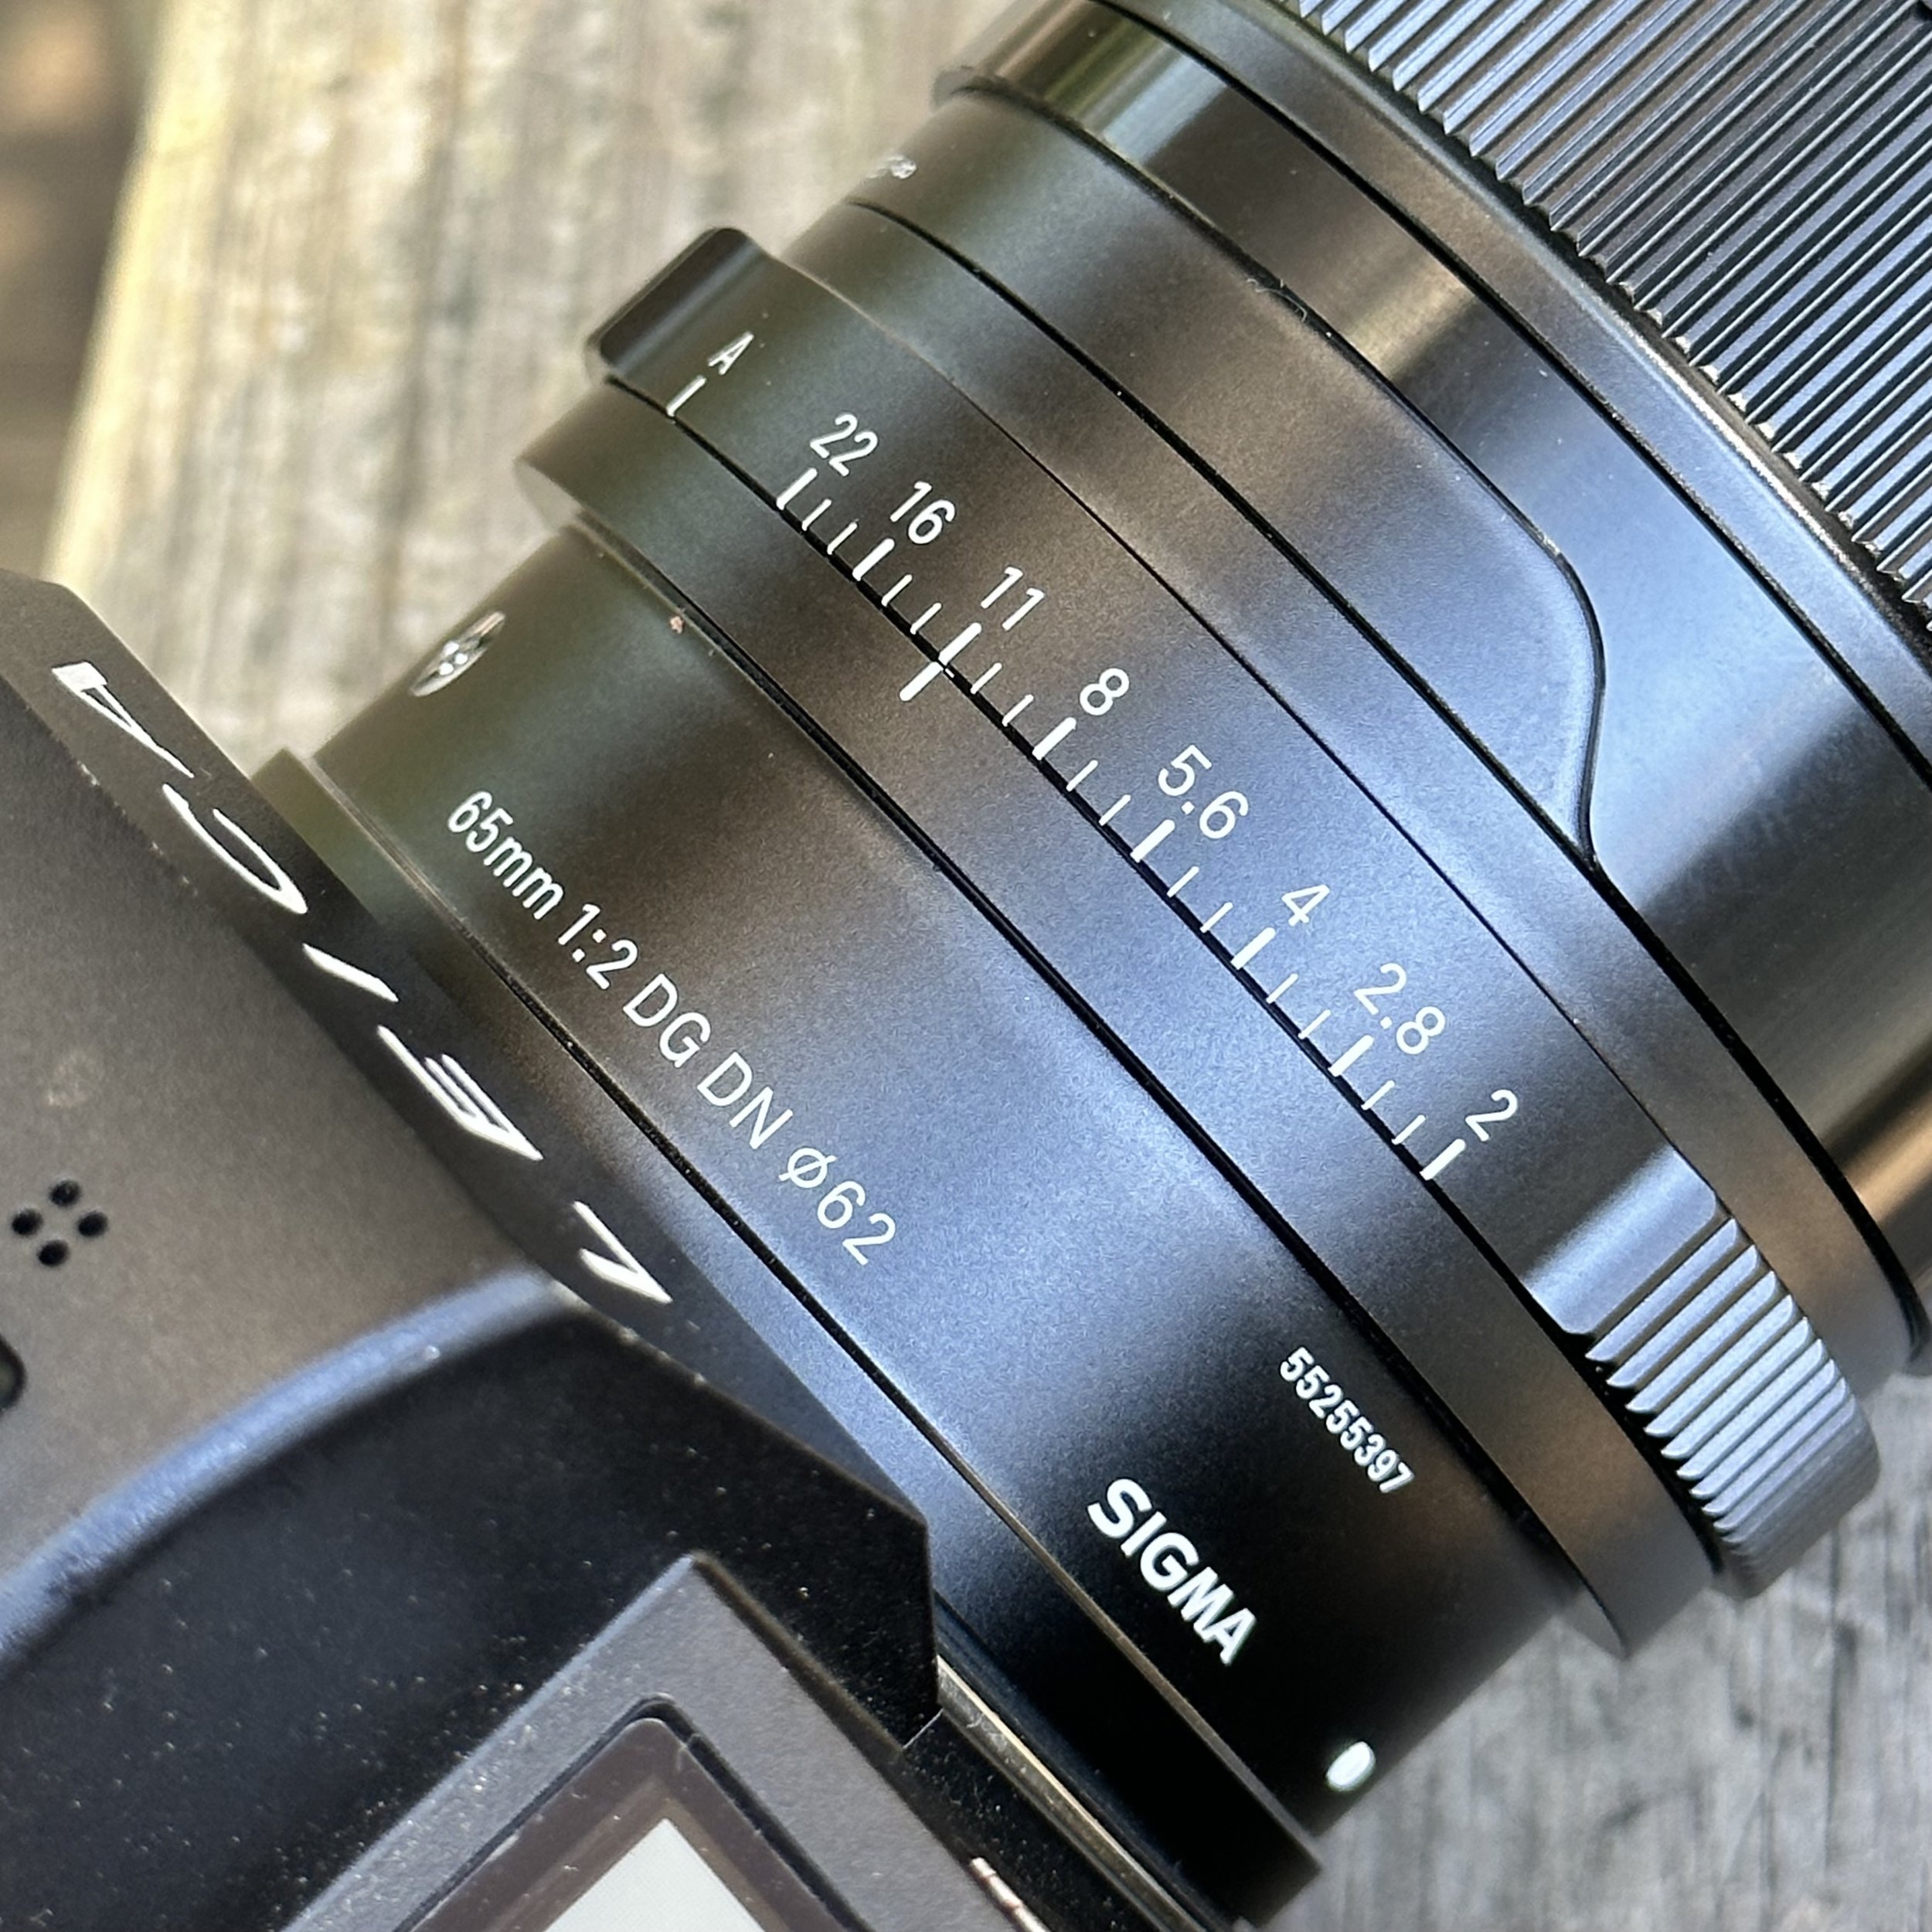
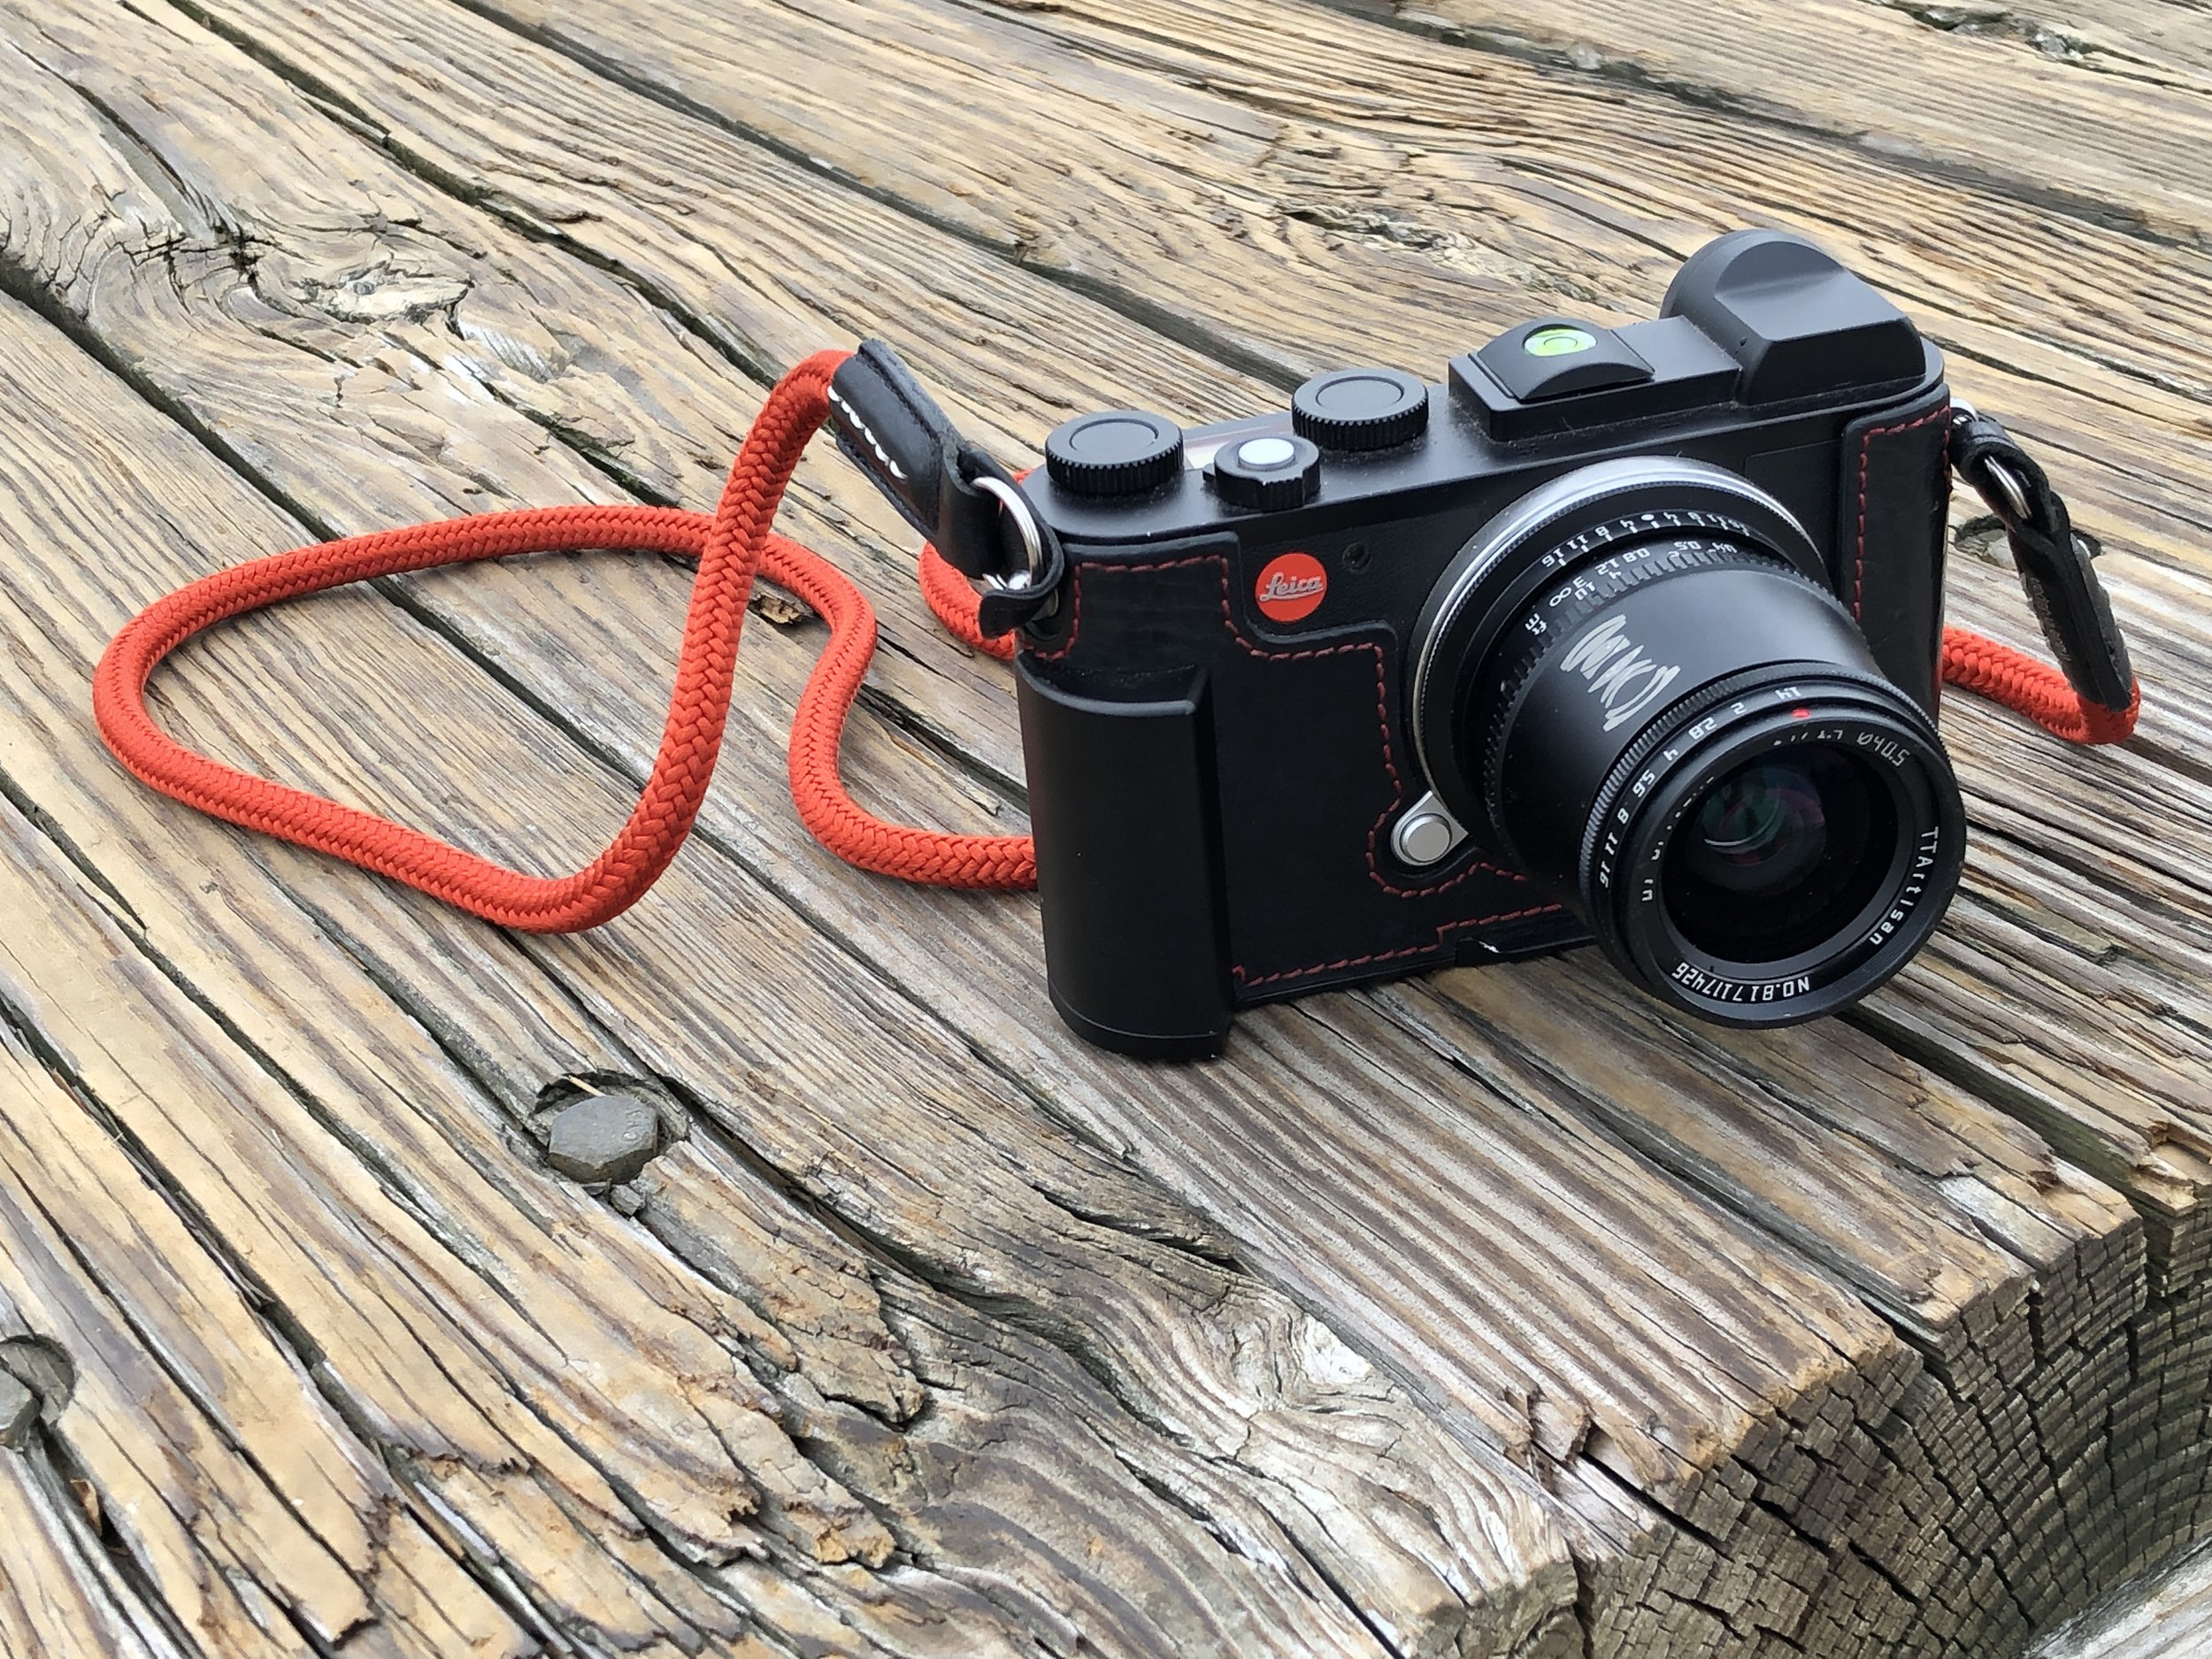
Minimum focus distance is a surprising 9 1/2” from the image plane. So this is right at 4.25 inches in front of the lens when mounted on my Leica SL2 camera. This also gives you a preproduction ratio of 1:2 on the image sensor, that is to say that if you have an object that is 1 inch across in reality, it will be 1/2 inch across the sensor. To get to 1:1 reproduction ratio you need help… The PK-3 extension ring will get you half that distance and to the true 1:1 reproduction ratio at minimum focus distance. All of this is conveniently engraved on the lens barrel for you should you need to look it up in the field… Also notice in these two images that the lens “pumps” air which means it has external focus movement, the lens grows and shrinks when you adjust focus, it is common belief that this is where dust gets into the lens from, when you open the lens fully to minimum focus distance the lens intakes a full charge of air and doesn’t have dust seals to prevent dust from entering the lens mechanism, so you get a little internal dust…

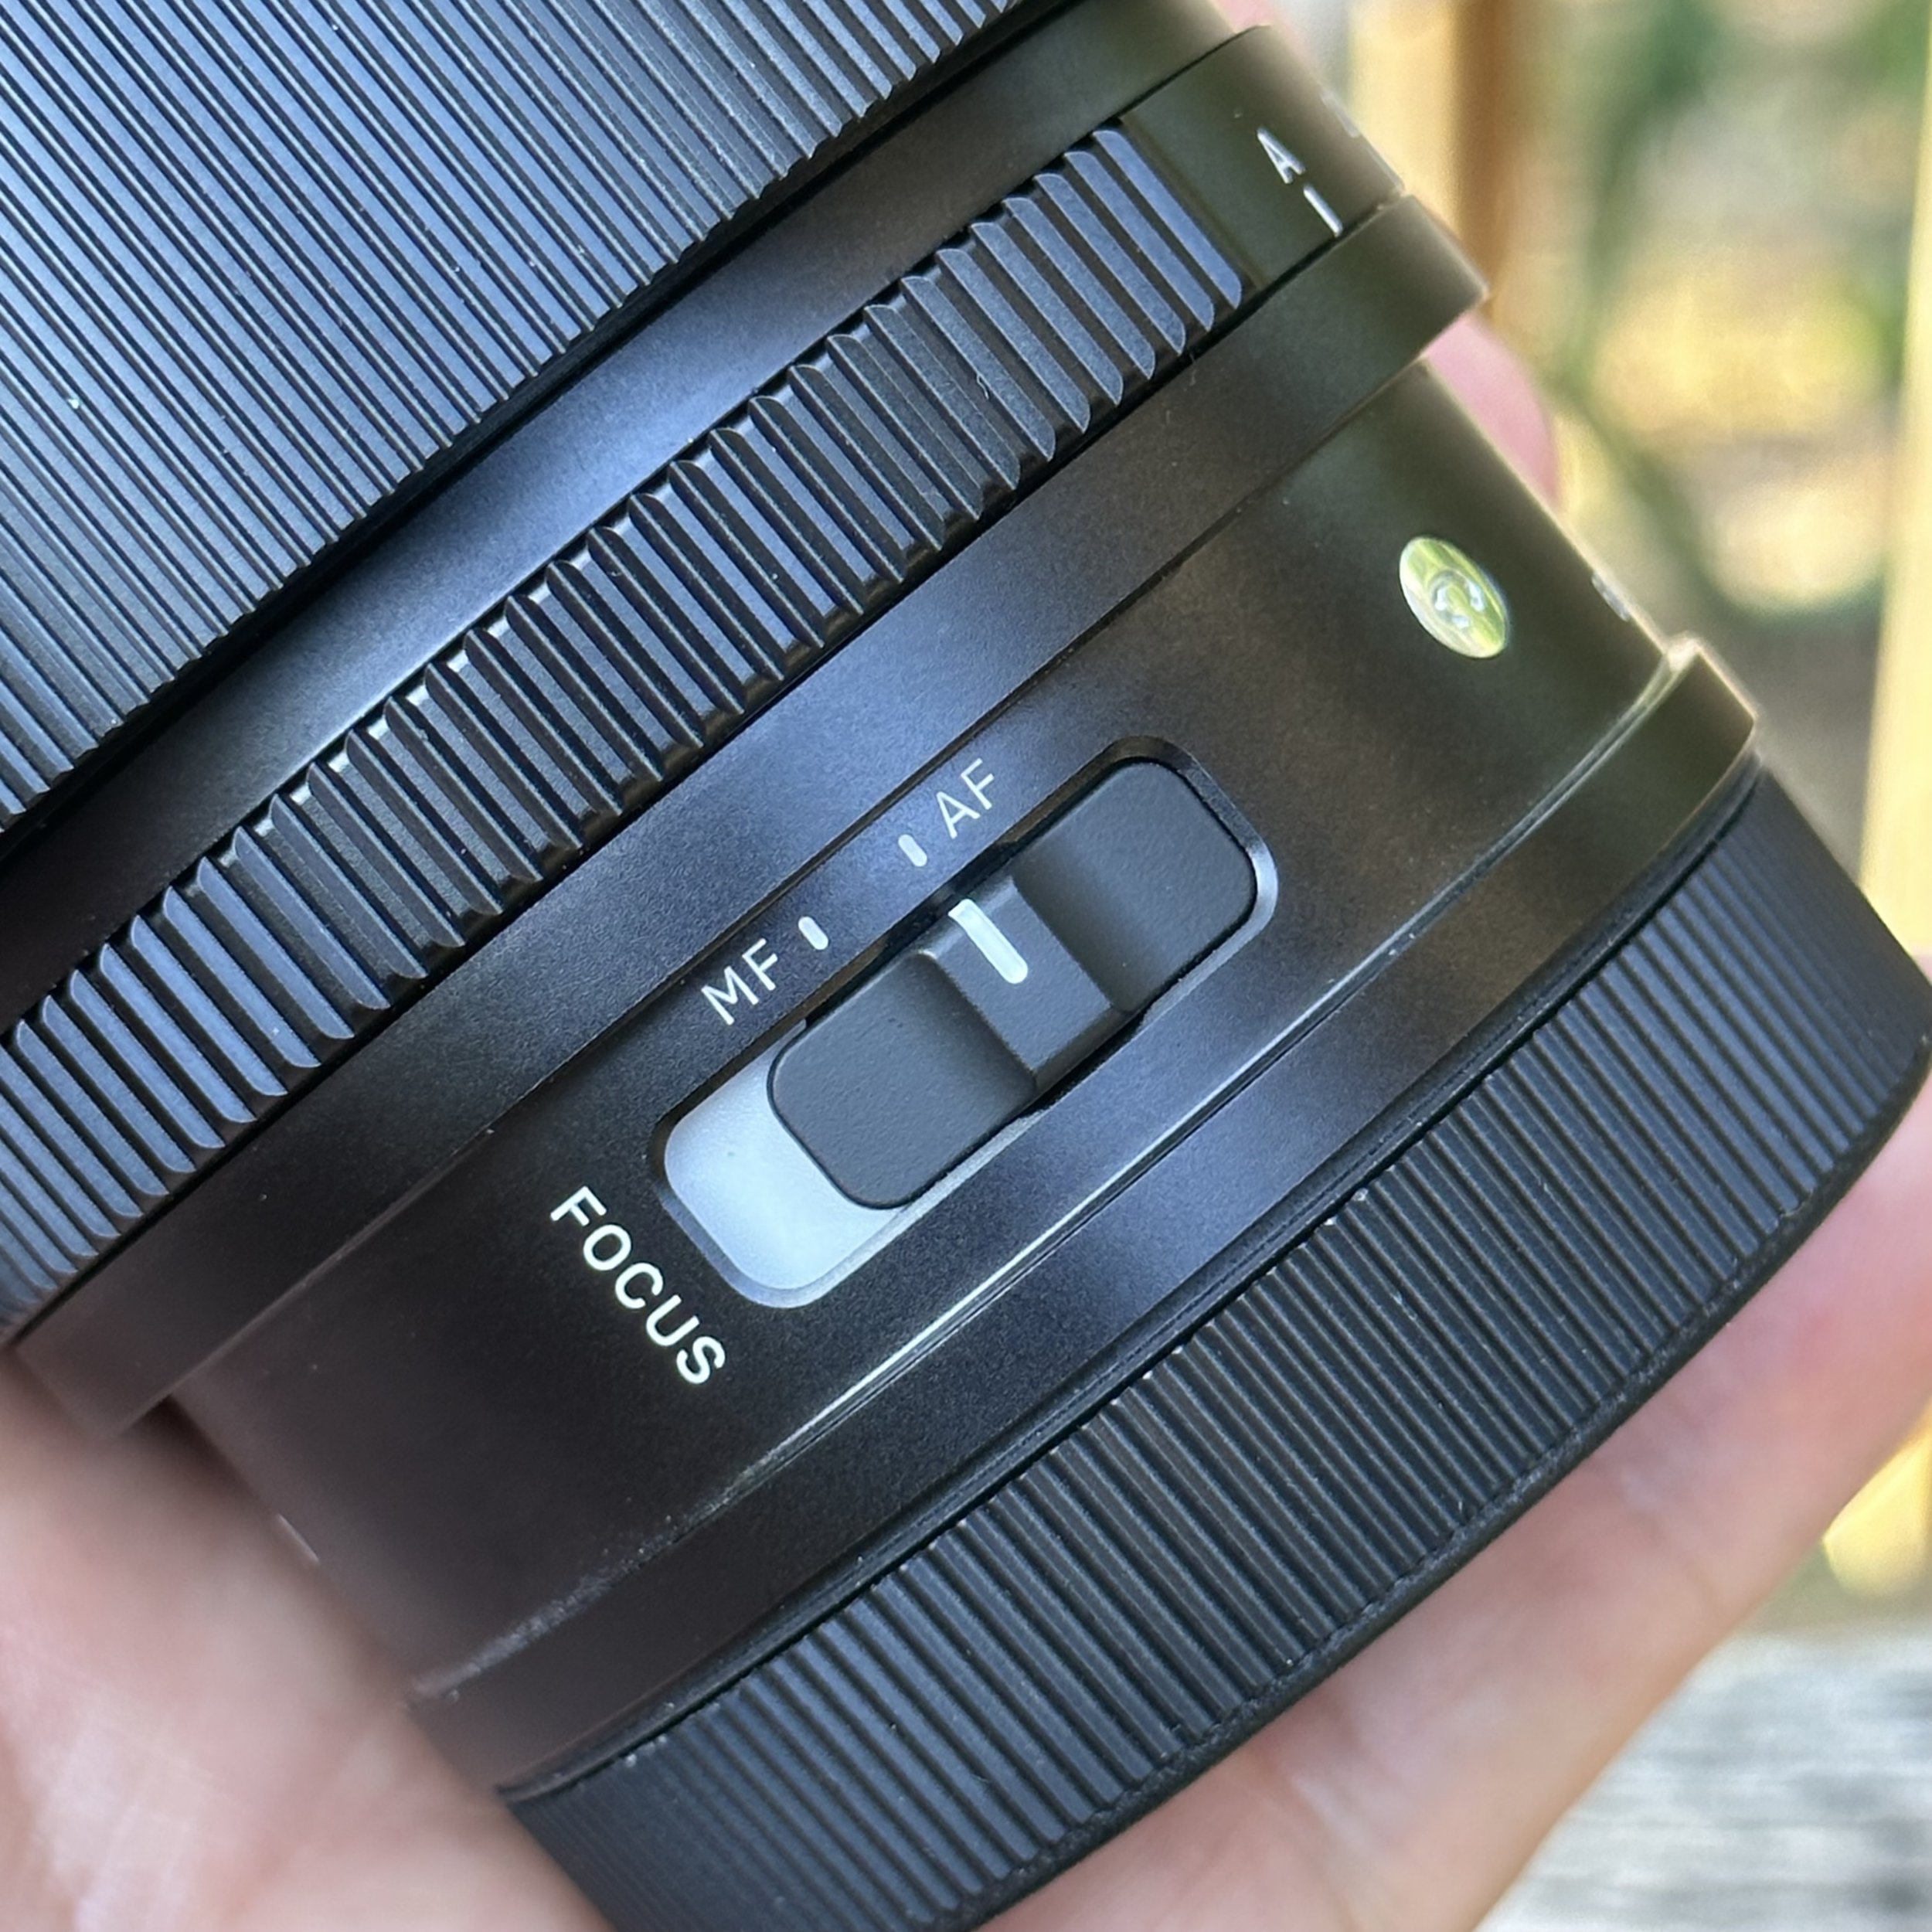
One last thing to note about this focus mechanism is that the reason I like using these lenses for general purpose photography like travel and such is that as you can see in the above photo, the focus throw from infinity to less than 1 meter is short, so focus is fast with this lens. It also has a range focus scale, but since it is 55mm, the scale is rather small and not easy to use, it will give you rough numbers to work with but that is all.

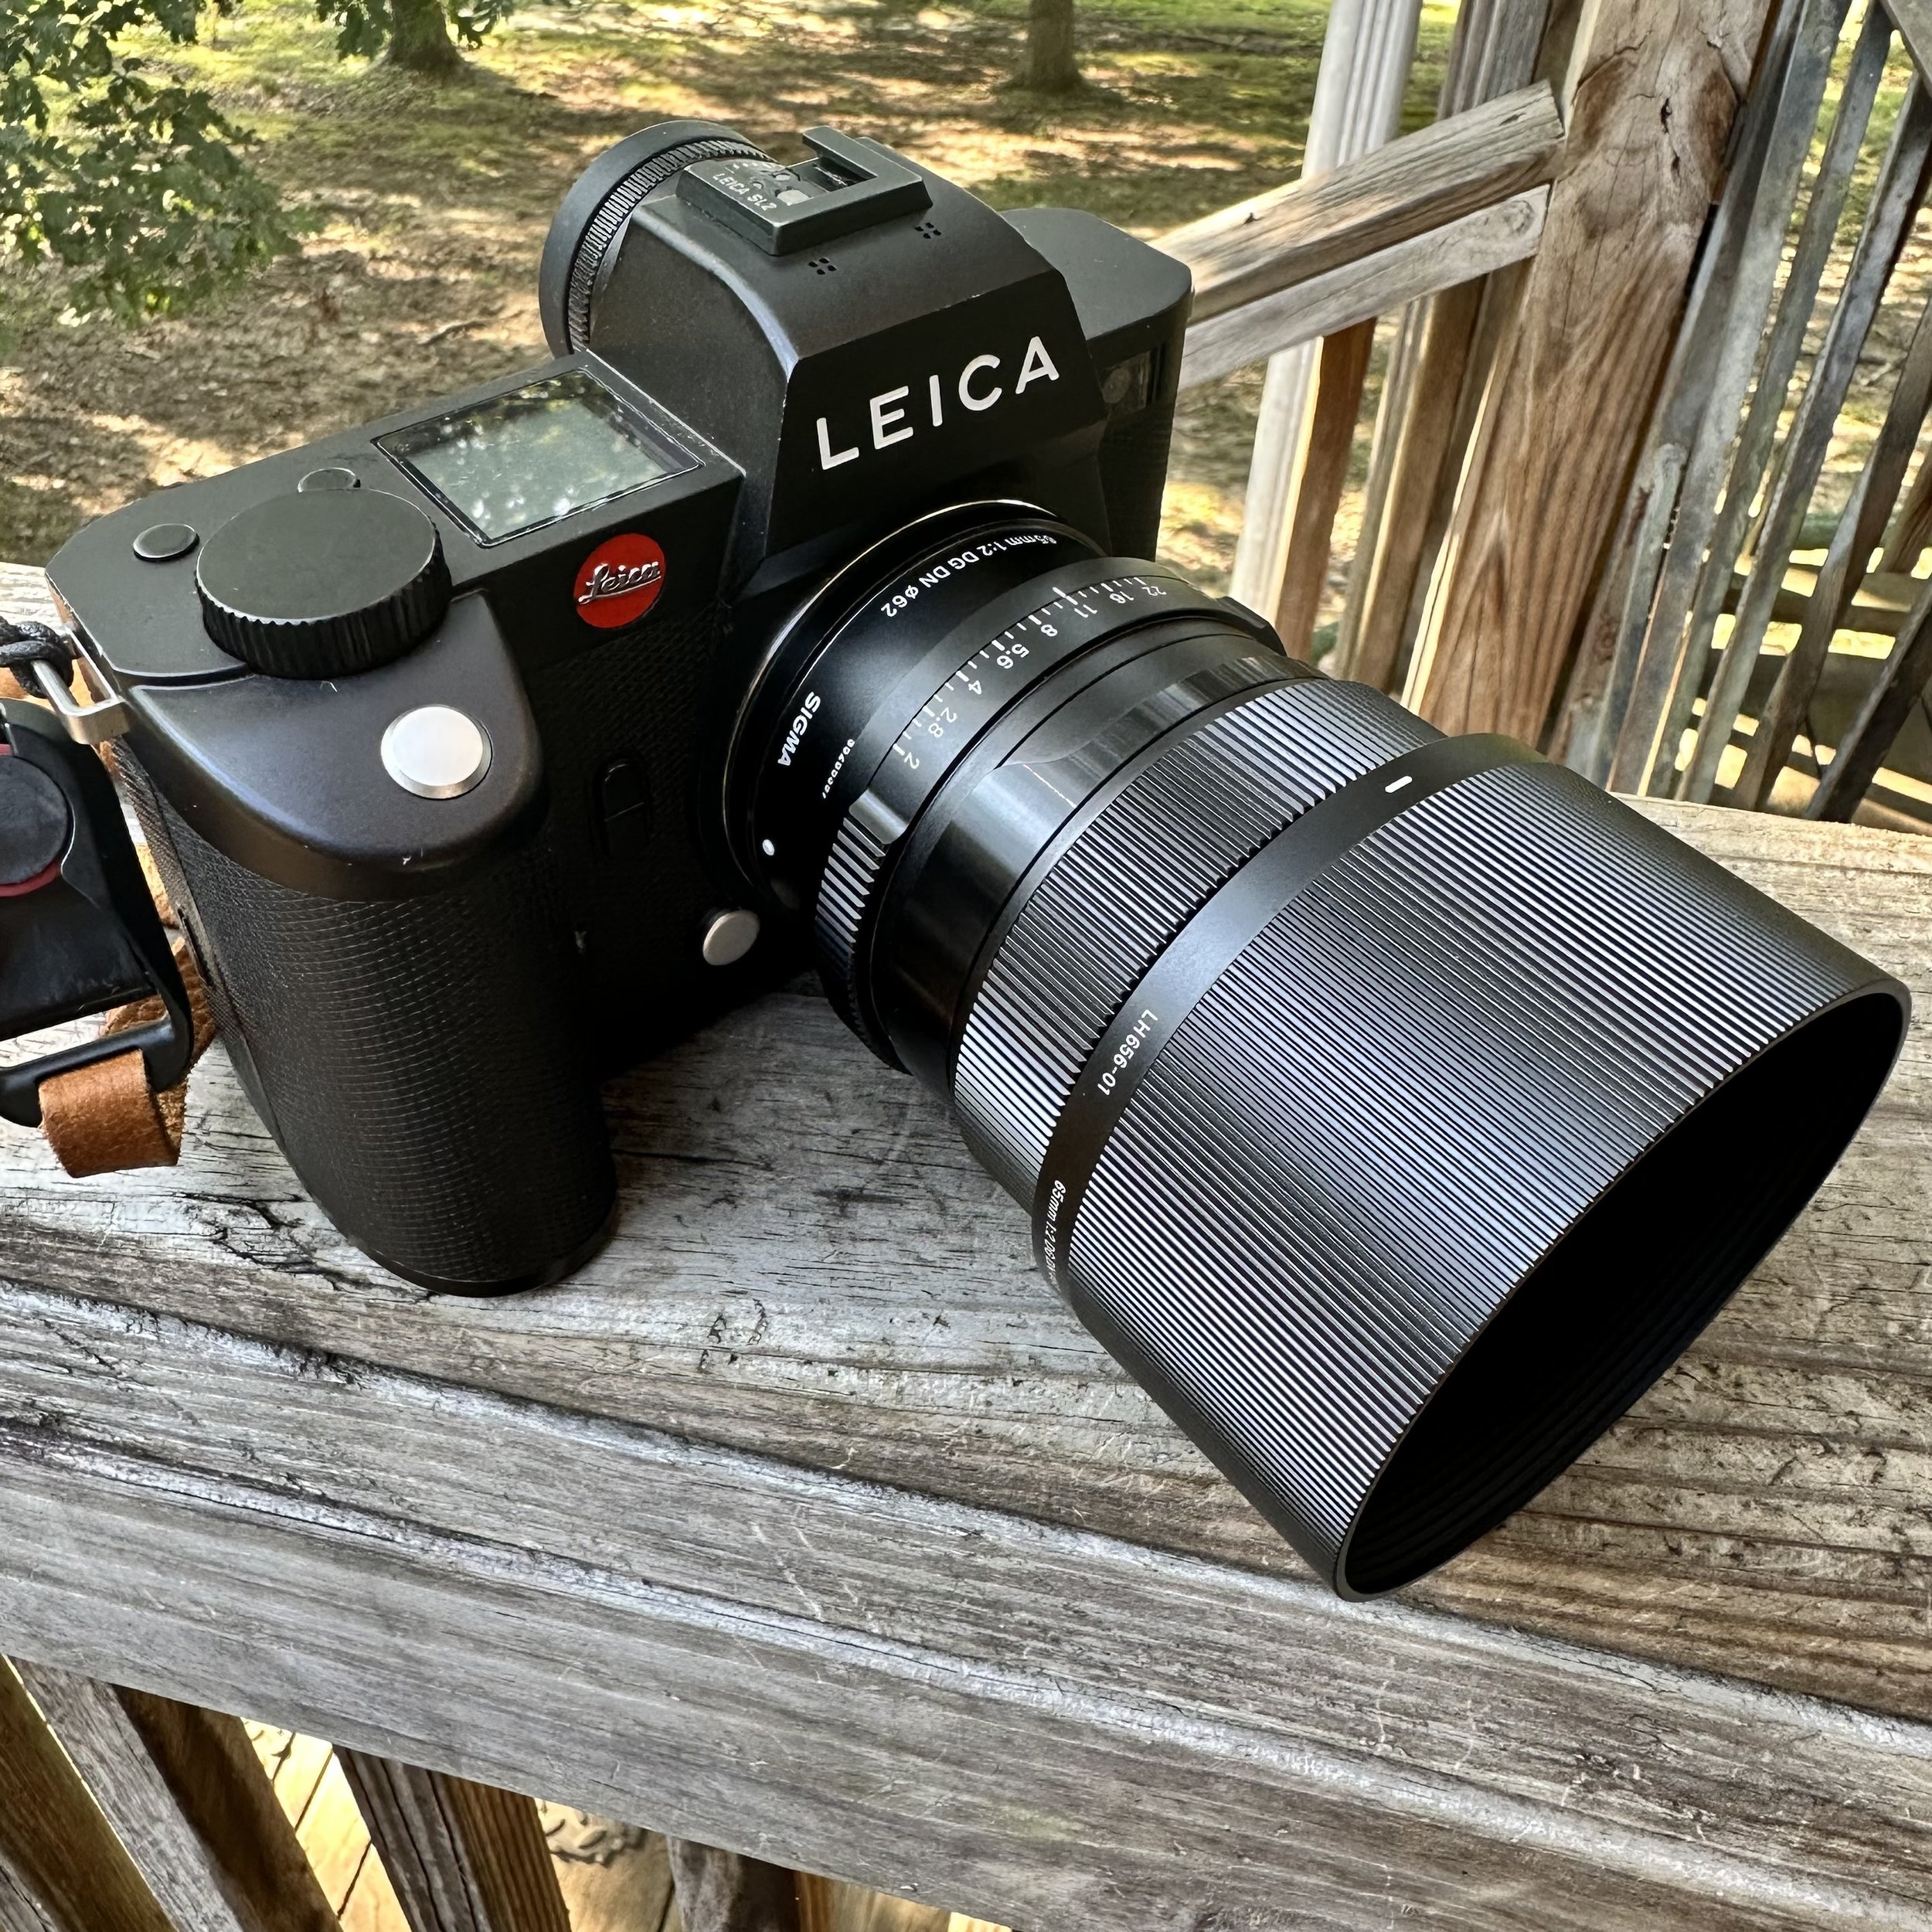
Enough with all this tech talk, let’s take it for a spin and see what the photos look like on my Leica SL2 mirrorless camera since it has IBIS on the sensor and I can hand hold photos at unheard of shutter speeds with it.

First thing I notice when using this lens is how good it feels in the hand. The location and feel of the controls are literally in the perfect location.

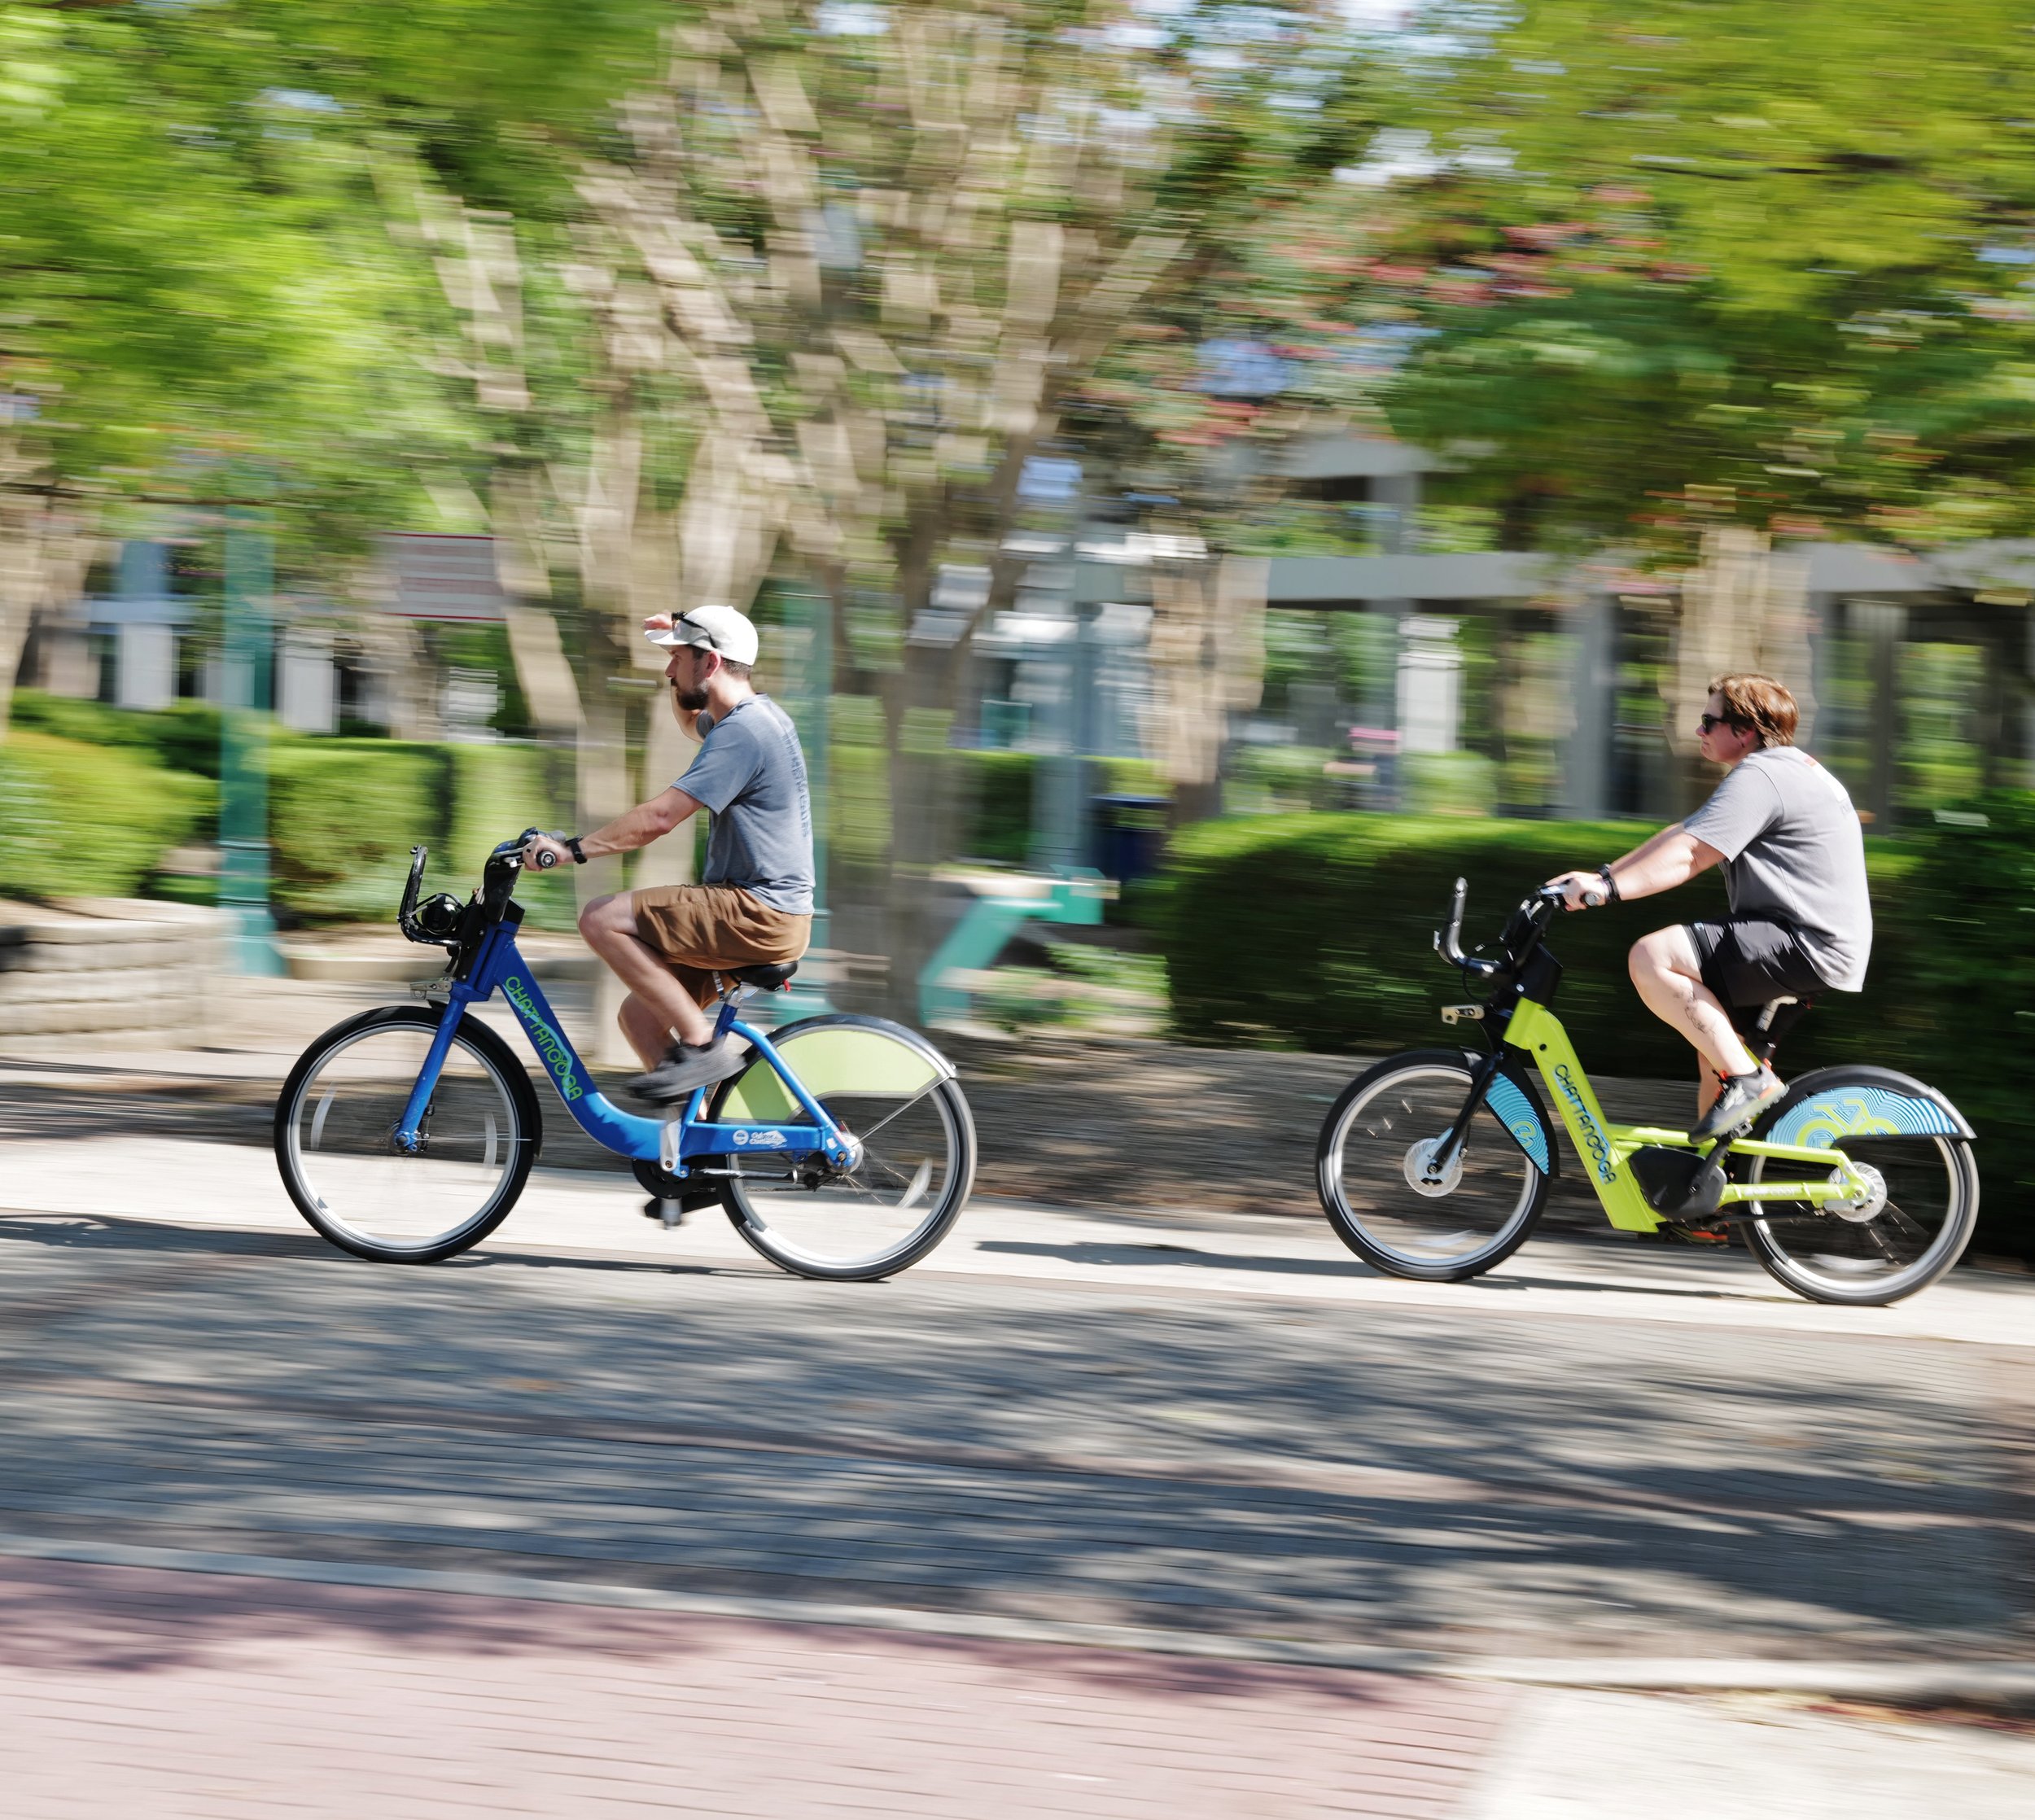
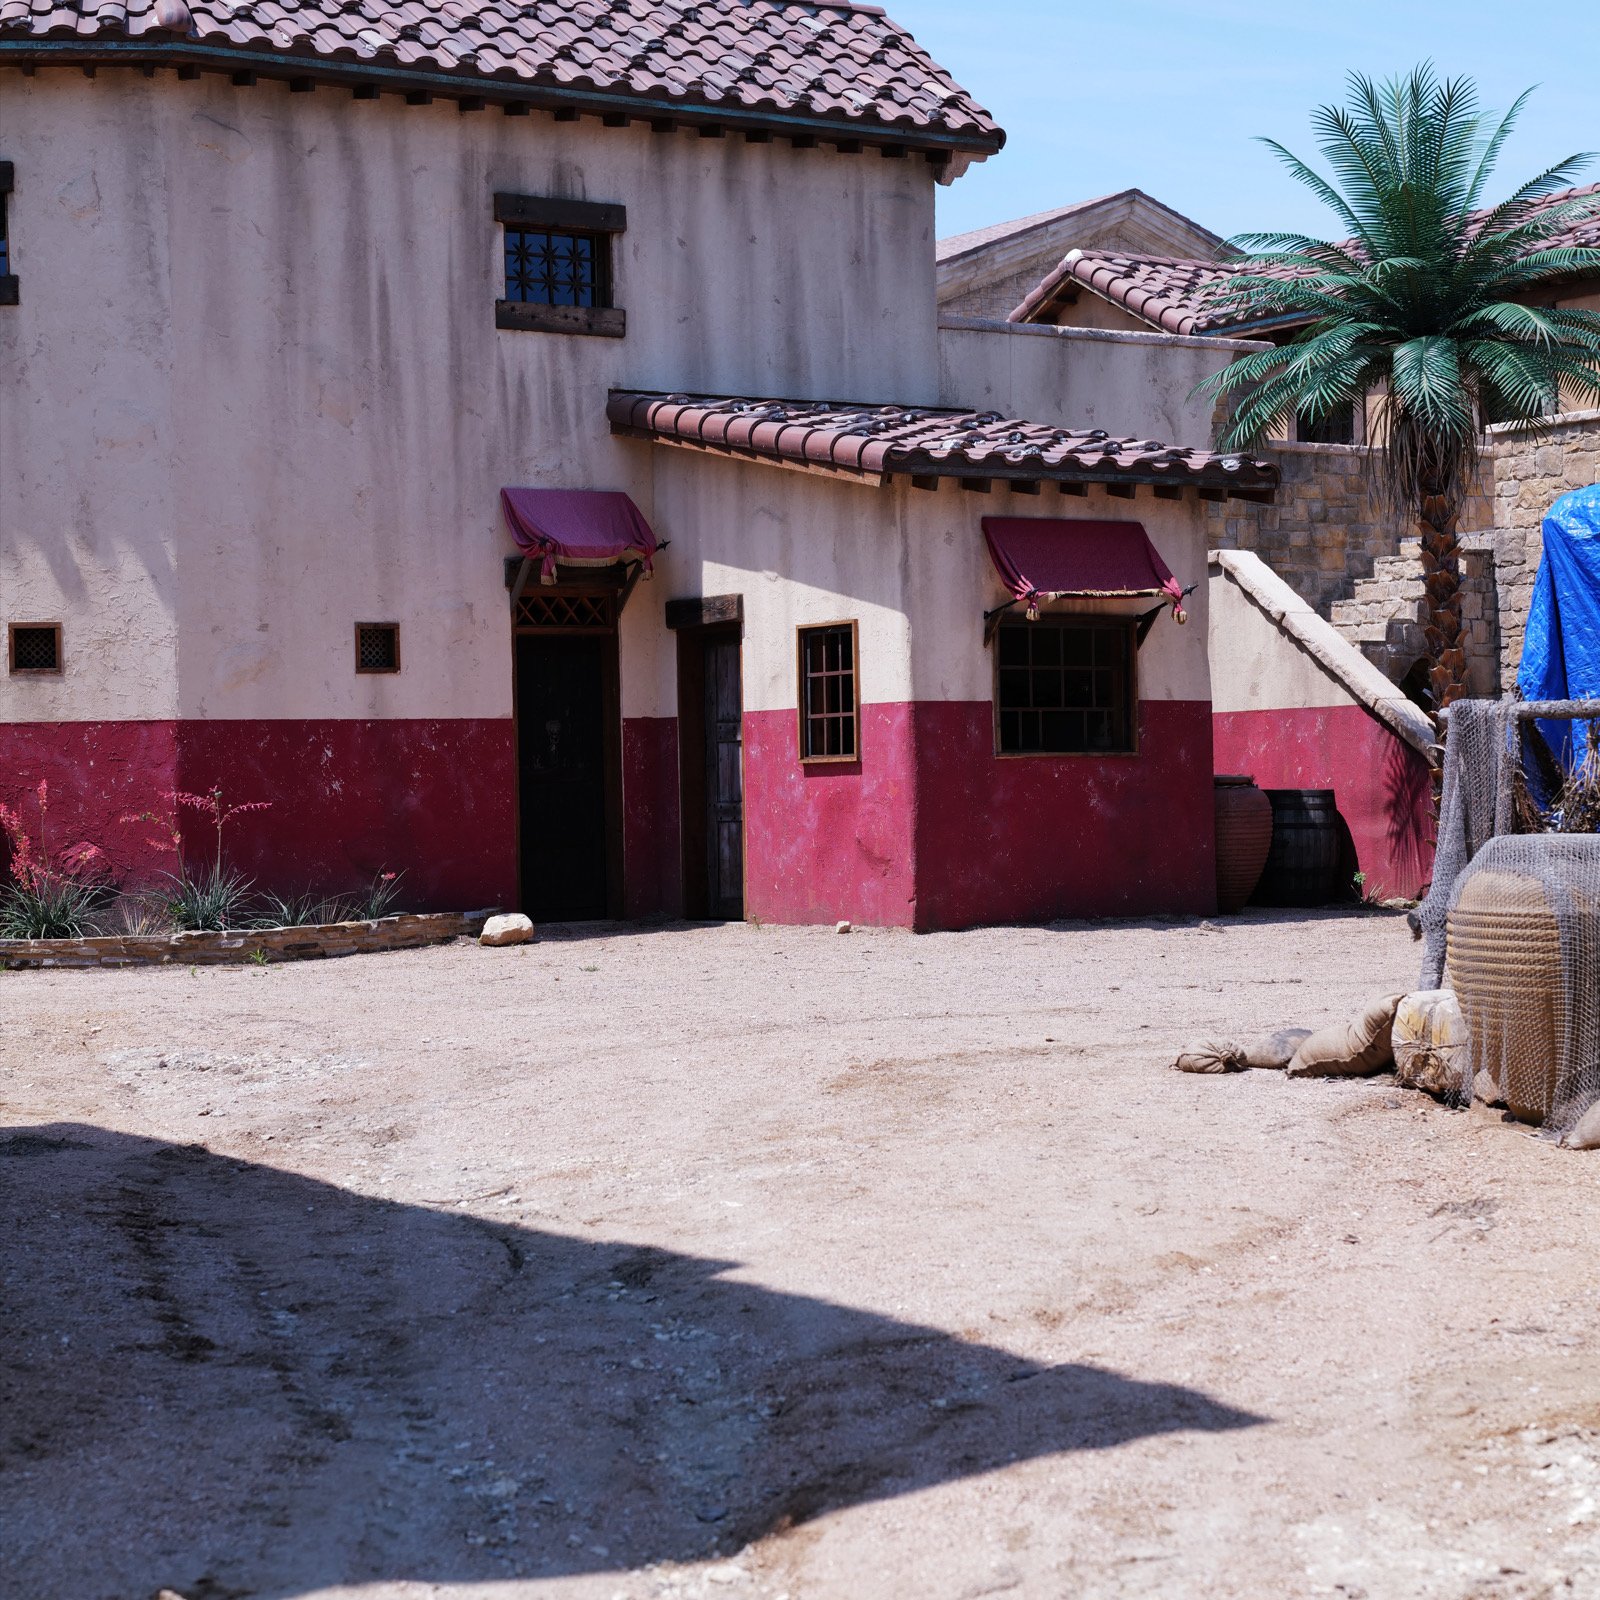
Another thing I noticed was that it is sharp, like incredibly sharp. To this point, it makes sense that is would be this good due to the design intent of the lens but it has a really nice general purpose focus throw too. This lends itself to being a wonderful walk about lens. The following photos were shot on my Leica SL2 using this lens as a walkable lens. I have used another Nikon macro lens before in this same capacity, the 60mm Micro Nikkor once lived on my D810 as a general purpose lens. It works flawlessly in this capacity.

In the above photo you can see what I love about a camera with stabilization in it. The camera sensor is rock steady so I can capture shutter speeds like in the photo above where I was running something like 1/30 second and some of my water blur shots were 1/4 second!!! Like the one below is a 1/4 second handheld exposure and if you will look, the rocks are crisp and the water has a really nice blur to in. This is at f32 as well so there will be some diffraction in the image from that but all in all, it looks really nice.

Below is a crop from this image. As you can see, the spider webs are even visible and this is handheld no less! As long as you have some decent light this combination is really nice. When you move to a mirrorless camera body that has IBIS on the sensor, it unlocks so many possibilities with lens / camera combinations. I dont know why hobbyists dont see this sooner but a lot dont.

So in conclusion, I highly recommend this little guy if you need a macro lens on occasion and want a nice general purpose lens the rest of the time. The f3.5 maximum aperture also allows the glass to be smaller and lighter as well. This is also a huge perk to everyone except those people who shoot with big glass… until next time, get your camera out and take a picture with it!

It is the holiday season again!

When you live in the United States, you get to celebrate certain holidays and they seem to come once a month… In the winters we have Halloween, then a month later you have November and with it comes Thanksgiving where everyone literally over eats on one day and then eats the same meal everyday for the next week at lunch. HaHa.

It also brings colder weather so the photography is different too. I have, of late, been using my 28mm more than anything else it seems. The wider angle giving me more of a ”scene” than a specific subject. It also gives me a lot more depth of field so getting focus is a lot easier too. You see, I tend to shoot these days with vintage manual focus lenses more often than not. I do love my modern lenses with their aftofucus and light weight construction producing wonderful images, but sometimes I just want to use something from a simpler time. I have also found the lenses that work best for me applications too. Mostly Nikkor and Asahi Optical(Pentax) lenses with a sprinkling of some others like Voigtlander and Leica just to name a few.

I will also use these lenses for things like photo walks as well as general photography.

In the above photo, I was attempting to capture blue hour in downtown with a 25mm and this shows what I am talking about a little better. The wider angle allows me to get more of a scene and tell more of a story that a tighter lens like the 50mm or 75mm would do. I would have to back up a lot more if I wanted to include all of this in a 50mm lens photo as the field of view is a great deal narrower. Another thing that comes with longer focal lengths is a phenomenon called “compression”. This is where things in the background tend to look closer together than they are in reality from the effect the lens has on the subject. The photo below shows what I am talking about with compression…

Learning how to use these effects to your own personal advantage will open up so many possibilities for you. You couldn’t get this photo on a 20mm lens, it just wont work, you need the compression of a telephoto lens to be able to “stack” all those light displays together like that. This is why it is important to get out and shoot with different focal lengths at different times of day and also in different places, it is almost impossible to learn well without “doing”…

All this to say, the holidays as a wonderful time of the year to get out and practice your photography.

The Hanimex 28mm f2.8 lens is a really interesting little lens...

Sometimes I just throw the dice on a vintage lens and occasionally it comes out really good and sometimes it is a dud…this time it is a winner.

I went to Ashville NC on a small trip recently and on this trip I was doing photography. Well, when it is a photography trip I always make it a point to go to Ball Photo and just “go shopping” for something interesting. They have SO much vintage gear to choose from that it is almost overwhelming to be honest. It is not for the feint of heart to be honest about it. But today found me at Ball Photo and while there I started looking for some glass to pick out… Well I found some.

We all know how much I love to shoot with vintage glass and I am always on the hunt for a new lens to play with. I have Leica glass for the Leica SL2 and use it quite often but I still really enjoy adapting some older lens to the camera and then seeing what I can get with this lens and camera combination when I go out with it. It is almost a challenge to see if I can come away with something good using this old lens… What generally happens is that I slowly build a collection of lenses that I REALLY love to use and I am starting to collect a full set of these lenses. Some examples would be the 28mm f3.5 Asahi Optical M42 mount lens that I keep in the camera bag, this lens is literally one of my favorite lenses of all time for some reason. I just love the results I get with it on the Leica SL2 camera. Well today finds me using a lens that is 2/3 of s top faster and a little bigger too.

The Hanimex 28mm f2.8 is a well made lens with the whole thing made of metal (probably brass from the way it feels but it could be anodized aluminum too I really am not sure) and has some really nice accents like the little silver bands around the focus ring which also has a faux leather appearance but I am almost certain is rubber. The range focus scale is graduated for every aperture marked (sans f4 for some reason) on the aperture ring, which is a nice touch for street photography. The detent clicks on the aperture ring are nice and pronounced as well as solid, no mushy aperture detents on this lens! All in all, it is a great little lens by design engineering standards. It is even a well designed attachment scheme as well with the M42 mount as it is easily adapted to about all mirrorless cameras on the market.

Many people also don’t realize that the M42 adapter can be adjusted to get the lens top dead center of the adapter too. There are three tiny set screws on the adapter that hold the threaded ring in place on the lens adapter to adjust this. To make this adjustment is simple, just screw the lens into the mount till it seats and snug it well so it wont work loose while in use. Next get the Allen key that came with the adapter and loosen the three set screws till the lens can spin in the mount and simply turn the lens till the center mark is top dead center of the adapter and then push in on the mount while tightening the set screws back down to make it hold the ring again and your done. It is that simple. Mine is slightly off center here and I have simple been too lazy to adjust it as it is close enough for me to be able to get out and shoot anyway. I don’t normally worry about it too much as once you set the adapter once, then all the lenses will time up and you don’t have to mess with it again. Installing lenses over the years on this adapter and tightening them has slipped the timing a little and this is why it is slightly off center. Once again, it is no big deal to me and i just go out and shoot…

So the first official outing with this lens was to go to the mall in Chattanooga TN with it and capture some Christmas spirit with it…on black Friday no less.

Well to be quite honest, it performed wonderfully. Now to be fair, the camera does have IBIS in it and this allows me to shoot at pretty slow shutter speeds without the need for a tripod. As long as you go into the camera settings and tell the camera it is a 28mm lens, the camera can compensate for movement really well allowing for incredibly slow shutter speeds like the last photo in this string from the mall where it was 1/10 of a second…hand held. Most of the other photos are shot at 1/250 second to freeze the people so that I can show the current clothing styles as well as the general appearance of the mall in 2023.

All in all, the Hanimex performed extremely well in this role. The images are sharp and the colors are easily adjusted in post processing to give any look you want. It also doesn’t hurt to have that Leica “look” from the camera processing the colors before saving the RAW file too, Leica does something special with their processing to give the colors a look that is unique to Leica cameras. It is hard to explain, but it is a thing.

In the next photos I didn’t show all the images as they just reflect what it is like to shoot indoors where there is controlled light and no sun to deal with. The following photos show what happens when you have the sun shining on the front element.

Above is the same photo as the one right under this text except that I shaded the lens from the sun. This lens cant handle the sun shining on it from any angle without showing you that it was happening with some sort of sun flare in the image. In the below image there is geometric artifacts as well as a overall glare from the sun.

In the below photo you can also see the geometric glare in the center of frame, this could be used to your advantage in some applications like vintage style portraits where you position the subject to where the flare adds to the aesthetic of the image. Here the flare doesn’t do that though and is more of a nuisance that anything else. So this is something to keep in mind when using vintage glass, you will run into these kinds of problems from time to time like the older generation has to do…lol.

Lastly, can you make portraits with the 28mm lens? The answer is yes, you can as long as you are careful with the composition and keep the subject centered like I did here. The 28mm lens can distort toward the edges so it is imperative to keep the person in the center of the photo as much as humanly possible if you want the image to turn out like anything you want at all. Maria was gracious and allowed me to make her portrait at the mall using one of the advertising lights as a “studio light” to give us nice diffused side light and I think the image turned out really well for a 60 year old lens with improvised lighting.

As well as this blog post, I also have a video sharing some of these points and showing more of the old Sitton’s mill location should you want to go check that out at the link below.

Thanks and if you are into vintage glass, this is a keeper in my book and for pennies too, so with that, get your camera out and go take a picture with it!

Discussing my Leica SL2 and a Yashica 28mm on a photowalk in Chattanooga TN

Well, I have finally made time to go take photos again and to be honest about it, I wanted to let it cool off a little too. Well, it is nicer weather now and I am starting to get out and look for photo opportunities again. I have a few I am looking into but for right now, it is still a good ole case of urban photography that I so love to do.

Today we find me in Chattanooga yet again and this time I am setup on a side street off of Main street called Rossville Avenue and this road has some really neat old buildings on it, some of which I have photographed in the past but I like to get photos of them as I go along to show how they change with time. I get parked and pay for one hour of parking so I have to make it count. Putting a little pressure on myself to come away with SOMETHING of value in this time allotment.,,

My first stop is the Hamilton Parts Distributors building that has been NOT a parts distributor for quite some time as of this point…2023. The building is really starting to show its age too with numerous windows bricked up on the sides as well as the front giving it a sort of dystopian imbalanced look. This could be a set right out of a movie or something. I took several photos from different angles today and some look better than others. I really like the front door and the corner that I get today for some reason… Here they are, what do you think?

I love how the building still has remnants of the signage that was painted on it some time in the past too. Also look at the foundation material, today it is all either poured concrete or cement blocks and has been for many decades, so I am going to speculate this is pre-war construction meaning before World War 2, due to these limestone foundation stones that look like they were repurposed from another construction site that existed before this building did. I have evidence of these cut stones going back to the mid 19th century so I know these are probably something left over either from a fire or was just cast off and the people that built this building saw a chance to save a few dollars on this part of the construction. Also notice that they didn’t seem to think that these stones were very appealing as they hid them behind a mortar stucco finish as seen in the front door photo.

My next stop was right next door at Zarzours Cafe.

This cafe has been in business for over 100 years, Yeah, you read that right…a century and as you see on the sign. It is closing in less than a month. I have never eaten here either. I will change that in the next few days. I have to be able to say that I sat at their café and enjoyed the fine cuisine they had to offer for a century! How could I let that slide???

Back to the walk at hand. I took a couple of photos of the restaurant and parking area and headed on down the street.

The next stop was at the Koch Foods Processing plant. This is one of two processing plants inside the city that I am aware of. These have been here for decades too so they are pretty much fixtures of the city at this point. One is on Broad street and the other is here on Rossville Ave. It being such an iconic location coupled with the skyline containing Lookout Mtn as well makes for a cool photo to me.

After the chicken plant, I made my way over to Main street and did a little photography on Main as well. Main usually has something really colorful as well as interesting too, this is why I usually always make my way over and look around for a little while at a minimum…

These two photos just go to show what all can be found on Main street even when it is not having some sort of special event. All it takes is a little creativity and time of your part to come away with some interesting photos. Now you might be thinking these are not interesting photos, and you will be right as the photo interest rate will vary from person to person, but I found that these to be quite interesting so I am sharing them with you…lol. The difference between the two photo primarily is the shutter speed as one is really slow to blur the truck and the other is faster so it will capture the whole construction scene with out any motion blur on my part.

Well, this is going to be a wrap for the post, I hope you enjoyed following along and if you would like to watch a video of this trip, just click on the link below. Thank you for you time and get your camera out!

Fall color photos FINALLY!!!

Well, it sure took long enough, but I finally found a place local to me that had some beautiful fall color photo opportunities.

This is not something I normally have when it is as dry as it has been recently. Let me explain…

I am no scientist but I have stayed in a Holiday Inn before, so here goes. From what I have seen, there are three different scenarios that usually unfold around here in the fall.

The first event is like this, we get plenty of rain in the spring, it dries out a little in the mid summer months and then it starts to rain in late September or early October. This is actually the best possible scenario from what I can tell…

The second scenario is the same as the first one except the rain turns into a thunderstorm storm with heavy rain and usually high winds during peak color season, knocking all the leaves off of the trees.

Then there is option three, this one is where there is rain in the spring but then it is dry for the entirety of summer and fall. This is the type of season we are in now. There has not been enough rain to matter in two months…maybe more. It is so little water that the creek next to my house has no surface water in it as of this writing.

Of the three events, the first one is the preferred for fall color photos as there is sufficient water for the trees to transition normally to their dormant winter state and you get this incredible color display in the fall. This year though, we have event three where everything is a huge tinderbox and the leaves are simply drying out and turning brown then falling off of the trees without passing through their color phase at all…except…in the few places where there is still ground water to water the trees.

Enter North Chickamauga Creek WMA near Soddy Daisy Tennessee. This is a small WMA (Wildlife Management Area) situated in a gorge next to Mowbray mountain and is a popular spot for the locals to cool off in the summertime in the river. Well, the river is just a brook at this point and is barely moving at all, BUT it is there! If you watch my YouTube video on it you will see what I mean. Even so, there is still enough water to feed the trees so they had a fall color change.

Since I found some colors this year, I now had to figure out what I wanted to use to capture all this color with. I finally settled on my camera being the Leica SL2 as it has a high resolution sensor and several other features that lend itself to being a wonderful landscape photography camera. You see the Leica SL2 is a mirrorless camera so it can be adapted to various vintage lenses really easily and we all know how I love using vintage lenses! So today’s lens of choice for the Leica is the Nikkor 28mm f2.8 AiS. This is one of Nikon’s crowning achievements in lens design as it was as close to optical perfection as they had ever gotten to that point. So naturally I used this lens.

The magic of the Leica SL2 as well is that it has IBIS on the sensor. This basically turns all my vintage lenses into stabilized lenses. I know there are a ton of other cameras that also have these same features but I just like the Leica SL2 for some reason.

Now that the camera setup is settled, next is finding the photo I want. I started out looking for macro level images, vistas and scenes, then I moved in closer to get more detailed image ideas. The first one is shown above of the red maple tree in a sea of yellow. Then I moved to the river bed and found some wonderful colors out in the open.

This was literally what I was greeted with when I looked upstream from where I entered the river bottom. Not much water, but I got such a color splash from the trees that I didn’t even care. I would have liked for it to not be overcast, but you take what you can get and work with it. I really love this image too, so much texture and color in one image that is is almost overwhelming. I was really starting to embrace the look that the 28mm lens was giving me and then I decided to move upstream to that large boulder you see in the above photo and get a different perspective from that spot.

The little smidgen of sky showing the over cast clouds almost makes it otherworldly or something like that. I was blown away with this image when I got it into Lightroom and was able to see it better. It almost doesn’t look real back up in the valley next to the sky. The clouds were epic! This is also shot hand held with the 28mm lens. What is nice is that it allowed me to be very agile and not have the burden of the back pack and a tripod with me at all. There is something to be said for simplicity…

So in summary, if you want to find fall colors even when it has been really dry, find the water. Where ever there is water, there will be fall colors. At least that is what I have seen, your mileage may vary.

The Sigma 90mm f2.8 DG DN Telephoto Lens Review

This is the second of two Sigma lens reviews I have done recently and this lens is no slouch either. The 90mm f2.8 DG DN Sigma lens is a very well made little prime lens and this particular copy is for the L mount for Leica and Panasonic cameras. I am sure Sigma makes this lens for other lens mounts as well, but I dont have that list with me so I cant speculate past that.

In the photo below you can see how small the lens actually is. The lens hood takes up almost as much space as the lens itself. That is crazy! With the all metal construction and well made optical formula, this lens is also punching up as they say.

Some notable differences between the Sigma lens and my Leica counterparts are that the Sigma lens actually has an aperture ring on it that also has 1/3 stop detents. This is really nice as it allows manual aperture control to be basically mapped to a control surface that photogs are accustomed to using. If you want the usual camera control for the aperture, then simply turn the aperture ring to the “A” position and your ready to go. Ít couldn’t be simpler.

The next thing they did on the lens that I am not so sure I like yet is to put a switch to choose between manual and automatic focus. The Leica lenses use a software control to do this and it is pretty simple to implement and once you get used to doing it that way it really is a good system. There are less openings in the lens to let water in and the control is right they with the various auto focus modes all in one spot. The Sigma system has you choose manual or auto on thr lens and then if you choose auto, you have to further goto the software and choose the automatic mode you want. It makes choosing autofocus a two step affair. This is probably just a user issue where I lack practice with the lens, but this seems a little clumsy compared to the Leica process. It is possible that Leica didn’t share all the tech needed to make this happen, I don’t know, but like I said I am on the fence on this one.

Lastly is image quality. The Sigma has it. It produces sharp, distortion free images with good color and exposure. What more can I say here? It really is amazing what you get for the price. These lenses can run with the big boys, in my opinion, just fine. If you pixel peep deep enough you might find fault in them, but only photographers do that. The normal person never digs into the corners or zooms into 500% on a photo so I am not going to rate this lens like that either. The photos look wonderful…just look at the ones below.

So in conclusion, if you want great glass at a fraction of the cost of Leica, these lenses are just the ticket. Sigma has done a complete 180 from the last time I used one over a decade ago and that makes me happy. Now get your camera out and go take a picture with it.

The Sigma 65mm f2.0 L mount lens review

So a good friend loaned me his lens. One of my subscribers that I have grown to know over the years offered to send me a couple of his Sigma lenses and let me use them for a while as review samples for you guys.

I really appreciate your offer Hassan and look forward to the day when we finally get to link up and go out on a photowalk together!

Hassan packed up two of his beautiful Sigma primes and sent them up for a look. He sent his 65mm f2 DG DN and his 90mm f2.8 DG DN. Both of these are in Leica’s L mount as Hassan has a Panasonic Lumix camera that is also in L mount due to the L mount alliance between Leica, Sigma and Panasonic.

The first impression of this lens is the darn thing is tiny. This lens is really small, this is awesome as it means it makes the system really compact. The next thing I noticed right away is how nice the build is, all metal construction for the major parts, including the lens hood from what I can tell. Really nice fitment of the lens components so there really is no play in the mating parts. Parts designed to move, like the aperture ring, move only in the direction they are designed to move in. The machine work and fitment is nicely executed from what I can tell.

The next thing I noticed is how fast the focus works, just understand this…it is fast. How fast? Well, it is fast enough to get the shot for me. it is not as fast as my native Leica glass, but it is plenty fast enough for my personal use. I don’t have a way to measure the focus speed, but it works great and I have no complaints about it.

It was even great at shooting panning blur photos of the passing bicycle riders in Coolidge Park.

So I took it out for a photo walk or two while I had it and to be honest, I think it is 98% of my Leica glass in every conceivable way. It is so close that you would not be able to tell if I showed you two photos and had you tell me which one came from which lens and why you think your answer is right. It is just that good. The images are laser sharp. The rendering is wonderful too. It is just a great lens all around.

Another thing I want to mention here is that the interaction with the lens is different than my Leica glass. Sigma approaches the aperture and the manual focus modes differently that Leica. I will be honest here, I kinda like the Sigma approach to aperture better too. The Leica lens is all software controlled, there are no external controls on Leica L mount glass except for the focus ring, so you use the camera’s controls to adjust everything. On the Sigma, the aperture control is on the lens, which is nice in my opinion. It has aperture choices in 1/3 stop clicks from f2 to f22 and then you can roll the aperture ring around to “A” for auto mode and the camera now has full control of the aperture just like the SL primes.

The other thing that Sigma does is something I am on the fence about. The manual focus is a switch selection on the lens itself. I dont know why they chose this way to control this function and to be honest, it is not my favorite way of doing this function. It might be that Leica’s firmware prevents Sigma from exploiting manual focus without it. I really don’t know why, but the focus ring is an encoder design which means it is not mechanically connected to the focus helicoid in the lens. One would think this would be how it would be designed if there was a mechanical switch separating the two modes. All that to say my thoughts of this lens are that it is a great lens, especially for the money and you can get them about anywhere. Well done Sigma, well done.

Thank you for reading my thoughts on the Sigma 65mm f2 DG DN lens that Hassan loaned me for my Leica SL2. It has been an adventure for me.

Sometimes, when I go for a photowalk, I don’t want to be a loner…

When I go out to shoot photos I normally go alone as it fits my time table perfectly and I dont have to do any coordination with anyone else. I just grab my kit and go. Well, today is different.

So on this day I linked up with Tim Childers at Mean Mug coffee on Main street in Chattanooga TN and started out with a cup of coffee and some chatting about our youtube channels. Then it was off to find interesting photos and explore some of the old industrial part of the city.

We begin by making our way down to the old foundry turned farmers market. On the way I noticed some interesting stuff at a local processing plant before getting to the farmers market. After grabbing a couple of shots there we headed over to the market space and make some photos of the skate park.

The skate park was basically abandoned so once we worked the scene over as best we could we decided to head over towards the river. From the skate park we make our way to the riverfront industrial area where we grab some photos occasionally while walking down to the aquarium. This is a unique are as it is being converted to modern condominiums and there is a huge development project slated later to construct a park and such as well.

Once we got downtown, we decided to get out of the heat for a little while and grab some lunch at Taco Mac before making our way back to our cars on Main Street. The longer we walked, the hotter it got on this day and by the time we got to Taco Mac I was soaked. We stayed there till I dried out and then went back out in it for more. Haha. Market street has a fair bit of shade fortunately so we was able to avoid most of the sun while heading back to the car.

Some notable stops along the way for me were the intersection of Main and MLK, the HWY 27 bridge, the skate park and the processing plant for me. I hope you enjoyed this little AAR about our photowalk and if you haven’t done it yet, go check out both of our videos from this day at the links below.

Links to both videos are here:

David Saylors Photowalk VLOG

Tim Childers Photowalk VLOG

Also, wanted to thank you for following my blog as well as my videos, It means the world to me.

Test driving the Leica Q2...sorta.

If you want to see more photos and some more discussion on the idea, follow this link to the video where I do this walk. Other wise, read on friend!

I went for a little stroll in downtown Chattanooga and decided that on this photowalk that I wanted to simulate the Leica Q2 to see if i really wanted on. Photography is a funny thing, some photographers will buy one camera and use it all their life and others will change out lenses and camera bodies numerous times.

My simulated Leica Q2 for the day.

I am a little of both as I love to play with new gear as well as use gear that has become my favorite kit so to speak. Well, I have the Leica SL2 and I also have a nice little Asahi optical 28mm prime lens that I have an adapter for so I figured I would put this together and see if the shooting experience would be close enough to the Q2 to give me an idea of what it would be like without having to spend 6000$ on it.

I really love those Leica colors for some reason, maybe it is a bias I have towards the brand but to me the images just seem more rich in color. I really love how they turned out though and the idea of the Q2 is a great one for a general street camera. The high megapixel sensor combined with the 28mm lens is a potent street combination as you can see below where I shot the image as a candid just in passing and was able to adjust the composition later in post to get what I was looking for.

This photo was shot about 10 feet away and with the 28mm on a full frame sensor it looks MUCH further away. But through the power of cropping… I can make it take on a couple of different looks as you can see below.

This is a 12 megapixel crop of the original image.

This is a 16 megapixel crop of the original image.

As you can see I can get two very different feeling images from this single frame. That is kinda powerful to be honest. I mean, you can change the entire dynamic of the image with a simple crop. That is actually liberating to be honest. I mean just look at the two again. One has this lonly, almost bleak feeling to it while the other has a warmer almost restful feel to it. That is really cool to me. So this is a perk of the Leica Q2 in my book.

So what else comes with the Q2 that I didnt have today? Well, autofocus is one, another is larger aperture. This lens is f3.5 which is two full stops slower than the lens on the Q2. This would matter more in low light as I was shooting most of this day at f11 to reduce the need to adjust focus. Range focus at f11 on a 28mm prime is basically 4 feet (1.3 meters) to infinitiy. So it literally was point the camera, press the shutter and the image was in focus. But if I wanted to shoot indoors or in the evening, the f1.7 aperture would be nice to have to keep my ISO down some or be able to raise the shutter speed a little to freeze action better.

What I really liked about the 28mm was that it made me interact with the people more. The photo above is a great example of this, these two guys were walking by and I just asked them if I could grab a quick photo, they were stoked and so was I. This is honestly a problem I have that I am working to get past. I don’t like bothering people and will walk by potentially great photos simply because I don’t want to bother them. The 28mm forces you to get closer if you want the detail in the photos so I have to get closer to do that. So I think honestly, this is going to have be a perk of the 28mm Summilux lens after all…

All in all, this kit performed really well for me and I think the Leica Q2 would perform equally as well. BUT I do really like the ergonomics of the SL family of camera bodies so for me I will keep my SL2 and use a 28mm lens when I want to have the Q2 experience in a camera. So until next time, get your camera out and go take a photo with it.

Photography on a movie set

What do you photograph when on a movie set to capture the essence of the set? I felt my job was more to do that than to capture the movie per say. That’s the movie makers job, not mine.

Here I started at the front gate. If you will notice, it’s nondescript and you really have no idea what is here at all. This is by design for obvious reasons but I still found it interesting to see how bland it was.

The sound stage is a controlled space where “sets” are built to look like locations but the film makers can control literally everything in the environment such as sound, light and weather. It was important to me to get this “side” of the set to tell the whole story.

This is what the other side of that rough framed wall has on it. A complete first century Roman executive office ready for the official to go to work. As you can see, this set of photos is not what you would normally see when watching the movie.

Another aspect I wanted to capture was the people that were there both as tourist and as employees of the location. This shows all of that in one photo as well as how the “more permanent” set features, and then a tarp to protect something not weather resistant too.

Here we have visitors, film crew, actors, film production gear, in a period setting all in one photo. This is what a behind the scenes photo should look like to me. Capturing what is NOT on camera rather than trying to see what is being filmed. This is where the interesting part is at for me. Of course most other people don’t see things like me. They want to see things like the photos below.

Notice how I framed out anything not period correct…

This is fine if you are wanting to maintain the aesthetic of the period in your photos, but that is not my goal.

This is more my speed. Here we have a prop stored in an out of the way spot that is in stark contrast to the modern building in which it is located. Below is another image I quite like. You have a Roman quarter with a prop guy working on decorating the area for an upcoming scene. His presence brings a contrast to the image that makes you wonder about it.

Above is a great example. Here we have gear carts stored in the shade for filming in a nearby area. The juxtaposition is intriguing to me for some reason.

The above image is more subtle though. At a glance it is period correct, but upon closer inspection things will start to appear that should not be there. Like the wheel of a cart or a tarp in the back ground.

As you can see it is fun trying to tell a different story from what the set was built to be used for. The set has become a different part of the actual story which is the behind the scenes life and not first century AD. I hope this has inspired you to do something similar with your photography and thanks for following along!

Getting a fresh perspective on a common event.

Today I had a thought about what sets my Sacred Harp photos apart from everyone else’s photos.

I thought about this for a while and figured out that my goal is not to simply capture every leader (although that is kind of a side quest) but rather I want to capture the essence of the event as a whole. The reason I say this is because I see others capturing images of just the leaders and usually just from the front straight on. Now to be fair, this does produce good images but for me they are not as interesting. Hence…

When I goto a Sacred Harp singing there is a specific location that I want to be at in the room. It is near the bass section where it meets the tenor section. Now if I were more serious about the photos, and less serious about singing with the class, I would actually goto the other side of the room as most people mark time with their right hand. This makes getting a good photo, which I will spell my recipe for below, even harder since I am on their right side and their hand blocks their face alot.

My “recipe” for a good photo is as follows:

  • I want them looking at the crowd and not their book if possible (I want to see their eyes)

  • I would love a strong expression

  • I want the face to look relaxed and not contorted from singing a strong note

  • I want their hand in motion and slightly blurred from movement

  • I want their face properly exposed

  • I want good white balance

  • I want them 75 to 80% offset to the side for deep “look space”

  • Finally, I also want photos of the rest of the event (this is kinda separate but it helps tell the story)

So with that daunting list of requirements delineated let’s take a look at them a little more in depth.

I want them looking at the crowd.

This is kinda standard composition information but this creates a bond in the photo between the leader and the class visually. I want the photo to hold the viewer and have them explore the image.

I love getting a strong expression.

This is really hard to do most of the time. I have certain leaders that I know will give me this and I actually look forward to these leaders for this reason alone. This draws the viewer into the photo and lends an emotional aspect to the image.

I want the face of the leader to look relaxed.

Most of the time, when people lead, they are nervous and it shows in the photos. So I watch for them to relax a little. This usually happens towards the end of the song so I will watch for opportunities to get a better photo then if I can. Sometimes people have odd expressions when they sing as well and this contorts the face to make them look less appealing in the photo, so I will look for pauses in the music to where they might be catching their breath or their part is silent so I can grab a quick photo then. My goal here is to get them actually enjoying the song and not just leading it.

I want the motion blur of them marking time with their hand.

This gets me that “action” look that I am wanting that shows something is happening and that they are not just standing there I want that photos to show that the event is “alive” with activity if possible. By having a little motion blur from the hand moving, it does this without making the whole image blurry. At least for me, it does.

I want their face properly exposed.

This as it turns out, is a really hard thing for me to get right while on the fly. Seems there is almost always a window in the frame and the sunlight is wreaking havoc on the light meter in the camera. I do my best to compensate for this, but sometimes it just doesn’t work right and the person is almost a black silhouette. As a good photographic rule though, this is normally a well exposed part of the image.

I want good white balance.

Again, you would think this would be a no brainer, but as it turns out, this is a lot harder than you would think. You see these events happen normally in venues that are poorly lit with mixed color temperature lights so you never really know what to expect. I will normally grab a white balance value at the beginning, and again at lunch as the sunlight will dope the reading and make your pictures look yellow…

I want them offset way over to one side.

We are talking way past the rule of thirds concept as I am not trying to follow that concept at all, but rather I am wanting to tell a story and it is not about one person, but the class as a whole with the leader just one part of it. The singers are just as important so I want as many of them in the frame as possible to give more context to the image. Sometimes I get a good image and this isn’t the case like with Terry (1st at the top), but this is not what my usual goal is. He leads very uniquely and I love photographing him for this reason.

I want photos of the rest of the event.

You see, there is more than just the singers and the leaders and them singing songs. There are people just there to hear it, kids playing and people eating… Plus this is sometimes the only venue where some people ever meet up so there are lively conversations sometimes as well and lots of laughter. I want to try to capture this as well.

The desert table alone is worth the trip in my book!

This is a tall order to be sure, but I normally get one or two “real keepers” from these singings that will meet either all or nearly all of my rules for leaders. So of those rules are pretty low hanging fruit, like proper white balance, just takes me remembering to take a sample of the interior occasionally to make sure it has not changed on me. some are much harder, like getting position and facial expression and exposure right when they are moving around while they lead… Something I dont strive for though is perfectly sharp images, a little motion blur just adds character to the photo and makes it look like they are actually doing something instead of posting up static for a photo. Also I dont care if the eye isnt tack sharp either as the photo isnt a portrait but rather something closer to reportage in my mind. I like it when the eyes are sharp but it isnt on the list if you will notice. I dont list it because the story is more important to me than that aspect. I dont know why, but that is how I see it. Everyone loves the images when I share them too so I am happy with most of them too…

Do you have a favorite venue or event you like to shoot and do you have a set of personal rules that make us your perfect photo from that event? I would like to hear about your version of this story!!!

Recent events that happen this time of year in my photography...

I hope your having a good day where ever you are in the world. Recently I have been doing several different genres of photography and they are typical of what I shoot this time of year. Things that include trips to a fall themed event, or rock climbing, in particular, bouldering, and low light stuff like I did with Phil and Ray the other night.

So there has not been some sort of overlying theme, but more to the point of Autumn Activities instead(which I guess is a theme, isnt it?). This year has been really a whirlwind too as it seems that work has been crazy this year and I am picking up amateur radio more so I don’t have as much time for making videos for my YouTube channel (that to be honest, no one really watched anyway and I have been more focused on my website blogs due to this revelation) So now, I have noticed a shift in my focus from making YouTube content to enjoying my hobbies of photography and amateur radio. This is big for me as I am now getting out and shooting more and the results are starting to accumulate. The bulk of my photos are terrible in my mind and never make it out of the initial culling, but some of them are gems that I like and will share. I think this is because I am actually shooting more so I am starting to see more around me. This only comes from getting out and shooting photos. No amount of research or watching videos on the internet will give you this skill, you just have to put in the time doing it and now I am doing just that.

Now that I am getting out to shoot more, I am also noticing something else. I am learning the gear better and noticing things about my camera and how I have it setup that are problems and need correcting and building out things like my user profiles so I can easily recall the settings for certain kinds of photography or lens setups I like to use regularly.

Another thing I have noticed is that I am getting more comfortable with photographing people. This has been a huge stumbling block for me, but over time I have come to the realization that most people just don’t care. The ones that do care will let you know and i just deescalate by deleting their image anyway as I don’t want to have photos of someone who isn’t happy with me taking the photo anyway. That turns into a win win in my book, I don’t go to extremes or let people inspect my equipment like letting them go through the memory card or anything, but if they ask I always delete the image. It is just how I operate.

I was talking not long ago with Phil about shooting in low light and he made a good point, he waits till winter to do his low light images as it gets dark earlier and he doesn’t have to stay up late to get cool night photos… There is some wisdom in this that I have learned over the summer as well. I did a bunch of low light photos then and he is right, I ended up not getting into bed till well after 11 on many days.

The results were awesome with the photos I got, but I did have to stay up really late to get them. Something else I noticed was that it is a very different mindset when you are gathering content for a YouTube video as opposed to just shooting for yourself and looking for the images that you want to capture instead of trying to collect content for a video. You see, with video content collection, you end up looking for specific images to highlight talking points in the video and not photos that are interesting or particularly good in any real way other than to showcase that specific talking point. When I go shoot now, I just look at my surroundings and make photos of what interests me. No cross platform thought process or video centric stuff. Just photos. This has been quite liberating since starting the channel back in 2017. I fell like a weight has been lifted from me and I am free to explore the world and document it without the burden of video content creation.

Let that sink in for a minute. Shoot for you, not the internet, not for Instagram, not for Vero, not for Facebook, but for YOU. If you will do this you will soon see that your photos will start getting better and you will enjoy photography.

Now get your camera out and go take a picture with it!