Using the Micro Nikkor 55mm f3.5 lens on my Leica SL2 camera for general photography

When you think of a general purpose lens, your mind normally doesn’t wander to a macro lens.

I have found over the years that there are a couple of Nikkor lenses in this family that work really well for the task of general purpose photography lens and this is one of them. This particular copy is an Ai variant made somewhere in the late 1976 to early 1977 time frame so this lens is almost 50 years old and just look at the image quality it produces… Lens manufactures were on their A game at this point and Nikon was a force to be reckoned with in this area. This lens isn’t even their best macro lens either… That is something that to this day surprises me a little. It has an external aperture ring that is detented in whole stops…except the very first one where it goes from f3.5 to f4 for some reason… Who knows why they did this, but they did so it is there if you want to use it.

Minimum focus distance is a surprising 9 1/2” from the image plane. So this is right at 4.25 inches in front of the lens when mounted on my Leica SL2 camera. This also gives you a preproduction ratio of 1:2 on the image sensor, that is to say that if you have an object that is 1 inch across in reality, it will be 1/2 inch across the sensor. To get to 1:1 reproduction ratio you need help… The PK-3 extension ring will get you half that distance and to the true 1:1 reproduction ratio at minimum focus distance. All of this is conveniently engraved on the lens barrel for you should you need to look it up in the field… Also notice in these two images that the lens “pumps” air which means it has external focus movement, the lens grows and shrinks when you adjust focus, it is common belief that this is where dust gets into the lens from, when you open the lens fully to minimum focus distance the lens intakes a full charge of air and doesn’t have dust seals to prevent dust from entering the lens mechanism, so you get a little internal dust…

One last thing to note about this focus mechanism is that the reason I like using these lenses for general purpose photography like travel and such is that as you can see in the above photo, the focus throw from infinity to less than 1 meter is short, so focus is fast with this lens. It also has a range focus scale, but since it is 55mm, the scale is rather small and not easy to use, it will give you rough numbers to work with but that is all.

Enough with all this tech talk, let’s take it for a spin and see what the photos look like on my Leica SL2 mirrorless camera since it has IBIS on the sensor and I can hand hold photos at unheard of shutter speeds with it.

First thing I notice when using this lens is how good it feels in the hand. The location and feel of the controls are literally in the perfect location.

Another thing I noticed was that it is sharp, like incredibly sharp. To this point, it makes sense that is would be this good due to the design intent of the lens but it has a really nice general purpose focus throw too. This lends itself to being a wonderful walk about lens. The following photos were shot on my Leica SL2 using this lens as a walkable lens. I have used another Nikon macro lens before in this same capacity, the 60mm Micro Nikkor once lived on my D810 as a general purpose lens. It works flawlessly in this capacity.

In the above photo you can see what I love about a camera with stabilization in it. The camera sensor is rock steady so I can capture shutter speeds like in the photo above where I was running something like 1/30 second and some of my water blur shots were 1/4 second!!! Like the one below is a 1/4 second handheld exposure and if you will look, the rocks are crisp and the water has a really nice blur to in. This is at f32 as well so there will be some diffraction in the image from that but all in all, it looks really nice.

Below is a crop from this image. As you can see, the spider webs are even visible and this is handheld no less! As long as you have some decent light this combination is really nice. When you move to a mirrorless camera body that has IBIS on the sensor, it unlocks so many possibilities with lens / camera combinations. I dont know why hobbyists dont see this sooner but a lot dont.

So in conclusion, I highly recommend this little guy if you need a macro lens on occasion and want a nice general purpose lens the rest of the time. The f3.5 maximum aperture also allows the glass to be smaller and lighter as well. This is also a huge perk to everyone except those people who shoot with big glass… until next time, get your camera out and take a picture with it!

The Hanimex 28mm f2.8 lens is a really interesting little lens...

Sometimes I just throw the dice on a vintage lens and occasionally it comes out really good and sometimes it is a dud…this time it is a winner.

I went to Ashville NC on a small trip recently and on this trip I was doing photography. Well, when it is a photography trip I always make it a point to go to Ball Photo and just “go shopping” for something interesting. They have SO much vintage gear to choose from that it is almost overwhelming to be honest. It is not for the feint of heart to be honest about it. But today found me at Ball Photo and while there I started looking for some glass to pick out… Well I found some.

We all know how much I love to shoot with vintage glass and I am always on the hunt for a new lens to play with. I have Leica glass for the Leica SL2 and use it quite often but I still really enjoy adapting some older lens to the camera and then seeing what I can get with this lens and camera combination when I go out with it. It is almost a challenge to see if I can come away with something good using this old lens… What generally happens is that I slowly build a collection of lenses that I REALLY love to use and I am starting to collect a full set of these lenses. Some examples would be the 28mm f3.5 Asahi Optical M42 mount lens that I keep in the camera bag, this lens is literally one of my favorite lenses of all time for some reason. I just love the results I get with it on the Leica SL2 camera. Well today finds me using a lens that is 2/3 of s top faster and a little bigger too.

The Hanimex 28mm f2.8 is a well made lens with the whole thing made of metal (probably brass from the way it feels but it could be anodized aluminum too I really am not sure) and has some really nice accents like the little silver bands around the focus ring which also has a faux leather appearance but I am almost certain is rubber. The range focus scale is graduated for every aperture marked (sans f4 for some reason) on the aperture ring, which is a nice touch for street photography. The detent clicks on the aperture ring are nice and pronounced as well as solid, no mushy aperture detents on this lens! All in all, it is a great little lens by design engineering standards. It is even a well designed attachment scheme as well with the M42 mount as it is easily adapted to about all mirrorless cameras on the market.

Many people also don’t realize that the M42 adapter can be adjusted to get the lens top dead center of the adapter too. There are three tiny set screws on the adapter that hold the threaded ring in place on the lens adapter to adjust this. To make this adjustment is simple, just screw the lens into the mount till it seats and snug it well so it wont work loose while in use. Next get the Allen key that came with the adapter and loosen the three set screws till the lens can spin in the mount and simply turn the lens till the center mark is top dead center of the adapter and then push in on the mount while tightening the set screws back down to make it hold the ring again and your done. It is that simple. Mine is slightly off center here and I have simple been too lazy to adjust it as it is close enough for me to be able to get out and shoot anyway. I don’t normally worry about it too much as once you set the adapter once, then all the lenses will time up and you don’t have to mess with it again. Installing lenses over the years on this adapter and tightening them has slipped the timing a little and this is why it is slightly off center. Once again, it is no big deal to me and i just go out and shoot…

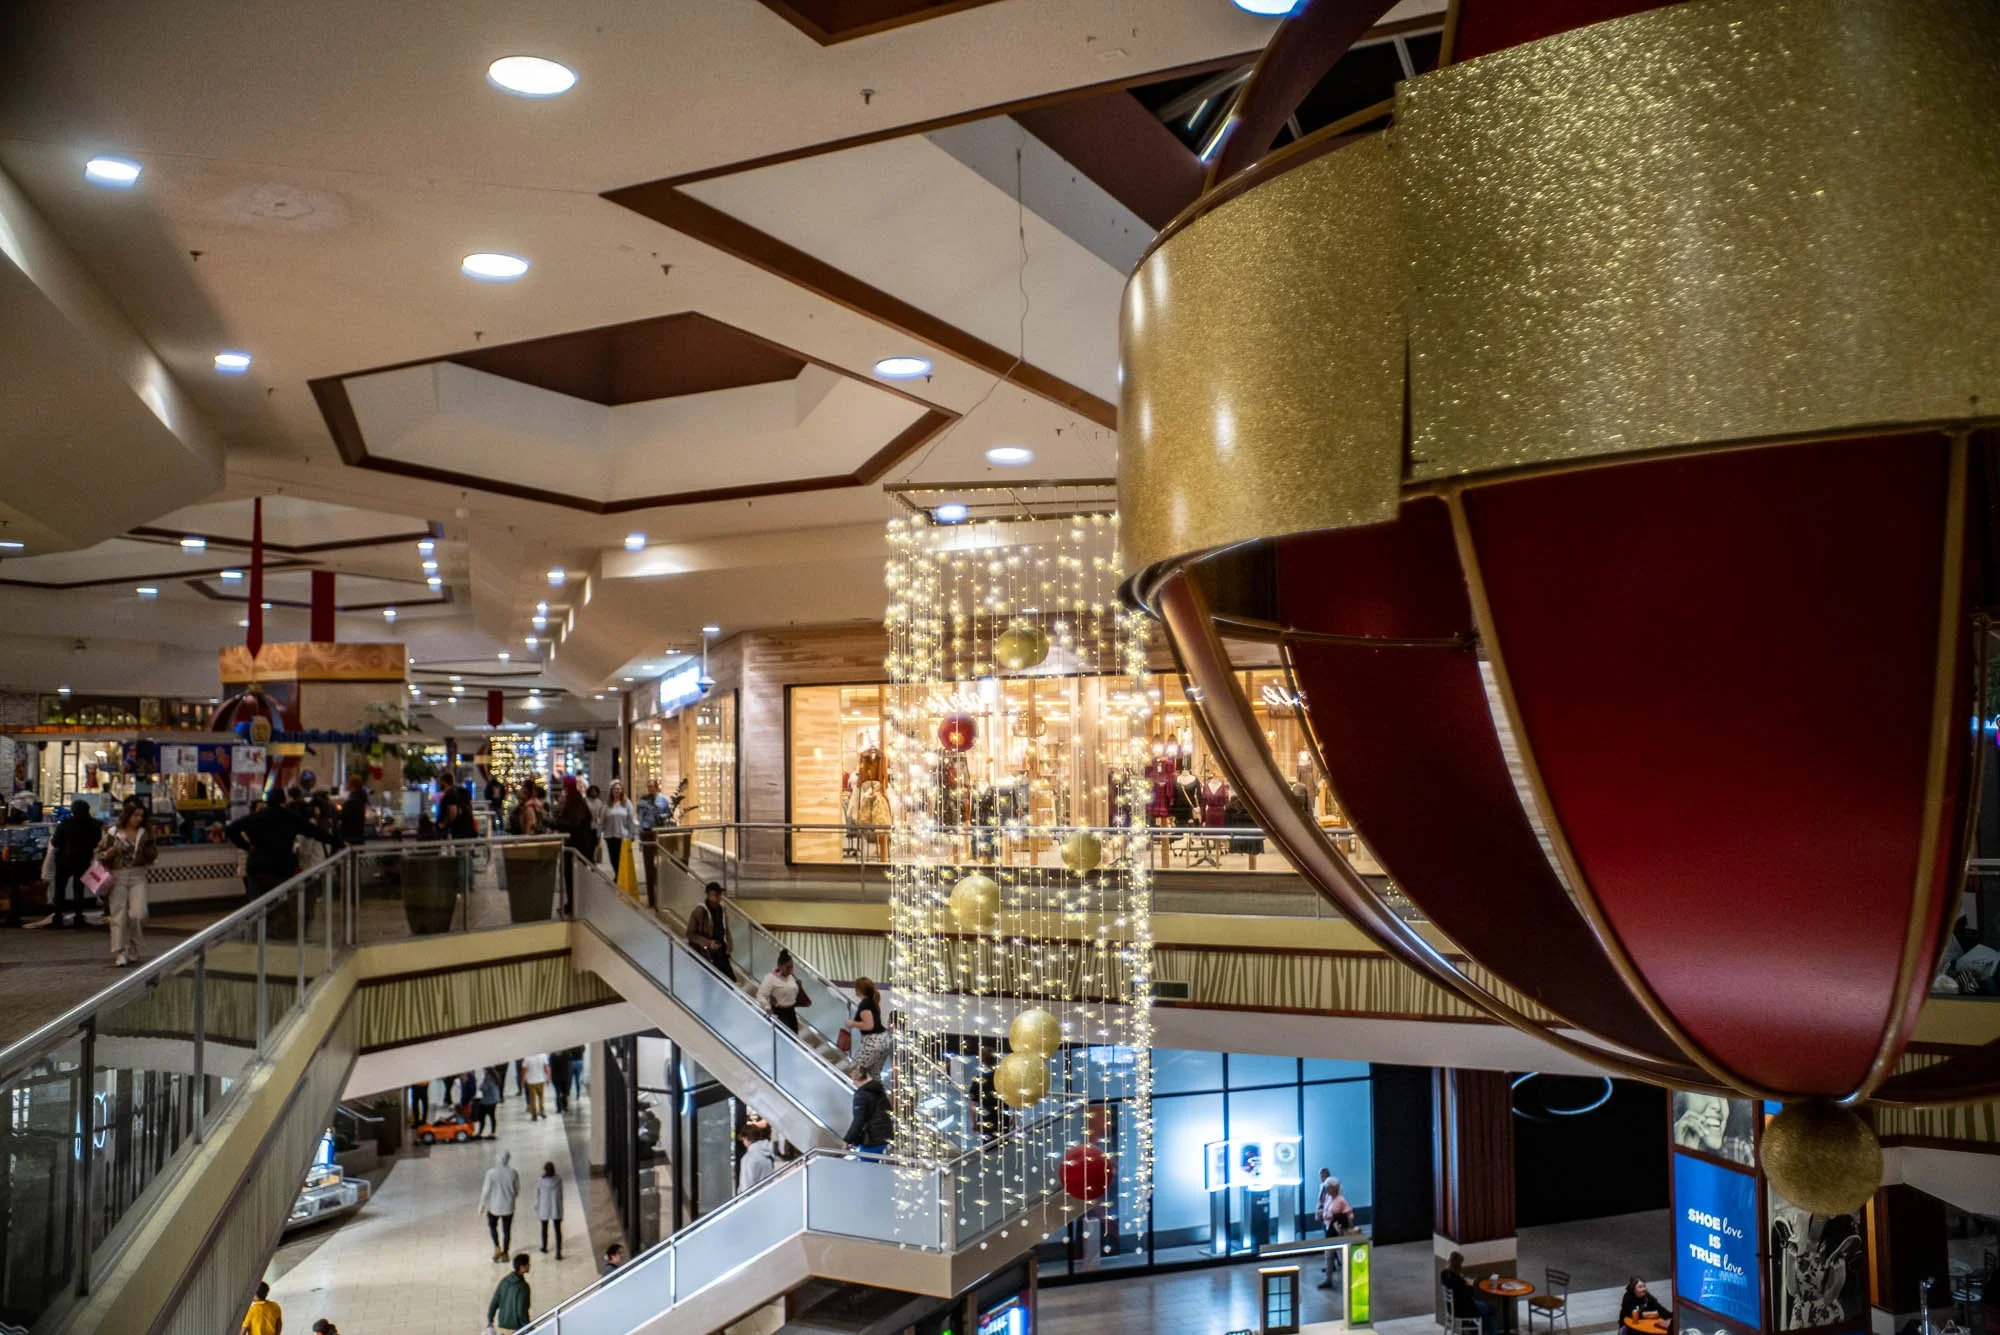
So the first official outing with this lens was to go to the mall in Chattanooga TN with it and capture some Christmas spirit with it…on black Friday no less.

Well to be quite honest, it performed wonderfully. Now to be fair, the camera does have IBIS in it and this allows me to shoot at pretty slow shutter speeds without the need for a tripod. As long as you go into the camera settings and tell the camera it is a 28mm lens, the camera can compensate for movement really well allowing for incredibly slow shutter speeds like the last photo in this string from the mall where it was 1/10 of a second…hand held. Most of the other photos are shot at 1/250 second to freeze the people so that I can show the current clothing styles as well as the general appearance of the mall in 2023.

All in all, the Hanimex performed extremely well in this role. The images are sharp and the colors are easily adjusted in post processing to give any look you want. It also doesn’t hurt to have that Leica “look” from the camera processing the colors before saving the RAW file too, Leica does something special with their processing to give the colors a look that is unique to Leica cameras. It is hard to explain, but it is a thing.

In the next photos I didn’t show all the images as they just reflect what it is like to shoot indoors where there is controlled light and no sun to deal with. The following photos show what happens when you have the sun shining on the front element.

Above is the same photo as the one right under this text except that I shaded the lens from the sun. This lens cant handle the sun shining on it from any angle without showing you that it was happening with some sort of sun flare in the image. In the below image there is geometric artifacts as well as a overall glare from the sun.

In the below photo you can also see the geometric glare in the center of frame, this could be used to your advantage in some applications like vintage style portraits where you position the subject to where the flare adds to the aesthetic of the image. Here the flare doesn’t do that though and is more of a nuisance that anything else. So this is something to keep in mind when using vintage glass, you will run into these kinds of problems from time to time like the older generation has to do…lol.

Lastly, can you make portraits with the 28mm lens? The answer is yes, you can as long as you are careful with the composition and keep the subject centered like I did here. The 28mm lens can distort toward the edges so it is imperative to keep the person in the center of the photo as much as humanly possible if you want the image to turn out like anything you want at all. Maria was gracious and allowed me to make her portrait at the mall using one of the advertising lights as a “studio light” to give us nice diffused side light and I think the image turned out really well for a 60 year old lens with improvised lighting.

As well as this blog post, I also have a video sharing some of these points and showing more of the old Sitton’s mill location should you want to go check that out at the link below.

Thanks and if you are into vintage glass, this is a keeper in my book and for pennies too, so with that, get your camera out and go take a picture with it!

Discussing my Leica SL2 and a Yashica 28mm on a photowalk in Chattanooga TN

Well, I have finally made time to go take photos again and to be honest about it, I wanted to let it cool off a little too. Well, it is nicer weather now and I am starting to get out and look for photo opportunities again. I have a few I am looking into but for right now, it is still a good ole case of urban photography that I so love to do.

Today we find me in Chattanooga yet again and this time I am setup on a side street off of Main street called Rossville Avenue and this road has some really neat old buildings on it, some of which I have photographed in the past but I like to get photos of them as I go along to show how they change with time. I get parked and pay for one hour of parking so I have to make it count. Putting a little pressure on myself to come away with SOMETHING of value in this time allotment.,,

My first stop is the Hamilton Parts Distributors building that has been NOT a parts distributor for quite some time as of this point…2023. The building is really starting to show its age too with numerous windows bricked up on the sides as well as the front giving it a sort of dystopian imbalanced look. This could be a set right out of a movie or something. I took several photos from different angles today and some look better than others. I really like the front door and the corner that I get today for some reason… Here they are, what do you think?

I love how the building still has remnants of the signage that was painted on it some time in the past too. Also look at the foundation material, today it is all either poured concrete or cement blocks and has been for many decades, so I am going to speculate this is pre-war construction meaning before World War 2, due to these limestone foundation stones that look like they were repurposed from another construction site that existed before this building did. I have evidence of these cut stones going back to the mid 19th century so I know these are probably something left over either from a fire or was just cast off and the people that built this building saw a chance to save a few dollars on this part of the construction. Also notice that they didn’t seem to think that these stones were very appealing as they hid them behind a mortar stucco finish as seen in the front door photo.

My next stop was right next door at Zarzours Cafe.

This cafe has been in business for over 100 years, Yeah, you read that right…a century and as you see on the sign. It is closing in less than a month. I have never eaten here either. I will change that in the next few days. I have to be able to say that I sat at their café and enjoyed the fine cuisine they had to offer for a century! How could I let that slide???

Back to the walk at hand. I took a couple of photos of the restaurant and parking area and headed on down the street.

The next stop was at the Koch Foods Processing plant. This is one of two processing plants inside the city that I am aware of. These have been here for decades too so they are pretty much fixtures of the city at this point. One is on Broad street and the other is here on Rossville Ave. It being such an iconic location coupled with the skyline containing Lookout Mtn as well makes for a cool photo to me.

After the chicken plant, I made my way over to Main street and did a little photography on Main as well. Main usually has something really colorful as well as interesting too, this is why I usually always make my way over and look around for a little while at a minimum…

These two photos just go to show what all can be found on Main street even when it is not having some sort of special event. All it takes is a little creativity and time of your part to come away with some interesting photos. Now you might be thinking these are not interesting photos, and you will be right as the photo interest rate will vary from person to person, but I found that these to be quite interesting so I am sharing them with you…lol. The difference between the two photo primarily is the shutter speed as one is really slow to blur the truck and the other is faster so it will capture the whole construction scene with out any motion blur on my part.

Well, this is going to be a wrap for the post, I hope you enjoyed following along and if you would like to watch a video of this trip, just click on the link below. Thank you for you time and get your camera out!

Chasing the light...

Ok, this is going to be a short and sweet kind of post. I normally make YouTube videos about things that involve lots of images playing past the viewer and just lay some music over it to more or less inspire the viewer to do what I say at the end…”Get your camera out and go take a picture with it”

Never before has this been a truer statement than today. But we need to ask ourselves an important question…what do we like to shoot?

With world events being what they are and how the physical world around us is changing constantly as time goes on, I am not ready to just let it pass me by without documenting some of it as I go. Armed with this knowledge, I look for two things to photograph, things that will be gone soon or interesting light. That is what drew me to the photo above of the couple painting down by the river by iPhone light. The light was just too good to pass up.

You see, I am not what I would call an artist. I don’t think my photography is that noteworthy. Once I am gone, maybe someone will find these hard drives and then will think they are filled with the coolest photos and video the world has ever seen, just not today. That being said, I do think that I am a decent documentary photographer and that as time goes on I get better with it.

Things I normally photograph will be buildings that are gone now, that I could tell somehow that were probably headed for the wrecking ball or like the series below where I photo-documented the construction of the Kinley hotel and how there is a Coca-cola sign that is now hidden from view between the buildings because of the hotel. For me this is the sort of thing that is simply fascinating for some reason.

As an added bonus in these photos there is also another piece of history that undergoes a change as well. If you will notice that the sign on the corner for the ADAMS building appears in the last 4 photos where I thought to go across the street and get the image. This sign survives into the renovation and it restored and back in place at the end. The ADAMS building no longer exists but the sign somehow survives into the current day…

Another aspect of my photography is more artistic where I will shoot at night to capture interesting light in different areas of the city, where ever that might be. I have began to look for movie marques in the town square of small towns and get them lit up at night.

But the real thing I have started to do it just take photos. Things that happen around me like the photo here of the smoke from local wildfires because it hasn’t rained in something like 2 or 3 months at this point.

These next two photos were not taken on the same night, but were captured about 1/4 mile of each other. One is the river front and I just liked the way the light fell that night on the water as well as the light spill from the street lights across the river and the color of the sunset all just came together for a great photo. The next one is simply a photo of a couple of buildings on Market and 5th street. The signage and the lights just made for a cool photo to me so I stopped for a second and grabbed a few images of it at varying exposure levels so I could get the lit signs to expose properly as well as the rest of the stuff. It is just a cool photo to me.

If you have not figured it out yet, I want you to start taking a long hard look at what it is that you enjoy photographing. i mean REALLY boil it down to the simplest components. For me it was the two things I just mentioned, for you it might be saturated colors or people waving at you or blur in your photo. The point is, don’t just generalize your answer, the only person you hurt in this event is yourself if you are not 100% truthful.

If you like to watch videos too, here is the video I did on the same subject.

So ask yourself what it is that you like and then go out and make photos of that AND don’t let yourself fall into the trap of not being able to change this with time. I started out wanting to shoot urban decay only, but it turned out that was not the root of what I like to shoot, but it led me to it. Anyway, with that said, get your camera out and go take a picture with it!

Fall color photos FINALLY!!!

Well, it sure took long enough, but I finally found a place local to me that had some beautiful fall color photo opportunities.

This is not something I normally have when it is as dry as it has been recently. Let me explain…

I am no scientist but I have stayed in a Holiday Inn before, so here goes. From what I have seen, there are three different scenarios that usually unfold around here in the fall.

The first event is like this, we get plenty of rain in the spring, it dries out a little in the mid summer months and then it starts to rain in late September or early October. This is actually the best possible scenario from what I can tell…

The second scenario is the same as the first one except the rain turns into a thunderstorm storm with heavy rain and usually high winds during peak color season, knocking all the leaves off of the trees.

Then there is option three, this one is where there is rain in the spring but then it is dry for the entirety of summer and fall. This is the type of season we are in now. There has not been enough rain to matter in two months…maybe more. It is so little water that the creek next to my house has no surface water in it as of this writing.

Of the three events, the first one is the preferred for fall color photos as there is sufficient water for the trees to transition normally to their dormant winter state and you get this incredible color display in the fall. This year though, we have event three where everything is a huge tinderbox and the leaves are simply drying out and turning brown then falling off of the trees without passing through their color phase at all…except…in the few places where there is still ground water to water the trees.

Enter North Chickamauga Creek WMA near Soddy Daisy Tennessee. This is a small WMA (Wildlife Management Area) situated in a gorge next to Mowbray mountain and is a popular spot for the locals to cool off in the summertime in the river. Well, the river is just a brook at this point and is barely moving at all, BUT it is there! If you watch my YouTube video on it you will see what I mean. Even so, there is still enough water to feed the trees so they had a fall color change.

Since I found some colors this year, I now had to figure out what I wanted to use to capture all this color with. I finally settled on my camera being the Leica SL2 as it has a high resolution sensor and several other features that lend itself to being a wonderful landscape photography camera. You see the Leica SL2 is a mirrorless camera so it can be adapted to various vintage lenses really easily and we all know how I love using vintage lenses! So today’s lens of choice for the Leica is the Nikkor 28mm f2.8 AiS. This is one of Nikon’s crowning achievements in lens design as it was as close to optical perfection as they had ever gotten to that point. So naturally I used this lens.

The magic of the Leica SL2 as well is that it has IBIS on the sensor. This basically turns all my vintage lenses into stabilized lenses. I know there are a ton of other cameras that also have these same features but I just like the Leica SL2 for some reason.

Now that the camera setup is settled, next is finding the photo I want. I started out looking for macro level images, vistas and scenes, then I moved in closer to get more detailed image ideas. The first one is shown above of the red maple tree in a sea of yellow. Then I moved to the river bed and found some wonderful colors out in the open.

This was literally what I was greeted with when I looked upstream from where I entered the river bottom. Not much water, but I got such a color splash from the trees that I didn’t even care. I would have liked for it to not be overcast, but you take what you can get and work with it. I really love this image too, so much texture and color in one image that is is almost overwhelming. I was really starting to embrace the look that the 28mm lens was giving me and then I decided to move upstream to that large boulder you see in the above photo and get a different perspective from that spot.

The little smidgen of sky showing the over cast clouds almost makes it otherworldly or something like that. I was blown away with this image when I got it into Lightroom and was able to see it better. It almost doesn’t look real back up in the valley next to the sky. The clouds were epic! This is also shot hand held with the 28mm lens. What is nice is that it allowed me to be very agile and not have the burden of the back pack and a tripod with me at all. There is something to be said for simplicity…

So in summary, if you want to find fall colors even when it has been really dry, find the water. Where ever there is water, there will be fall colors. At least that is what I have seen, your mileage may vary.

The Sigma 65mm f2.0 L mount lens review

So a good friend loaned me his lens. One of my subscribers that I have grown to know over the years offered to send me a couple of his Sigma lenses and let me use them for a while as review samples for you guys.

I really appreciate your offer Hassan and look forward to the day when we finally get to link up and go out on a photowalk together!

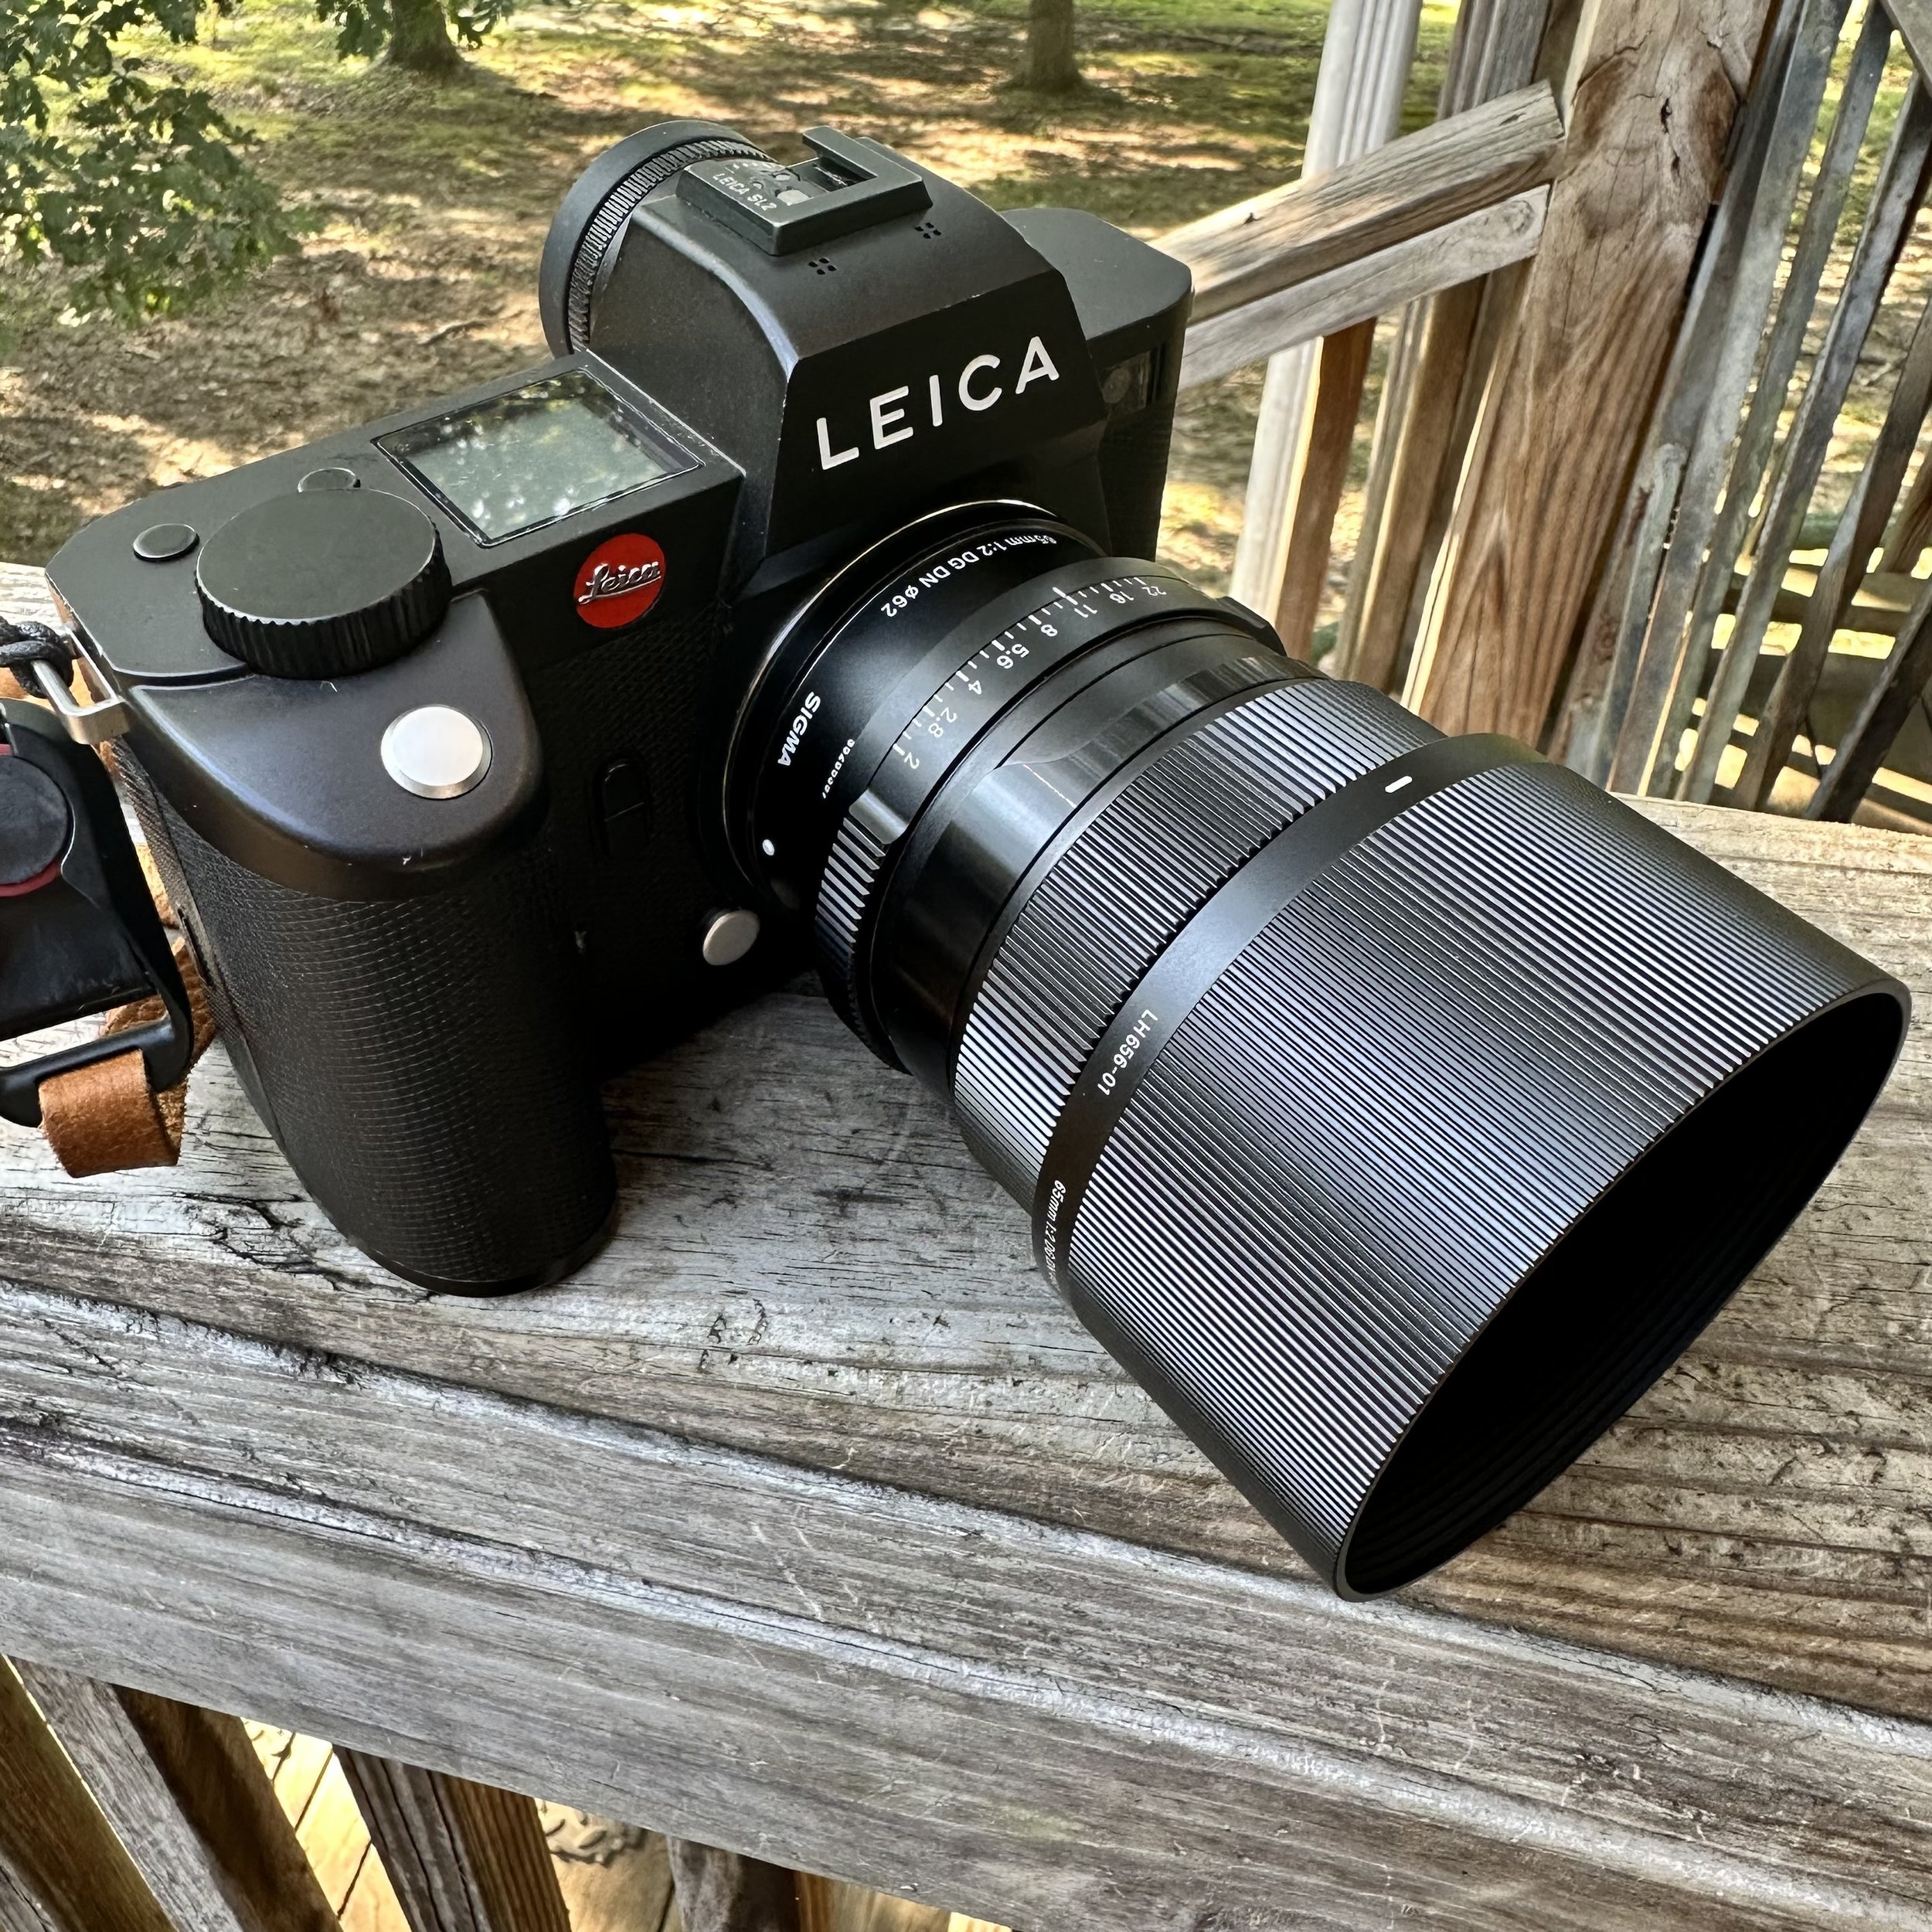
Hassan packed up two of his beautiful Sigma primes and sent them up for a look. He sent his 65mm f2 DG DN and his 90mm f2.8 DG DN. Both of these are in Leica’s L mount as Hassan has a Panasonic Lumix camera that is also in L mount due to the L mount alliance between Leica, Sigma and Panasonic.

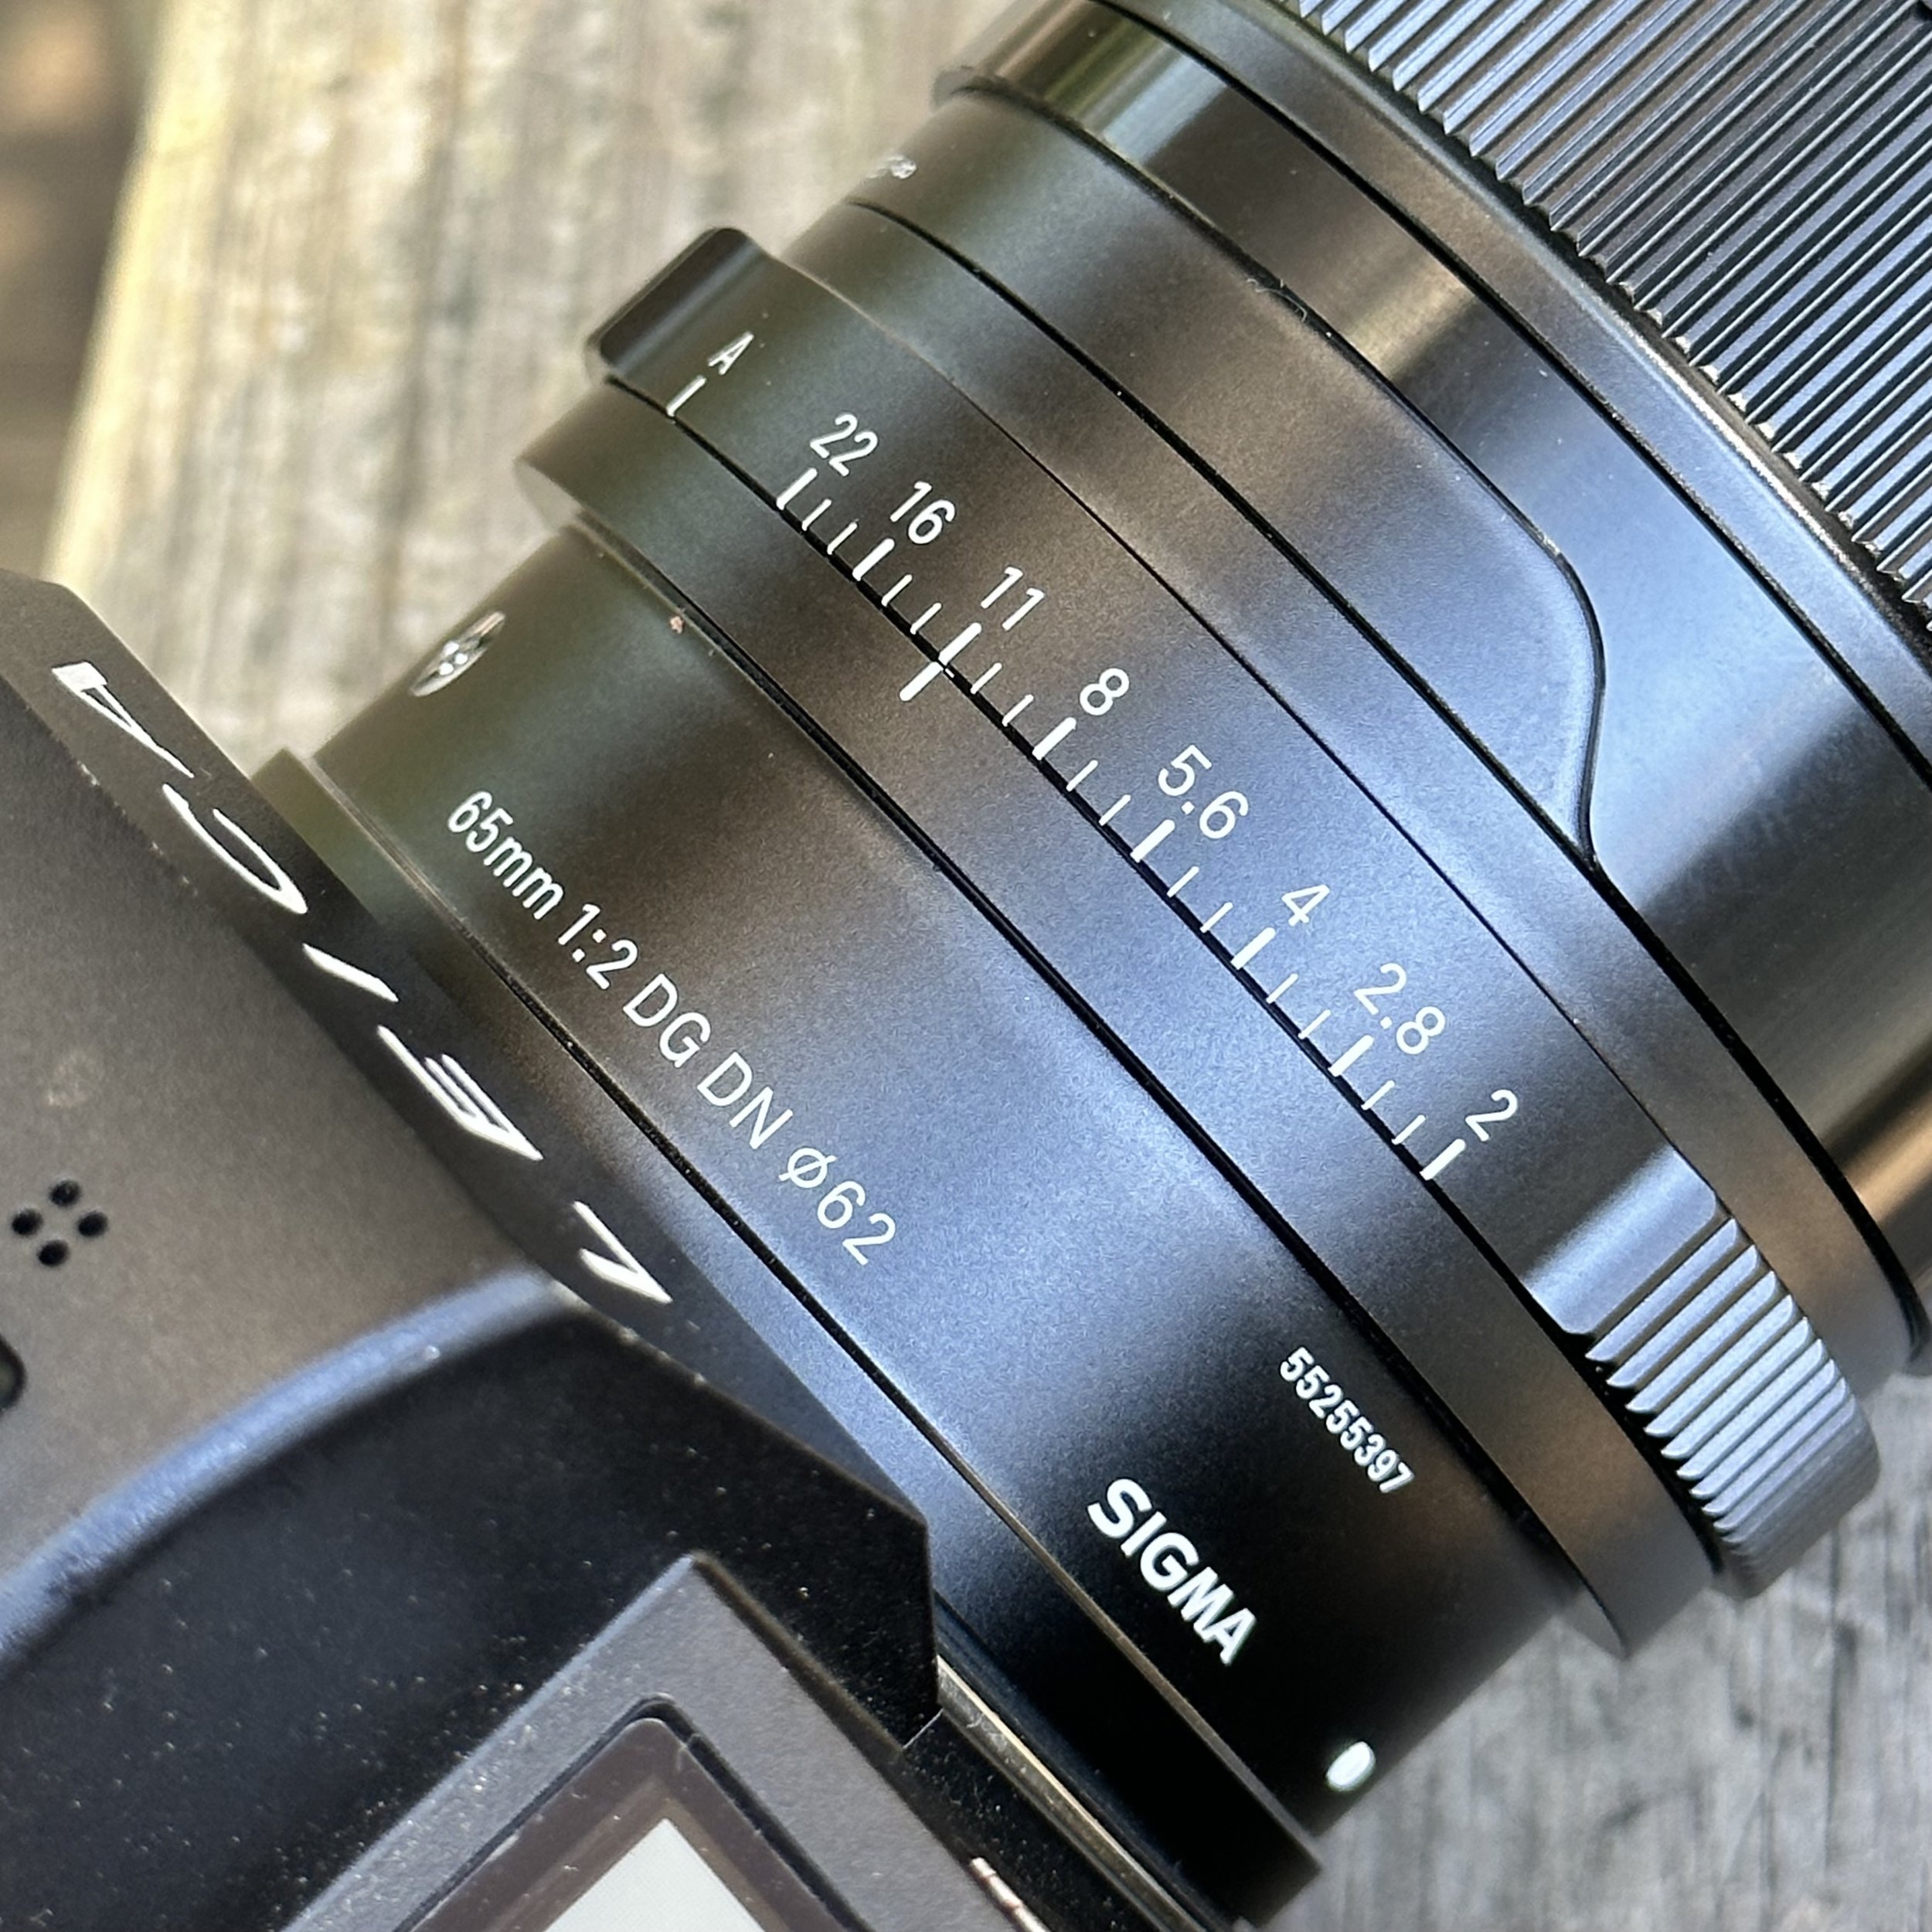
The first impression of this lens is the darn thing is tiny. This lens is really small, this is awesome as it means it makes the system really compact. The next thing I noticed right away is how nice the build is, all metal construction for the major parts, including the lens hood from what I can tell. Really nice fitment of the lens components so there really is no play in the mating parts. Parts designed to move, like the aperture ring, move only in the direction they are designed to move in. The machine work and fitment is nicely executed from what I can tell.

The next thing I noticed is how fast the focus works, just understand this…it is fast. How fast? Well, it is fast enough to get the shot for me. it is not as fast as my native Leica glass, but it is plenty fast enough for my personal use. I don’t have a way to measure the focus speed, but it works great and I have no complaints about it.

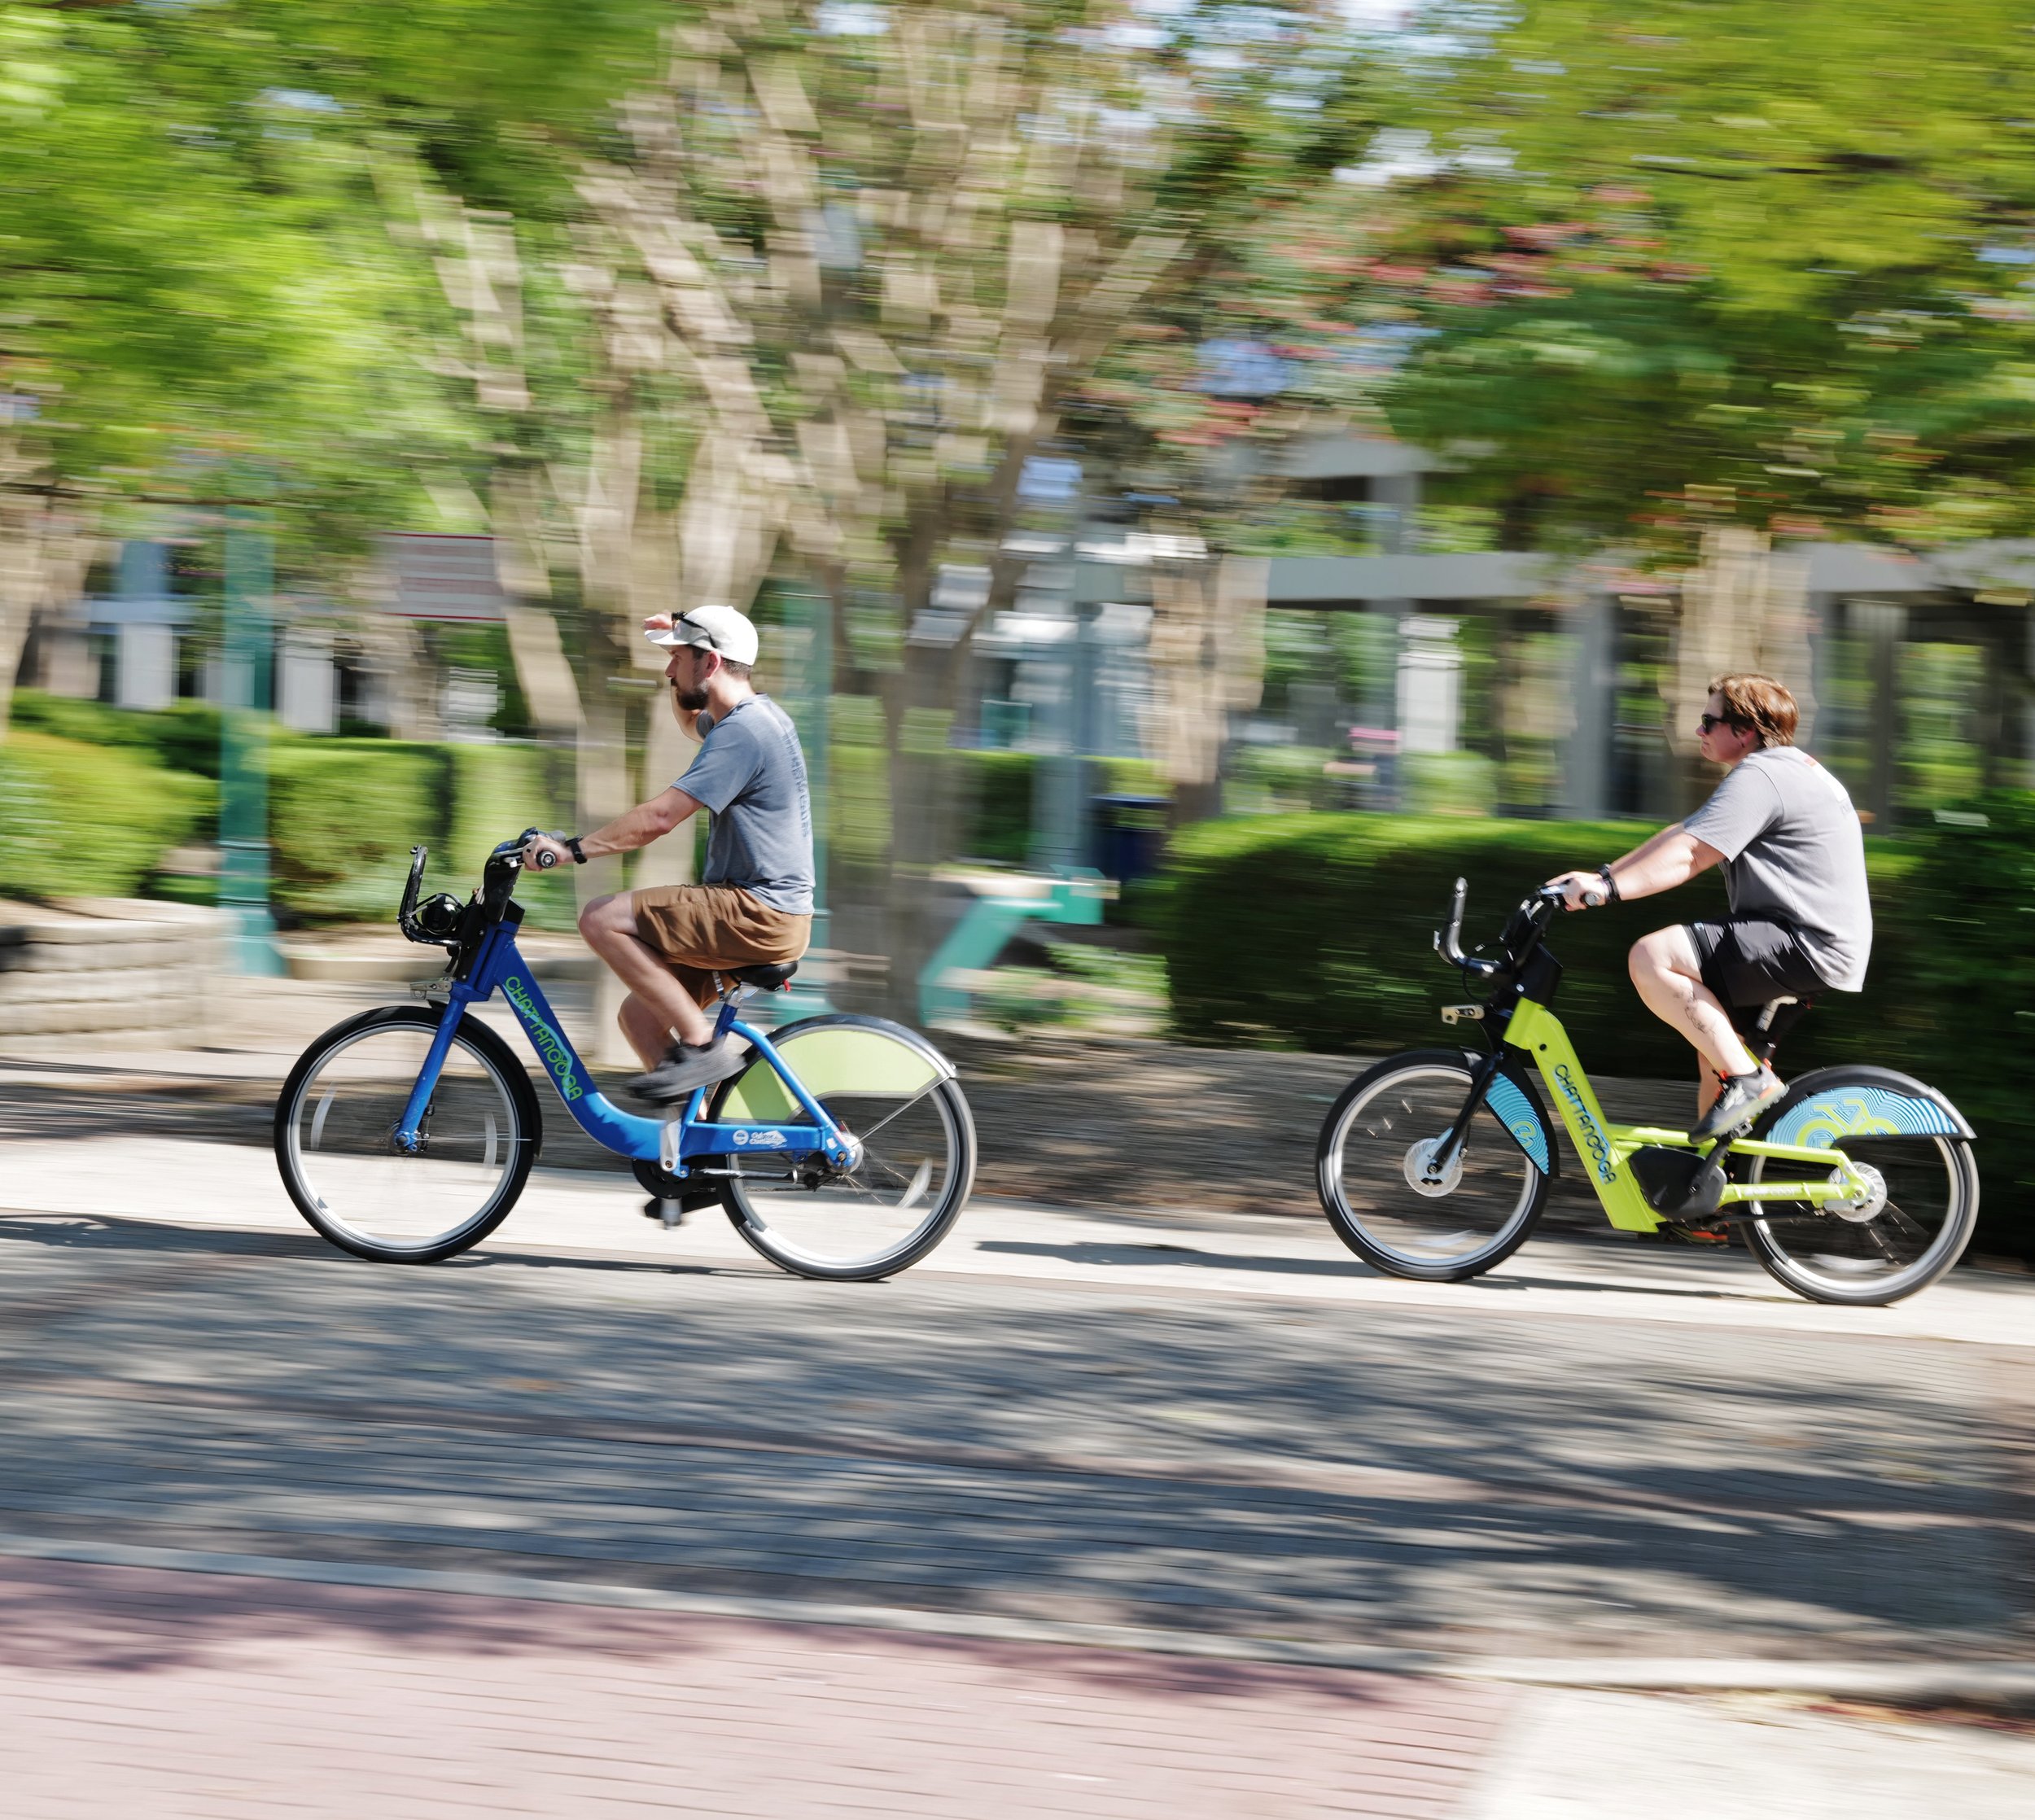
It was even great at shooting panning blur photos of the passing bicycle riders in Coolidge Park.

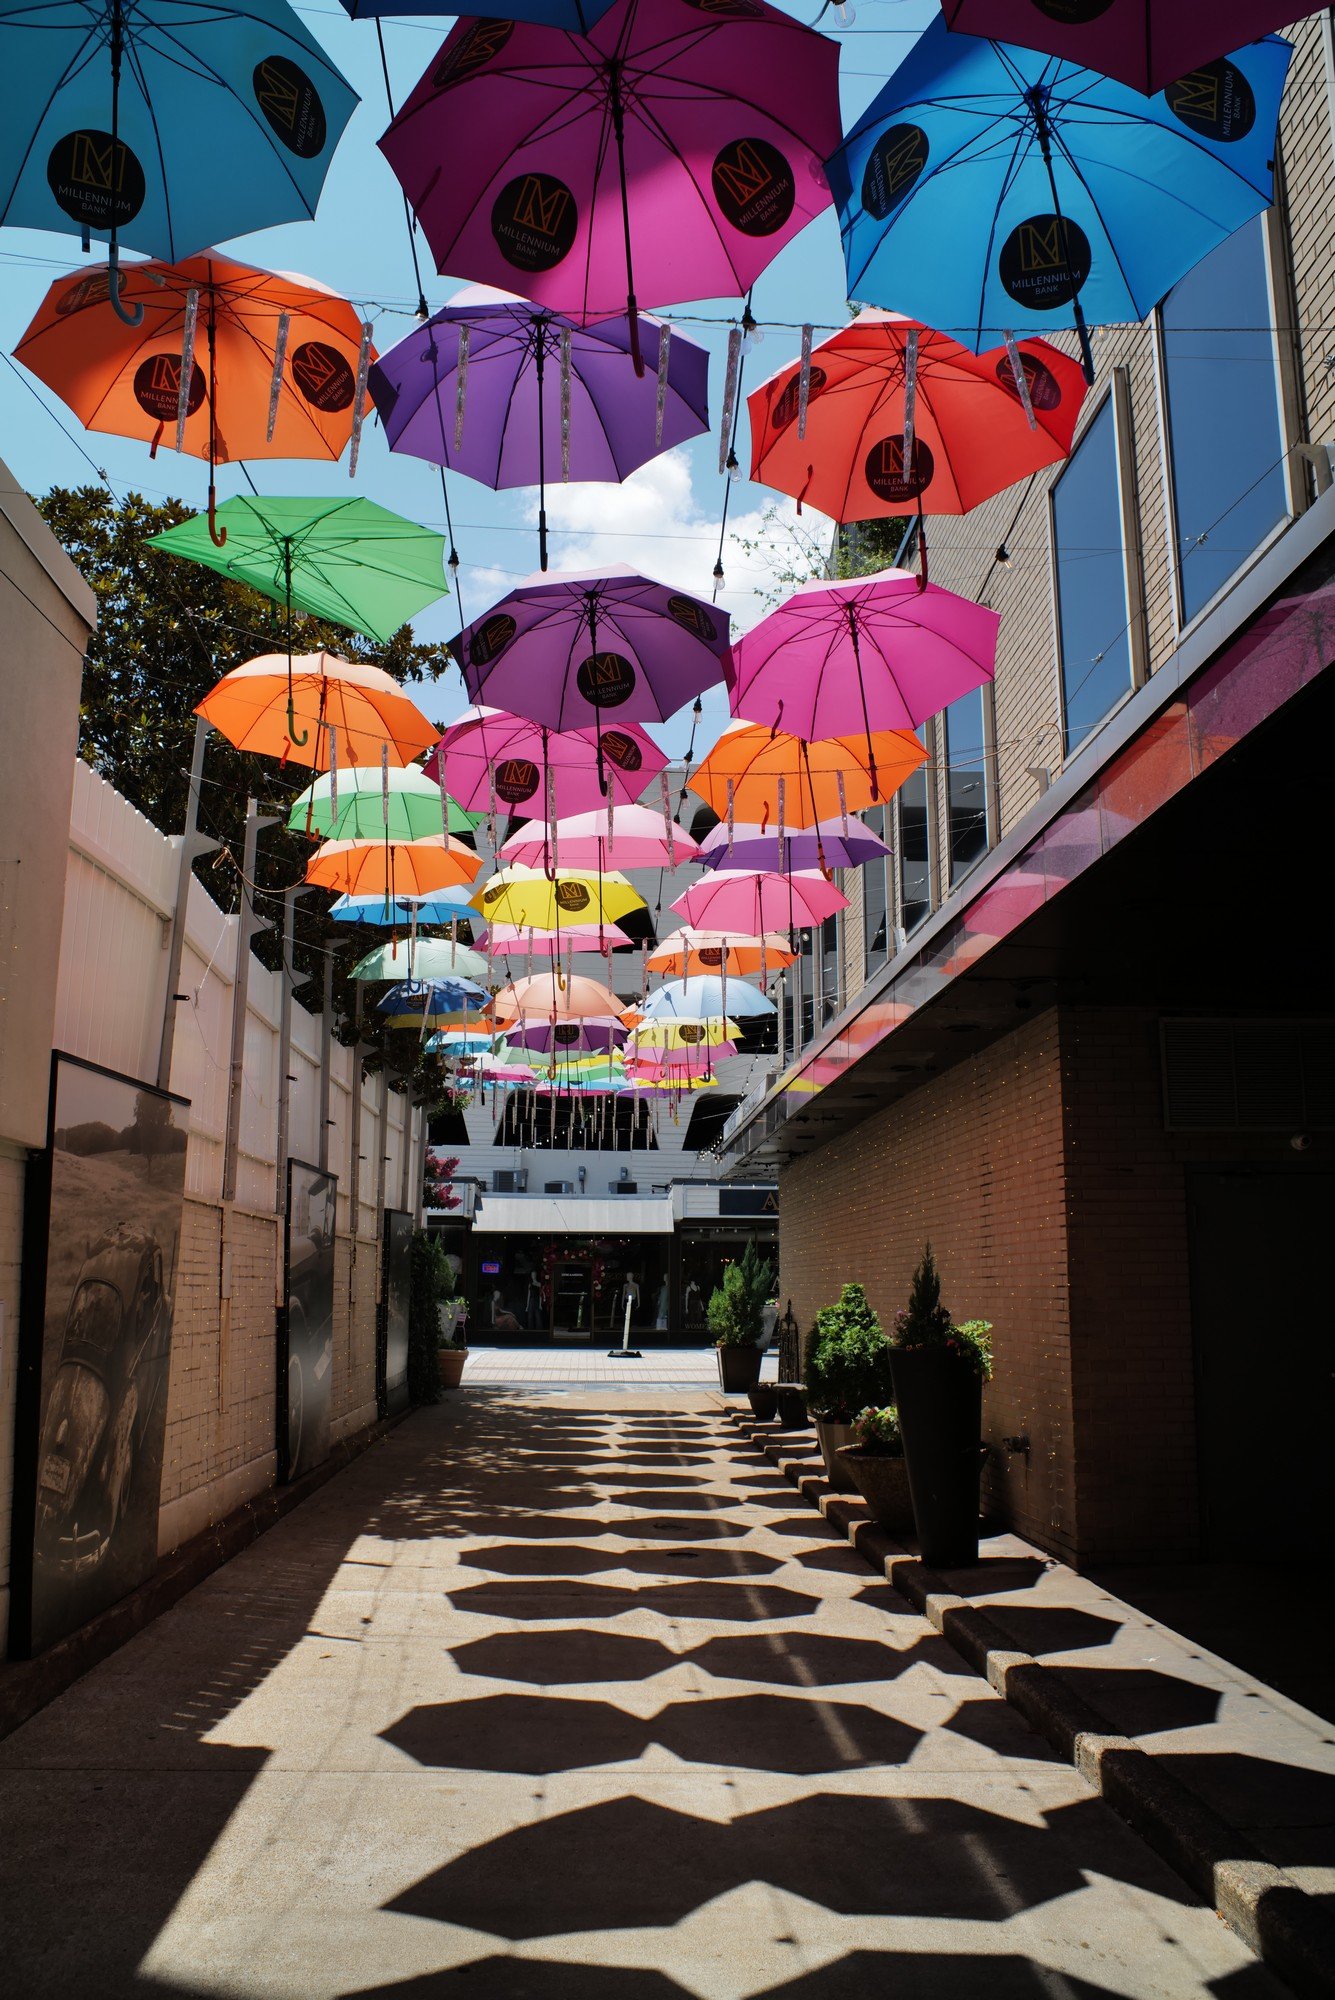
So I took it out for a photo walk or two while I had it and to be honest, I think it is 98% of my Leica glass in every conceivable way. It is so close that you would not be able to tell if I showed you two photos and had you tell me which one came from which lens and why you think your answer is right. It is just that good. The images are laser sharp. The rendering is wonderful too. It is just a great lens all around.

Another thing I want to mention here is that the interaction with the lens is different than my Leica glass. Sigma approaches the aperture and the manual focus modes differently that Leica. I will be honest here, I kinda like the Sigma approach to aperture better too. The Leica lens is all software controlled, there are no external controls on Leica L mount glass except for the focus ring, so you use the camera’s controls to adjust everything. On the Sigma, the aperture control is on the lens, which is nice in my opinion. It has aperture choices in 1/3 stop clicks from f2 to f22 and then you can roll the aperture ring around to “A” for auto mode and the camera now has full control of the aperture just like the SL primes.

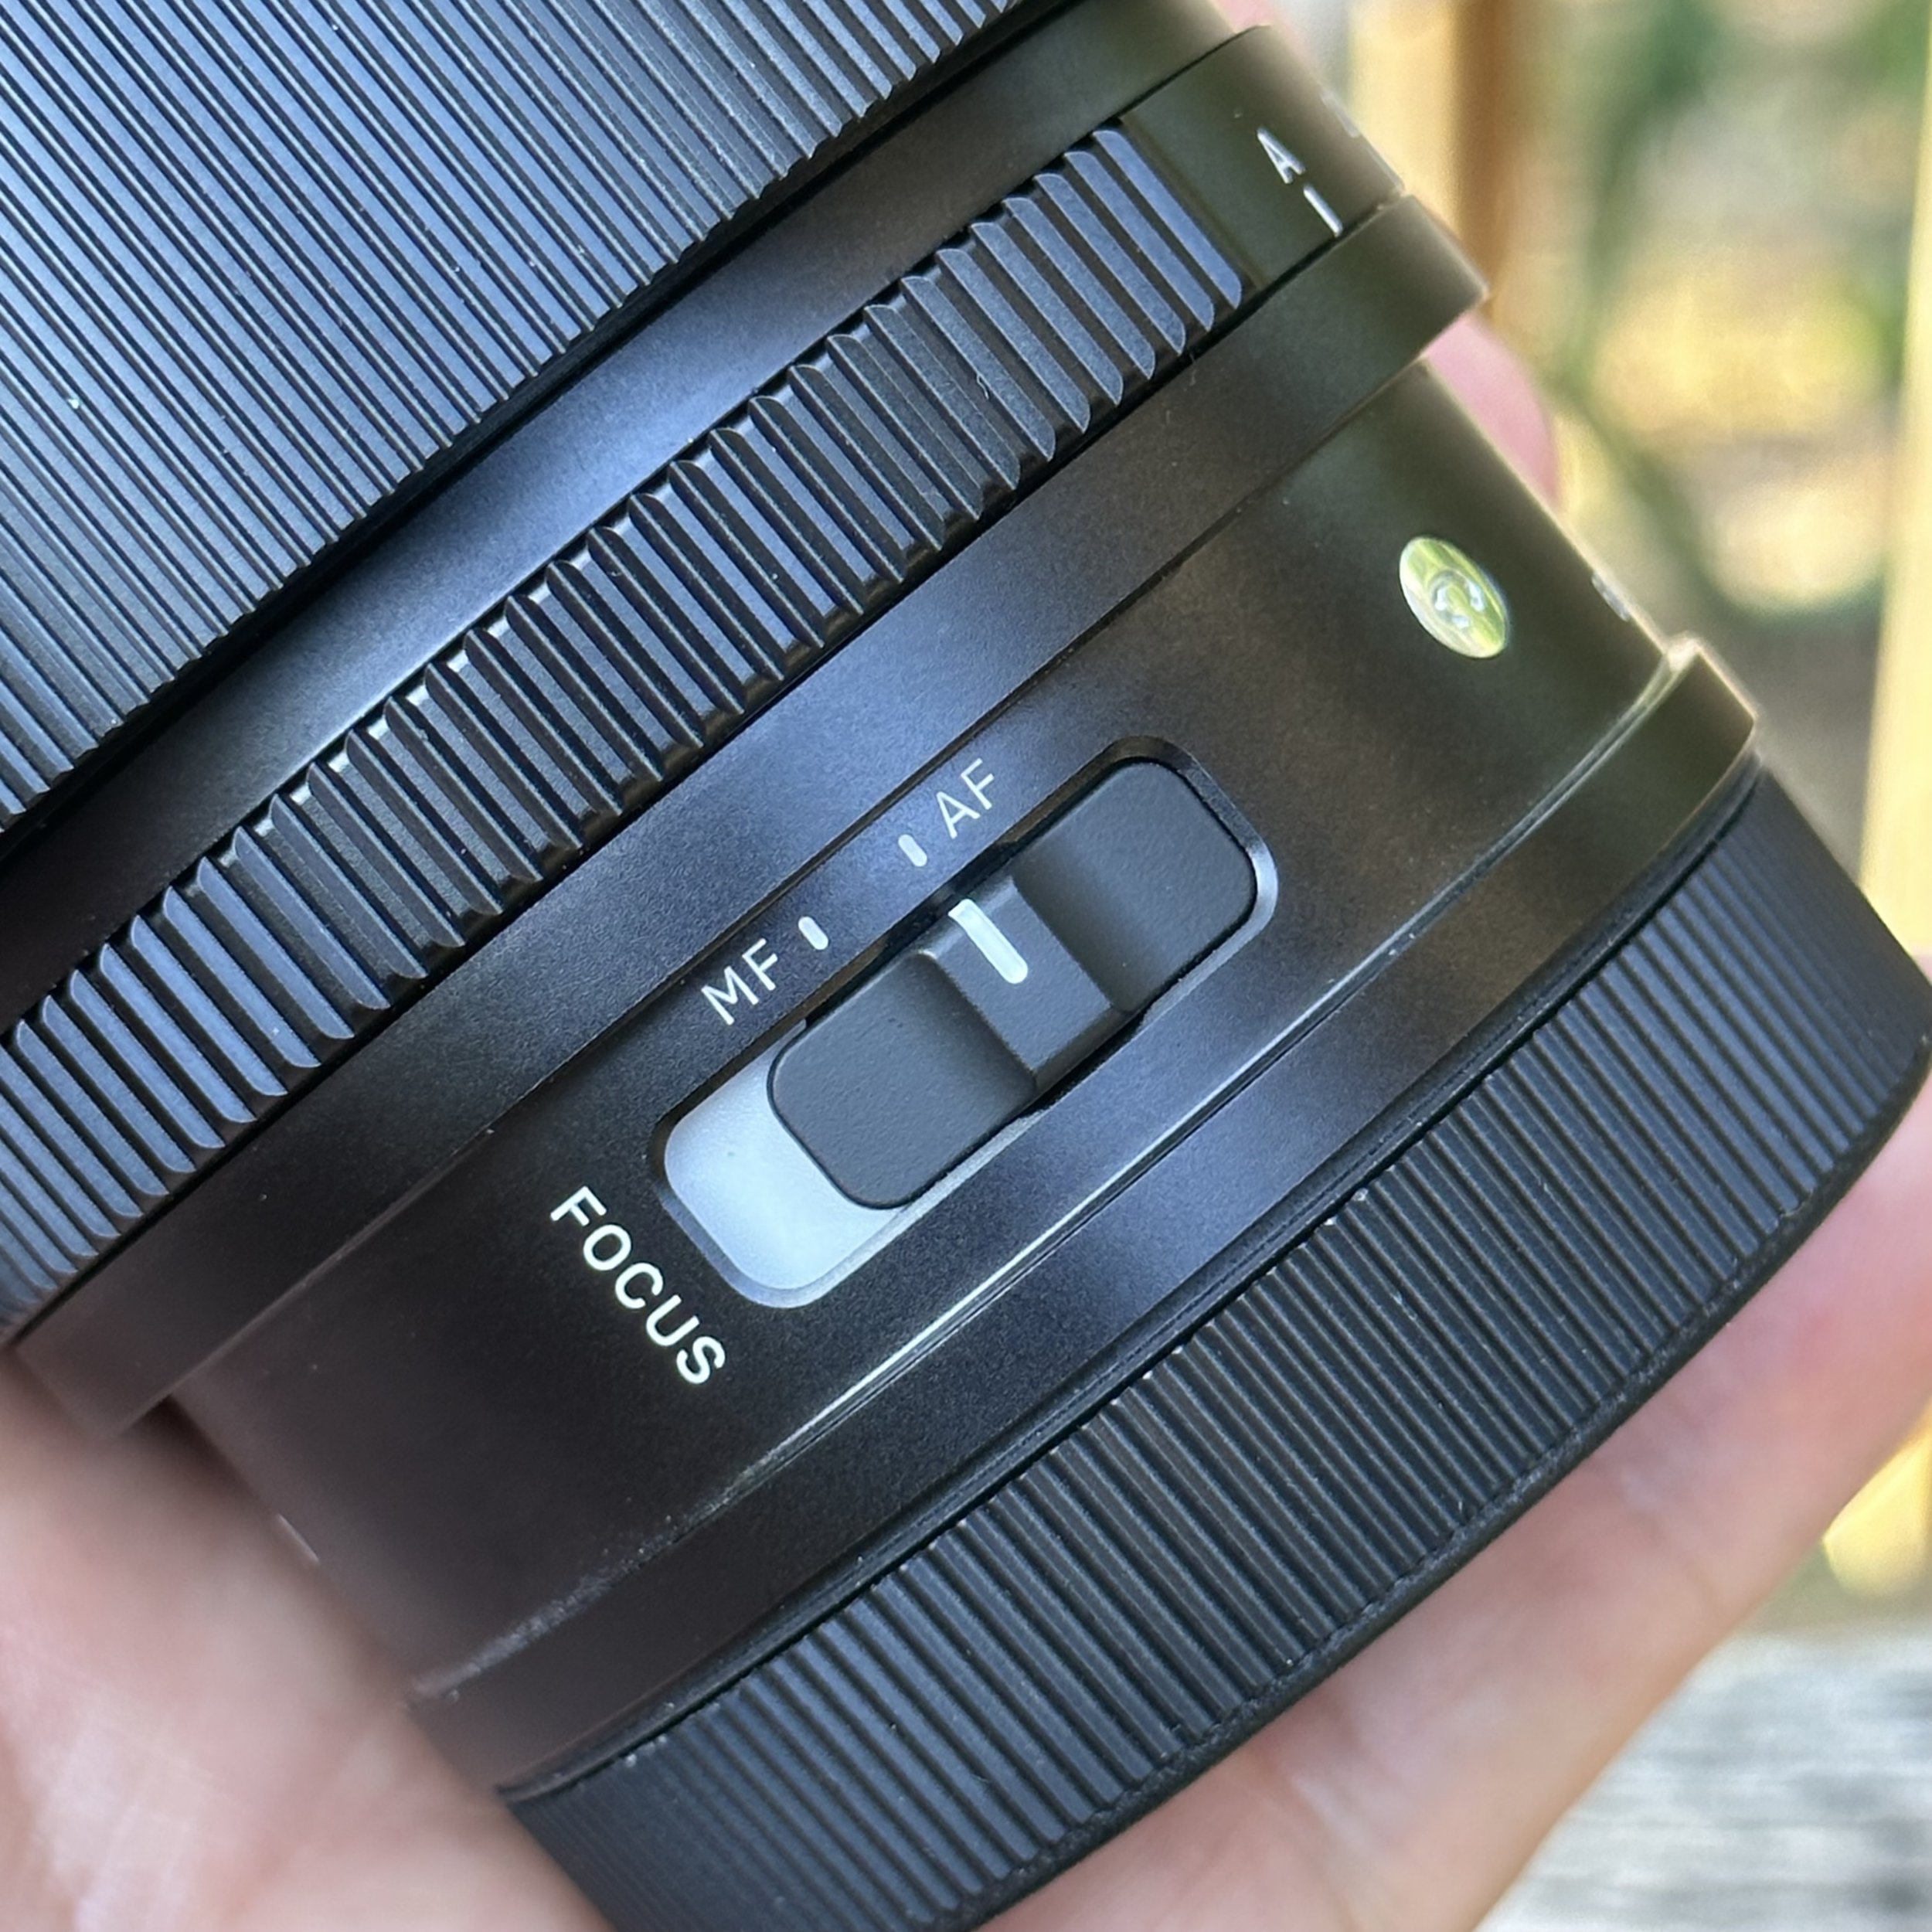
The other thing that Sigma does is something I am on the fence about. The manual focus is a switch selection on the lens itself. I dont know why they chose this way to control this function and to be honest, it is not my favorite way of doing this function. It might be that Leica’s firmware prevents Sigma from exploiting manual focus without it. I really don’t know why, but the focus ring is an encoder design which means it is not mechanically connected to the focus helicoid in the lens. One would think this would be how it would be designed if there was a mechanical switch separating the two modes. All that to say my thoughts of this lens are that it is a great lens, especially for the money and you can get them about anywhere. Well done Sigma, well done.

Thank you for reading my thoughts on the Sigma 65mm f2 DG DN lens that Hassan loaned me for my Leica SL2. It has been an adventure for me.

Nikon Zf Full Frame Concept Camera Rumor Discussion

Well here we are. Talking about fictitious cameras again… lol.

Of course this is my satire photo I cobbled together for a concept, I kind of like the aesthetic though.

When I heard this rumor I thought about it and dismissed it almost immediately, but then I started thinking about it more and more and came to realize that I would really like a camera like the rumored Nikon Zf mirrorless retro camera. Let’s take a walk down “Wishful Lane” and cobble together the main features I would like to see in such a camera.

David Saylors Nikon Zf Full Frame Rumor Street Photography Camera Livestream

Link to video on youtube

First off we need to establish something, Nikon is no newcomer to the retro camera space, if anything they are a leader in this space in my opinion. You see, they have already tried this several years ago. The Nikon Df was a full frame DSLR retro styled camera that first came out in late 2013. Here is the problem with the Df, it was ahead of its time. The Df came out at the height of the DSLR period in camera history and nobody wanted to go back in time to the cameras that looked like that… yet. To say it simpler, nobody wanted it…

Reference photo scraped from the internet courtesy of B&H Photo.

The Nikon Df was a really cool camera too, sporting a full frame sensor in a stylish retro body. It was simply just too soon. Fast forward to mid 2017 and Fujifilm launches arguably their most important camera to date…the XT3. Sure the XT1 and XT2 had done fairly well, but this camera propelled them into the Street, Reportage, Lifestyle camera space like a rocket. Everybody had an XT3 at one point, shoot I even used one for several years. It is a great camera.

Another image scraped from the internet for reference.

Fuji had been chumming the waters for several years at this point in the street photography niche and a strong marketing campaign combined with a period in time when youtubers were the main game in town for getting the word out and the XT3 took over this game…for a time. The point had been finally made that the photography world was in fact ready for a retro styled camera.

Next in this story came the Zf-c from Nikon, this little power house of a camera was basically a test run, in my opinion, to see if Nikon had enough market segment clout to pull users from Fujifilm, Olympus and Leica over to their court. They even released it with a retro styled 28mm lens to go with it. Pure genious in my opinion as the 28mm f2.8 Ai-s was one of their best lenses ever made. This has to be the most blatant shot across the bow of Fujifilm in the company’s history… Just look at the two cameras in the comparison below.

Sceen capture from Cameradecision.com, a website that will allow you to compare many cameras.

I grabbed this image above from CameraDecision.com as it has the measurements to show how close they actually are in physical size and appearance. Just look at it and then try to tell me with a straight face this wasn’t a test shot at improving Nikon's street photography market share…lol

You know what though, it worked. Zfc sales soared and the cameras flew off the shelves. People loved the tiny little camera but it wasn’t without its shortcomings. These shortcomings will be what is fixed in the Zf if I am right… You see Leica has already figured it out. The dropped the CL from their lineup entirly due to the fact that people that want crop sensor street cameras simply buy the Fujifilm machines. Fujifilm owns this market outright now. It is common knowledge that if you shoot crop sensor street photos it is probably on a Fuji… So Leica simply leaned into their full frame machines and focused on them more, this proved to be the right move for them too. Nikon is also starting to see this in my opinion and the Zf will be the camera that they use to show it.

The things I am lookng for in the Zf that will make me choose it will be:

  1. 24Mp full frame, stacked, BSI sensor - Low light is what I am wanting here.

  2. IBIS - slow shutter speeds are so much easier with good stabilization.

  3. The same battery as the other full frame machines.

  4. Dual card slots - not a deal breaker but overflow is nice.

  5. High quality EVF - A hi-res EVF is important to me.

  6. Released with a set of fast primes like 28mm, 35mm, & 50mm.

  7. A tilting screen is a must. A side swinging (flip out) design is not important though.

  8. Shutterless design like the Z8 & Z9

  9. Weather resistant in the rain.

You will notice that video is not on this list. That is because I don’t think this camera will be used by video enthusiasts and good video specs will not really matter. Sure, give it 4K 30p or some such if you want. That way you can capture the occasional B roll clip of shoot off of a tripod or what have you, but 90 percent of the people that will choose this camera will be choosing it for the stills experience.

I think that if they lean into the stills side of the game on this machine and integrate the external controls from something like an F3, that they will have a solid winner on their hands. I know I would love to have one. I bought the XT3 back in the day because Nikon didn’t have what I wanted. The Zfc was a near miss for me, I almost bought one when my buddy Phil Thach did, but I was able to keep my resolve to hold out for the full frame version…lol.

You see, I already have a crop sensor street camera with my Leica CL, so I just didn’t see the point in another crop sensor machine that didn’t have IBIS. If I buy another APS-c camera it will have IBIS. The tech is there, just look at the Fujiifilm XH2 for instance. The IBIS makes a big difference for me in that I like to shoot with fairly slow shutter speeds to capture motion blur and in low light or even at night. This is why I want the 24MP sensor, the larger photo-sites will make noise control a lot easier for the processor. Also killing shadow noise at the same time. Another point that needs expanding is that I like the EVF in my Leica cameras as I use glasses and with the EVF I can see the camera display7 information as well as the scene exposure and I can focus it to be able to not need to use my glasses. This matters in that if I looked through my glasses, I have to press the lens against the rubber eye cup and this usually has skin oils on it which in turn makes my glasses useless… Hence the reason for being able to focus the viewfinder to my un-aided eye. I simply look directly into the EVF and I can see everything, including image review if needed. I have grown to NEED a good EVF at this point instead of wanting it.

What do you think would make the perfect retro styled camera? Let me know in the comments below!

Test driving the Leica Q2...sorta.

If you want to see more photos and some more discussion on the idea, follow this link to the video where I do this walk. Other wise, read on friend!

I went for a little stroll in downtown Chattanooga and decided that on this photowalk that I wanted to simulate the Leica Q2 to see if i really wanted on. Photography is a funny thing, some photographers will buy one camera and use it all their life and others will change out lenses and camera bodies numerous times.

My simulated Leica Q2 for the day.

I am a little of both as I love to play with new gear as well as use gear that has become my favorite kit so to speak. Well, I have the Leica SL2 and I also have a nice little Asahi optical 28mm prime lens that I have an adapter for so I figured I would put this together and see if the shooting experience would be close enough to the Q2 to give me an idea of what it would be like without having to spend 6000$ on it.

I really love those Leica colors for some reason, maybe it is a bias I have towards the brand but to me the images just seem more rich in color. I really love how they turned out though and the idea of the Q2 is a great one for a general street camera. The high megapixel sensor combined with the 28mm lens is a potent street combination as you can see below where I shot the image as a candid just in passing and was able to adjust the composition later in post to get what I was looking for.

This photo was shot about 10 feet away and with the 28mm on a full frame sensor it looks MUCH further away. But through the power of cropping… I can make it take on a couple of different looks as you can see below.

This is a 12 megapixel crop of the original image.

This is a 16 megapixel crop of the original image.

As you can see I can get two very different feeling images from this single frame. That is kinda powerful to be honest. I mean, you can change the entire dynamic of the image with a simple crop. That is actually liberating to be honest. I mean just look at the two again. One has this lonly, almost bleak feeling to it while the other has a warmer almost restful feel to it. That is really cool to me. So this is a perk of the Leica Q2 in my book.

So what else comes with the Q2 that I didnt have today? Well, autofocus is one, another is larger aperture. This lens is f3.5 which is two full stops slower than the lens on the Q2. This would matter more in low light as I was shooting most of this day at f11 to reduce the need to adjust focus. Range focus at f11 on a 28mm prime is basically 4 feet (1.3 meters) to infinitiy. So it literally was point the camera, press the shutter and the image was in focus. But if I wanted to shoot indoors or in the evening, the f1.7 aperture would be nice to have to keep my ISO down some or be able to raise the shutter speed a little to freeze action better.

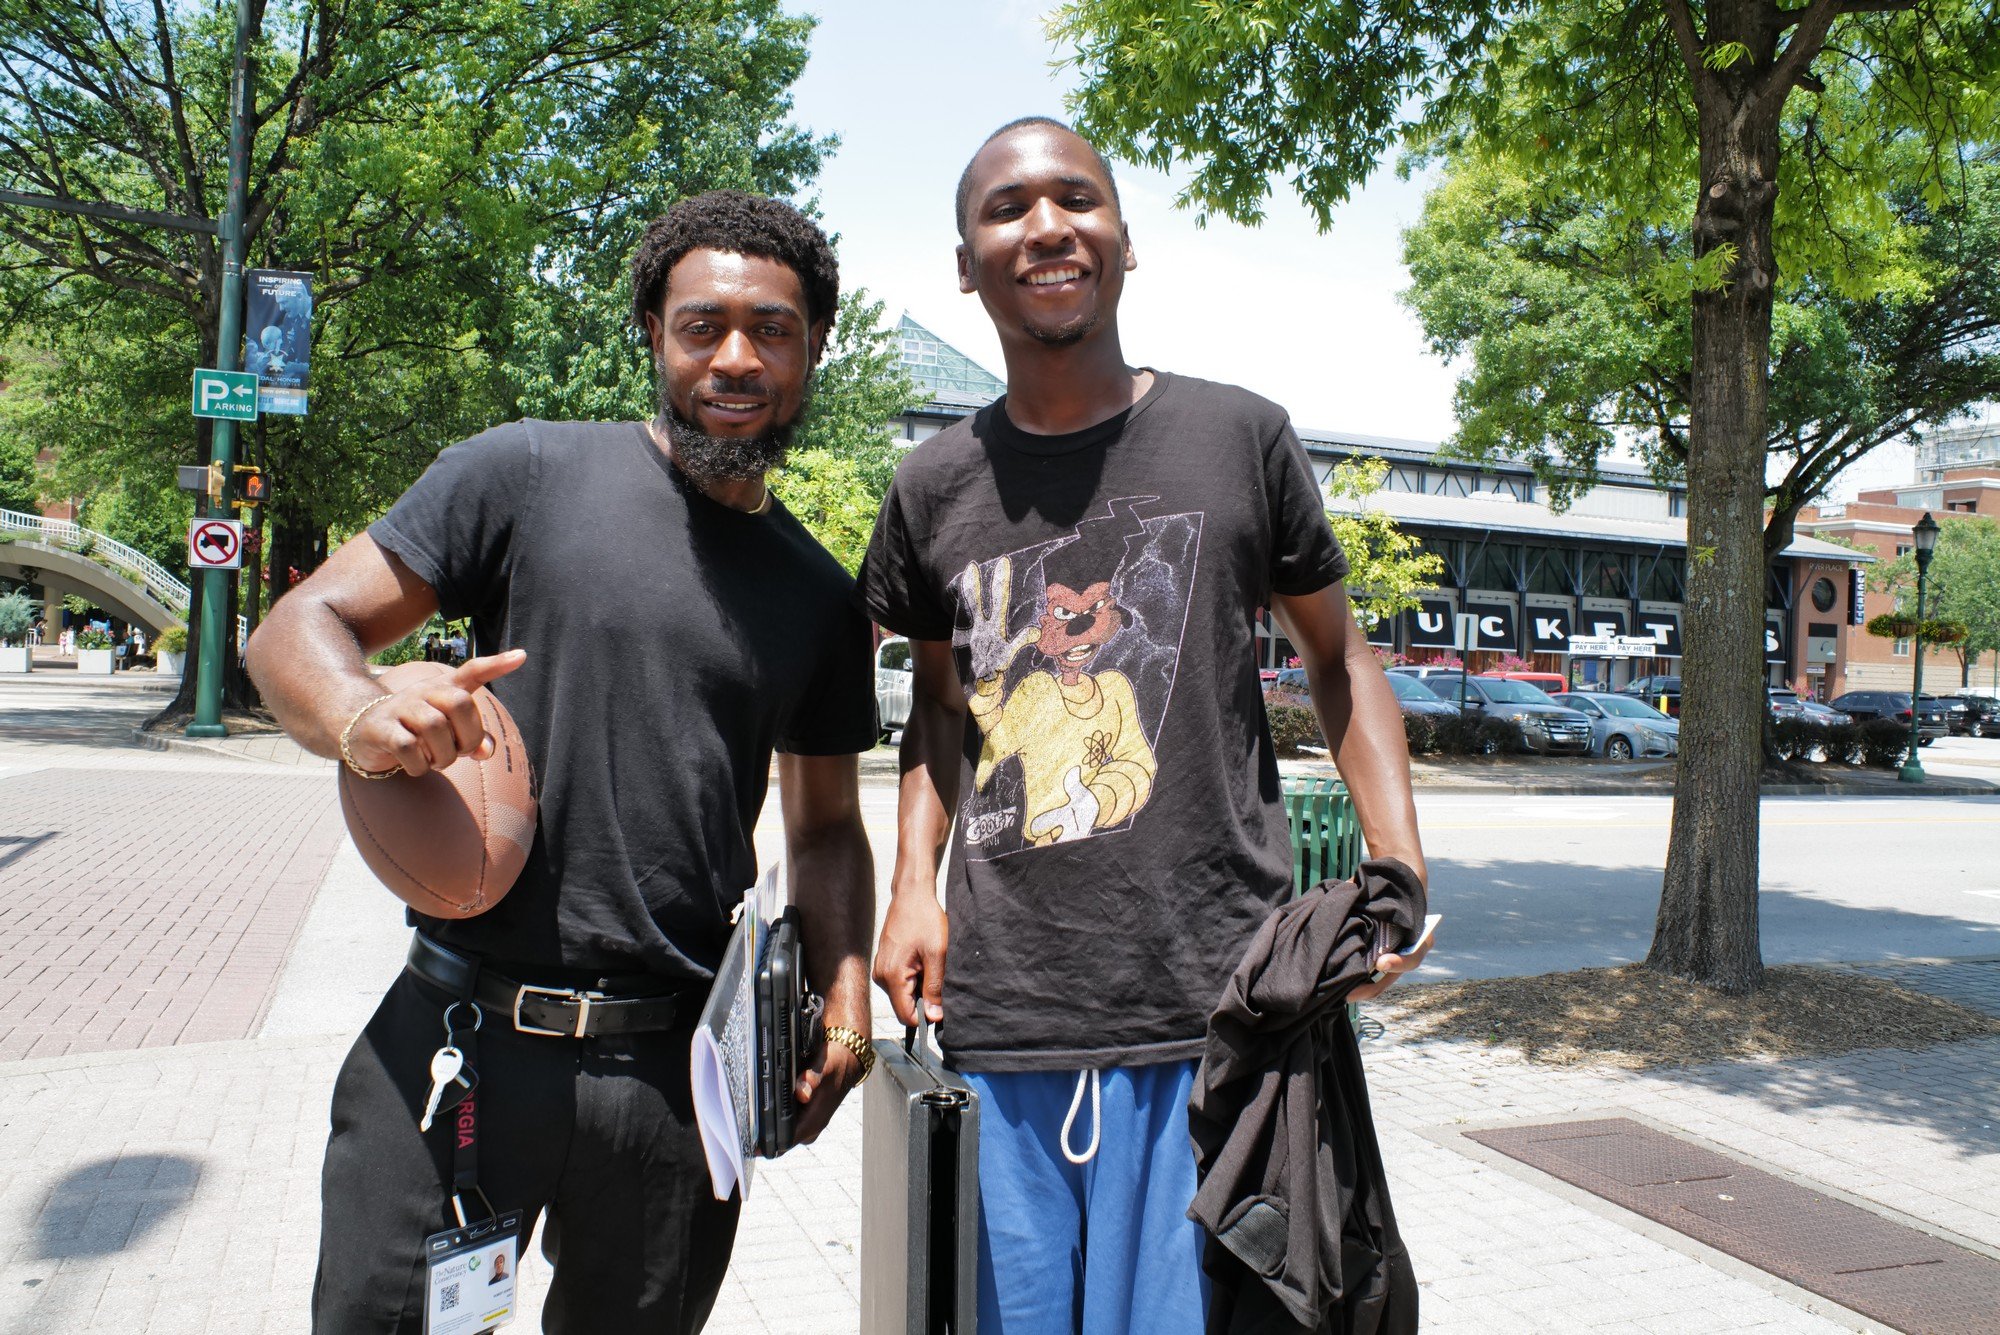
What I really liked about the 28mm was that it made me interact with the people more. The photo above is a great example of this, these two guys were walking by and I just asked them if I could grab a quick photo, they were stoked and so was I. This is honestly a problem I have that I am working to get past. I don’t like bothering people and will walk by potentially great photos simply because I don’t want to bother them. The 28mm forces you to get closer if you want the detail in the photos so I have to get closer to do that. So I think honestly, this is going to have be a perk of the 28mm Summilux lens after all…

All in all, this kit performed really well for me and I think the Leica Q2 would perform equally as well. BUT I do really like the ergonomics of the SL family of camera bodies so for me I will keep my SL2 and use a 28mm lens when I want to have the Q2 experience in a camera. So until next time, get your camera out and go take a photo with it.

Just capturing everyday life…

When I decided to take some time away from youtube and just explore my photography, I didnt know how much fun it would be to just take the camera and an extra battery. It blew my mind to be honest.

Still I found myself starting to look for more interesting photos when I am out and about these days. Something else I have really come to realize is that you cant get the photo if you dont go out with your camera.

Here is an example of what I mean by getting out and shooting more. You are not going to be where the action is if you dont get out and shoot. Just being out in the field greatly increases your chances of getting a photo. That being said, I am the worlds worst at failing to get the shot. I got the one about due to range focus being set on the lens so I didnt need to even bring the camera to my eye. I literally saw it unfolding and just raised the camera and snapped the frame. It is also heavily cropped too so I can get the composition I wanted. That is a luxury of the 47mp sensor on the Leica SL2 that I was using that day, it gives you options.

Here we have a photo I have taken a couple of times now. Every year our hometown has an event in this park and the kids play in the creek is flagrant defiance of the posted sign. It is such a cliche photo that I can’t pass it up. Obvious civil disobedience to signage if a fun photo so if you see one of these scenarios just get your camera out and take the picture. You just might like what you end up with.

Here we have a scene of “small town Americana” that I thought was kinda interesting. These little carnival foodie trucks are a common sight in rural America and I wanted to capture that essence if possible. I am not sure if I was successful but to me it is a cool photo.

Here I found something interesting when I went to Cloudland Canyon State Park to setup a POTA activation the other morning. A cloud inversion isnt real common until the fall, but conditions were apparently just right. So I grabbed a photo before turning on the radio and now I have this photo.

Here is the last photo I want to talk about. This was a quickie iPhone capture that I saw and just had to get right quick. Use what you have and get the photo, that is the rule of the day. I have come to learn that when you get something like this in your head just go take the photo and be done with it, it will gnaw at you forever if you dont. I think some of the best photos, street or otherwise, come from just capturing everyday life. What do you think?

Prime lens primer

So you have never used a prime lens before… well let’s change that.

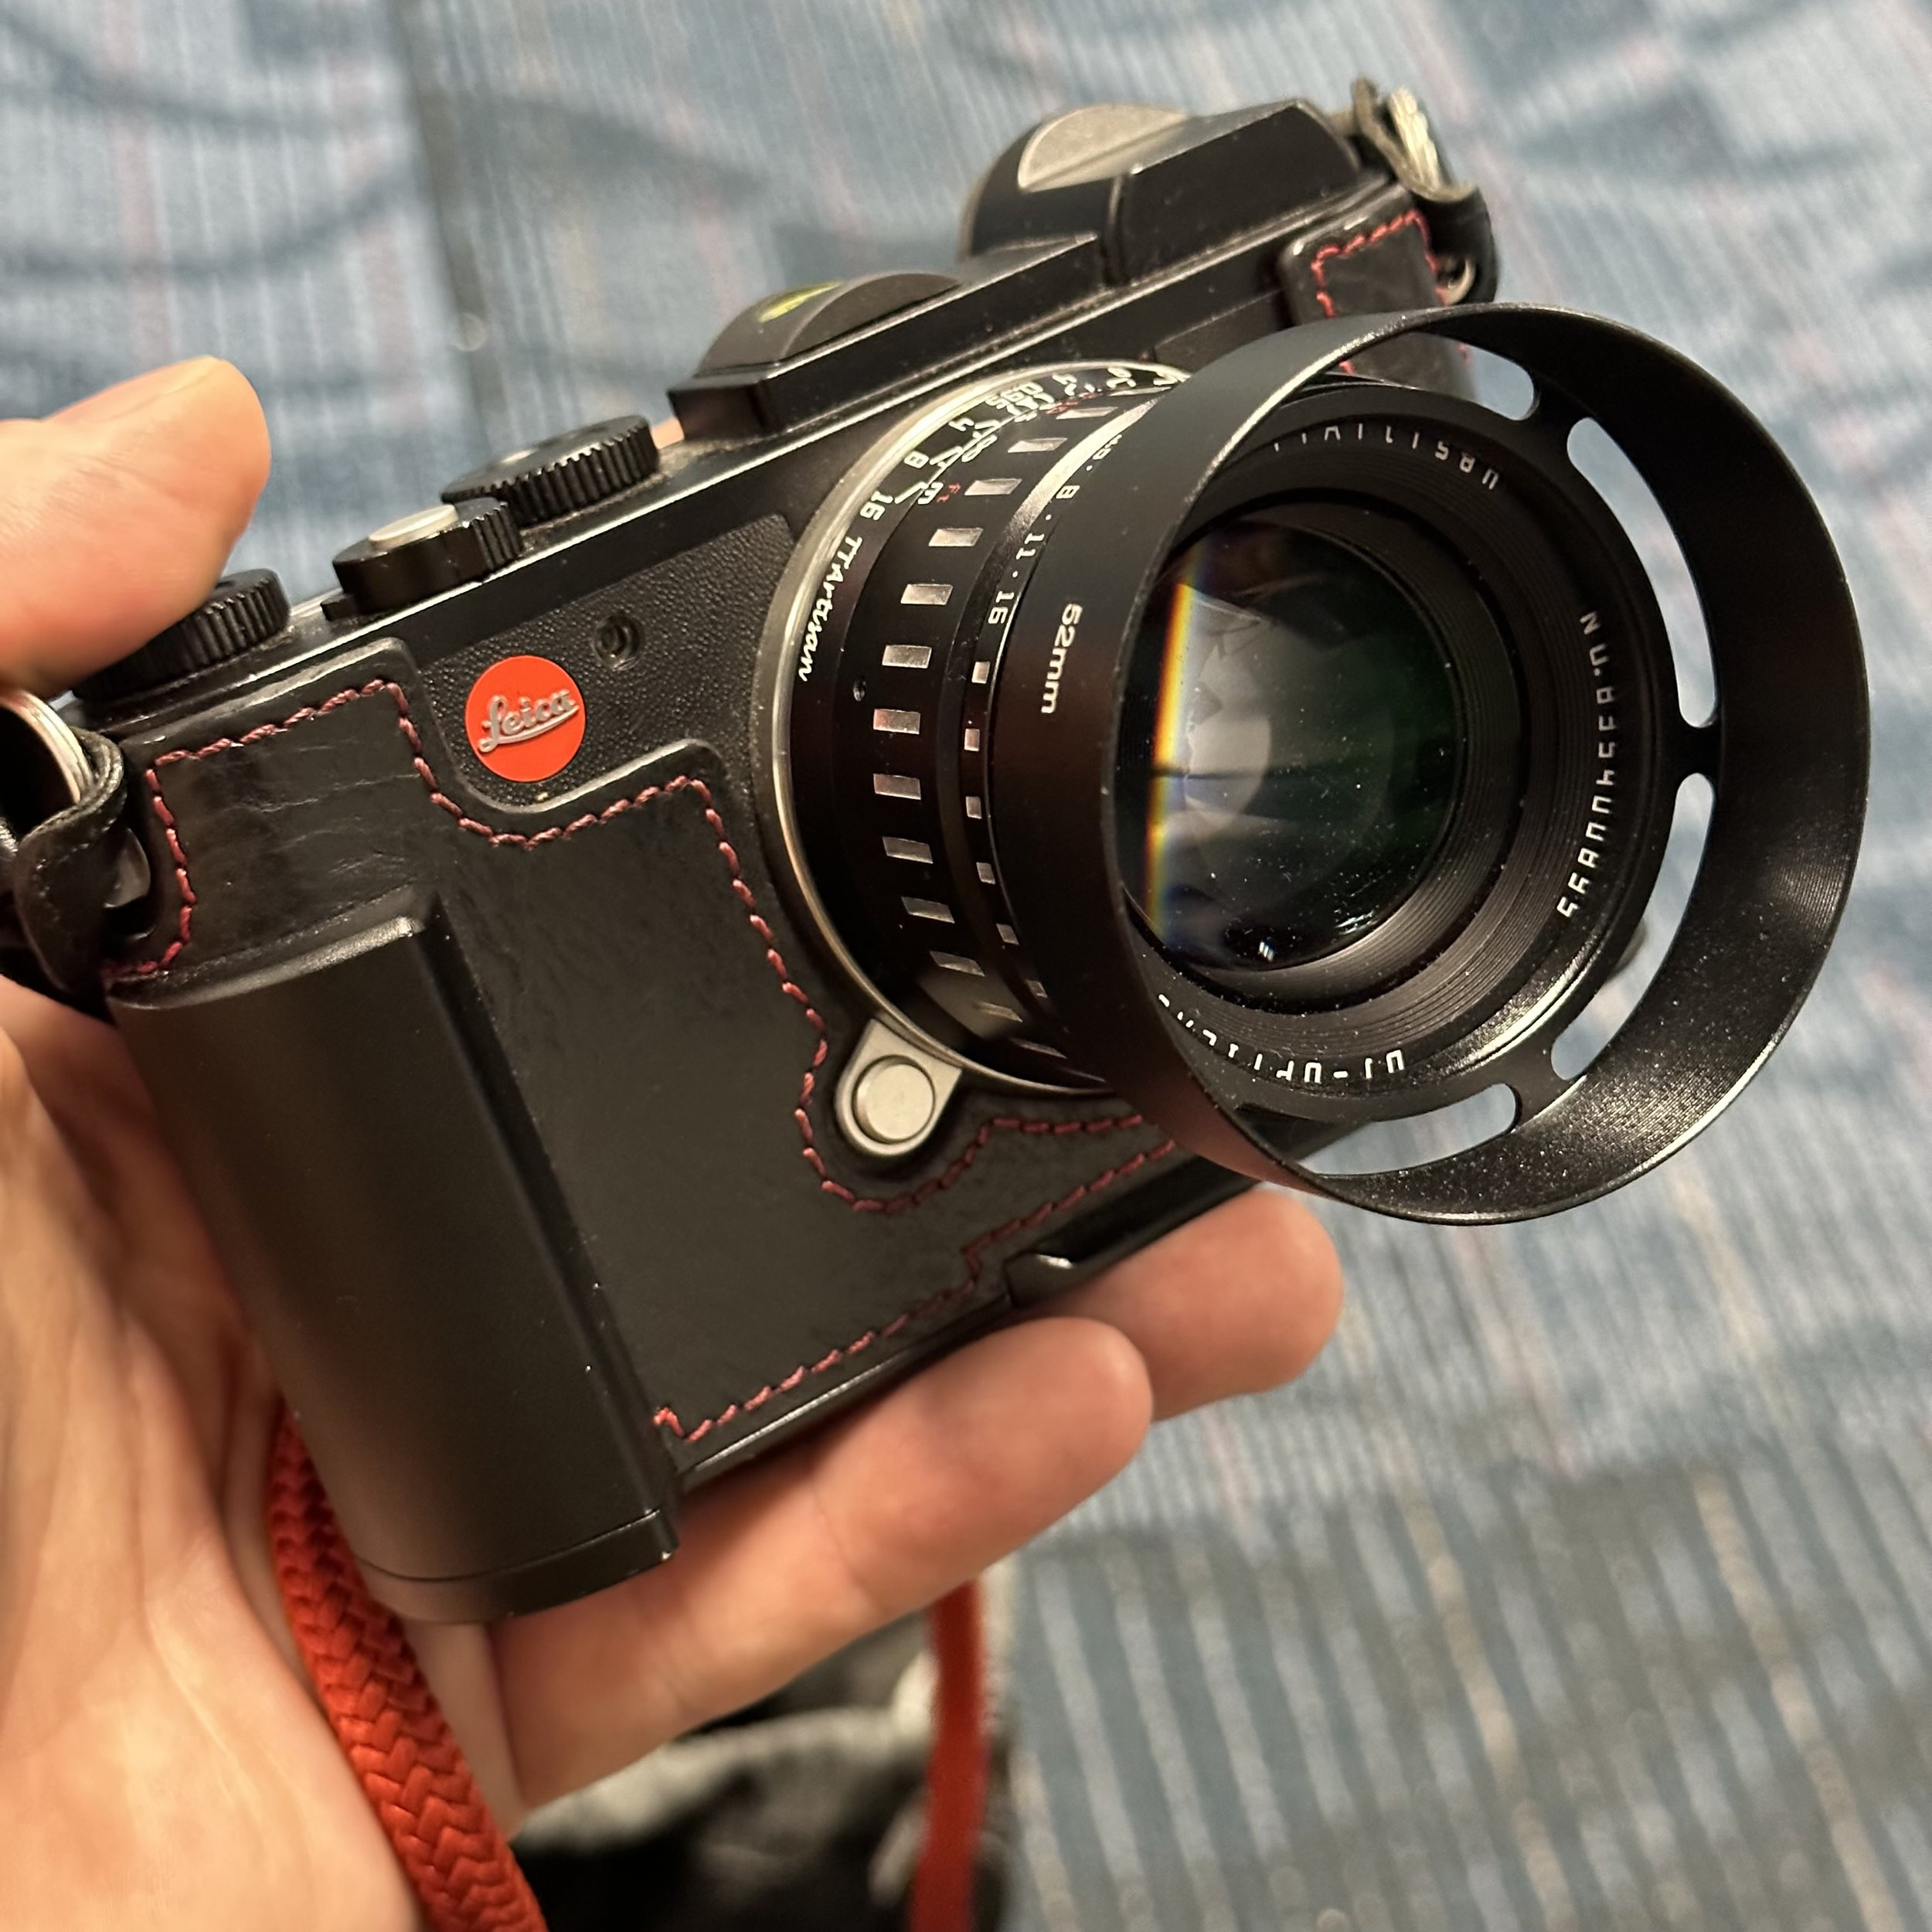
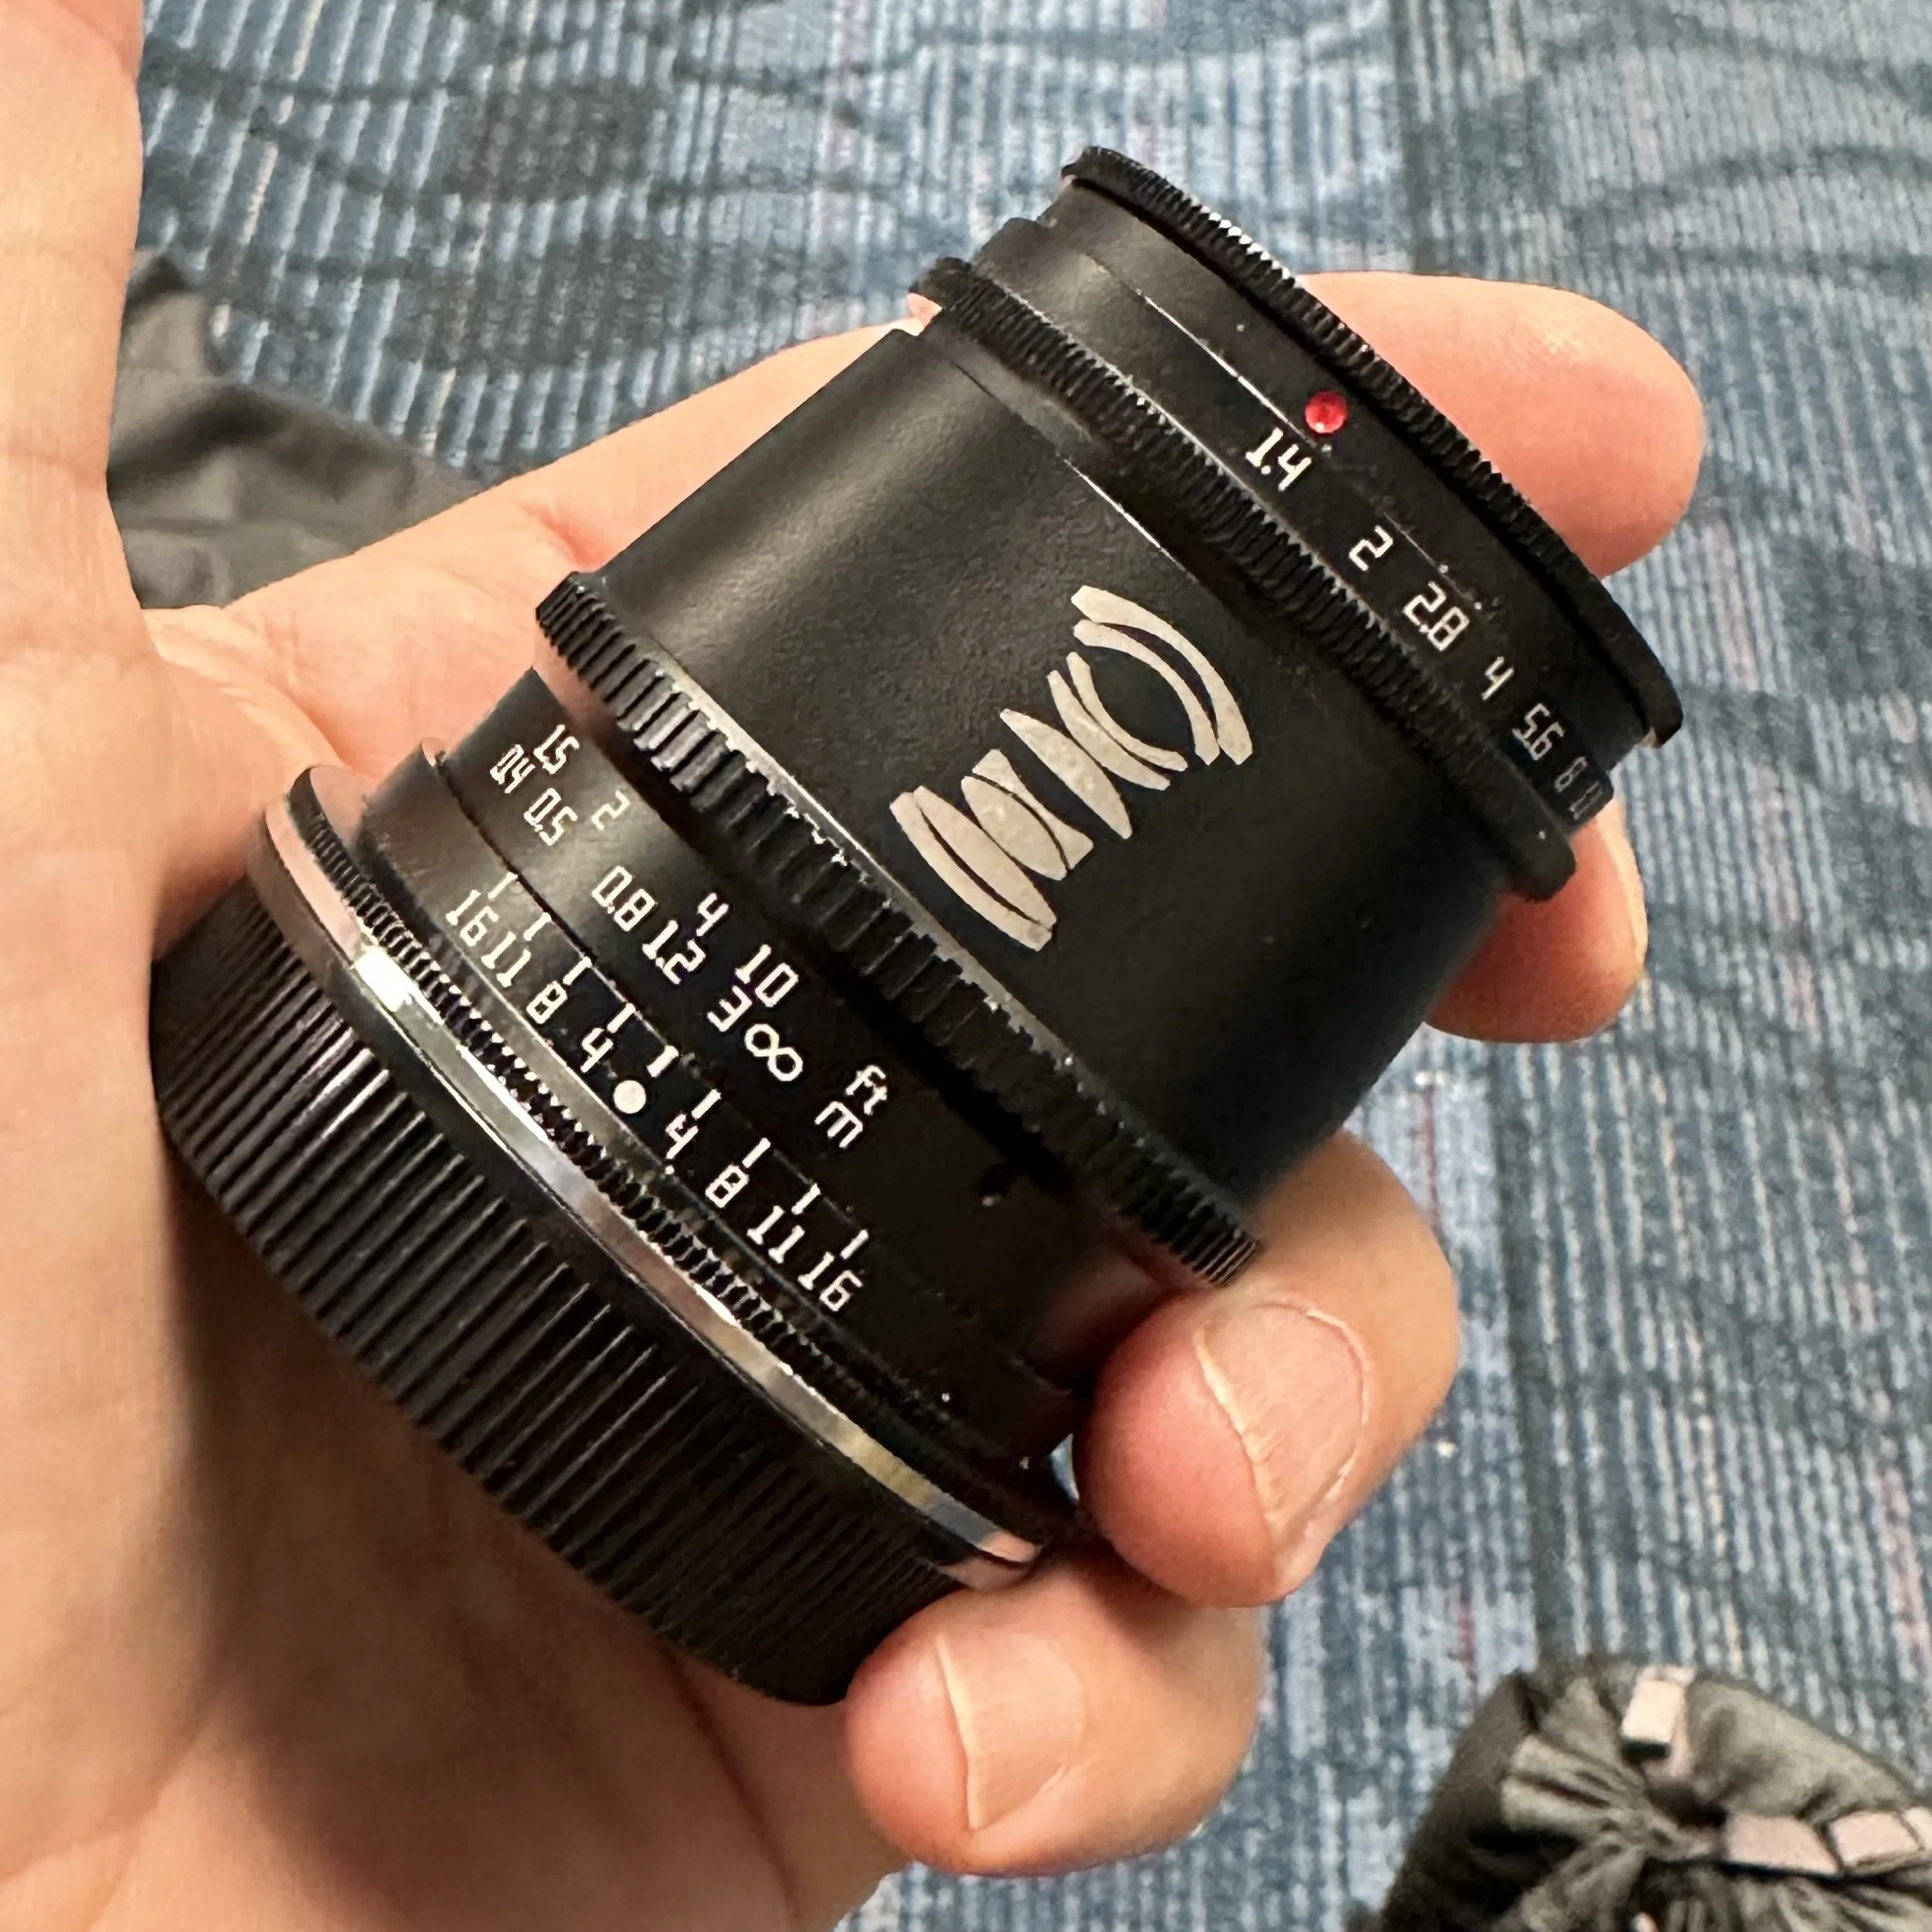
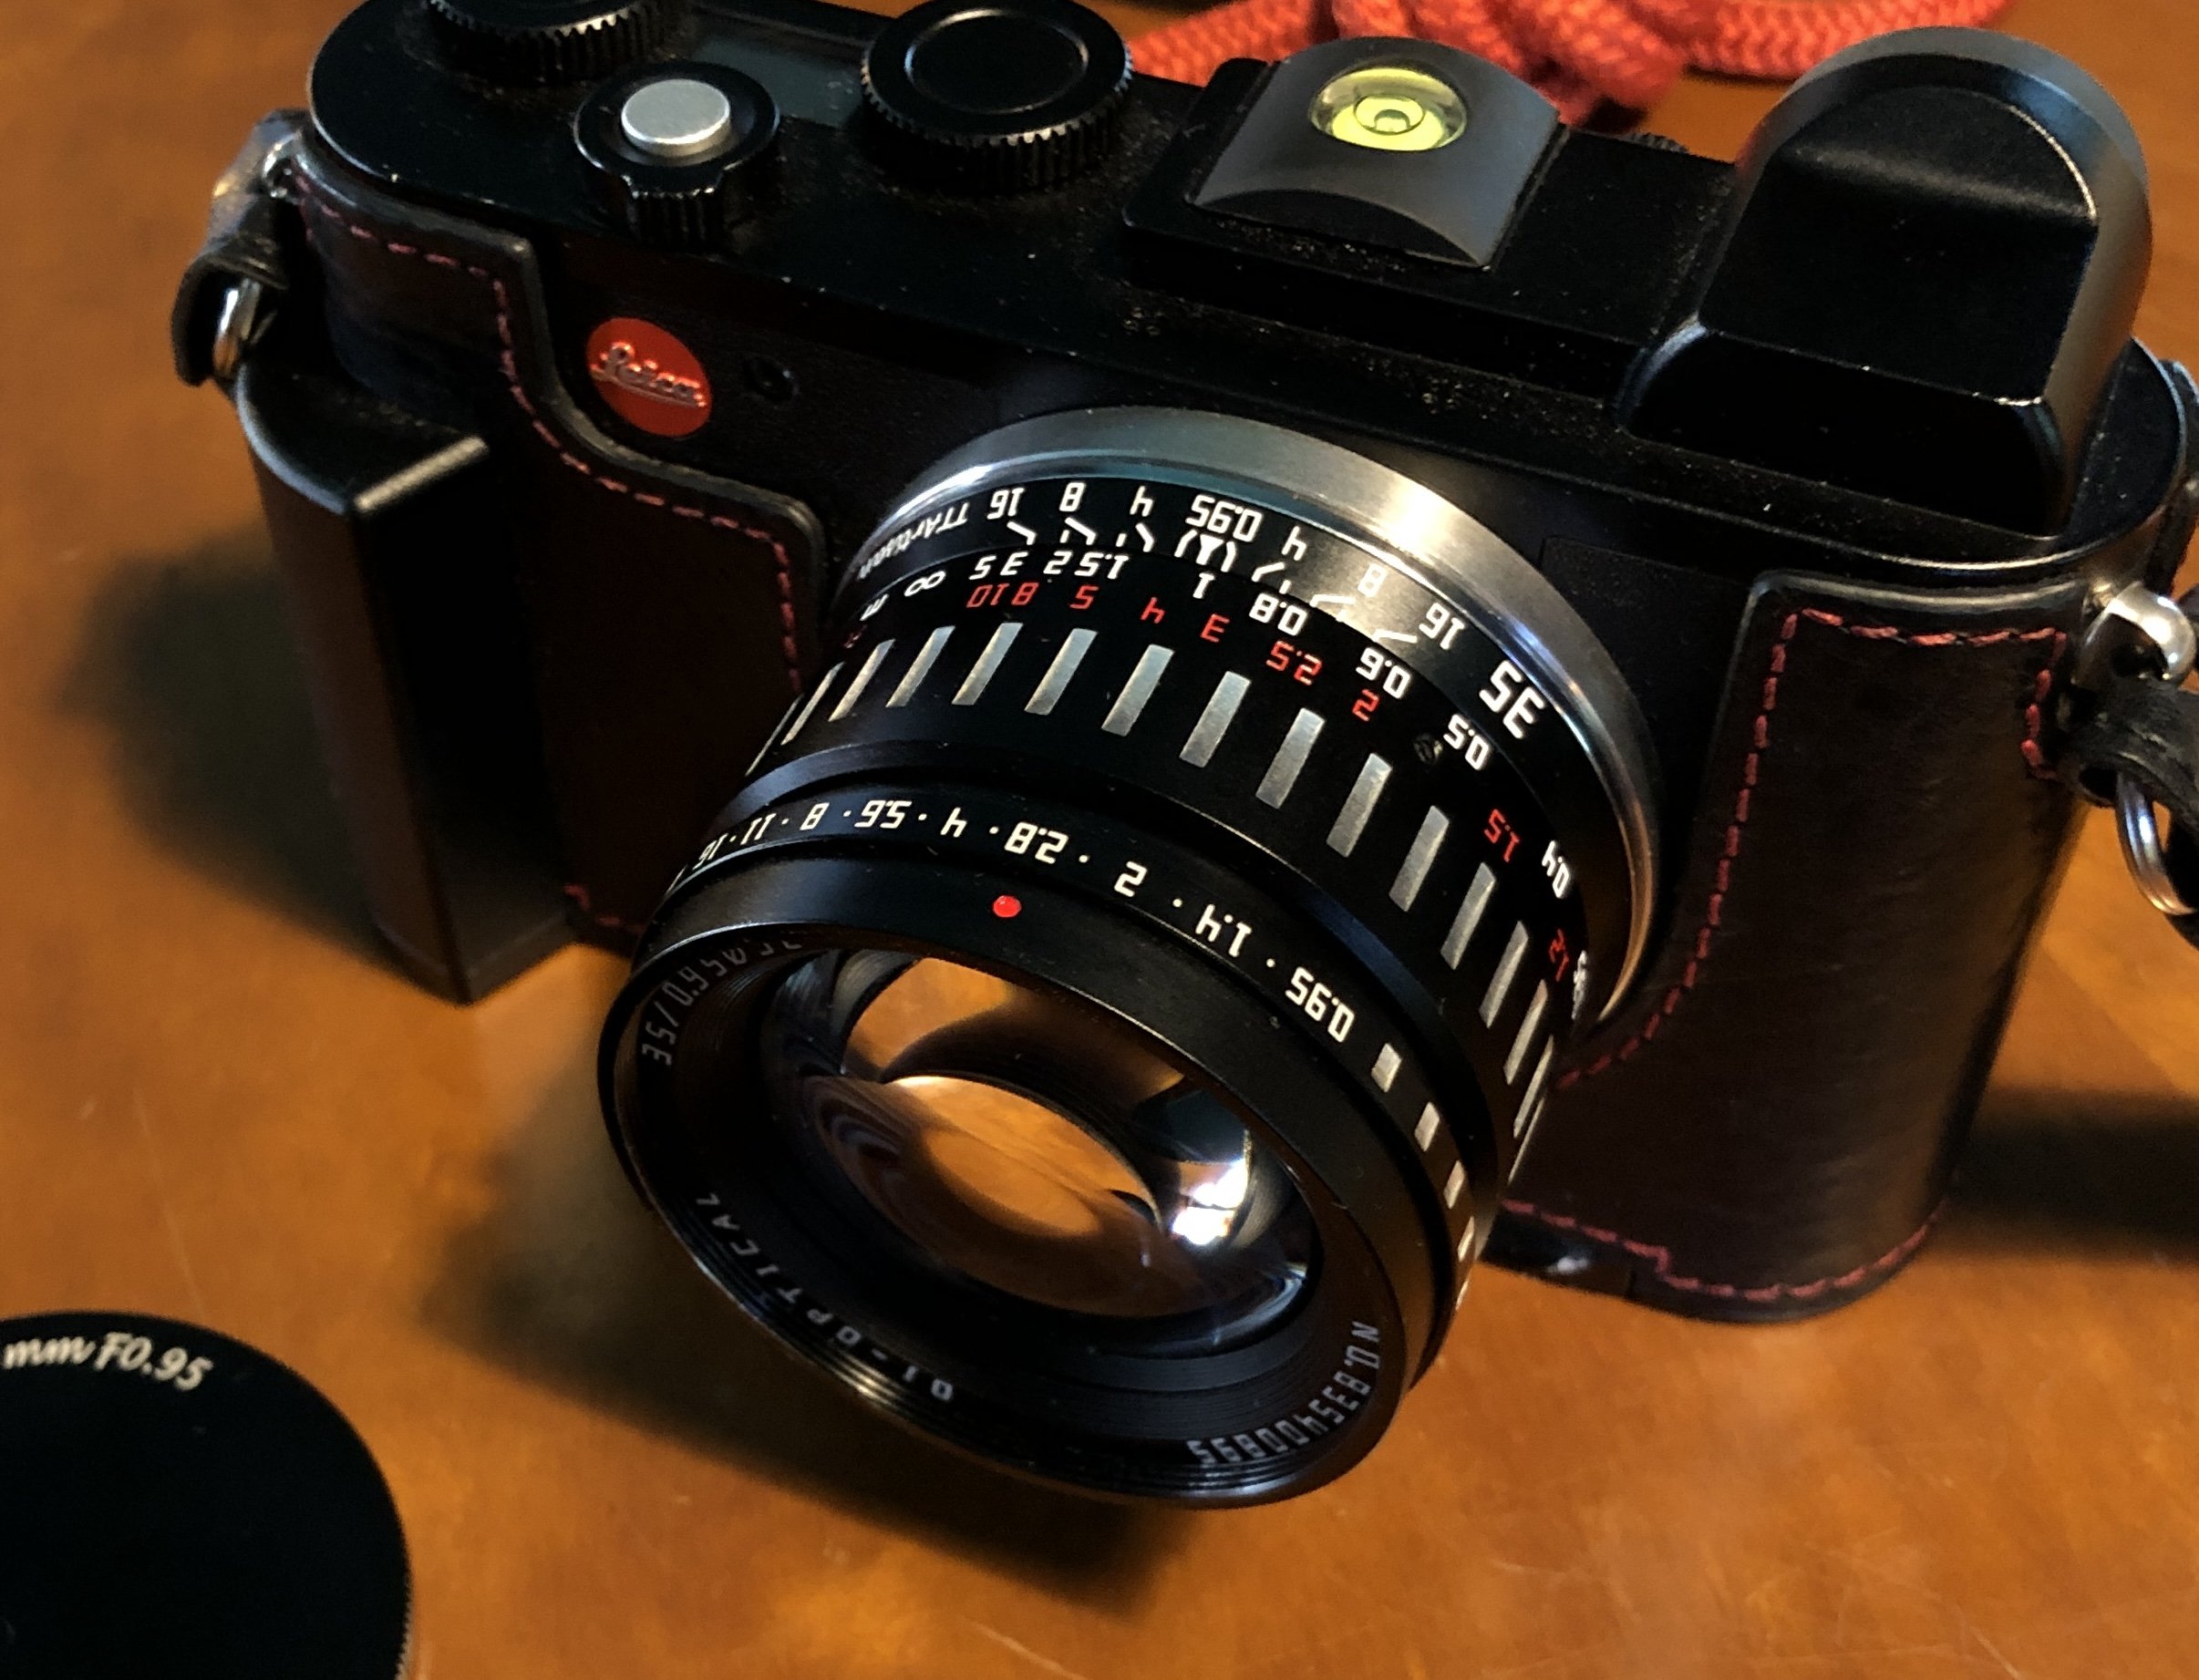
Leica CL with the TTArtisan 35mm f0.95 APS-C prime lens

A prime lens is like a window into another world of photography. They can be had in much larger apertures than zooms usually, they are smaller under most circumstances, and if you get vintage ones…they can produce very unique results.

Another thing that prime lenses are good for is they teach you to compose based on the environment. You have to work within the confines of the focal length which means you will have to either move closer or further away to “zoom” with your feet to get your composition. Sometimes this means not getting a certain shot at all because you would have to stand in the middle of a river to get the composition or something like that. But I rarely run into this problem and once I start seeing in focal length it seems I filter out these problems subconsciously anyway.

Leica CL with the TTArtisan 17mm f1.4 APS-C lens.

You will also learn to see in your chosen focal length over time as well. That is, once you shoot a while with just one focal length… You hear street photographers talk about the 28 or the 35 and they know what the photo is going to look like based on experience.

I will be honest here, it is really liberating to have such a small and potent setup when I run prime lenses. Zoom lenses give you versatility, but I see people that use zoom lenses still carrying a camera bag. This seems overly redundant to me, I use the one lens all day and get out in the environment, but I am not everyone. Some people prefer to have all the options on hand so they can setup and shoot whatever comes their way I guess. Maybe they have missed a opportunity in the past while using a prime and now want the versatility of a zoom to give them better odds in the future should that happen again, I don’t know. Those are some of the speculations I have had, but for me, I just like having something dedicated like the prime brings to the table.

Zoom lenses do serve a purpose though, they are the work horses of the professional photography world. Giving the professional the ability to change focal lengths instantly on demand to fulfill the job at hand. Primes force the professional to move around a lot more to build the composition that the zoom makes short work of. This is important when you are on a clock. Anything that saves time also saves money so zooms have their uses.

So what makes a prime appealing over a zoom? That large aperture and the small size are some of the magic that the zoom lens lacks.

Lenses like the one above with it’s f0.95 maximum aperture can create an effect that nothing else can produce. The “Bokeh” or blurred out background is something that large apertures are well known for. The portrait below is a prime example of the feature. The background was probably 15 feet behind him when I shot this photo.

Primes lenses come into their own when it comes to vintage lenses too. This is where I have found my passion. The old Pentax glass along with the Nikon and early Canon stuff is all phenomenal. I do have some early Leica stuff but the Pentax / Asahi branded glass is just awesome. I also will try about anything to see what the photos are like as well. I have even adapted some glass that should not be able to be adapted like some Argus lenses. I documented that process on my YouTube channel if you want to see how I was able to make that work. Argus had a unusual way to drive the focus on the lens and it posed a challenge to get it to work.

One of my favorite vintage lens brands is Pentax and the Asahi Optical company.

With the advent of the mirrorless camera, we now have a flange distance that is conducive to adapting these vintage lenses to our cameras easily and the electronics in the camera make using these lenses even easier than ever as well. Things like focus magnification and focus peaking as well as exposure preview to see how the image will look before you press the shutter are great for coupling vintage primes to your new shiny mirrorless camera. Some even allow image stabilization via sensor stabilization so you even get that feature with vintage glass sometimes.

So if you have not used prime lenses in the past, I implore you to get a simple one, like the 50mm f1.8 on full frame (affectionately named the “nifty fifty”) or it’s APS-C little brother, the 35mm f1.8 DX (Nikon uses the term DX for their APS-C cameras) and put it on your hobby camera and leave it there for a month. It will either make you hate primes or fall in love with them. For me I got the 35mm f1.8, installed it on my Nikon D7000 and left it for almost a year without removing it. I really loved that lens.

So until next time, get your camera out and go take some photos with it!

How important is the time of day when you shoot a photo?

When you take the photo is just as important as what you photograph

Seems there is all sorts of information out there about what to take pictures of, but no one (other than landscape photographers) talk much about the TIME you take your photo. In this article, I want to explore this a little with a simple location that is right down the road from my apartment and show the difference that just a few hours can make in the mood and feel of a location that is being captured.

The camera of choice with my the Leica CL with the TTArtisan 17mm f1.4 lens shot off of a tripod so shutter speed isn’t a problem. I will be maintaining an ISO of 100 for all photos and an aperture of f11 on all photos, so shutter speed will be what I have to change to keep the exposures to where I like them.

The time of day is something that a lot of people think about a little but really don’t put much effort into the planning of the photo. It takes a good bit of reconnoitering to get the location scouted with the vibe you are wanting in the photo. I see these locations all the time, when I am driving around in the day time and when I see them at night it is a completely different scene. Some people like shooting in the daytime, some like the blue hour or golden hour and some, like me, prefer the night… So seeing a night photo while viewing the scene lit by the sun is a problem. I can get somewhat of a visual based on previous photos I have taken of other locations, but until you see it lit by the street lights and 8’ fluorescent tubes, you just don’t know what you will be getting.

I don’t know why I like shooting at night so much, but I do. The low light and the negative space just do something for me and the photos reflect it.

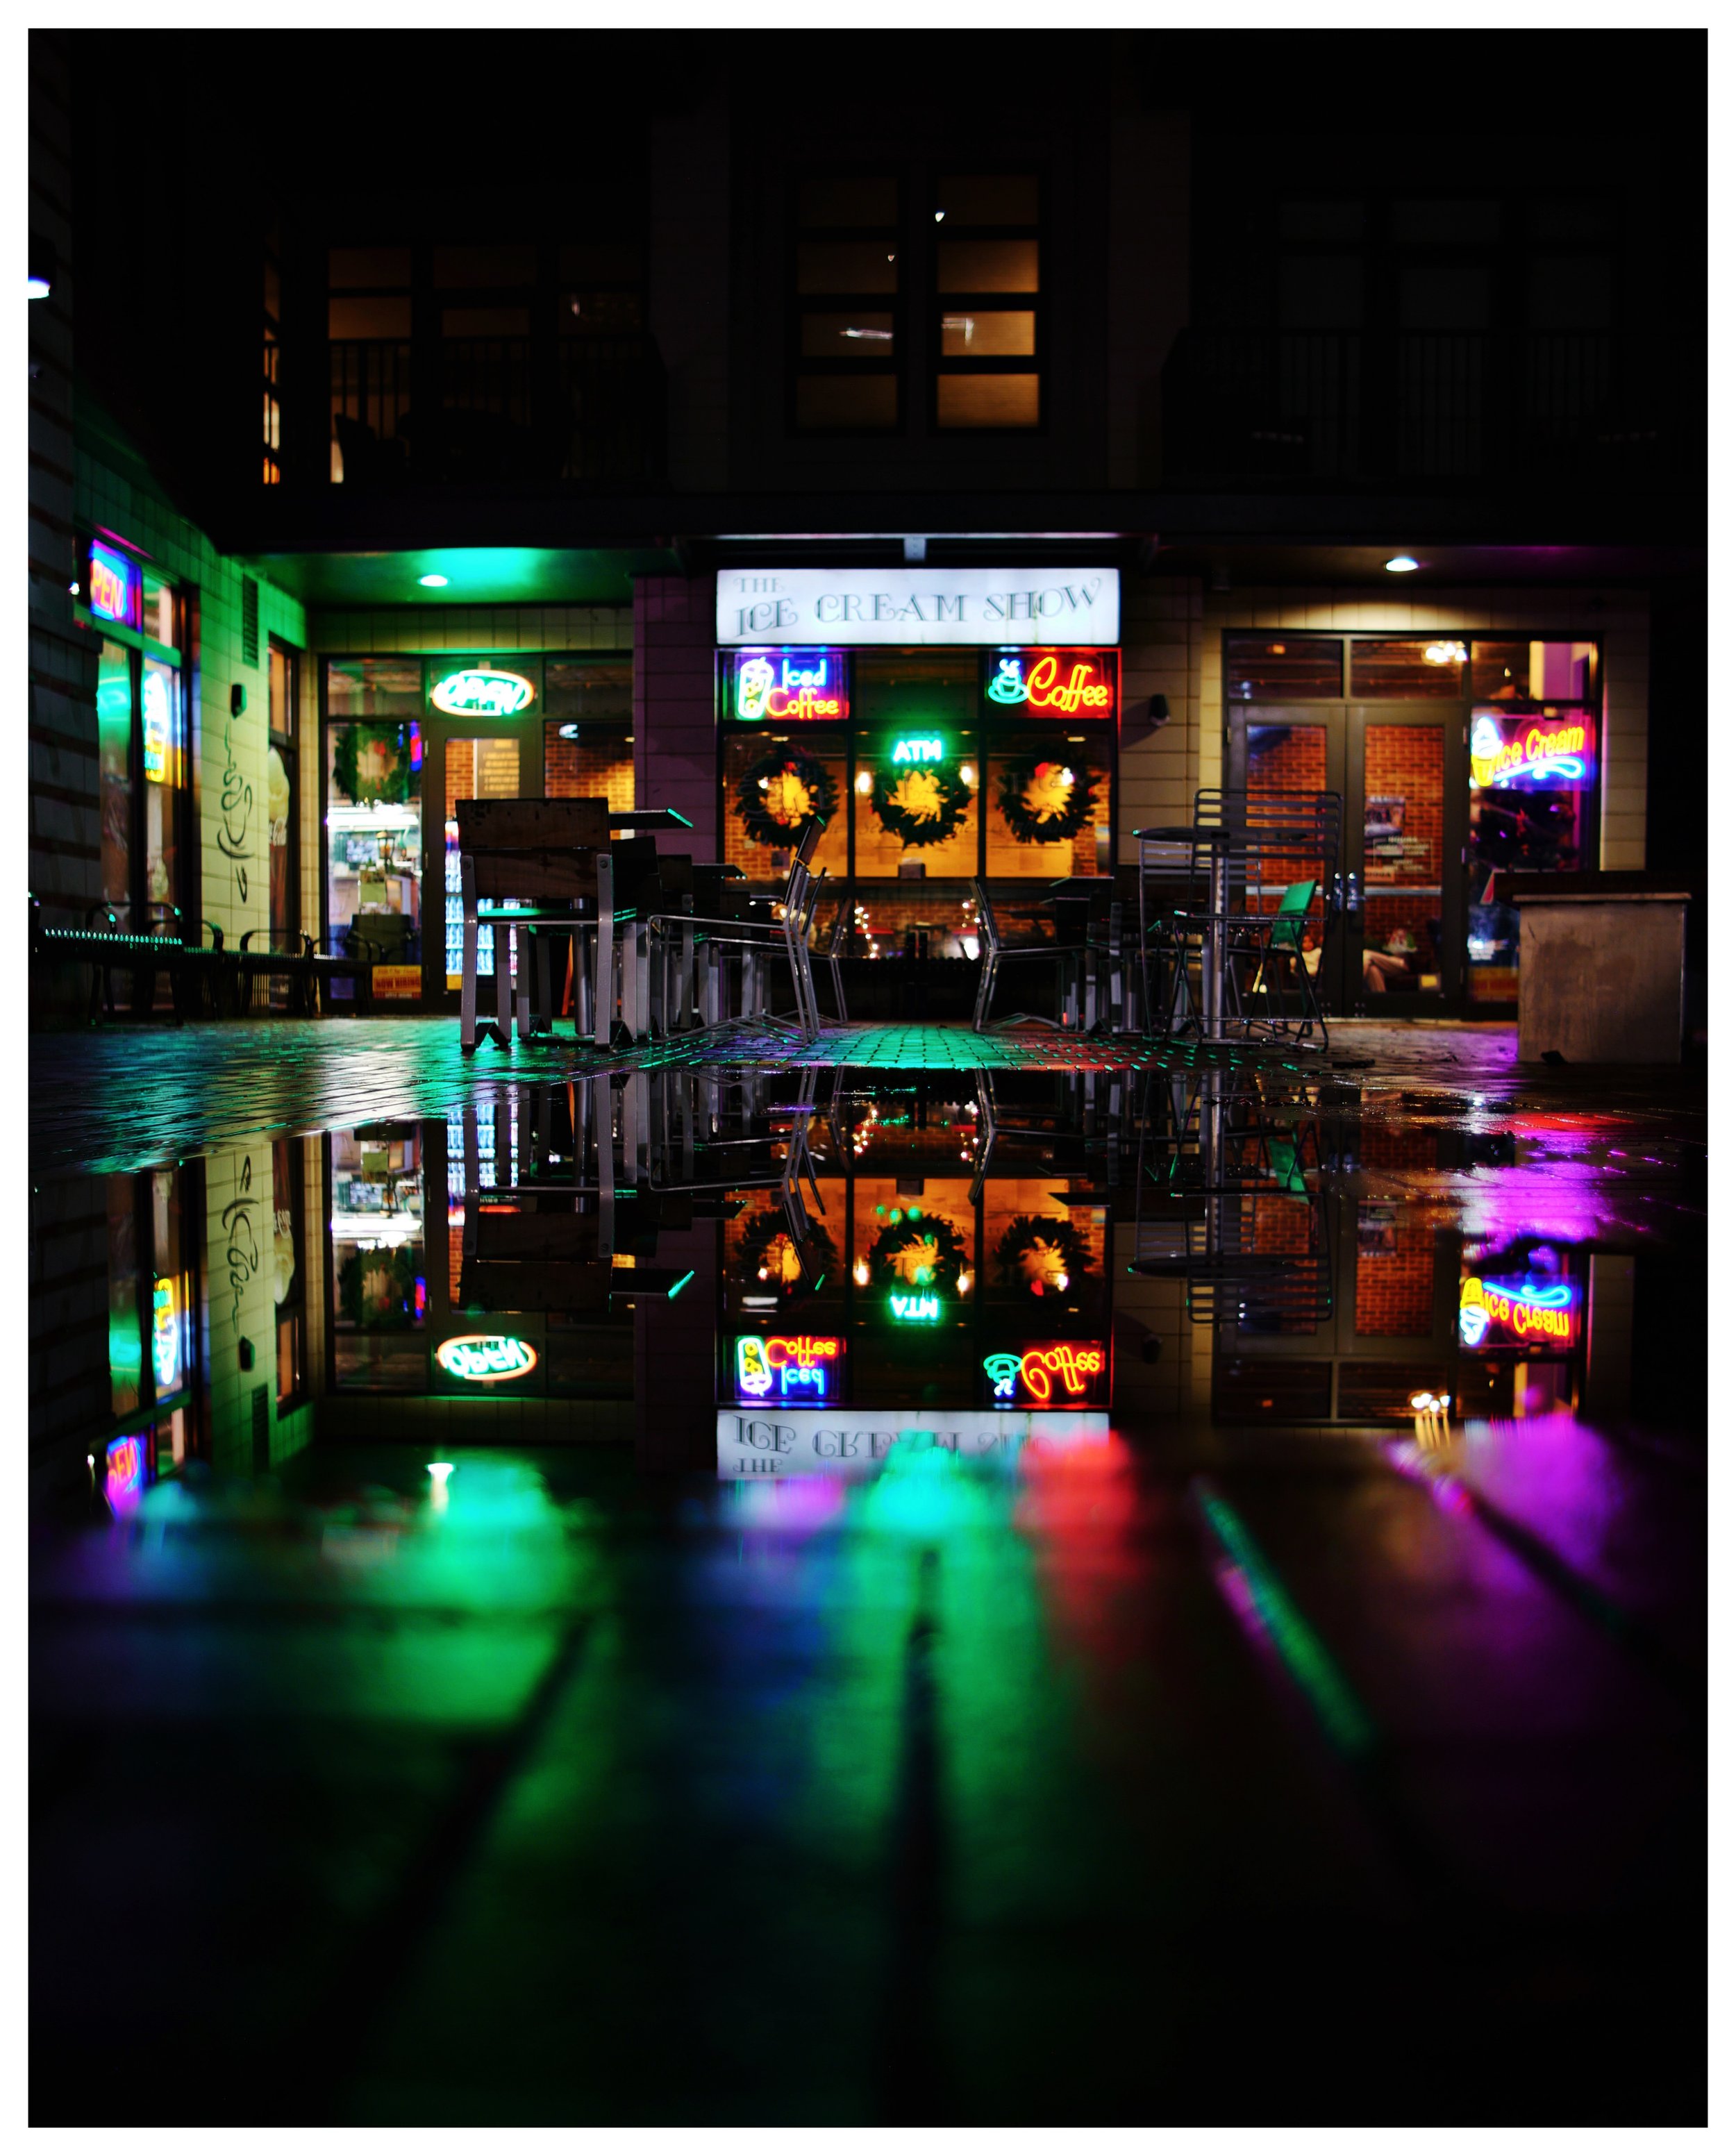
Ybor City has some interesting light that is only available at night.

I do like some blue hour stuff to add the touch of blue sky to my images at times, but not always. Another perk to shooting at night is that it is cooler in the summer months, with temps being generally lower and the sun in not beating down on me, I am more inclined to stay on a location longer and get better images. Street photos at night are a little tougher as I need larger apertures to keep ISO manageable, and this means focus is a lot more of an issue as depth of field is significantly shallower than in the daytime, but it is manageable if you think about it first.

I normally set focus traps and shoot in burst mode and this will usually net me a sharp photo of a scene at night at even crazy large apertures like f1.4 or f0.95… It just takes a bit of practice and patience.

The gear matters…

The gear you use at night matters just as much as the subject you are shooting. If you have the wrong equipment, you simply won’t get the shot.

Fast glass gives you options.

Take for instance, street photography, this is dynamic and has movement in it. For most human movement, a shutter speed of 1/250 second will freeze action sufficiently. 1/200 in a pinch if the subject isn’t moving too much will net sharp photos. Well, to get a decent exposure, you will need fast glass, shot wide open and will still probably need a fair amount of ISO to compensate.

Now, if you are shooting static subjects like buildings or scenes and motion isn’t an issue, you can just let the shutter stay open until the exposure is good, but once you cross about 10 seconds, humans tend to vanish from the scene… Cars make long lines with their headlights as they drive by and things begin to look different. So you can see it all depends on what you want to capture to drive your gear choices here.

I personally like to have fast glass if possible as this is the most versatile lenses. These lenses can still be stopped down for times when you want deeper depth of field and opened up when you need the extra light gathering power of “fast glass”. So whenever possible, I will always opt for the larger aperture option over the smaller, if just makes sense to me to have that extra optional aperture when needed. The old adage “better to have it and not need it than to need it and not have it” comes to mind…

Water reflections are magical in low light or night photos.

Now that lenses are talked to death, what about the camera? Well, honestly any camera will do. It is the least important part of the equation to be honest. As long as it can be controlled manually for all three major functions, it will do. You see, it must be able to adjust shutter speed, ISO and aperture manually to be able to get creative results at night. The camera running in automatic mode will make choices in these controls that will not be what the photographer wants most of the time. It is guessing and will most likely guess wrong… But just about all reasonable cameras will let you control these functions and this is where it gets good…

The time of day.

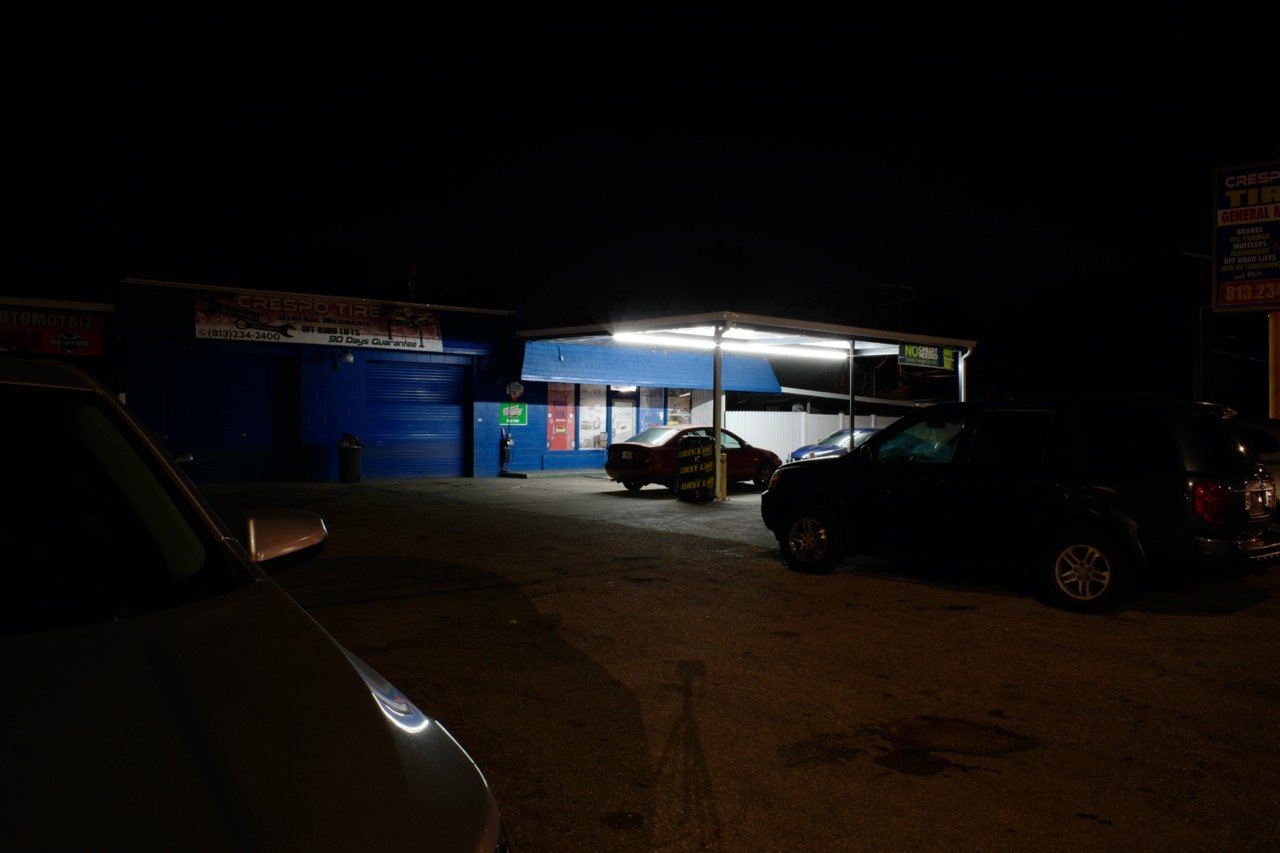
Back to the original subject. Here are two photos taken from the same location, with the same camera and lens combination, at two different times of day.

Here we have a daytime scene of a garage.

Here is the same composition at night. Notice the change in mood.

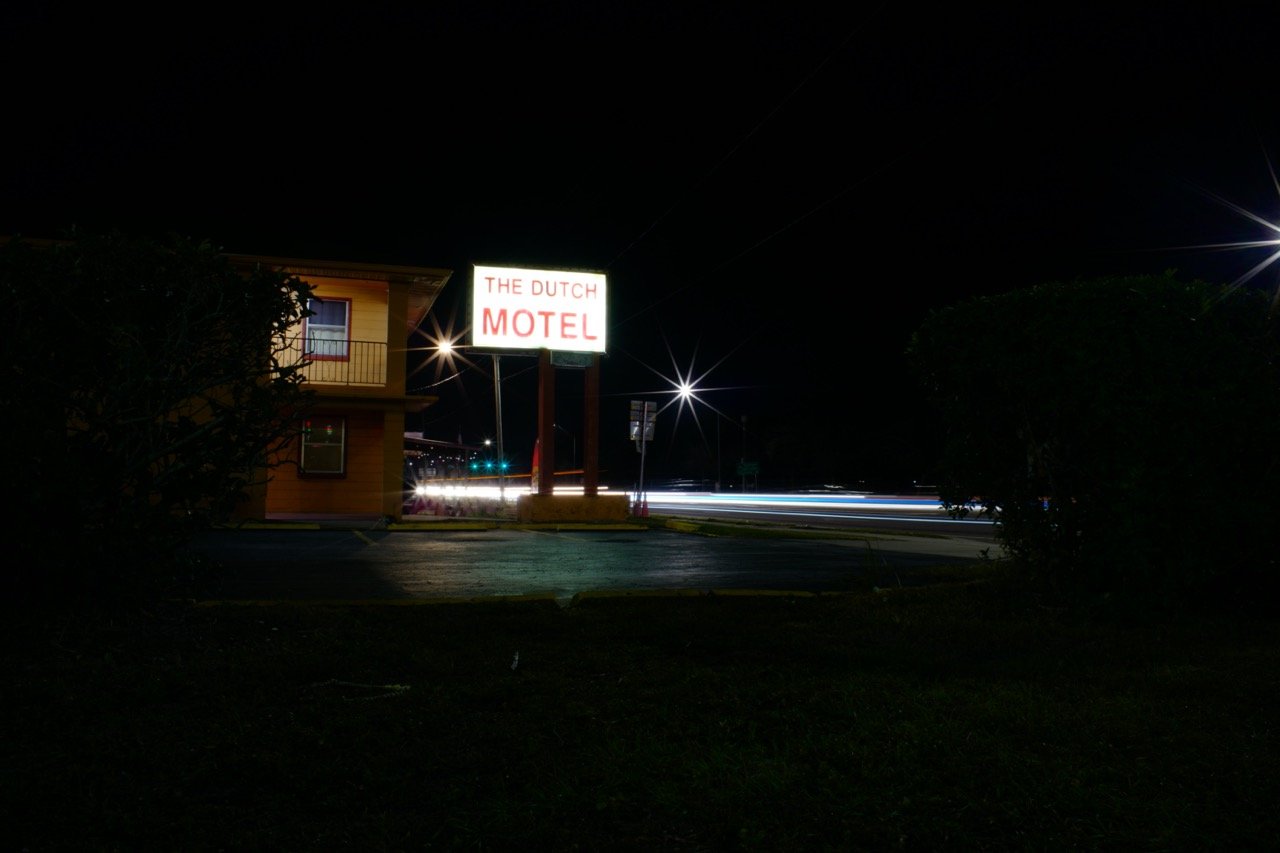
Here is the same scene, but the overhead lights are turned off (different day). This changes the mood even more and gives the scene a different feel. Take a look at the scene below of the Dutch Motel sign I found the other evening. The daytime photo isn’t much to look at, but the night time one has all sorts of interesting features that make it unique and otherworldly since it is distorting time so much with the incredible shutter time of 10 seconds!

The Dutch Morel sign isn’t much to ponder during the day…

1/400 second ISO 100 f8

Once nightfall comes and you slow down the shutter, the magic happens

10 seconds ISO 100 f8

This is just a couple of examples too, there are many others that I have noticed over the years. So if you want a certain feel from an image, the time of day absolutely matters. There are some things that a strobe just won’t overcome and the sun is one especially if you are shooting buildings and not portraits.

So if you want to learn more about low light photography, check out my youtube channel here. David Saylors Youtube Channel.

What does lens focal length do to me psychologically when shooting street photography?

Photography and the human mind…

I have found that when I put on a wide lens, I suddenly loose the fear of getting close to people for some reason. I am still guarded with people and don’t approach a lot of them, but I will still get closer. This is a real struggle for me and I find it even harder due to time constraints that I have to shoot street. I don’t normally get to go shoot street when the large crowds are out and about. I end up being in the areas when there is little to no activity. So for me to get a good candid street photo is pretty special. I don’t get dozens a week like some photogs I see, but maybe one a month…maybe.

17mm APS-C photo on the Leica CL

I find that I like to get two kinds of photos when I shoot wider than 35mm and a different kind of photo when I shoot 35mm or longer. I didn’t even realize it until the other day when I put the 17mm on my Leica CL (like a 28mm on full frame) The 28mm is also what happens to come on the Leica Q series cameras. This particular machine is quite costly and you can’t change the lens either. But for street photography , the 28mm is a great choice and lots of people LOVE the Leica Q2 and Q2 Monochrome just for this reason!
17mm APS-C photo on the Leica CL

When I put the 17mm TTArtisan APS-C lens on the camera I consciously know that the lens is very wide and that I am going to have to get close if I want to fill the frame. Then I fill the frame with images that make me happy for some reason. It is really strange that if you want better photos, sometimes you just have to get closer… Photography is strange, people have all sorts of different ideas about what it is. You know what? They are all correct. Every single one of them. What is that all about? LOL

35mm APS-C photo on the Leica CL

When I put on the 35mm (50mm equivalent) The mindset shifts to scenes with people in them or portraits on the street when I use longer lenses for some reason. It just happens too, I don’t even think about it, I just do it. I start looking for interesting things across the street when running the 35mm or longer lens. I also noticed that I like to compose from different view points too. I will end up shooting from a lower angle with the wide lens and from my eye level with the longer lenses. I think this is because of the viewing angle when I look at the photos in post, but it is a very strong phenomenon.

The Leica CL has become my de-facto street camera with either the 35mm or the 17mm as of late. I really like the form factor of the Leica CL and I also use a grip frame on it. This grip frame is made by LIMS that is currently out of production from everything I have seen. This grip frame is awesome because it has a ARCA SWISS tripod adapter on it and there is an opening for the battery door in the bottom plus it has the grip extension on the right side that makes this basically the perfect street camera for me. I like the form factor of this machine the most, it being very unassuming yet has exceptional image quality, makes this a wonderful little street camera. My only thing I would like better would be to have the Leica Q2 Monochrome as I love monochrome AND the low light power of that camera is phenomenal! But for now, I really want to use the CL all the time.

I say that with a bit of sarcasm, you see as as of late I have really started to embrace color photography more and more and have not shot in monochrome on my digital machines in ages. So the monochrome might not be the best solution for me, but I really like the idea of the low light powerhouse that it is. That is the real appeal for me to be honest about it.

The Leica CL adorned with the TTArtisan 17mm f1.4 APS-C manual lens.


So there you have it, a small treatise on my thoughts about the focal length and what I instinctively shoot with each one. I am odd and I know it, so this is by no means a definitive explanation about anything, but rather just an observation into what I do when I use certain lenses and what kind of gear I tend to lean towards when I go shoot.

Now get your camera out and go take a photo with it!