Belize in a nutshell…(blogpost)

This is a trip log of sorts.

Day 1 - We wake up at 4:30 and get ready to leave and pack the last few items we think we will need and head off to the airport.

Something we learned from the trip to England last year that was a basic revelation to us was that we don’t need as much stuff as we think we do. This was because we had decided to hike the Canterbury trail in England. This forced us to leave everything behind that wasn’t essential for the hike since we had to carry everything we wanted in our backpack. Let me tell you, you can get brutally honest with yourself when it comes to hiking and weight in your pack. To the point of removing packaging from items to simply cull the dead weight.

This led me to also take a very hard look at my camera kit. I normally would take all sorts of lenses in the off chance I would get to do this or that kind of photography. I learned over the years though that I would end up carrying all this gear and never touch it.

Well, I looked at what we would be doing and what I figured I wanted to capture and I took just one camera and two small prime lenses. A crop sensor camera and a 17mm along with a 35mm lens is all I needed. This would cover 99% of what I would be shooting and I would be able to carry it easily in my backpack.

Now, I am on another trip out of the country and I am applying the same principle again. The kit is just as small as last time but with less charging gear. I only brought chargers for USB only this time. This may prove to have been a mistake but we will see. I am also carrying only the back pack again as well.

The reason I like to travel with a backpack now is that there is no baggage to check or pickup…or lose, since I have it with me at all times. Plus the airport maneuverings is also much easier too. Much easier since you just go in and get your boarding passes (we still haven’t transitioned to using our phones yet), pass through security ( which you still do even if you check a bag) and go straight to your gate. Easy. Not to mention that I dont have to drag my roller bag around with me AND both of my hands are free as well.

You see, I despise airports and air travel to be quite honest about it. That is a blog post all it’s own. Haha.

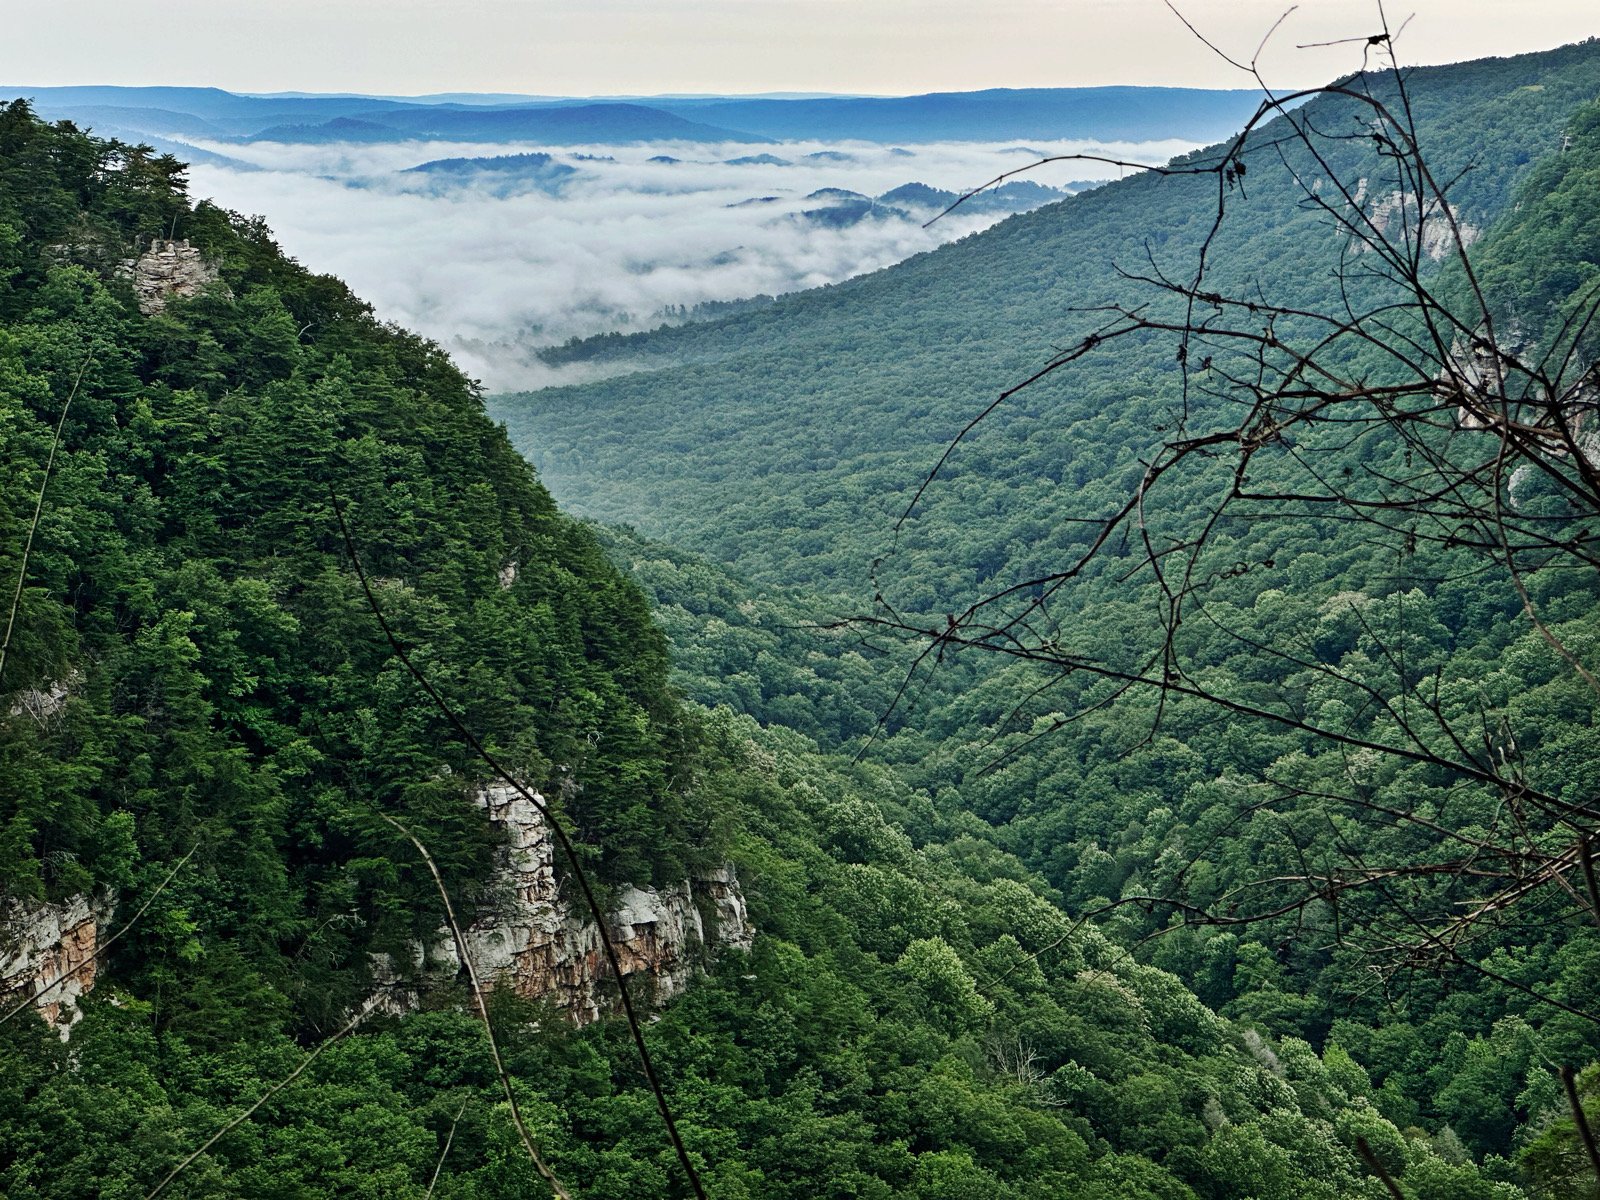
Flying out of Chattanooga is also better to me since it is a smaller airport, the whole vibe is just lower key. This also gets me past the long lines at the big airports at check in as well as the long lines at the TSA checkpoint too. I don’t normally bother with photos at the airport like others do but here are a couple for fun. All photos of travel are taken with my phone so I don’t have to break out the camera.  The below photo is of note though, this is what overcast skies looks like from the other side of the clouds. Looks almost looks like a desert somewhere, doesn’t it?

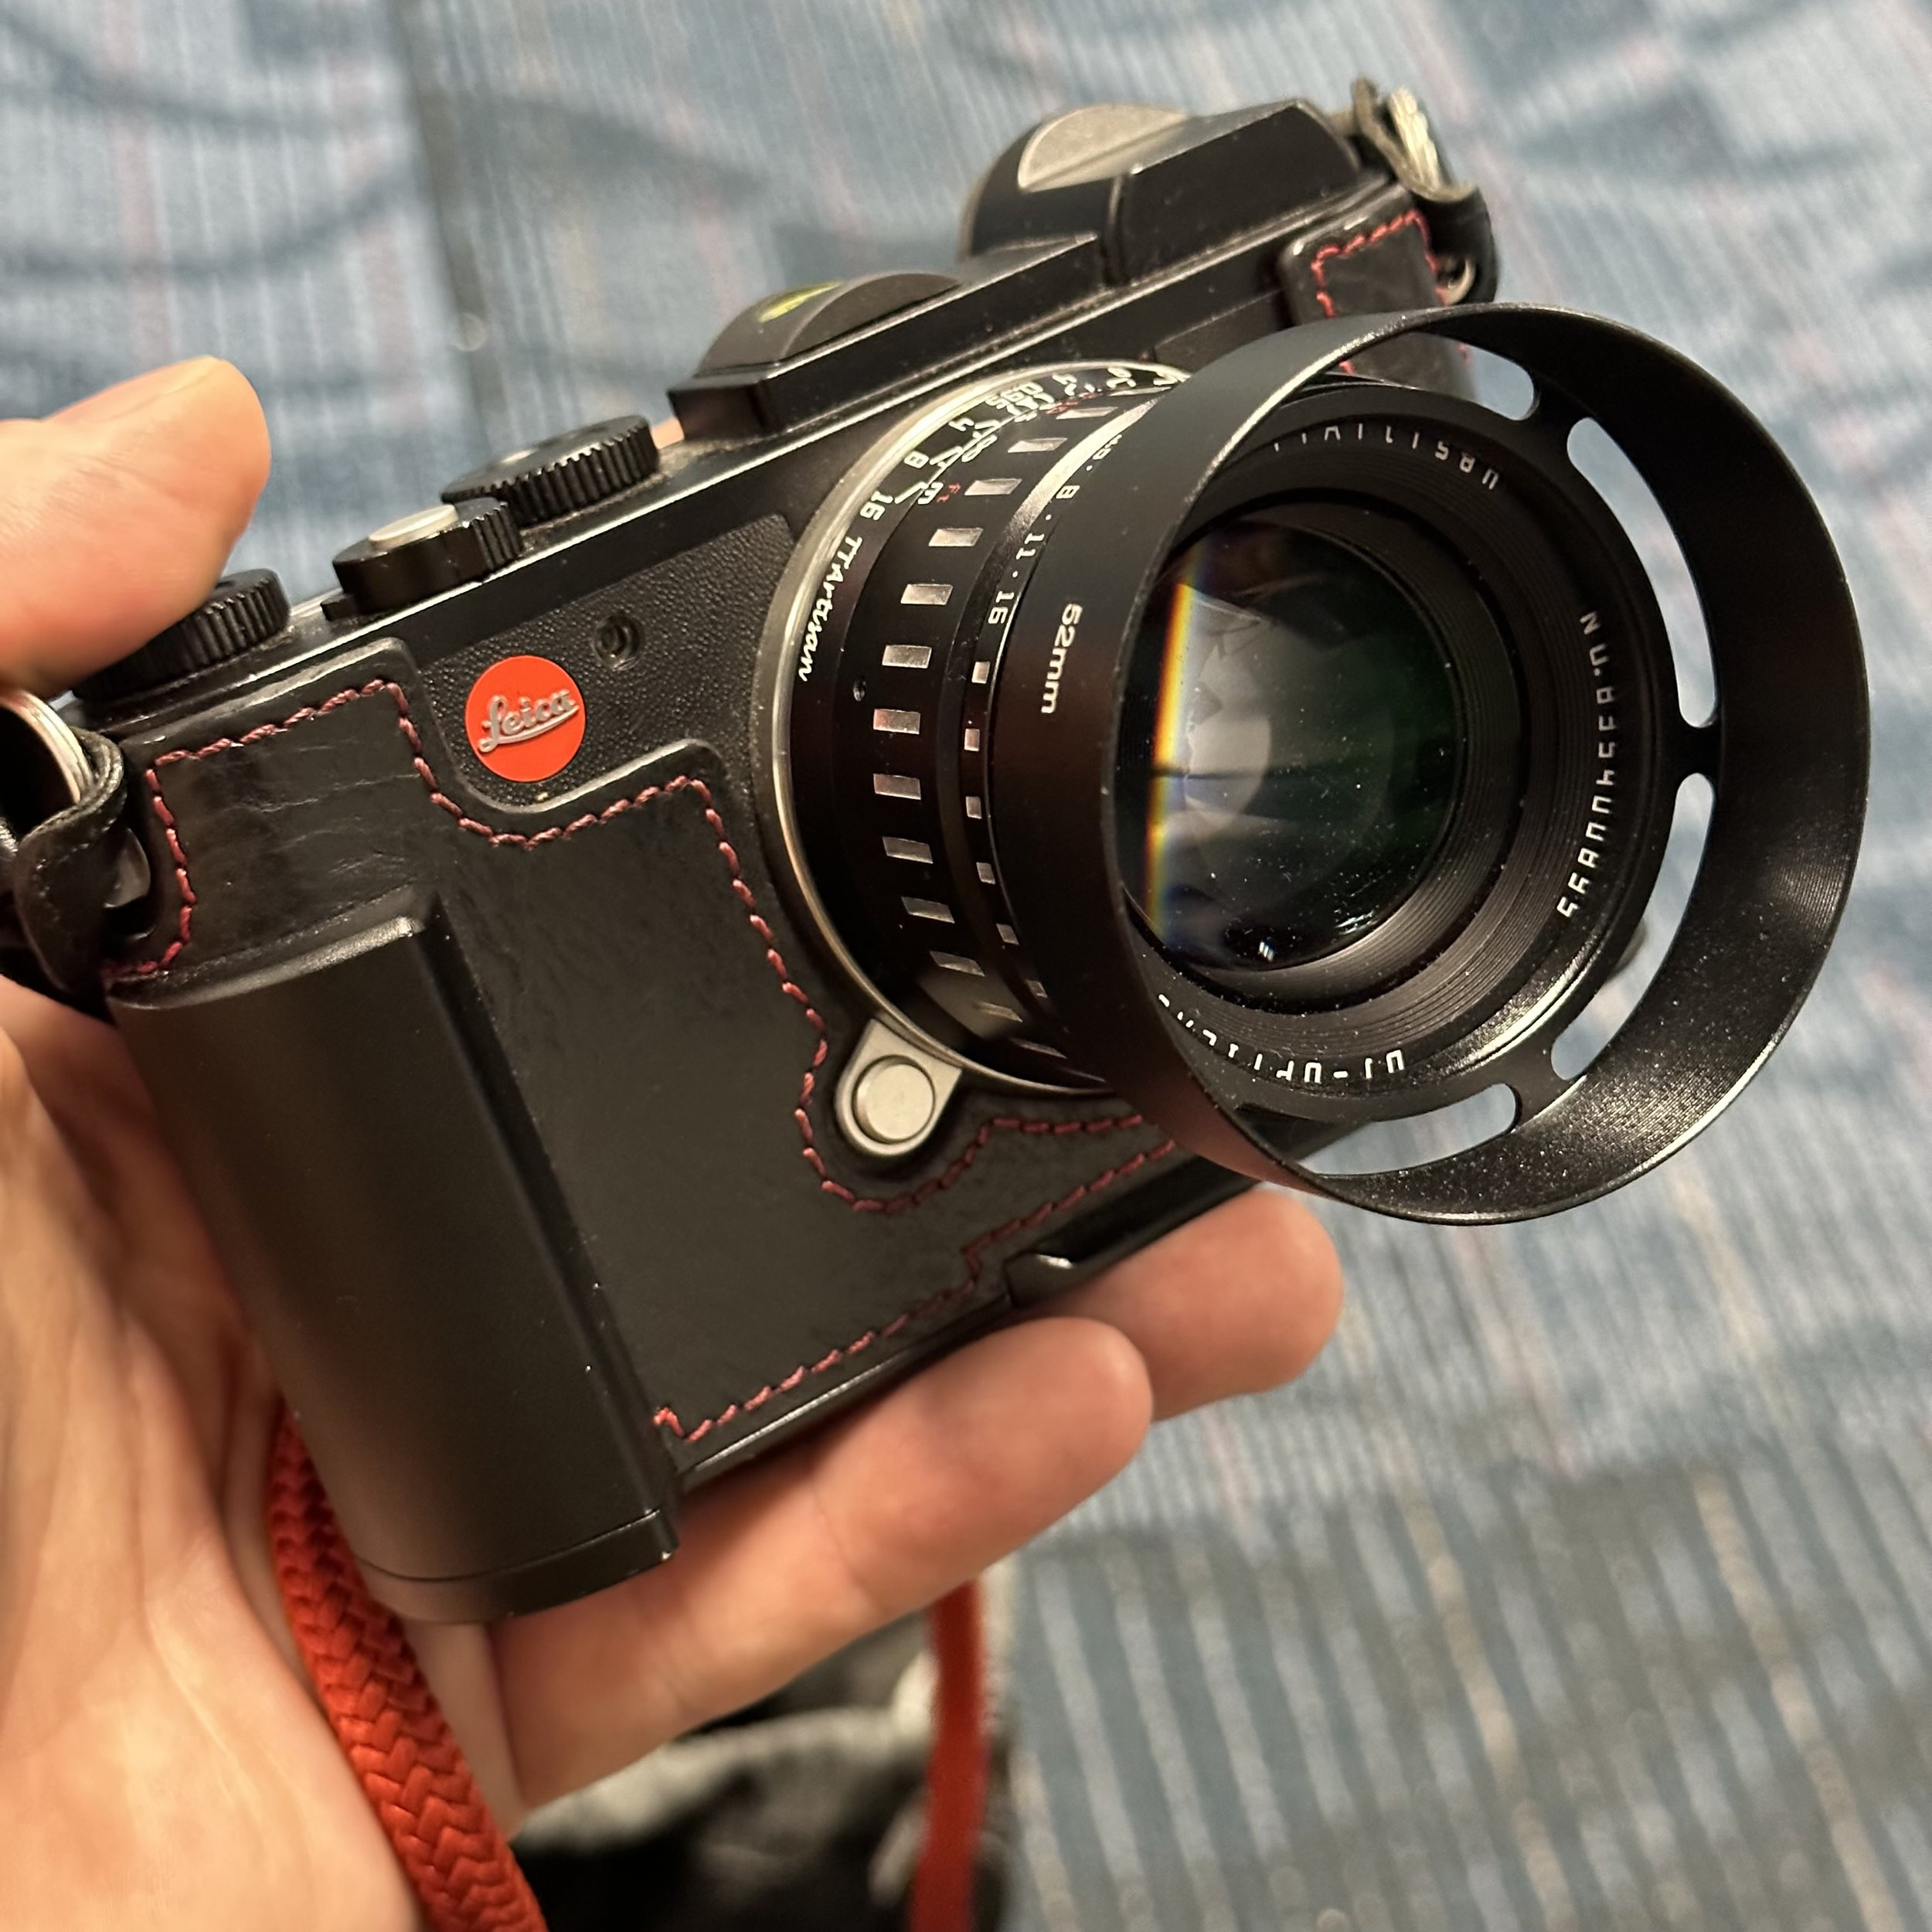
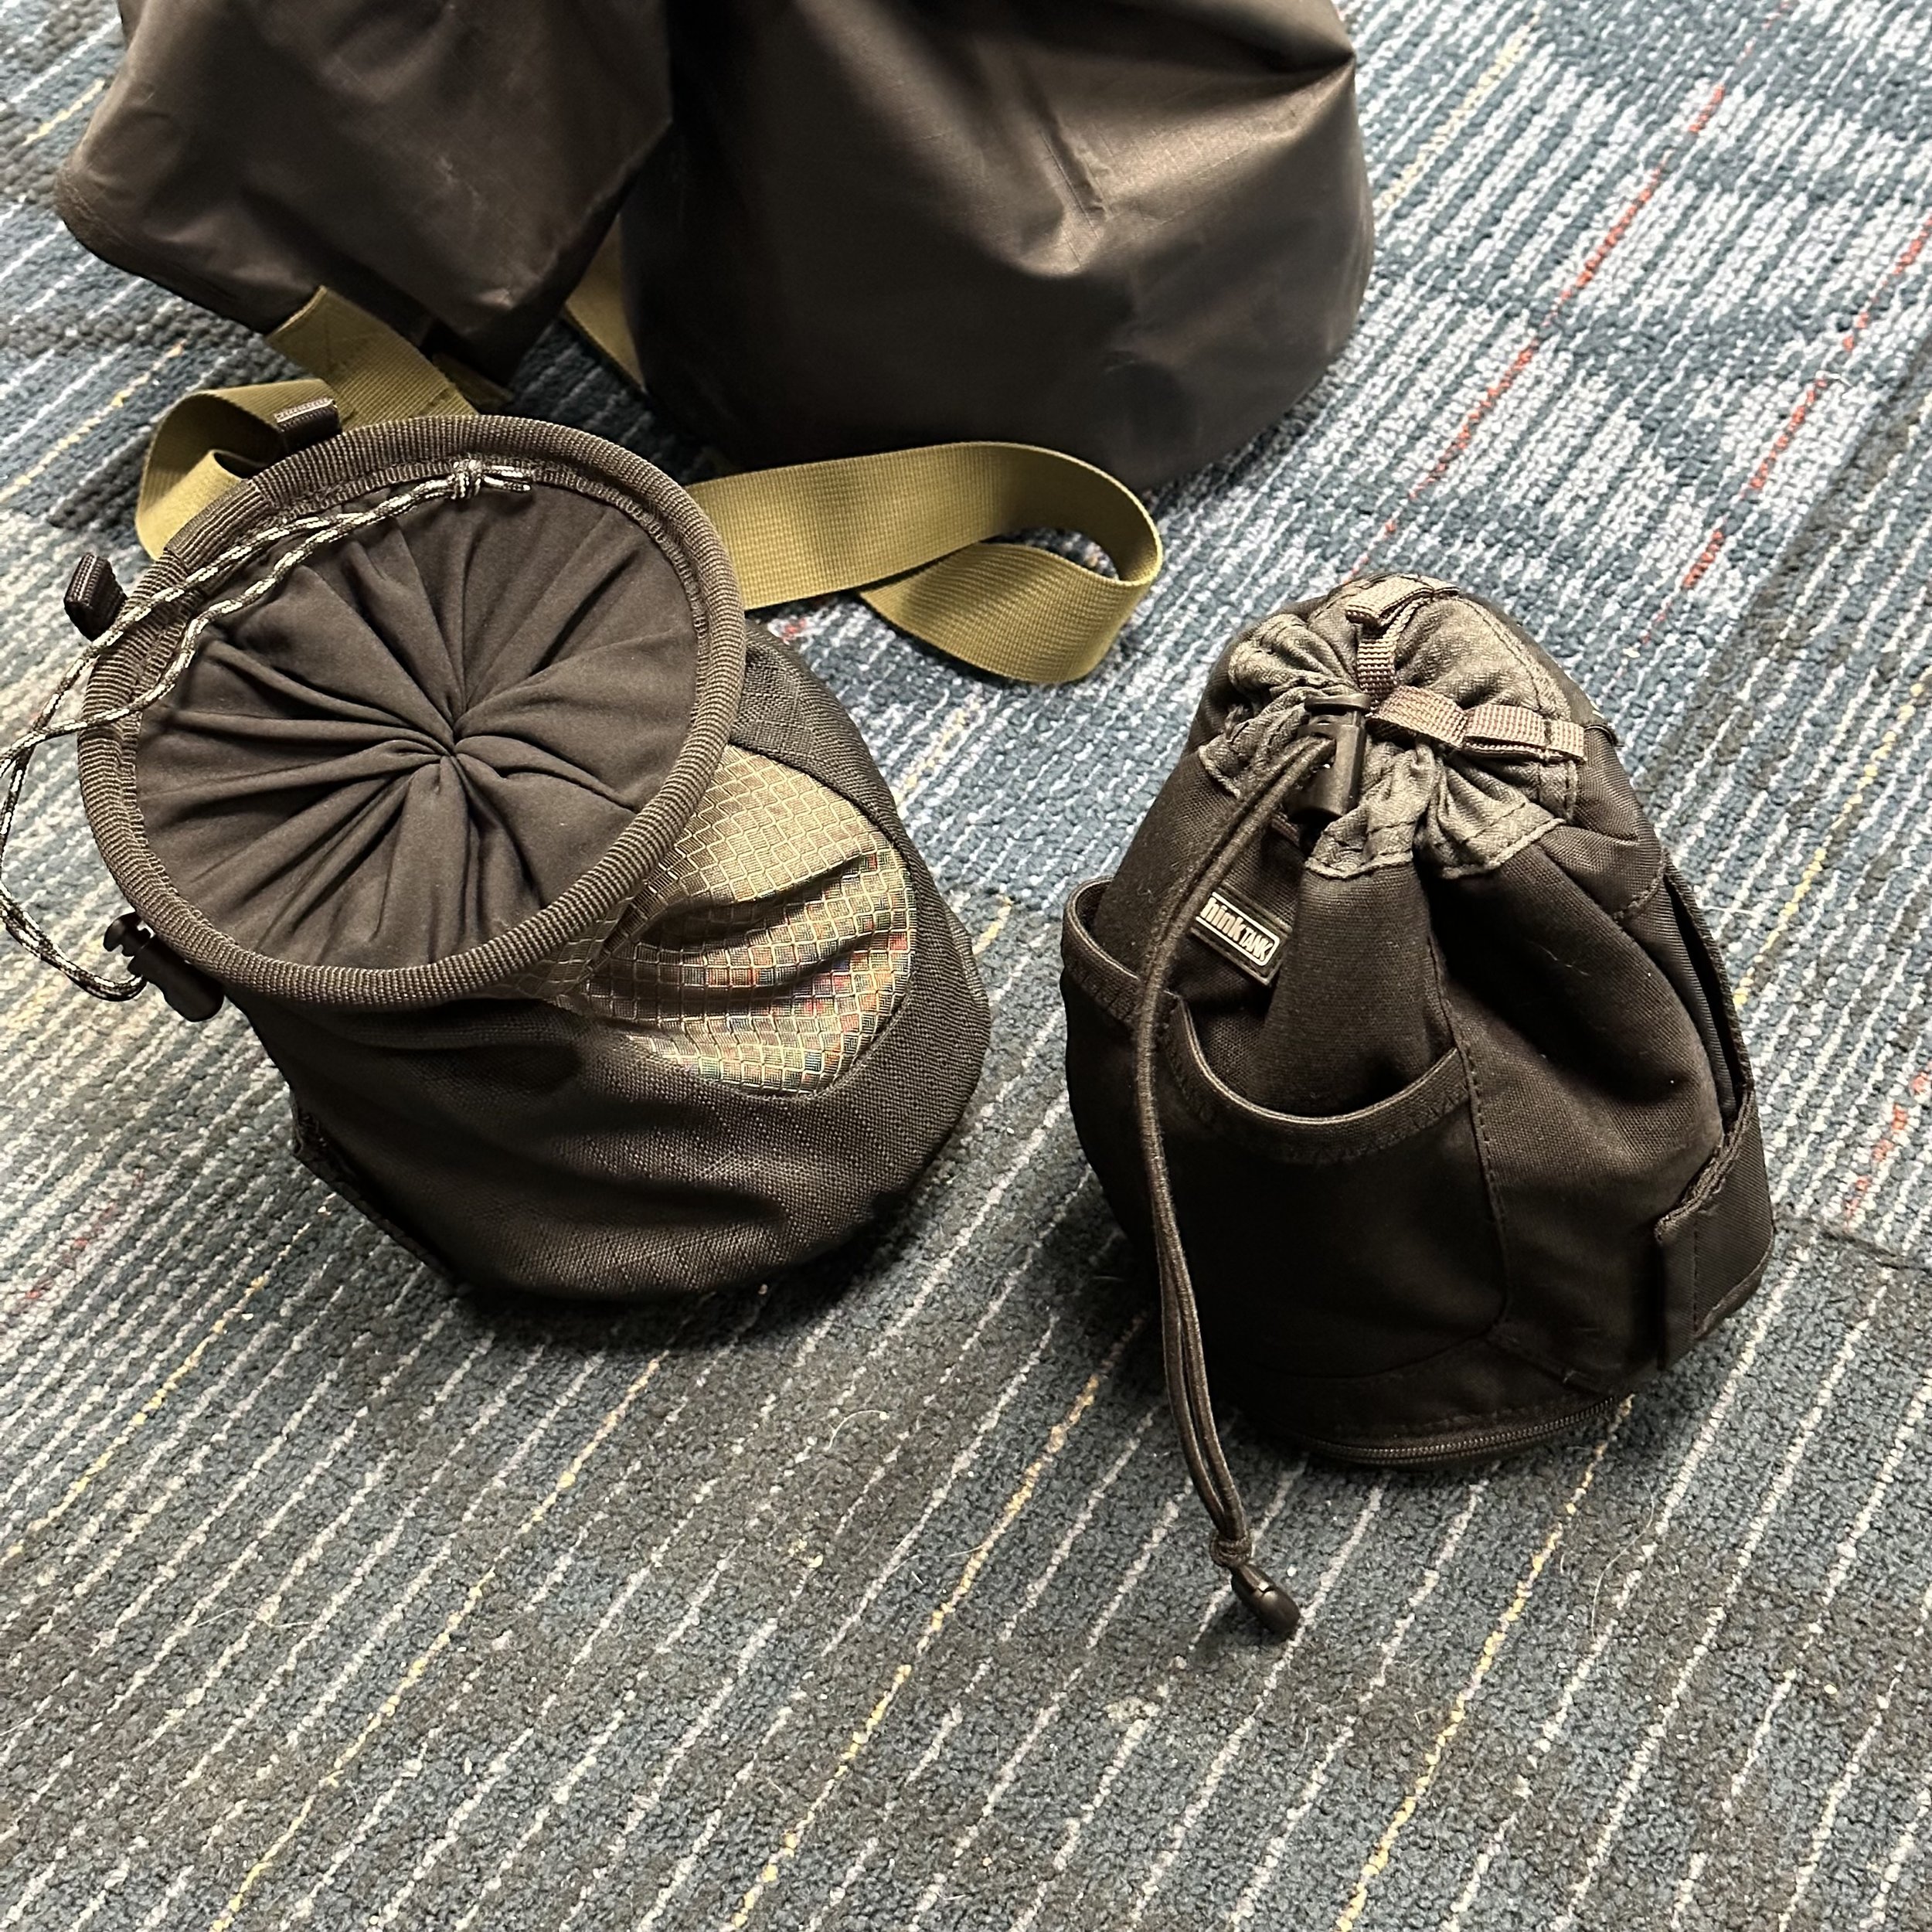
The camera kit is shown below. I didn’t bother with lots of items I normally carry to the point of probably a fault. Lol. No lens cloths, no rocket air, no card wallet, no spare lens caps, no tripod plates (or tripods either for that matter), not even a camera bag… officially. The bag you see is actually a lens “dump pouch” that goes on your belt. It happens to be big enough to hold almost all of the camera equipment I brought. What doesn’t fit is in a ziplock bag, like the battery charger and cable and the DJI Osmo Action that I usually vlog with. I didn’t even bring all of my spare batteries as I only used two a day at the most so I brought three. Lol…couldn’t help myself.

I didn’t bother with a spare battery for the Osmo as I never ran one down on my normal days anyways and it USB charges so the same cable will charge the action camera as my camera charger.

The inventory is longer than I had originally planned with me adding the DJI Osmo Action and the Lume Cube Panel Mini (fill light) was a couple of luxuries I really wanted for vlogging but fit in the pack easily enough. I have almost decided that I can vlog on my phone just about as good as the Osmo Action…almost.

Once on the ground in Belize we pass through customs and then board a smaller plane to Placencia where we will be staying for a couple of days.

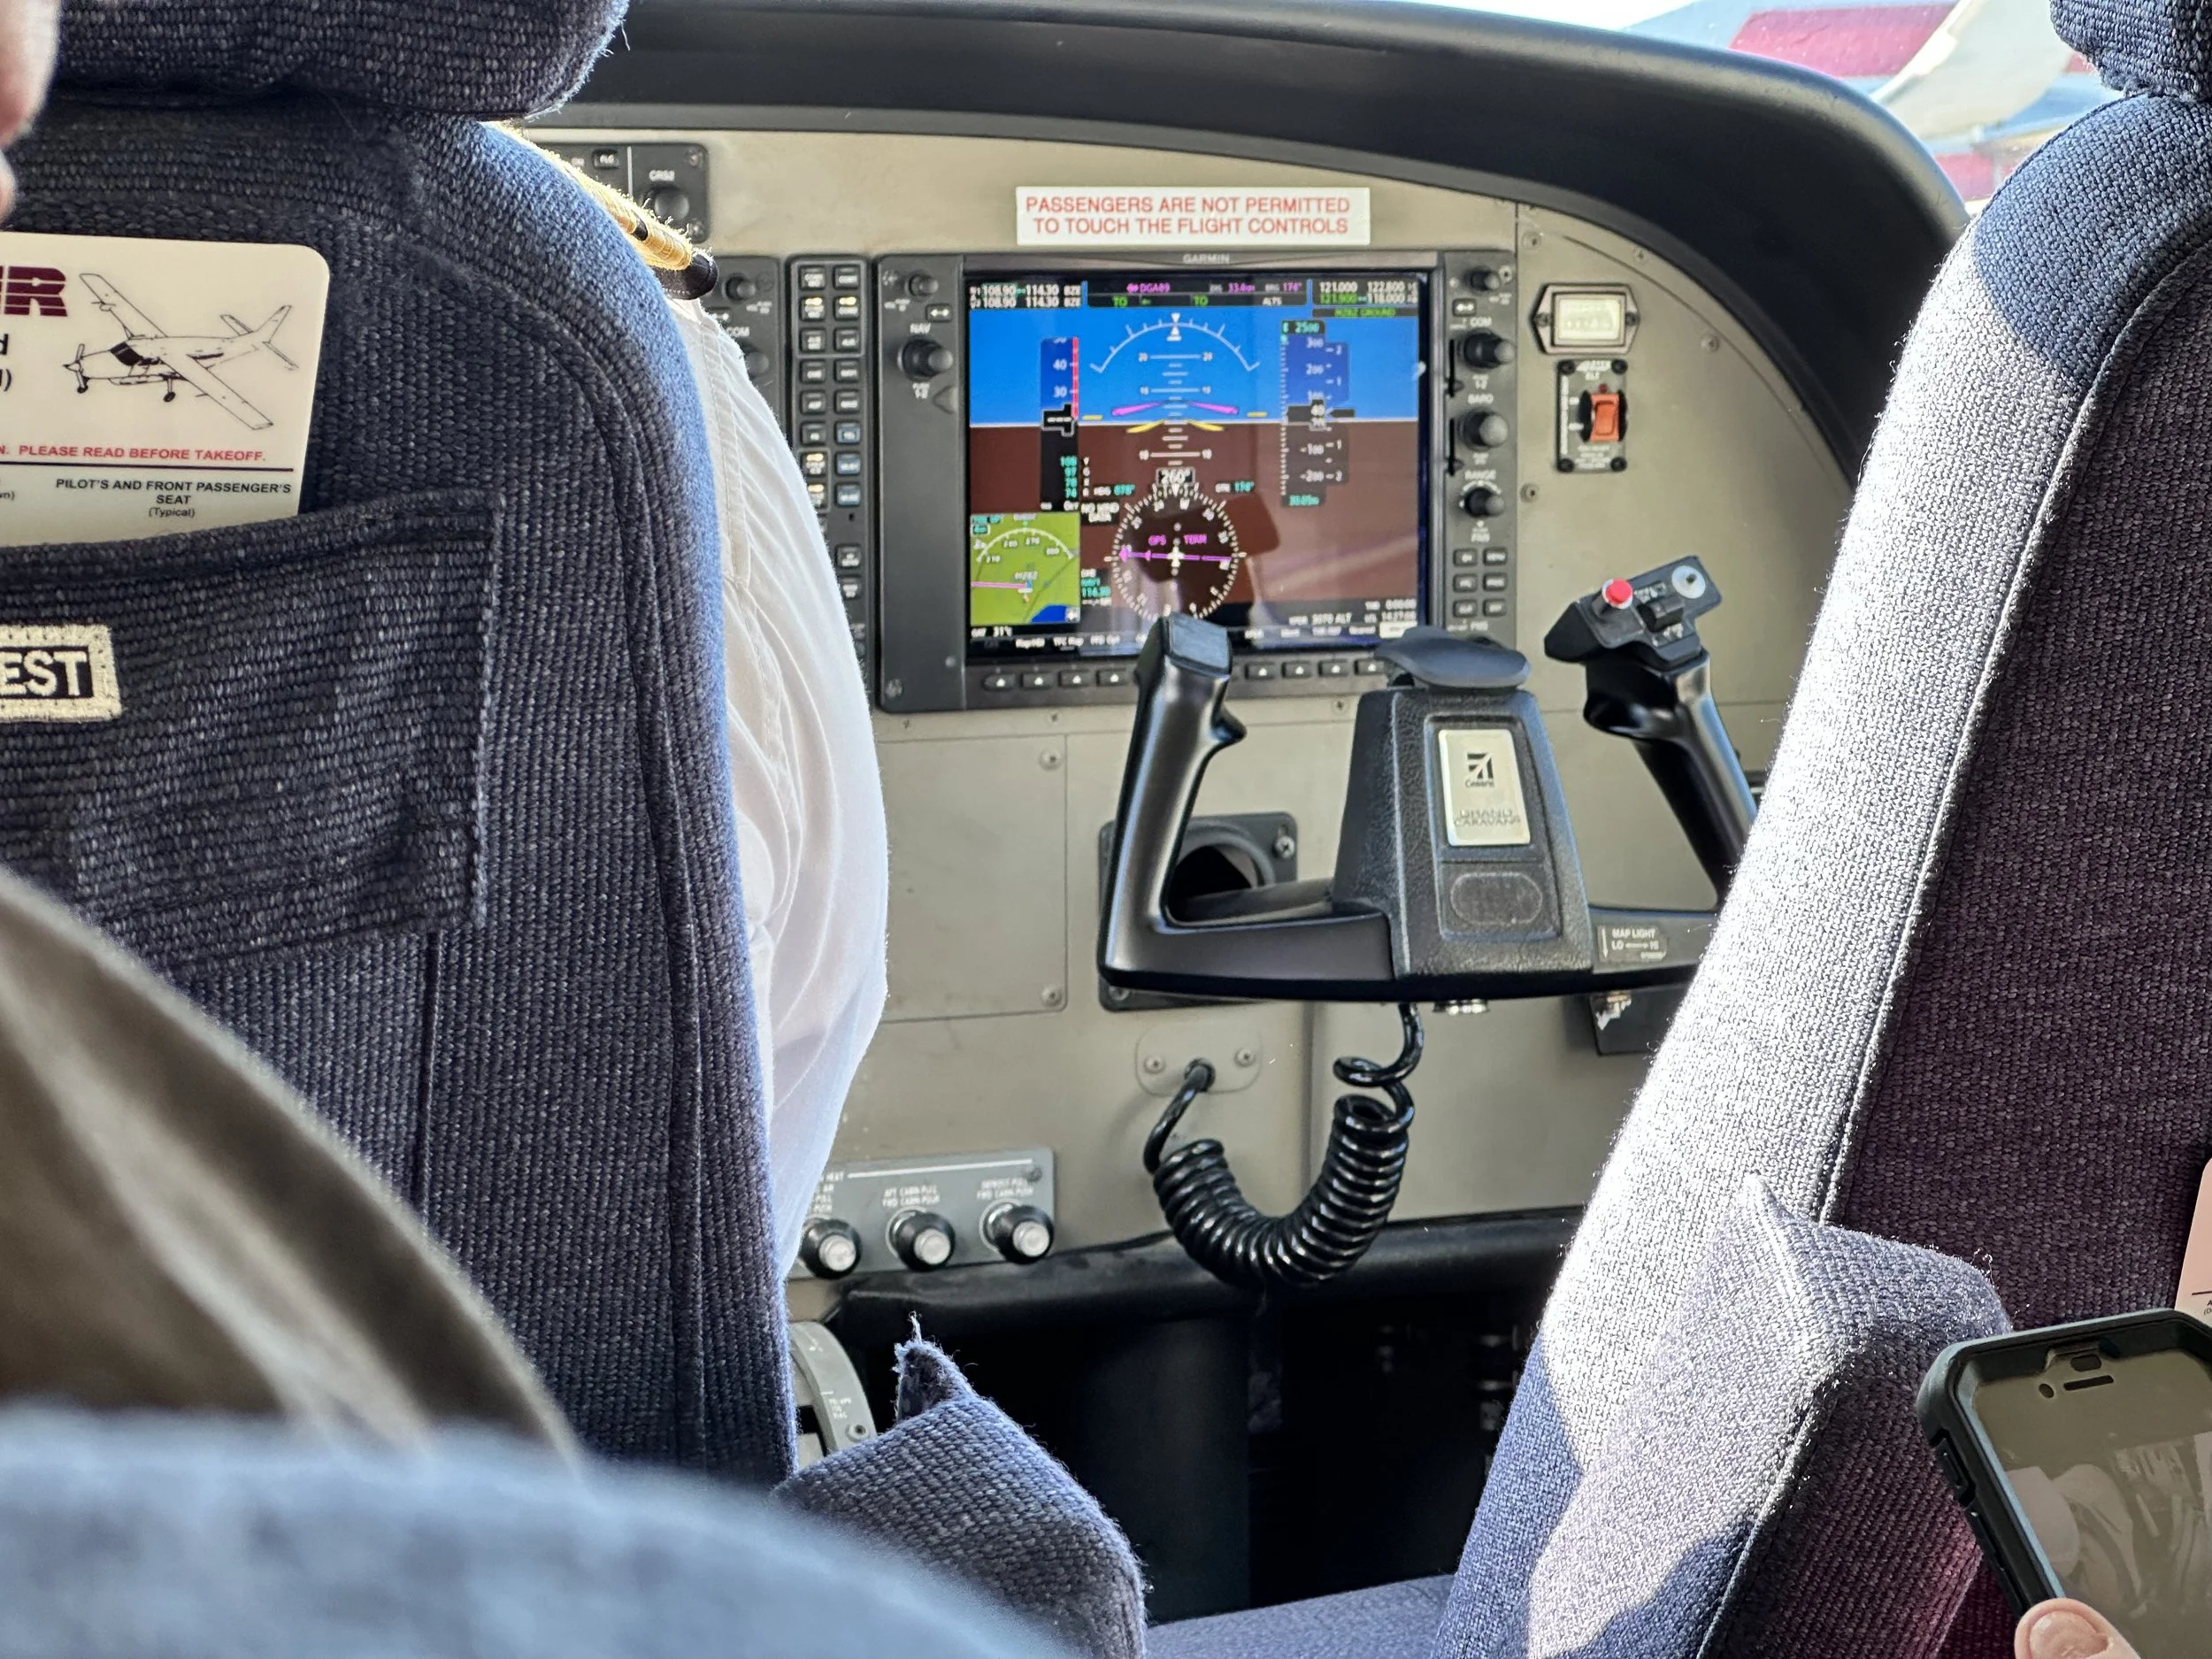
You can also tell that they play by different rules in Belize. Notice how there is no copilot, I wonder what the protocol is for a incapacitated pilot? Makes you wonder… anyway, he did just fine and we arrived in fine order. It was actually kind of nice to take the little plane down to Placencia as it flies at a much lower altitude and I could see the towns along the way really well.

I also noticed that our plane had a copy of Microsoft Flight Simulator installed…haha. It is actually neat how technical the instruments have become but still display like the old ones did. It displayed EXACTLY like the old instruments but just on a digital display. I just thought it was really neat to see that.

After we arrived and got settled in, we went to the beach and walked in the ocean. It was really surreal to wake up and the outside temperature be 29 degrees and that evening it be almost 80 degrees.

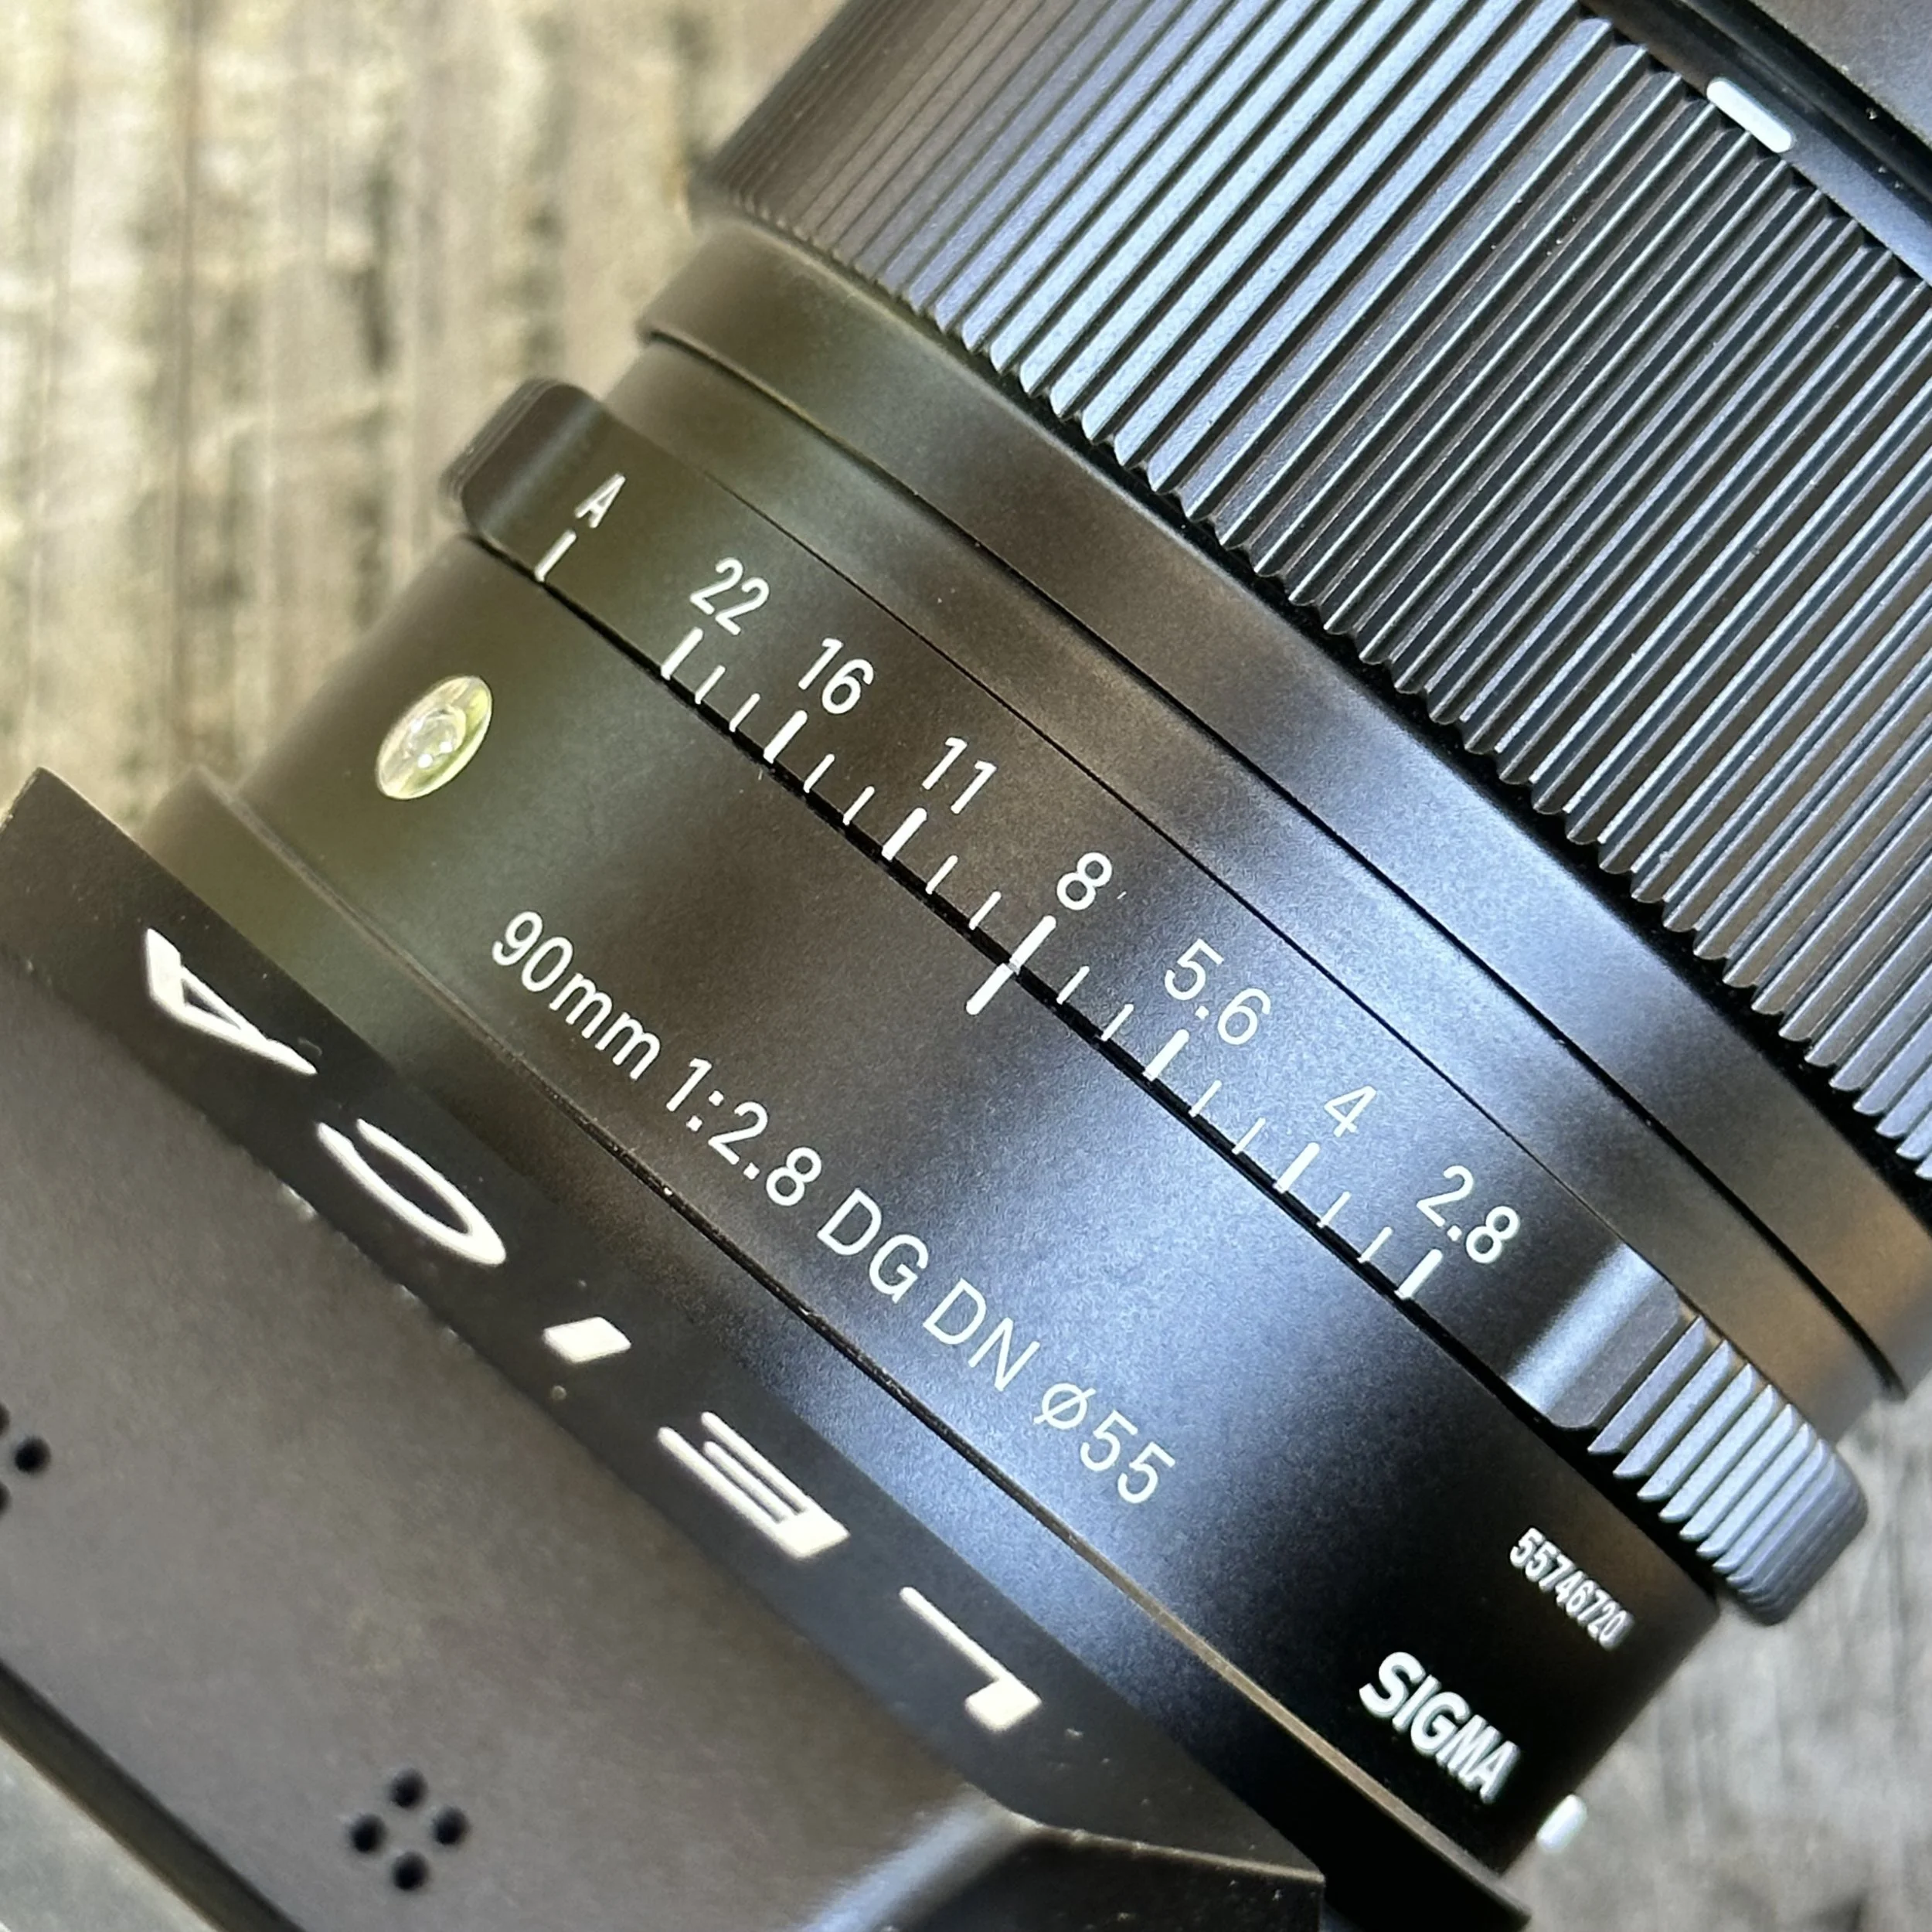
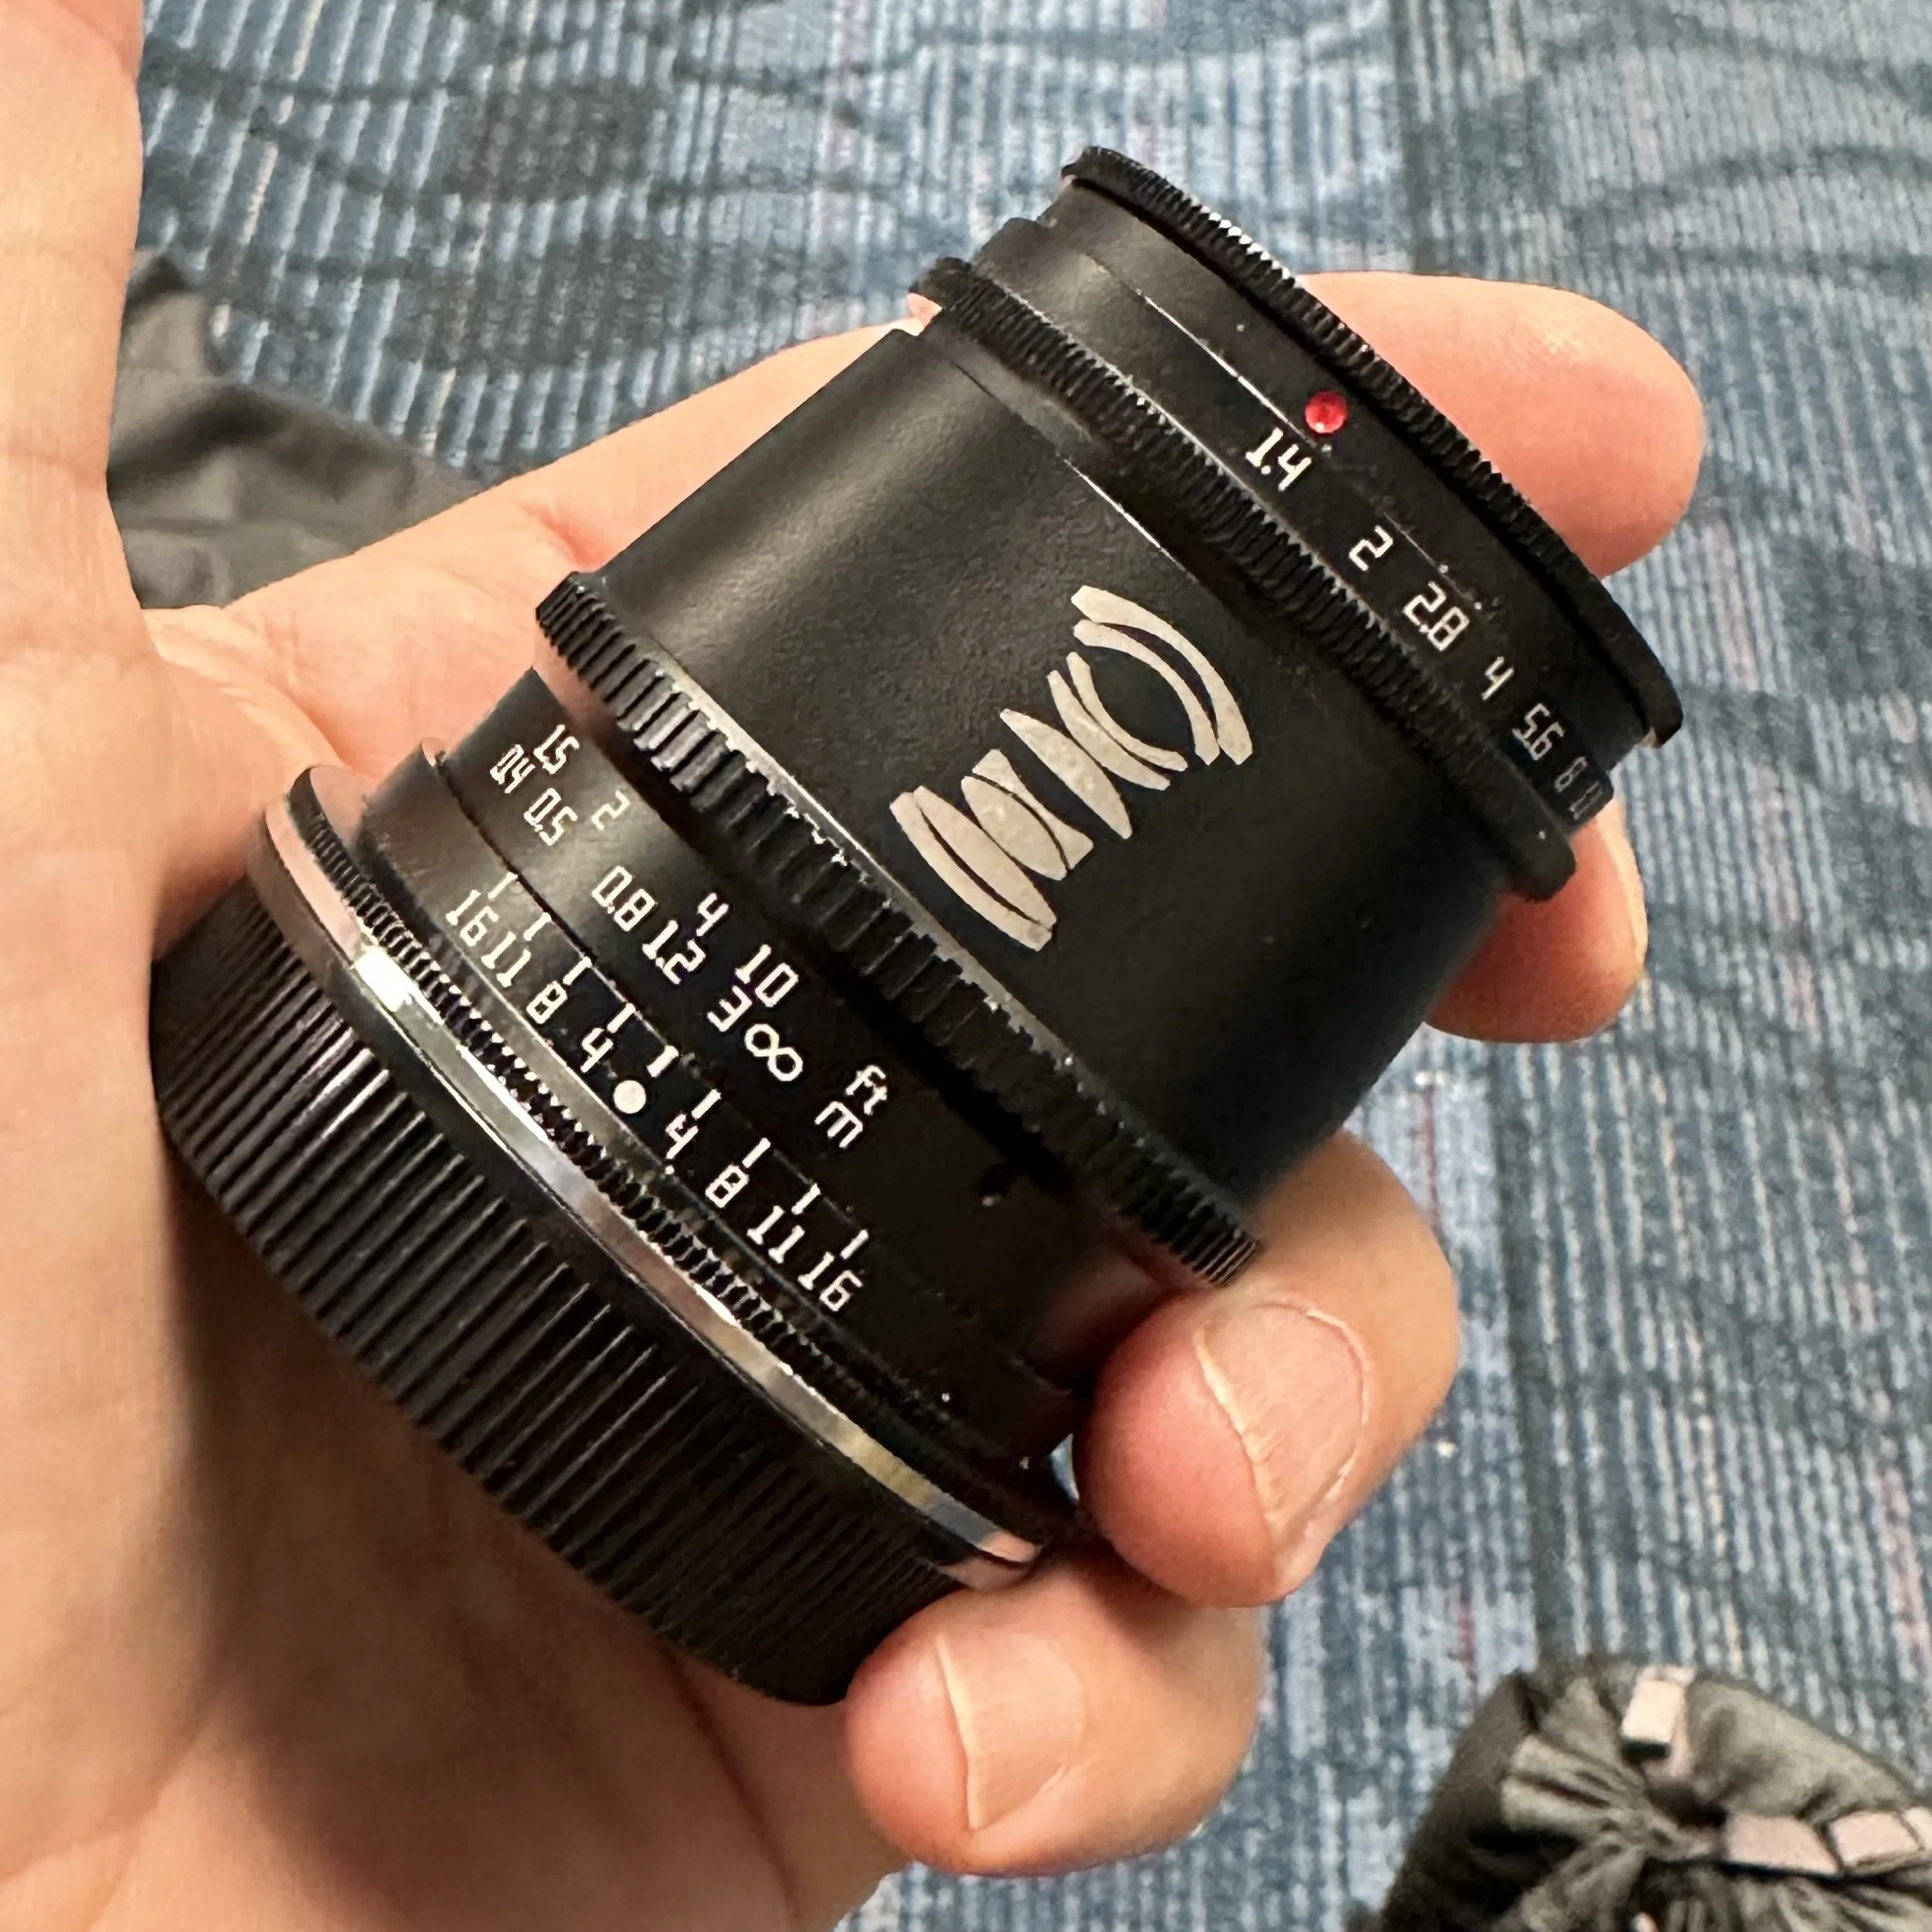
Once settled in, we went to the beach for a bit the relax a little and for this I took my 17mm f1.4 lens on the Leica CL. This is a great focal length for general photography as well as some landscapes. After our beach excursion it was time for some great food and fellowship.

We ate a wonderful meal for supper and hung out a while then it was off to bed. I used the 35mm at f0.95 for a change just to see if I could get some photos in focus at f0.95 and it was a success! Day 2 was an off day from photo and video collection as I wanted to just be in the moment. This meant no camera gear of any kind. It was really nice to “unplug” for a while. Next installment will be the “ruins”…I DID take my camera this time…

A day out with Aaron in Chattanooga

It was time.

We have not gathered to shoot photos in quite some time now so Aaron found there was a beard competition happening in Chattanooga and decided to make his way down for it.

When he arrived we spent the evening playing with stuff (his new Z8 in particular) and catching up. But then it was off to bed so we could get up and start our big day of photography.

The next morning comes around and we down some coffee and make a plan to meet up about lunchtime as I had to go to our Church’s Association as a delegate. Seems I made a mistake and assumed I didn’t need to go… lol, I see what that got me. Anyway, I really enjoy Association so it wasn’t like a chore, it meant changing plans a little from the original plans for the day.

So after I finish with business at association, I head over to the Harley Davidson dealership which is where the beard competition is being held. There I find Aaron is short order and it is really crowded. He basically tells me to get my camera out and take a picture with it so I sheepishly do as I am told.

You see I am not very aggressive with my photography especially when it involves people. I will ask at times but most of the time, this is why I don’t shoot aggressive street stuff. So now I am starting to get some photos and it is exactly as he mentioned. People happy to get their photos captured are everywhere. Like this fellow below, he was more than happy to pose for me. I will be honest, this kind of event is the perfect thing to break down your personal barriers to shooting photos of people you don’t know.

Even the girls got in on the fun!

Well the beard competition winds down about 3 or so in the afternoon and we decide to rearrange the rest of the day to shoot some street photography in downtown and also to go have supper at a great Italian restaurant later on.

The streets of Chattanooga were busier than usual with it being a holiday weekend but it still wasnt really bad where we went for our walk.

We found this mural with the light reflecting from the building across the alley and it was just something you couldn’t pass up.

We started on Main Street and then headed down Market Street to about 7th where we turned over to Broad Street and then back towards Main eventually diverting over to Cowart street before arriving at the truck.

So now you have the route, let see what we got. I kept joking about channeling my inner Eggleston as I would take photos of the mundane. Another thing I have learned is my Leica wants to shoot about 2/3 stop over exposed compared to my friends Nikon cameras. I kept -2/3 stop exposure compensation dialed in the whole time. I did this to keep the sky from being blown out as the shadows would be dark due to the bright afternoon sun. I will dig into the setup on my camera more to see if I can find out why it is doing that.

Along the way we saw a lot of cool stuff to photograph, like in the images below where it is different light so the images come out different from my usual time of day. With the light further over to the west we kept getting these awesome light spill shots like the one below of the old Rone Regency Jewelers location. This location will be sorely missed by me when they finally do something with this building. I love the gritty nature of the old signage and it wasn’t long ago that the windows were not boarded up so you could actually see inside the store. Even so, the black painted plywood makes a nice contrast to the lighter color of the upper section of the building bringing balance to the image.

We also found a few people to photograph as well. It was not quite as busy as I had figured it would be for a holiday weekend in the downtown area, but there were a few people out and about and I was able to grab a few photos of them. The Leica SL2 is a great camera for this kind of photography as it makes stunning portraits as well as makes for a wonderful, albeit heavy, street camera.

All in all we had a great time and then even got to go eat wonderful Italian cuisine later too. What more could you ask for? Well, there is one more thing I could ask for…

Lightroom Classic… I did it, I went over to the dark side and installed Lightroom back on my system again. It has the power to edit like I need finally and I kept running into problems that Exposure couldn’t easily solve for me so it was time to upgrade…or move over laterally to or what ever you call it…So going forward, I will be learning how to use Lightroom to edit my photos…wish me luck.

If you want to see more abotu this day, I made a vlog cideo about the photowalk portion of the day and it can be watched here.

Youtube link to vlog

The Sigma 90mm f2.8 DG DN Telephoto Lens Review

This is the second of two Sigma lens reviews I have done recently and this lens is no slouch either. The 90mm f2.8 DG DN Sigma lens is a very well made little prime lens and this particular copy is for the L mount for Leica and Panasonic cameras. I am sure Sigma makes this lens for other lens mounts as well, but I dont have that list with me so I cant speculate past that.

In the photo below you can see how small the lens actually is. The lens hood takes up almost as much space as the lens itself. That is crazy! With the all metal construction and well made optical formula, this lens is also punching up as they say.

Some notable differences between the Sigma lens and my Leica counterparts are that the Sigma lens actually has an aperture ring on it that also has 1/3 stop detents. This is really nice as it allows manual aperture control to be basically mapped to a control surface that photogs are accustomed to using. If you want the usual camera control for the aperture, then simply turn the aperture ring to the “A” position and your ready to go. Ít couldn’t be simpler.

The next thing they did on the lens that I am not so sure I like yet is to put a switch to choose between manual and automatic focus. The Leica lenses use a software control to do this and it is pretty simple to implement and once you get used to doing it that way it really is a good system. There are less openings in the lens to let water in and the control is right they with the various auto focus modes all in one spot. The Sigma system has you choose manual or auto on thr lens and then if you choose auto, you have to further goto the software and choose the automatic mode you want. It makes choosing autofocus a two step affair. This is probably just a user issue where I lack practice with the lens, but this seems a little clumsy compared to the Leica process. It is possible that Leica didn’t share all the tech needed to make this happen, I don’t know, but like I said I am on the fence on this one.

Lastly is image quality. The Sigma has it. It produces sharp, distortion free images with good color and exposure. What more can I say here? It really is amazing what you get for the price. These lenses can run with the big boys, in my opinion, just fine. If you pixel peep deep enough you might find fault in them, but only photographers do that. The normal person never digs into the corners or zooms into 500% on a photo so I am not going to rate this lens like that either. The photos look wonderful…just look at the ones below.

So in conclusion, if you want great glass at a fraction of the cost of Leica, these lenses are just the ticket. Sigma has done a complete 180 from the last time I used one over a decade ago and that makes me happy. Now get your camera out and go take a picture with it.

So I went on the Canterbury pilgrimage a few months back…

Yeah, you heard that right? I went on the Canterbury pilgrimage. This is an interesting thing for me because I’ve never really done a long-distance hike like this before.

I wasn’t even sure I was capable of completing it to be quote honest about it. Well, we jumped in with both fett so to speak and went headlong into this trip ill prepared. The first thing we decided to do was limit our equipment to what we could carry in our respective backpacks. This eliminated a literal mountain of gear that we had deemed needed but optional. It also made the journey much nicer. We finally decided on a couple of changes of clothes, I took a small amount of camera gear in a dry bag (since it rains in the UK alot) and a water bottle. We would pick up snacks along the way and add that to our loadout as we needed it.

This also generated another benifiit with our travel, the airport processing got ALOT simpler this way. We literally didnt check anything so we just went through the TSA check point and carried our packs right to the gate and they were not really encumbering as we had literal backpacks so our hands were free to do things like buy coffee or get out credit cards… it made traveling so much less stressful to be quite honest that I might be adjusting my future travel to operate in this mode. You never lose your luggage as you walk onto the plane with it and it fits into the over head space without issue…every time. This was glorious for me as I worry about the luggage making it to the same place as me or even worse, not arriving at all…

Well, once on the ground in England we checked into our hotel and went for some food, what we found is that the food in the UK is … different… from what we are accustomed to here in the US. We had to adjust to this as it seemed that they have a very specific diet and do not vary from it for any reason. We joked about how for a country that conquered most of planet earth at one point for spices, they dont use them!

Well, we spent the next couple of days being tourists in London for the sake of brevity then we embarked on the mission to Winchester to start the pilgrimage. Once in Winchester, we found the cathedral where we attended the service the next morning and also got our blessing from the preist at the same time.

So first things first, hiking this trail is actually really fun. It could be monotonous for someone who isn’t comfortable with their own thoughts for hours at a time, but it was fine to me. I didn’t even listen to music on this trip, I was just …there…

We ate at so many restaurants and pubs that I am not even going to get into that. Suffice it to say that we enjoyed them all. Since we didn’t take gear that allowed us to cook we really didn’t have a choice. Which is kinda cool since I love to go out to eat. Lol.

As for hiking gear, here is my load-out for this trip, I had a full change of clothes plus extra socks, I also took my phone charging gear, a Katadyn water filter as I was not sure if I would have ready access to clean water. Sometimes you don’t have that access to be honest and I wished I had taken another water bottle. I took a single Nalgene quart water bottle, a ziplock bag of snacks from the grocery store, a rain coat and my dry bag with my camera gear in it.

I picked up a set of trekking poles in Winchester that I almost wore out by the end. My backpack is a Mystery Ranch Pitch 40 which is actually geared toward rock climbing but worked just fine for this trip. I am going to take a moment here to point out that a really well engineered backpack makes all the difference in the world. I was carrying about 25 to 30 pounds from day to day and my back was NEVER sore or painful from the pack. Not once. I can absolutely with certainty recommend Mystery Ranch backpacks after this trip. They work. I never really understood how to properly use a backpack, but after using this one, I figured it out and got it dialed in. It is not really designed for this kind of trek, but rather it is engineered for route climbing and carrying rope and chalk and harnesses and such instead. I just used it anyway…

Below are links to the YouTube videos where I documented some of the trip. We cover lots of ground in those videos so be prepared to keep up and not wander off during the video as you might not understand what is happening when you come back. Pause it instead and then hit play when you come back from the kitchen…

Well, we strike out and head for the next town and I must say at this point that the English countryside is absolutely gorgeous! We couldn’t get over how everywhere we looked that it looked like a postcard! We walked by beautiful fields, streams and all these little communities with some of the nicest people we have ever met!

One of the many churches we explored on our pilgrimage to Canterbury.

Over the course of the next two weeks we would explore numerous old churches as well as eat is many of the most quaint pubs you have ever seen! The bulk of the trek though is through the country with some parts being out in farmland for hours at a time on trail. You really need to make sure you take enough water when you leave too as there are times when water just isn’t available. I ran out on one long day and had debilitating leg cramps later that night because of dehydration. It is a thing ya’ll, don’t scoff at this part, drink electrolytes and water, it matters.

PSA out of the way, let’s talk about the camera gear I decided to take with me on this trip. For this trip I decided to travel light so I took my Leica CL and two prime lenses. The 17mm f1.4 and the 35mm f0.95 prime lens. Turned out I wished I had taken the 35mm f1.4 as it is smaller and lighter than the 0.95 aperture lens and would have saved me some weight. I don’t know if I even once opened up to f0.95 on this trip, even at night. I just didn’t need it so it was wasteful to bring it.

When you would cross from one field to another or maybe pass from the forest to the fields, you would come to one of these gates in a variety of forms, all of them would work in a pretty similar fashion, but none the less, it would be there. This is a simple cattle gate but in the United Kingdom, it is called a kissing gate for some reason.

This is a modern steel kissing gate and they are all over these trail systems in England.

This hike was a two fold event, first it was a way to explore England in a more intimate way than seeing the usual tourist sites and then hopping on a plane for the states. This way we get to talk to the locals and see parts of the country that other visitors will never see, eat food that they will never taste, and just enjoy the country like a traveler should. The second part or probably what should be considered the first part is the pilgrimage part of the trip. A pilgrimage is a trek to a significant location for the purpose of reflection and to be able to spend time with the Lord. I had ample time for this too, you get to be with your own thoughts a lot if you keep your cell phone put away and this gave me a lot of time to reflect. I am glad I did this as it allowed me to just disconnect from life for a while and to be able to just enjoy where I was at the time without having to think about what I was going to do the next day or what ever.

This was so important to me that I didnt even post much about the trip while on it. I used the map function most of the time (there is a website where you can get the route and it overlays on google maps). This was wonderful for someone who has grown VERY accustomed to using their phone alot.

Here is a perfect example of what I am talking about. This bridge is pre-war era construction. The reason I know this is because the whole thing is riveted together. Any other modern form of metal joining would be significantly cheaper than rivets. Arc welding wasn’t really common place till after world war 2 so rivets were used everywhere till then. If I had been a typical traveler heading to the next destination, I most likely would not have noticed this.

In closing, I am going to wrap this with the following quote that I made up just for this blog, but it does seem fitting to me. “If you dont stop to look at the flowers along the way, you wasted part of your trip”

I am really one of those people that likes the journey as much as the destination and this was the perfect blend for me. Daily goal oriented activity with lots to do and see along the way…

Until next time, get your camera out and go take a picture with it.

Episode 2 of the Canterbury Pilgrimage

So we pick up the adventure in Arlesford and head out for Alton, this turned out to be a longer day that I thought it would as I would decide to hike all the way from Inn to Inn on this one…

This is a quaint little town that is really neat and I did some street photos the evening before we left as the light was too good to pass up.

This is the hotel we stayed in and it was simply adorable. The whole first floor of the part you see here is a restaurant/pub and the hotel is L shaped with a significant portion out back behind this street facing portion. The rest of the town is also really neat to me as well. Like the image below of the building supply.

You can tell that they have been in this one spot for a long time. I was not able to get photos of the inside as I didnt not get out to take photos till it was well past closing time and we would be leaving in the AM before they would be open too. I kinda wished we would have planned the trip a little differently so that we could have stayed in a few of the towns an extra day to be able to explore them better…

So the next morning we leave out for the next town and make pretty good time. Alton is a larger town and we are hoping to be there by lunch, well turns out the girls decided to take public transportation after about 5 miles or so and I decided to leg it on in… this would prove to be painful.

I had looked at the map and speculated it to be about 10 miles to Alton and figured I would probably cover the remaining 5 miles in about 3 hours since I would be stopping to get photos and the erratic nature of the trail layout and such as that. Well, this turned into a 6 hour slog that added up to an additional 13 miles for the day! It even got to the point where I realized I needed to cover ground more rapidly or I would miss supper so I stopped capturing video for the YouTube channel all together and just grabbed the occasional photo instead.

Now to be fair, I did cross a lot of beautiful countryside on this leg of the trip and I don’t regret making the trek this day, but I failed to drink enough water and had debilitating cramps later that night from dehydration. The lesson here is to drink more water, especially if you are doing an activity that is physically demanding in any way.

The English countryside is some of the most picturesque terrain I have ever laid my eyes on and for the local is it just …home… I have seen a lot of beautiful places on this earth and they all have a charm. The charm here is the people and how they groom the landscape for agriculture beautifully. It is literally a post card in almost any direction you look. So I did just that, took photos in every direction, and wound up with something like 1400 unique images when I got home two weeks later.

Here we have the road crossing into Alton where you walk under the road to get into the town proper. This is the kind of things you don’t see much where I live and I found interesting. The footpaths are so important to the English that they build this kind of infrastructure to keep them operational. I wished we would have done this with the old hiking trails from our countries early settlements and made them into hiking trails today…just a thought.

The next day we really didnt do much hiking as I escorted Sierra to the airport and then went back and linked up with Teresa and we made our way by train over to Farnham. We really wanted to explore the town and Kelly had already went ahead on her own so it was the perfect opportunity. We had a great time in Farnham and found Kelly later so it all went great. Then the next day we leave Farham and make our way over to the stepping stones which is a huge deal on this trail and I didn’t even know about it till this morning.

These stepping stones are part of the trail system and when we found them we decided to make a small event of it and enjoy a few minutes at this location to make it a little more memorable. If you would like to see the stepping stones just watch the video linked above. I didn’t get my camera out of the dry bag here for obvious reasons so I only have video from this location. These kinds of treks are not just about seeing how fast you can cover ground or seeing how many miles you can hike in one day, but about stopping and smelling the flowers or grabbing some photos. This is what this pilgrimage was about for me.

Test driving the Leica Q2...sorta.

If you want to see more photos and some more discussion on the idea, follow this link to the video where I do this walk. Other wise, read on friend!

I went for a little stroll in downtown Chattanooga and decided that on this photowalk that I wanted to simulate the Leica Q2 to see if i really wanted on. Photography is a funny thing, some photographers will buy one camera and use it all their life and others will change out lenses and camera bodies numerous times.

My simulated Leica Q2 for the day.

I am a little of both as I love to play with new gear as well as use gear that has become my favorite kit so to speak. Well, I have the Leica SL2 and I also have a nice little Asahi optical 28mm prime lens that I have an adapter for so I figured I would put this together and see if the shooting experience would be close enough to the Q2 to give me an idea of what it would be like without having to spend 6000$ on it.

I really love those Leica colors for some reason, maybe it is a bias I have towards the brand but to me the images just seem more rich in color. I really love how they turned out though and the idea of the Q2 is a great one for a general street camera. The high megapixel sensor combined with the 28mm lens is a potent street combination as you can see below where I shot the image as a candid just in passing and was able to adjust the composition later in post to get what I was looking for.

This photo was shot about 10 feet away and with the 28mm on a full frame sensor it looks MUCH further away. But through the power of cropping… I can make it take on a couple of different looks as you can see below.

This is a 12 megapixel crop of the original image.

This is a 16 megapixel crop of the original image.

As you can see I can get two very different feeling images from this single frame. That is kinda powerful to be honest. I mean, you can change the entire dynamic of the image with a simple crop. That is actually liberating to be honest. I mean just look at the two again. One has this lonly, almost bleak feeling to it while the other has a warmer almost restful feel to it. That is really cool to me. So this is a perk of the Leica Q2 in my book.

So what else comes with the Q2 that I didnt have today? Well, autofocus is one, another is larger aperture. This lens is f3.5 which is two full stops slower than the lens on the Q2. This would matter more in low light as I was shooting most of this day at f11 to reduce the need to adjust focus. Range focus at f11 on a 28mm prime is basically 4 feet (1.3 meters) to infinitiy. So it literally was point the camera, press the shutter and the image was in focus. But if I wanted to shoot indoors or in the evening, the f1.7 aperture would be nice to have to keep my ISO down some or be able to raise the shutter speed a little to freeze action better.

What I really liked about the 28mm was that it made me interact with the people more. The photo above is a great example of this, these two guys were walking by and I just asked them if I could grab a quick photo, they were stoked and so was I. This is honestly a problem I have that I am working to get past. I don’t like bothering people and will walk by potentially great photos simply because I don’t want to bother them. The 28mm forces you to get closer if you want the detail in the photos so I have to get closer to do that. So I think honestly, this is going to have be a perk of the 28mm Summilux lens after all…

All in all, this kit performed really well for me and I think the Leica Q2 would perform equally as well. BUT I do really like the ergonomics of the SL family of camera bodies so for me I will keep my SL2 and use a 28mm lens when I want to have the Q2 experience in a camera. So until next time, get your camera out and go take a photo with it.

Just capturing everyday life…

When I decided to take some time away from youtube and just explore my photography, I didnt know how much fun it would be to just take the camera and an extra battery. It blew my mind to be honest.

Still I found myself starting to look for more interesting photos when I am out and about these days. Something else I have really come to realize is that you cant get the photo if you dont go out with your camera.

Here is an example of what I mean by getting out and shooting more. You are not going to be where the action is if you dont get out and shoot. Just being out in the field greatly increases your chances of getting a photo. That being said, I am the worlds worst at failing to get the shot. I got the one about due to range focus being set on the lens so I didnt need to even bring the camera to my eye. I literally saw it unfolding and just raised the camera and snapped the frame. It is also heavily cropped too so I can get the composition I wanted. That is a luxury of the 47mp sensor on the Leica SL2 that I was using that day, it gives you options.

Here we have a photo I have taken a couple of times now. Every year our hometown has an event in this park and the kids play in the creek is flagrant defiance of the posted sign. It is such a cliche photo that I can’t pass it up. Obvious civil disobedience to signage if a fun photo so if you see one of these scenarios just get your camera out and take the picture. You just might like what you end up with.

Here we have a scene of “small town Americana” that I thought was kinda interesting. These little carnival foodie trucks are a common sight in rural America and I wanted to capture that essence if possible. I am not sure if I was successful but to me it is a cool photo.

Here I found something interesting when I went to Cloudland Canyon State Park to setup a POTA activation the other morning. A cloud inversion isnt real common until the fall, but conditions were apparently just right. So I grabbed a photo before turning on the radio and now I have this photo.

Here is the last photo I want to talk about. This was a quickie iPhone capture that I saw and just had to get right quick. Use what you have and get the photo, that is the rule of the day. I have come to learn that when you get something like this in your head just go take the photo and be done with it, it will gnaw at you forever if you dont. I think some of the best photos, street or otherwise, come from just capturing everyday life. What do you think?

Getting a fresh perspective on a common event.

Today I had a thought about what sets my Sacred Harp photos apart from everyone else’s photos.

I thought about this for a while and figured out that my goal is not to simply capture every leader (although that is kind of a side quest) but rather I want to capture the essence of the event as a whole. The reason I say this is because I see others capturing images of just the leaders and usually just from the front straight on. Now to be fair, this does produce good images but for me they are not as interesting. Hence…

When I goto a Sacred Harp singing there is a specific location that I want to be at in the room. It is near the bass section where it meets the tenor section. Now if I were more serious about the photos, and less serious about singing with the class, I would actually goto the other side of the room as most people mark time with their right hand. This makes getting a good photo, which I will spell my recipe for below, even harder since I am on their right side and their hand blocks their face alot.

My “recipe” for a good photo is as follows:

  • I want them looking at the crowd and not their book if possible (I want to see their eyes)

  • I would love a strong expression

  • I want the face to look relaxed and not contorted from singing a strong note

  • I want their hand in motion and slightly blurred from movement

  • I want their face properly exposed

  • I want good white balance

  • I want them 75 to 80% offset to the side for deep “look space”

  • Finally, I also want photos of the rest of the event (this is kinda separate but it helps tell the story)

So with that daunting list of requirements delineated let’s take a look at them a little more in depth.

I want them looking at the crowd.

This is kinda standard composition information but this creates a bond in the photo between the leader and the class visually. I want the photo to hold the viewer and have them explore the image.

I love getting a strong expression.

This is really hard to do most of the time. I have certain leaders that I know will give me this and I actually look forward to these leaders for this reason alone. This draws the viewer into the photo and lends an emotional aspect to the image.

I want the face of the leader to look relaxed.

Most of the time, when people lead, they are nervous and it shows in the photos. So I watch for them to relax a little. This usually happens towards the end of the song so I will watch for opportunities to get a better photo then if I can. Sometimes people have odd expressions when they sing as well and this contorts the face to make them look less appealing in the photo, so I will look for pauses in the music to where they might be catching their breath or their part is silent so I can grab a quick photo then. My goal here is to get them actually enjoying the song and not just leading it.

I want the motion blur of them marking time with their hand.

This gets me that “action” look that I am wanting that shows something is happening and that they are not just standing there I want that photos to show that the event is “alive” with activity if possible. By having a little motion blur from the hand moving, it does this without making the whole image blurry. At least for me, it does.

I want their face properly exposed.

This as it turns out, is a really hard thing for me to get right while on the fly. Seems there is almost always a window in the frame and the sunlight is wreaking havoc on the light meter in the camera. I do my best to compensate for this, but sometimes it just doesn’t work right and the person is almost a black silhouette. As a good photographic rule though, this is normally a well exposed part of the image.

I want good white balance.

Again, you would think this would be a no brainer, but as it turns out, this is a lot harder than you would think. You see these events happen normally in venues that are poorly lit with mixed color temperature lights so you never really know what to expect. I will normally grab a white balance value at the beginning, and again at lunch as the sunlight will dope the reading and make your pictures look yellow…

I want them offset way over to one side.

We are talking way past the rule of thirds concept as I am not trying to follow that concept at all, but rather I am wanting to tell a story and it is not about one person, but the class as a whole with the leader just one part of it. The singers are just as important so I want as many of them in the frame as possible to give more context to the image. Sometimes I get a good image and this isn’t the case like with Terry (1st at the top), but this is not what my usual goal is. He leads very uniquely and I love photographing him for this reason.

I want photos of the rest of the event.

You see, there is more than just the singers and the leaders and them singing songs. There are people just there to hear it, kids playing and people eating… Plus this is sometimes the only venue where some people ever meet up so there are lively conversations sometimes as well and lots of laughter. I want to try to capture this as well.

The desert table alone is worth the trip in my book!

This is a tall order to be sure, but I normally get one or two “real keepers” from these singings that will meet either all or nearly all of my rules for leaders. So of those rules are pretty low hanging fruit, like proper white balance, just takes me remembering to take a sample of the interior occasionally to make sure it has not changed on me. some are much harder, like getting position and facial expression and exposure right when they are moving around while they lead… Something I dont strive for though is perfectly sharp images, a little motion blur just adds character to the photo and makes it look like they are actually doing something instead of posting up static for a photo. Also I dont care if the eye isnt tack sharp either as the photo isnt a portrait but rather something closer to reportage in my mind. I like it when the eyes are sharp but it isnt on the list if you will notice. I dont list it because the story is more important to me than that aspect. I dont know why, but that is how I see it. Everyone loves the images when I share them too so I am happy with most of them too…

Do you have a favorite venue or event you like to shoot and do you have a set of personal rules that make us your perfect photo from that event? I would like to hear about your version of this story!!!

How important is the time of day when you shoot a photo?

When you take the photo is just as important as what you photograph

Seems there is all sorts of information out there about what to take pictures of, but no one (other than landscape photographers) talk much about the TIME you take your photo. In this article, I want to explore this a little with a simple location that is right down the road from my apartment and show the difference that just a few hours can make in the mood and feel of a location that is being captured.

The camera of choice with my the Leica CL with the TTArtisan 17mm f1.4 lens shot off of a tripod so shutter speed isn’t a problem. I will be maintaining an ISO of 100 for all photos and an aperture of f11 on all photos, so shutter speed will be what I have to change to keep the exposures to where I like them.

The time of day is something that a lot of people think about a little but really don’t put much effort into the planning of the photo. It takes a good bit of reconnoitering to get the location scouted with the vibe you are wanting in the photo. I see these locations all the time, when I am driving around in the day time and when I see them at night it is a completely different scene. Some people like shooting in the daytime, some like the blue hour or golden hour and some, like me, prefer the night… So seeing a night photo while viewing the scene lit by the sun is a problem. I can get somewhat of a visual based on previous photos I have taken of other locations, but until you see it lit by the street lights and 8’ fluorescent tubes, you just don’t know what you will be getting.

I don’t know why I like shooting at night so much, but I do. The low light and the negative space just do something for me and the photos reflect it.

Ybor City has some interesting light that is only available at night.

I do like some blue hour stuff to add the touch of blue sky to my images at times, but not always. Another perk to shooting at night is that it is cooler in the summer months, with temps being generally lower and the sun in not beating down on me, I am more inclined to stay on a location longer and get better images. Street photos at night are a little tougher as I need larger apertures to keep ISO manageable, and this means focus is a lot more of an issue as depth of field is significantly shallower than in the daytime, but it is manageable if you think about it first.

I normally set focus traps and shoot in burst mode and this will usually net me a sharp photo of a scene at night at even crazy large apertures like f1.4 or f0.95… It just takes a bit of practice and patience.

The gear matters…

The gear you use at night matters just as much as the subject you are shooting. If you have the wrong equipment, you simply won’t get the shot.

Fast glass gives you options.

Take for instance, street photography, this is dynamic and has movement in it. For most human movement, a shutter speed of 1/250 second will freeze action sufficiently. 1/200 in a pinch if the subject isn’t moving too much will net sharp photos. Well, to get a decent exposure, you will need fast glass, shot wide open and will still probably need a fair amount of ISO to compensate.

Now, if you are shooting static subjects like buildings or scenes and motion isn’t an issue, you can just let the shutter stay open until the exposure is good, but once you cross about 10 seconds, humans tend to vanish from the scene… Cars make long lines with their headlights as they drive by and things begin to look different. So you can see it all depends on what you want to capture to drive your gear choices here.

I personally like to have fast glass if possible as this is the most versatile lenses. These lenses can still be stopped down for times when you want deeper depth of field and opened up when you need the extra light gathering power of “fast glass”. So whenever possible, I will always opt for the larger aperture option over the smaller, if just makes sense to me to have that extra optional aperture when needed. The old adage “better to have it and not need it than to need it and not have it” comes to mind…

Water reflections are magical in low light or night photos.

Now that lenses are talked to death, what about the camera? Well, honestly any camera will do. It is the least important part of the equation to be honest. As long as it can be controlled manually for all three major functions, it will do. You see, it must be able to adjust shutter speed, ISO and aperture manually to be able to get creative results at night. The camera running in automatic mode will make choices in these controls that will not be what the photographer wants most of the time. It is guessing and will most likely guess wrong… But just about all reasonable cameras will let you control these functions and this is where it gets good…

The time of day.

Back to the original subject. Here are two photos taken from the same location, with the same camera and lens combination, at two different times of day.

Here we have a daytime scene of a garage.

Here is the same composition at night. Notice the change in mood.

Here is the same scene, but the overhead lights are turned off (different day). This changes the mood even more and gives the scene a different feel. Take a look at the scene below of the Dutch Motel sign I found the other evening. The daytime photo isn’t much to look at, but the night time one has all sorts of interesting features that make it unique and otherworldly since it is distorting time so much with the incredible shutter time of 10 seconds!

The Dutch Morel sign isn’t much to ponder during the day…

1/400 second ISO 100 f8

Once nightfall comes and you slow down the shutter, the magic happens

10 seconds ISO 100 f8

This is just a couple of examples too, there are many others that I have noticed over the years. So if you want a certain feel from an image, the time of day absolutely matters. There are some things that a strobe just won’t overcome and the sun is one especially if you are shooting buildings and not portraits.

So if you want to learn more about low light photography, check out my youtube channel here. David Saylors Youtube Channel.

Why don't I shoot more landscape photography?

The short answer…it is out of my reach.

Mid day sun is “flat”…

You see I have always loved shooting nature and landscape photography and such but once I started really looking at it seriously, I started to realize that it can only be shot at certain times of the day or it doesn’t have that magical look to it.

Deep blue hour adds to this image where the building is white and red neon primarily.

Where the sun is at in the sky makes a ton of difference to how the image looks and for the most part, the higher the sun angle the less interesting the image. Just watch most landscape photography youtube videos and you will see them getting up several hours before dawn so they can get the sky colors like they want with the mood of the terrain like they want as well. Most of the time it is dawn or dusk only for the photos they want. This is for good reason too, the images just won’t be interesting otherwise.

You see, the shallow sun angle makes all sorts of things different and not just the direction the light is coming from. It changes the color of the light, the size of the shadows, how dark the shadows are, the sun controls lots of environmental elements like fog rising off of the grass or water, and if there is frost or not in the image. These are just a few of the things the sun directly controls, but you get the idea.

The main thing for me though is that I am not able to get out at these times of the day so I end up shooting either mid-day or early evening. Both of these are terrible for landscape photography and the images out there prove it. You just can’t get good images of wonderful vistas at those times, it only takes a moment to search the web to see this is true.

I do occasionally get out at the right times and will snag a cool photo or two of some cool landscape stuff, but for the most part … not…

What I do get are photos like the one below. I can get out at night some, and mid day as it seems to work out, but not at golden hour or blue hour either for the most part, but sometimes I will get that chance, so instead I have embraced night photography as well as high contrast mid day photography, which works well for street photography if more people were in the area.

I will also do some local documentary style photos of stuff like buildings in the town that are changing or if there is some kind of activity. Most of the time though, I end up just walking around.

This also turns out to be a good practice as it gives you perspective and you will start to notice images that you didnt see before. It makes me more observant of the environment or so it seems.

Well, I successfully wandered down a rabbit hole anyway… lol. You get the idea though, I am pretty sure I am not alone in why I cant do landscape photography and I am also sure there are more reasons than these. what do you shoot because of your circumstances instead? Leave a comment below and until next time. Get your camera out!!!


What does lens focal length do to me psychologically when shooting street photography?

Photography and the human mind…

I have found that when I put on a wide lens, I suddenly loose the fear of getting close to people for some reason. I am still guarded with people and don’t approach a lot of them, but I will still get closer. This is a real struggle for me and I find it even harder due to time constraints that I have to shoot street. I don’t normally get to go shoot street when the large crowds are out and about. I end up being in the areas when there is little to no activity. So for me to get a good candid street photo is pretty special. I don’t get dozens a week like some photogs I see, but maybe one a month…maybe.

17mm APS-C photo on the Leica CL

I find that I like to get two kinds of photos when I shoot wider than 35mm and a different kind of photo when I shoot 35mm or longer. I didn’t even realize it until the other day when I put the 17mm on my Leica CL (like a 28mm on full frame) The 28mm is also what happens to come on the Leica Q series cameras. This particular machine is quite costly and you can’t change the lens either. But for street photography , the 28mm is a great choice and lots of people LOVE the Leica Q2 and Q2 Monochrome just for this reason!

17mm APS-C photo on the Leica CL

When I put the 17mm TTArtisan APS-C lens on the camera I consciously know that the lens is very wide and that I am going to have to get close if I want to fill the frame. Then I fill the frame with images that make me happy for some reason. It is really strange that if you want better photos, sometimes you just have to get closer… Photography is strange, people have all sorts of different ideas about what it is. You know what? They are all correct. Every single one of them. What is that all about? LOL

35mm APS-C photo on the Leica CL

When I put on the 35mm (50mm equivalent) The mindset shifts to scenes with people in them or portraits on the street when I use longer lenses for some reason. It just happens too, I don’t even think about it, I just do it. I start looking for interesting things across the street when running the 35mm or longer lens. I also noticed that I like to compose from different view points too. I will end up shooting from a lower angle with the wide lens and from my eye level with the longer lenses. I think this is because of the viewing angle when I look at the photos in post, but it is a very strong phenomenon.

The Leica CL has become my de-facto street camera with either the 35mm or the 17mm as of late. I really like the form factor of the Leica CL and I also use a grip frame on it. This grip frame is made by LIMS that is currently out of production from everything I have seen. This grip frame is awesome because it has a ARCA SWISS tripod adapter on it and there is an opening for the battery door in the bottom plus it has the grip extension on the right side that makes this basically the perfect street camera for me. I like the form factor of this machine the most, it being very unassuming yet has exceptional image quality, makes this a wonderful little street camera. My only thing I would like better would be to have the Leica Q2 Monochrome as I love monochrome AND the low light power of that camera is phenomenal! But for now, I really want to use the CL all the time.

I say that with a bit of sarcasm, you see as as of late I have really started to embrace color photography more and more and have not shot in monochrome on my digital machines in ages. So the monochrome might not be the best solution for me, but I really like the idea of the low light powerhouse that it is. That is the real appeal for me to be honest about it.

The Leica CL adorned with the TTArtisan 17mm f1.4 APS-C manual lens.


So there you have it, a small treatise on my thoughts about the focal length and what I instinctively shoot with each one. I am odd and I know it, so this is by no means a definitive explanation about anything, but rather just an observation into what I do when I use certain lenses and what kind of gear I tend to lean towards when I go shoot.

Now get your camera out and go take a photo with it!

Industrial Landscape Photography in Jasper TN

The other day while on a business call, I had to travel through an industrial area and my eye just started picking up these images. Now I cant get them out of my head till I go shoot them.

This is the life of a photographer… once you get a composition in your head, you cant let it go till you shoot it.

It is interesting to me that I work like that. I will get fixated on a photo I want and nothing else will make me happy till I get it.

I am pretty sure that I am not alone on this either. I think it is part of the creative mindset. The photos I have in mind are of the industrial landscape that are local to my area. I saw the area in the morning light and it had this ethereal or maybe apocalyptic vibe. Like it was abandoned but was still intact and could be turned on at any moment. This is because I like those kinds of movies too, I guess.

So here is the plan, get back over there with a camera in the early morning light and shoot a bunch of stuff and then see what I got.

I found the air a little less foggy upon my return, but the morning light made it look good nonetheless so I got out and started getting images. The first stop was a plating factory that was in full operation and had a bunch of steam coming out of the factory. I had to shoot over a 6’ tall fence to get my image. It took several tries to get the one I wanted, but I finally got it.

Then I moved to work compositions around the railroad and associated infrastructure. The balance of the images are centered around this concept. I even hit pay dirt when a local switch engine showed up to move some tanker cars around!

My favorite image though has to be the image of the abandoned cattle gate. This is urban decay at its finest and I love this sort of thing for some reason. I hope this post and images inspires you to go back to something that caught your eye and get a photograph or two of it.

Until next time, get your camera out and go take a picture with it.

David - The Georgia Photographer