WK4DS Amateur Radio Blog
Search Posts
Sometimes it is nice to have a slower day
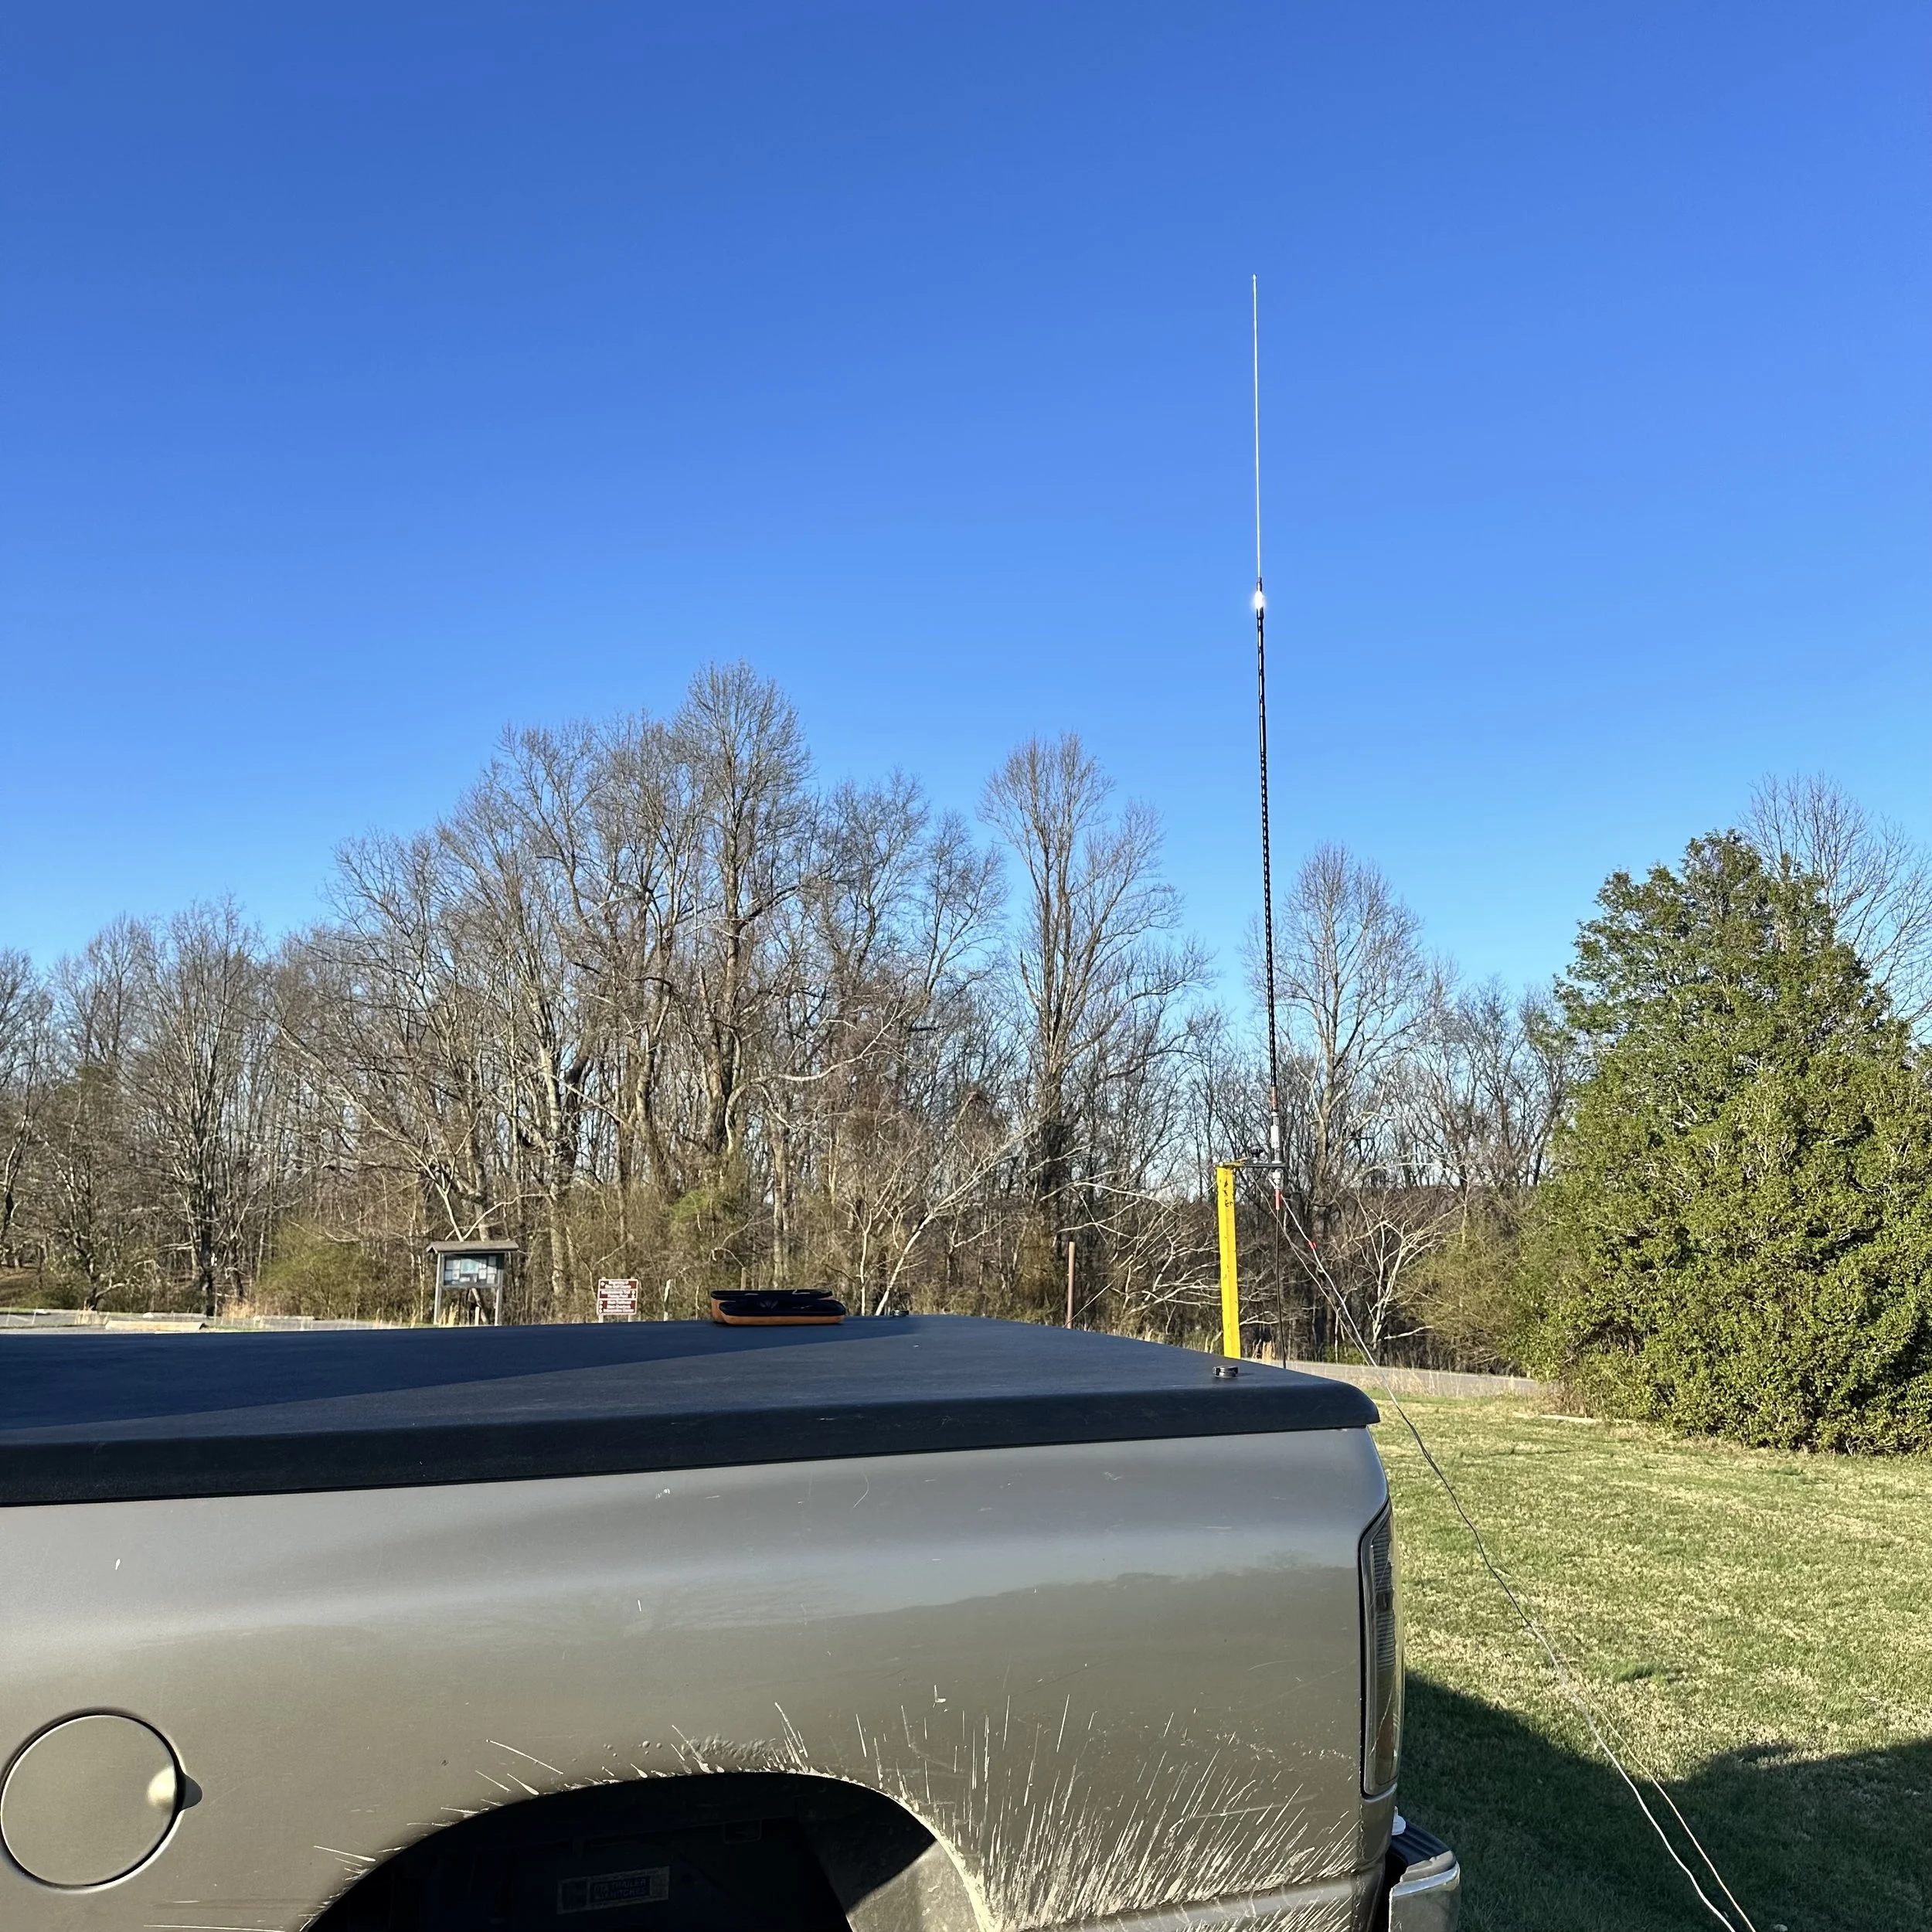
I recently setup an activation at K-2169 and had no where to be for the rest of the day… This is my kind of POTA activation!

The above photo is a little misleading, there was one other car in the lot, but due to camera angle and me wanting the truck to be in the frame as well as the parking lot it is out of view. But it was essentially empty, so it was really quiet and I didnt even see a park ranger on this day, they normally ride by once or twice while I am setup and sometimes they even stop for a chat. I have been here so much that they know what I am doing and are cool with it. I contribute this to the fact that I am in a corner of the property where there is little to no activity most of the time, I don’t consume more than one parking space with my setup, I stay out of the pavilions (I have used them in the past if they were not being used and had no placard reserving them), my setup doesn’t involve me driving stakes into the ground and I do my best to keep my footprint to a minimum. Since I use CW for the most part, I don’t make very much noise either so it is minimal impact all around. At least that is my perspective and it seems that it is also the park employees perspective as well…or they could just not care about the old codger over there with the little radios…lol.
Today saw me on the 17 meter band with Morse code and it has always been an intriguing experience. The rhythmic sound of the dots and dashes echoing over the airwaves brings a sense of nostalgia for a bygone era while honing my skills in communication and technology. Despite the advancements in digital modes, Morse code offers a unique challenge that is both rewarding and intellectually stimulating. Operating on the 17 meter band allows for reliable long-distance communication, opening up a world of possibilities to connect with fellow enthusiasts from different corners of the globe. (Check the log and you will see what I mean by waxing nostalgic) It's fascinating to see how a simple yet effective mode like Morse code continues to thrive in the modern age of ham radio.

Below is the whole station (minus the S meter I am currently building for it) for the TR-35 HF radio. I have built the “black box” of options to help complete out the radio, the box has a battery pack in it as well as a speaker for the radio since it has no speaker of it’s own and I have added a push button to activate the voltmeter so it doesn’t run constantly and drain said battery. There is also a power port on the front now to allow the connection of two accessories as well. (This is for future expansion of the kit to include one more item that I wished this radio had built into it, an S meter)…
I created the box with the cabling to connect it to the Penntek TR-35 radio and it makes a station out of it basically. Just add your favorite CW key and you are off to the races.

I really like the layout of this radio, if I could alter the design at all, it would be to add two pushbuttons to send the CW memories with, but that is nitpicking to be honest. One other thing is that I like to have an S meter for some reason, it is fine to operate without it, but I just like having it for some reason… The system works well as it is and once you use it for literally a couple of minutes, it is easy to send the memories. If you are into small CW radios, this is one to have in my opinion…

Another thing I like about this radio is the fact that all the controls are on the surface that you need when operating. I like that it has the four knobs at the bottom and i usually use all four of them in an activation! Come to think of it, I usually use EVERY control on the radio on every outing… Everything you need and nothing you don’t…except for that S meter… HaHa. Another thing I like about this radio is the size. It is so small that it fits in my hand (for the most part) and is a 4 band CW transceiver! Even though it doesn’t have an antenna tuner, this is still a huge win for me. It sold me almost immediately when I took it to the field. That was when I realized I had found the replacement for the Elecraft K1 that I had used for so many years..

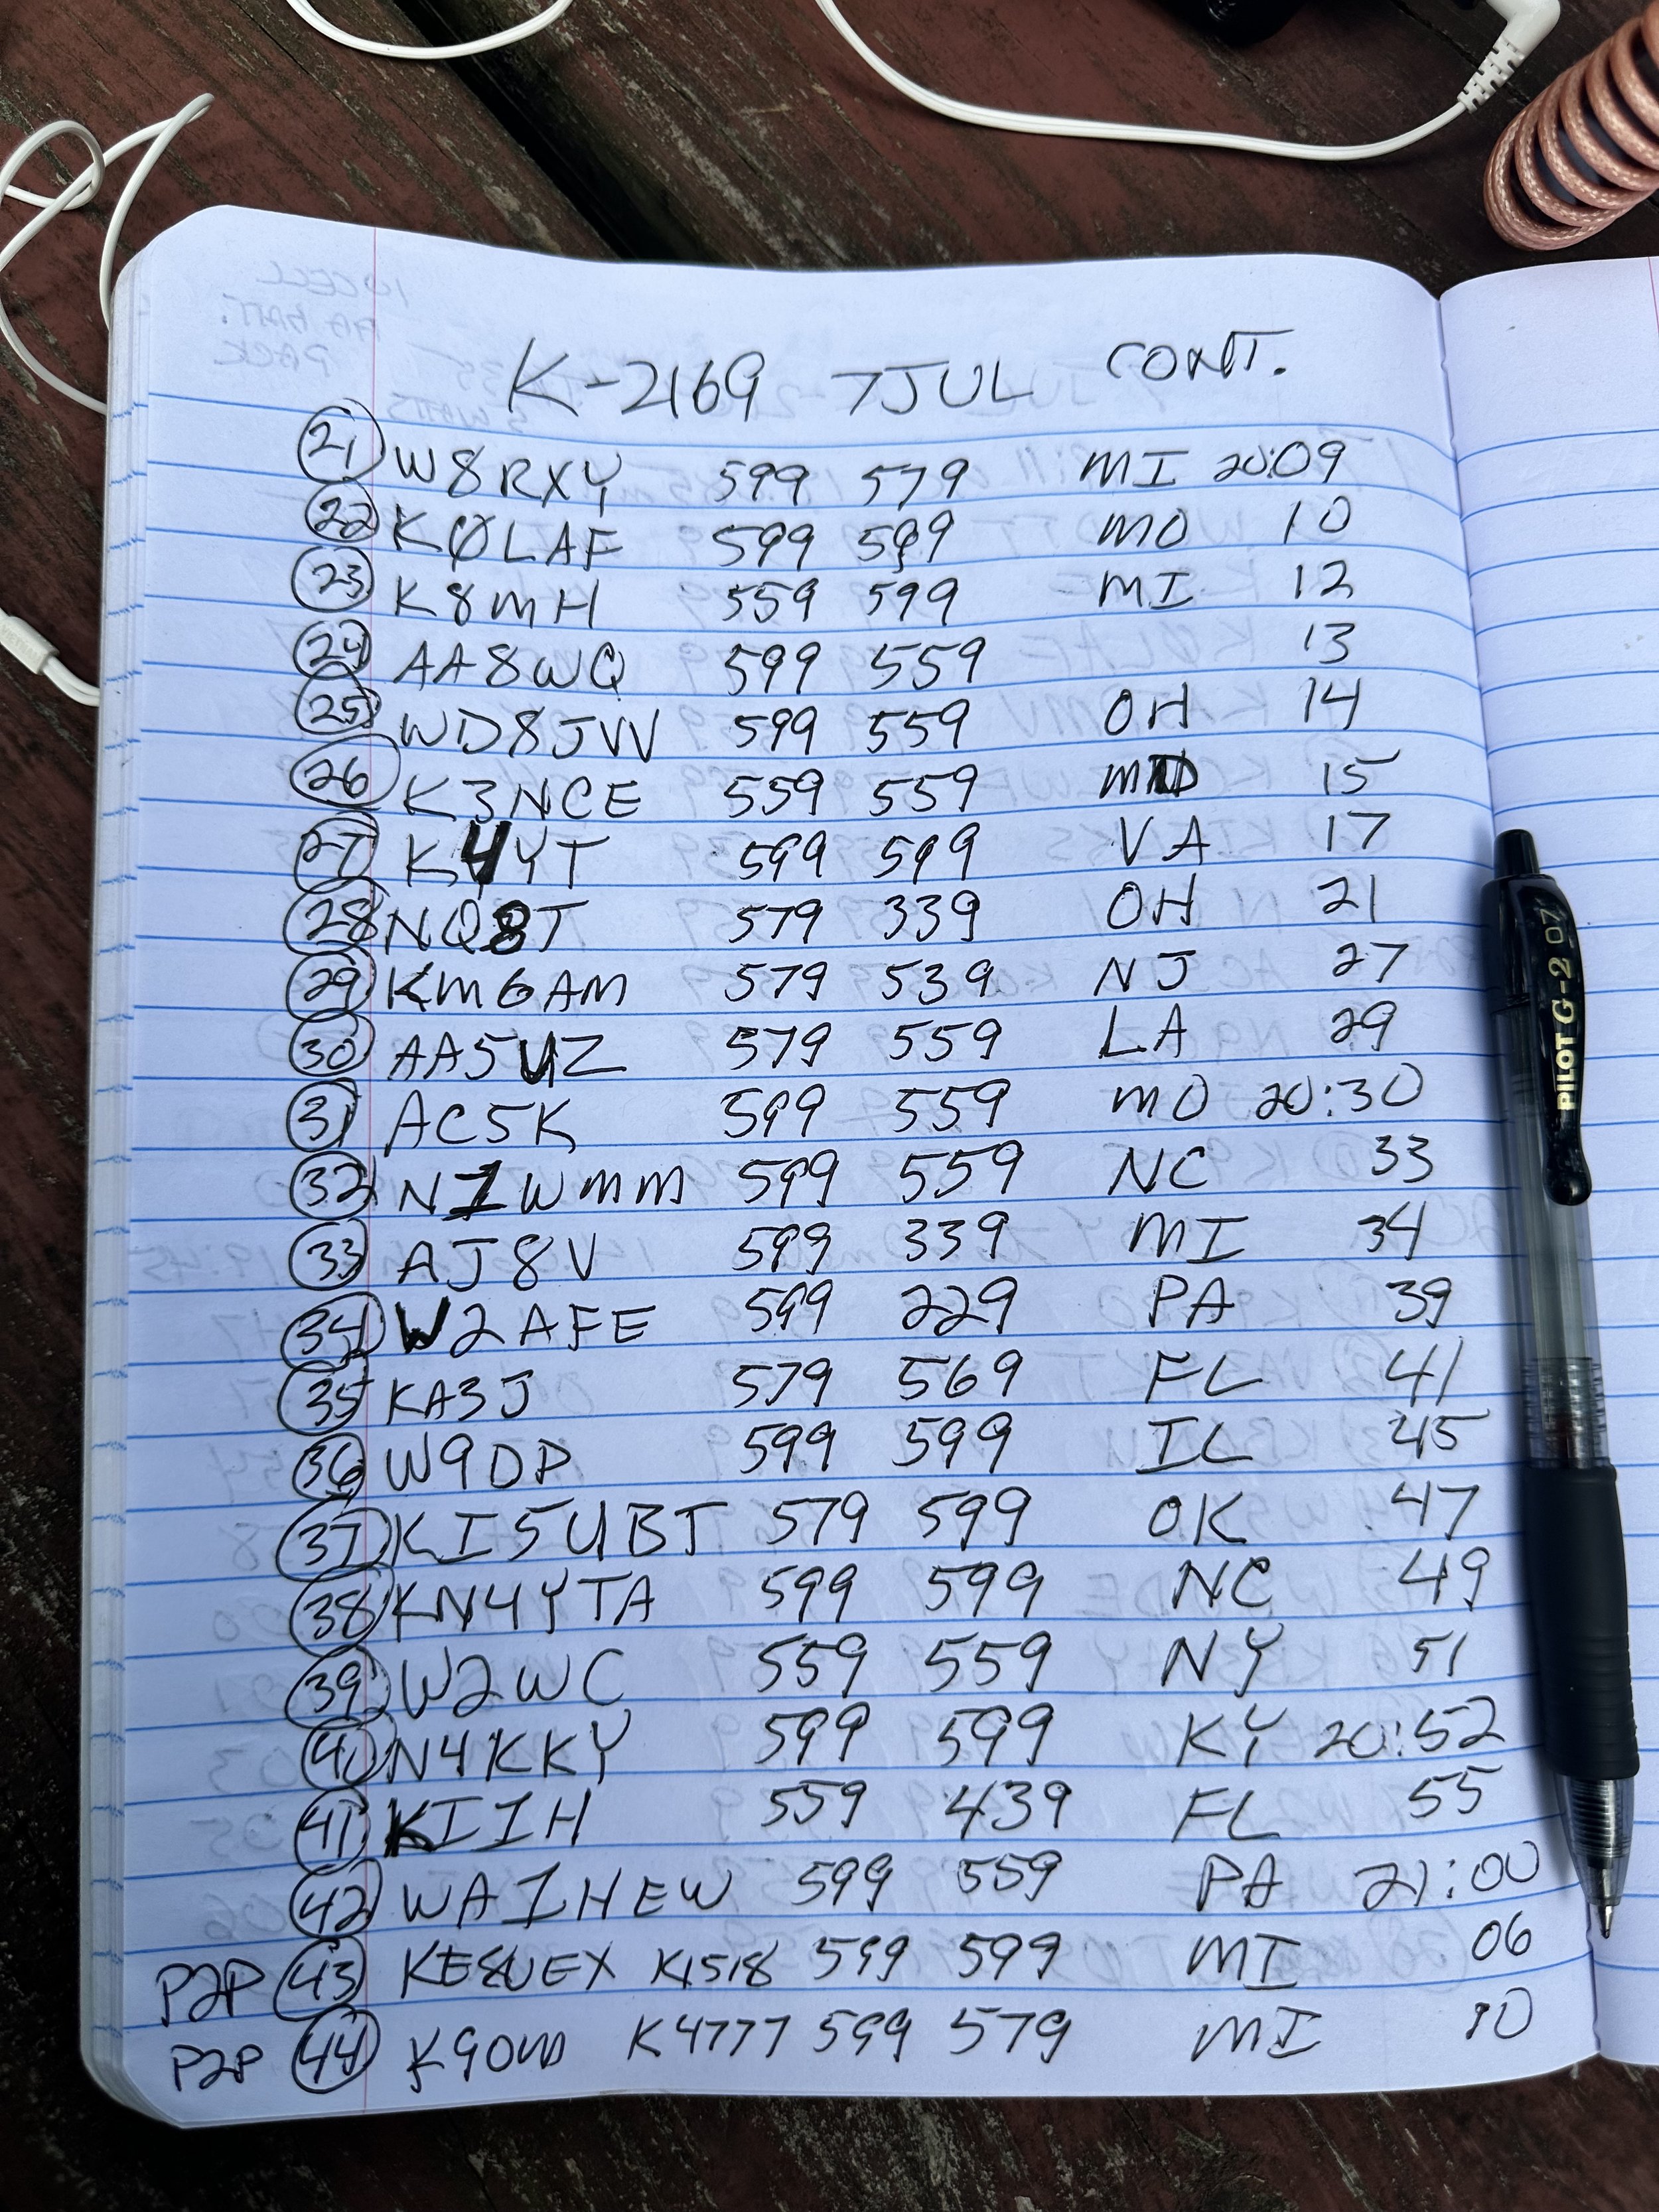
What your going to notice about today’s logbook page is that it doesn’t have very many calls in it. There is a couple of reasons for this. The first one is that the band was fading in and out pretty heavily. Just look at the time stamps on the RBN reports below and the associated the dB levels at those times, it was up and down heavily. Now I understand these stations are scattered around the country, but they are all west coast for the most part ( a feature of 17 meters is it skips over the closer states for me on my hamstick) and they show an amazing amount of variation in signal in just a few minutes of time. Once I looked at this, I realized I just needed to call and when the band would open up I would get two or three and then it would close back down, call a few minutes and get a couple more…rinse and repeat. It was still a lot of fun and I work Japan in one of the openings too!!!

Just check out that one lone DX contact from Japan! I was blown away when I heard his callsign coming into my tiny little radio. I love these kinds of days just as much as the faster paced, high QSO count days. It is just fun to setup a radio and make contact with distant stations whether in my own country or half way around the world.

Thank you for following along on my little journey to a local park, I hope it inspires you to get on the air and make contact with someone out there.
72 WK4Ds
Broke out the Penntek TR-35 for a change.
When you dont use a radio for a while it is almost like having a new radio…

This radio has quickly became on of my all time favorite radios. This tiny radio has everything you could ask for in a CW machine…EXCEPT for an internal antenna tuner…but I digress. In the past I have had the Elecraft K1 (a couple of times actually) which does have a tuner (both of mine had the tuner) but it was not as intuitive to use. That is why I sold it and got this one instead. It is a better radio in my opinion… Even missing the antenna tuner, I prefer this little radio to the K1, now this comes with some needed caveats as it is not really fair to compare these two radios directly. You see the K1 was design around 20 years ago and the TR-35 my more recently with much more modern technology and features. The stability of the TR-35 is uncanny compared to the K1 which would drift a little till it warmed up. Still the K1 was a wonderful machine for my needs and I used it to activate a POTA park on the island of Hawaii last year, so it is plenty capable.

Due to the weather improving I have moved the “shack” outside and setup on the bed cover to get some sun and fresh air, plus it is easier to work since I can spread out the gear somewhat.

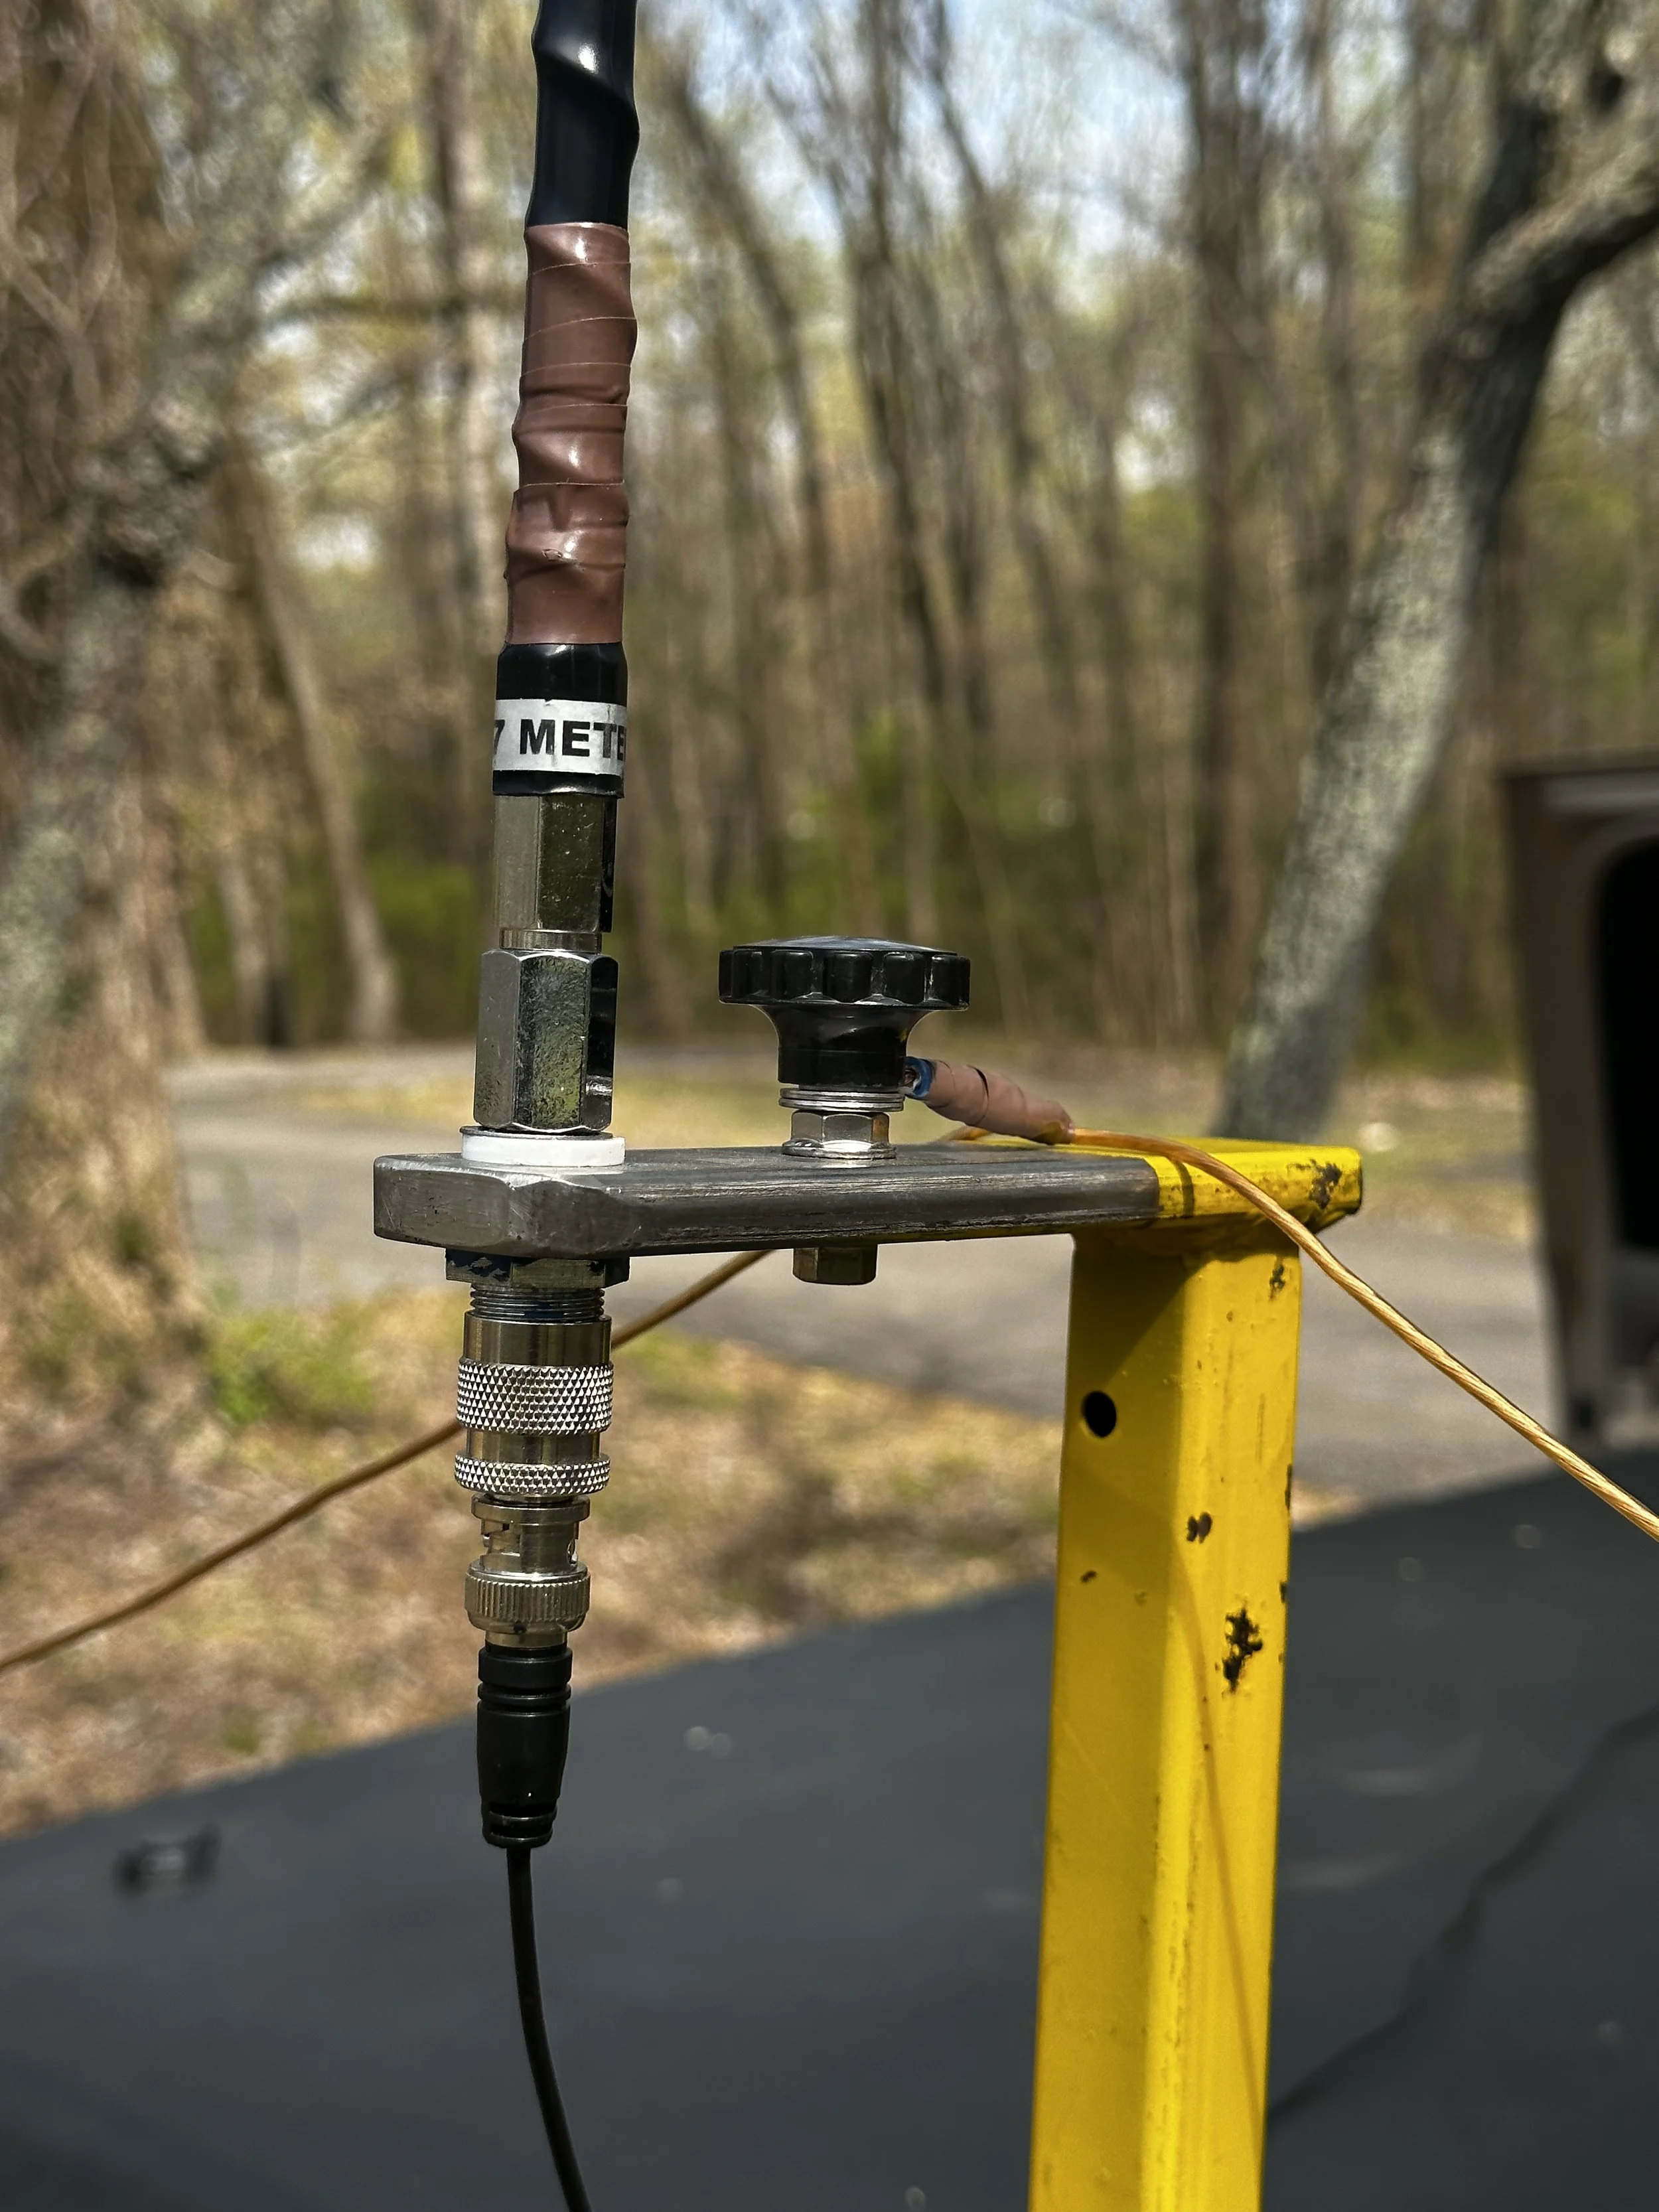
I like these hamstick antennas so much that I am thinking about making a tripod mount for them so that I can setup at a nearby picnic table and use them with an elevated counterpoise concept… I could even get them higher above the grade this way too, possibly improving performance a little.

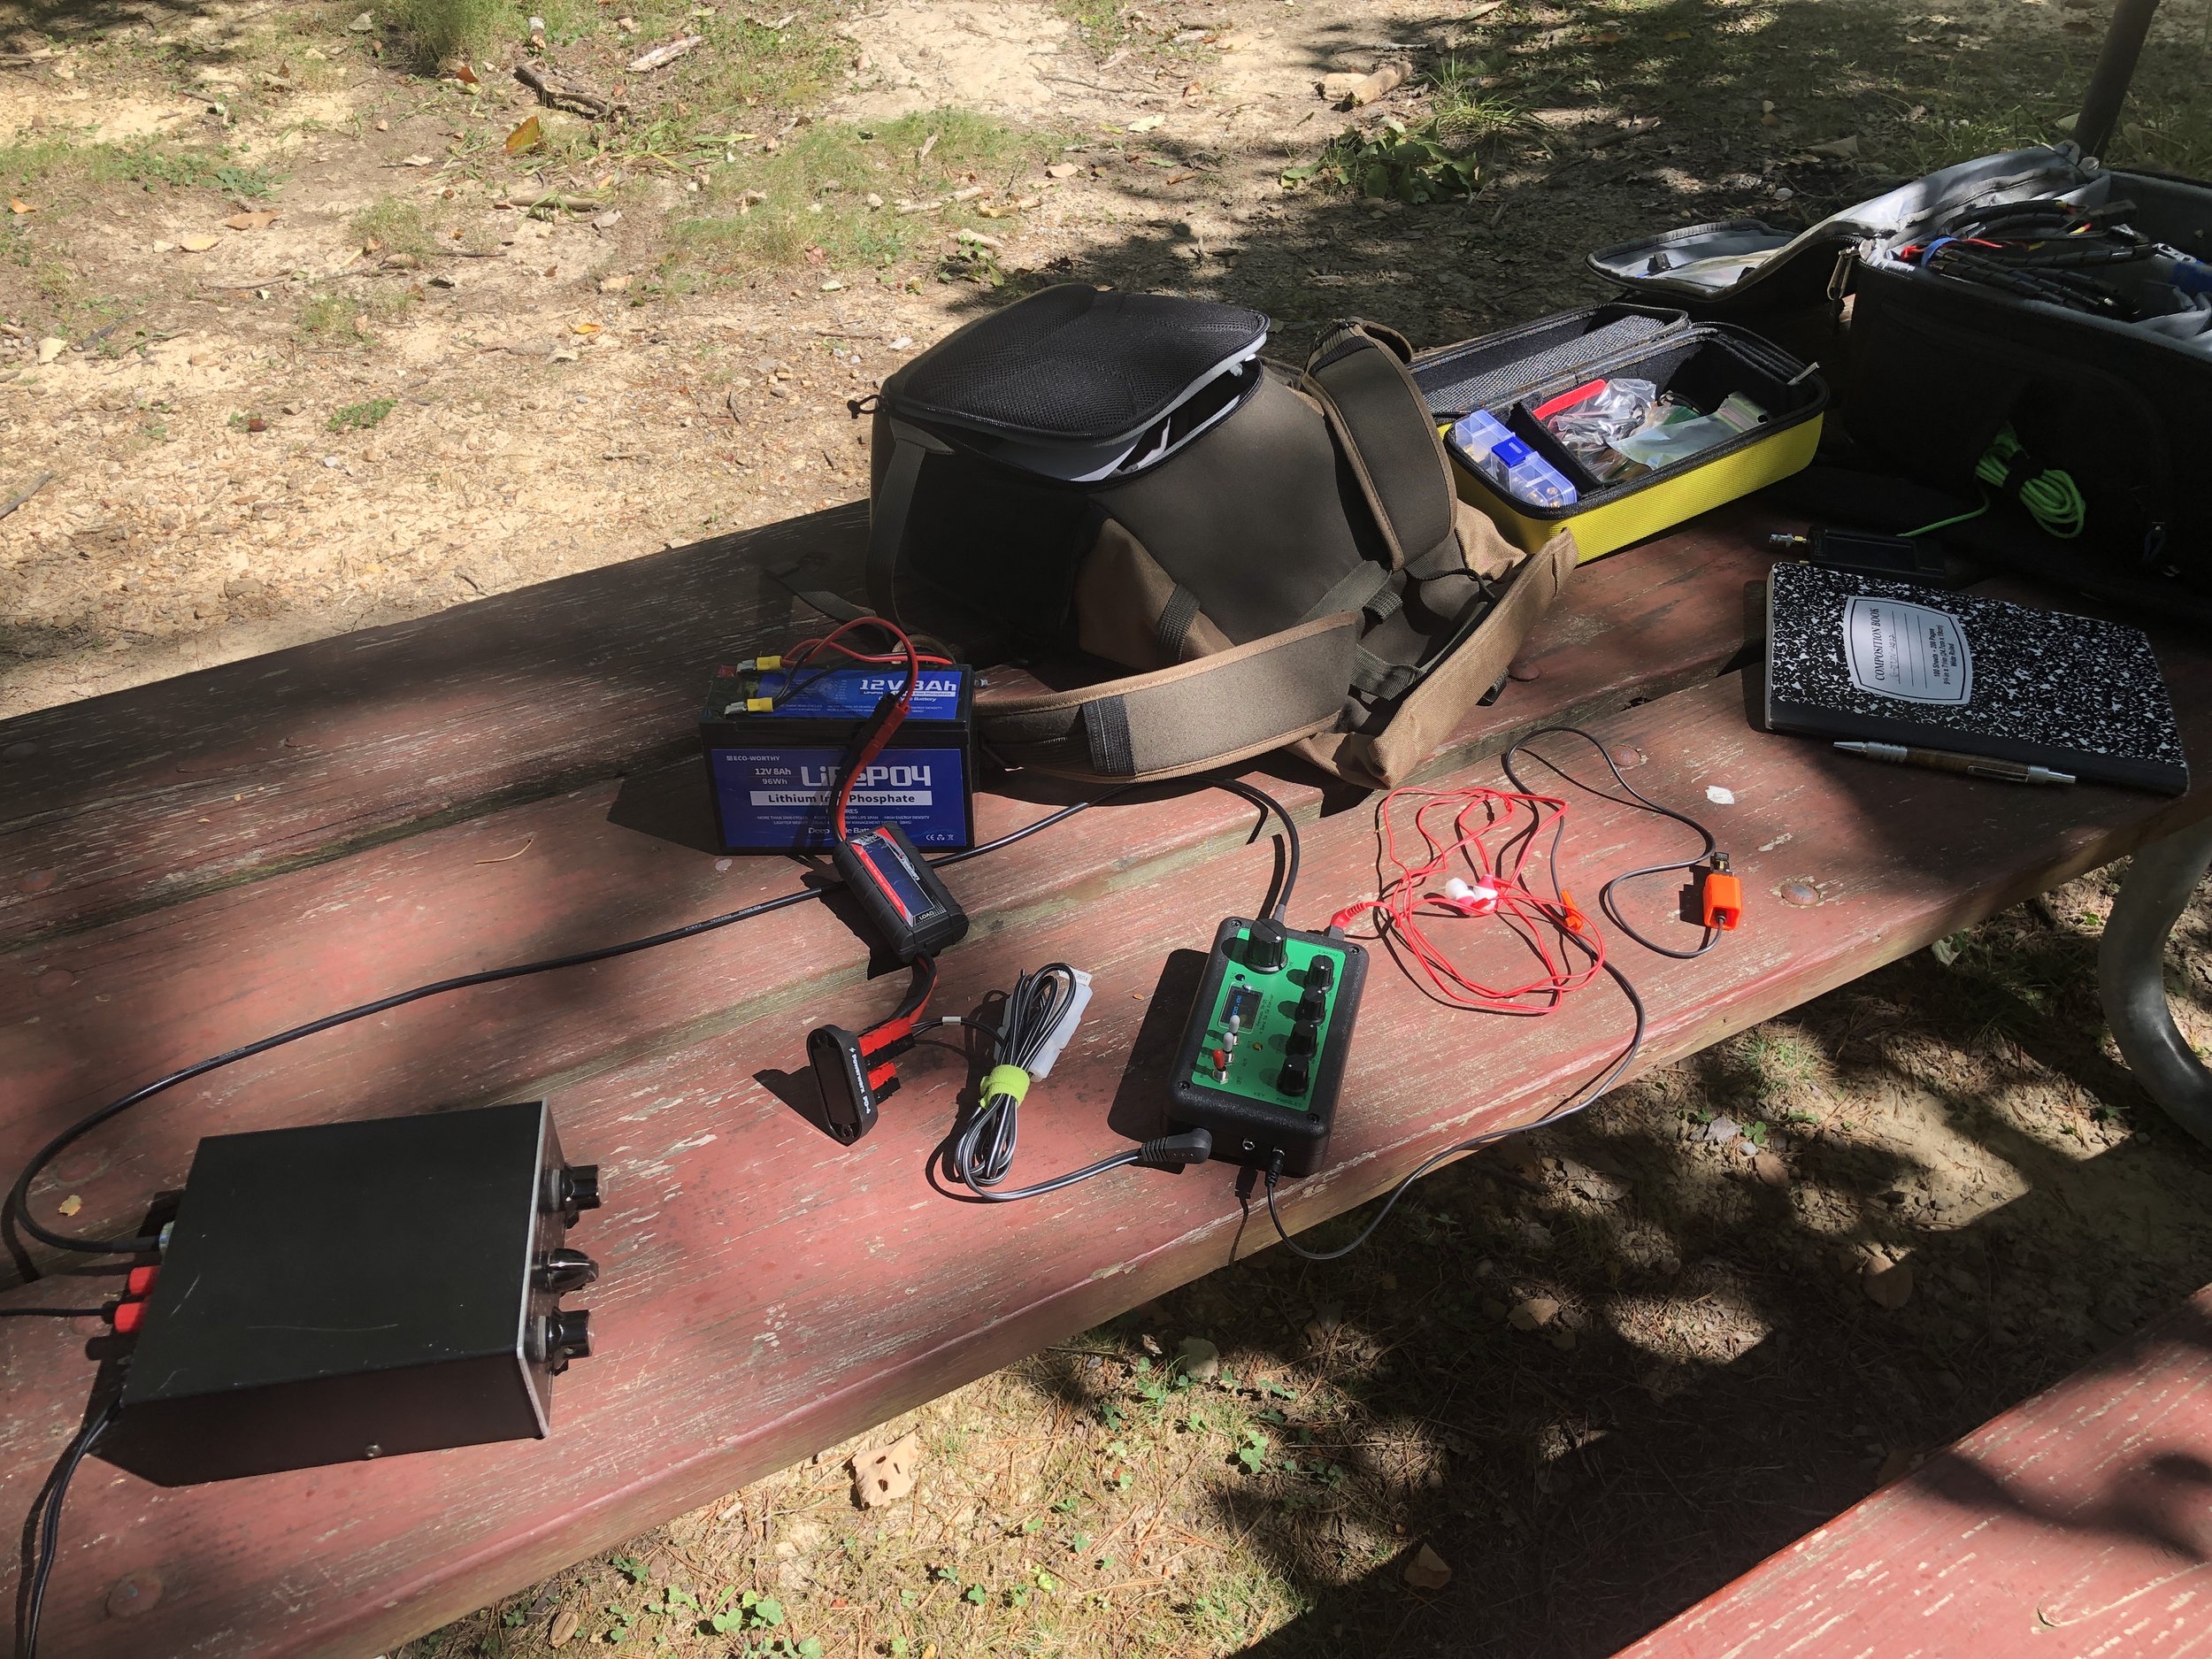
So this is the whole station today, the hamstick on 17 meters with a 15’ coax to the common mode choke. I put it on the nanoVNA and the resonant point was high, and I think it is from the fact that the 17 meter counterpoise wire have some broken off of them which makes them too short for a tuned circuit. But nonetheless the SWR measurement was plenty good enough to use, so I got on the air in short order. To try to compensate for this, I added the 20 meter radial that works so well for me now in the past on a bunch of bands. (I should probably measure this wire and make a new since it is getting frazzled) but it didn’t help very much today. I left it anyway as it did seem to help a little…

The operating position today… I really like using the bed cover for the operation position as it affords me the most user space I could possible imagine as well as it is simple. I have activated with this battery 3 or 4 times at this point and it is still over 13 volts!

The key for today is the Gemini travel key. This has turned out to be a wonderful little key and I am so happy to have bought it. It works so well.


As you can see from the log, I had a great day on 17 meters and even landed me a DX station! Jan was in the Netherlands when I started hearing his callsign! It was awesome that he could hear me too!!! There was some fading of course, but he could hear me! I made a good bit of notes about the activation in the log today where you can see things happening like when I lost a QSO outright to some one tuning up on top of me…for a long time… There is another note about the time when someone had a messed up car ignition that created some broad band noise and I couldn’t hear anything for a few minutes till they left.
The Penntek TR-35 goes QRO with the OUTCOM OPA-202 Amplifier
You have heard me mention KG4WBI a few times in this blog. He literally has what seems to be a veritable museum of vintage ham gear.

Well in today’s episode of “what oddball, ancient but yet working piece of gear is he going to pull out today” he hands me an amplifier. It is the OUTCOM OPA-202 to be exact and it has a feature we are really interested in. It doesn’t have a keying input which means it is RF sensing only. This stands to reason too as it also takes 1-10watts of RF energy and turns it into almost 175 watts on the output. At least that is what the literature says.

Here is my current test setup for gear, I have a coax stubbed out to the shack bench plus the Astron has powerpoles on the front making for an easy temporary setup location.
Made in copious quantities at what appears to be the end of the last ice age, the OUTCOM OPA-202 was a ham radio amplifier that was designed for 40 meters to 10 meters. Now your going to say, David, I know that…it says that right on the front with the 7-30mhz. I think this was done to target both the CB genre as well as the amateur radio group but I dont know for sure. What is odd is the literature below shows that it is rated for 80 meters too. Who knows what the lowest band it will work on is… I do know it works on 20 meters and 17 meters though as I tested it on both of those bands with my Penntek TR-35 transceiver.
The next thing you will notice is the selection buttons are labeled only for voice modes. This is another marketing ploy to help sell these little power houses. The buttons are actually power output selectors and depending on the combination you can theoretically get up to 175 watts out of this thing. Seen below I have it set to “SSB” mode which turns out to be semi break-in keying and 80 watts out. There are 4 levels depending on how you set the “AM” and “SSB” switches, but it also limits the amount of energy/duty cycle depending on the mode. It actually lists CW in the modes and the output and such, hence I am not running it full tilt. It also has protections built in to keep the over zealous operator from working it to death with long winded conversations. This particular unit seems to produce full break in keying if you select “AM” and semi break in with “SSB” modes. Probably due to the style of transmission coming with each of those modes. AM will produce a carrier the whole time you have the radio keyed and SSB only when you talk. To smooth out the relay action in SSB they have added a 1000 microfarad capacitor and a 470 ohm resistor to the relay keying circuit to keep it closed in just a little longer when SSB is selected so the relay wont sound like a machine gun. Another switch right beside the power switch is the pre-amp switch (REC AMP) which turns on a receiver pre-amp for weak signal work and it actually performs really well. I used it quite a bit and liked in particularly well.

So Roger wants me to … as he puts it… play with it and see how it works. This is his way of giving me something new to write about. LOL Once done, his plan is to integrate this amp into a vintage Field Day kit. This would be a neat little addition to his early Argonaut 2 that he has since it is only 5 watts output at full power.

In the flyer above, the bands go all the way to 80 meters but the unit we have doesn’t list 80 so they must have updated the specs over time for some reason.
Back to the RF sensing part, the reason we want this is it simplifies setup at field day for us. If we want to use QRP power for our ops then we can but if the bands just aint cooperating then we can easily add some power and get things moving. Our goal has always been to see if we can get on the air with QRP first and most years we are successful but occasionally we are not. So this allows us that leeway to be able to add output power as needed easily and with literally any radio we connect to it. We like this design so much that we are going to hijack the RF sensing circuit and see if we can copy it for another little amplifier he has that doesn’t have current sensing. We think it should be a simple thing to build a little project box that goes between the radio and amp that has both coax ports, a 12v power cable and a simple keying cable coming out to connect to the keying input on the amplifier. We even considered using the little 4 pin Amphenol plug so it will look “official” when we build it…hi hi.

Things of note about this amplifier, it has no fan, so it is static cooling only with the enormous heat sink that is attached. Don’t forget you have this monster of a heat sink when you install it in your car too as it will be on the bottom and I am pretty sure it needs ALOT of air to be able to keep it cool enough at full power. Another thing is the meter on this unit is frosted over, but no worries as when you key the radio, a light comes on behind it and lights it up just enough to be able to read the milliamperes DC that are flowing…somewhere…lol. Actually, from what I gather, the meters in these amplifiers were terrible and replacement was pretty common so apparently someone replaced this one and didn’t switch out the backplane so the meter would read right. It is supposed to be some sort of SWR meter from what I can gather by reading the manual.

Lastly, someone has replaced the power cable with new wire…and left the bulkhead connector off so I will add one back if I can find one before returning it to Trey. At least it is fused on both the +13.8 as well as the ground lead. That is nice when the insulation breaks down at the sheet metal and decides to short one of the wire.

Anyway, all that said, his museum piece actually works as I made several CW contacts with it using my Penntek TR-35 QRP transceiver. The little radio has plenty of drive for the OUTCOM OPA-202 so I was easily able to get 80 watts without issue and this was plenty to work one ragchew QSO as well as several POTA contacts. The system looks a little messy on the bench but will quickly clean up now that I have proven it works. So until next time, 72…errrr…73
de WK4DS
Testing a new power pack for backpacking…
This is the idea… I think I want to do some SOTA activations after listening to K4SWL talk about them on his YouTube channel. So this means that I need a smallish radio setup to be able to do these kinds of activations. I have to be able to pack them in and out from the SUMMIT, yeah, the very tip top of a mountain…

Today’s blog post covers the idea I have for a power source. I am going to use AA batteries. I know I can buy a Bioenno battery, but this gives me the options of picking up regular alkaline batteries if need be (I plan to make a couple of aluminum dummy cells for this option so the voltage wont be too high). It also allows me to repurpose the cells for my HT radios too as I have them configured to used these batteries as well. I found these 10 cell battery holders on Amazon and ordered one to try it out. Since it hold 10 cells, the voltage is higher and gets closer to the regular battery voltage everyone uses. The cells are 1.3 VDC when charged so this adds up to just over 13 volts in this kit. I measured the pack today before the activation at 13.2VDC…Perfect for what I wanted. So I load up the new battery pack and head over to K-2169 to test out the power pack life with a POTA activation.

The above photo is an optical illusion that has to do with the shutter speed of me camera and the refresh rate of the display on the radio, to the naked eye it was not gapped like this but looked fine. This little radio is a perfect little radio for SOTA so I am going to use it for that purpose.

Here is the basic radio kit as I plan to deploy it. The headphones are smaller and lighter than my box speaker/battery pack I made. I can also hear better on headphones too so it just made sense to use these instead. These are Sony headphones if I remember right, but I could be wrong. I will also be using my little travel key I bought as it is perfect for this project…till I get the new one that I plan on in the not-to-distant future.

I also plan to use a 40m EFHW antenna for my activations and just work 40m and 20m bands with it. This is the simplest antenna setup I can come up with as it doesn’t require a tuner and is pretty small for what it can do. I might get one of the compact verticals at some point, but for now that will have to do. I will also take a piece of throw line and a throw weight as well to get the antenna into the air. I will also add a piece of coax as this is the counterpoise in most cases. Otherwise I will need a coax AND a counterpoise… so I will eliminate the counterpoise and just work off the coax shield instead. Above is the tuner I used today as it was still in the truck from the last activation and I know how good it works.

This is the beauty of using campgrounds to activate, there are plenty of tie off points for your antenna system. LOL

After working almost 50 contacts over about 2 hours with almost all of it either making a contact or sending CQs meaning there was significant battery draw over these two hours, the battery voltage had only dropped from 13.2 to 12.82VDC. A little less than .4VDC or about 3% of the pack voltage overall. That is great as this tells me that almost any hike-to activation will have plenty of power to make contacts. I dont think I will be doing SOTA where I will have more than two or three hours on the summit for radio as there is the hike to and fro that has to be factored in as well. I call this part a success.

Pro-tip to the new hams just getting going. Grab a cheapo little volt meter for a field meter. This one was only a few dollars and worked perfectly. This technology has gotten very affordable and can be a priceless tool when you need to check the continuity of a piece of coax or to see if the battery pack has voltage on it like here. It has come in handy quite a few times now and stays in my POTA kit all the time. Until next time…72
Today is the day I went roving in POTA parks.
The rover award is when you activate at least 5 parks in one UTC day.

My final location of the day, Booker T Washington State Park K-2933 and it worked wonderfully!
I have been interested in this whole “rover” thing for a while now. So I finally dug into the rules so I would know what is required and laid out a plan. I found 5 parks that I could access easily and set out a route to them and just loaded down the truck with gear in anticipation of needing backup stuff. I didnt need it, but I had it. Like what you see here is three radios. The TR-35 (which is what I used for most of the day), the Icom IC-705, and the Elecraft K1 makes for a strong QRP expedition.

Anyway, so I figure I would start with my local park since I know where the parking lot is and the proximity to the main road is really good. I chose the Sitton Gulch parking lot at the bottom of the mountain because of the main road noted above and the fact that I have had great luck here in the past.

I got the activation, plus a few more contacts than I needed, in about 20 minutes of air time. Not a bad start! Well, I got excited once I cleared the pileup and had the activation in the bag and completely forgot to get a photo of the truck here. I realized it at the next park… If you want to know what that looks like, just read this blog post K-2169 POTA Activation at the very foot of a MOUNTAIN - AAR. It has a few photos of this parking area and I was in that lot.
I wanted to make sure I had enough time to activate each of the five parks AND not leave people calling if at all possible. Since I am using QRP power, this should not be a problem though and I normally dont get more than four or five calling me at once with two being the norm for me. Basically, pile ups are small for me. So I wanted to shave time off of the other parts to leave more time for “ON AIR” activities. Below is a quick photo of the cab of the truck showing how I left the gear when changing parks.

I just left the TR-35 connected and laid it on the dash to where it would not slide off and broke down the antenna by just removing the hamstick and disconnecting the coax. Then I put the yellow mount with the radials still attached in the truck bed ever so carefully and rolled the coax into the back seat and I was off. This made park changes really fast since I was sticking with 20 meters for this trip as I had good confidence that I could get the activations with just that band pretty quickly.

The next stop was the Zahnd WMA, which to be honest, I had never heard of till I started looking at doing a Rover. It is literally next to the road so it was in and out with a cleared little pileup and on I went. Below is what the parking area at the WMA looks like, it is actually really nice for a WMA parking lot. I had the place to myself since nothing is in season right now. Something else of note is that when I was working the early parks, I would cross 10 QSOs and then once I worked all the callers, I would go QRT and move, but once I got K-0716 activated I started getting comfortable with achieving the goal and would call CQ longer. For now though, as you can see below, 10 contacts (and just a few more) and I was off to the next location.


So the next location was about 10 miles down the road. I have activated Otting WMA before so I knew what to expect when I got here. The parking are is also right by the highway (which is why I chose this route to be honest) so access time is minimal.


You will notice I back into the parking location as much as possible to get the antenna out of the way so people and pets do not wander into it while I am transmitting.

Deploying the system involves, backing into a location to get my antenna out of the way and then opening the bed cover, installing the yellow antenna mount, laying the two radials out, then screwing in the radiator. Next I open the rear truck door, grab the coax and plug it into the antenna mount. A couple minutes arranging the cab, while listening to the band for an opening then I spot myself on the website and were off to the races. Below is the info kiosk at Otting, all these WMAs seem to have one now which is nice so I can see if there is a managed hunt or what.

Something else I like about the rover idea is there is a lot of driving in the country here. I passed through the town of Menlo GA between parks 3&4 and stopped to grab a couple of photographs. Some with my camera and some with my phone. Small town America is cool…

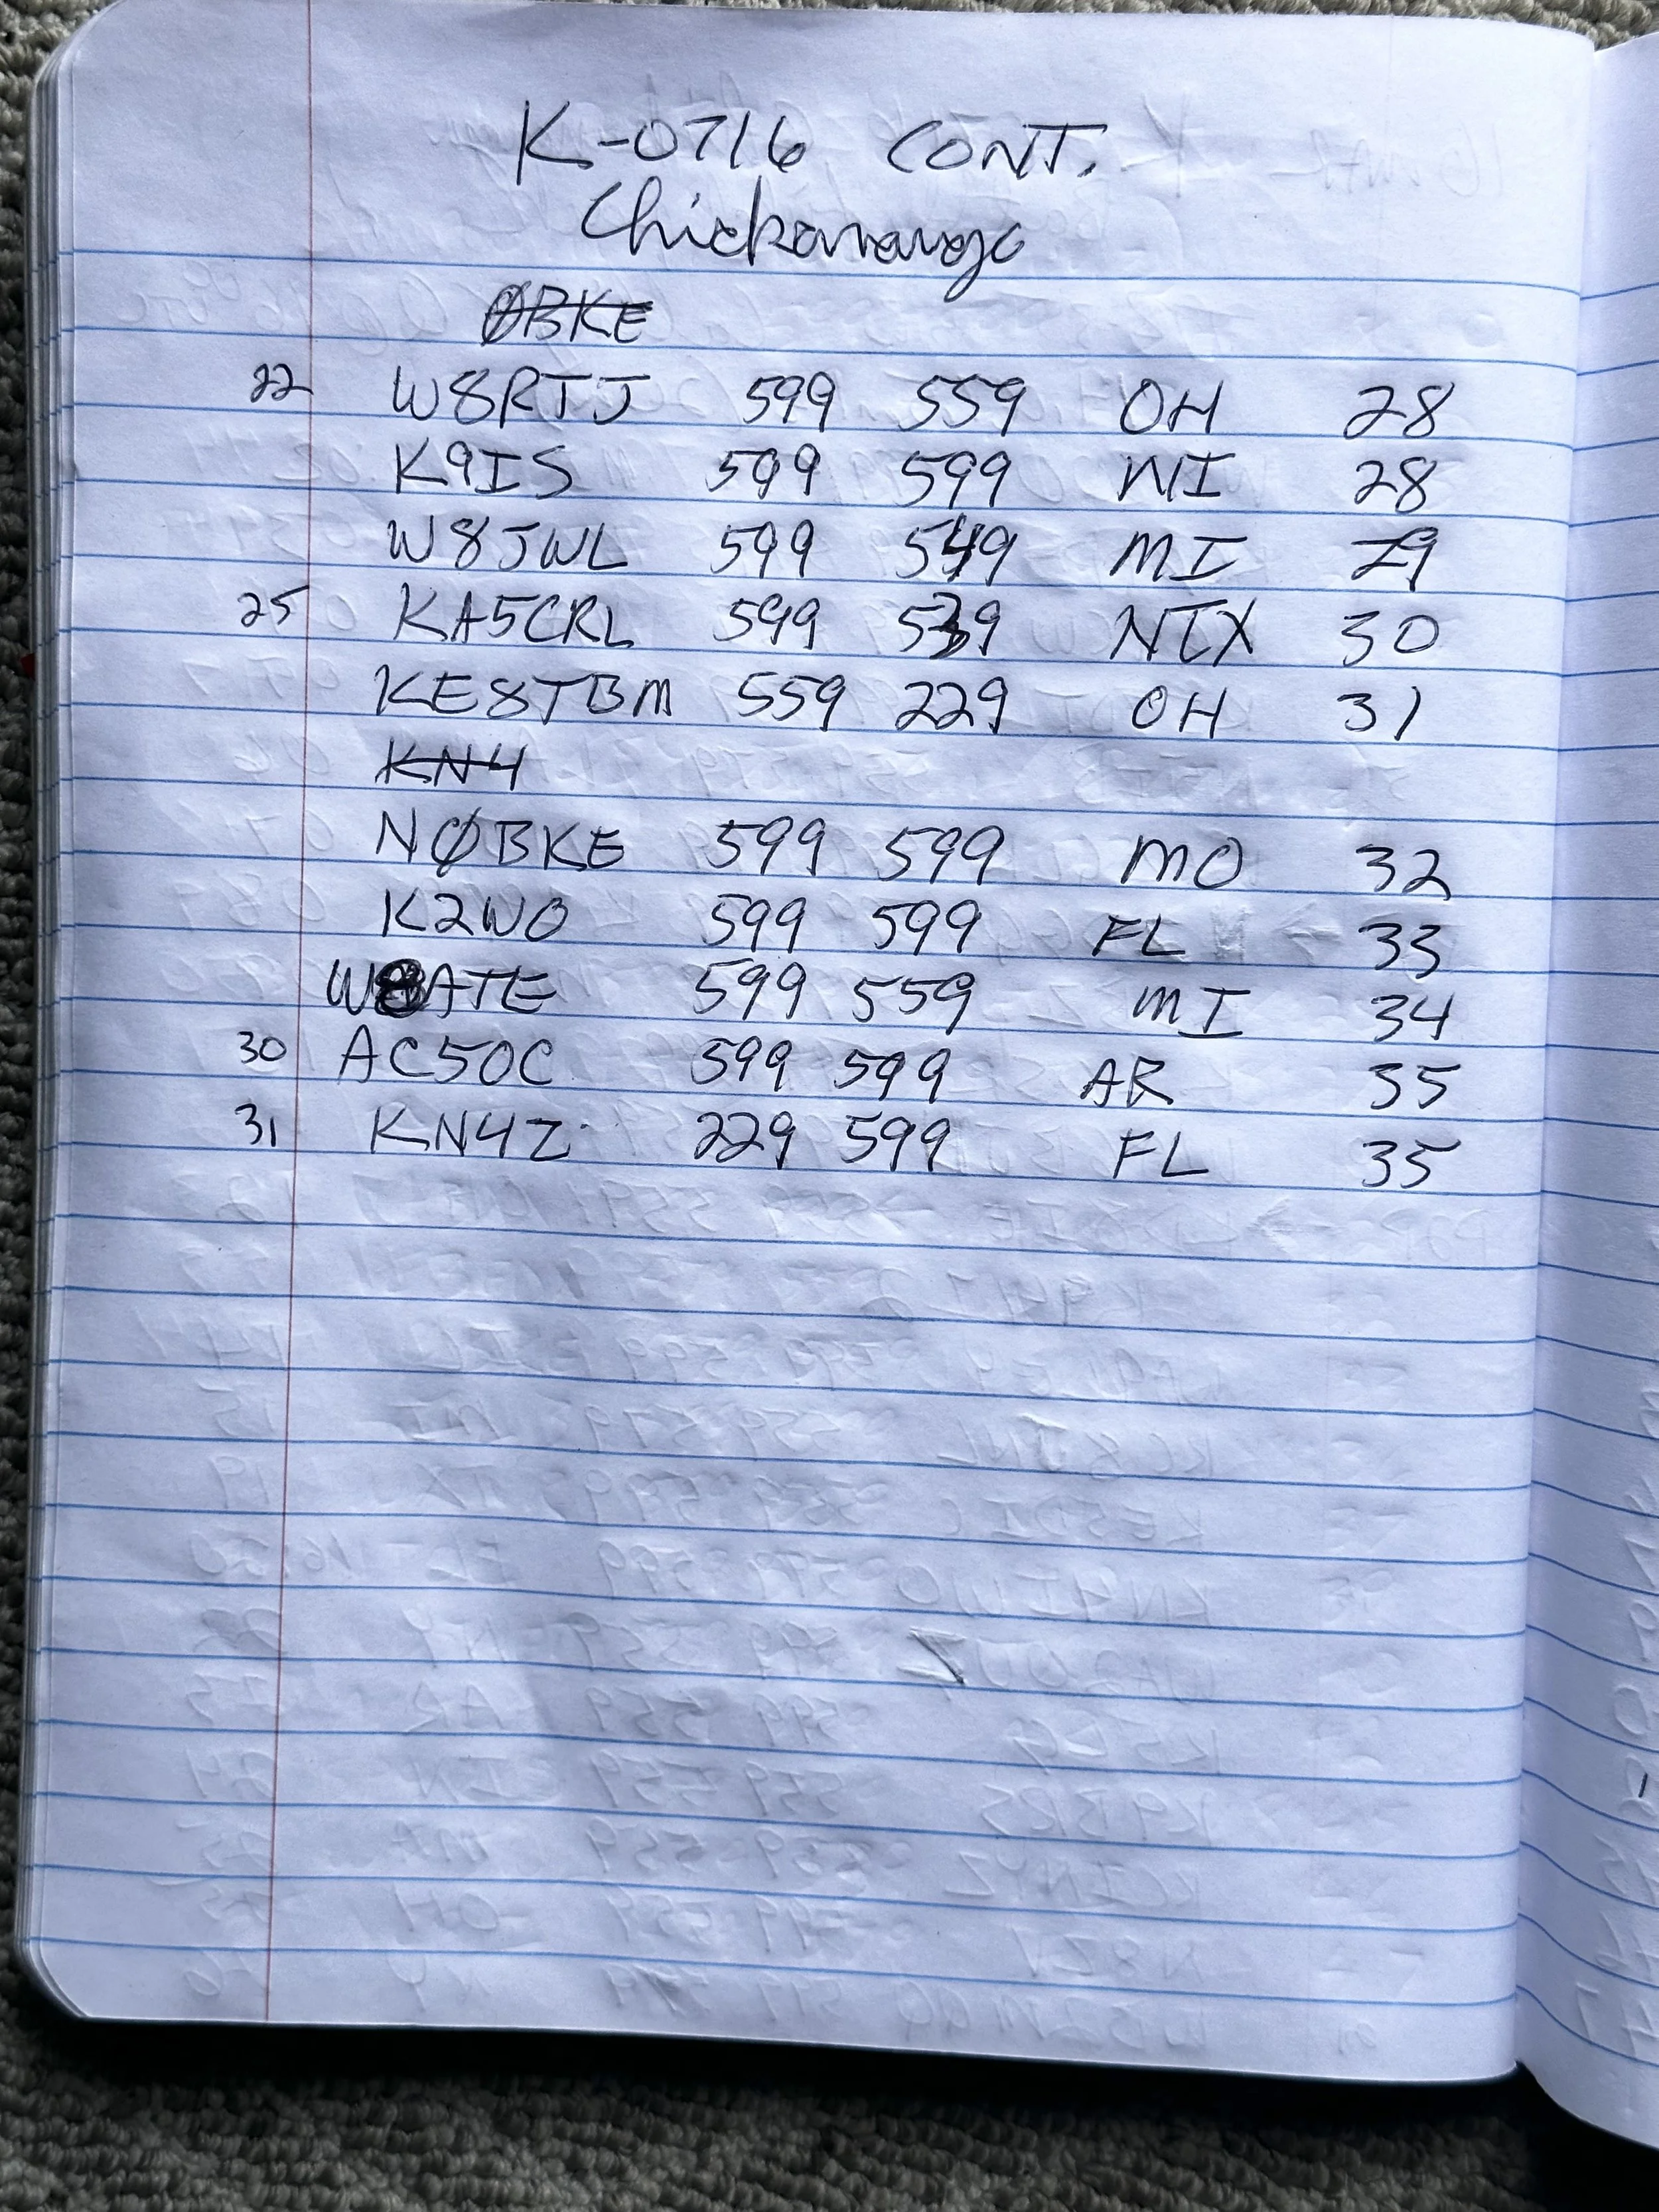
So for my next stop, I went to the Chickamauga national military Park, which is K-0716 and set up in the parking lot of what is known as the “tower” by the locals. It is actually known as Wilder tower and is a really common attraction in the park.

I backed into the space, even though they are angled in such a way as to promote pulling into them so this took a minute, but that allowed me to spread my radials in the grass strip between the parking space and the road. I have found that getting the radials out of the way of other people so they don’t trip over them is critical and backing into the parking spaces normally allows this. Another thing of note is do not transmit when there are people that can touch the radials as even at QRP power levels, there is enough RF energy on the radials to shock someone ever so slightly so the smart thing to do is not transmit while people are around your antenna. I had to be very mindful of the other people in the park while I did this particular activation, as I did not set up in my usual spot where there are very few people. In hindsight, I should have just used the usual spot as it is out of the way, and most people do not ever bother going there. Another thing to note is that by this point in the trip, I had gotten good at setting up and breaking down the antenna and radio to move to the next park. I knew exactly what I needed to do to get the radio in a position to where I could just set it out of the way and move to the next location without having to do a bunch of unnecessary, connecting and reconnecting of wires.

Once I got to this park, I realized how much time I still had and I decided to work contacts for a little longer here. I still continued to use 20 meters only because I did not want to get too comfortable with band changes and getting out additional equipment until I got to the fifth park. This park was actually fairly busy with people coming to see the tower, jogging and walking their dogs. Seeing this helped me to decide to keep the extra gear put away as well and figured I would play with the other bands once I got to the last park. I also knew the area at the last park pretty well and knew I would not have to worry about kids and pets getting into my antenna there.

As you can see though, I had a good run of a little pileup and it took me about 35 minutes to clear it. Once it was clear and I took a call from Teresa to sort out some shop problems, I was off to the last park of the day, K-2933. This has been one of my easy parks that if I am in the north east portion of Chattanooga that I can get to and have a nice quiet activation. so I go by there every month or so. I will probably get my repeat offender award for it at some point this summer.

Here is the storage tube I put together out of 2” PVC pipe to keep my growing ham-stick collection from getting damaged when not in use. It was cheap and I didn’t even glue it together, just friction. It fits diagonally in the truck bed with almost not play so it doesn’t roll around at all. Currently I only have 4 ham-sticks in it so I have plenty of room. You can also see the spare radials for the other bands I used here today laying on the ground for band changes. Like a genius, I tuned each band with out the radials for the other bands on the base and to prevent me from having any sort of problems arising from tuned stuff in the area, I just used them like I tuned them. Of course this worked beautifully well, but it did add a little more work. I am going to make the antenna mount to where I can install four ham-sticks at once and since they have such great out of band rejections, the RF for each band should find the right antenna without having to change them out. I just need to put the whole thing together and tune it first.

Mu impromptu sunshade for the Icom IC-705 worked really well.
Another surprise for this trip was that I pressed the Icom IC-705 into service as I have not used it in a while and wanted to play with it some today. I had also brought the Elecraft K1, but just as backup incase the other two radios failed on me…lol. The IC-705 is touch screen technology so it is easy to do all sorts of things like band changes and sending from memory when calling CQ. Plus it has a built in speaker which is nice when there isn’t a lot of noise in the area. Headphones are great when I am alone, but it is hard to explain to a passerby what I am doing if they can not hear the radio too. This is one of the only oughts I have with the Penntek TR-35. It has no internal speaker…
Here is your free tip of the day, most of you probably already know this, but some of you may not. Use colored phasing tape to color code your antenna and matching radials so you know which radials go with each ham-stick or what ever antenna you decide to use. This makes putting the right kit together a simple task instead of frustrating when the SWR is acting strange because you used the wrong radials with the vertical that you have on the mount.
Now as you can see below, I started on 30 meters. I ran into a problem here though, there was some sort of broadband QRM that was spaced in intervals across the whole band space. I finally found that 10.116mhz was fairly quiet and started calling. I got 4 answers before giving up to the QRM and moving to 20 meters where I had a great time free of this pesky QRM that was down on 30 meters. After a solid run of 18 contacts on 20 meters I figured I would give 17 meters a shot before calling it a day. I had somewhere I needed to be later so I had to pack it up by 19:00 UTC. Anyway, I do the band change to 17 meters and start calling. You can see in the log that it took me about 5 minutes to do the band change and get back on the air. This is why I laid all the stuff out like I did. I wanted to make it easy to do till I can get the multi antenna system done. Well I netted another 18 QSOs on 17 before having to go QRT for the day. Total for this park FOURTY in 1 hour and 20 minutes (80 minutes). I could have probably gotten more if I had not messed with the WARC bands and just stuck to 20 meters as it was going crazy. BUT where is the fun in that? I had the activation so why not play on the other bands a little since I have the stuff?


If you see your call in the log and want to swap QSL cards, I only do paper cards and I will respond to all that I get. This was a load of fun and I think next time I will take a helper to help with logging and band changes and stuff, I went solo today and it was … quiet… at times. This makes for a great times if you don’t mind the solitude, but for some it might be a problem. I was busy all day so it didn’t bother me in the slightest. Just be aware of that.
So till next time, get your radio out!!!
72
David WK4DS
Some days are better than expected in spite of band conditions.
Well today the work was grueling and about 3PM, the wife gave me clearance to go do an activation over at K-2169 Cloudland Canyon State Park. So come 4PM I grabbed the log book out of the house and jumped into the truck for a quick activation.

Upon arrival, I was all by myself in the upper parking lot. Wonderful as I can choose any spot I want to keep the sun out of my eyes and back the truck up next to the grass for my counter poise wires. So I deploy the “truck-tenna” as quickly as I can and get in the cab to plug in the TR-35. I got the cab nice and warm with the heater while setting up the antenna and then shut down the truck to keep the noise to a minimum while I activate. I really like my “trick” of having a quiet and warm winter time location for POTA. So for the winter this is how I will roll… lol literally.

The solar data says it wont be a great day for POTA…
So once I got setup, I dialed around on 20 meters a little to scope out the band conditions a little before I started, but it was opened up pretty strong when I dialed through the band. So I went up to the QRP area and found a nice quiet spot, listened for a few minutes while I wrote up my logbook with the usual data for my activation and then made a fatal mistake…I sent a CQ from the keyer memory while I started to log into the POTA website so I could spot myself, but before I could get it open on my iPhone I got an answer! So things are hopping now! LOL I log him then immediately get another call, and this went on for a couple of minutes. So I finally get a chance to spot myself so I can be found on the bands…. waa waa waaaaaa… (The joke is on me here, as I think I could have easily gotten the activation by just calling cq today as good as things were going) But once the spot went up, Dear Lord the gates were opened up! I had a mini-pile up the rest of the time I was able to operate, I literally cleared the pile 1 hour later and went QRT so I could go home.

You can tell if I am in a hurry or not by how I write the time next to the QSO, if I have time, I will write the proper time signature, if not then it is just enough data to log it for me.
Some things I took away from this activation are that a 20m hamstick is not able to hear inside about 500 miles, give or take… Just take a look at the map and it is painfully obvious. But yeah, it works WONDERFULLY outside of that zone! My best QSO tonight was to Oregon with WA7RAR using 5 watts at 2064 miles, not quite the 1000 miles per watt that people want, but it was still a good QSO for me! I still have not bought the other hamsticks yet, I am going to be ordering them soon though so we can play with different bands too.

I did have a few minutes where a spammer tried to shut me down, I didn’t even catch it until I copied the call twice and realized they were just pulling my chain sending random letters with just dits… Then they moved on and I went back to filling up the logbook. Also of note is that I learned TODAY that I could add the “stroke” and special designator in HAMRS and it would take it without killing the call sign! I entered my first mobile contact in my log today. I have logged a couple in the past but didn’t know I could enter the mobile designator in HAMRS… Sorry about that to the few ops that I have not given that info to on my logs.

So for future reference, don’t let the solar data tell you that you cant make a contact when things look bad online. Just give it a shot and throw out a CQ and see what happens. So until next time, just get on the air and have some fun!
72
WK4DS
David
The Penntek TR-35 activates POTA K-2169 gloriously!

Click on the image to goto the WA3RNC website to get your very own TR-35 in either kit or factory built versions.
Today started off like most others with some time at work in the morning and then I had a few hours around lunch to do an activation. In addition to the usual activities, I have been using a variety of radios lately to see what I like about each one. Since I had activated most recently with the IC705 (by far my most favorite POTA machine) and so I wanted to use a different radio. I have been using the TR-35 lately in the shack, but wanted more field time with it to see how easy it would be to work with.

33’ wire radiator and two 10’ counterpoises bundles for storage. I love these velcro tie back straps.
So on this outing, I used a 33’ wire “vertical” antenna that I pulled into the tree with my throwline. Once the vertical was up, I laid out both of my counter poise wires (I think they are 10’ each) and for good measure I spaced them into a v pattern for kicks… On my next trip out I plan to see if putting them at 90 degrees to the radiator and 180 degrees from each other helps, it probably does and I have been paying the price all along with my silly V setup I have been using… lol…anyway…

This is a great antenna tuner and still happens to be in production! The new version is a little more streamlined but it is the same internally as this older one.

Back of the antenna tuner is just as busy as the front!
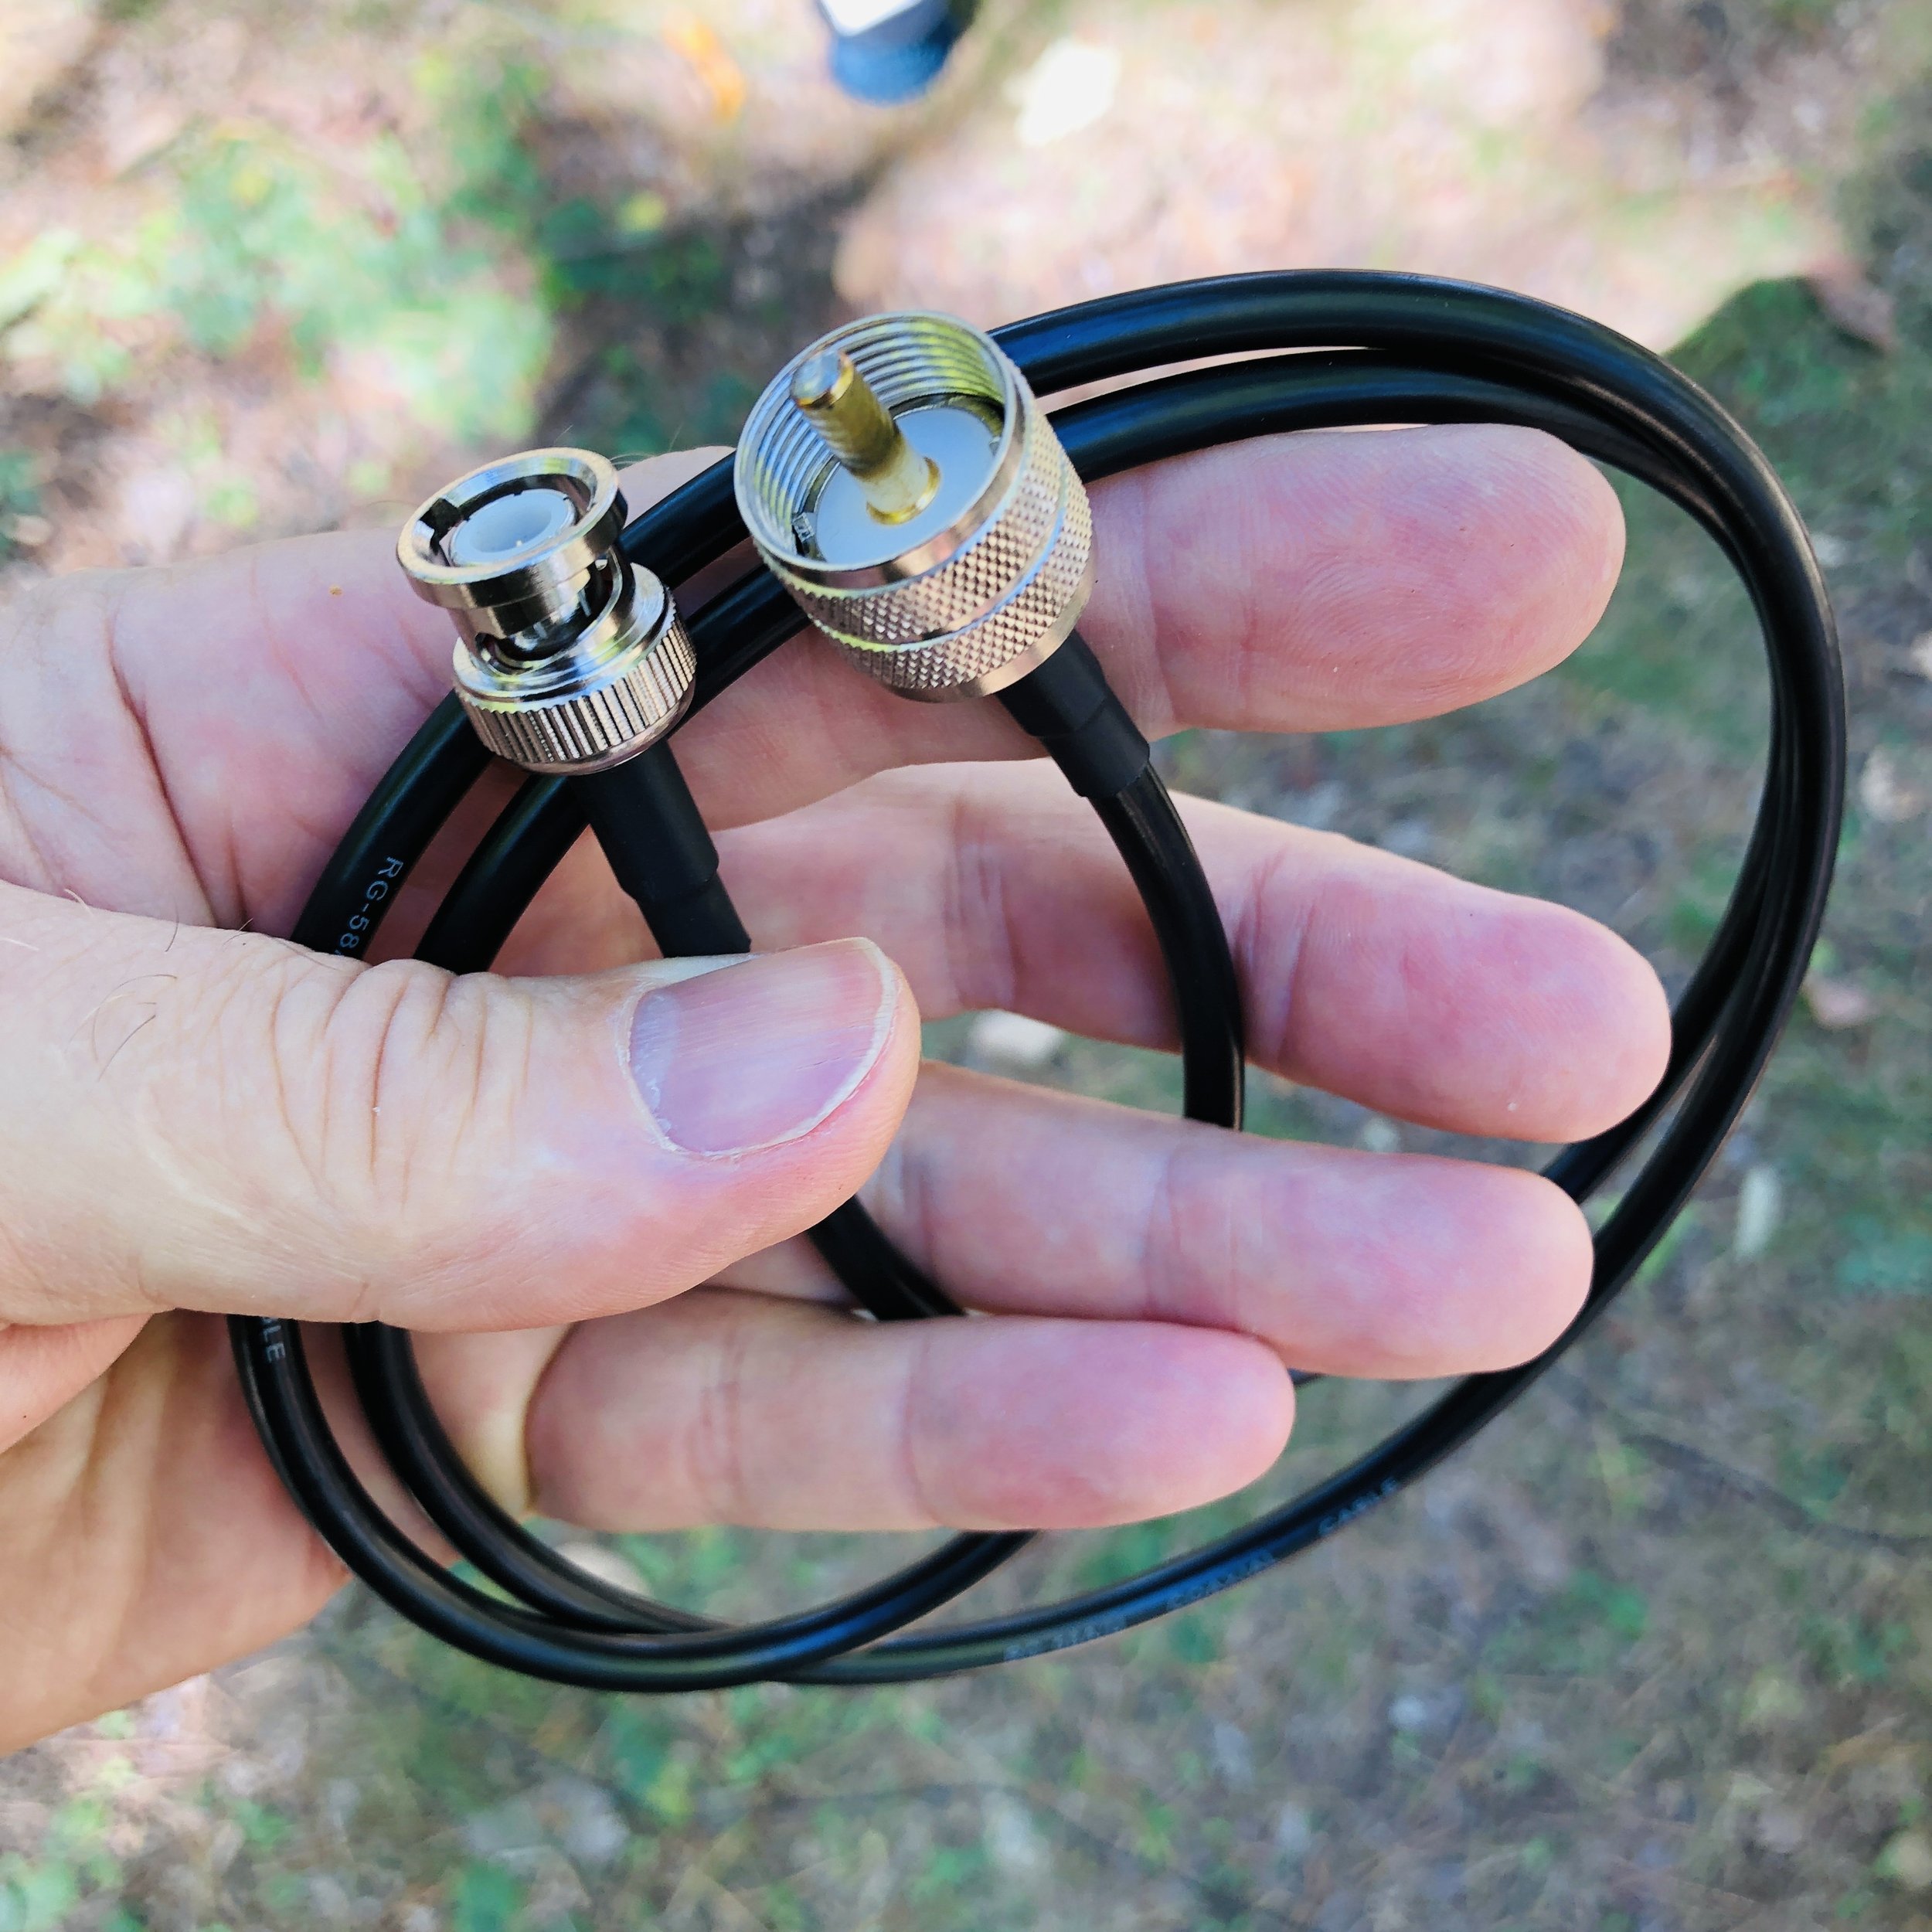
Once the antenna was up, I connected it to my MFJ travel tuner to the random wire lugs on the back of the unit. Then I use a special coaxial cable I bought from Amazon that has a BNC on one end and a PL259 on the other. The antenna tuner uses SO 239 mounts on it so the PL259 couples that end and the other end is natively a BNC on the TR-35, but I have also adapted my nanoVNA to BNC as well for simple tuning. Since my Ten Tec Argonaut 5 is SO 239, I have bought an adapter to convert it to this same system so I can tune the antenna easily on it as well.
This is not my idea, my late friend K4GC Brian was the person that taught me and Roger how to do this. It makes perfect sense when you think about it though so I started doing it once I got the VNA. Otherwise it is this trick of tuning till you hear the noise level peak and that is the best you get. This way works but it is possibly not centered where you need to be. Since the TR-35 doesn’t have an SWR meter, it has lots of protection circuits built in to prevent you from damaging the transmitter from tuning or operating at full power with poorly matched antennas. It has a current protection circuit as well as a thermal protection circuit, if either one activates, you really should check the antenna and see what is wrong, then reset the radio and try again. Alternatively, you could bring an SWR meter with you to get the tuner set as well if you don’t have a nanoVNA…
Amazon is a great place to find these sorts of oddball parts, several of the items in this blog today came from them.
Since everything is now BNC connected, I can quickly pull the cable from the radio, then connect it to the nanoVNA and see the tune on the tuner visually! I run a trace with the smith chart and a trace with a SWR line graph as well, with both of these running at once, it is pretty simple to get the SWR and the impedance really close to what the transmitter likes. Once I get the tuner adjusted to the band I want to use, I simply move the coax back over to the radio and off I go…

BNC is where it’s at with this system…

Here I am tuning for the 17m band, note that the VNA is showing the SWR of 1.541:1 and the impedance is 54.8 ohms and slightly inductive at 18.096mhz. I could dial some more of this out with the tuner, but it becomes a law of diminishing returns at some point with the tuning and this worked just fine. Note also that the SWR is fairly flat in the range I planned to work in also. (the yellow line represents SWR vs. Frequency)
Some things to note about the TR-35 that I noticed. The first one is that the headphone jack is wired from the factory for a mono plug, not the stereo plug that every set of headphone made in the last 30 years uses…why? So you go to Amazon once again and buy this little adapter to convert your normal headphones to a mono plug… You can go into the radio and change this on the circuit board, and the instructions even detail this mod, but you have to risk damage to the radio and it is a lengthy tear down and assembly process to get the board out of the case. Lot’s of chances to break something important if you asked me…so the adapter it is… Another thing I cant seem to master is the keyer programming. It is a simple operation to input the message into the keyer, but upon playback, it has odd spacing and sounds disjointed for some reason, I have tried slowing down the keyer speed to no avail, I will figure it out at some point, but for now, I don’t have that one working right. To put it plainly, it just sounds wrong on playback, like I was saying, it could be my sending is causing it, but I have not figured it out as of this writing. I have seen videos of it working as advertised so I am confident I can get it to work…eventually.

Amazon…they have literally everything at this point.
I powered it with my battery I use for my 705 activations, actually lots of the accessories I used came out of the 705 kit today for this activation. But I found this battery is way overkill for the TR-35, so I plan to get a smaller one for the travel battery to build the kit with. Probably something in the 4 or 5Ah range instead will be fine. I am also going to eliminate the voltmeter inline for the travel rig too, just a cable with power-poles on one end, the 2.1mm plug on the other and a fuse in line with the power. It pulls 5 watts wide open, does it really need 14 gauge wire??? Lol. I actually used the power cord for my IC-705 to power this radio today, the connector worked just fine. But I will make a cord just for this rig to go in the kit.

I am also still using the N6ARA tiny 3D printed paddle that I bought a while back(also from the 705 kit today) this is a device that although I like it, it has some problems that I have found. For one, it is really small and I didn’t take that into account when I bought it. It is available in a couple bigger sizes and I should have gotten one of those. This one is in my mind, one that should be a backup or a SOTA paddle or something like that as it’s main advantages are that it is light and small. What I have found from using it regularly is that is gets dirty contacts and you have to mess with it some and clean the contacts before it will send right once it gets some age on it. This is because it is plain copper/brass contacts (pc board with a brass arm on the “levers”) and they tarnish in a matter of days to the point it wont send properly till I clean them. I am looking into three solutions here, a nice travel key like the Begali travel paddle, make my own travel key, or buy a used small foot print paddle off the boards. I am actually leaning towards the Begali for now to give me time to design a key I can share with the world as well as for my personal use. Anyway, who doesn’t like a nice Begali key?

My N6ARA tiny paddle… I love this little key.
I have an alternative reason for working with this radio so much as well. I am going to be doing some traveling in the coming weeks and months and I want to take a radio that is not too large so it is easy to pack and carry around and such. This means smaller is better and the TR-35 is my physically smallest radio. This means it gets the nod based on size and now it also gets points for performance. Even if I cant figure out how to program the memory right. 😂
The kit will fit into one of several of my camera bags that I currently have so I don’t have to purchase a new bag to carry it in. I have found that camera bags work really well for QRP radios too, they just fit really well into old camera bags for some reason. By the way, I didn’t think of this idea either. I got this idea from my cohort KV9L who did this for his FT8 rig and I straight stole the idea from him. LOL.
Parts everywhere today! I took the IC-705 bag to “rob” all the support gear from so it would be a simple deployment and I have not built out the TR-35 go bag kit as of yet either…

I really like the aesthetic of the TR-35 as it has everything you need and nothing you dont. It really is an incredible little radio. I didnt build mine from a kit, I bought mine factory built and aligned so I could get on the air sooner.

1 hour on the air netted two pages of QSOs! That is awesome for me!
Logbook looks good with a good spread of contacts today with several from Canada in the log for a change. I usually only get one or maybe two Canadians and today I think there are at least four! This was with only about an hour on the air too. That is really good for me since I run QRP power. The map below shows how far 5 watts into a wire vertical will reach with a little understanding of how to use it. All in all I really like the TR-35 from Penntek, it a great little QRP radio that fits into what I enjoy doing in amateur radio, low power CW operating…

So if you have not done it yet, please like this blog post and if you have a RSS feed, you can sign up there too. I really appreciate your reading along today and if you have not done it yet, get your gear out!!!
Thanks and 73
David - WK4DS