
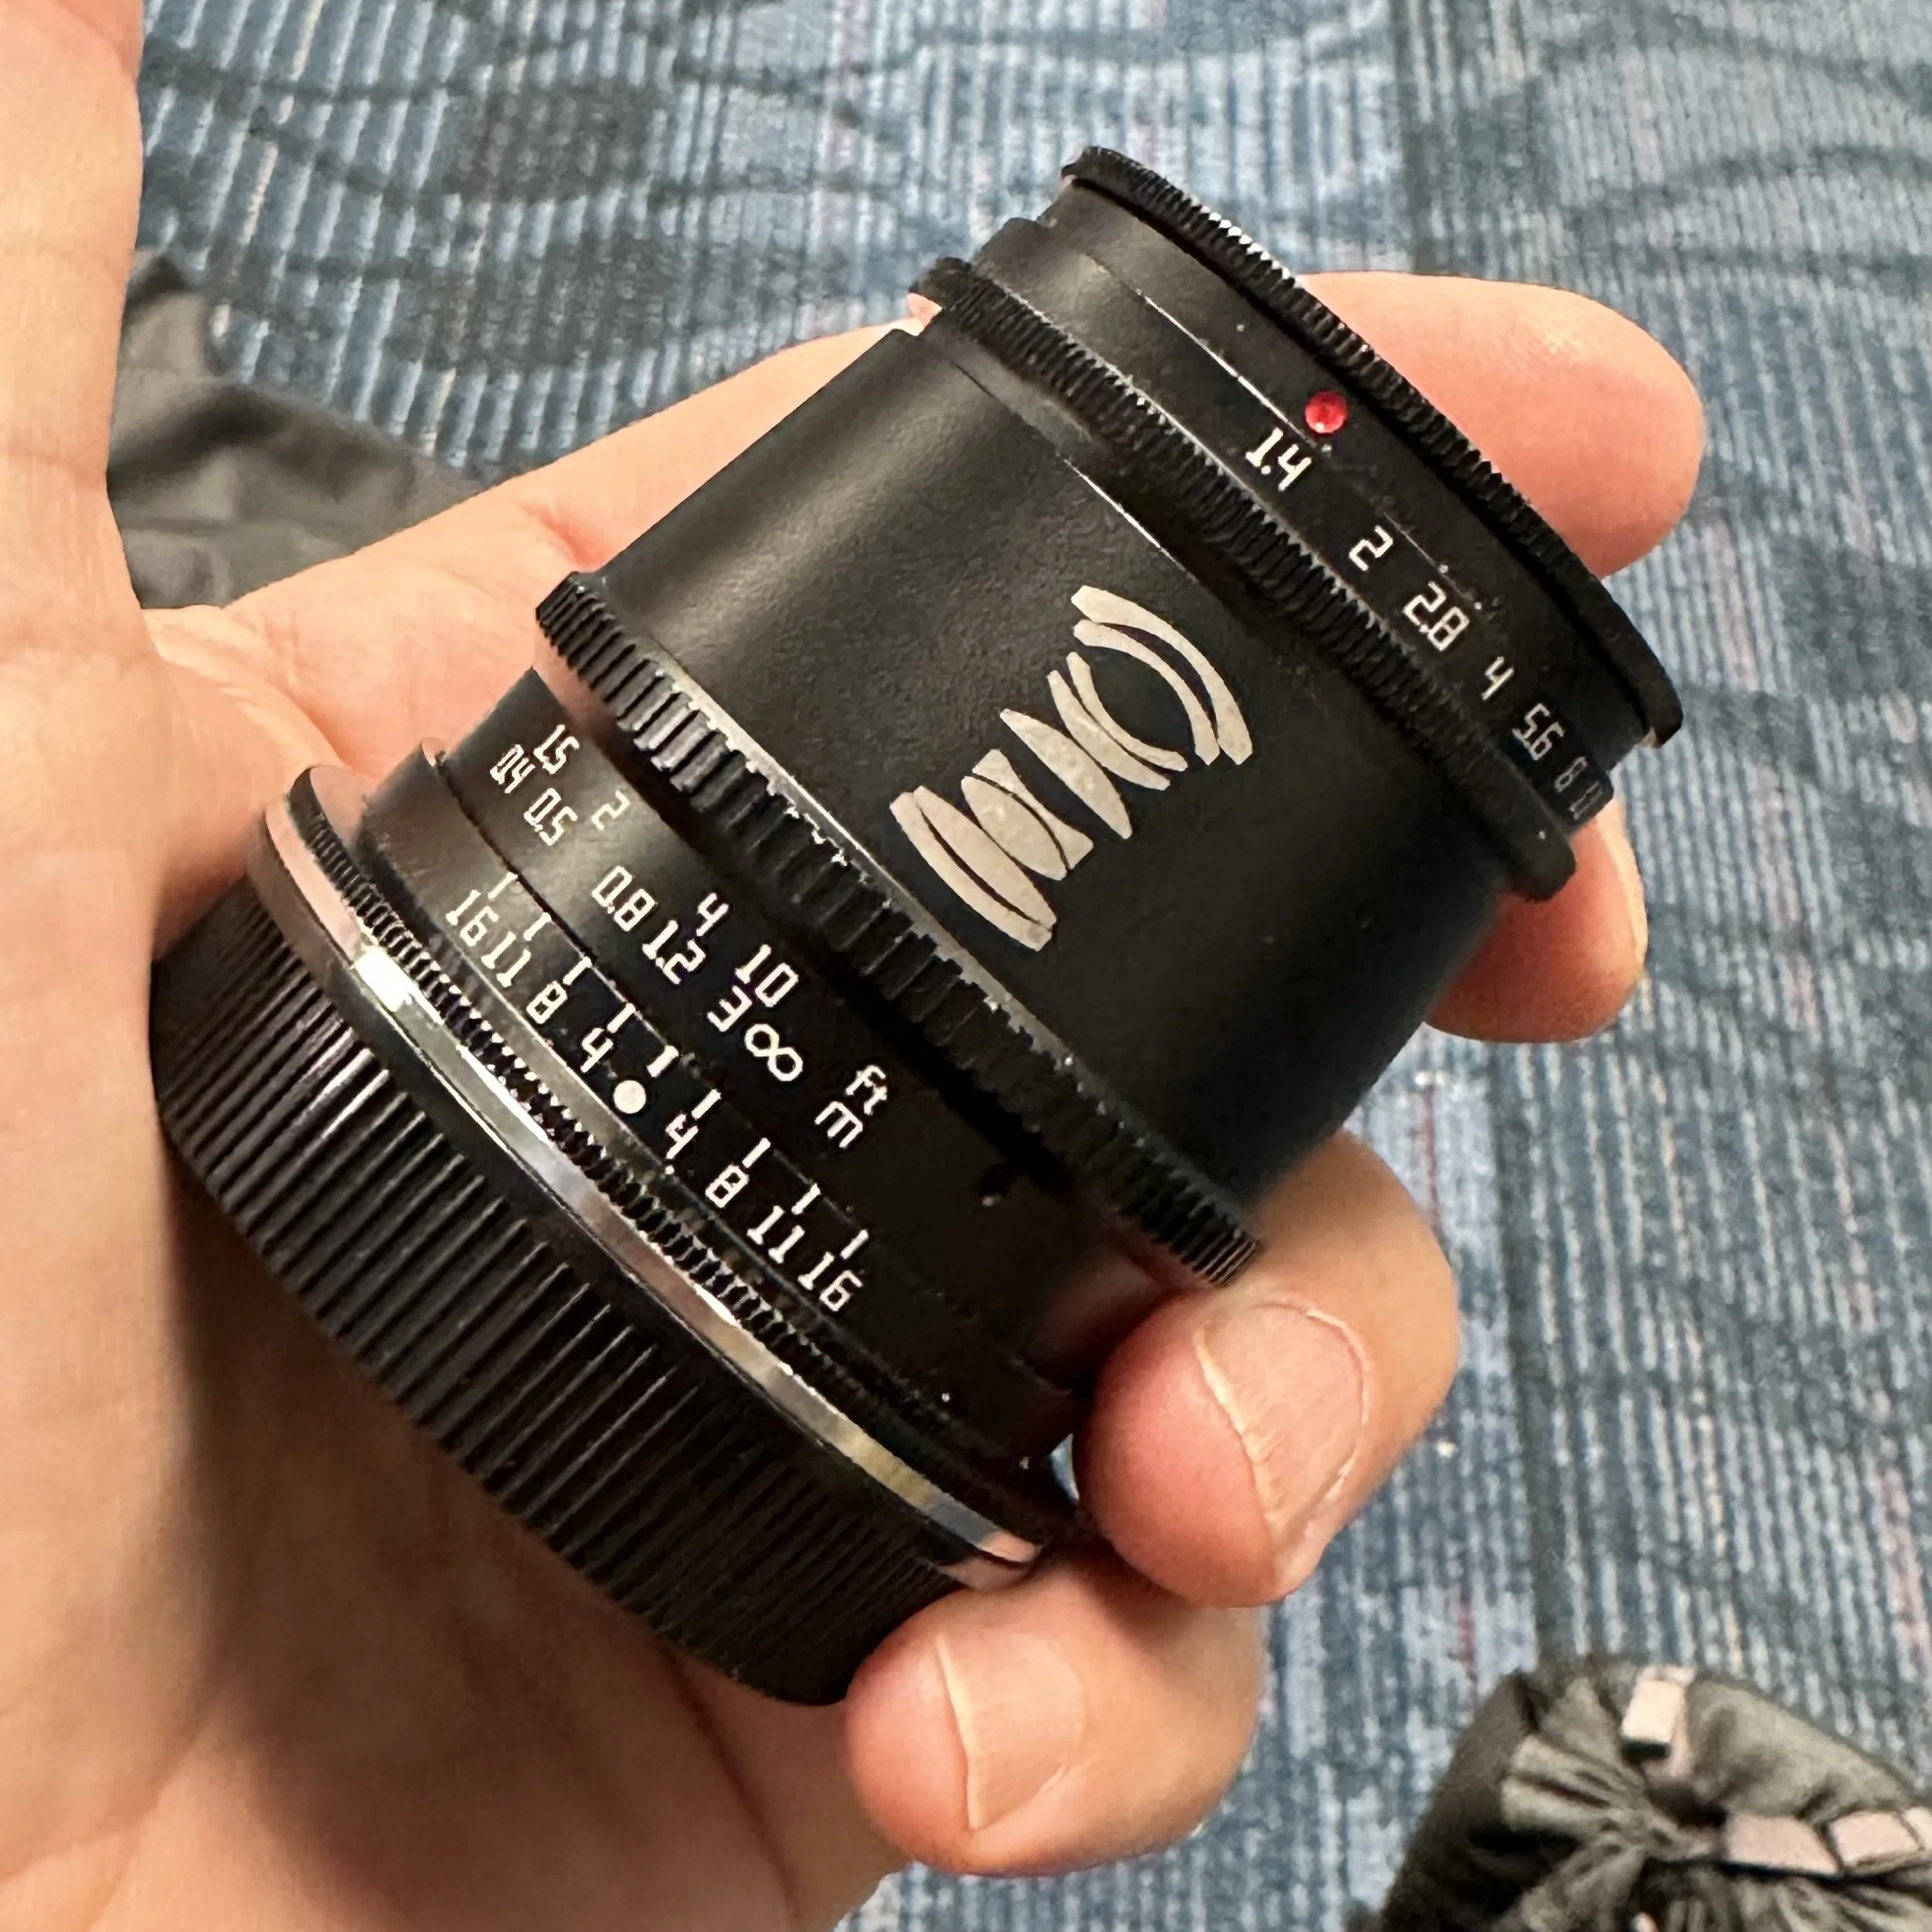
Voigtlander 35mm f1.2 Aspherical M Mount Lens
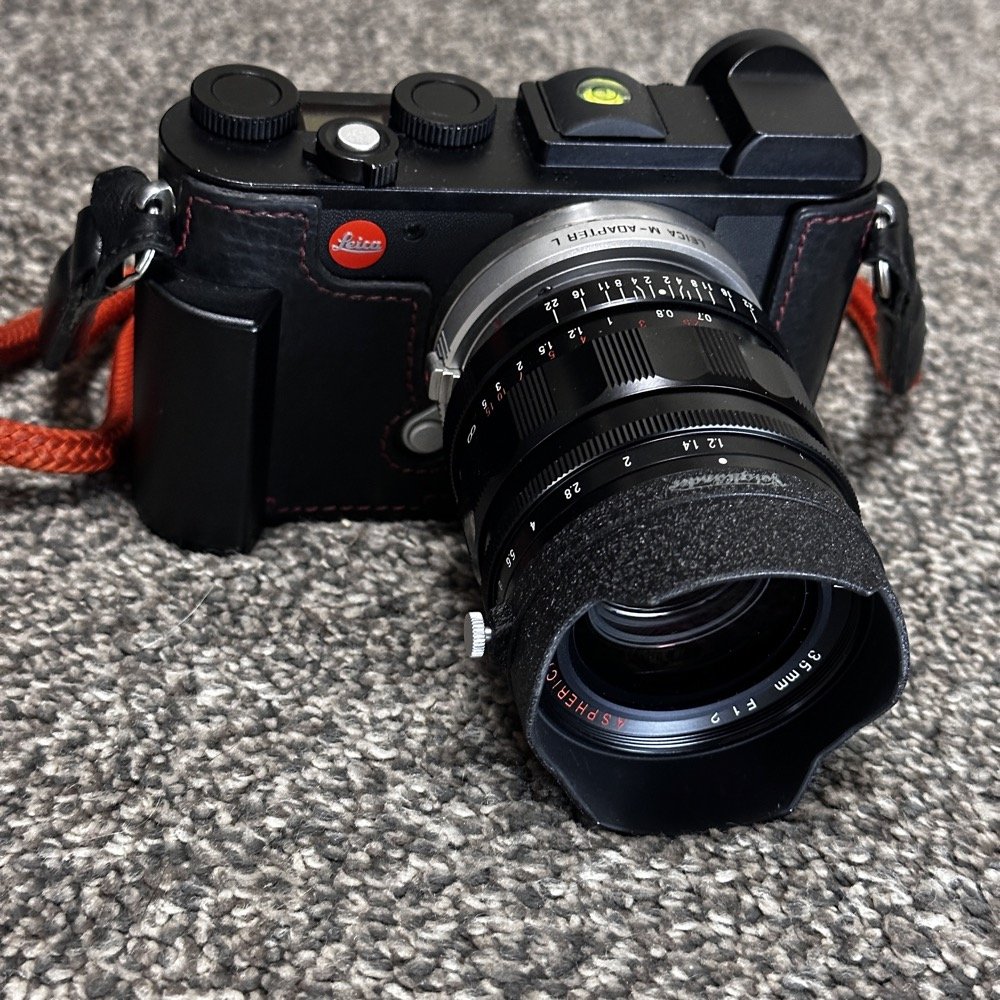
Lens Details - 35mm Voigtlander f1.2 Nokton Aspherical
My thoughts on the 35mm Voigtlander Nokton f1.2 Aspherical M mount lens are mostly good… mostly. This lens is really well made. It has perfect haptic feedback for me. The aperture clicks are smooth yet precise. The focus ring turns with just enough resistance to keep it from drifting but yet has no mechanical “feel” at all. It is just right. The spec sheet claims a maximum aperture of f1.2 and it will “stop down to f22 for those psychopaths that love diffraction in their photos”. This lens is fairly heavy though at just over a pound, you know it is on your camera. Especially a camera like the Leica CL…
So when I decided to pick one up, I started by looking at new ones. Well, that quickly led me to look at used ones! Haha. Turns out these lenses are quite costly when new and yet on the used market are quite reasonable. New ones run a smooth 1,000$ on Amazon for the 4th generation version. My version is the Gen 1 though so that saves a few bucks. The main differences between the versions is size, weight ( a byproduct of size ) and minimum focus distance. As the lenses get newer, they get shorter and focus just a little closer. How much closer you ask? Mine is .7 meters ( 27 5/8” ) and the newest version will focus down to .5 meters ( 19 11/16” )… So for several hundred dollars you get a slightly smaller and lighter lens that will focus about 8” closer. I don’t know about you, but I never shoot at the minimum focus except for lens reviews. Being able to focus closer like that is a non-issue for me. The difference in weight is only 190 grams too. This amount of weight( 6.7oz ) sounds like a lot and to some, it probably is, but for me it isnt that big of a deal. You know it is there, but it isnt that bad.
I have taken the Leica CL outfitted with this lens on several trips at this point and have come to conclude that I love it on the Leica CL mirrorless camera. Photos like the ones in this blog post show how this lens performs.
Shooting with the Voigtlander 35mm f1.2 M mount lens
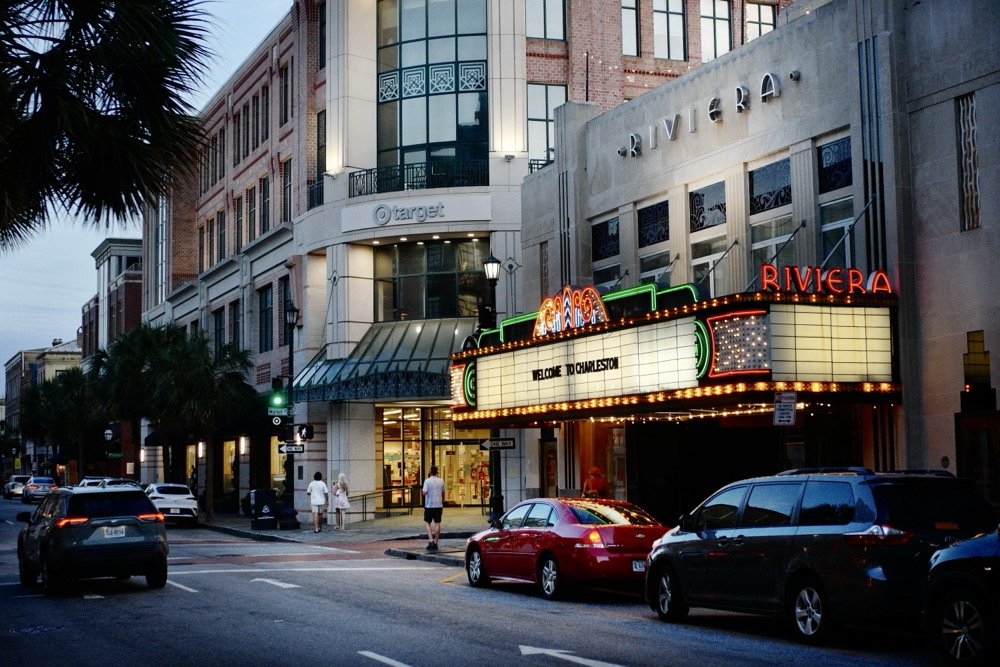
This first photo shows what the Voigtlander 35mm f1.2 M mount lens is capable of. The low light performance of this lens can not be understated. I have found that blue hour photography is completely within reach of this little camera and lens combo. The clarity of the glass is incredible even when ISO is hogher to get a decent exposure.
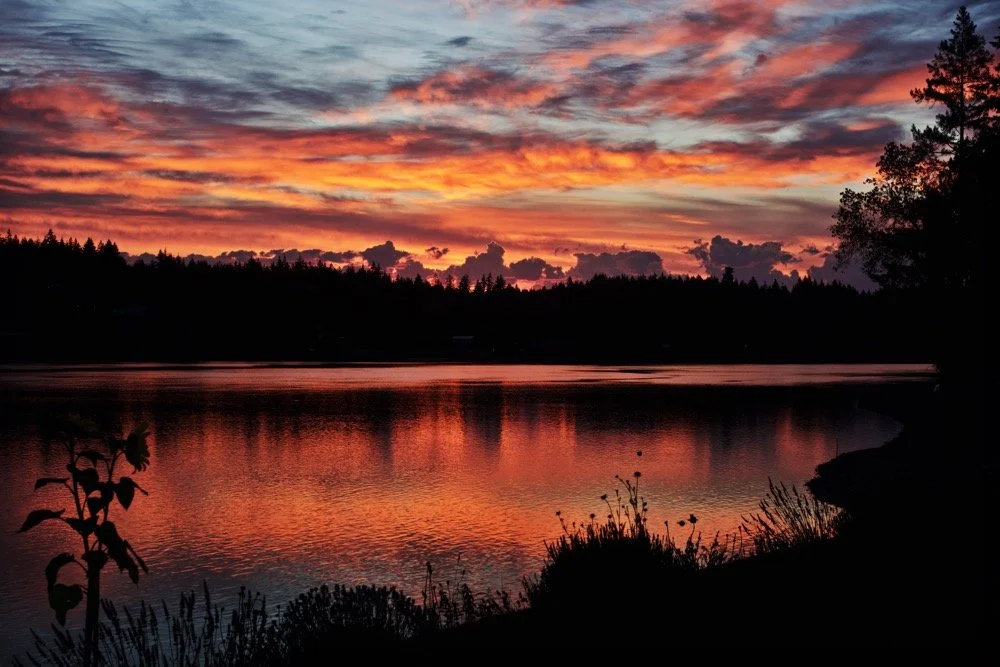
The photo below is of a sunrise in Washington state at a friend’s house. Notice how rich the colors are. I have post process edited this image as well, but if the color data was not present the edit would not work.
The image has good distortion control all the way to the edges too. You can easily see how the horizon line and the clouds maintain their lines throughout. I am cheating a little here though. This is a full frame lens and I am shooting it on a crop sensor body. This is part of why it is so big actually. I didn’t mind this though as I also wanted to shoot it on my SL2 full frame camera as well.
Point is that on my Leica CL, I am only using the center of the lens which is usually the best part anyway. It is like a cheat code for crop sensor shooters.
Street Photography and Range Focus
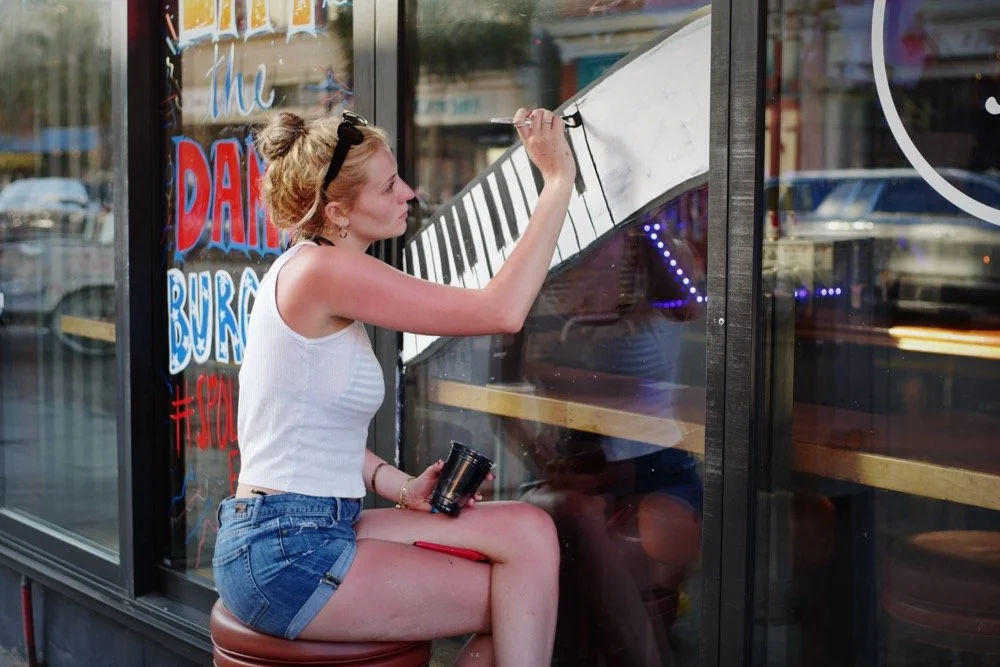
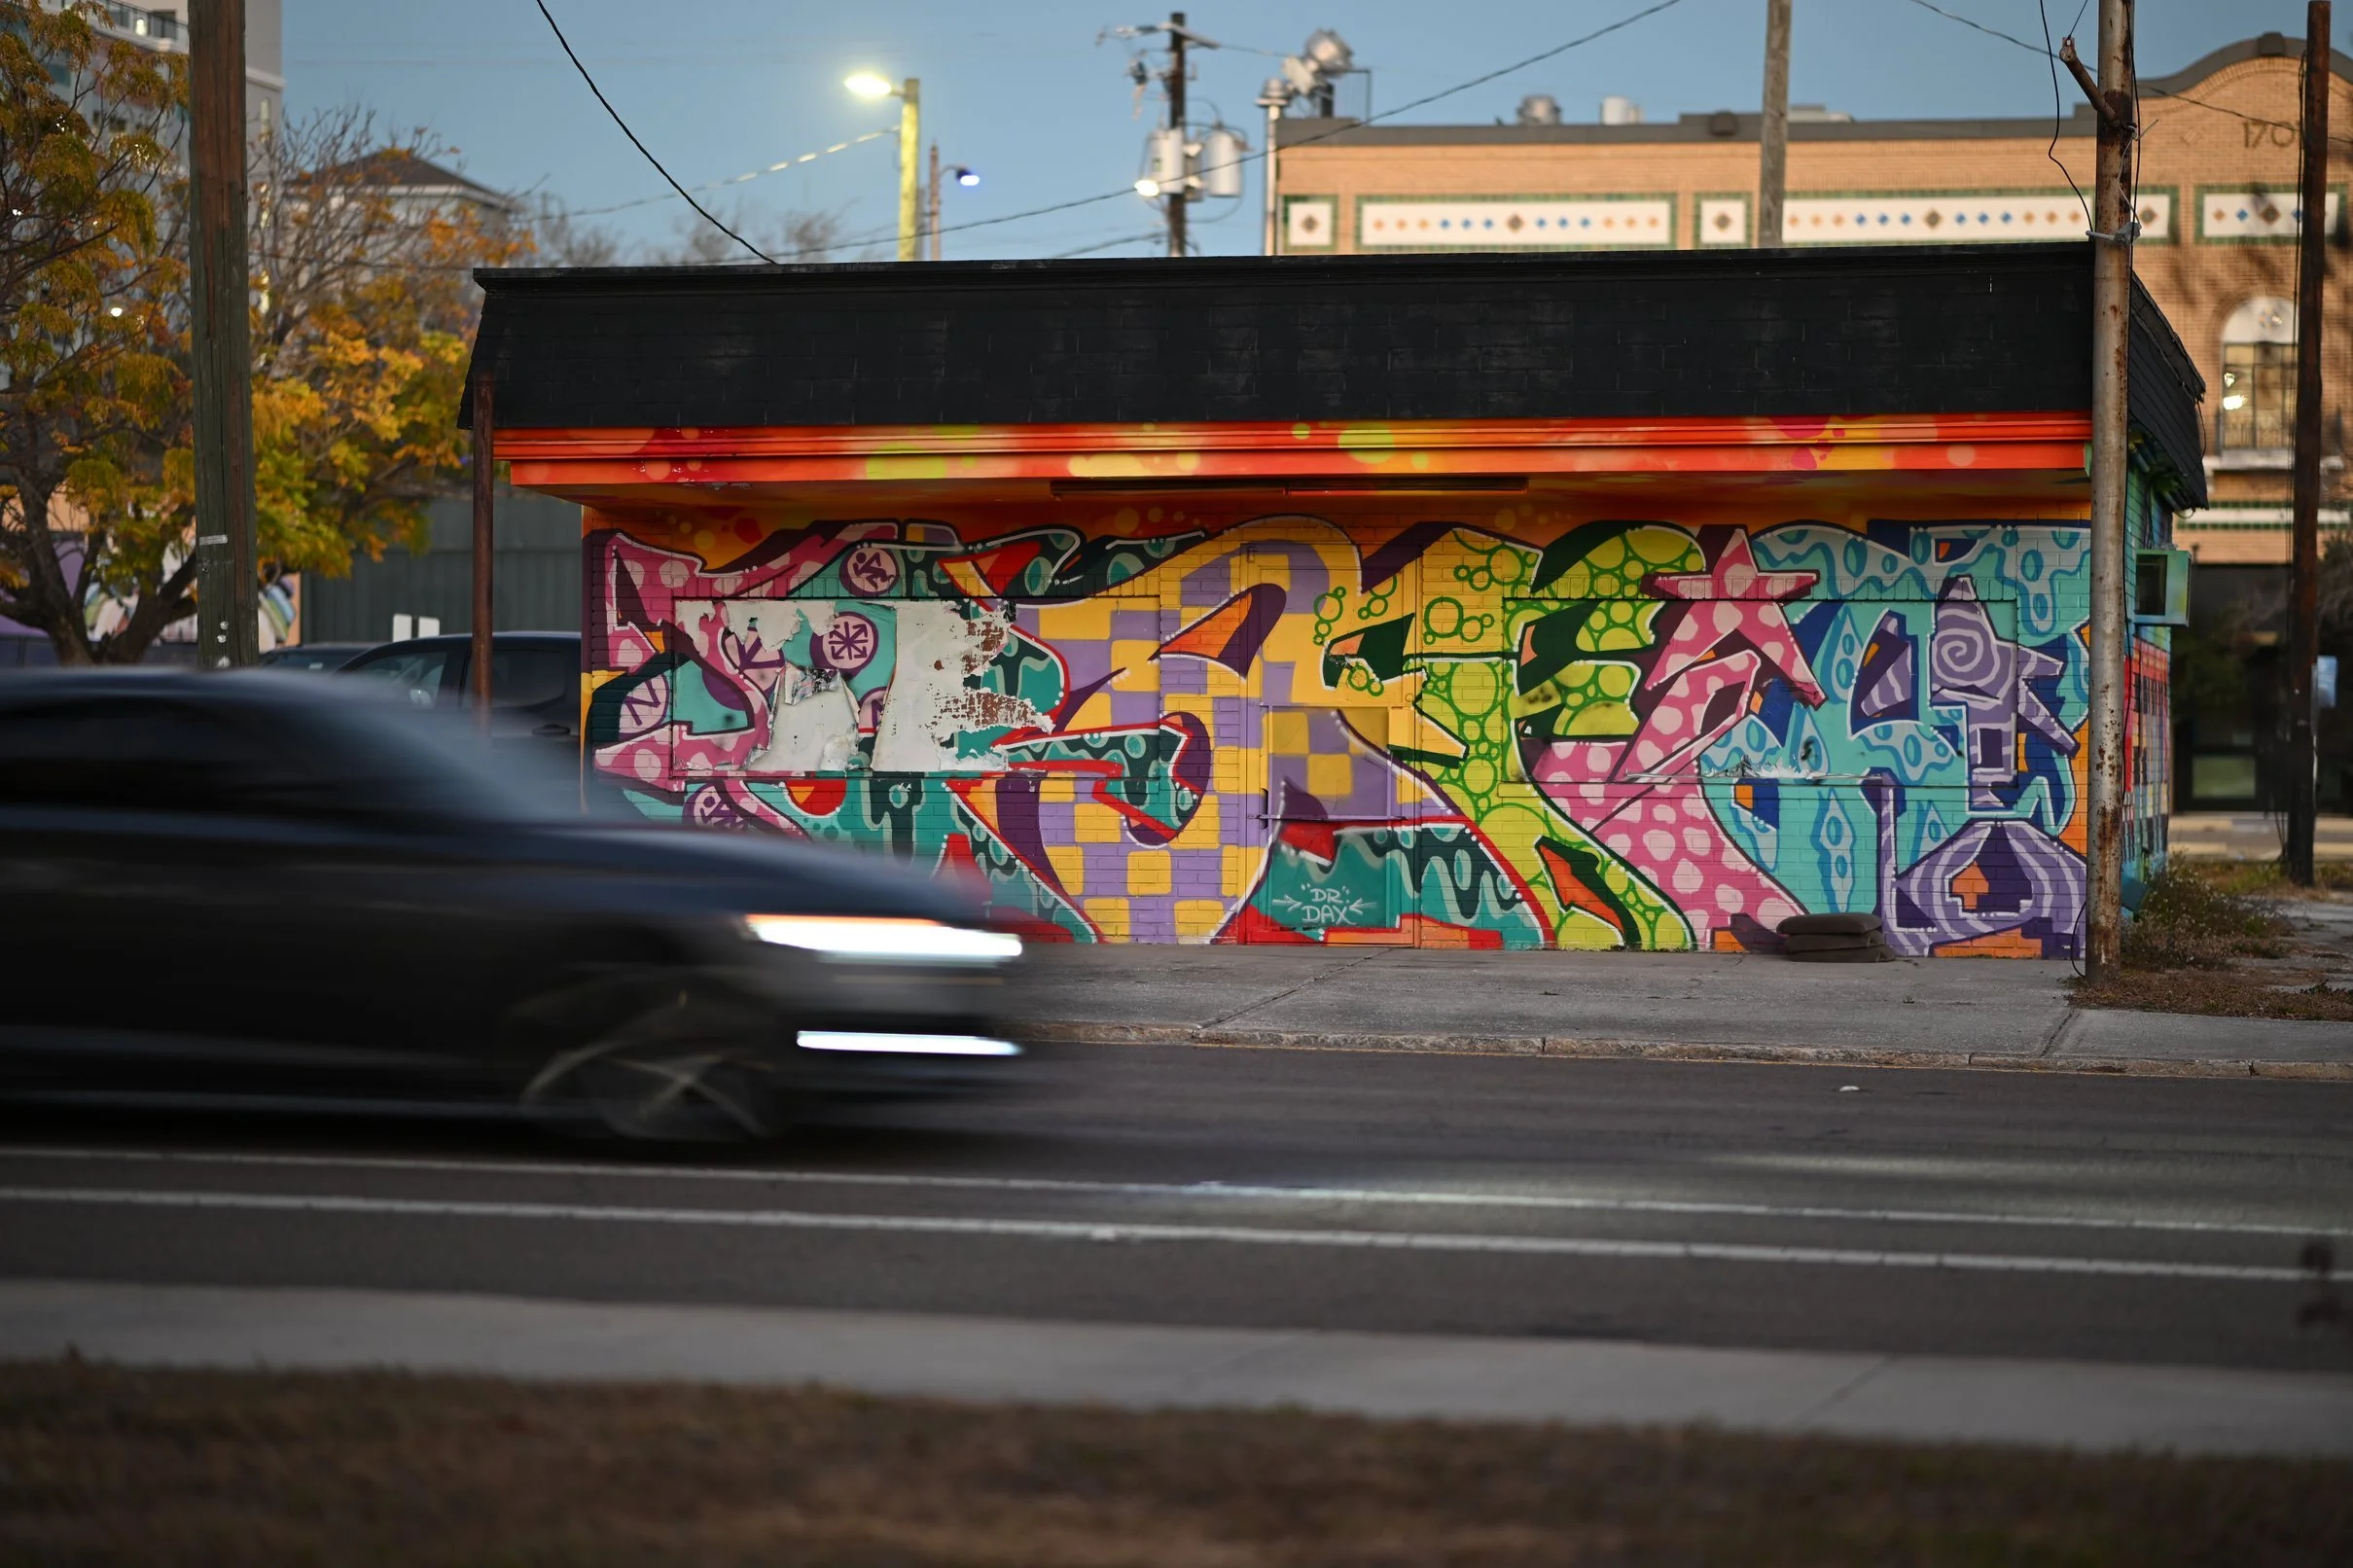
I like how well this lens works for general street photography applications. Scenes as below with the girl painting the sign are really easy to capture. I prefer to shoot range focus in these scenarios if possible. This is where you set the focus point to some distance that is in reason of where you plan on subjects appearing in your scenes. This way you only need to press the shutter to capture the image.
I find that at f5.6 I will focus on things a lot more than if I set it to f8 and go with it. An aperture of f8 is very forgiving for street photos. I will usually choose something across the street and get sharp focus on it then I can just “point -n- pull” photos easily. If I want more light, then f5.6 usually solves that but I find I need to focus considerably more often. Way more than you would think for just one stop of light. The best days are the really sunny days where I can use f11. This is literally a “set it and forget it” aperture.
Concluding the Leica CL / Voigtlander 35mm f1.2 lens
Would I tell you to run out and buy this lens? If your views align with mine, yes. I absolutely love this lens on my Leica CL! This combination produces beautiful images with rich colors. It is also a fun rig to deploy too. The Voigtlander lens is a joy to use and gives off a feel of quality that some more budget friendly lenses do not.
I would also recommend checking out g with places like MPB (no affiliation BTW) before ordering from Amazon (where I do have affiliate links below). While Amazon will have brand new product with a nice return policy, it will cost more. MPB has better prices and even older generation lenses like my personal copy of this lens. So you have some decisions to make, but if you choose new, I really would appreciate it if you followed one of the links below to Amazon before purchasing. It should credit me with the purchase and help support my website if you do.
Thank you and get out there!!!
Support this website by using these affiliate links to shop on Amazon:
Leica M11 Digital Rangefinder Camera
Voigtlander Nokton IV 35mm f1.2 M Mount Lens
Nikon AF-S FX NIKKOR 105mm f/1.4E ED Lens
Voigtlander Nokton 35mm f/1.4 II
Sandisk 128GB Extreme Pro memory cards
This 21-Year-Old Nikon's Colors (Straight Out of Camera) Will Surprise You
Here is the scene… I'm standing in downtown Chattanooga with a camera that's older than some of the people that are reading this blog post. The Nikon D200 was introduced in 2005, which makes it 21 years old this year. And you know what? The colors coming straight out of this CCD sensor camera are better than what I get from most modern cameras without heavy editing.
Here is the scene… I'm standing in downtown Chattanooga with a camera that's older than some of the people that are reading this blog post. The Nikon D200 was introduced in 2005, which makes it 21 years old this year. And you know what? The colors coming straight out of this CCD sensor that is in this camera are better than what I get from most modern cameras without heavy editing.
The richness of the Nikon D200 CCD Sensor color science is hard to dispute when the SOOC photos look like this.
Today I'm taking you on a photowalk through downtown Chattanooga to show you what this vintage DSLR can do, and more importantly, why CCD sensor cameras still have a magic that modern CMOS sensors just can't quite replicate.
The Setup: Simple and Effective
For this photowalk, I'm keeping everything as simple as possible:
Camera: Nikon D200 (CCD sensor, 10.2 megapixels) Lens: Nikon 35mm f/1.8 DX Settings: Aperture priority, ISO 640 fixed Focus: Back button focus, AF-C (continuous autofocus)
Why ISO 640? Because it's daytime, it's sunny, and with a CCD sensor, you want to keep that ISO low to get the best color rendition. The result? My shutter speed stays nice and high, and the colors are just incredible right out of camera.
The 35mm f/1.8 DX lens is compact, sharp, and on this DX body it gives me a perfect walk around focal length. This combination is light, fast, and honestly? It just feels right since it simulates 50mm on a full frame sensor
The Photowalk: Downtown Chattanooga
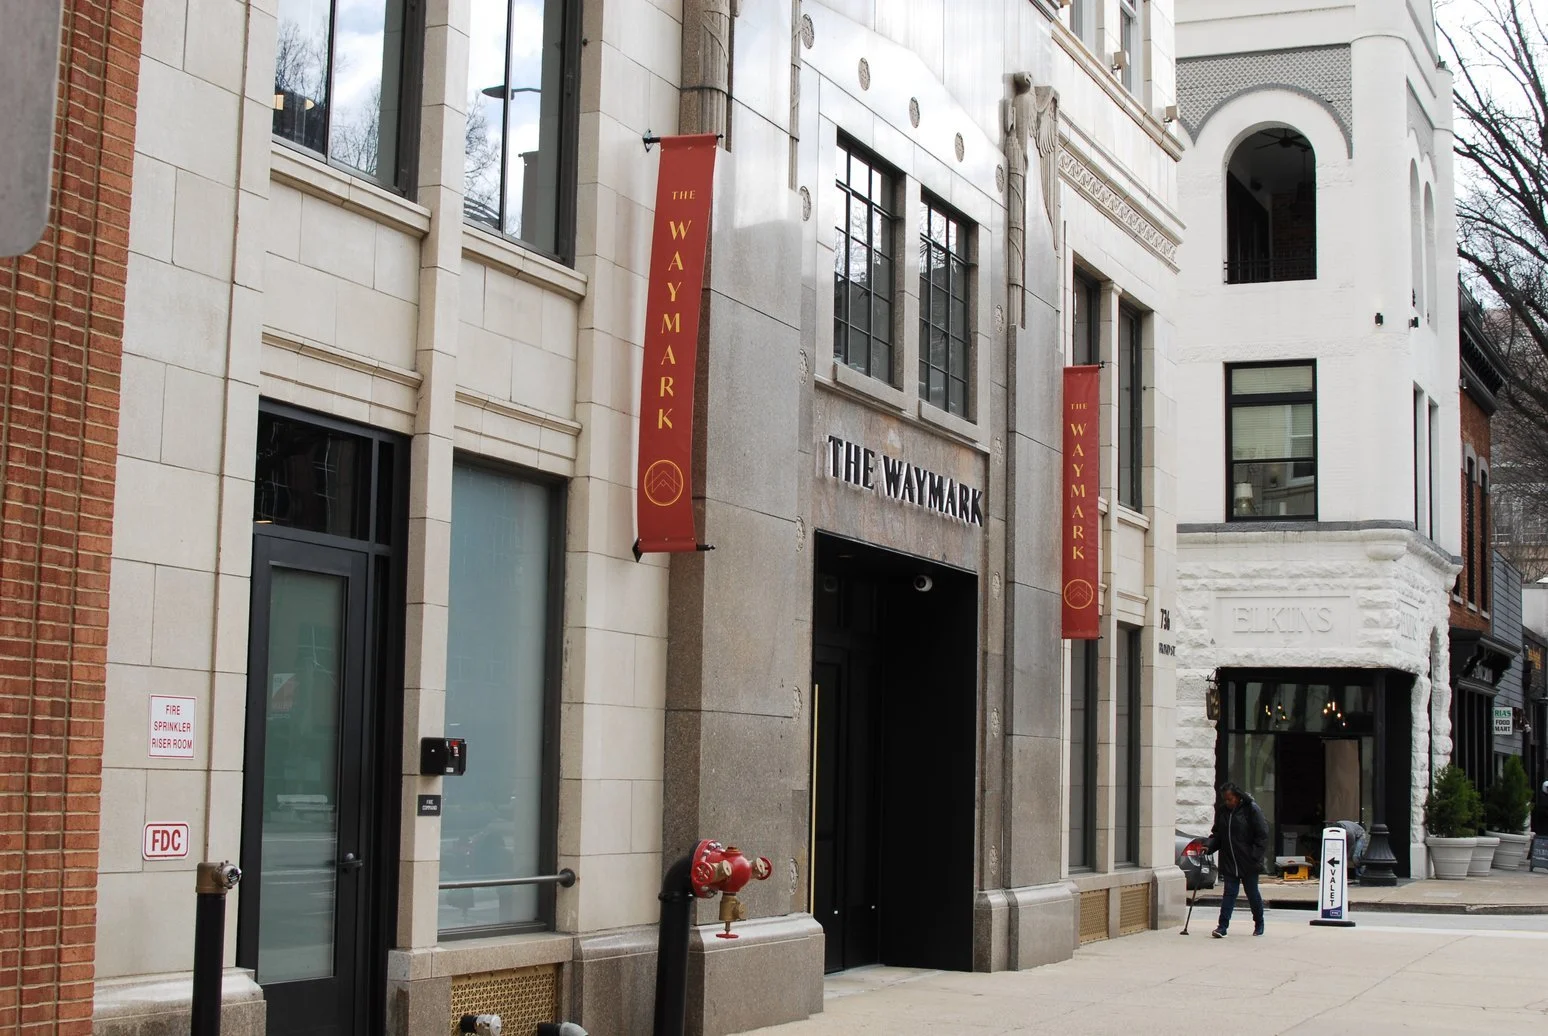
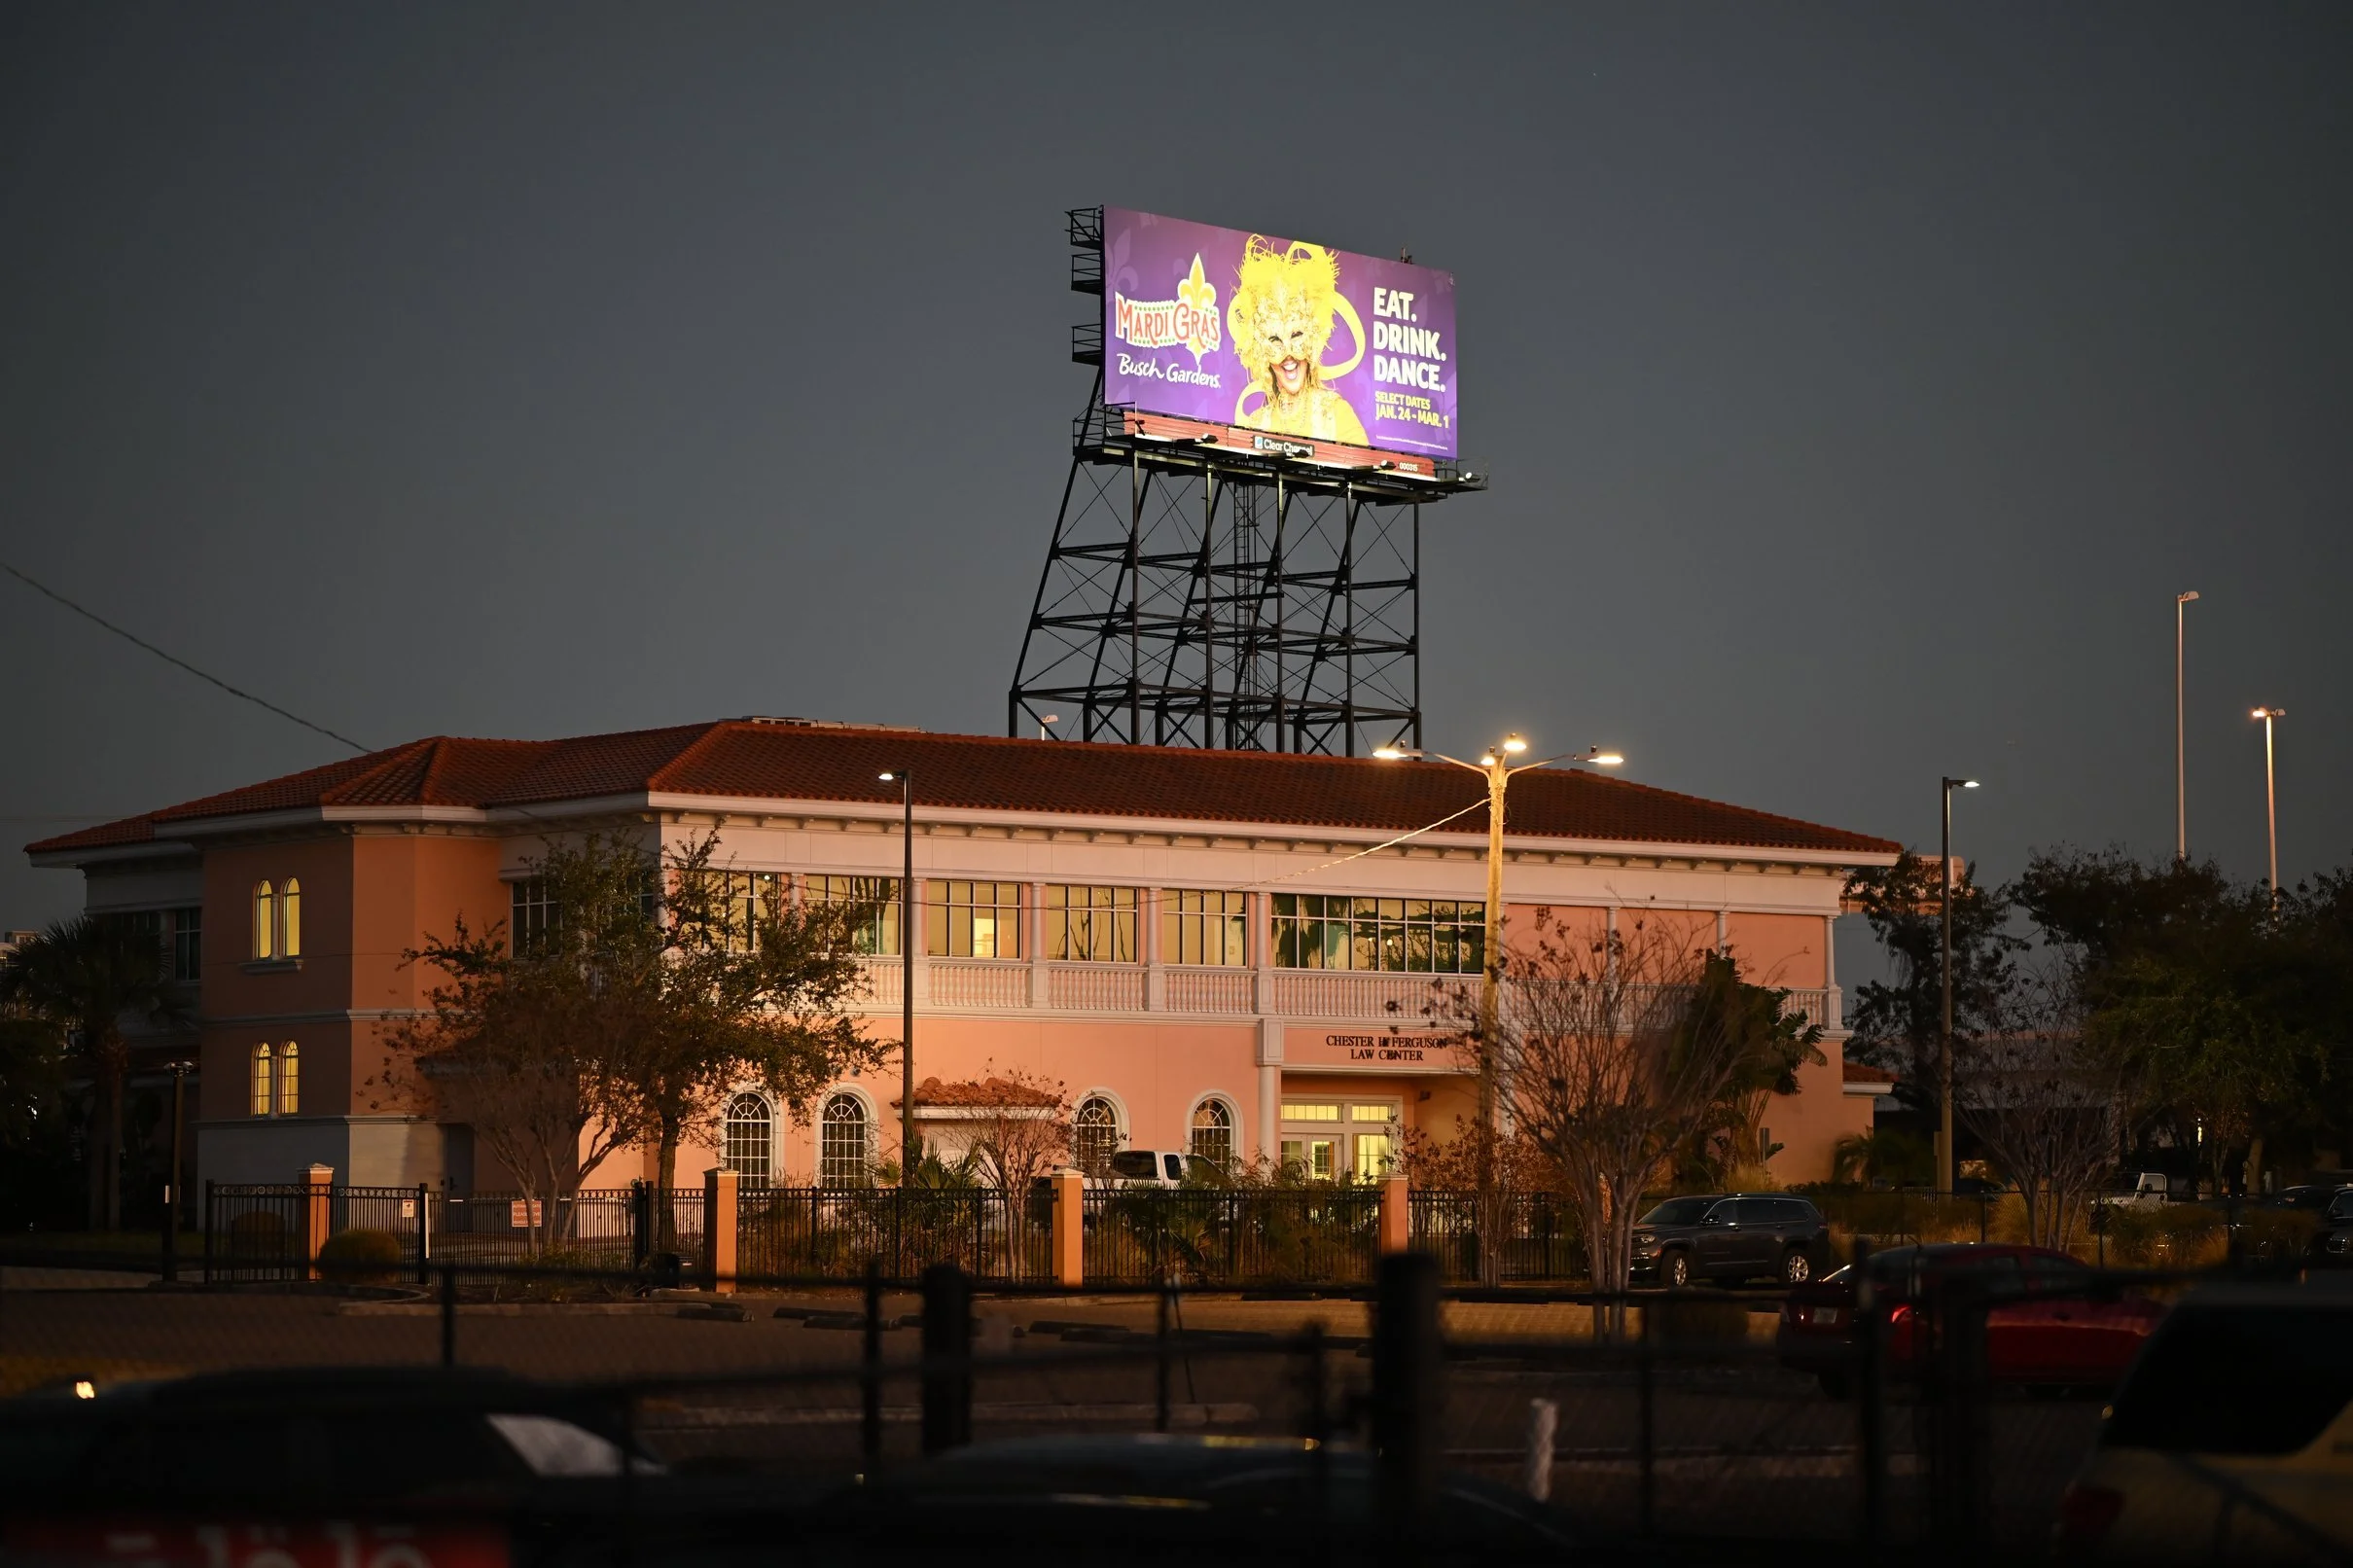
The vibrant colors coming out the Nikon D200 show up in SOOC images like this photo of the entrance to the newly opened Waymark Hotel.
I parked near the Waymark hotel (the old Chattanooga Bank building) and immediately noticed it's finished! When I left for Florida a while back, it was still under construction. Now it's open for business, people are working inside, and I walked through the lobby to check it out.
It's neat, though personally I think it's a little crowded with all the walls, partitions, and conference rooms they've put in. Looks like they're putting a restaurant in the corner where the old jewelry store used to be, but that piece isn't finished yet. Got a couple of photos of the outside with the D200, and the colors on that old brick and the new signage? Perfect straight out of camera.
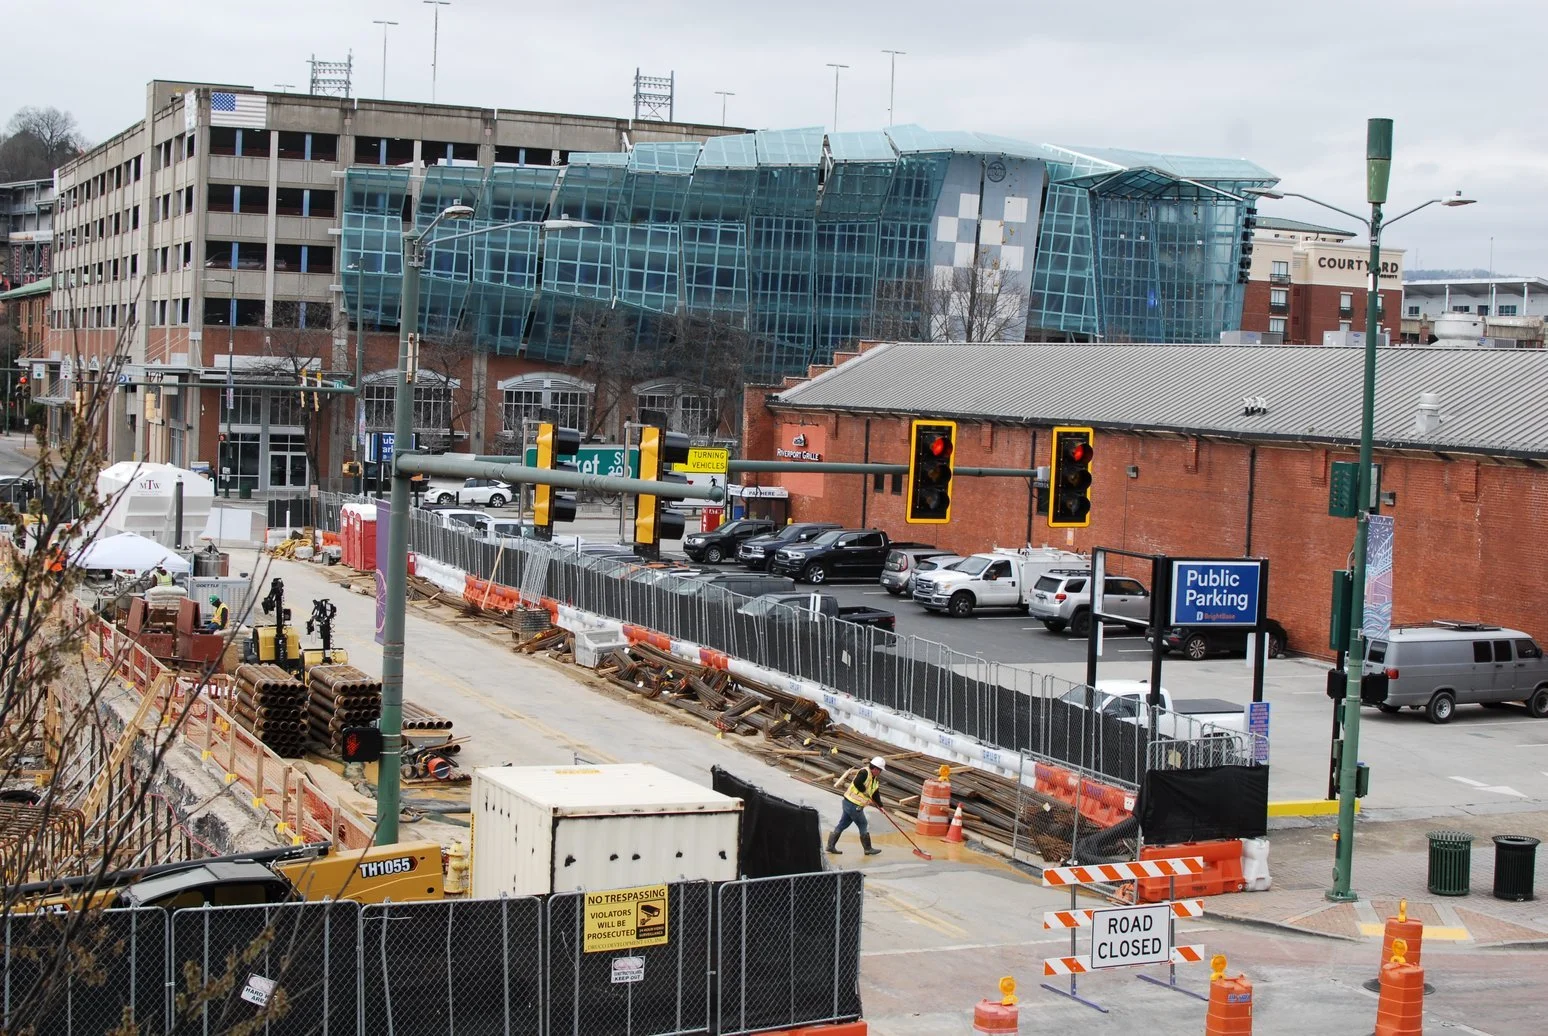
The Trolley Barn Construction
Across the street from my vantage point, they're completely changing the landscape over where the trolley barn once stood. I mean, it's a canyon! They have completely removed the old structure and are drilling these massive holes in the ground for something. At first I thought they were drilling a well, that is what it looks like, but I'm pretty sure they're just putting in pylons to stabilize the soil or set up a foundation. Whatever they're building is going to have a serious basement for this new hotel!
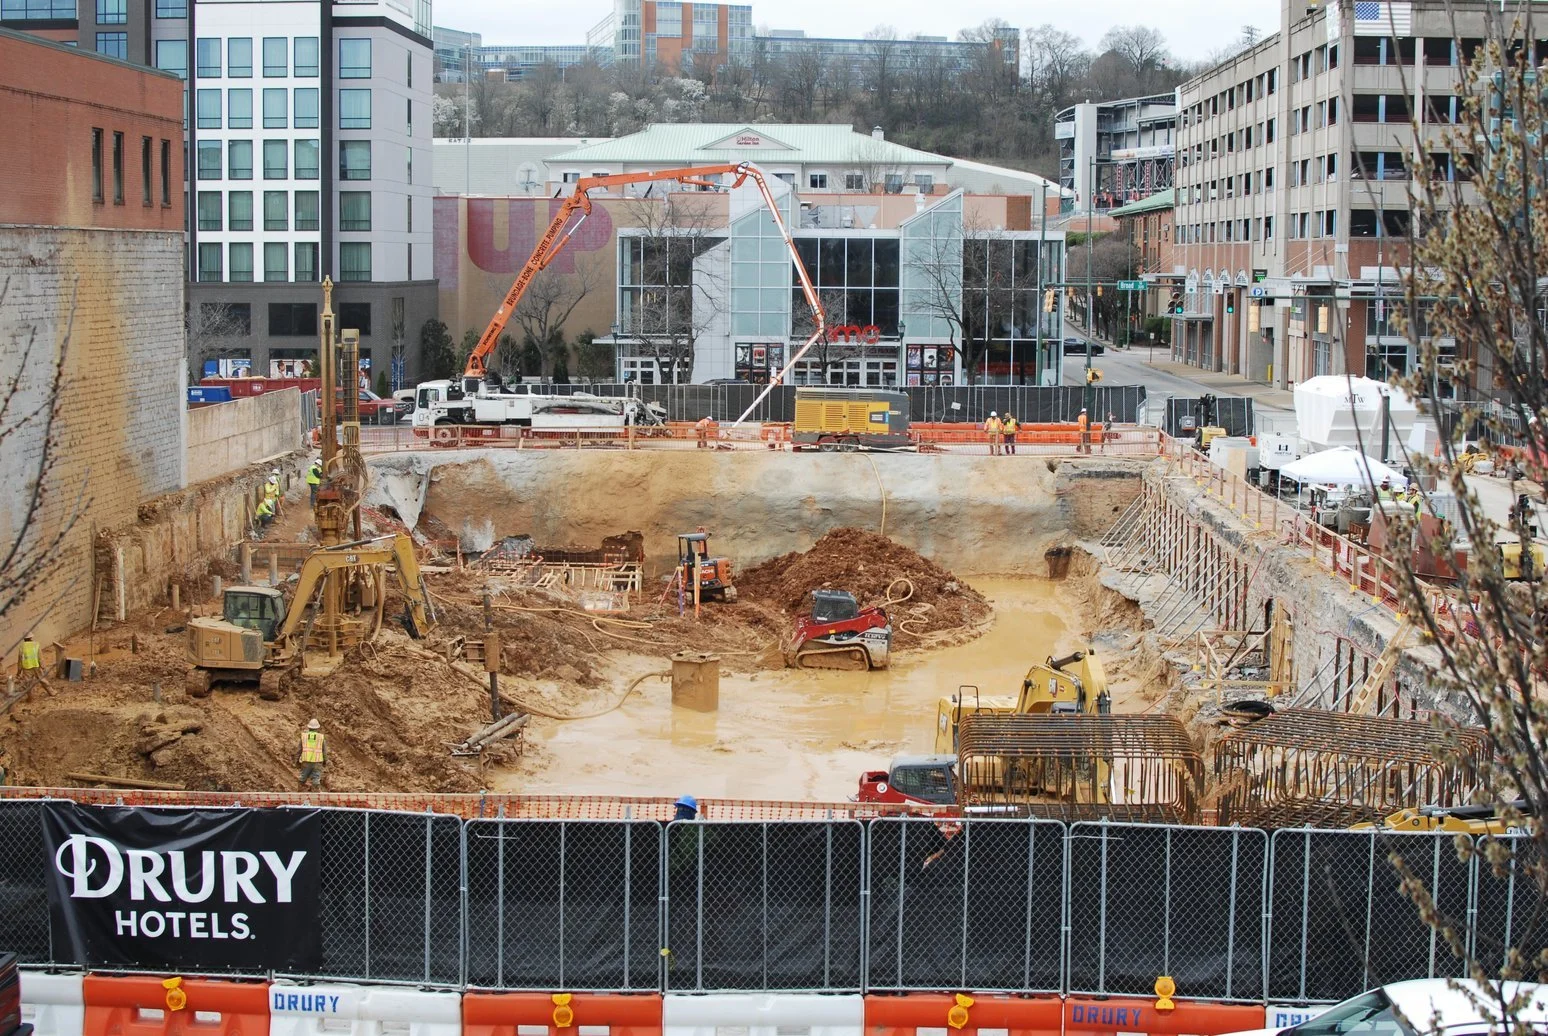
The nikon D200 is quite possibly the perfect camera for outings such as this where you have no idea what you will encounter. Like this construction site!
I grabbed a couple of shots of the construction site. Now, construction photography isn't the most glamorous subject, but the way the D200 renders the earth tones, the machinery, the shadows in that hole...errr...basement area...haha. Well, you just don't get that from modern sensors without a lot of post-processing work. Hold that thought (like Hugh Brownstone would say)...
Walking Broad Street and Main
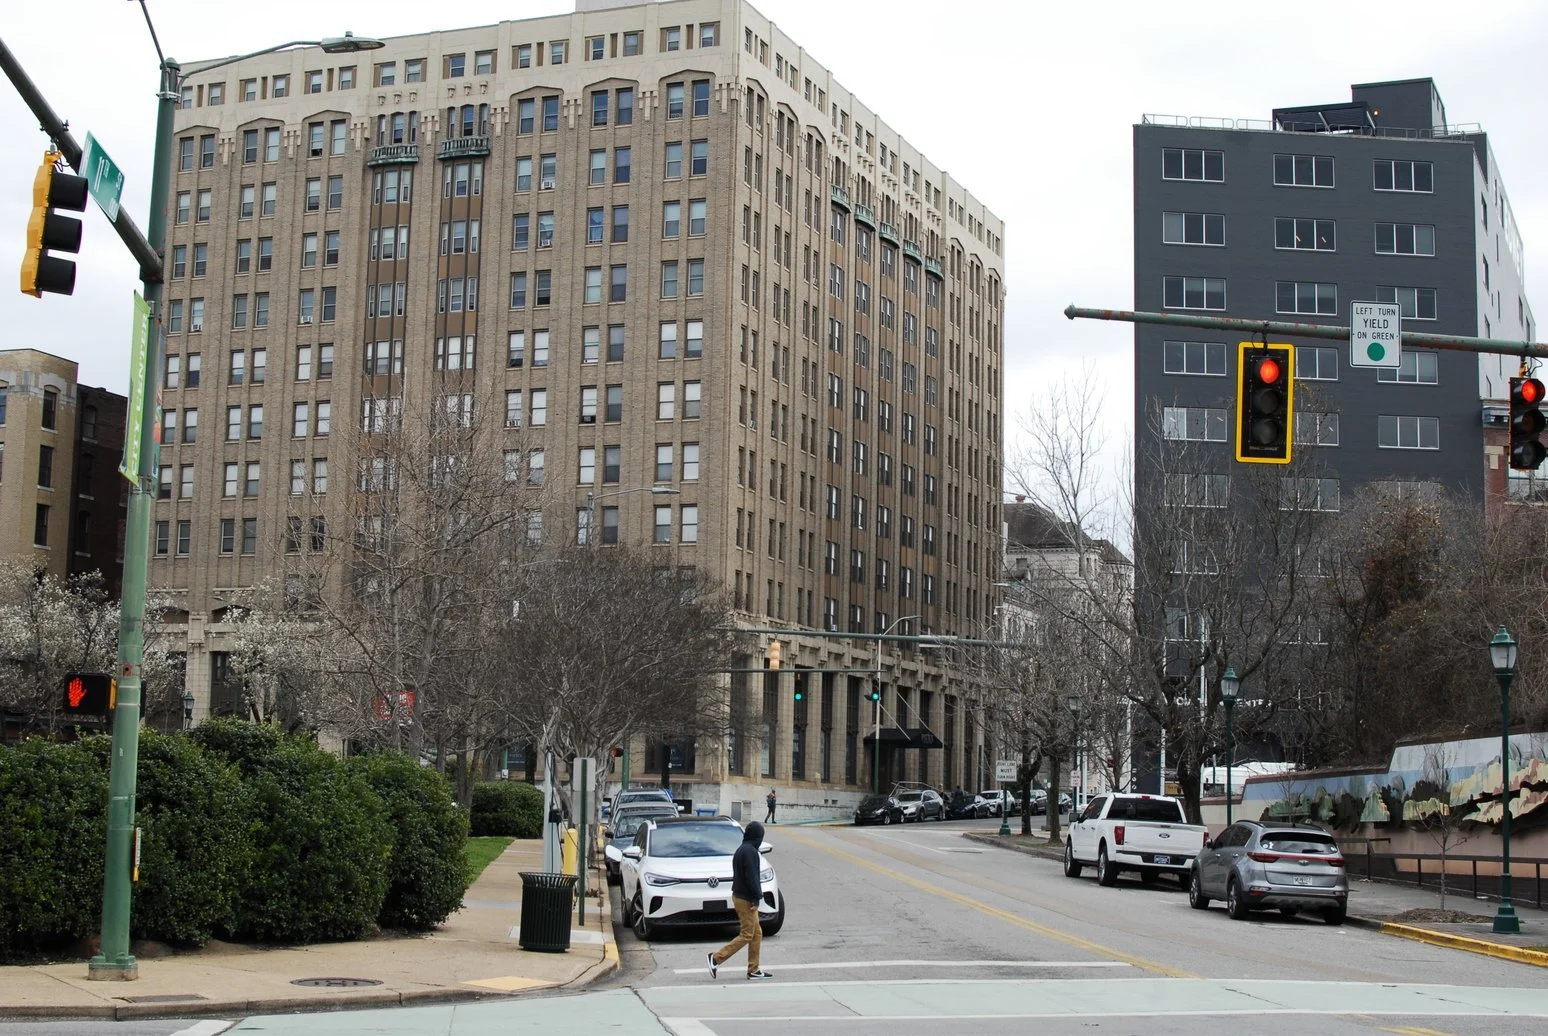
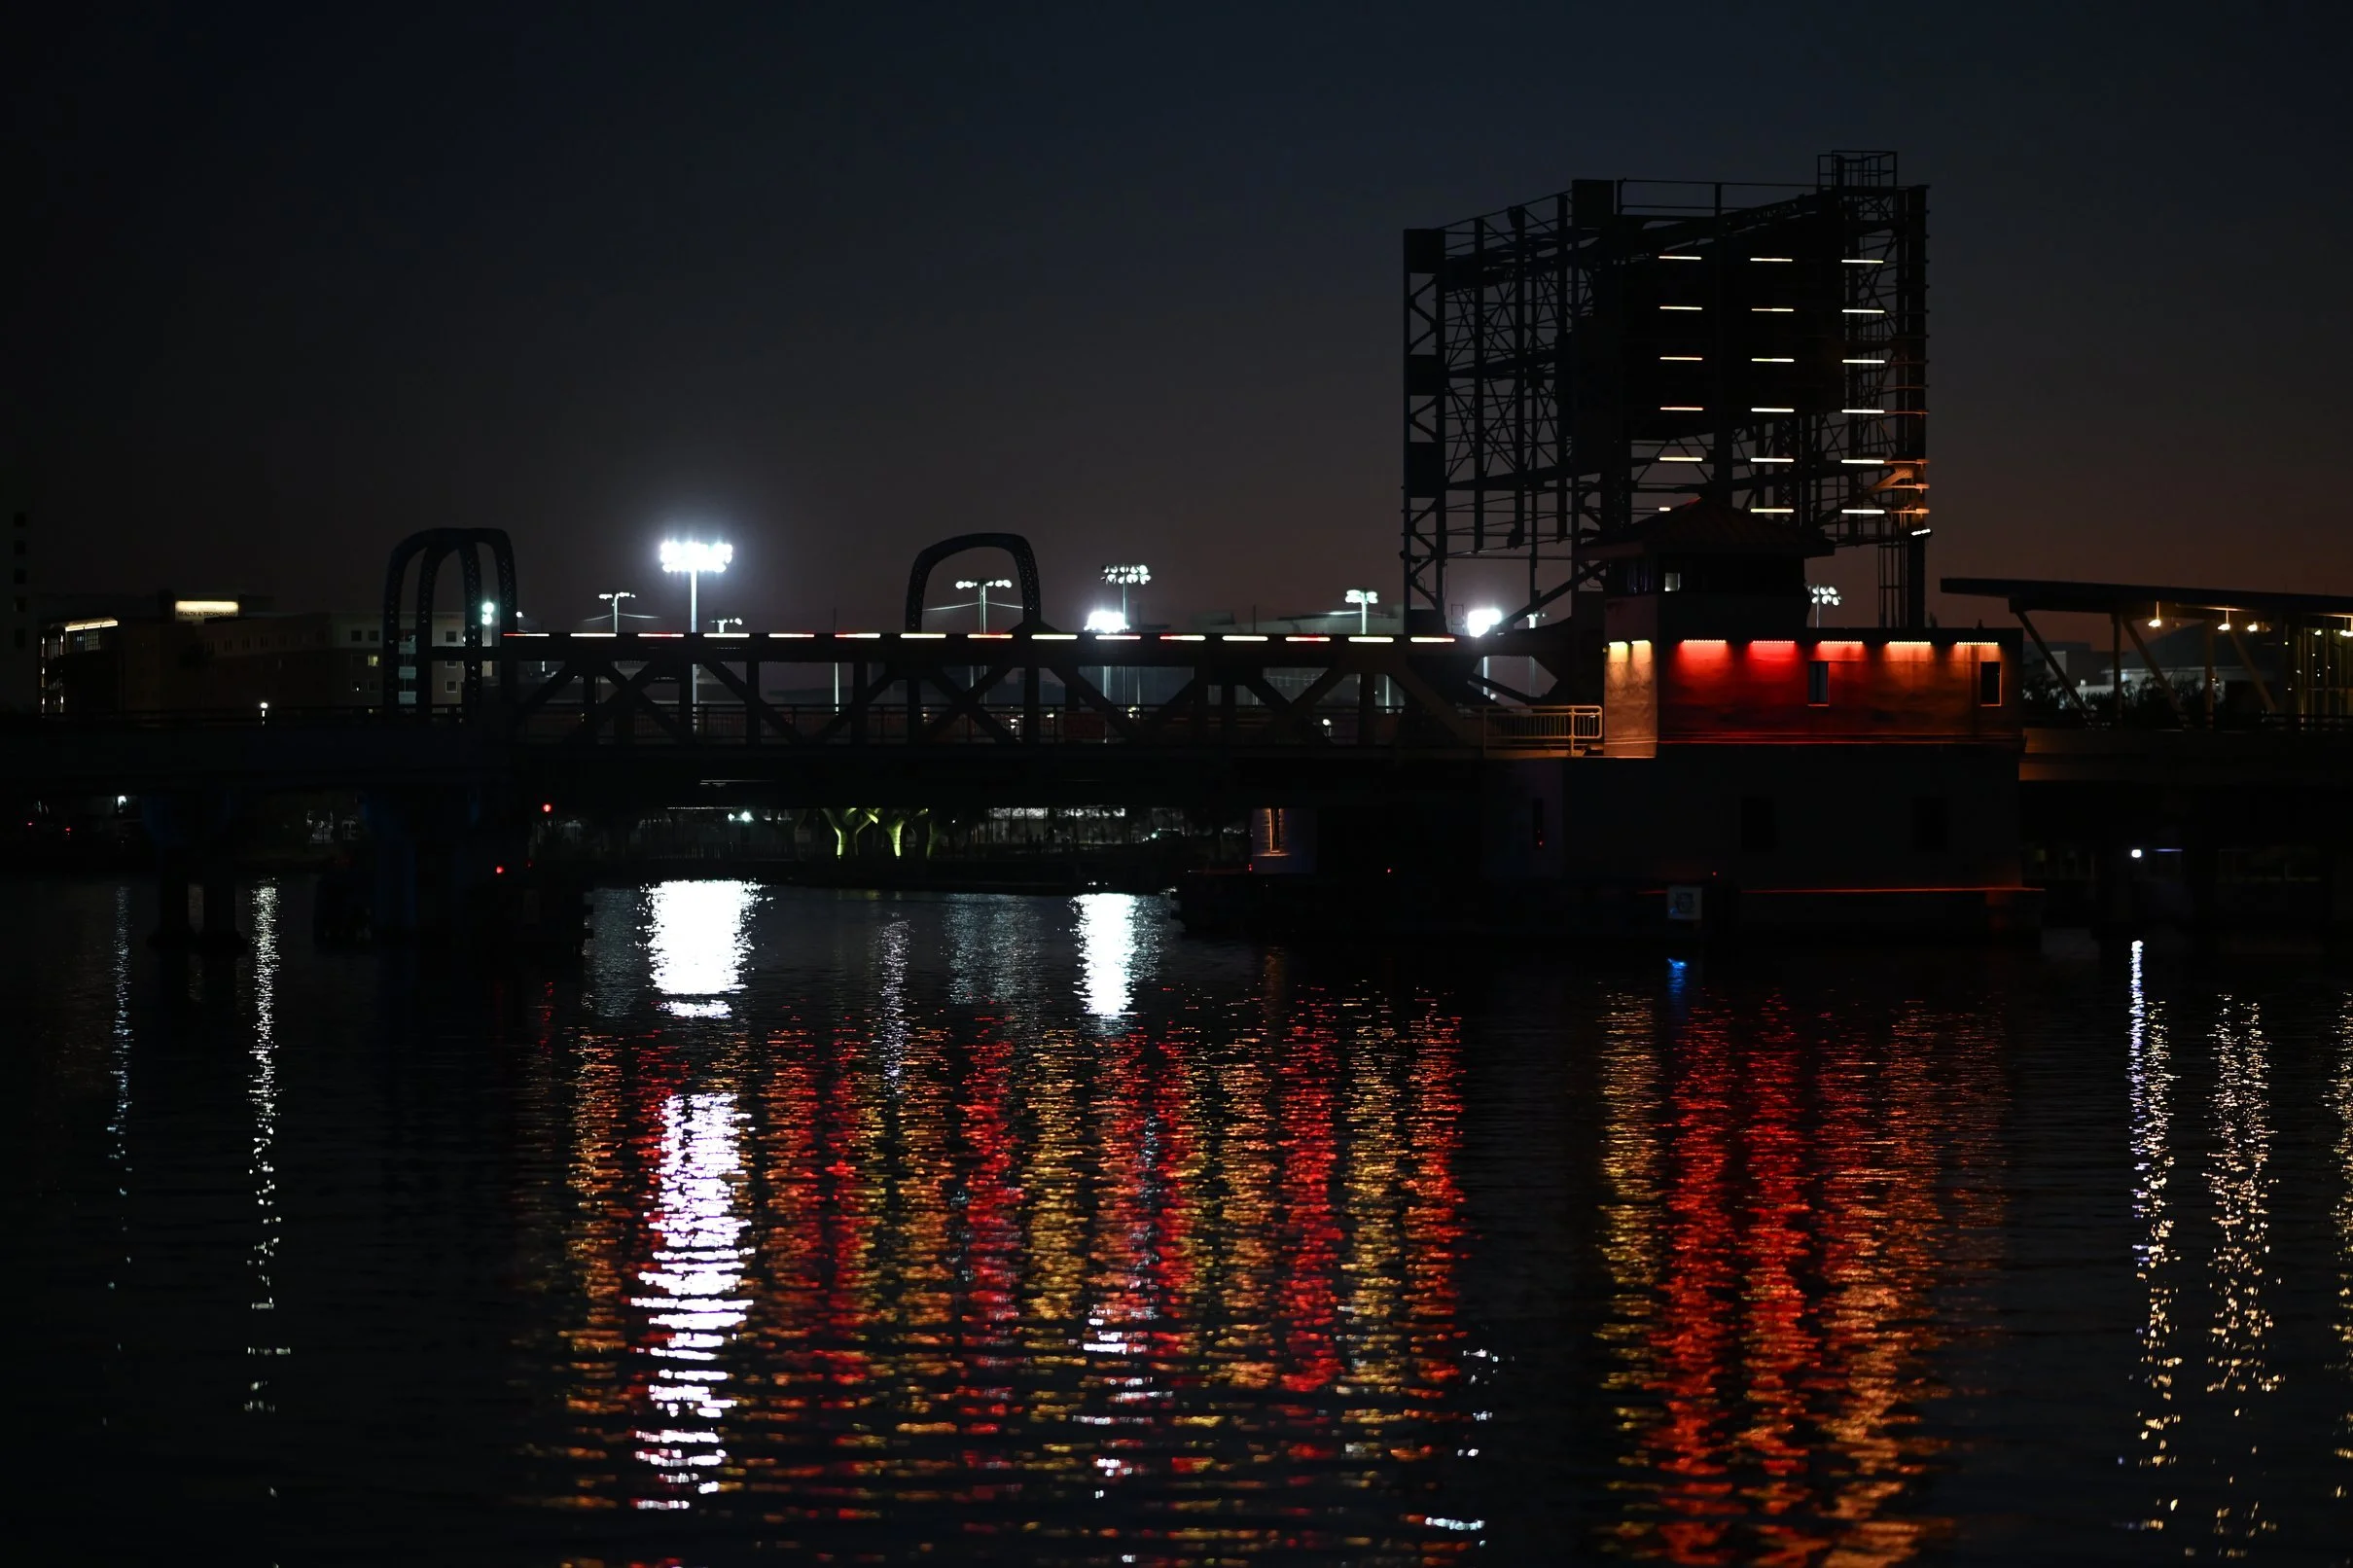
I made my way down Broad Street to the “Southside”, crossed around 13th or so, and headed down to Main. Between the TVA building and that stretch, it's kind of sameness honestly. Not a lot to photograph in that particular section, but I did graba shot of the TVA complex as it looked sort of like a liminal space or something.
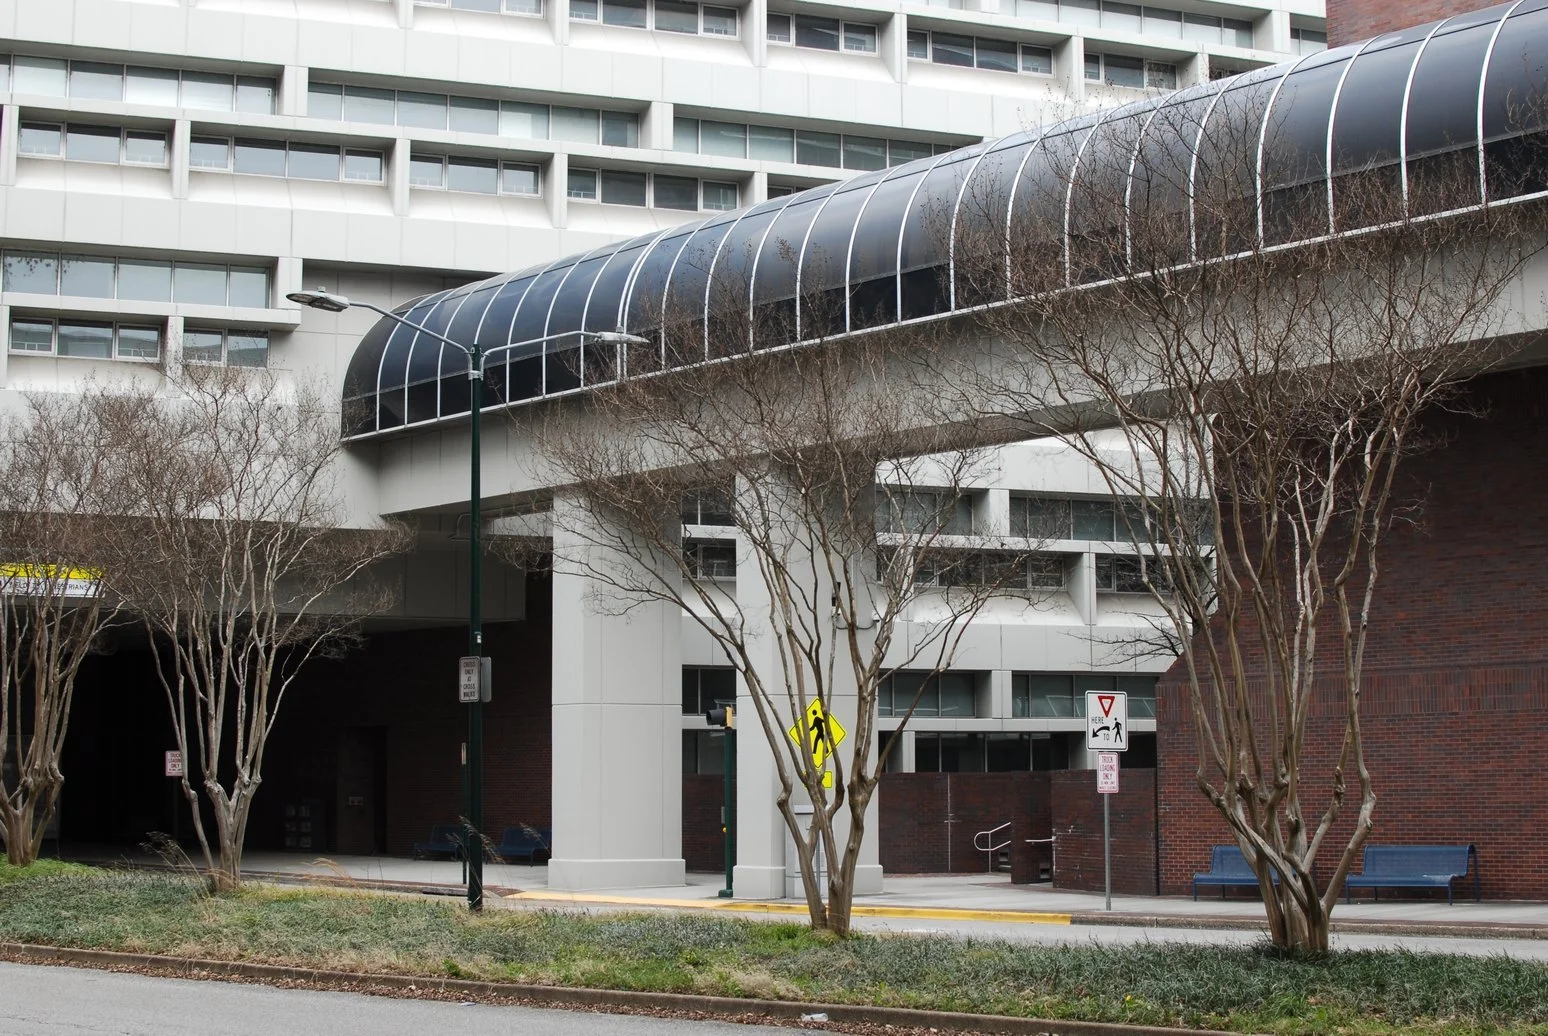
Urban outdoor liminal spaces are kinda hard to find, but I think this one fits. Shot on the Nikon D200 camera.
But once I got down to Main, things picked up. I stopped at an open-air building that was once a bank. The corner has the original bank logo still on it, and inside there's Blue Orleans restaurant, a barber shop, and a tattoo place down at the end of the hall.
The interesting thing about this building is it's open all the time. They can close the windows, but mostly it's just open to the street. It's got this great natural light coming through, and the D200 loves that kind of light. The dynamic range isn't huge on this old sensor, but when you expose it right? The colors are just gorgeous. Knowing that, you start looking for scenes that work for it.
The First Time for Everything
On my way back to Main street, I had a first. Usually when I hear sirens in downtown Chattanooga, it's a fire truck or an ambulance. But this time, it was something different, a police car came screaming through with lights and sirens going full tilt right by me. That was a first! He was in a huge hurry, wherever he was going.
I didn't get a photo of that moment, but I did get a good laugh out of it. If you watch my youtube video, you will see what I am talking about here...it never fails...lol.
Why CCD Sensors Are Special
Here's the thing people don't understand about CCD sensors: it's not about resolution or ISO performance or even sharpness. Modern CMOS sensors beat CCD in all those technical metrics.
But color? Color science? That's where CCD sensors and the supporting algorithm shine.
The way a CCD sensor renders color in the older Nikon cameras, especially in good light, is just different. It's smoother, more film-like, with better color separation. Reds are red, blues are blue, and skin tones are just beautiful without having to mess with them in post. Seriously, I rarely edit my D200 images at all, maybe the exposure is a little off for some reason and I need to correct that, but all the other stuff I never touch.
You don't need to do the "film look" editing dance that everyone does with modern cameras. You just shoot it, and the colors are already there. Straight out of camera.
The Colors That Made Me Fall in Love
When I get these files home and look at them on the computer, I'm always surprised by how good they look right out of the camera. The JPEGs from the D200 are perfectly usable for most things.
That brick red from old buildings. The warm tones in afternoon light. The way it handles shadows without turning them muddy. The color separation between similar tones. This is what I'm talking about when I say CCD magic.
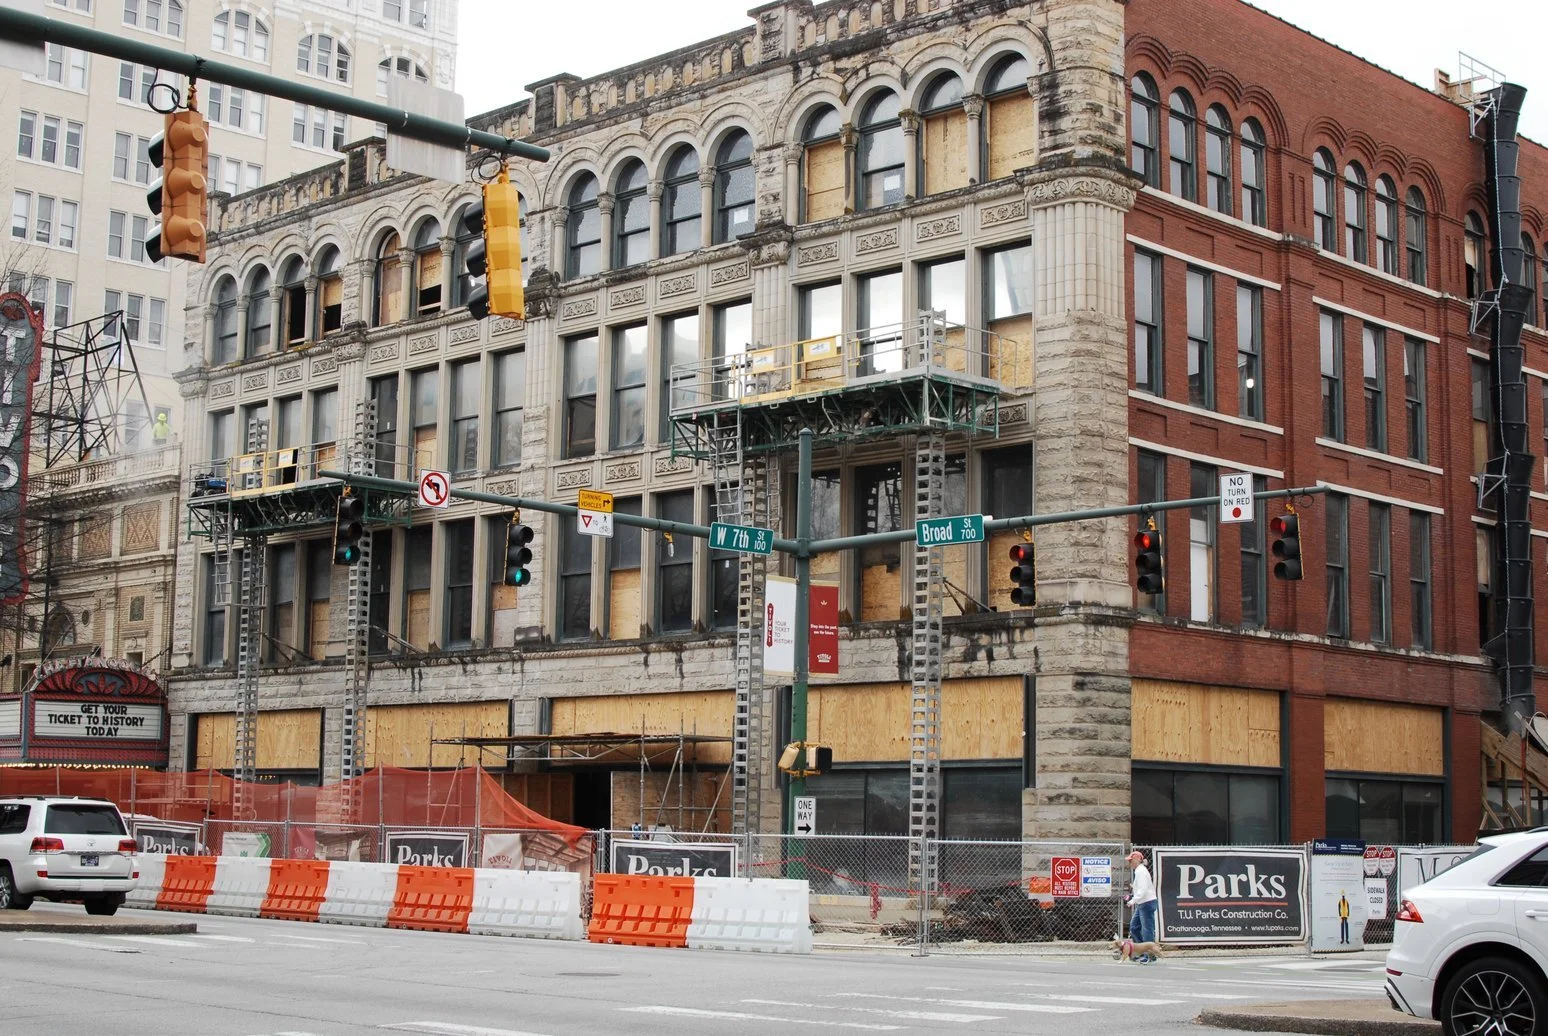
Construction in progress on the Tivoli theater shot with the Nikon D200 camera.
Modern cameras give you more megapixels, better high ISO, faster autofocus, and video capabilities. But they don't give you these colors straight out of camera. You have to work for them in post-processing. Nikon knew something back in the day that they are not talking about now or have lost. The old engineers knew film, color film like Kodachrome and knew what people liked when it came to these film stocks so they built their color science around it. Now the new generation of photographers are wanting that color pallette again and this is pretty much the only place to find it.
The Reality Check: What This Camera Can't Do
Let me be honest about the limitations here, because I'm not going to pretend this is the perfect camera for everything:
High ISO is rough. Above ISO 800, you're going to see noise. A lot of noise. This is a camera for good light.
Autofocus is slow by modern standards. It works fine for my street photography and static subjects, but don't expect to track a bird in flight. That is a total no go with this machine… or your some sort of super human tracking machine, because the camera aint gonna do it!
10.2 megapixels is limiting if you need to crop heavily. Plan your compositions in-camera.
No video capabilities. This is a stills-only camera as it comes from the era when a camera like this was for photos and video cameras looked very different.
The LCD screen is tiny and low-resolution by today's standards. You're basically shooting and hoping until you get home to the computer. It is so low resolution that I use it to confirm the composition was right when I shot the image, but checking focus is laughable at best.
But you know what? None of that matters for what I was doing today(I didn’t even look at the screen on the back except to set the time. Walking around downtown Chattanooga, shooting architecture and street scenes in good light, this camera is more than enough. Actually, it's better than enough. It's perfect for this...for me.
The Shutter Count Question
When I got back to the truck, I mentioned I wanted to figure out how many shutter clicks this camera has on it. I've put several thousand on it since I've owned it, and I'm curious what the total count is. The D200 has a shutter rated for 100,000 actuations, and mechanically, this camera is in great shape. The count is a little over 33,000, which means this machine is essentially like new mechanically. The shutter still sounds crisp, the mirror slap is confident, and everything just works. They don't make them like this anymore, and I mean that literally. The build quality on the D200 is tank-like compared to most modern cameras.
Why I Keep Coming Back to This Camera
I own modern cameras. I've got mirrorless options. I've got cameras with better specs in every measurable way, some of which are quite costly.
But I keep coming back to the D200 for photowalks because of the experience. The colors are part of it, sure. But it's also the simplicity. The lack of distractions. The feeling of a real camera in your hands with real buttons and real dials.
When I'm shooting with the D200, I'm not checking the histogram every shot. I'm not chimping on the back screen. I'm not worried about whether I got the shot or not. I'm just shooting and trusting the camera to do what it does.
And what it does is give me beautiful photos with rich colors straight out of camera.

Ellis Resturant sign has become a local icon in the city of Chattanooga, shot with the Nikon D200 camera.
The Lesson: You Don't Need New Gear
Here's what I want you to take away from this: You can get really good photos from a camera with a CCD sensor, or to put it another way, a really old camera. They haven't made CCD sensors for new cameras in like 20 years!
If you've got an old DSLR sitting in a drawer somewhere (a Nikon D200, D2X, D70, Canon 5D, 20D, whatever), pull it out. Charge the battery (or order a new one from Amazon if your current battery is toast). Put a simple prime lens on it and go take some pictures.
I think you're going to be surprised by what you see. Especially the colors.
The camera companies want you to believe you need the latest and greatest gear to take good photos. But that's just not true. A 21-year-old camera can still produce images that will surprise you, especially if you're used to the over-processed, over-sharpened look of modern cameras “in camera” processing to get you the “straight out of camera” images. (iPhone I am looking at you...)
Final Thoughts
Market and MAin streets in Chattanooga Tn, shot with the Nikon D200 camera
This photowalk reminded me why I love photography in the first place. Not because of the gear, but because of the process. Walking around my city, seeing familiar places with fresh eyes, capturing moments and light and color.
The Nikon D200 helped me do that without getting in the way. The colors it gave me straight out of camera made editing basically unnecessary. And at the end of the day, I walked away with photos I'm proud of from a camera that's old enough to buy its own beer.
Well, if cameras could buy beer. You get what I mean...lol.
Thank you for coming along on this photowalk with me. If you've got an old camera sitting around, I challenge you to pull it out and give it a try. You might just fall in love with photography all over again.
Until next time, get your camera out and go take a picture with it!
Camera and Lens Details
Camera: Nikon D200
Released: 2005
Sensor: CCD, 10.2 megapixels, APS-C (DX format)
ISO Range: 100-1600 (extended to 3200)
Shutter: Rated for 100,000 actuations
Build: Professional magnesium alloy body
Current used price: $50-150 depending on condition
Lens: Nikon 35mm f/1.8G AF-S DX
Released: 2009
Focal length equivalent: 52.5mm on DX
Aperture: f/1.8-22
Weight: 7 oz (200g)
Current used price: $100-150
Settings Used:
Mode: Aperture priority (A)
ISO: 640 (fixed)
Focus: Back button focus, AF-C (continuous)
White balance: Auto (CCD sensors handle this well!)
Support this website by using these affiliate links to shop on Amazon:
Leica M11 Digital Rangefinder Camera
Nikon AF-S FX NIKKOR 105mm f/1.4E ED Lens
Voigtlander Nokton 35mm f/1.4 II
Sandisk 128GB Extreme Pro memory cards
Nikon 50mm f1.8 S Lens for Z mount
All photos in this post were shot with the Nikon D200 and 35mm f/1.8 DX lens. Colors are straight out of camera with minimal editing.
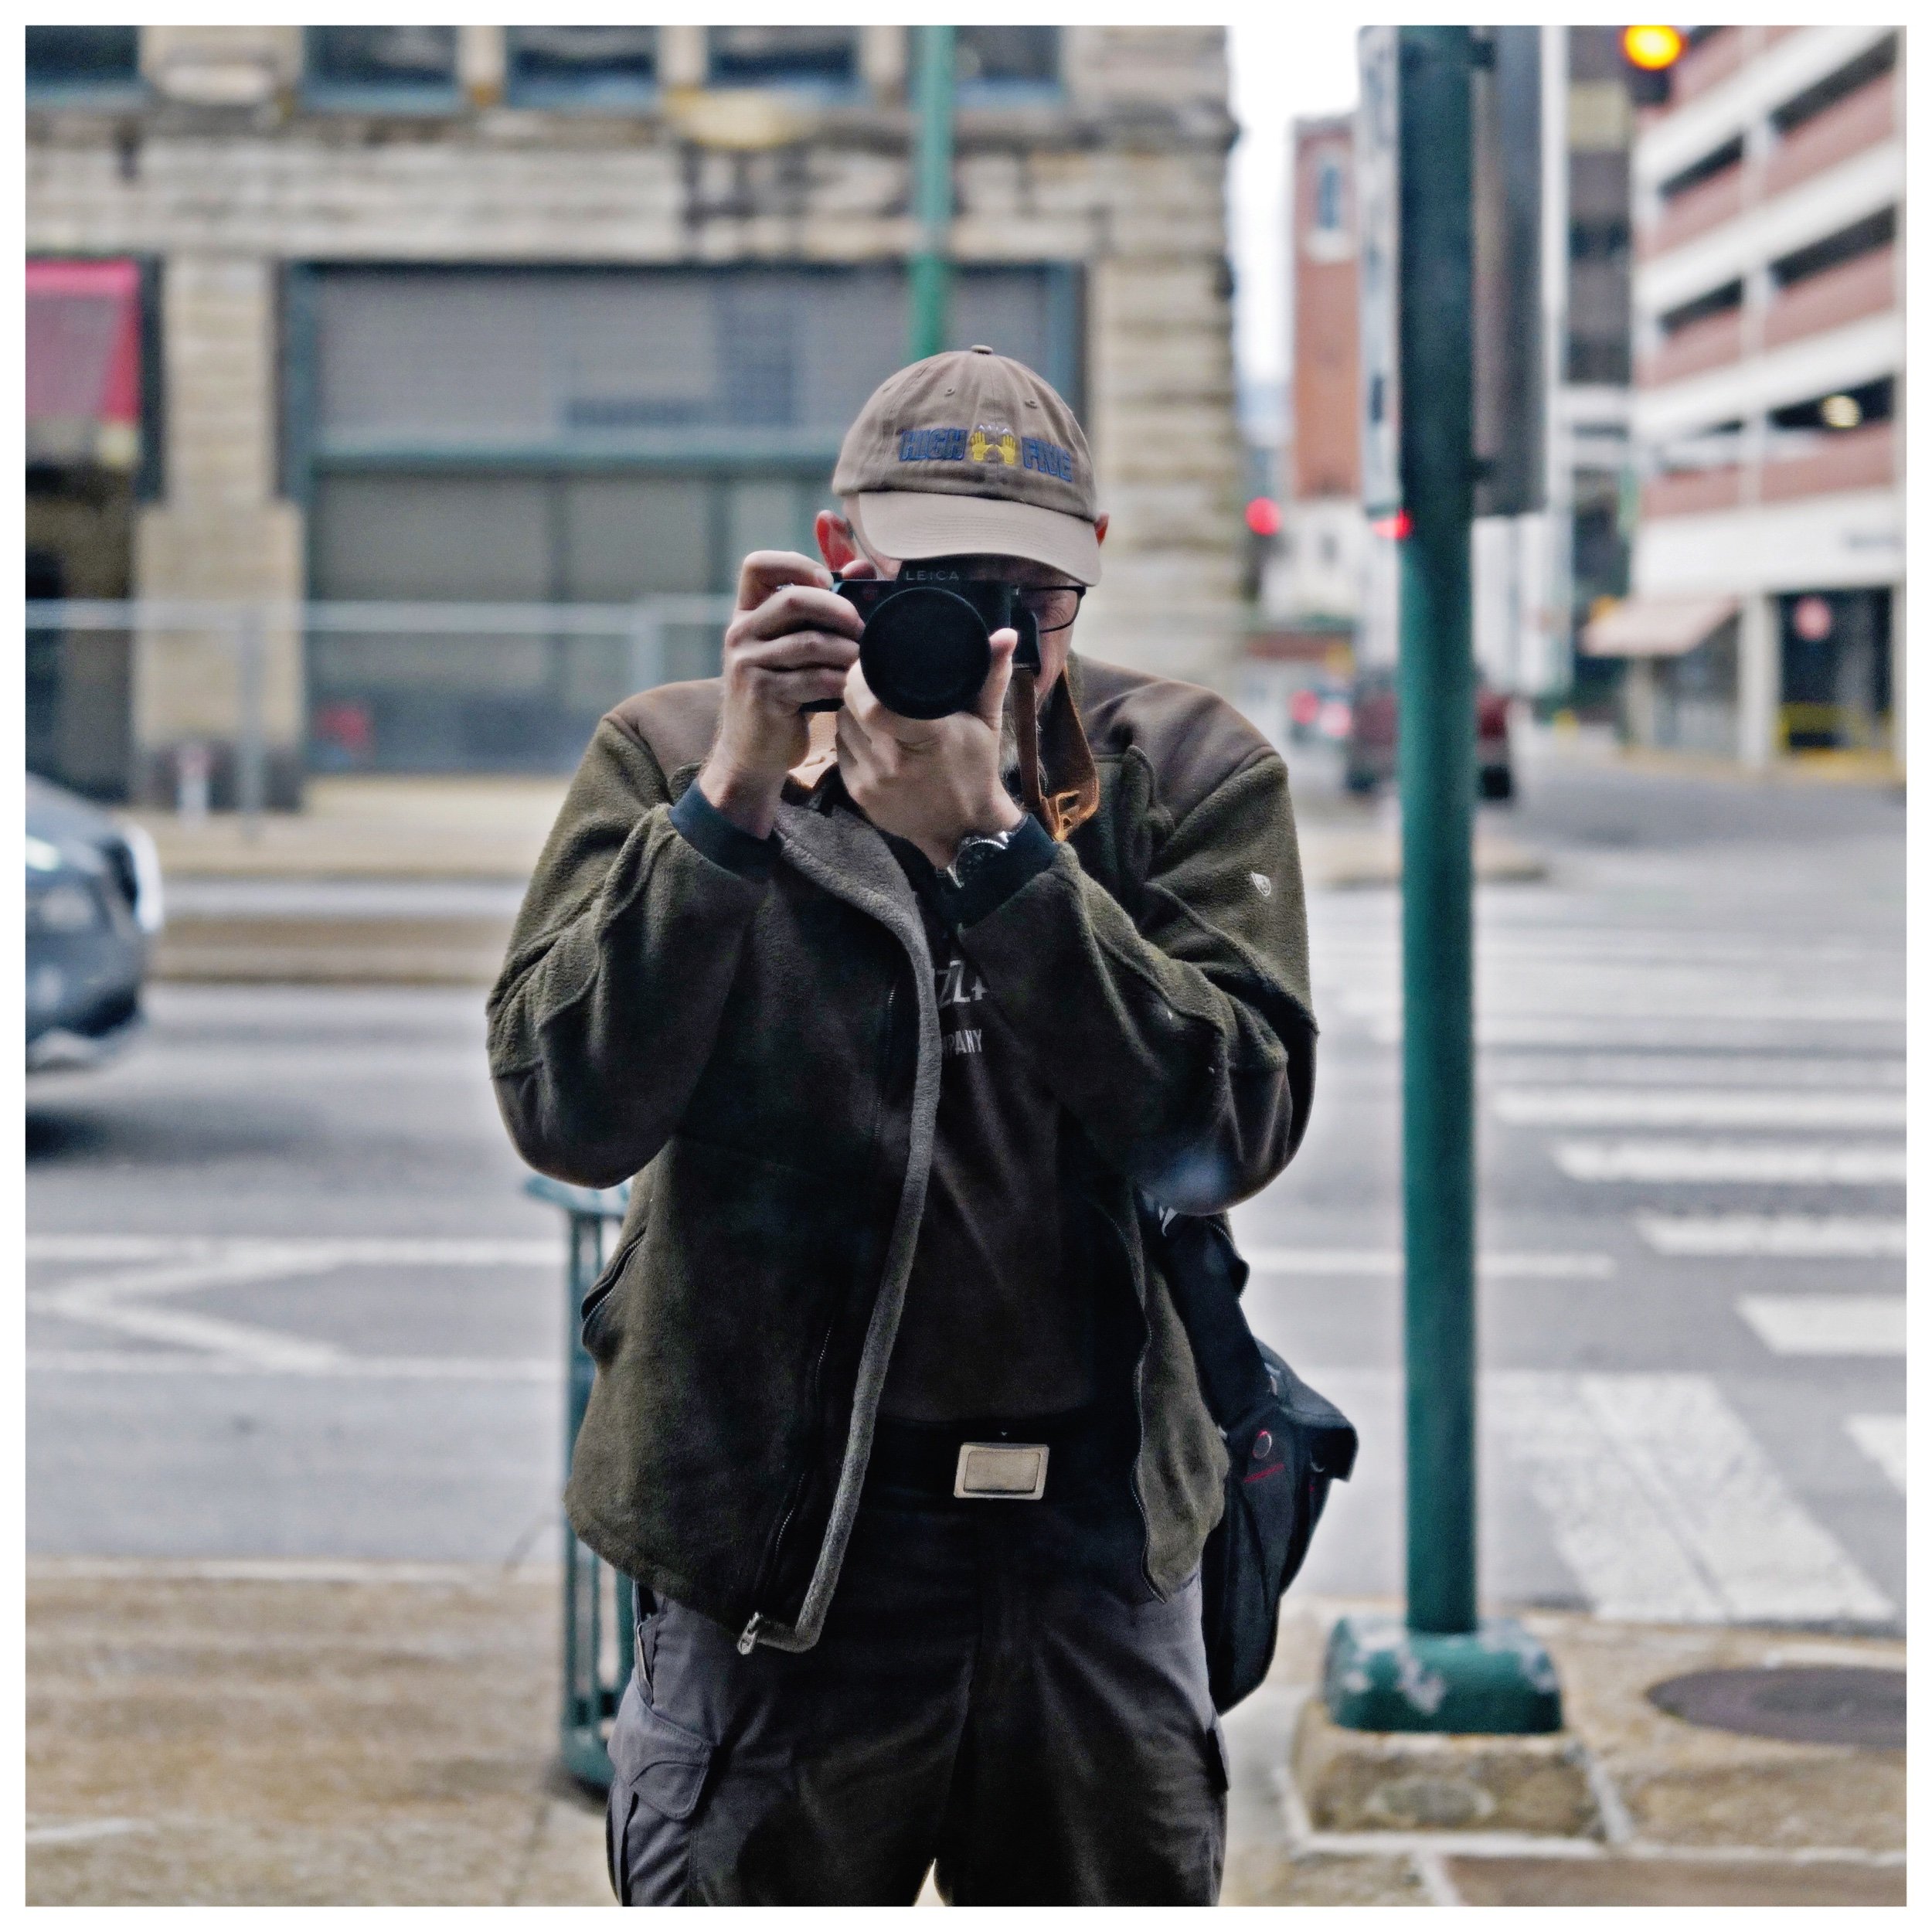
Street Photography with a 105mm Lens: Breaking All the Rules (and Loving It)
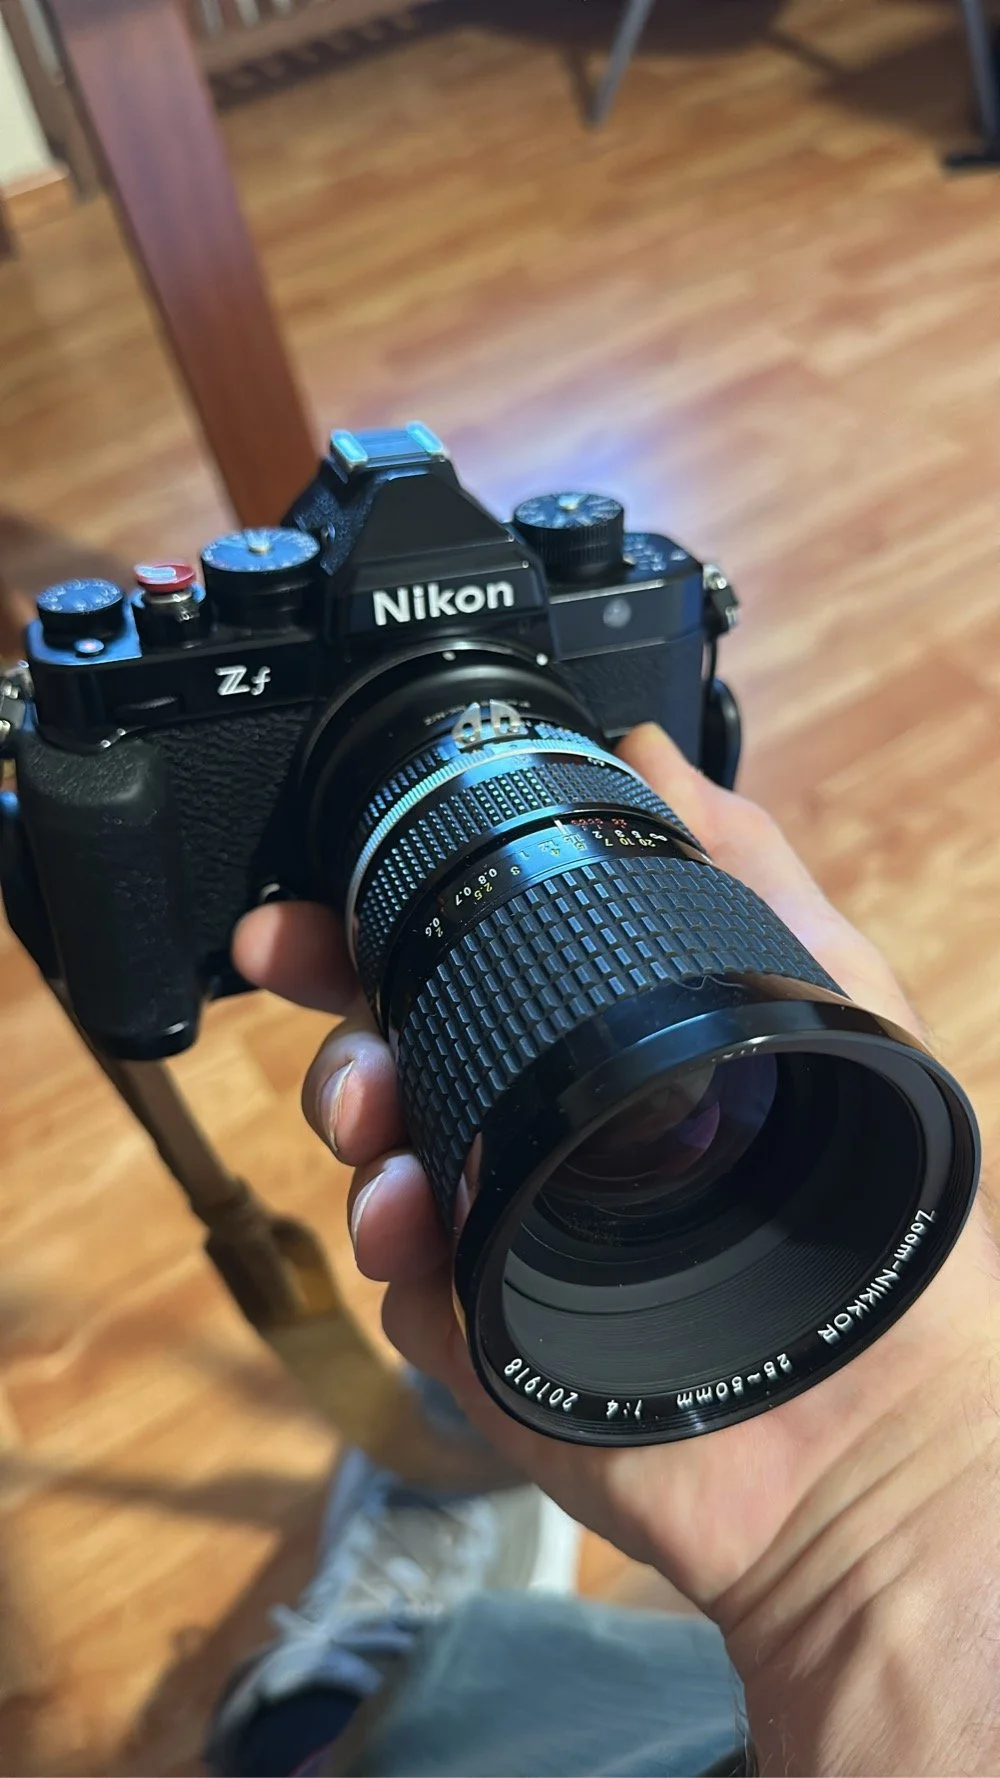
Recently I went to downtown Tampa Florida to shoot some street photography but ended up taking the wrong camera with me. Instead of my Leica CL and the 35mm TTartisan lens, I had taken the Nikon Zf with the Nikkor 105mm f1.4 F mount prime lens instead. At the end of the day, all went really well with the equipment supplied, but it did prove challenging at times.
Is 105mm too long for street photography? I used to think so. But after taking my Nikon Zf and 105mm f1.4 lens to the streets of Tampa, I discovered that telephoto street photography offers unique advantages that traditional 35mm and 50mm lenses can't match. Here's everything I learned about using a 105mm lens for street photography.
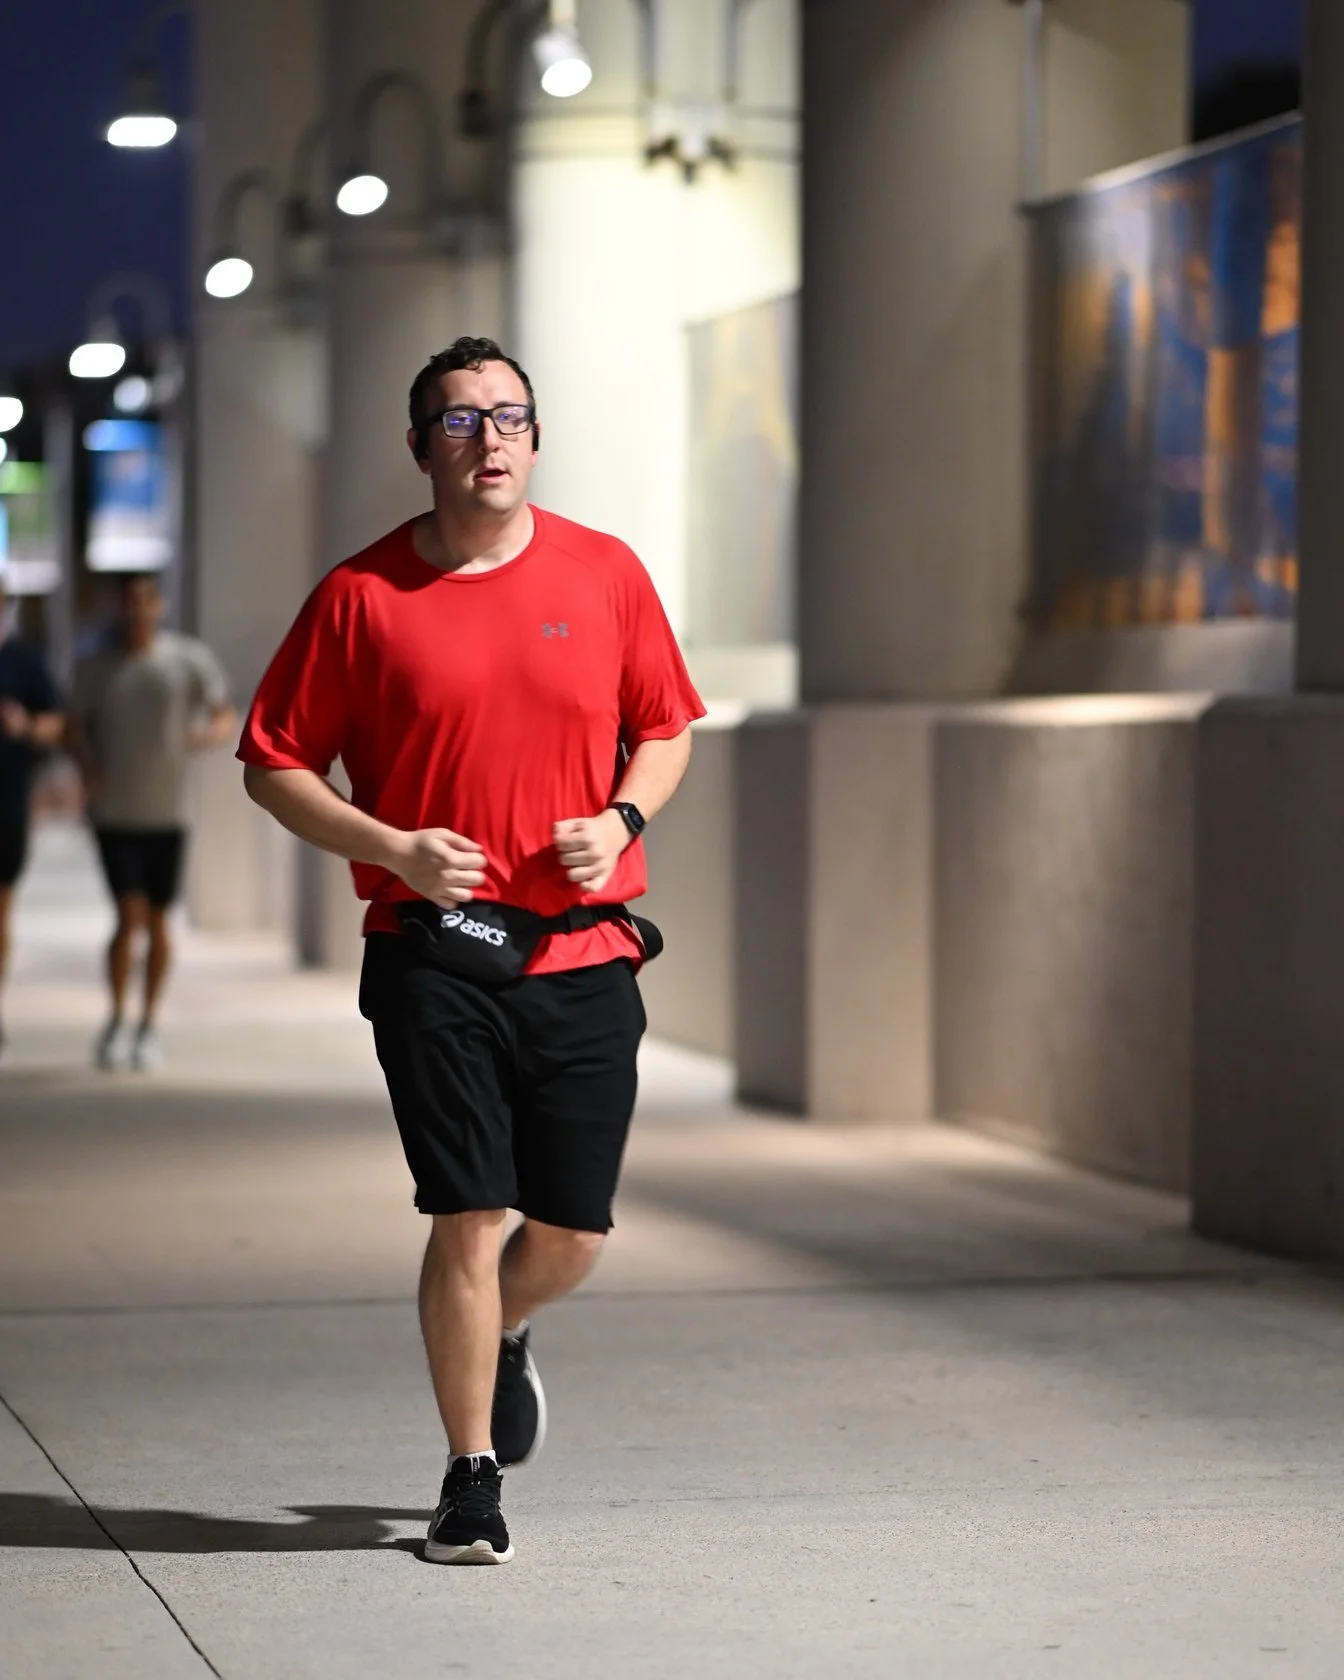
The 105mm f1.4's compression effect isolates subjects beautifully in busy urban environments
If you've spent any time reading about street photography online, you've probably been told a thousand times that you need a 35mm or 50mm lens. Maybe a 28mm if you're feeling adventurous. The "experts" will tell you that anything longer is impractical, that you can't capture the decisive moment with a telephoto, that you'll be too far from your subject to get that authentic street vibe. Well… here I am doing the exact opposite with my Nikon Zf and 105mm f1.4 lens, and honestly, I'm having more fun than I've had with street photography in years.
How I Got Here (Or: My Descent Into Madness)
Let me back up a bit. I've been shooting street for a while now, mostly with the conventional focal lengths everyone recommends. My Leica glass, vintage manual focus lenses, the whole kit that's supposedly "right" for street work. And don't get me wrong, those setups work great. But lately I've been noticing something… I was shooting the same kinds of shots, standing at the same distances, looking for the same moments. It had become, should I say it… predictable.
Then I picked up the 105mm f1.4 for the Nikon Zf. I had initially bought it to photograph Sacred Harp singings only, but it is too nice to just leave it put away in the cabinet till just those events happen. This lens is an absolute monster in every sense of the word. It's heavy, it's expensive, and according to conventional wisdom, it has absolutely no business being on a camera for street photography. The focal length is "too long", the lens is "too conspicuous", and you'll "never be able to react fast enough." I heard all of these things in my head as I mounted it on the camera for the first time.
You know what happened? I completely ignored all that advice and took it out to Tampa anyway.
At f1.4, the 105mm creates layers of depth impossible with wider lenses
The Reality of 105mm Street Photography: Compression and Perspective
Here's the thing that nobody tells you about shooting street with a longer lens… it fundamentally changes how you see. With a 35mm or 50mm, you're looking at scenes, at environments, at people in context. With the 105mm, you're hunting for moments, for expressions, for layers of depth that compress into each other in ways that wider lenses simply can't achieve. Unlike traditional street photography lenses like 35mm or 50mm, the 105mm focal length has a very unique look to it.
Walking around Tampa (which if you haven't been here, has some fantastic street photography opportunities between Ybor City, downtown Tampa, and the waterfront (just to name the obvious), I found myself looking at the city completely differently. I wasn't trying to capture the whole scene anymore. I was looking for isolated moments… the way sunlight catches someone's face three blocks away(yeah this is an exaggeration, but you get the point haha), the compression of people at different distances along a sidewalk, the details that you'd never notice with a wider view.
Now, to be completely transparent about it, there are some real challenges here. The 105mm f1.4 is not a small lens. You're not being subtle when you raise this thing to your eye. I've sort of made peace with this though. Over the years I have come to realize that most people just don't care if you're taking photos in public spaces. The ones that do care will let you know and I just delete their image anyway as I don't want photos of someone who isn't happy with me taking their photo. Win-win in my book.
Nikon 105mm f1.4 Settings for Street Photography (Because We Can't Ignore It)
Let's talk about the practical stuff for a minute. At 105mm, your depth of field is razor thin, especially at f1.4. This means two things:
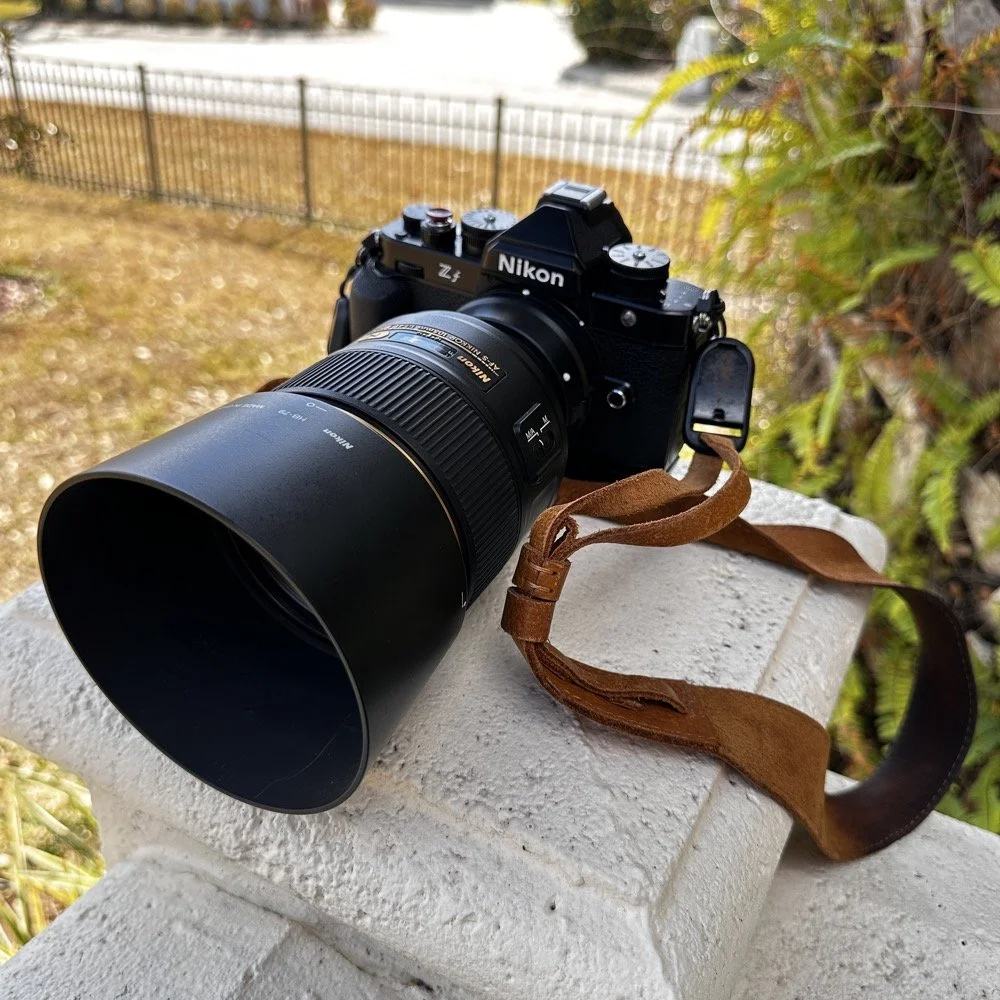
My street photography setup: Nikon Zf with Nikkor 105mm f1.4E ED
You need to be absolutely nailing your focus. With the Nikon Zf's excellent eye-detect AF, this is actually less of a problem than you'd think. The camera does most of the heavy lifting here.
The background separation is absolutely incredible. I mean, as Thomas Heaton would put it “Absolutely stunning”. You can shoot a photo of someone on a busy street and the background melts into this beautiful blur that makes your subject pop in ways that are impossible with wider apertures on shorter lenses.
For more information about the 105mm f1.4 F mount Nikkor lens, you can find it on the Nikon Official website here.
The compression effect at 105mm creates visual layers that draw the eye through the frame
The compression effect is the other huge technical advantage. When you're shooting down a street, people at different distances compress together in the frame, creating layers that add so much visual interest. It's like… have you ever noticed how in a good photo there's often this sense of depth, of things happening at multiple distances? The 105mm makes that almost automatic if you position yourself right.
Distance estimation becomes important though. At 105mm, you're often 20-30 feet or more from your subject. This actually works in your favor in some ways. People are less likely to notice you, and even if they do, you're far enough away that it doesn't feel as invasive. But you also need to be thinking about your working distance. I've learned to scan ahead as I walk, looking for potential shots that are developing 20-40 feet in front of me rather than right in my face. It also works really well for the wide city avenues you tend to find in major city downtown areas. You can shoot photos across the street and it looks good.
What I've Learned About Light
The f1.4 aperture is a godsend for street photography. Tampa's got some interesting lighting situations… bright sun one minute, then you duck under an awning or into a covered walkway and suddenly you're down 3 stops. With this lens wide open, I can keep shooting in conditions where my other lenses would be struggling.
Dark shade really is about 3 stops lower than direct sun, and I'm constantly making that mental calculation as I move through the city. The beauty of shooting with such a fast lens is that I can stay at f1.4 and just adjust my shutter speed for most situations. I've got my Zf set up with a couple of user profiles… one for bright sun at f5.6 or f8, and another for low light wide open. Takes literally two seconds to switch between them. If I particularly lazy, I will just throw the camera into Aperture Priority and let it set the shutter speed for me, with f1.4 and ISO 640 it will ALWAYS freeze the action whether in the shade or the sun…
This makes the Nikon 105mm f1.4 ideal for low-light street photography situations that would challenge slower lenses.
Why Telephoto Lenses Work for Street Photography
Look, I'm not saying everyone should go out and buy a 105mm f1.4 for street photography (though if you have one, you absolutely should try it). What I am saying is that sometimes the conventional wisdom in photography is… well, it's just conventional. It's not wrong, but it's also not the only way.
There's something liberating about shooting street with a lens that you're "not supposed to" use. It forces you to slow down, to really look at what you're doing, to be more intentional about your compositions. You can't just spray and pray at 105mm (well, you can but it probably isnt going to do you much good…haha). You have to wait for the moment, anticipate where your subject is going to be, think about your background and foreground elements a little and so fourth.
When researching the best focal length for street photography, you'll rarely see telephoto lenses recommended. But 105mm street photography offers a completely different perspective that can set your work apart.
In a weird way, it's brought me back to what I loved about manual focus vintage lenses. It's engaging. Every shot requires thought and intention. And honestly, that makes the keepers so much more satisfying when you nail one just to be honest about it.
The Setup
Since people always ask… here's what I'm working with:
Nikon Zf (which I absolutely love for this kind of work)
Nikon 105mm f1.4E ED
Usually shooting in aperture priority, Auto ISO (today all were at f1.4)
Focus mode: AF-C with eye detection
RAW + JPEG (though I rarely use the RAWs these days)
User profiles saved for different lighting conditions
The Zf is perfect for this because it's not overly large, has excellent AF, and the files are just gorgeous. The vintage-inspired controls mean I'm always aware of my settings without taking the camera from my eye.
See my complete photography gear setup here.
Frequently Asked Questions About 105mm Street Photography
Is 105mm too long for street photography?
No, 105mm is not too long for street photography. While unconventional compared to the traditional 35mm or 50mm focal lengths, the 105mm lens offers unique advantages that can actually improve your street photography. The longer focal length provides exceptional compression effects, beautiful subject isolation through shallow depth of field, and the ability to capture genuine candid moments from a comfortable distance without disturbing your subjects. I've found that shooting with the Nikon 105mm f1.4 in Tampa has completely changed how I see and compose street scenes.
What are the best camera settings for 105mm street photography?
For the Nikon 105mm f1.4 on my Nikon Zf, I typically use these settings:
Aperture: f1.4 for maximum bokeh and low-light performance (or f5.6-f8 in bright sun)
ISO: Auto ISO ranging from 640 to 6400
Shutter Speed: 1/250s minimum to freeze motion (Aperture Priority handles this)
Focus Mode: AF-C (continuous autofocus) with eye detection enabled
File Format: RAW + JPEG (though I mostly use the JPEGs)
The fast f1.4 aperture is crucial - it allows you to maintain fast shutter speeds even when you duck under awnings or into shaded areas where the light can drop by 3 stops.
Can you use a telephoto lens for street photography?
Absolutely! Telephoto lenses like the 105mm, 85mm, or even 135mm can be excellent choices for street photography. They offer a different creative approach compared to wide-angle lenses. With a telephoto lens, you can:
Compress perspective to create layered compositions
Isolate subjects with beautiful background blur
Shoot from 20-40 feet away, making candid photography easier
Capture details and expressions that wider lenses would miss
The key is understanding that telephoto street photography requires a different technique - you need to anticipate moments, work with compression effects, and be comfortable with your working distance.
What is the best lens for street photography?
There's no single "best" lens for street photography - it depends on your style and what excites you to shoot. Traditional wisdom says 35mm or 50mm, and those are fantastic choices. However, the Nikon 105mm f1.4E ED excels for street photography when you want:
Exceptional bokeh and subject isolation
The ability to shoot from a distance
Compressed perspective for unique compositions
Outstanding low-light performance (f1.4 aperture)
The best lens is the one that makes you want to go out and shoot. For me right now, that's the 105mm. It might not be forever, but it's teaching me to see the streets of Tampa in completely new ways.
How far should you stand from your subject with a 105mm lens?
With the 105mm lens, I typically position myself 20-40 feet from my subject for street photography. This distance works well because:
People are less likely to notice you or feel self-conscious
You have time to anticipate and compose as subjects approach
The compression effect at this distance creates beautiful layered compositions
It doesn't feel invasive, even in public spaces
Compare this to a 35mm lens where you might need to be 5-10 feet away. The 105mm gives you breathing room while still capturing intimate moments.
Does the Nikon 105mm f1.4 work well in low light for street photography?
Yes, the Nikon 105mm f1.4 is exceptional for low-light street photography. Tampa has very dynamic lighting - bright sun one moment, then you're under a covered walkway and the light drops 3 stops. The f1.4 aperture is a godsend in these situations. I can keep the lens wide open and simply adjust my shutter speed, or let Aperture Priority mode handle it. Even in challenging light, the combination of f1.4 and the Nikon Zf's excellent high-ISO performance means I can keep shooting without worrying about motion blur or underexposure.
Recommended Gear for 105mm Street Photography
Support this website by using these affiliate links to shop on Amazon:
Nikon AF-S FX NIKKOR 105mm f/1.4E ED Lens
Voigtlander Nokton 35mm f/1.4 II
Sandisk 128GB Extreme Pro memory cards
Final Thoughts
I went through this whole evolution as a photographer where I thought I needed to follow all the rules, use all the "right" gear for each type of photography, and do things the way everyone said they should be done. At some point I simply stopped buying into that and started shooting what felt right to me.
If there's one thing I've learned from all my years doing this, it's that the best camera is the one that makes you want to go out and shoot. The best lens is the one that helps you see things in new ways. And the best focal length for street photography? It's the one that excites you enough to actually do street photography. For more technical background on compression effects, Ken Rockwell has an excellent explanation here.
I will tell you what feels right to me right now, it's 105mm. It's probably not forever… I still love my 50mm and I'm definitely not getting rid of my wider lenses. But for this moment in my photographic journey, this "wrong" setup is teaching me to see the streets of Tampa in completely new ways.
Maybe that's worth breaking a few rules for.
Support this website by using these affiliate links to shop on Amazon:
Leica M11 Digital Rangefinder Camera
Nikon AF-S FX NIKKOR 105mm f/1.4E ED Lens
Voigtlander Nokton 35mm f/1.4 II
Sandisk 128GB Extreme Pro memory cards
Nikon 50mm f1.8 S Lens for Z mount
What unconventional gear choices have you made that actually worked out? I'd love to hear about them in the comments. And if you're in the Tampa area and want to grab a photo walk sometime (while I am in the area), hit me up. Just don't judge me for showing up with this giant telephoto lens. Haha.
Solo Photography: Why I Prefer Shooting Alone for Street and Travel Photography
I do enjoy both types of trips, I am just more inclined to solo trips over trips involving others. I don't know if this is a desire to enjoy the freedom associated with solo travel, if it is some sort of childhood learned behavior, or that it might just be therapeutic. Whatever it is, I just love solo photography.
When I think about my most favorite photography themed trips, I only have two categories. Solo trips and collaborations are my main two categories here.
Of those two categories though, solo trips are my favorite.
I do enjoy both types of trips, I am just more inclined to solo trips over trips involving others. I don't know if this is a desire to enjoy the freedom associated with solo travel, if it is some sort of childhood learned behavior, or that it might just be therapeutic. Whatever it is, I just love solo photography.

Why Solo Photography Works for Me
In fact I love it so much that I almost never collaborate with others on any sort of project whether it be a video or photo shoot or even to just hang out as they say. This is partly because I grew up pretty much by myself and learned to enjoy solitude instead of hating it.
When you spend enough time alone, you come to learn the freedom it provides and you actually crave it. So for me, I will operate alone for the most part.
There's something about being out with just my Leica CL and a lens that just works. No one to wait for, no one to compromise with on where to go next, and no one to apologize to when I want to stand on a corner for 20 minutes watching light change on a building. If I see something interesting down a side alley, I can just go. No group discussion required.
The Leica CL is practically invisible anyway. The small form factor means I can blend into crowds at markets or slip into doorways without drawing attention. Try doing that with a group of photographers bristling with tripods and camera bags - you'll clear the street in seconds.
Show Image

The Freedom to Move at Your Own Pace
The standard recipe for success is pretty simple. Don't tell anyone you're going out shooting and then go. Lol… I was only half joking here, if you're serious then you will just go.
Another thing that is special about solo photography is that you can explore at a pace that is inconceivable by others. You can go as slow or as fast as you want and can even get into areas where multiple people just would not be feasible.
I've had photowalks where I covered 10 miles in an afternoon because I was following interesting scenes from neighborhood to neighborhood. I've also had sessions where I spent three hours within a two-block radius because the light was just right. Both were equally rewarding, and both would have been impossible if I'd been trying to coordinate with someone else's schedule or energy level.
When I'm alone with my camera, time sort of disappears. I'm not thinking about whether my companion is getting bored or hungry or tired. I'm just in the flow of observation and capture. That's when the best images happen - when you're not trying to make them happen, they just unfold in front of you.
The Drawbacks (Because There Are Some)
Now this is not without its pitfalls either. You see, when you don't collaborate with others your projects typically won't grow past a certain point. If you are the kind of person who has big ambitions for your projects, then operating like me is probably not the best idea.
To be fair though, it is not without its pitfalls too. For some people, being alone with your thoughts is actually terrifying. So if you need interaction with others, then what I am doing here is not for you.
I'm not going to lie and say solo photography is for everyone. Missing out on collaboration means missing out on second perspectives, on someone to watch your back, on bouncing ideas around. If your camera fails, you're on your own. If you get a flat tire on the way home, there's no one to help. And yeah, your channel or your business or your Instagram probably won't grow as fast without the networking and collaboration that comes from working with others.
But here's the thing - I'm okay with that. My photography isn't about building an empire or going viral. It's about the process, the meditation, the simple act of seeing and capturing. And that works best for me when it's just me and the camera.

Gear Considerations for Solo Shooting
Over the years I've learned that when you're shooting alone, your gear choices matter even more. You can't hand off a second camera body to someone else. You can't ask your buddy to carry the extra lens. Everything you bring, you carry.
This is why the Leica CL has become my go-to for solo work. One body, usually just one lens - typically my Voigtlander 35mm Nokton or the TTArtisan 35mm f1.4. A spare battery in my pocket. That's it. I've done full day photowalks with nothing more than that.
The SL2 with the APO Summicron is amazing, don't get me wrong, but that package is heavy and conspicuous. Great for certain kinds of work, but not ideal for wandering around a city for hours. When you're alone, you feel the weight of every piece of gear, and you notice when people notice you.
Minimal gear also means minimal decisions. I'm not standing there switching lenses and missing moments. I know what my 35mm can do. I know where I need to be standing to get the shot I want. It becomes instinctive. Photographer Eric Kim has written extensively about the benefits of minimal gear for street photography, and I've found his approach aligns well with solo work.
Safety and Awareness
Here's something nobody really talks about - shooting alone requires a different level of awareness. You don't have someone watching your back while you're looking through the viewfinder. You're responsible for noticing your surroundings, keeping track of your gear, and making smart decisions about where you go and when.
The Digital Photography School has good guidelines on staying safe as a photographer, which become even more important when shooting alone."
I stick to populated areas during daylight hours. I stay aware of who's around me. If something feels off, I move on. My wife usually knows where I am and when I expect to be back. These aren't revolutionary safety practices, but they matter more when you're solo.
The flip side is that this constant awareness makes you a better photographer. You're tuned in to everything happening around you. You notice details. You see patterns. You sense when something interesting is about to happen. That heightened awareness feeds directly into better images.

Finding Your Zone
When I wander the streets with my camera, I am at peace. No one to make sure you're not leaving behind or holding back. No judgement about equipment, it is just the process. If you have not found your zen activity then I recommend you start looking at what makes you really happy and focus on that.
This took me years if not decades to truly figure out. Looking back, things could have gone a very different way had I followed what worked for me instead of what other people said I should be doing.
For a while there I thought I needed to be out shooting with wide glass, getting close to people, being all up in the action like you see in classic street photography. That works for some people. Not me. I have a real problem invading personal space. It's a hard boundary for me, and trying to force myself past it just made photography stressful instead of enjoyable.
So I adapted. I shoot longer focal lengths (that 35mm on the crop sensor CL gives me a 50mm equivalent field of view). I find my scenes from a respectful distance. I wait for moments to develop instead of forcing them. And you know what? The images are better because I'm comfortable, I'm in my element, and I'm enjoying the process. Not everyone needs to shoot like Henri Cartier-Bresson to do great street photography - finding what works for you is what matters.
How to Get Started with Solo Photography
If you're thinking about trying solo photography, here's my advice: just start. Don't overthink it.
Grab your camera, one lens, and head out somewhere familiar. Your own neighborhood is fine. Walk around for an hour. See what you notice. Don't put pressure on yourself to come back with amazing images - just get comfortable being out there alone with your camera.
Once you're comfortable close to home, expand your range. Try a different neighborhood. Head downtown. Visit a park. Each time you go out, you'll build more confidence and develop your own rhythm.
The first few times might feel weird. You might be self-conscious. You might wonder what you're doing wandering around by yourself with a camera. That's normal. It passes. Eventually you stop thinking about yourself and start noticing everything else.
Solo Doesn't Mean Isolated
Here's the thing people sometimes misunderstand - shooting solo doesn't mean you're antisocial or that you hate people. It just means you prefer the creative process to be solitary.
I still enjoy talking with other photographers. I still like sharing images and getting feedback. I still appreciate seeing what others are creating. I just don't want to coordinate schedules or compromise vision when I'm actually out shooting.
Some of my best photo conversations happen after the fact - showing someone what I found, talking through why I framed something a certain way, learning what others are working on. The difference is the actual capture happens on my terms, at my pace, following my instincts.
The Bottom Line
Solo photography isn't the only way or even the best way - it's just the way that works for me. Your mileage may vary. Some people thrive in collaborative environments. Some people need that external motivation to get out and shoot. Some people genuinely enjoy the social aspect of group photowalks.
Me? I enjoy the silence, the solitude, and the freedom to follow wherever my eye leads me. I love knowing that if I want to spend an hour photographing rust patterns on a fence, nobody's going to roll their eyes or check their watch. And when I get home and look through what I captured, those images feel entirely mine - for better or worse.
If you're wired like I am, give solo shooting a try. Start small, build confidence, find your rhythm. And if you discover it's not for you? That's fine too. The goal isn't to shoot alone - the goal is to shoot in whatever way brings you joy and produces images you're proud of.
Is solo photography safe? Solo photography can be safe with proper precautions. Stay aware of your surroundings, stick to well-lit public areas, let someone know your plans, and trust your instincts. The National Press Photographers Association offers additional safety resources for photographers working alone."
What gear do I need for solo photography? Keep it minimal - one camera body, 1-2 versatile lenses, spare battery, and memory cards. The lighter your kit, the more freedom you have to move and explore.
How do I get comfortable shooting alone? Start in familiar areas close to home. Build confidence gradually, practice being aware of your surroundings, and focus on the creative process rather than self-consciousness.
Is solo photography better than shooting with others? Neither is inherently better - they serve different purposes. Solo shooting offers freedom and personal creative flow, while group shoots provide collaboration and different perspectives.
Thanks for following along on my ramblings here. Check out my street photography portfolio to see what solo shooting produces, and I hope to hear from you soon!"
Other related posts and subjects
Recommended Gear for Solo Street Photography
Support this website by using these affiliate links to shop on Amazon:
Leica M11 Digital Rangfinder Camera
Voigtlander Nokton 35mm f/1.4 II
Sandisk 128GB Extreme Pro memory cards

Solo Street Photography with Leica CL: Finding Joy Shooting Alone (Not Following the Rules)
I really like the 50mm perspective of these lenses on a crop sensor camera like my Leica CL. If I use a full frame machine then Iwill usually opt for something in the 50 to 58mm range as well.
After years of feeling pressure to do street photography "the right way," I finally figured something out: solo street photography photowalks with my Leica CL and a 50mm lens bring me more joy than following anyone else's rules. This is the story of how I stopped trying to shoot like Peter McKinnon, quit worrying about YouTube success, and rediscovered why I fell in love with photography in the first place—just grabbing my camera and hitting the streets alone.

My go-to setup: Leica CL with Voigtlander 35mm Nokton—this gives me a 50mm perspective on the crop sensor.
Why I Love Solo Street Photography (And You Might Too)
There's something incredibly freeing about solo photowalks that I didn't appreciate until I tried them consistently. When you're alone, there's no one to impress, no one waiting on you, and no one questioning why you're standing in the same spot for ten minutes watching the light change. You can be completely present with your camera and your surroundings without any social pressure.
I'll admit, at first the idea of walking around with a camera alone felt a bit weird. But then I realized—nobody cares. People are absorbed in their own lives, and you're just another person walking down the street. The freedom this brings is immense. If I see something interesting, I can stop and shoot it from ten different angles without feeling like I'm holding anyone up. If nothing inspires me, I can just enjoy the walk. There's zero pressure to "perform" or justify your creative choices to anyone.
My Leica CL Street Photography Setup: 50mm Perspective on Crop Sensor
It is just plain fun to grab a camera, a spare battery and hit the streets to see what I can find to photograph. My weapon of choice is the Leica CL mirrorless camera with one of several lenses. Usually though, my Leica CL is wearing a Voigtlander 35mm Nokton or a TTArtisan 35mm f/1.4, you never know which.
I really like the 50mm perspective of these lenses on a crop sensor camera like my Leica CL. The 1.5x crop factor means that 35mm lens gives me a 52.5mm field of view—basically a classic 50mm perspective. This is perfect for my shooting style because it gives me comfortable working distance from my subjects while still creating nice compression and subject isolation. If I use a full frame machine then I will usually opt for something in the 50 to 58mm range as well.
The Leica CL itself is the perfect camera for solo photowalks. It's small enough to not be intimidating, quiet enough to be discreet, and produces image quality that rivals cameras three times its size. The electronic viewfinder is bright and clear, the controls are simple and intuitive, and the whole package fits easily in my hand or jacket pocket. I can carry it all day without fatigue, and more importantly, I can carry it without thinking about it—which means I'm thinking about photography instead of gear.
I will take my 28mm lenses for the occasional stroll, but my staples are the 50mm lenses. Shoot, I even have the Leica APO Summicron SL 50mm for my Leica SL2 mirrorless camera as well because I like them so much. That is an insane package to be just strolling around town with slung around your neck…as well as heavy. Haha.
Breaking the Street Photography Rules: Why 50mm Works Better for Me Than 28mm
This literally took me years if not decades to truly figure it out. That is a hard pill to swallow at times too. Looking back, things could have gone a very different way had I followed my real passion instead of thinking I could be like Peter McKinnon… Live and learn I guess.
Before Pete came along and made me think I could be this ultra successful YouTube personality, I did things that other people said were what you should do. Like do street photography with wide glass and get close to people and stuff like that. That works for some people, but not me, I seem to have a real problem getting close to other people. Invading their personal space is such a red flag for me that I will just let the photo go before I attempt something like that.
Here's what nobody tells you about the "get close with a wide lens" approach: it's not just about technical skill, it's about personality. Some photographers are naturally extroverted, comfortable in stranger's personal space, and can pull off that close-up street style. I'm not one of those people. And you know what? That's completely okay. Using a 50mm or even longer lets me capture authentic moments from a respectful distance where neither I nor my subject feels uncomfortable. The photos are different than 28mm shots, but they're not worse—they're just mine.
This made for some truly terrible photos just to be honest about it. Mostly, it made me not want to go out and shoot though… so my very first Nikon DSLR would sit in the closet for months at a time with me not so much as looking at it. Who wants to go to a job and be stressed about that all day THEN make your hobby about "getting out of your comfort zone" and being stressed about that too?!? I almost gave up photography at one point because of this to be honest.

A typical scene from my solo photowalks—natural moments, comfortable distance
I have spent so long making YouTube content that I had actually forgotten how much fun it was to just go shoot. I will now get my camera and a battery or two and just hit the bricks. What I had to learn to do was to make a video about one every so often to share what I am doing with the viewers. I took a “sabbatical” the last two years in the first part of the year so I could do this. It helped dramatically too with my well being and my creativity.


Simple gear for photowalks: one camera, one lens, spare batteries. That's all I need.
From YouTube Pressure to Photography Joy: My Personal Journey
I finally found some joy when my daughter began competing in rock climbing. She joined a team and they would go all over for these events and I got my camera out and started photographing these gatherings and realized that there was more to this hobby than just what others said is good photography. I found a lot of joy in capturing interesting angles of the climbers and going to the trouble of sharing the photos with the team when done. It was really rewarding to be honest.
Then I broke my ankle and at about the same time, Sierra "aged out" of the team and stopped attending the events as life got in the way. Well, I needed a new avenue to focus on and found it in my YouTube channel. I learned over the years that a good YouTube content creator is not a good photographer—they are two very different things and I wandered down that rabbit hole for a while before realizing that it wasn't going to work for me.
The YouTube algorithm rewards consistency, spectacle, and engagement over artistry. It wants you to post weekly, chase trends, and create content that keeps people watching. That's fine if you want to be a content creator, but it's exhausting if you just want to be a photographer. I found myself thinking more about thumbnails and titles than I did about light and composition. I was shooting for the camera review, not for the creative satisfaction. That's when I knew something had to change.
The Joy of Street Photography Photowalks Without Pressure
This is where I am at now… just a guy with a camera out taking some pictures. No YouTube schedule to maintain, no algorithm to please, no gear to review, no style to emulate. Just me, my Leica CL, and whatever catches my eye. Some days that's dramatic light on a building. Other days it's a person waiting for the bus. Sometimes it's nothing at all, and that's fine too.
I have spent so long making YouTube content that I had actually forgotten how much fun it was to just go shoot. I will now get my camera and a battery or two and just hit the bricks. What I had to learn to do was to make a video about one every so often to share what I am doing with the viewers. I took a "sabbatical" the last two years in the first part of the year so I could do this. It helped dramatically too with my wellbeing and my creativity.
The biggest lesson? Photography should add to your life, not drain it. If your hobby is causing you stress instead of joy, you're doing it wrong—not because you're a bad photographer, but because you're following someone else's path instead of your own. Give yourself permission to shoot what you love, how you love, with whatever equipment makes you happy. That's where the good work lives.
Solo Street Photography Tips: Finding Your Own Style
Ultimately I found that I loved to go on photowalks and simply take pictures around me. Here's what I've learned about making solo photowalks work:
Keep your gear simple. I bring one camera, one lens, and two batteries. That's it. No bag, no accessories, nothing to fidget with or second-guess. This simplicity forces you to work within constraints, which actually makes you more creative, not less.
Shoot for yourself first. I used to think about how a photo would perform on Instagram or YouTube before I even took it. Now I shoot what interests me in the moment. Some of my favorite images would probably get three likes on social media, and I don't care. They're mine.
Walk the same routes sometimes. There's this idea that you need exotic locations for good street photography. I've learned more shooting the same three-mile radius around my house than I did traveling to "photogenic" cities. Familiarity breeds understanding. When you know a place well, you start to see the light differently, notice the rhythm of the day, and find moments you'd miss as a tourist rushing through.
Don't force it. Some walks I come home with fifty keepers. Other times I get nothing. Both are valuable. The walks where I don't press the shutter much are still feeding my creative eye, teaching me to see, and giving me time to think. Photography is as much about observation as it is about capture.
Frequently Asked Questions About Solo Street Photography
Is it okay to do street photography alone?
Absolutely! Solo street photography is not just okay—it's often the best way to shoot. When you're alone, you move at your own pace, follow your creative instincts without compromise, and blend into the environment more naturally. I've found that shooting solo actually reduces pressure because there's no one watching, judging, or waiting for you. You can spend five minutes on one corner if that's what feels right, or walk five miles following the light. Some of my best work happens when I'm alone with my camera and my thoughts.
What focal length is best for street photography?
There's no "best" focal length—only what works for your personality and shooting style. The conventional wisdom says 28mm or 35mm, but I prefer 50mm equivalent (which is a 35mm lens on my Leica CL crop sensor). The 50mm perspective gives me comfortable distance from my subjects, creates nice compression, and doesn't make me feel like I'm invading anyone's personal space. If you're uncomfortable getting close to strangers, telephoto focal lengths like 50mm, 85mm, or even 105mm can work beautifully. Don't let anyone tell you there's only one "right" way to do street photography.
How long should a street photography photowalk be?
Your photowalk should be exactly as long as it needs to be. Sometimes I'm out for 30 minutes and come home with great shots. Other times I'll wander for three hours and barely press the shutter. I've learned to follow my energy and creative flow rather than forcing a specific duration. Start with 30-60 minutes if you're new to photowalks, and let it evolve naturally. The goal is joy and creativity, not checking off a time requirement.
Can you do street photography with a Leica CL?
The Leica CL is fantastic for street photography! It's compact, discreet, produces excellent image quality, and the crop sensor actually gives you a nice 50mm perspective with a 35mm lens (or 75mm with a 50mm lens). The quiet shutter, simple controls, and build quality make it perfect for solo photowalks. I love that it doesn't scream "expensive camera" like a big DSLR or even a Leica M, so I can blend in while still getting Leica color and image quality. It's honestly my favorite camera for just grabbing and hitting the streets.
Do I need to follow street photography "rules"?
No! This is the most important thing I've learned: there are no rules, only guidelines that work for some people. You don't have to shoot wide angle, you don't have to get close to strangers, you don't have to shoot in black and white, and you certainly don't have to make yourself uncomfortable to get "good" street photography. Find what brings you joy and shoot that way. The best street photography comes from authentic vision, not from following someone else's rules. If 85mm or 105mm feels right, use it. If you prefer color, shoot color. Make your own rules.
What should I bring on a solo street photography walk?
Keep it simple—that's the beauty of solo photowalks. I typically bring just my Leica CL with one lens (usually my Voigtlander 35mm Nokton or TTArtisan 35mm f/1.4), and one or two spare batteries. That's it. No camera bag, no lens changes, no complicated gear setup. The simplicity is liberating. You can add a small water bottle and maybe your phone for emergencies, but resist the urge to pack heavy. The lighter you travel, the longer you'll walk and the more you'll enjoy it. Less gear equals more photography.
Support this website by using these affiliate links to shop on Amazon:
Leica M11 Digital Rangefinder Camera
Nikon AF-S FX NIKKOR 105mm f/1.4E ED Lens
Voigtlander Nokton 35mm f/1.4 II
Sandisk 128GB Extreme Pro memory cards
Nikon 50mm f1.8 S Lens for Z mount
Thanks for following along on my ramblings here. If you're feeling the same pressure I felt—to shoot a certain way, use specific focal lengths, or build a YouTube following—I hope this gives you permission to just grab your camera and go shoot for the joy of it.
Are you doing solo photowalks? I'd love to hear about your experiences in the comments below. What focal length do you prefer? Do you follow the "rules" or have you found your own path?
Want more honest photography content without the pressure? Subscribe to my photography blog for weekly posts about real creative journeys, not just gear reviews and pixel-peeping.

My Photography Journey: From Nikon D7000 Beginner to Leica Minimalist
Back in the dark ages, it was common to buy actual books on a subject of photography as YouTube was still sort of in its infancy. You could find information on the web but it was still really limited. Today we are literally bombarded with a constant stream of information that is dizzying.
Introduction (Keep your opening, add this after the first image):
When I started on my photo knowledge journey, I went by all the usual things associated with doing a self-taught skillset.
Back in the dark ages, it was common to buy actual books on a subject of photography as YouTube was still sort of in its infancy. You could find information on the web but it was still really limited. Today we are literally bombarded with a constant stream of information that is dizzying.

The author on the streets of Chattanooga taking photos with his Nikon D7000 camera.
Starting My Photography Journey with the Nikon D7000
I chose my camera based on information from one of the OGs of the photography space on the web… Ken Rockwell. Now hear me out before you throw your computer across the room.
It is no secret that Ken has a love affair with Nikon and it shows through on his site. So many well worded reviews to choose from made starting my journey with photography a Nikon based one. It is cemented so well that I have never even tried to shoot Canon on my own volition. Nikon should be giving Ken royalties to be honest about it. His reviews are fair (from what I can tell) and well worded and very technical. He has other brands on his site these days too, but back in the day, it was a wealth of Nikon information. For more of my photography philosophy and techniques, browse through my photography blog archive.
When I did jump in, it was with a D7000 DSLR. This was the most technologically advanced of the DX format models at the time. The camera included things such as the focus motor for the older screw drive focus lenses as well as sporting several other features not available on the lesser models of the period. I loved that camera and shot on it for several years while learning the rudiments of the craft.
Looking back, the Nikon D7000 was an excellent choice for a beginner. The DX sensor gave me reach for wildlife and sports, the built-in focus motor meant I could use affordable older lenses, and the 16-megapixel sensor was more than enough for learning composition and exposure. If you're considering a used D7000 today, it's still a capable camera for learning photography fundamentals.
Learning the Rules (And Eventually Breaking Them)
During this period I learned all the cliche things about shooting "better" photos and some of those old rules still linger today in my composition techniques. Fortunately I have since learned that some things are not actually set in stone and you can bend and even break the rules if done right and the images will be great anyway.
My vintage lens collection - living proof that GAS recovery is an ongoing journey!
Back then I took the idea of mounting one lens and using it for a period of time. Sometimes these periods of time could be quite long. I remember mounting the 35mm f1.8 and leaving it on the camera for months at one point. This is probably why I have gravitated back to that field of view today. Once you use a certain focal length a while, you will get comfortable with what that lens can do for you and you know what to expect. It is like asking an old friend for advice… you just know it is going to be good.
This "one lens" approach taught me more about photography than any gear upgrade ever could. By limiting my options, I learned to see in 35mm. I learned to move my feet instead of twisting a zoom ring. I started anticipating shots instead of reacting to them. This was my first step toward minimalism, though I didn't realize it at the time.

Early street photography from my Nikon D7000 learning phase - exploring light and composition
[Image placement here]
The Gear Acquisition Syndrome Phase
At some point I bought a big fast aperture zoom (the 70-200mm if memory serves me) and thought I was in hog heaven. Well, if you dont need a big expensive zoom lens, then why did you buy one? G.A.S. Is the usual culprit here and I am guilty of having this disorder of photography. I am recovering at this point though and at some point I simply stopped buying the latest camera because it was better than the last one or what ever. I still to this day cant seem to stop buying vintage lenses though so I am a work in progress… lol.
Every photographer goes through the GAS phase. We convince ourselves that the next lens, the next camera body, or the next upgrade will unlock our creative potential. The truth? It rarely does. That 70-200mm f/2.8 was an incredible lens, but I found myself leaving it at home more often than not because of the weight and bulk.
I have since figured out that with my photography, I dont need zoom lenses very often at all. I have figured out that I can have more fun with a nice prime lens and not worry too much about missing some special photo or some such. I have learned to just let some photos go and be more in the moment instead. You dont always have to get every single photo possible.
Prime Lenses vs Zoom Lenses: What I Learned
Prime lenses changed everything for me. Here's what I discovered:
Lighter kit = more shooting: A 35mm prime weighs a fraction of a 70-200mm zoom
Better low-light performance: Fast primes (f/1.8, f/1.4) let me shoot in conditions where zooms struggled
Creative limitations = creative growth: Fixed focal lengths forced me to think differently
Better image quality: Even affordable primes often outperform expensive zooms
The 35mm focal length became my signature. On DX format (Nikon D7000), this gave me roughly a 52mm equivalent field of view—perfect for street photography, environmental portraits, and everyday shooting. If you're looking for more on my current gear choices, check out my gear page.
Living Through the Viewfinder vs Living in the Moment
I went through this phase too. Living life through the camera viewfinder… this isn't really living but rather documenting and is not the same thing. This is why I now travel with a very light camera kit if I am going on a trip to do something other than photography for the primary focus of the trip. I feel it is more important to live in the moment than to worry incessantly on getting the best angle or exposure or whatever.
Early street photography from my Nikon D7000 learning phase - exploring light and composition
This realization was profound. I was so focused on capturing every moment that I wasn't actually experiencing the moments I was capturing. Family vacations became photo assignments. Dinners with friends became lighting challenges. I was missing the point entirely.
It is this last part that has taught me that I have evolved as a photographer. I no longer need to photograph everything possible and spend countless hours editing in lightroom to be happy. To be completely transparent about it, I only edit a very select few images in Lightroom these days just to get the "one" I want. I still shoot in raw plus jpeg to give me that choice but I rarely use the raw files.
My current approach: I shoot RAW+JPEG but use the JPEGs 95% of the time. The camera's built-in processing is usually good enough, and accepting that has freed me from spending hours at the computer. When I do edit, it's intentional—one or two photos from a day that really speak to me.
You can see this philosophy in action in my post about solo street photography with the Leica CL, where I discuss finding joy in the process rather than the pursuit of perfection.
My Photography Evolution: From Technical to Intentional
Looking back at your photography journey, have you progressed in a positive way?
For me, the answer is absolutely yes—but not in the way I expected. I haven't progressed by acquiring better gear or mastering more advanced techniques. I've progressed by:
Simplifying my kit - From a bag full of zooms to a single prime lens
Reducing post-processing - From hours in Lightroom to accepting JPEGs
Being more selective - From shooting hundreds of frames to choosing moments intentionally
Enjoying the process - From chasing the perfect shot to experiencing life with a camera in hand
My journey from the Nikon D7000 to my current Leica setup isn't about having better equipment—it's about understanding what I actually need and what brings me joy. The D7000 taught me the fundamentals. The prime lenses taught me to see. The GAS phase taught me what I don't need. And minimalism taught me what photography is really about.
You can see this philosophy in action in my post about solo street photography with the Leica CL , where I discuss finding joy in the process rather than the pursuit of perfection.
Frequently Asked Questions
Is the Nikon D7000 still good in 2024?
Yes, the Nikon D7000 is still an excellent camera for learning photography. While it lacks modern features like 4K video or advanced autofocus, its 16-megapixel sensor, built-in focus motor, and solid build quality make it perfect for beginners. You can find used D7000 bodies for under $300, making it an incredible value for learning the craft.
Should beginner photographers use prime lenses or zoom lenses?
I recommend starting with a prime lens, specifically a 35mm or 50mm. While zoom lenses offer versatility, prime lenses force you to move, think about composition, and really learn to see. They're also typically sharper, faster (better in low light), and more affordable than equivalent zoom lenses. Once you master a prime, you'll know if you actually need a zoom.
How do you overcome Gear Acquisition Syndrome (GAS)?
The best cure for GAS is to pick one camera and one lens and commit to using only that setup for 3-6 months. You'll quickly learn what you actually need versus what you think you need. I also recommend asking yourself: "Will this new gear let me take photos I literally cannot take with my current setup?" If the answer is no, don't buy it.
What focal length is best for street photography?
I prefer 35mm (on full frame) or 23mm on APS-C, which gives you a similar field of view. This focal length is wide enough to capture context but not so wide that it distorts subjects. The 50mm equivalent focal length is also popular and works beautifully—it's really about personal preference. Try both if you can. See examples in my street photography portfolio</a> to see how I use these focal lengths in practice.
Do you need to shoot RAW or is JPEG okay?
For most photography, especially if you're still learning, JPEG is perfectly fine. Modern cameras have excellent JPEG processing. I shoot RAW+JPEG and use the JPEGs 95% of the time. Only shoot RAW if you know you'll be doing significant post-processing or if you're shooting in challenging lighting conditions where you'll need maximum flexibility.

Support this website by using these affiliate links to shop on Amazon:
Leica M11 Digital Rangefinder Camera
Nikon AF-S FX NIKKOR 105mm f/1.4E ED Lens
Voigtlander Nokton 35mm f/1.4 II
Sandisk 128GB Extreme Pro memory cards

Micro Nikkor 55mm f/3.5 Review: The Best $50 Vintage Lens for Leica SL2
What if one of the sharpest lenses you could put on your Leica SL2 cost less than $50 and was made in 1976? That's exactly what I discovered when I adapted a vintage Micro Nikkor 55mm f/3.5 to my Leica SL2—and the results genuinely surprised me. This isn't just a macro lens review. It's the story of how a nearly 50-year-old Nikon F-mount lens became one of my favorite walkaround lenses on one of the best modern mirrorless cameras available.
What if one of the sharpest lenses you could put on your Leica SL2 cost less than $50 and was made in 1976? That's exactly what I discovered when I adapted a vintage Micro Nikkor 55mm f/3.5 to my Leica SL2—and the results genuinely surprised me. This isn't just a macro lens review. It's the story of how a nearly 50-year-old Nikon F-mount lens became one of my favorite walkaround lenses on one of the best modern mirrorless cameras available.

The Micro Nikkor 55mm f/3.5 AI variant on the Leica SL2 via F-to-L adapter — an unlikely but exceptional pairing.
Micro Nikkor 55mm f/3.5: What Makes This Vintage Lens Special
I have found over the years that there are a couple of Nikkor lenses in this family that work really well for the task of general purpose photography and this is one of them. This particular copy is an AI variant made somewhere in the late 1976 to early 1977 time frame, so this lens is almost 50 years old—and just look at the image quality it produces. Lens manufacturers were on their A game at this point and Nikon was a force to be reckoned with in this area. This lens isn't even their best macro lens either, which is something that to this day surprises me a little.
What makes the Micro Nikkor special compared to other vintage 50mm lenses is that it was designed for exacting scientific and reproduction photography. That design intent required flat-field sharpness, minimal distortion, and consistent performance from close focus all the way out to infinity. Most vintage 50mm lenses were optimized for portrait distances and can get a little soft or lose contrast at other distances. The Micro Nikkor doesn't play that game—it's sharp everywhere.
It has an external aperture ring that is detented in whole stops, except the very first one where it goes from f/3.5 to f/4 for some reason. Who knows why Nikon did this, but they did, so it is there if you want to use it.
Adapting Nikon F-Mount Lenses to the Leica SL2
Before we get into performance, a quick word on adapting this lens. The Leica SL2 uses the L-mount, and to run Nikon F-mount glass on it you need an F-to-L adapter. I use the Urth version and it works well for fully manual lenses like this one—there's nothing electronic to pass through, so any mechanically precise adapter will do the job. If you want to get fancy, Novoflex makes precision German-engineered adapters that are the gold standard, but they cost considerably more than the budget options and for a manual vintage lens, the results are essentially identical.
What makes the Leica SL2 particularly great for adapted vintage glass is the combination of focus peaking and magnified live view in the EVF. You can dial in focus with real confidence even at close distances, and the IBIS works completely independently of the lens—the camera has no idea what glass is mounted and compensates for shake regardless. This makes lenses that might have been borderline usable in low light suddenly practical for handheld shooting. More on that in a moment.

The external aperture ring with whole-stop detents — classic 1970s Nikon build quality.
Minimum focus distance is a surprising 9 1/2” from the image plane. So this is right at 4.25 inches in front of the lens when mounted on my Leica SL2 camera. This also gives you a reproduction ratio of 1:2 on the image sensor, that is to say that if you have an object that is 1 inch across in reality, it will be 1/2 inch across the sensor. To get to 1:1 reproduction ratio you need help… The PK-3 extension ring will get you half that distance and to the true 1:1 reproduction ratio at minimum focus distance. All of this is conveniently engraved on the lens barrel for you should you need to look it up in the field… Also notice in these two images that the lens “pumps” air which means it has external focus movement, the lens grows and shrinks when you adjust focus, it is common belief that this is where dust gets into the lens from, when you open the lens fully to minimum focus distance the lens intakes a full charge of air and doesn’t have dust seals to prevent dust from entering the lens mechanism, so you get a little internal dust…
The lens 'pumps' air as it extends to close focus — a common trait of this era of optics.
One last thing to note about this focus mechanism is that the reason I like using these lenses for general purpose photography like travel and such is that as you can see in the above photo, the focus throw from infinity to less than 1 meter is short, so focus is fast with this lens. It also has a range focus scale, but since it is 55mm, the scale is rather small and not easy to use, it will give you rough numbers to work with but that is all.
Enough with all this tech talk, let’s take it for a spin and see what the photos look like on my Leica SL2 mirrorless camera since it has IBIS on the sensor and I can hand hold photos at unheard of shutter speeds with it.
First thing I notice when using this lens is how good it feels in the hand. The location and feel of the controls are literally in the perfect location.
Another thing I noticed was that it is sharp, like incredibly sharp. To this point, it makes sense that it would be this good due to the design intent of the lens but it has a really nice general purpose focus throw too. This lends itself to being a wonderful walk about lens. The following photos were shot on my Leica SL2 using this lens as a walkable lens. I have used another Nikon macro lens before in this same capacity, the 60mm Micro Nikkor once lived on my D810 as a general purpose lens. It works flawlessly in this capacity.
Using the Micro Nikkor 55mm as a Walkaround Lens on Leica SL2
The following photos were shot on my Leica SL2 using this lens as a walkable lens. I have used another Nikon macro lens before in this same capacity—the 60mm Micro Nikkor once lived on my D810 as a general purpose lens and it works flawlessly in that role. The 55mm is similar in character.
For street photography and travel, the 55mm field of view on full frame is about as classic as it gets. You're not cramped like you can be with a 35mm in tight spaces, and you're not zooming in on subjects from far away like you would with 85mm or 105mm. It sits right in the middle of the world as you see it, which makes composition intuitive. The short focus throw means you can adjust focus quickly as subjects move, which is more important for this kind of use than it would be in a controlled macro environment.
Where it struggles a bit is in low light. The f/3.5 maximum aperture isn't going to win any awards for low-light capability compared to fast primes. But combined with the Leica SL2's excellent high-ISO performance and the IBIS, you can push it further than you'd expect—as you'll see in the next section.
Shot handheld at 1/30 second — the Leica SL2's IBIS makes this kind of exposure possible with a vintage manual focus lens.
In the above photo you can see what I love about a camera with stabilization in it. The camera sensor is rock steady so I can capture shutter speeds like in the photo above where I was running something like 1/30 second and some of my water blur shots were 1/4 second!!! Like the one below is a 1/4 second handheld exposure and if you will look, the rocks are crisp and the water has a really nice blur to it. This is at f32 as well so there will be some diffraction in the image from that but all in all, it looks really nice.

Shot handheld at 1/30 second — the Leica SL2's IBIS makes this kind of exposure possible with a vintage manual focus lens.
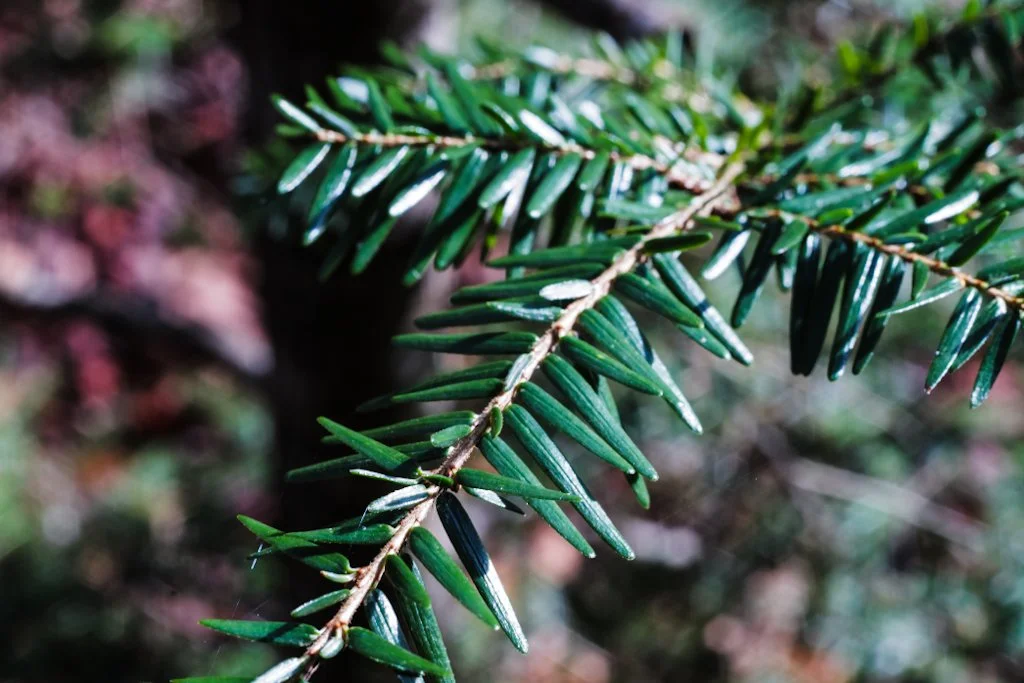
1/4 second handheld at f/32 — diffraction softens things slightly but the IBIS still produces usable results.
Below is a crop from this image. As you can see, the spider webs are even visible and this is handheld no less! As long as you have some decent light this combination is really nice. When you move to a mirrorless camera body that has IBIS on the sensor, it unlocks so many possibilities with lens / camera combinations. I dont know why hobbyists dont see this sooner but a lot dont.

100% crop showing spider web detail — handheld with IBIS. This lens resolves more than you'd expect for its age and price."
Leica SL2 IBIS + Vintage Glass: A Game-Changing Combination
In the above photo you can see what I love about a camera with stabilization in it. The camera sensor is rock steady so I can capture shutter speeds like in the photo above where I was running something like 1/30 second, and some of my water blur shots were at 1/4 second! The one below is a 1/4 second handheld exposure and if you look, the rocks are crisp and the water has a really nice blur to it. This is at f/32 as well, so there will be some diffraction in the image from that, but all in all it looks really nice.
I don't know why hobbyist photographers don't recognize this sooner, but when you move to a mirrorless camera body that has IBIS on the sensor, it unlocks so many possibilities with vintage lens combinations. You're essentially giving a 50-year-old lens a set of capabilities it was never designed to have. Nikon didn't design this lens to be hand-holdable at 1/4 second—but the Leica SL2 makes it so.
Think about what this means practically. That f/3.5 maximum aperture that looks modest on paper suddenly becomes much more workable. Instead of needing a tripod for anything in shade or indoors, you can hand-hold at much slower shutter speeds and let the IBIS do the work. In a museum, a church, a dimly lit market—anywhere a tripod isn't practical—this combination keeps you shooting. It's the kind of capability that used to require carrying a tripod and a fast prime. Now you can do it with a $50 vintage lens and good technique.
Image Quality: What to Expect from a 50-Year-Old Lens
Below is a crop from one of my sample images. As you can see, the spider webs are even visible and this was handheld. As long as you have some decent light, this combination is really nice.
Let me put some numbers to what you're seeing. The Leica SL2 has a 47 megapixel sensor—a genuinely demanding sensor that will expose any lens weakness. Lesser vintage glass can look acceptable at web resolution but fall apart when you pixel-peep on a sensor this resolute. The Micro Nikkor 55mm f/3.5 doesn't fall apart. Center sharpness is exceptional at every aperture, and corner performance is very good stopped down. The color rendering has that warm, slightly organic character that vintage Nikon glass is known for, which pairs nicely with Leica's color science.
The one area where you see the lens's age is bokeh at close focus distances. When shooting macro-close, out-of-focus areas can look a bit busy—it's not the smooth, creamy blur you'd get from a modern lens optimized for portrait work. But for general photography at normal distances, the rendering is pleasant and natural, never clinical or harsh.
Who Should Buy the Micro Nikkor 55mm f/3.5 for Leica SL2?"
This lens is a fantastic choice for:
The budget-conscious Leica shooter. Leica glass is expensive—there's no way around that. The Micro Nikkor 55mm f/3.5 gives you exceptional optical performance for a fraction of the cost of any L-mount prime. If you're building a kit and want quality glass that doesn't break the bank, vintage adapted lenses like this one are the answer.
Travel photographers who want a dual-purpose lens. One lens that handles landscapes, street photography, and close-up detail shots? That's what this is. Pack light and still have versatility.
Vintage lens enthusiasts. If you enjoy the tactile experience of manual focus and appreciate the history of classic glass, this lens is deeply satisfying to use. It's mechanically solid, beautifully made, and feels like a precision instrument.
Anyone curious about adapted lenses on the SL2. If you haven't explored the world of adapted vintage glass on your Leica SL2, this lens is an inexpensive, low-risk way to discover what IBIS + manual focus vintage glass can do. You might find, as I did, that you love it.
Frequently Asked Questions About the Micro Nikkor 55mm f/3.5
Is the Micro Nikkor 55mm f/3.5 good for general photography (not just macro)?
Yes — and this is the thing most people don't realize about this lens. While it was designed as a macro lens, the Micro Nikkor 55mm f/3.5 is an outstanding general-purpose walkaround lens. The focus throw from infinity to under one meter is short and smooth, making it fast to use in the field. The 55mm focal length gives you a classic "normal" field of view, and the sharpness holds up beautifully at all distances — not just close focus. I've used mine for street photography, travel, landscapes, and waterfall shots, and it handles all of them with ease. The f/3.5 maximum aperture is slower than dedicated portrait lenses, but for anything in decent light, this lens is genuinely excellent.
Can you adapt Nikon F-mount lenses to the Leica SL2?
Yes, and it works very well. The Leica SL2 uses the L-mount, and with an F-to-L mount adapter you can use almost any Nikon F-mount lens on the camera. Since the Micro Nikkor 55mm f/3.5 is a fully manual lens with an external aperture ring, you control the aperture on the lens itself and the camera handles exposure metering in aperture-priority mode. The Leica SL2's focus peaking and magnified live view make manual focusing accurate and enjoyable. There are no electronic connections needed for this vintage lens — it's a fully mechanical pairing that works remarkably well.
Does Leica SL2 IBIS work with adapted vintage lenses?
Yes, and it's one of the best reasons to use vintage glass on the Leica SL2. The 5-axis IBIS works independently of the lens — the camera compensates for camera shake regardless of whether the lens communicates electronically. With the Micro Nikkor 55mm f/3.5, I've successfully hand-held shots at 1/30 second and even 1/4 second, which would be nearly impossible without stabilization. This opens up a whole new world for vintage lens shooters — lenses that were borderline impractical in low light suddenly become viable handheld options. The combination of Leica SL2 IBIS and vintage Nikon glass is genuinely one of my favorite pairings in photography.
What adapter do I need to use Nikon F lenses on the Leica SL2?
You need a Nikon F to Leica L-mount adapter (sometimes listed as "F to L" or "Nikon F to L-mount"). Several brands make these including Urth, K&F Concept, and Novoflex (premium option). For fully manual vintage lenses like the Micro Nikkor 55mm f/3.5, an inexpensive adapter works perfectly well since there are no electronic connections to pass through — you just need a mechanically precise fit. Novoflex is the gold standard for precision, but budget options from Urth or K&F Concept work fine for manual glass.
How sharp is the Micro Nikkor 55mm f/3.5 on a modern mirrorless camera?
Extremely sharp — almost surprisingly so given the lens is nearly 50 years old. The Micro Nikkor 55mm f/3.5 was designed for close-focus scientific and reproduction photography, which required exceptional flat-field sharpness and minimal distortion. Those same qualities make it outstanding on a modern high-resolution sensor like the Leica SL2's 47MP chip. At middle apertures (f/5.6 to f/11) this lens is genuinely difficult to fault. Wide open at f/3.5 it's already very good, and the sharpness only improves as you stop down. The one caveat is that at f/32 you'll see diffraction softening, but that applies to any lens at very small apertures.
What is the PK-3 extension ring for the Micro Nikkor 55mm f/3.5?
The PK-3 extension ring is a Nikon accessory that mounts between the lens and camera body, moving the lens further from the sensor and allowing it to achieve true 1:1 macro magnification. Without the PK-3, the Micro Nikkor 55mm f/3.5 reaches a 1:2 reproduction ratio at minimum focus — meaning a 1-inch subject appears as half an inch on the sensor. With the PK-3 ring, you get 1:1 reproduction, where a 1-inch subject fills 1 inch of sensor. If you need true life-size macro shots, the PK-3 is the answer. Without it, the lens is still excellent for general macro work like flowers, insects, and small objects — just not true 1:1.
Recommended Gear for Adapting Vintage Lenses to Leica SL2
Support this website by shopping through these affiliate links:
Leica M11 Digital Rangefinder Camera
Nikon AF-S FX NIKKOR 105mm f/1.4E ED Lens
Voigtlander Nokton 35mm f/1.4 II
Sandisk 128GB Extreme Pro memory cards
Nikon 50mm f1.8 S Lens for Z mount
So in conclusion...
The Micro Nikkor 55mm f/3.5 is genuinely one of the best bang-for-buck vintage lenses you can adapt to the Leica SL2. For under $50 on the used market, you get a lens that handles macro work beautifully, doubles as a sharp general-purpose walkaround, and—paired with the SL2's IBIS—lets you hand-hold exposures that should be impossible.
Is it perfect? No. The f/3.5 maximum aperture limits your low-light shooting compared to faster primes, and you won't get smooth, creamy bokeh at close focus distances. But for sharpness, color rendering, close-focus capability, and sheer character? This nearly 50-year-old lens punches well above its weight class on a modern mirrorless body.
Get out there and grab one. You won't regret it.
Have you tried adapting vintage Nikon lenses to your mirrorless camera? Drop your experiences in the comments below—I'd love to hear what combinations you're running.
Want more vintage lens reviews and Leica SL2 content? Subscribe to my photography blog for honest, real-world gear testing without the fluff.
Chattanooga Photowalk: Leica SL2 + Yashica 28mm Street Photography
Chattanooga's Rossville Avenue is one of those streets most people drive past without a second thought. But stop and look closer—you'll find pre-WWII architecture, a century-old cafe that's about to close forever, and urban decay that looks like a movie set. That's exactly what I did with my Leica SL2 and a vintage Yashica 28mm f/2.8 lens: parked for one hour of street photography and came away with something worth sharing.
Chattanooga's Rossville Avenue is one of those streets most people drive past without a second thought. But stop and look closer—you'll find pre-WWII architecture, a century-old cafe that's about to close forever, and urban decay that looks like a movie set. That's exactly what I did with my Leica SL2 and a vintage Yashica 28mm f/2.8 lens: parked for one hour of street photography and came away with something worth sharing.
Hamilton Parts Distributors: Pre-War Architecture in Chattanooga
Today we find me in Chattanooga yet again and this time I am setup on a side street off of Main street called Rossville Avenue and this road has some really neat old buildings on it, some of which I have photographed in the past but I like to get photos of them as I go along to show how they change with time. I get parked and pay for one hour of parking so I have to make it count. Putting a little pressure on myself to come away with SOMETHING of value in this time allotment.,,

Rossville Avenue in Chattanooga—one of those streets you drive past but never really see. Time to change that.
My first stop is the Hamilton Parts Distributors building that has been NOT a parts distributor for quite some time as of this point…2023. The building is really starting to show its age too with numerous windows bricked up on the sides as well as the front giving it a sort of dystopian imbalanced look. This could be a set right out of a movie or something. I took several photos from different angles today and some look better than others. I really like the front door and the corner that I get today for some reason… Here they are, what do you think?
I love how the building still has remnants of the signage that was painted on it some time in the past. Also look at the foundation material—today it's all either poured concrete or cement blocks and has been for many decades. So I'm going to speculate this is pre-war construction, meaning before World War II, based on these limestone foundation stones.
These stones look like they were repurposed from another construction site that existed before this building did. I've seen evidence of these cut stones going back to the mid-19th century in Chattanooga, so I know these are probably something left over either from a fire or were just cast off when another building was demolished. The people who built this building saw a chance to save a few dollars on this part of the construction.
Also notice that they didn't think these stones were very appealing—they hid them behind a mortar stucco finish as you can see in the front door photo. Practical, but not pretty.
What I really love about locations like this is that they tell stories about how Chattanooga was built. This isn't some sterile modern construction—this is history you can see and photograph. The bricked-up windows, the deteriorating facade, the repurposed foundation stones—it all adds up to a building that looks like it could be a set piece in a dystopian film. And it's just sitting here on Rossville Avenue where most people never even glance at it.

The corner angle showing all those bricked-up windows. Dystopian and unbalanced—looks like a movie set.

The front entrance of the old Hamilton Parts Distributors building. Notice the limestone foundation stones—likely pre-WWII construction repurposed from an earlier building.
Zarzours Cafe: 100 Years of Chattanooga History (Closing Soon)
My next stop was right next door at Zarzours Cafe.

Zarzours Cafe—over 100 years in business and closing in less than a month. I'll be eating there before they close. How could I not?
This cafe has been in business for over 100 years. Yeah, you read that right—a century, as you can see on their sign. And it's closing in less than a month from when I took these photos.
I'd never eaten there before this photowalk, which honestly is a little embarrassing considering how long they've been around. But I made a promise to myself right then: I'm going to sit at their cafe and enjoy the fine cuisine they've been serving for a century before they close their doors for good. How could I let that slide? A business that survives 100 years in Chattanooga—through the Great Depression, World War II, economic changes, everything—deserves to be experienced and remembered.
This is what urban photography is really about for me. Sure, you can go shoot pretty buildings and interesting light, and that's fine. But when you're documenting places like Zarzours that are about to disappear, you're preserving Chattanooga history. These photos matter in a way that just "pretty pictures" don't. In ten years, twenty years, someone's going to search for Zarzours Cafe and these images will be part of the record of what it looked like before it closed.
Back to the walk at hand. I took a couple of photos of the restaurant and parking area and headed on down the street.

Another angle of Zarzours. A century of Chattanooga history about to become just a memory.
Koch Foods and Lookout Mountain: Iconic Chattanooga Skyline
The next stop was at the Koch Foods Processing plant. This is one of two processing plants inside the city that I am aware of. These have been here for decades too so they are pretty much fixtures of the city at this point. One is on Broad street and the other is here on Rossville Ave. It being such an iconic location coupled with the skyline containing Lookout Mtn as well makes for a cool photo to me.

Koch Foods processing plant with Lookout Mountain in the background—an iconic Chattanooga skyline view that's been here for decades.
Main Street Chattanooga: Urban Photography in Action
After the chicken plant, I made my way over to Main street and did a little photography on Main as well. Main usually has something really colorful as well as interesting too, this is why I usually always make my way over and look around for a little while at a minimum…

Same spot, faster shutter speed to freeze the construction scene. Main Street always has something interesting going on.
Leica SL2 + Yashica 28mm: Why This Combo Works for Street Photography
These two photos just go to show what all can be found on Main street even when it is not having some sort of special event. All it takes is a little creativity and time of your part to come away with some interesting photos. Now you might be thinking these are not interesting photos, and you will be right as the photo interest rate will vary from person to person, but I found that these to be quite interesting so I am sharing them with you…lol. The difference between the two photo primarily is the shutter speed as one is really slow to blur the truck and the other is faster so it will capture the whole construction scene with out any motion blur on my part.
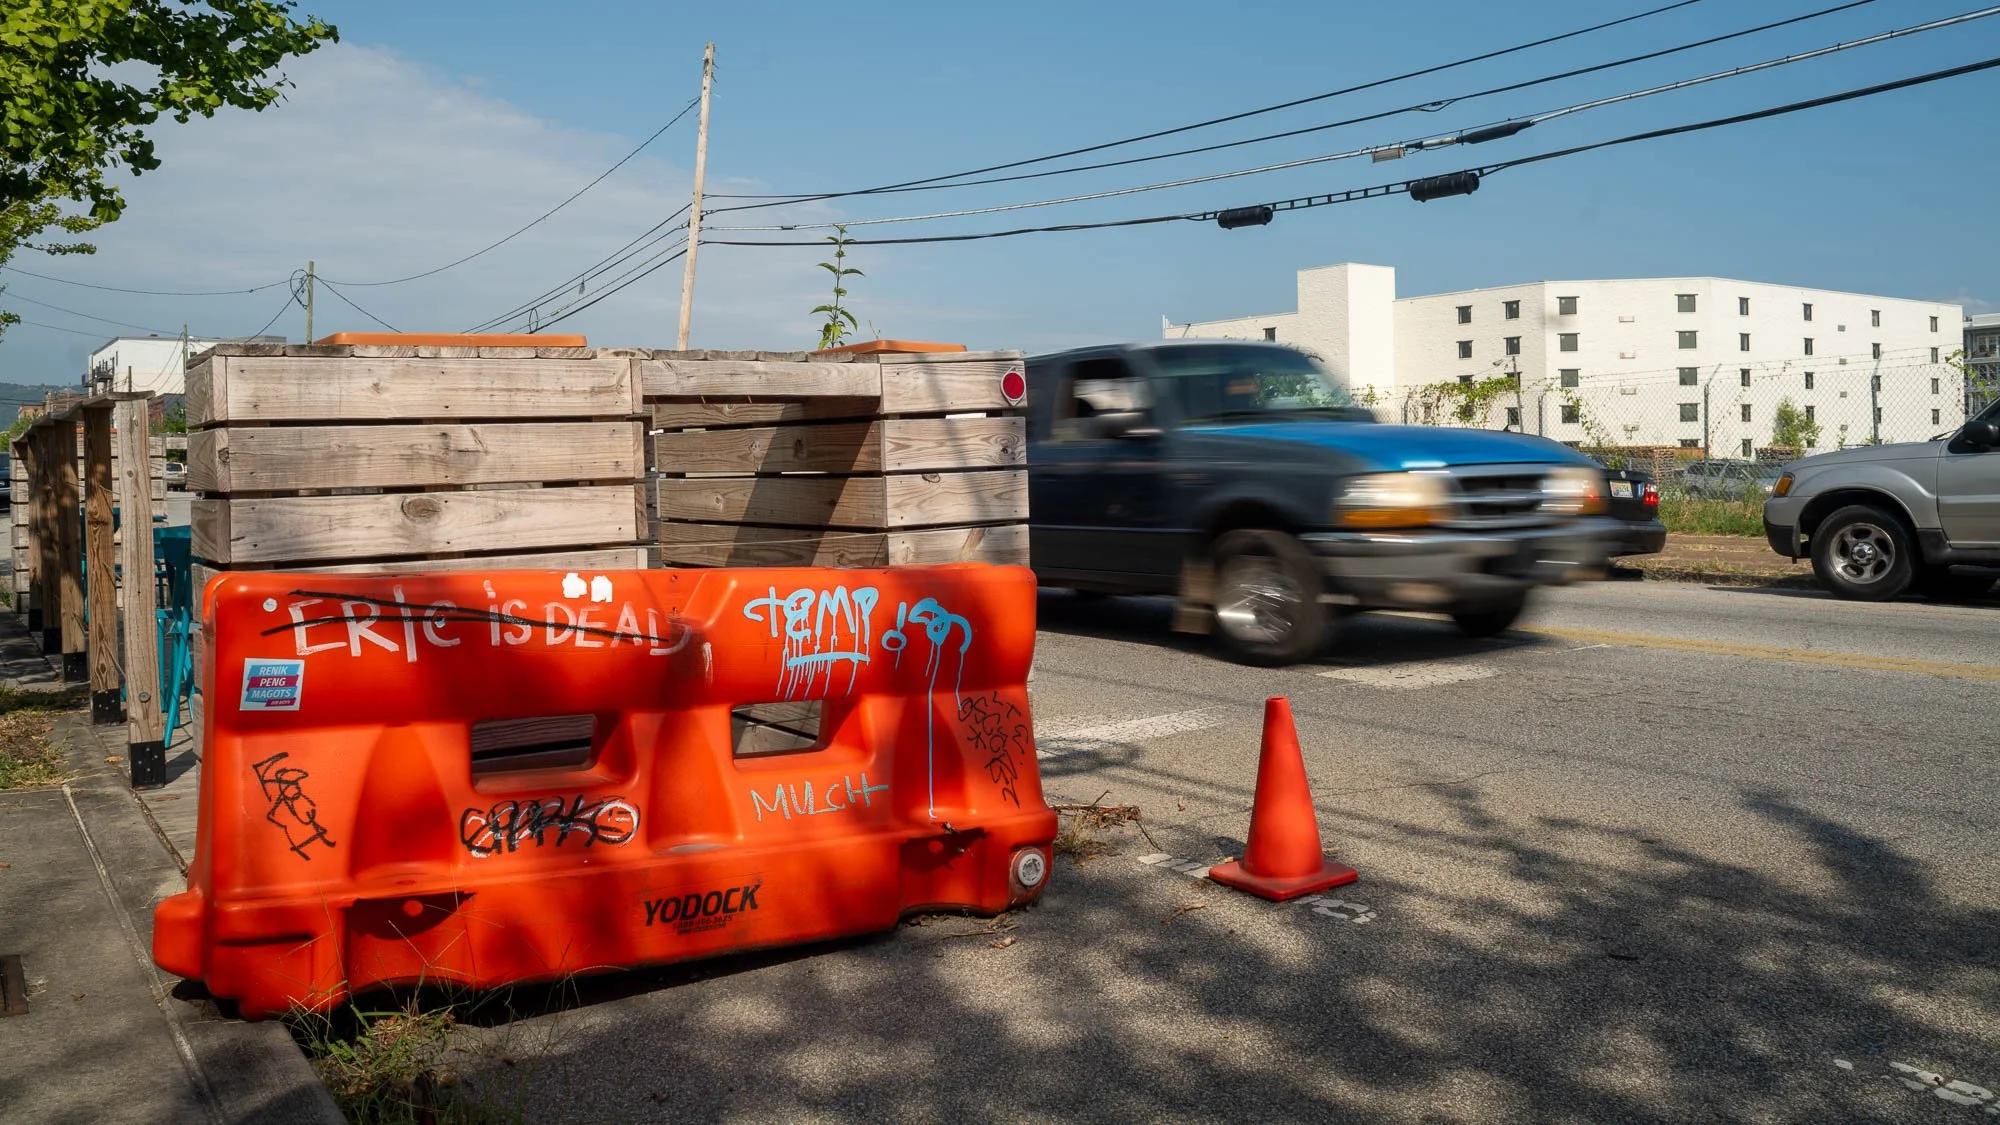
Main Street with a slow shutter to blur the truck. The Leica SL2's IBIS makes this kind of handheld shot possible.
Leica SL2 + Yashica 28mm: Why This Combo Works for Street Photography
The Yashica 28mm f/2.8 is one of those vintage lenses that just works. It's not fancy, it's not expensive, and it doesn't have modern coatings or any electronic connections. But for street and urban photography like this Chattanooga photowalk, it's exactly what I need.
The 28mm focal length gives you enough width to capture environmental context—like the whole Hamilton Parts building facade or the Koch Foods plant with Lookout Mountain in the background—without getting into ultra-wide territory where everything starts looking distorted. It's the kind of focal length where you can work close to your subject or step back and get the whole scene, and either way, the composition feels natural.
Paired with the Leica SL2, this combination is almost perfect for what I'm doing. The SL2's IBIS (in-body image stabilization) means I can hand-hold at slower shutter speeds than I could with any other camera. That Main Street shot where I blurred the truck? That's 1/15 second or slower, handheld, with a manual focus lens. Without IBIS, that would be a blurry mess. With the SL2 compensating for camera shake, it's clean and usable.
The focus peaking on the SL2 makes manual focusing with the Yashica fast and accurate. I set focus peaking to show me exactly where sharp focus is, and between that and the bright EVF, I can nail focus even in challenging light. It's honestly more enjoyable to shoot with than autofocus sometimes—you're more engaged with the process, more intentional about what you're focusing on.
And here's the best part: the Yashica 28mm cost me a fraction of what a native L-mount lens would cost. I get great image quality, I enjoy the process, and I'm not worried about damaging an expensive modern lens while walking around industrial areas of Chattanooga photographing old buildings. It's the perfect urban photography setup.
IBIS and Adapted Lenses: Technical Advantages of the Leica SL2
One thing I want to emphasize about shooting adapted vintage lenses on the Leica SL2 is how much the IBIS changes what's possible. In-body image stabilization isn't just a convenience feature—it fundamentally changes how you can use manual focus lenses in real-world shooting.
With older cameras, the rule of thumb was that your minimum handheld shutter speed should be roughly 1/focal length. For a 28mm lens, that means 1/30 second or faster. Slower than that and you'd get camera shake blur unless you had very steady hands or were bracing against something.
The SL2's IBIS throws that old rule out the window. I regularly shoot at 1/15 second, 1/8 second, sometimes even slower if I'm careful. The sensor is compensating for my hand movement in real-time, which means I can use lower ISOs for better image quality, or shoot in lower light conditions without needing a tripod.
For street and urban photography where you're often in shaded areas or shooting late in the day, this is huge. The Yashica 28mm has a maximum aperture of f/2.8, which is good but not super fast. In dimmer light, without IBIS, I'd be pushing ISO up to 1600 or 3200 to maintain usable shutter speeds. With IBIS, I can stay at ISO 400 or 800 and let the shutter speed drop, knowing the stabilization will keep things sharp.
It's one of those features that doesn't seem like a big deal until you actually use it in the field, and then you wonder how you ever shot without it. Vintage glass on a modern mirrorless body with IBIS is genuinely the best of both worlds.
Some are asking…
Best Time to Shoot Rossville Avenue: Morning light is good for the Hamilton Parts building facade. Late afternoon gives you nice side light on Zarzours and the other buildings along the street. Main Street is active all day, but I prefer shooting there in the afternoon or early evening when the light gets more interesting.
Parking and Logistics: Like I mentioned, metered parking is available right on Rossville Avenue. One hour was enough time for me to hit Hamilton Parts, Zarzours, Koch Foods, and make my way to Main Street. If you want to spend more time, pay for two hours to give yourself breathing room.
Safety: This isn't the touristy part of Chattanooga (it is more for the local crowd in this area) so just be aware of your surroundings. It borders an industrial area, not dangerous, but use common sense. Don't leave gear visible in your car, keep your camera bag close, and stay alert. I've never had any issues, but it's always smart to be aware when you're photographing in less-traveled parts of town.
Support this website by using these affiliate links to shop on Amazon:
Leica M11 Digital Rangefinder Camera
Nikon AF-S FX NIKKOR 105mm f/1.4E ED Lens
Voigtlander Nokton 35mm f/1.4 II
Sandisk 128GB Extreme Pro memory cards
Nikon 50mm f1.8 S Lens for Z mount
Frequently Asked Questions About Chattanooga Photography
Where is the best street photography in Chattanooga?
Main Street and Rossville Avenue are excellent for urban and street photography. Main Street is more polished with events, murals, and restaurants—it's the tourist-friendly side of downtown. Rossville Avenue offers grittier architecture and history. The area around the old Hamilton Parts Distributors building has pre-WWII structures that make for compelling photography if you're into urban decay and architectural history.
For skyline shots, look for locations where you can frame Lookout Mountain in the background—it's iconic Chattanooga and makes for instantly recognizable compositions. The Koch Foods plant area on Rossville gives you that view. Also worth checking: the riverfront, the Walnut Street Bridge, and the side streets off Main where you'll find older buildings and interesting character that don't make it into the tourist brochures.
Is Zarzours Cafe still open in Chattanooga?
As of when I took these photos in late 2023, Zarzours Cafe was preparing to close after over 100 years in business. This century-old Chattanooga institution on Rossville Avenue was a landmark, and I made it a point to photograph it—and eat there—before it closed forever. If you're reading this after 2023, it's likely already closed, which makes these photos even more valuable as historical documentation of Chattanooga's changing landscape.
It's one of those things that makes urban photography meaningful to me. You're not just capturing pretty pictures—you're documenting history before it disappears. Businesses that survive 100 years deserve to be remembered, and photography is how we do that.
Can you use vintage lenses for street photography?
Absolutely. I shot this entire Chattanooga photowalk with a Yashica 28mm f/2.8—a vintage adapted lens on my Leica SL2. The 28mm focal length is great for street photography because it captures environmental context without being too wide or distorted. You get the subject plus the surrounding architecture and scene, which tells a more complete story.
The Leica SL2's IBIS and focus peaking make manual focusing with vintage glass practical and enjoyable even in fast-moving street situations. Plus, vintage lenses have character and cost a fraction of modern glass. For street photography where you're often shooting at f/5.6 to f/8 anyway, vintage lenses perform beautifully. The Yashica 28mm is sharp, handles well, and cost me way less than any modern L-mount 28mm would.
What camera settings work best for urban photography?
For urban photography like this Chattanooga photowalk, I typically shoot in aperture priority mode at f/5.6 to f/8. This gives you good depth of field to keep both foreground and background reasonably sharp while keeping shutter speeds manageable in changing light conditions.
The Leica SL2's IBIS lets me hand-hold at slower speeds than I could with other cameras—like that Main Street shot with the motion-blurred truck. I set a minimum ISO (usually 100-400 depending on available light) and let the camera adjust shutter speed based on the scene. For adapted manual lenses like the Yashica 28mm, I use focus peaking to nail focus quickly and confidently.
If you're shooting architecture specifically, sometimes I'll stop down to f/11 or f/16 for maximum sharpness corner-to-corner, but for general street photography, f/5.6 to f/8 is the sweet spot.
Where can I park for photography on Rossville Avenue in Chattanooga?
There's metered street parking along Rossville Avenue. I paid for one hour of parking which gave me enough time to walk and photograph the Hamilton Parts building, Zarzours Cafe, Koch Foods, and make my way over to Main Street. The parking is affordable and convenient, and the walk between all these locations is pretty short—maybe a quarter mile total if you're hitting everything.
Just be aware of your surroundings. This area is more industrial and local than touristy, so stay alert when you're setting up shots and wandering around. It's not dangerous, but it's also not the Walnut Street Bridge where there are tourists everywhere. Just use common sense like you would in any urban environment.
How do you photograph closing businesses before they're gone?
When I heard Zarzours Cafe was closing after 100 years, I made it a priority to photograph it while I still could. These historical documentation shots become more valuable over time as the city changes. My advice: shoot multiple angles, capture signage clearly, and include contextual details like the parking lot, neighboring buildings, and street views that show where it sits in the neighborhood.
Take both "beauty shots" and straightforward documentary photos. You're not just making art—you're preserving Chattanooga history. The signage, the facade, the surrounding context—all of it matters for the historical record.
And if you can, patronize the business before it closes. I planned to eat at Zarzours before they shut down for good. If something is worth photographing because it's historically significant, it's worth supporting while you still can.
That's one hour of parking on Rossville Avenue in Chattanooga—from pre-WWII architecture at Hamilton Parts Distributors to a century-old cafe about to close forever, to the iconic skyline view at Koch Foods with Lookout Mountain in the background. Not bad for a quick urban photowalk with a Leica SL2 and a vintage 28mm lens.
Chattanooga has so much history hiding in plain sight. You just have to park, get out, and look. Next time you're driving through, skip Main Street for a minute and explore Rossville Avenue. You'll find stories in every building.
Have you photographed Chattanooga or documented historic locations before they're gone? Drop a comment—I'd love to hear about your urban photography spots.
Want more Chattanooga photography and Leica SL2 content? Check out my other photowalks and vintage lens reviews on the blog.

What Should You Photograph? A Documentary Photographer's Philosophy
Ok, this is going to be a short and sweet kind of post. I normally make YouTube videos about things that involve lots of images playing past the viewer and just lay some music over it to more or less inspire the viewer to do what I say at the end…”Get your camera out and go take a picture with it”
Ok, this is going to be a short and sweet kind of post. I normally make YouTube videos about things that involve lots of images playing past the viewer and just lay some music over it to more or less inspire the viewer to do what I say at the end…”Get your camera out and go take a picture with it”
What Do You Really Like to Photograph?

A couple painting down by the Tennessee River in Chattanooga, using iPhone light as the sun sets. The light was just too good to pass up. This is what I mean by chasing interesting light!
Never before has this been a truer statement than today. But we need to ask ourselves an important question…what do we like to shoot?
With world events being what they are and how the physical world around us is changing constantly as time goes on, I am not ready to just let it pass me by without documenting some of it as I go. Armed with this knowledge, I look for two things to photograph, things that will be gone soon or interesting light. That is what drew me to the photo above of the couple painting down by the river by iPhone light. The light was just too good to pass up.
Documentary Photography vs. Art Photography
Look, I need to be honest about something. I'm not trying to make art. I'm trying to make a record. There's a difference, and it took me a long time to be okay with that difference!
Art photography is about creating something beautiful or meaningful that didn't exist before. It's intentional, it's creative, it's about YOUR vision and YOUR interpretation. And that's great! The world needs art photographers.
Documentary photography is different. It's about capturing what IS, not what could be. It's about preservation, about creating a historical record, about showing things that will be gone tomorrow or next week or next year. When I photograph a building that's about to be demolished, I'm not trying to make it beautiful (though sometimes it is). I'm trying to make sure someone, somewhere, sometime in the future can see what it looked like before it disappeared.
Think about old photos from the 1800s or early 1900s. We don't look at those and judge them as "good photography" or "bad photography." We look at them as historical documents. They show us what streets looked like, what people wore, how buildings were constructed. That's what I'm doing, just with better cameras!
The Kinley hotel construction series below? That's not art. That's documentation. But in 50 years, someone researching Chattanooga's development will be glad those photos exist. The ADAMS sign preservation story? Someone doing historical research will use those images. That's the value of documentary photography, and it's a value I'm proud to contribute to my community.
You see, I am not what I would call an artist. I don’t think my photography is that noteworthy. Once I am gone, maybe someone will find these hard drives and then will think they are filled with the coolest photos and video the world has ever seen, just not today. That being said, I do think that I am a decent documentary photographer and that as time goes on I get better with it.
Things I normally photograph will be buildings that are gone now, that I could tell somehow that were probably headed for the wrecking ball or like the series below where I photo-documented the construction of the Kinley hotel and how there is a Coca-cola sign that is now hidden from view between the buildings because of the hotel. For me this is the sort of thing that is simply fascinating for some reason.
The Two Things I Photograph (And Why)
After years of shooting and trying different subjects and styles, I've boiled down what I actually photograph to TWO core things:
1. Things that will be gone soon This includes buildings scheduled for demolition, businesses that are closing, signs that are coming down, and landscapes that are about to change. The world changes fast, especially in cities. If I don't photograph it now, nobody will, and it'll just be gone forever!
The Kinley hotel construction? I knew that Coca-Cola sign would be hidden forever once the hotel went up. So I documented it. The old buildings on Rossville Avenue? Many of them won't be here in 10 years. I'm making sure we have a record of what they looked like.
2. Interesting light Sometimes the light is just too good to pass up. That couple painting by the river using iPhone light? The light was perfect. The sunset reflecting on the river with street lights spilling across the water? Had to stop and capture it. Night scenes with lit marquees and neon signs? Yeah, that's interesting light right there!
Here's the thing: these two categories overlap more than you'd think. Interesting light often happens during times of change. Dawn, dusk, construction lights at night, the golden hour before a storm. Light and change go together in photography!
How to find YOUR two things: Ask yourself: what do I keep photographing over and over? Not what you WANT to photograph or what you think you SHOULD photograph. What do you ACTUALLY photograph when you just go out with your camera for fun?
Look through your last 100 photos. What patterns do you see? For me, it was always buildings and light. For you, it might be people's faces, or textures, or motion, or something I'd never think of. The point is to be honest about what actually draws your attention in the field!
Documenting Chattanooga's Changing Landscape

The Coca-Cola sign that was visible downtown before the Kinley hotel construction. Once the hotel went up, this sign was hidden forever between buildings. This is exactly why I photograph things that will be gone soon!
The Kinley Hotel Construction Series: A Photography Case Study

The Kinley hotel coming out of the ground. I documented this entire construction project knowing it would change the downtown Chattanooga skyline permanently.

Mid-construction on the Kinley. The building taking shape and starting to hide the Coca-Cola sign that was behind it.

The Kinley with its distinctive blue exterior starting to appear. Each stage of construction tells part of the story of how Chattanooga is changing.

Later stage construction showing the ADAMS building sign across the street. Notice how the sign appears in these later photos once I thought to cross the street for a wider angle. That sign has its own story!
The ADAMS Sign: Hidden History Preserved
As an added bonus in these photos there is also another piece of history that undergoes a change as well. If you will notice that the sign on the corner for the ADAMS building appears in the last 4 photos where I thought to go across the street and get the image. This sign survives into the renovation and it is restored and back in place at the end. The ADAMS building no longer exists but the sign somehow survives into the current day…

The ADAMS building sign in its original weathered condition. The ADAMS building itself no longer exists, but somehow this sign survived into the renovation.
Chattanooga is going through massive change right now, and has been for the past 10-15 years. The downtown area is being redeveloped, new hotels are going up, old buildings are being renovated or torn down, and the whole character of certain neighborhoods is shifting.
This makes it perfect for documentary photography! There's always something changing, always some building in transition, always some piece of history that's about to disappear or transform.
The Kinley hotel construction is just one example. That entire block looked completely different five years ago. The Coca-Cola sign that's now hidden between buildings? That was a prominent downtown landmark for decades. Now you can only see it from certain angles, and soon it'll probably be gone entirely when the building it's painted on gets renovated or demolished.
The ADAMS building sign surviving the renovation? That's actually unusual! Most old signs don't make it through development. The fact that someone cared enough to preserve and restore that sign says something about Chattanooga's relationship with its history. That story is worth documenting!
Other Chattanooga locations I've documented that are now gone or changed: the old Terminal Station before its renovation, several restaurants and businesses that closed during COVID, vintage signage that's been removed or painted over, and entire blocks that look nothing like they did five years ago.
If you live in any city or town that's growing or changing, you have the same opportunity. Start photographing what's there NOW, because it won't be there forever. Future historians and your community will thank you!

The same ADAMS sign after restoration. They actually cared enough to preserve and restore it! This is unusual. Most old signs don't survive development.
Chasing Light: Night Photography in Small Towns
Another aspect of my photography is more artistic where I will shoot at night to capture interesting light in different areas of the city, where ever that might be. I have began to look for movie marques in the town square of small towns and get them lit up at night.

The Marietta Square Theatre at night in August 2023. I've started looking for movie marquees in small town squares and photographing them lit up at night. There's something special about these historic theaters!
But the real thing I have started to do it just take photos. Things that happen around me like the photo here of the smoke from local wildfires because it hasn’t rained in something like 2 or 3 months at this point.

Smoke from local wildfires during a 2-3 month drought. Sometimes documentary photography is just capturing what's happening around you, even if it's not pretty. This is what November 2023 looked like in our region.
These next two photos were not taken on the same night, but were captured about 1/4 mile of each other. One is the river front and I just liked the way the light fell that night on the water as well as the light spill from the street lights across the river and the color of the sunset all just came together for a great photo. The next one is simply a photo of a couple of buildings on Market and 5th street. The signage and the lights just made for a cool photo to me so I stopped for a second and grabbed a few images of it at varying exposure levels so I could get the lit signs to expose properly as well as the rest of the stuff. It is just a cool photo to me.
Night Photography Settings and Approach"
Since a lot of what I shoot involves low light and night photography, let me give you the practical details of how I actually do this.
Camera Settings: For night photography like the movie marquee shot, I'm typically shooting at ISO 400-800, aperture around f/2.8 to f/4, and shutter speeds ranging from 1/30 second to several seconds depending on the scene. The key is having a camera with good high ISO performance (my Leica SL2 handles this well) and either using a tripod or bracing against something solid.
For the river reflection shot, I used a longer exposure (probably 2-3 seconds) to smooth out the water and capture the light trails. This means a tripod is basically required unless you want blur!
Equipment: You don't need fancy gear for night photography, but you do need:
A camera that can handle high ISO without too much noise (or just be willing to make really long exposures to make up for it)
A fast lens (f/2.8 or wider is ideal)
A tripod or something to brace against
Patience to let your eyes adjust and find the light
I shoot with the Leica SL2 and various vintage lenses, often wide open or close to it. The in-body stabilization helps for handheld shots at slower shutter speeds.
Finding the Light: The best night photography happens during blue hour (the 20-30 minutes after sunset before it's fully dark). You get ambient light from the sky plus artificial lights from buildings and streets. This creates depth and color that pure darkness doesn't give you.
Also, look for lit signage! Movie marquees, neon signs, storefronts with their lights on. These create natural focal points and add color to night scenes.

The riverfront at sunset with street lights reflecting across the water. Sometimes all the light just comes together. The sunset color, the street light spill, the reflections. This is why I chase the light!

Buildings on Market and 5th Street in Chattanooga. The lit signage and building lights just made for a cool photo that night. I stopped and grabbed a few images at varying exposure levels to get everything exposed properly.
If you have not figured it out yet, I want you to start taking a long hard look at what it is that you enjoy photographing. i mean REALLY boil it down to the simplest components. For me it was the two things I just mentioned, for you it might be saturated colors or people waving at you or blur in your photo. The point is, don’t just generalize your answer, the only person you hurt in this event is yourself if you are not 100% truthful.
If you like to watch videos too, here is the video I did on the same subject.
Your Style Will Evolve (And That's Good)
Here's something important I want you to understand: your photography style WILL change over time, and that's not just okay, it's actually good!
I started out obsessed with urban decay. Abandoned buildings, peeling paint, broken windows, industrial ruins. I thought that's what I wanted to photograph forever. And you know what? It was a good starting point! It got me out shooting, it taught me about light and composition, and it connected me with other photographers who liked the same aesthetic.
But over time, I realized urban decay wasn't the root of what I liked. It was just a symptom of something deeper: I was drawn to things that were disappearing, to the passage of time, to change and transformation. Urban decay just made that visible in an obvious way!
Once I understood that pattern, my photography opened up. Now I photograph construction (the opposite of decay!), historic signs being preserved, changing skylines, and light at different times of day. All of these connect to that same root interest in time and change.
The lesson: Start with what attracts you right now, but stay open to discovering the deeper pattern underneath. Don't lock yourself into "I'm an urban decay photographer" or "I only shoot landscapes" or whatever. Let your interests evolve!
Ask yourself every six months: what am I actually photographing these days? What patterns do I see? What keeps drawing my attention? Your answers might surprise you, and that's when the most interesting growth happens.
For you, it might not be about time and change at all. Maybe you'll discover you're really interested in human connection, or geometric patterns, or the way weather affects a scene. The point is to keep asking the question and being honest about the answer!
So ask yourself what it is that you like and then go out and make photos of that AND don’t let yourself fall into the trap of not being able to change this with time. I started out wanting to shoot urban decay only, but it turned out that was not the root of what I like to shoot, but it led me to it. Anyway, with that said, get your camera out and go take a picture with it!
If you're struggling to figure out what YOU actually like to photograph, here are some questions that helped me:
1. What photos do you KEEP coming back to look at? Not the ones you think you should like, but the ones you actually open and view again. Those reveal something about your real interests.
2. What do you photograph when nobody's watching or judging? Forget Instagram, forget what's popular, forget what other photographers are doing. What do YOU photograph just because you want to?
3. What makes you stop and say "I need to capture this"? Pay attention to that impulse! What triggers it? Light? A specific subject? A moment in time? That's your style trying to tell you something.
4. What do you get excited to show people? When you're showing photos to friends or family, which ones do you genuinely want them to see? Not the "best" technically, but the ones you're proud of or excited about?
5. If you could only photograph ONE thing for the rest of your life, what would it be? This is a hard question, but it forces you to identify what really matters to you in photography.
For me, the answers kept pointing to documentation, preservation, and light. Your answers will point somewhere else, and that's your path forward!
Support this website by using these affiliate links to shop on Amazon:
Leica M11 Digital Rangefinder Camera
Nikon AF-S FX NIKKOR 105mm f/1.4E ED Lens
Voigtlander Nokton 35mm f/1.4 II
Sandisk 128GB Extreme Pro memory cards
Nikon 50mm f1.8 S Lens for Z mount
Frequently Asked Questions About Finding Your Photography Style
How do I find my photography style?
Start by being brutally honest about what you actually photograph, not what you think you should photograph. Look through your last 100 photos and identify patterns. What subjects keep appearing? What situations make you stop and take photos? For me, it was always buildings that were changing or disappearing, plus interesting light conditions. Your patterns will be different! The key is honest self-reflection, not copying what popular photographers are doing. Your style is already there in your work. You just need to identify it and lean into it intentionally.
What is documentary photography?
Documentary photography is about creating a historical record, not about creating art (though it can be both!). When I photograph a building before it's demolished or document a construction project, I'm preserving something for the future. Documentary photography captures what IS, not what you wish it was or what you imagine it could be. Think about old photographs from the 1800s. We value those not as art but as historical documents. That's documentary photography. It serves your community by preserving visual history that will matter to future generations.
What should I photograph as a beginner?
Photograph whatever genuinely interests you right now, even if it seems boring or obvious. Don't worry about finding your "style" immediately. Just shoot! I started photographing urban decay because that's what looked cool to me at the time. Years later, I realized the deeper pattern (things disappearing, interesting light), but I couldn't have discovered that without first spending time shooting what initially attracted me. Start with what interests you, shoot a LOT, and let your patterns emerge naturally over time.
How do you photograph at night without a tripod?
You need a camera with good high ISO performance and the fastest lens you can get (f/2.8 or wider is ideal). I typically shoot at ISO 400-800 for night photography, sometimes higher if needed. Use a wide aperture (f/2.8 or f/4) to let in more light, and brace yourself against something solid like a wall or pole. The Leica SL2's in-body stabilization helps me handhold at slower shutter speeds than I could with other cameras. That said, a tripod is still better for really dark scenes or long exposures! Don't be afraid to carry a small travel tripod.
Can your photography style change over time?
Yes, and it should! My photography style has evolved significantly. I started obsessed with urban decay, then realized I was really interested in things that were disappearing or transforming. That deeper understanding opened up new subjects: construction photography, historic sign preservation, changing skylines. Don't lock yourself into one style forever. Every six months, ask yourself: what am I actually photographing these days? What patterns do I see? Let your style evolve as you grow and learn more about what really interests you.
What makes Chattanooga good for documentary photography?
Chattanooga is going through massive urban development right now. New hotels, renovated buildings, changing neighborhoods, businesses closing and opening. This constant change makes it perfect for documentary photography! There's always something disappearing or transforming. The Kinley hotel covering the old Coca-Cola sign, the ADAMS sign surviving a building renovation, old businesses on Rossville Avenue. These changes are worth documenting because future generations will want to see what Chattanooga looked like during this transformation period. Your town probably has similar changes happening!
How do I know if I'm a documentary photographer or an art photographer?
Ask yourself: when you take a photo, are you trying to capture what's really there, or are you trying to create something new? Documentary photography is about preservation and record-keeping. Art photography is about personal vision and creative expression. Many photographers do both! I'm primarily documentary focused because I care more about preserving history than making beautiful images (though sometimes they're both). There's no wrong answer here. It's just about understanding your own motivations and leaning into what actually drives you to pick up a camera.
What camera do I need for documentary photography?
Any camera works for documentary photography! Documentary is about subject and intention, not gear. That said, certain features help: good low light performance (for night photography), ability to shoot in challenging conditions, and reliability. I use a Leica SL2 with vintage lenses, but I've done documentary photography with everything from DSLRs to smartphones. The best camera for documentary photography is the one you'll actually carry with you when the moment happens. Don't let gear be an excuse for not starting!

A day out with Aaron in Chattanooga
It was time...
We have not gathered to shoot photos in quite some time now so Aaron found there was a beard competition happening in Chattanooga and decided to make his way down for it.
It was time...
We have not gathered to shoot photos in quite some time now so Aaron found there was a beard competition happening in Chattanooga and decided to make his way down for it.
The Setup: What I Shot With
For this day out with Aaron, I kept my setup simple:
Camera: Leica SL2 (full-frame mirrorless) Lens: Leica 50mm APO-Summicron Mode: Aperture priority with -2/3 exposure compensation ISO: Auto (probably ranged between 200-800) Settings: Wide open or close to it (f/2 to f/4 for subject separation)
Aaron was shooting with his new Nikon Z8, and we kept comparing how our cameras metered the scenes differently. The Leica wanted to overexpose about 2/3 stop compared to his Nikon, which meant I had to dial in negative exposure compensation the whole time. This is something you learn when shooting different camera systems together!
The SL2 is heavy (like really heavy compared to smaller mirrorless cameras or rangefinders), but it makes stunning images and the build quality is tank-like. I don't baby it on the streets, which is exactly how a street camera should be used!

Shot with Leica SL2 and 50mm during our Chattanooga day out with Aaron at the beard competition.
When he arrived we spent the evening playing with stuff (his new Z8 in particular) and catching up. But then it was off to bed so we could get up and start our big day of photography.
The next morning comes around and we down some coffee and make a plan to meet up about lunchtime as I had to go to our Church’s Association as a delegate. Seems I made a mistake and assumed I didn’t need to go… lol, I see what that got me. Anyway, I really enjoy Association so it wasn’t like a chore, it meant changing plans a little from the original plans for the day.
So after I finish with business at association, I head over to the Harley Davidson dealership which is where the beard competition is being held. There I find Aaron is short order and it is really crowded. He basically tells me to get my camera out and take a picture with it so I sheepishly do as I am told.

The beard competition at Harley Davidson in Chattanooga. This event was perfect for breaking down personal barriers to photographing strangers! People were there to be seen and photographed, making it easy practice for someone like me who's normally shy with the camera. Shot with Leica SL2 + 50mm.

This fellow was more than happy to pose for me at the beard competition! Events like this are perfect for overcoming shyness in street photography because people expect cameras and are happy to participate. Shot with Leica SL2 and 50mm. The afternoon light gave great contrast for portraits like this!
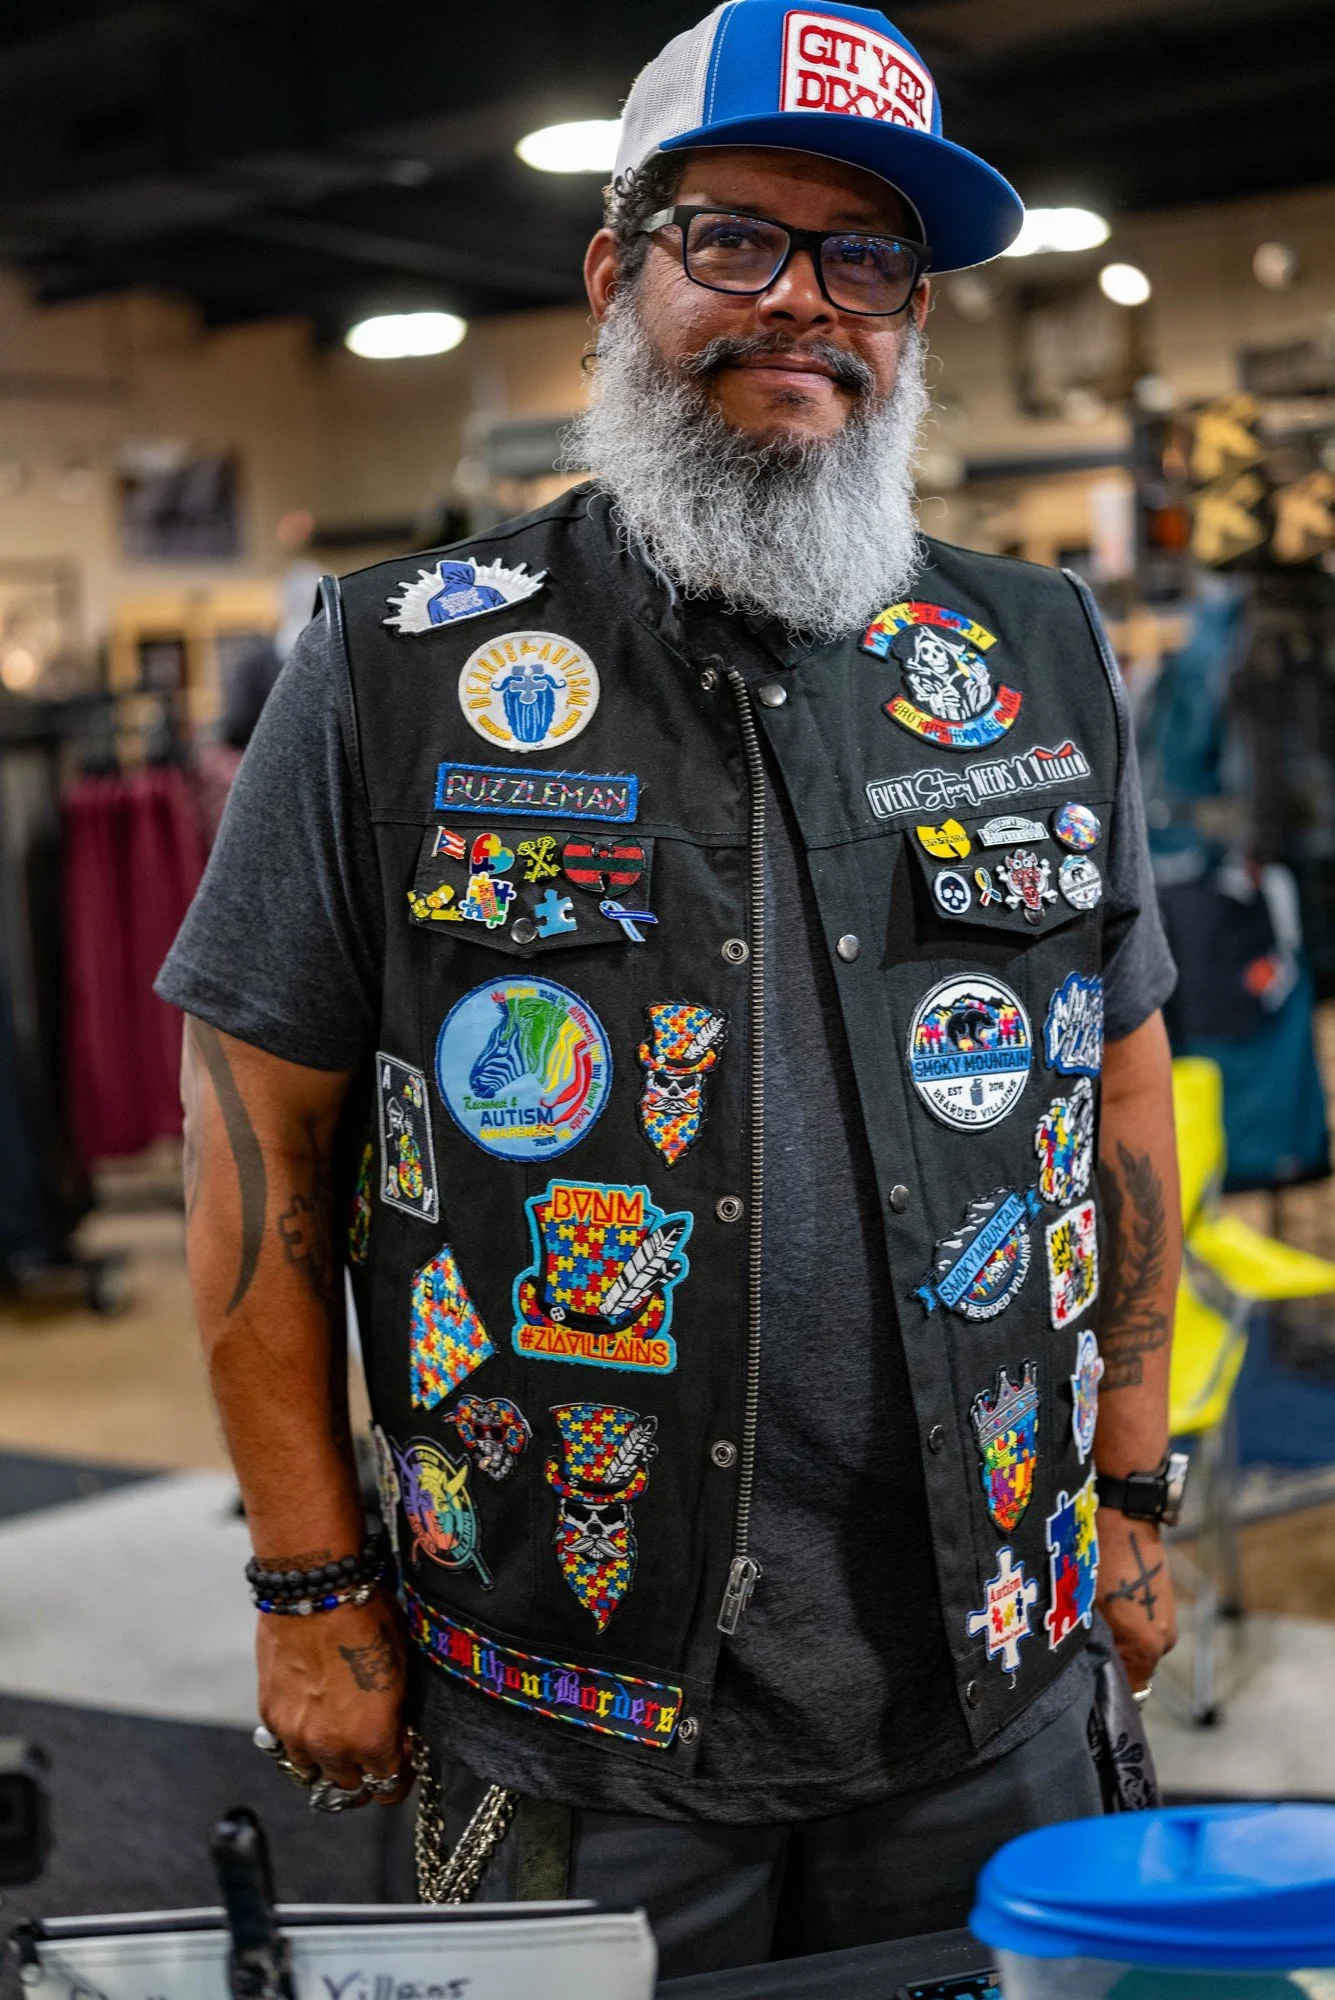
The atmosphere at the beard competition was incredible! Crowded but friendly, with people everywhere happy to get their photos taken. Aaron was right when he told me to just get my camera out and shoot. Sometimes you need that push from a friend! Leica SL2 + 50mm, aperture priority mode.

The atmosphere at the beard competition was incredible! Crowded but friendly, with people everywhere happy to get their photos taken. Aaron was right when he told me to just get my camera out and shoot. Sometimes you need that push from a friend! Leica SL2 + 50mm, aperture priority mode.
You see I am not very aggressive with my photography especially when it involves people. I will ask at times but most of the time, this is why I don’t shoot aggressive street stuff. So now I am starting to get some photos and it is exactly as he mentioned. People happy to get their photos captured are everywhere. Like this fellow below, he was more than happy to pose for me. I will be honest, this kind of event is the perfect thing to break down your personal barriers to shooting photos of people you don’t know.

The Leica SL2 with the 50mm APO Summicron is the perfect camera for a beard Competition!

Even the girls got in on the fun at the beard competition! Not everyone there had a beard, lol. Shot with Leica SL2 + 50mm at Harley Davidson in Chattanooga. This is why I love event photography as practice for street work!
Why Events Are Perfect for Shy Street Photographers
I mentioned I'm not very aggressive with my photography, especially when it involves people. This is something a lot of photographers struggle with! We want to capture candid moments and interesting people, but we don't want to be intrusive or make anyone uncomfortable.
Events like the beard competition are the perfect training ground because:
People expect cameras. They're there to be seen and photographed, so you're not the weird person with a camera. You're just another photographer at an event.
Subjects are willing. Most people will happily pose if you ask, and many will even seek you out to get their photo taken. This builds your confidence!
Low stakes. If someone says no or looks uncomfortable, there are dozens of other subjects around. You're not losing a once-in-a-lifetime shot.
Practice makes perfect. The more you shoot people at events, the more comfortable you get approaching strangers in regular street situations.
Aaron's advice was simple: "Get your camera out and take a picture with it." Sounds obvious, but when you're standing there feeling shy, you need someone to tell you it's okay to just shoot!
Start with events. Work up to regular street photography. Your shyness will fade as your confidence grows! Back to the story in progress…
Well the beard competition winds down about 3 or so in the afternoon and we decide to rearrange the rest of the day to shoot some street photography in downtown and also to go have supper at a great Italian restaurant later on.
The streets of Chattanooga were busier than usual with it being a holiday weekend but it still wasnt really bad where we went for our walk.

We found this mural with light reflecting from the building across the alley and it was just something we couldn't pass up! This is what afternoon light does in downtown Chattanooga. The light spill creates scenes you don't get at other times of day. Leica SL2 + 50mm on our photowalk route through Main and Broad Streets.
We started on Main Street and then headed down Market Street to about 7th where we turned over to Broad Street and then back towards Main eventually diverting over to Cowart street before arriving at the truck.
So now you have the route, let see what we got. I kept joking about channeling my inner Eggleston as I would take photos of the mundane. Another thing I have learned is my Leica wants to shoot about 2/3 stop over exposed compared to my friends Nikon cameras. I kept -2/3 stop exposure compensation dialed in the whole time. I did this to keep the sky from being blown out as the shadows would be dark due to the bright afternoon sun. I will dig into the setup on my camera more to see if I can find out why it is doing that.

The Tivoli Theater is an iconic landmark in downtown Chattanooga Tennessee and never disappoints for a photograph.
Along the way we saw a lot of cool stuff to photograph, like in the images below where it is different light so the images come out different from my usual time of day. With the light further over to the west we kept getting these awesome light spill shots like the one below of the old Rone Regency Jewelers location. This location will be sorely missed by me when they finally do something with this building. I love the gritty nature of the old signage and it wasn’t long ago that the windows were not boarded up so you could actually see inside the store. Even so, the black painted plywood makes a nice contrast to the lighter color of the upper section of the building bringing balance to the image.

The old Rone Regency Jewelers location with afternoon light spilling across the facade. This location will be sorely missed by me when they finally do something with this building. I love the gritty nature of the old signage! The black painted plywood makes a nice contrast to the lighter color of the upper section, bringing balance to the image. Shot with Leica SL2 + 50mm Summicron on our downtown Chattanooga photowalk with Aaron.
We also found a few people to photograph as well. It was not quite as busy as I had figured it would be for a holiday weekend in the downtown area, but there were a few people out and about and I was able to grab a few photos of them. The Leica SL2 is a great camera for this kind of photography as it makes stunning portraits as well as makes for a wonderful, albeit heavy, street camera.
Why Afternoon Light Changed Everything
I usually shoot at different times of day (mid-morning usually), so this late afternoon session was different for me. With the sun further over to the west, we kept getting these awesome, direct sun light spill shots that I don't normally see.
What made afternoon light special:
Hard shadows: The bright afternoon sun created strong shadows and high contrast. Great for black and white or dramatic color shots.
Light spill: Buildings reflecting light into alleys and onto other buildings. This is what made the Rone Regency Jewelers shot work so well!
Window light: Storefronts and windows become light sources, creating interesting reflections and secondary lighting.
Challenge mode: Protecting highlights meant I had to underexpose a bit (-2/3 stop), which made shadows darker. This forced me to look for scenes that worked with that contrast.
Different light means different photos. Don't just shoot at the same time every day! Mix it up and see what you discover.
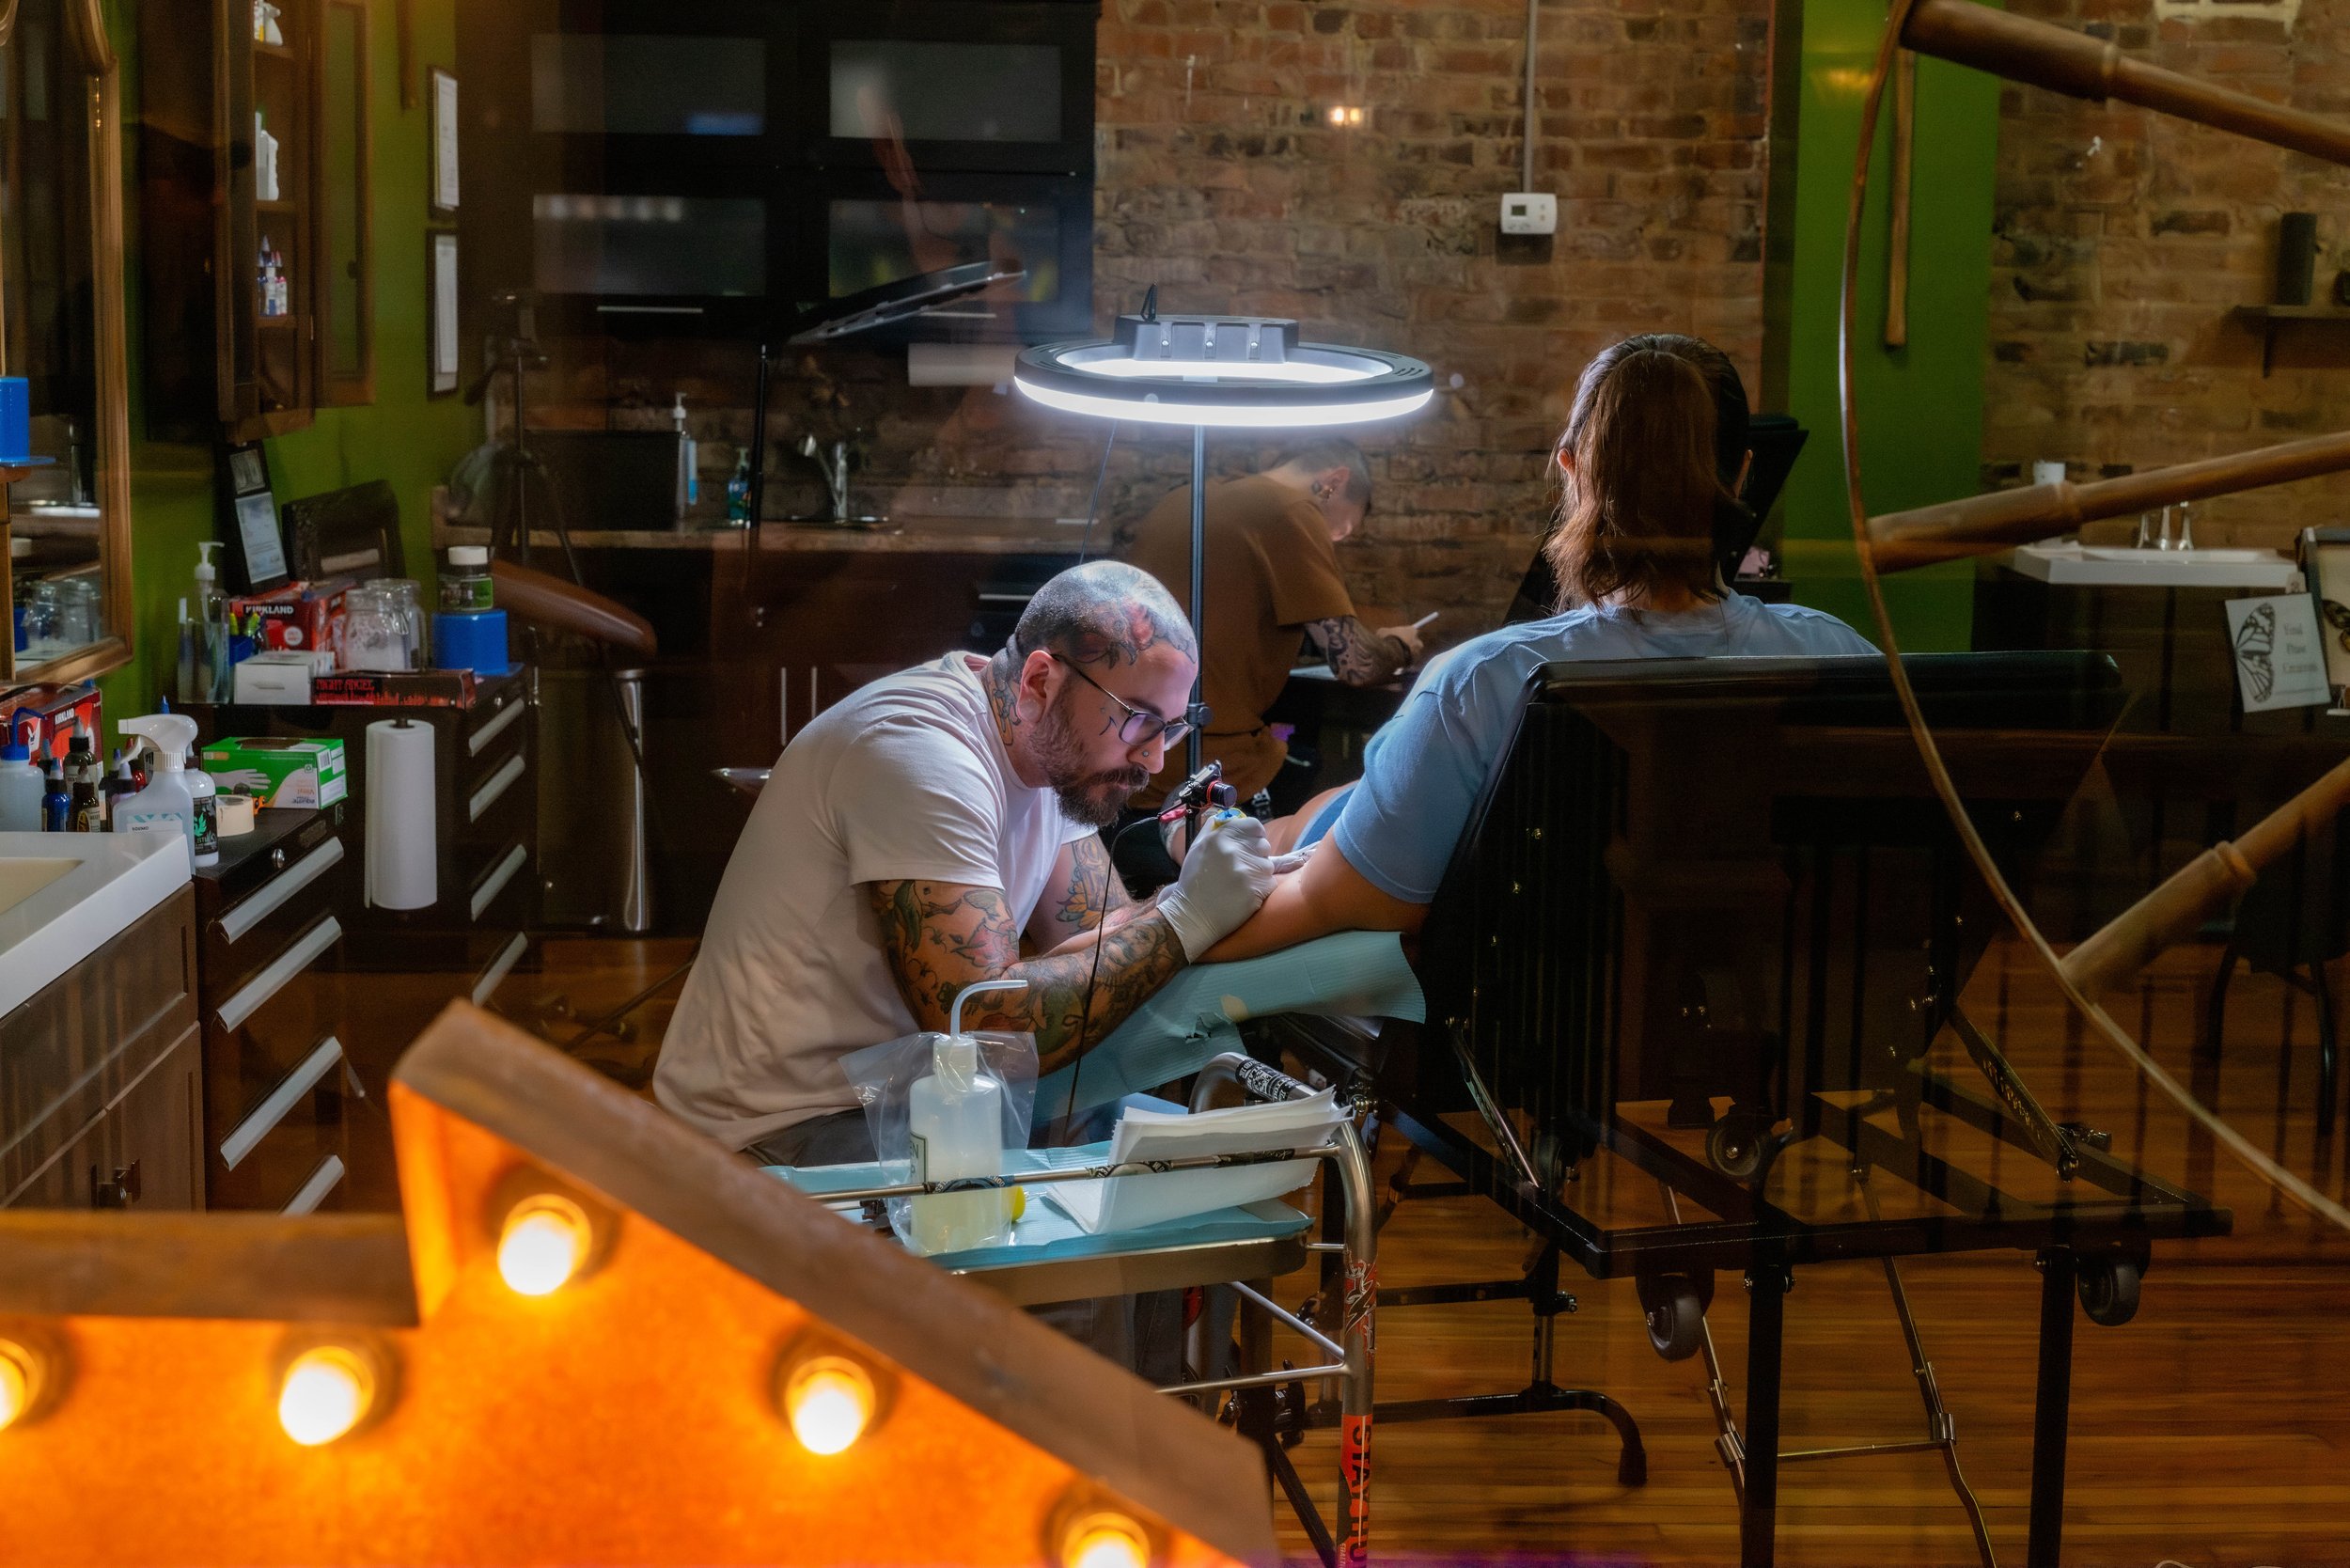
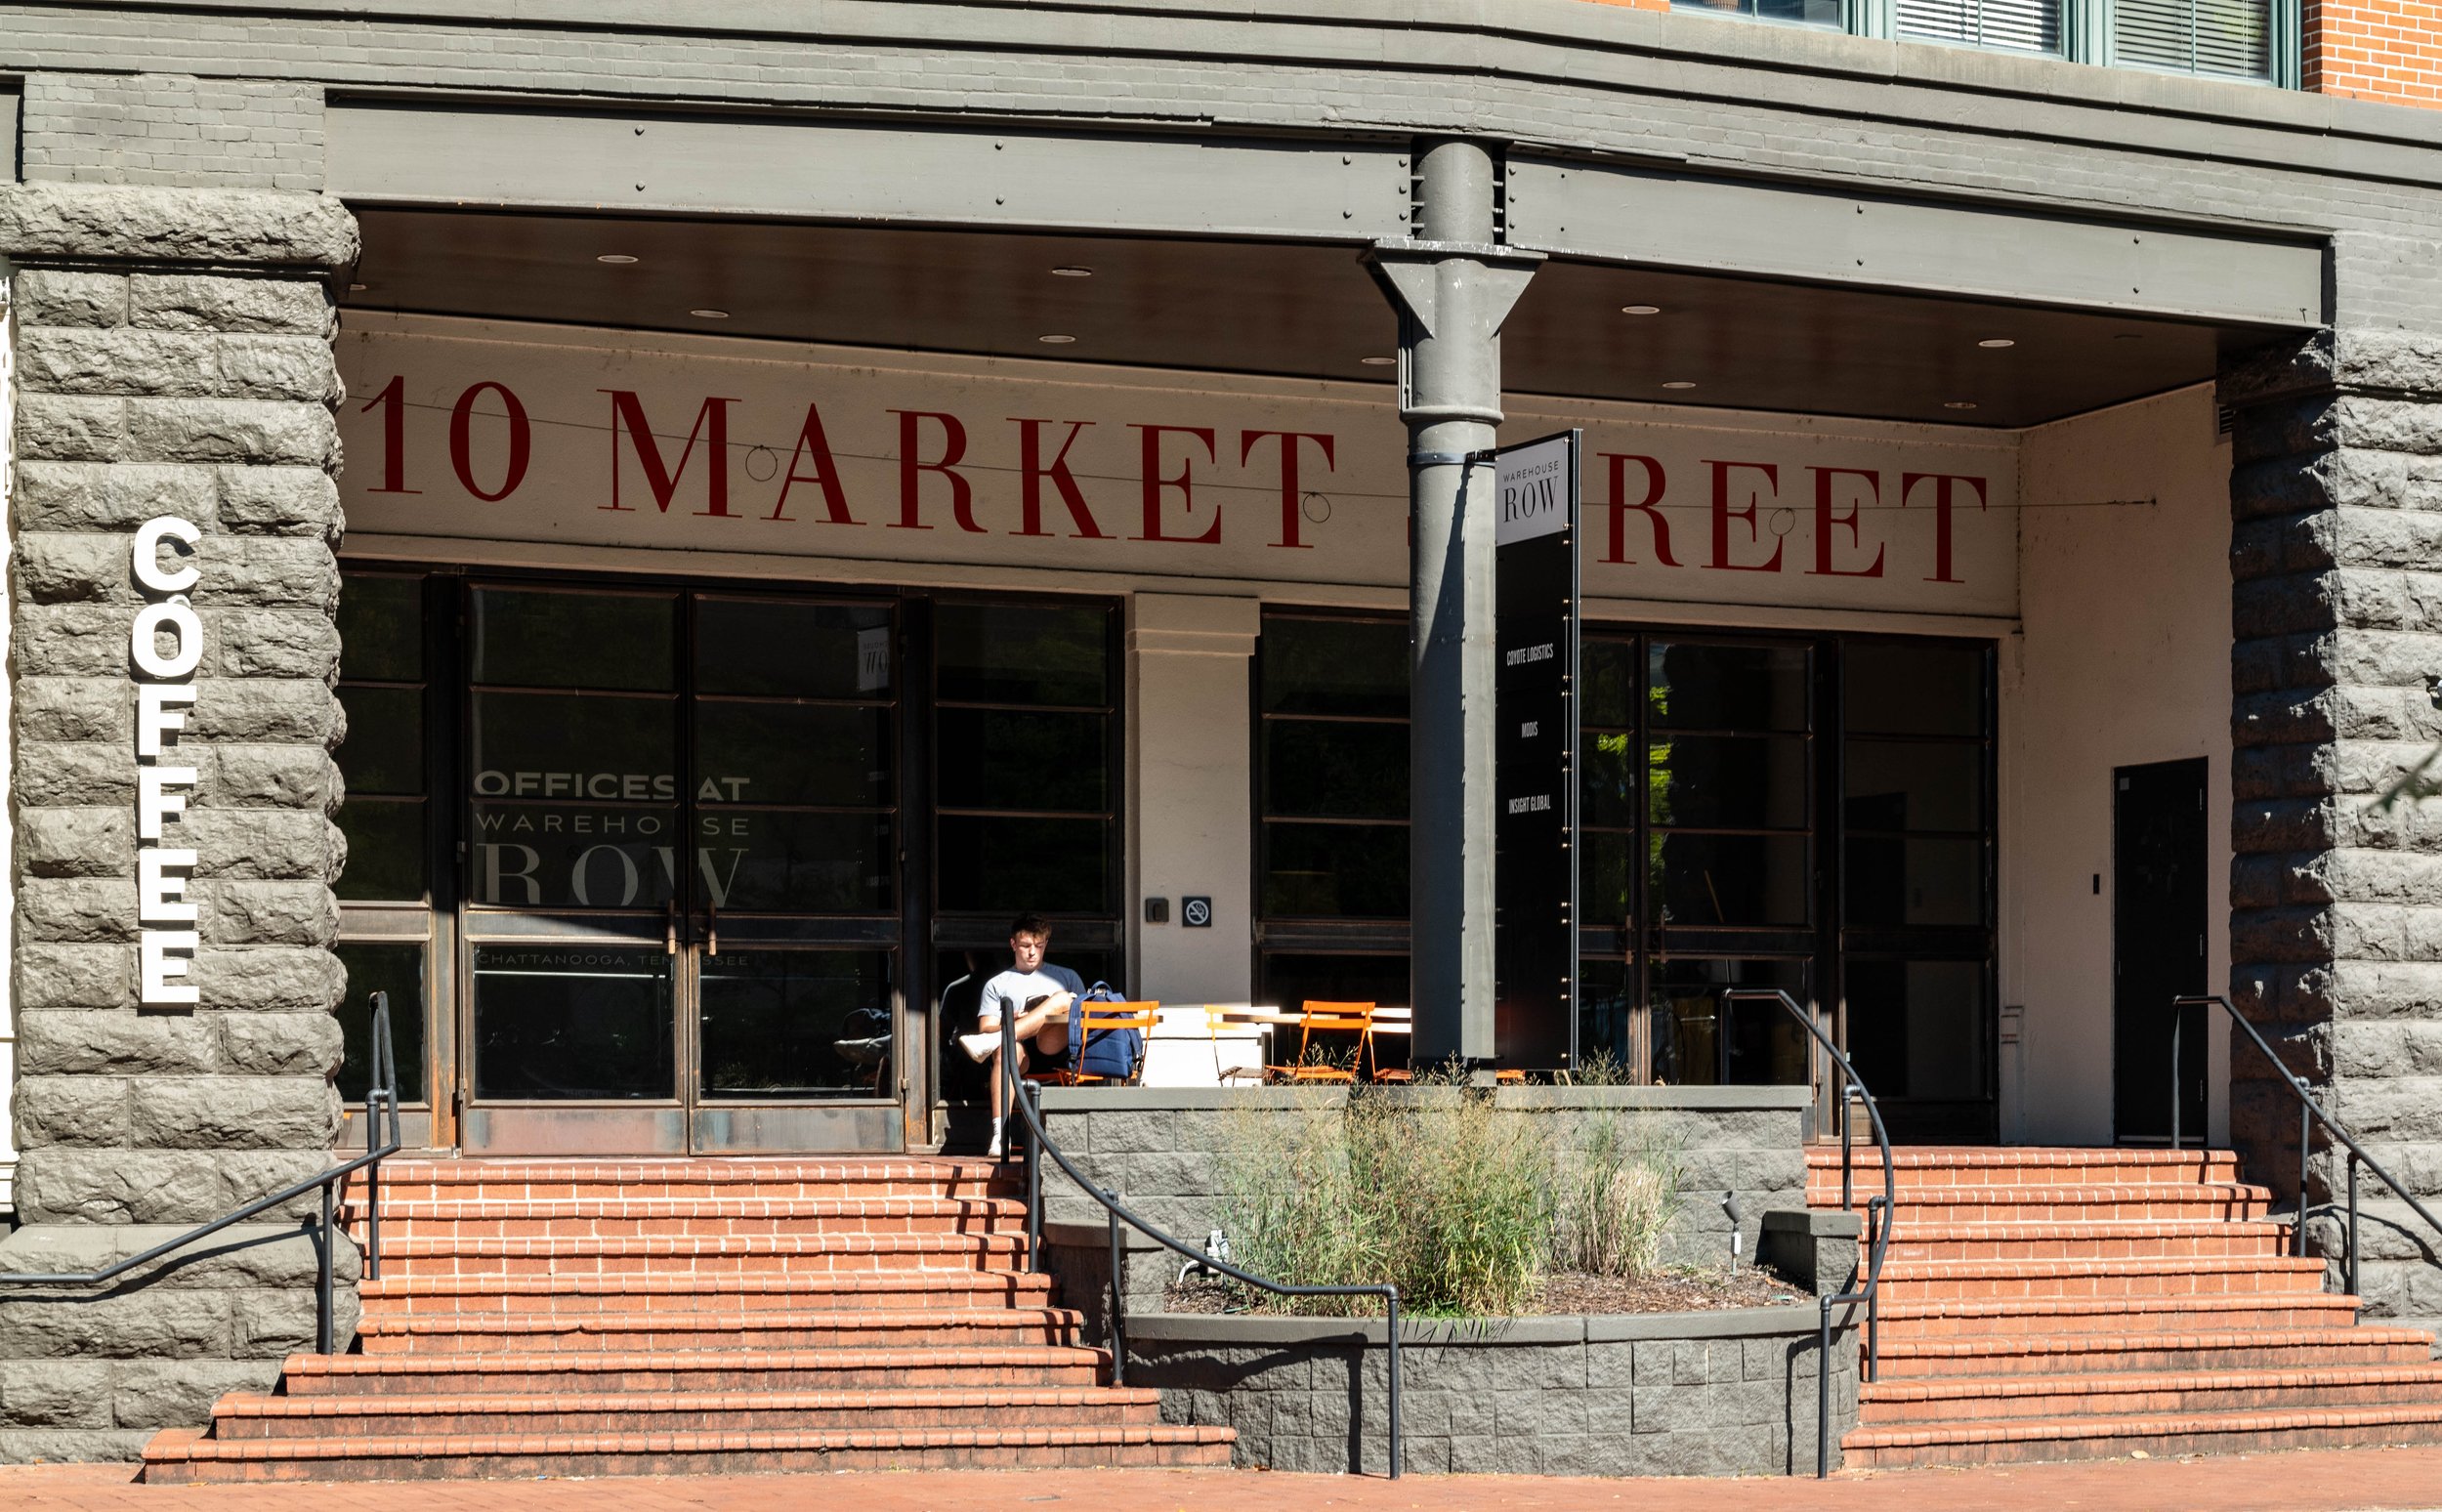
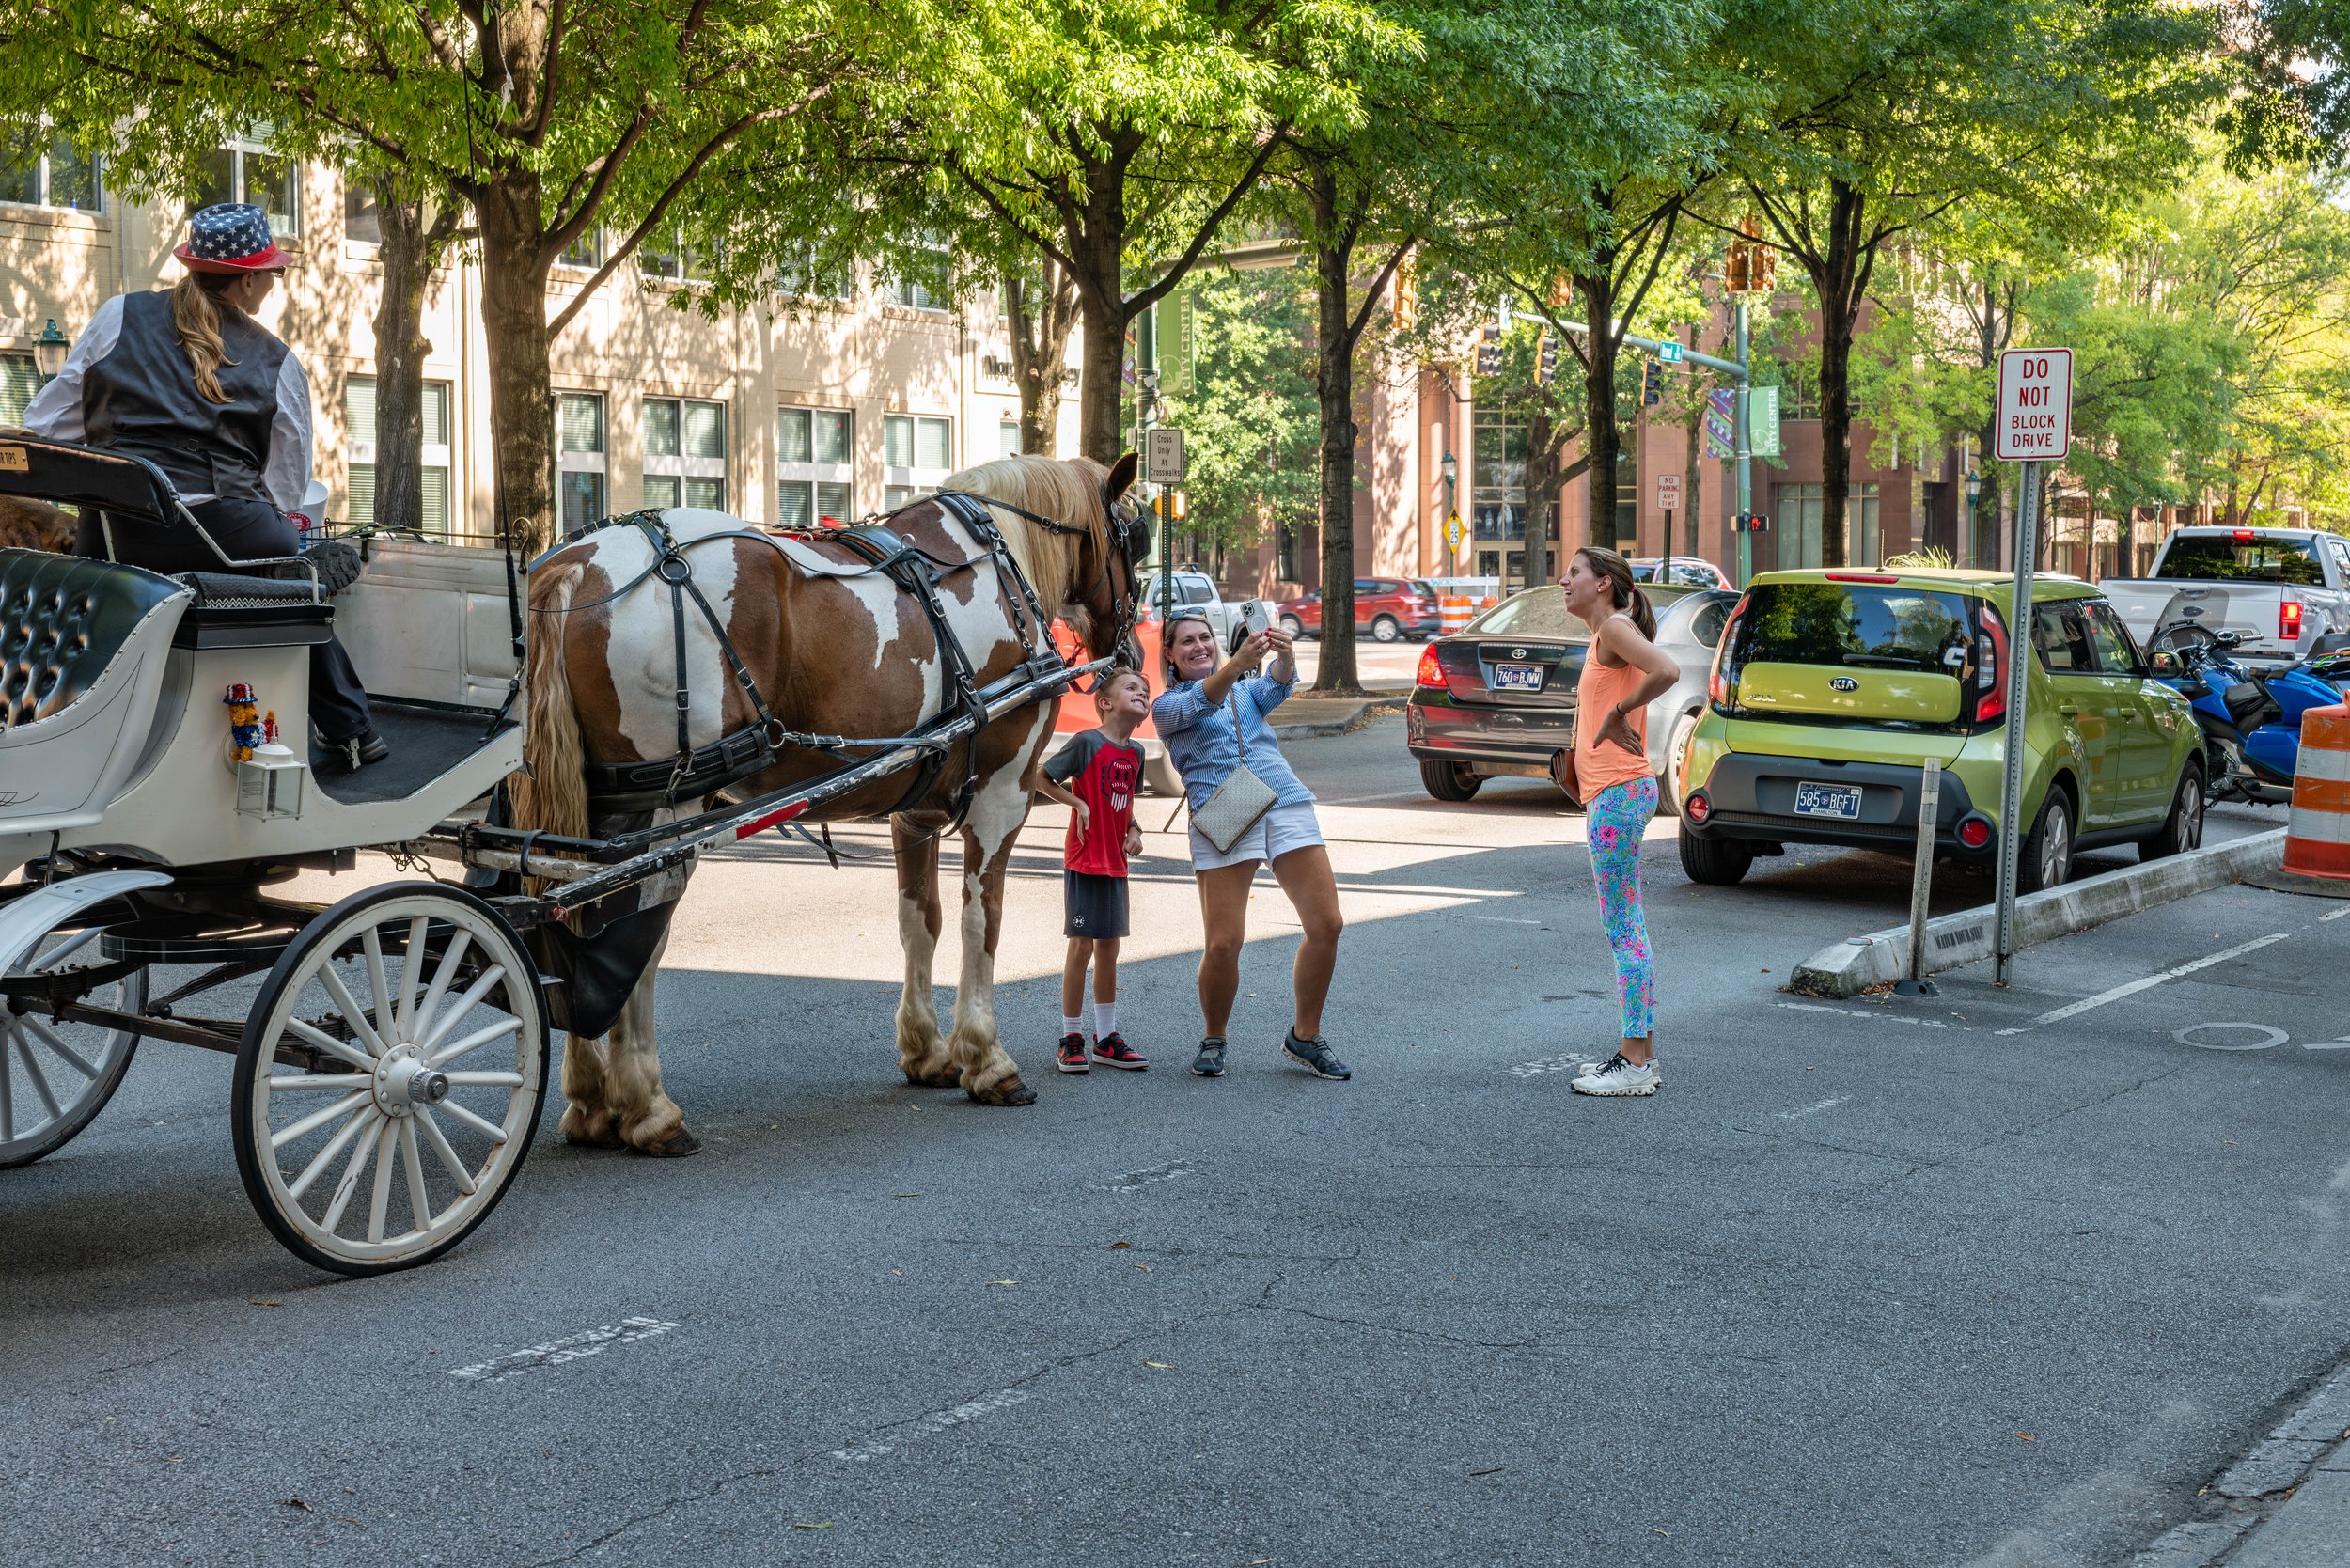
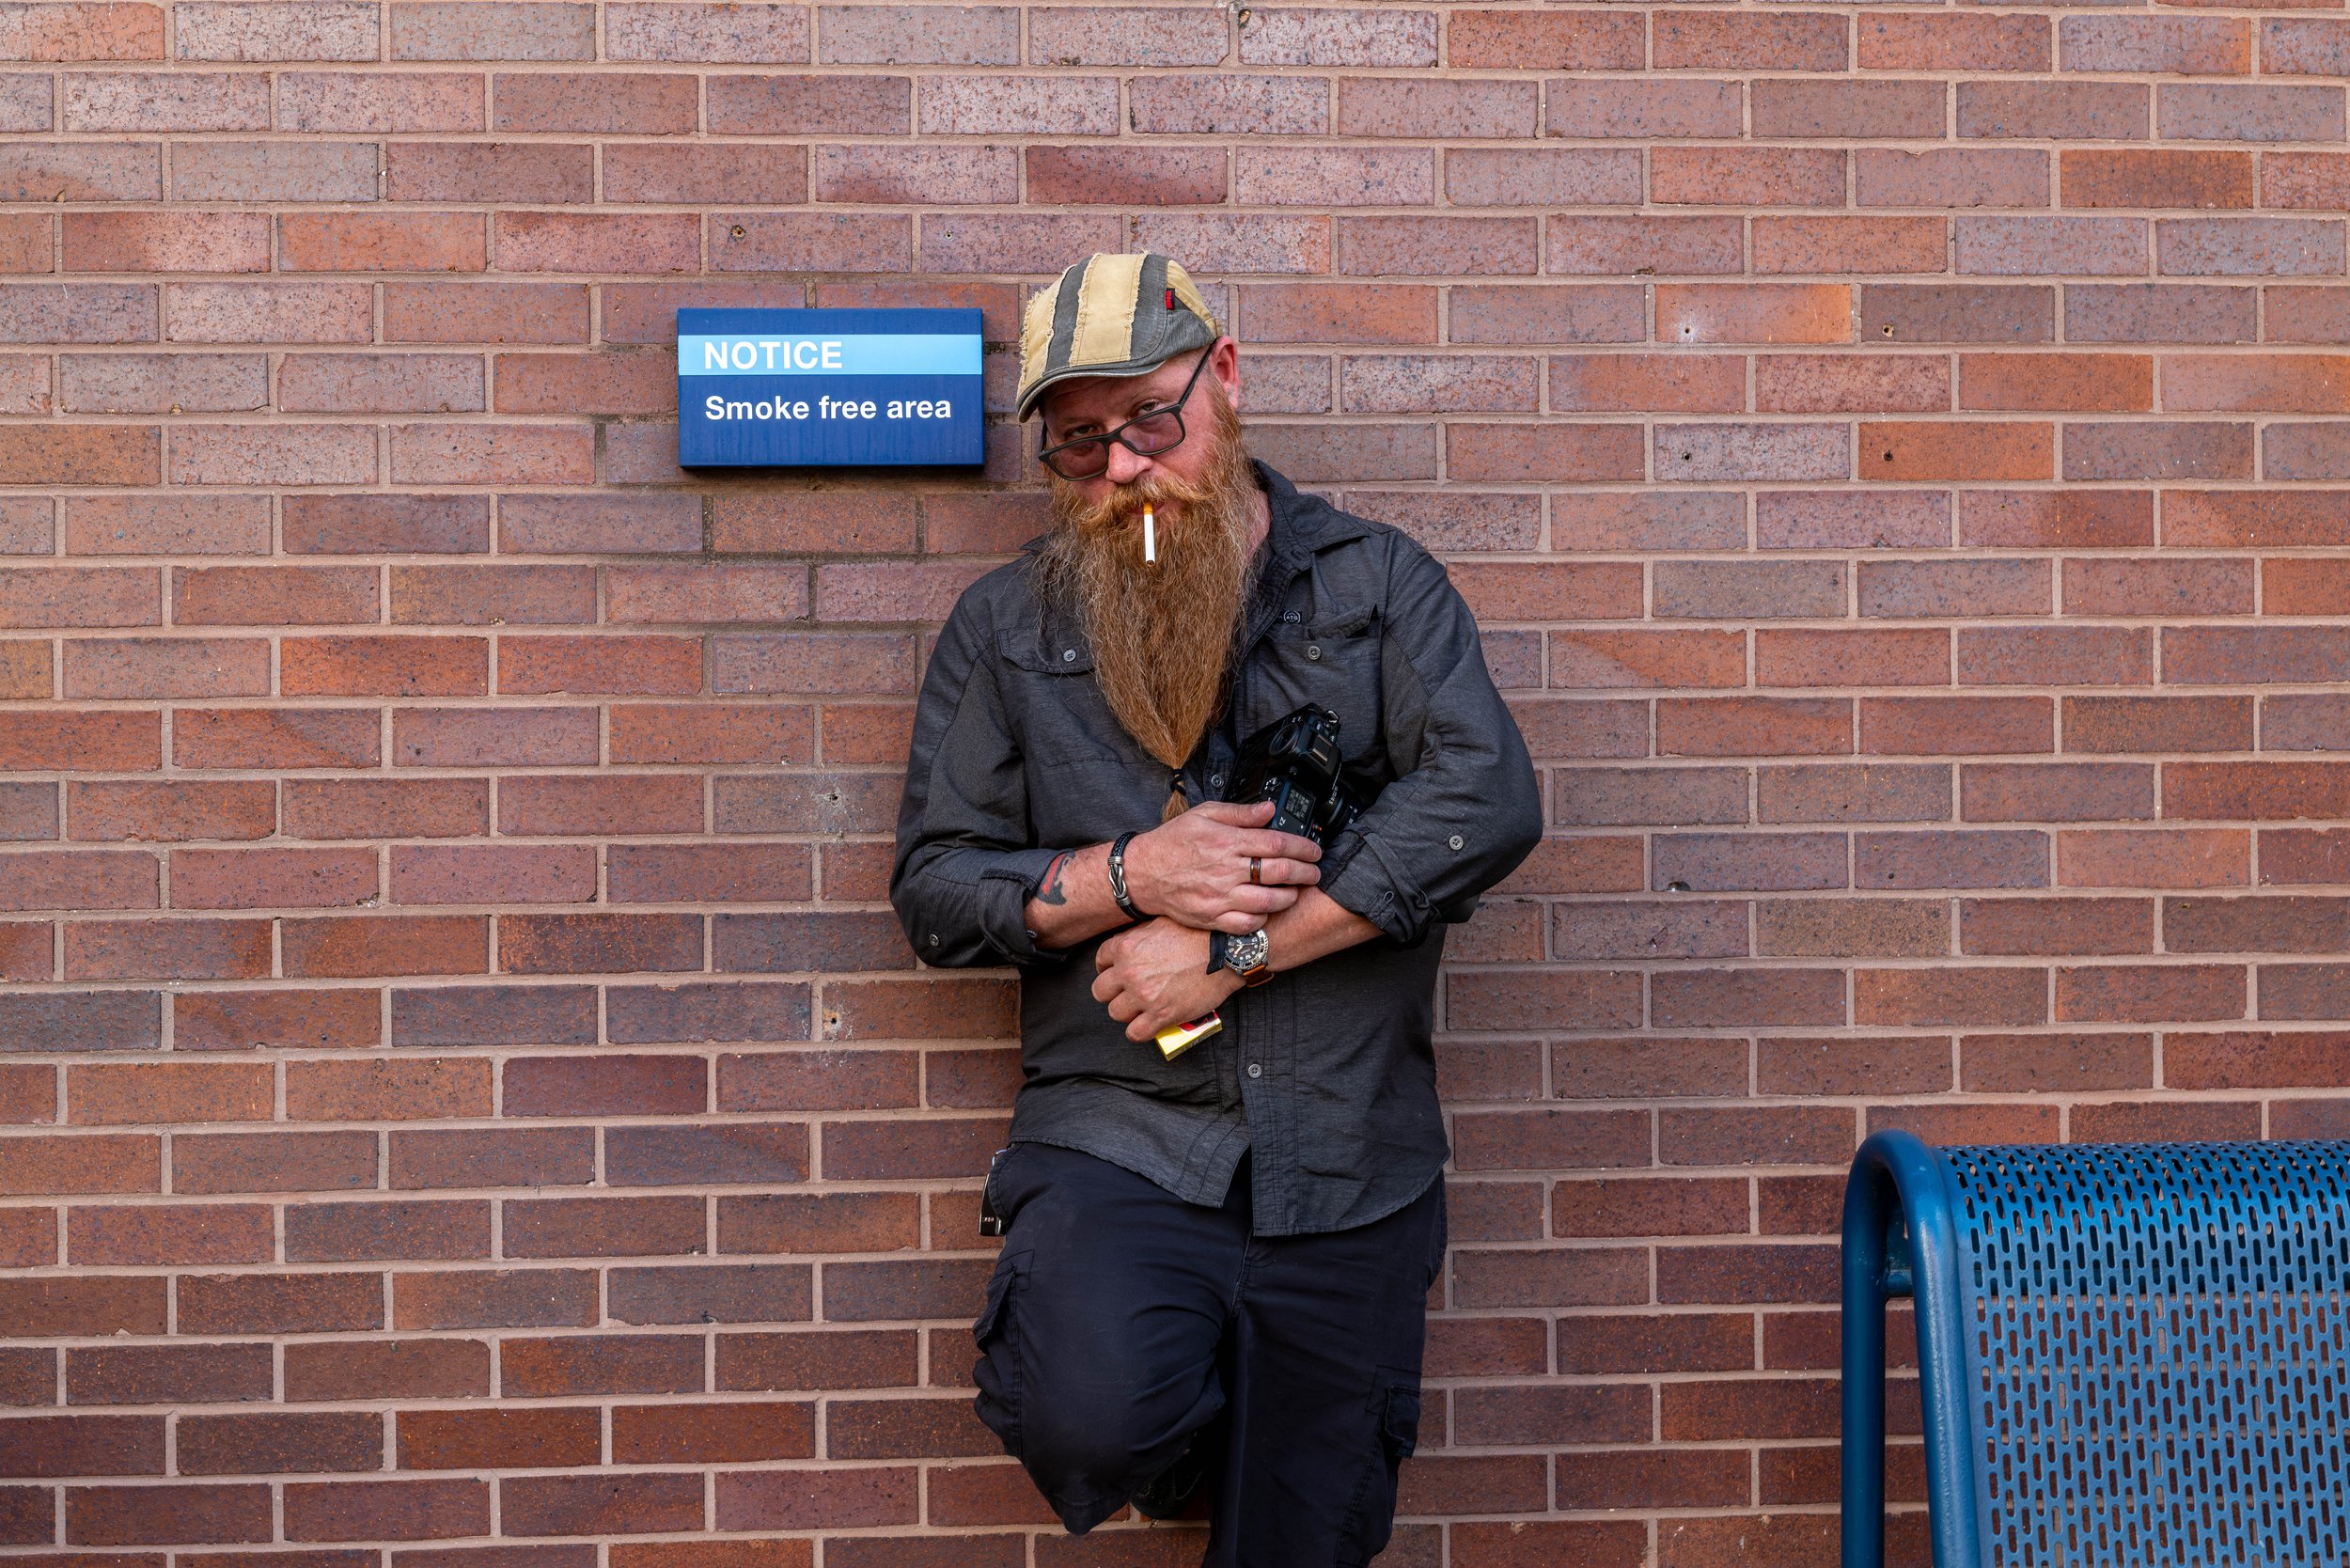
All in all we had a great time and then even got to go eat wonderful Italian cuisine later too. What more could you ask for? Well, there is one more thing I could ask for…
Lightroom Classic… I did it, I went over to the dark side and installed Lightroom back on my system again. It has the power to edit like I need finally and I kept running into problems that Exposure couldn’t easily solve for me so it was time to upgrade…or move over laterally to or what ever you call it…So going forward, I will be learning how to use Lightroom to edit my photos…wish me luck.
If you want to see more abotu this day, I made a vlog cideo about the photowalk portion of the day and it can be watched here.
What I Look For in Street Photography
During the photowalk, Aaron joked about me "channeling my inner Eggleston" as I photographed mundane things. But that's what street photography is about! Here's some of the things that I look for:
Light: Always first. How is the light hitting the subject? Is there interesting shadow play? Is it spilling from one building to another?
Layers: Foreground, midground, background. The best street photos have depth and multiple elements working together.
People: Not always necessary, but human presence adds scale and story. Even just a silhouette or someone walking through the frame.
Color or contrast: Bright colors that pop, or strong black and white contrast. Something that makes the eye stop.
Geometry: Leading lines, patterns, shapes, architecture. The bones of a good composition.
Moments: Candid expressions, interesting gestures, unexpected juxtapositions.
The mundane: Everyday things that become interesting when you isolate them with your camera.
Don't overthink it! Just walk and shoot what catches your eye. You can analyze it later when you're editing. Then you can take inventory of what you shoot the most and see if those images have some meaning or if it is just what you like to shoot…either way, it is good to get out and shoot photos so go have some fun.
Frequently Asked Questions About Street Photography and Chattanooga Photowalks
How do you overcome shyness when photographing strangers?
Honestly, I still struggle with this! I'm not aggressive with my photography, especially when people are involved. I'll ask permission sometimes, but most of the time I just shoot what feels natural without getting in people's faces. What helped at the beard competition was that people were already there to be seen and photographed. They were happy to pose! Events like this are perfect for breaking down those personal barriers to shooting photos of people you don't know. Start with events where people expect cameras, then work your way up to regular street photography. Aaron's advice of "get your camera out and take a picture with it" is the best cure for shyness, even if it feels awkward at first!
What's the best time of day for street photography in downtown Chattanooga?
The afternoon worked great for us! With the sun further over to the west, we kept getting these awesome light spill shots bouncing off buildings. The light was different from my usual shooting times, and it created some really interesting shadows and contrasts. Late afternoon (around 3-5pm) gives you that warm golden light that looks great for both architecture and people. Early morning works too, but afternoons tend to have more people out and about, which is what you want for street photography. Avoid harsh midday sun if you can, unless you're going for high-contrast black and white work!
What's a good street photography route in downtown Chattanooga?
The route Aaron and I took worked really well: Start on Main Street, head down Market Street to about 7th, turn over to Broad Street, then back towards Main, and eventually divert over to Cowart Street. This gives you a good mix of architecture, street scenes, and people. You'll pass old buildings like the Rone Regency Jewelers location (which has great gritty signage), modern storefronts, alleys with interesting light, and public spaces where people gather. The whole loop is maybe 2-3 miles depending on how much you wander, perfect for a couple hours of shooting!
Is the Leica SL2 too heavy for street photography?
Yes and no, lol. The SL2 is definitely heavy compared to smaller mirrorless cameras or rangefinders. But it makes stunning portraits and the image quality is just incredible. I kept it paired with just the 50mm lens to keep things simple. Is it the "ideal" street camera? Probably not if you're walking all day. But does it work? Absolutely! The weight actually helps stabilize handheld shots, and the build quality means I don't baby it. If you've got one, use it for street photography. Don't let the weight stop you. Your shoulders might complain, but the photos will be worth it!
Why was your Leica exposing differently than Aaron's Nikon?
Great question! I noticed my Leica SL2 wants to shoot about 2/3 stop overexposed compared to Aaron's Nikon cameras. I kept -2/3 stop exposure compensation dialed in the whole time to keep the sky from being blown out. The shadows would be dark anyway due to the bright afternoon sun, so I was protecting the highlights. Different camera brands meter scenes differently, and Leica tends to be a bit generous with exposure to preserve shadow detail. This is something you learn when shooting with multiple camera systems. Just dial in the compensation and keep shooting! I need to dig into my camera setup more to see if there's a metering mode that matches my shooting style better.
What camera settings do you use for street photography?
For this photowalk with the Leica SL2, I was shooting mostly in aperture priority mode with the 50mm lens. I kept -2/3 exposure compensation dialed in (as mentioned above). ISO was probably auto, and I let the camera pick the shutter speed. For street photography, I like to shoot wide open or close to it (f/2 to f/4) to get that subject separation, but I'll stop down if I need more depth of field. The key is to keep your settings simple so you're reacting to moments, not fiddling with dials. Set it and forget it, then just focus on composition and timing!
Can you photograph people at public events without permission?
At events like the beard competition where people are specifically there to show off and be seen? Yes! Most people were happy to be photographed and many posed for us. That said, I still try to be respectful. If someone looks uncomfortable or waves me off, I move on. For regular street photography, it's trickier. I generally don't ask permission before shooting (it kills the moment), but if someone objects after I've taken their photo, I delete it. Know your local laws, be respectful, and don't be creepy. Events are the easiest place to start because people expect cameras!
What makes a good subject for street photography?
Honestly? Almost anything! During the photowalk I kept joking about channeling my inner Eggleston as I would take photos of the mundane. Look for interesting light (like that spill on the Rone Regency Jewelers building), patterns, textures, people doing everyday things, architectural details, reflections, shadows... anything that catches your eye. Don't overthink it. I shot everything from bearded bikers to boarded-up buildings to random street corners. The beauty of street photography is finding the interesting in the ordinary. Just walk around and let things reveal themselves to you!
Should I shoot RAW or JPEG for street photography?
I shoot RAW because I like having the flexibility in post-processing. For this shoot, I ended up using Lightroom Classic to edit (I went back to the "dark side" after trying to use Exposure, lol). RAW gives me the power to recover highlights, lift shadows, and adjust colors the way I want them. That said, if you're comfortable with your camera's JPEG processing and you don't want to spend time editing, shoot JPEG! The best format is the one that gets you shooting. Street photography is about being out there capturing moments, not agonizing over file formats!
How do you choose which photos to keep from a street photography session?
I wish I had a good systematic answer for this, lol. Honestly, I just go through them and keep the ones that speak to me. Does the composition work? Is the light interesting? Did I capture a genuine moment or expression? Is there something about the image that makes me want to look at it again? I'm pretty ruthless in culling, especially with street photography where you might shoot hundreds of frames. If it doesn't grab me immediately, it gets deleted. The photos I shared in this post were the ones that stood out when I was editing. Trust your gut, and don't be afraid to delete mediocre shots. Only keep the good stuff!
BONUS QUESTION: What's the best way to learn street photography?
Go out with a friend like Aaron who will tell you to "get your camera out and take a picture with it"! Seriously, having a photography buddy makes a huge difference. You push each other, share ideas, and it's way less awkward than being alone with a camera on the street. Start with events (like the beard competition) where cameras are expected, then work up to regular street shooting. Use a simple setup (one camera, one lens), set your camera to aperture priority or full manual, and just walk. Don't overthink it. The best teacher is just getting out there and shooting. Oh, and watch Aaron's work or other street photographers you admire, but then go do your own thing. Your style will develop over time!
Support this website by using these affiliate links to shop on Amazon:
Leica M11 Digital Rangefinder Camera
Nikon AF-S FX NIKKOR 105mm f/1.4E ED Lens
Voigtlander Nokton 35mm f/1.4 II
Sandisk 128GB Extreme Pro memory cards
Nikon 50mm f1.8 S Lens for Z mount
Thanks for stopping by, now get your camera out and go take a photo or two with it!

Sigma 90mm f/2.8 DG DN Review: Leica Quality for $600 (L-Mount)
This is the second of two Sigma lens reviews I have done recently and this lens is no slouch either. The 90mm f2.8 DG DN Sigma lens is a very well made little prime lens and this particular copy is for the L mount for Leica and Panasonic cameras. I am sure Sigma makes this lens for other lens mounts as well, but I dont have that list with me so I cant speculate past that.
This is the second of two Sigma lens reviews I have done recently and this lens is no slouch either. The 90mm f2.8 DG DN Sigma lens is a very well made little prime lens and this particular copy is for the L mount for Leica and Panasonic cameras. I am sure Sigma makes this lens for other lens mounts as well, but I dont have that list with me so I cant speculate past that.
Sigma 90mm f/2.8 DG DN: Technical Specifications
Before we dive into the hands-on experience, here are the specs:
Optical Design:
Focal length: 90mm
Maximum aperture: f/2.8
Minimum aperture: f/22
Aperture blades: 9 (rounded for smooth bokeh)
Physical Specs:
Mount: L-mount (Leica SL/CL, Panasonic S-series)
Filter size: 55mm
Length: 2.4 inches (61.6mm)
Weight: 10.4 oz (295g)
Minimum focus distance: 19.7 inches (50cm)
Construction:
All-metal barrel
Aperture ring with 1/3 stop detents
AF/MF switch on lens barrel
Weather sealing: No (one downside vs Leica)
Price:
Sigma 90mm f/2.8 DG DN: ~$600
Leica APO-Summicron-SL 90mm f/2 ASPH: ~$5,395
Yeah, that's not a typo. The Leica costs nine times more than the Sigma. Let's see if that price difference is justified!
What is 90mm Good For? Use Cases and Focal Length
If you're not familiar with 90mm as a focal length, let me explain why this is such a useful lens to have:
Portrait Photography: 90mm is a classic portrait focal length! It gives you nice compression, flattering perspective, and enough working distance that you're not right in your subject's face. The f/2.8 aperture provides good subject separation without going overboard. This is what I'd grab for environmental portraits where I want context but still want the subject to stand out.
Street Photography: At 90mm, you get compressed perspective that makes street scenes feel more intimate. You can shoot from across the street without being obvious, and the focal length picks out details in a way that 35mm or 50mm just can't. It's not a run-and-gun street lens, but for deliberate composition? It's great!
Detail Work: Need to photograph architectural details, signage, or anything where you want isolation without getting too close? 90mm is perfect. I use this focal length all the time for documenting buildings and urban details in Chattanooga.
What 90mm is NOT good for: Wide landscapes (too narrow), group photos in tight spaces (you'll run out of room to back up), and anything requiring fast reaction (it's a slower, more deliberate focal length). Know your lens's strengths!

The Sigma 90mm f/2.8 DG DN with its lens hood attached. Notice how the hood is almost as big as the lens itself! This is a genuinely compact 90mm prime lens.
In the photo below you can see how small the lens actually is. The lens hood takes up almost as much space as the lens itself. That is crazy! With the all metal construction and well made optical formula, this lens is also punching up as they say.
Size comparison showing how small this lens actually is. The lens hood takes up almost as much space as the lens itself. That's crazy for a 90mm focal length! With all-metal construction and excellent optics, this little lens is punching way above its weight.
Some notable differences between the Sigma lens and my Leica counterparts are that the Sigma lens actually has an aperture ring on it that also has 1/3 stop detents. This is really nice as it allows manual aperture control to be basically mapped to a control surface that photogs are accustomed to using. If you want the usual camera control for the aperture, then simply turn the aperture ring to the “A” position and your ready to go. Ít couldn’t be simpler.
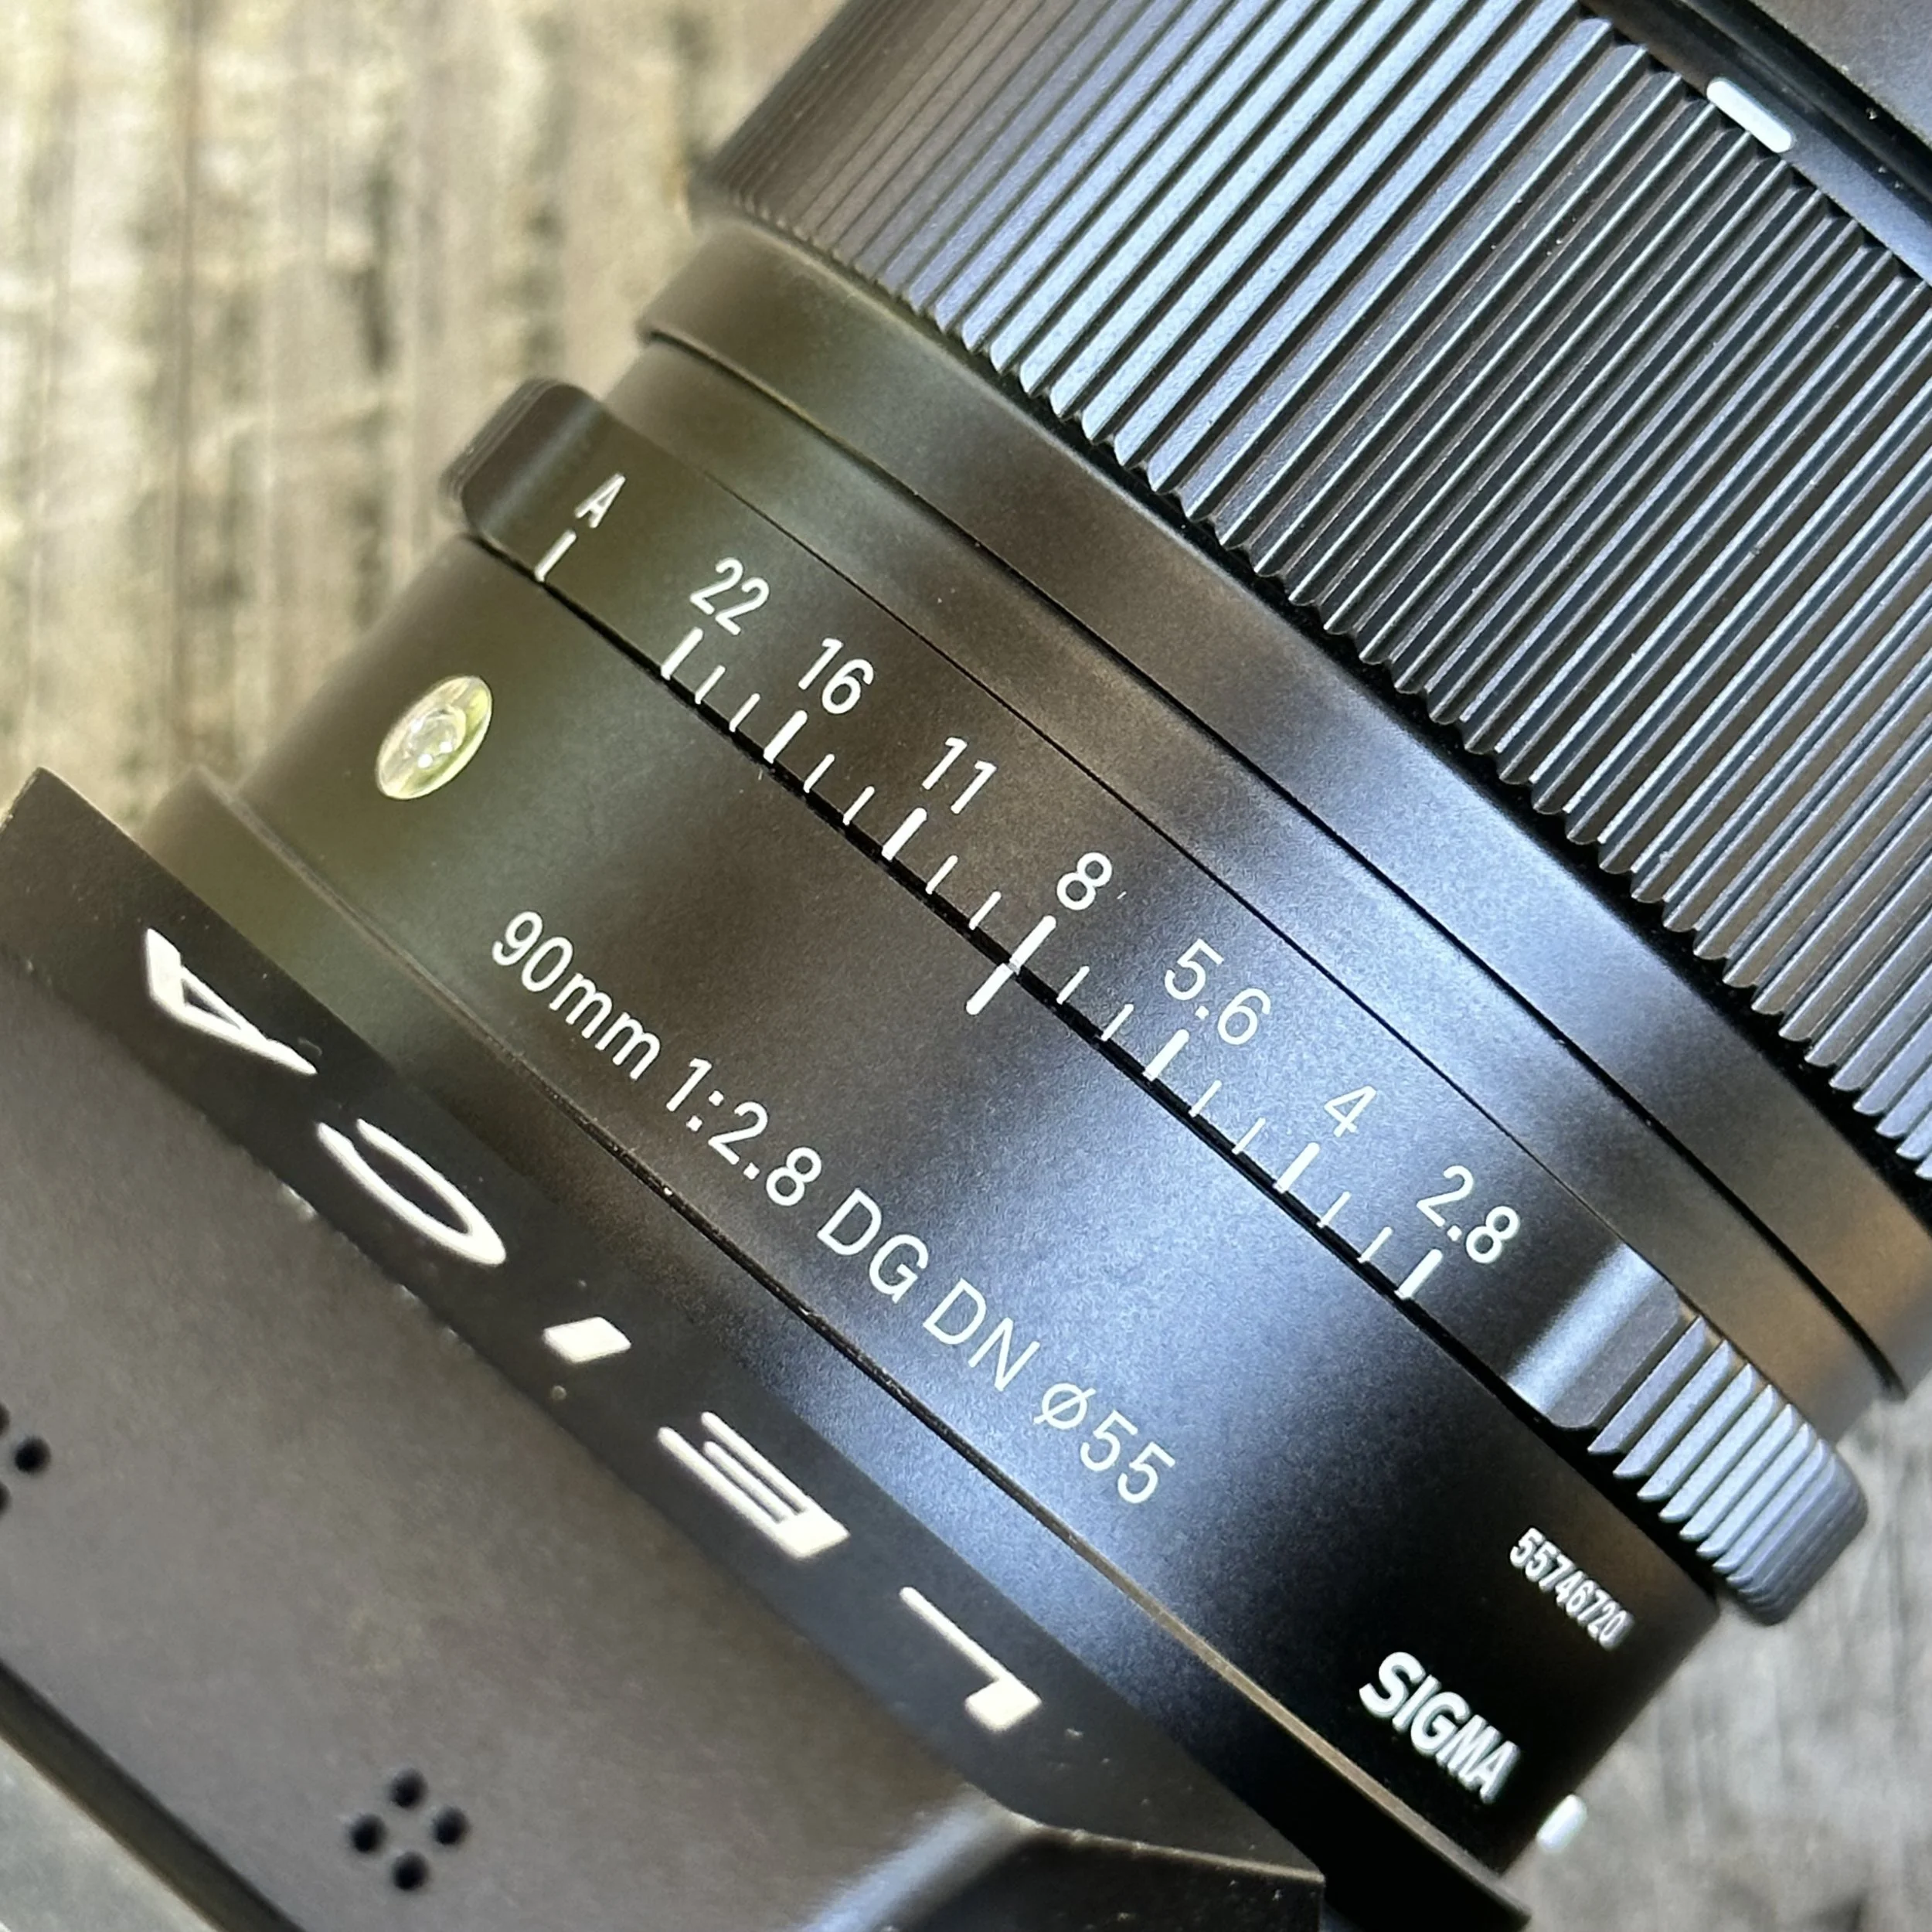
The aperture ring on the Sigma 90mm with 1/3 stop detents. This is a really nice feature that allows manual aperture control mapped to a control surface photographers are already used to. Turn it to "A" for camera-controlled aperture. Simple and intuitive!
The next thing they did on the lens that I am not so sure I like yet is to put a switch to choose between manual and automatic focus. The Leica lenses use a software control to do this and it is pretty simple to implement and once you get used to doing it that way it really is a good system. There are less openings in the lens to let water in and the control is right they with the various auto focus modes all in one spot. The Sigma system has you choose manual or auto on the lens and then if you choose auto, you have to further goto the software and choose the automatic mode you want. It makes choosing autofocus a two step affair. This is probably just a user issue where I lack practice with the lens, but this seems a little clumsy compared to the Leica process. It is possible that Leica didn’t share all the tech needed to make this happen, I don’t know, but like I said I am on the fence on this one.

The AF/MF switch on the lens barrel. This is the one design choice I'm not sold on yet. Leica lenses use software control for focus modes in one step. The Sigma requires you to switch here first, then choose the AF mode in the camera menu. It's a two-step process that feels clumsy compared to Leica's system. Still works fine, just takes getting used to!
Lastly is image quality. The Sigma has it. It produces sharp, distortion free images with good color and exposure. What more can I say here? It really is amazing what you get for the price. These lenses can run with the big boys, in my opinion, just fine. If you pixel peep deep enough you might find fault in them, but only photographers do that. The normal person never digs into the corners or zooms into 500% on a photo so I am not going to rate this lens like that either. The photos look wonderful…just look at the ones below.
Sample Photos: What This Lens Can Do
Let me show you what this lens can actually produce in real-world use. These are all shot with the Sigma 90mm f/2.8 on my Leica SL2:
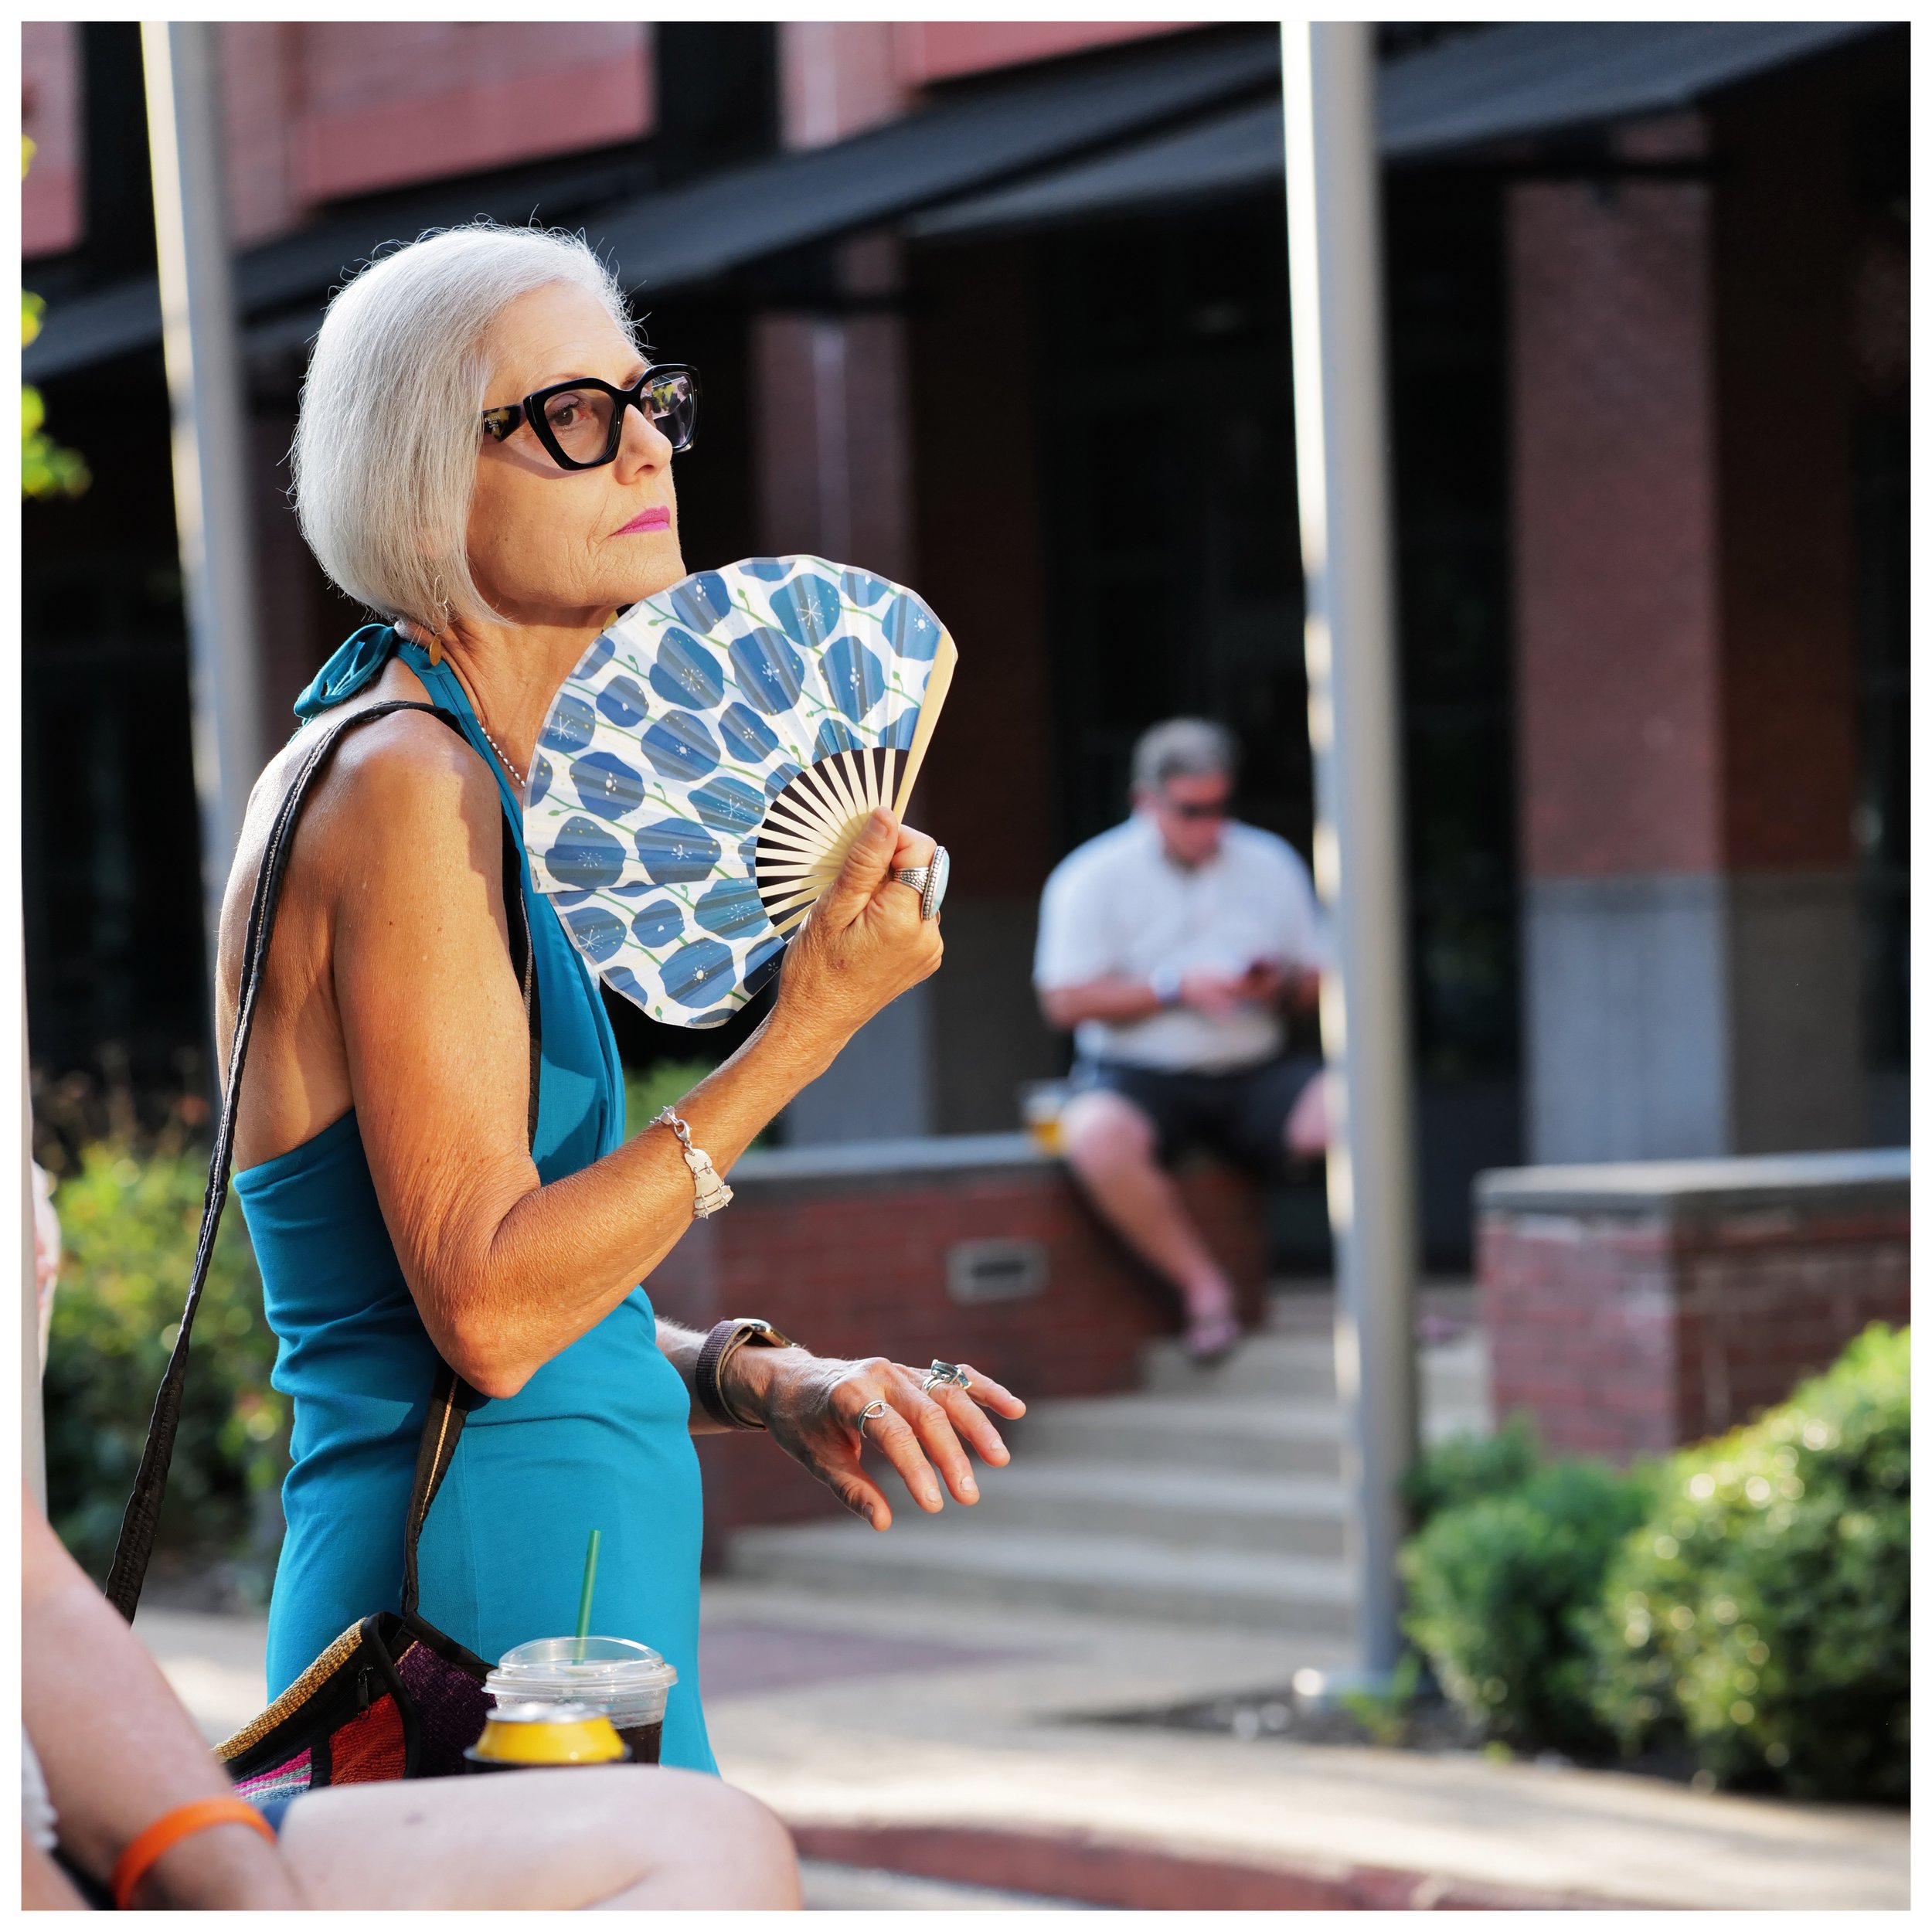
Sample photo shot with the Sigma 90mm f/2.8 on my Leica SL2. Look at the sharpness, color rendering, and contrast! This lens produces distortion-free images with excellent detail. What more can you ask for at this price point?
Look at the sharpness across the frame! The colors are accurate without being oversaturated, the bokeh is smooth and not distracting, and the compression at 90mm makes these compositions work. The first photo shows how this lens handles contrast and detail in mixed lighting. The second demonstrates subject isolation at f/2.8. The third shows color rendering in challenging light.
This is what you're getting for $600. Not "budget lens performance." This is legitimate high-quality glass that happens to cost less than the Leica equivalent.
One thing to note: these photos weren't babied. I was shooting handheld in various lighting conditions, some shots were wide open at f/2.8, and I didn't do any special post-processing beyond my normal workflow. This is real-world performance, not controlled test charts!

Another example of what this lens can do. The 90mm focal length gives you nice compression and the f/2.8 aperture provides good subject separation. The bokeh is smooth and not distracting. This is Leica-quality glass at a fraction of the cost!

More proof that the Sigma 90mm delivers excellent image quality in real-world use. Colors are accurate without being oversaturated, detail is sharp across the frame, and the lens handles mixed lighting well. These aren't test charts, this is actual photography!

Final sample showing the Sigma 90mm's capabilities. Shot handheld in Chattanooga during a block party. The lens is sharp, colors look great, and the compression at 90mm makes the composition work. If you want great glass at a fraction of Leica's price, this lens is the ticket!
Sigma vs Leica: Is the Price Difference Worth It?
Let's address the elephant in the room: Leica makes a 90mm lens for L-mount. The Leica APO-Summicron-SL 90mm f/2 ASPH costs about $5,400. The Sigma costs $600. That's a $4,800 difference.
What do you get for that extra $4,800?
The Leica advantages:
One stop faster (f/2 vs f/2.8)
APO designation (apochromatic correction, minimal chromatic aberration)
Legendary Leica color rendering and micro-contrast
Full weather sealing
Leica brand prestige (if that matters to you)
Probably slightly sharper wide open (though the Sigma is already sharp!)
The Sigma advantages:
Costs $600 instead of $5,400
Still produces excellent images (as you can see from my samples!)
Aperture ring with detents (Leica's is clickless)
Compact and lightweight
You save $4,800 that you can spend on other lenses or, you know, food!
My take: If you're a professional portrait photographer who needs f/2 and perfect optical performance for paying clients? Maybe the Leica is worth it. If you're a Leica SL2 shooter who wants excellent 90mm performance without spending a small fortune? The Sigma is absolutely the right choice.
I'd rather have the Sigma 90mm f/2.8 plus a Sigma 35mm and 65mm for the same price as one Leica 90mm. That's three lenses versus one! Unless you're chasing that last 5% of optical perfection, the Sigma is the smart buy.
Pros, Cons, and Who Should Buy the Sigma 90mm f/2.8
Let me break down the good and the not-so-good about this lens:
What I Love (Pros):
Image quality is excellent: Sharp, great color, minimal distortion
Compact size: Fits easily in a bag, lens hood is bigger than the lens!
Aperture ring with detents: Manual aperture control feels great
All-metal construction: Feels solid and well-made
Price: $600 vs $5,400 for the Leica equivalent
Real f/2.8: Not a variable aperture zoom, consistent light gathering
What I Don't Love (Cons):
Two-step focus mode selection: AF/MF switch on lens PLUS software menu selection feels clumsy compared to Leica's one-step software control
Only f/2.8: If you need f/2, you'll have to step up to the Leica (and pay 9x more)
No weather sealing: Leica lenses are weather sealed, this isn't
Learning curve: Takes some getting used to if you're coming from Leica's system
Who Should Buy This Lens:
Leica SL2 or Panasonic S-series shooters on a budget
Portrait photographers who want 90mm without spending $5,000+
Anyone building an L-mount lens kit and prioritizing value
Street photographers who like compressed perspective
Photographers who appreciate manual aperture rings
Who Should Skip This Lens:
People who absolutely need f/2 or faster
Photographers who require weather sealing for their work
Anyone who already owns the Leica 90mm f/2 (obviously!)
Wide-angle shooters (this isn't your lens!)
Support this website by using these affiliate links to shop on Amazon:
Sigma 90mm F2.8 DG DN for L Mount
Nikon AF-S FX NIKKOR 105mm f/1.4E ED Lens
Voigtlander Nokton 35mm f/1.4 II
Sandisk 128GB Extreme Pro memory cards
Final Thoughts
So in conclusion, if you want great glass at a fraction of the cost of Leica, this lens is just the ticket. Sigma has done a complete 180 from the last time I used one over a decade ago and that makes me happy.
Here's my bottom line: The Sigma 90mm f/2.8 DG DN is the lens Leica SL2 shooters should buy if they can't justify $5,400 for the Leica version. And honestly? Most people can't and shouldn't justify that price difference. The Sigma produces excellent images, feels solid, and costs less than many Leica lens hoods!
The only real downsides are the two-step focus mode selection (which is a user interface annoyance, not a deal-breaker) and the lack of weather sealing. If those don't bother you, this lens is a no-brainer for L-mount shooters.
Sigma has seriously stepped up their game in recent years. I remember using Sigma lenses a decade ago and being underwhelmed. These new DG DN lenses for mirrorless mounts? They're competitive with first-party glass at a fraction of the price. This is exactly what the L-mount system needs—excellent third-party options that don't compromise on quality.
Would I rather have the Leica 90mm f/2? Sure, if someone else is paying for it! But would I rather have the Sigma 90mm plus four other Sigma primes for the same money? Absolutely. That's the math that makes sense for most photographers.
Now get your camera out and go take a picture with it!
Sometimes, when I go for a photowalk, I don’t want to be a loner…
When I go out to shoot photos I normally go alone as it fits my time table perfectly and I dont have to do any coordination with anyone else. I just grab my kit and go. Well, today is different.

So on this day I linked up with Tim Childers at Mean Mug coffee on Main street in Chattanooga TN and started out with a cup of coffee and some chatting about our youtube channels. Then it was off to find interesting photos and explore some of the old industrial part of the city.
We begin by making our way down to the old foundry turned farmers market. On the way I noticed some interesting stuff at a local processing plant before getting to the farmers market. After grabbing a couple of shots there we headed over to the market space and make some photos of the skate park.

The skate park was basically abandoned so once we worked the scene over as best we could we decided to head over towards the river. From the skate park we make our way to the riverfront industrial area where we grab some photos occasionally while walking down to the aquarium. This is a unique are as it is being converted to modern condominiums and there is a huge development project slated later to construct a park and such as well.

Once we got downtown, we decided to get out of the heat for a little while and grab some lunch at Taco Mac before making our way back to our cars on Main Street. The longer we walked, the hotter it got on this day and by the time we got to Taco Mac I was soaked. We stayed there till I dried out and then went back out in it for more. Haha. Market street has a fair bit of shade fortunately so we was able to avoid most of the sun while heading back to the car.

Some notable stops along the way for me were the intersection of Main and MLK, the HWY 27 bridge, the skate park and the processing plant for me. I hope you enjoyed this little AAR about our photowalk and if you haven’t done it yet, go check out both of our videos from this day at the links below.
Links to both videos are here:
Also, wanted to thank you for following my blog as well as my videos, It means the world to me.
What Shooting a Zeiss Ikon Contina Taught Me About Modern Cameras
I picked up a vintage Zeiss Ikon Contina while on a trip to the UK and had it sent straight to Zack's Camera for a full CLA when I got home, because the shutter was dragging badly. Once it came back in good working order I loaded it with Ilford HP5, grabbed my old Sekonic handheld light meter, and hit the streets of Chattanooga to find out what shooting a fully manual film camera with no rangefinder and no automatic anything actually feels like. The short answer is that our modern cameras are far more remarkable than most of us give them credit for.
Me with my freshly CLA Zeis Ikon Contina ready for some fun on the streets of Chattanooga TN.
I picked up a vintage Zeiss Ikon Contina while on a trip to the UK and had it sent straight to Zack's Camera for a full CLA when I got home, because the shutter was dragging badly. Once it came back in good working order I loaded it with Ilford HP5, grabbed my old Sekonic handheld light meter, and hit the streets of Chattanooga to find out what shooting a fully manual film camera with no rangefinder and no automatic anything actually feels like. The short answer is that our modern cameras are far more remarkable than most of us give them credit for.
Zeiss Ikon Contina…a vintage fully mechanical camera.
I bought this camera while on my trip in the UK and when I got back home I sent it to Zack’s Camera for a CLA as the shutter was dragging pretty bad. Once back from Zack’s, (who did a phenomenal job BTW) I loaded it up with some HP5 and grabbed my old Sekonic light meter and hit the streets of Chattanooga to play with my “new” toy.

The Zeiss Ikon Contina after returning from a full CLA at Zack's Camera. Everything is fully mechanical, no batteries required anywhere in the system.
It didn’t take long to realize that we as photographers in the 21st century are so spoiled with our cameras that have auto…everything. I am currently 54 years old and even when I was younger we already had cameras with automatic focus and exposure and even auto film advance. This machine is the grandfather to those cameras.
Shooting photos with the Zeiss Ikon Contina Camera
The day I went out to shoot had partly cloudy skies so as I would walk the streets I would take light meter readings and adjust the camera accordingly for the light on hand. This almost turned into a chore as the clouds would move in front of the sun and lower the light by 2 stops then the cloud would move out of the way and the meter would jump back up those two stops. Also, I learned dark shade is 3 stops lower than direct sun, so keep that in the back of your mind while looking for street scenes too.

A good light meter like the Sekonic pictured here will make getting the exposure set correctly a lot easier.
So now I see why some people like having those tiny little hot shoe mounted light meters. The handheld one was nice but it sure was inconvenient to carry around. Having a free hand to adjust and hold the camera would have been nice at times. Plus the light meter is just in the way all the time. I don’t have a lanyard on it so I either had it in my pocket or my hand, neither of which are really desirable.
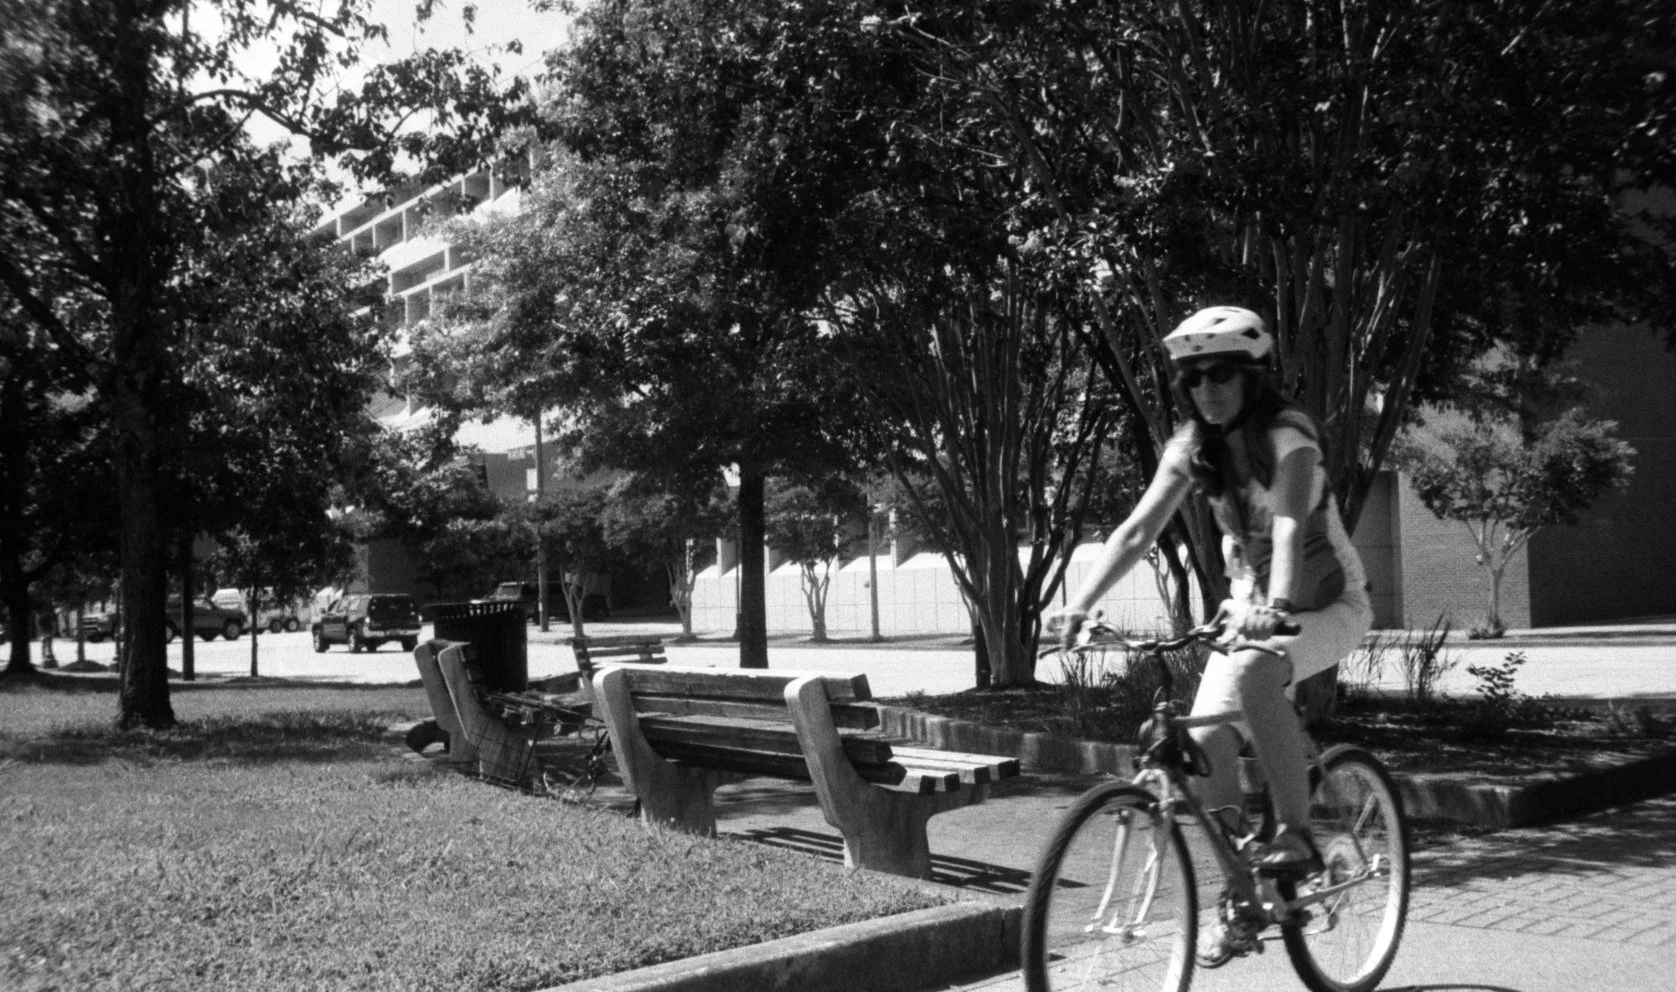
Motion blur in full sun… Zeiss Ikon Contina vintage camera with Ilford HP5 film.
Once I started to get the exposure settings figured out, I start thinking, I am ready to hit the trail and get some sweet street photos. Nothing could be further from the truth. I now have to learn how to focus the camera. Yes, you heard that right, I… a photographer, had to learn how to focus a camera. That was strange to me as I have been accustomed to simply looking through the viewfinder and focusing and then pressing the shutter. Not so on the Contina! You have to engage in the fine art of range estimation with this camera. Yeah, you literally either get out a tape measure and put your camera on a tripod OR just guess as best you can. Seriously, those are the choices here…spitballing it or measuring tools! The viewfinder is literally used only for composing the image. The taking lens is a completely separate system. Unlike the rangefinder cameras such at the Leica M series of legend where the view finder has a calibrated “patch” from the rangefinder that is mechanically coupled to the taking lens, where you see what appears in the viewfinder as an aligned image when it is in focus, you just throw the dice with the Zeiss Ikon Contina. It is quite humbling to he honest about it.

You quickly learn about f stops and how to change depth of field so you have a hope of getting something in focus. Notice on the lens the distance scale and the depth of field scales? You better, because you are going to be using those alot if you plan to shoot with the aperture opened up at all.
The film for the day… Ilford HP5 B&W Film
On my first roll of film I used Ilford HP5 400 speed and quickly realized this was actually a mistake. This camera is so old that the highest ISO on the built in meter is 320 and the fastest shutter speed is 1/300 second. Yeah, in a world where I personally have cameras right now that will shoot at 1/32000 second, I just bought a camera that maxes out at 1/300… Luckily, the aperture goes down to f22 so in full sun it is correctly exposing (I think) at 1/300 second. This did help with the other problem though…focus. Since at f22 everything from 1 meter to infinity is in focus I just had to make sure that I had not bumped the focus ring and moved it.
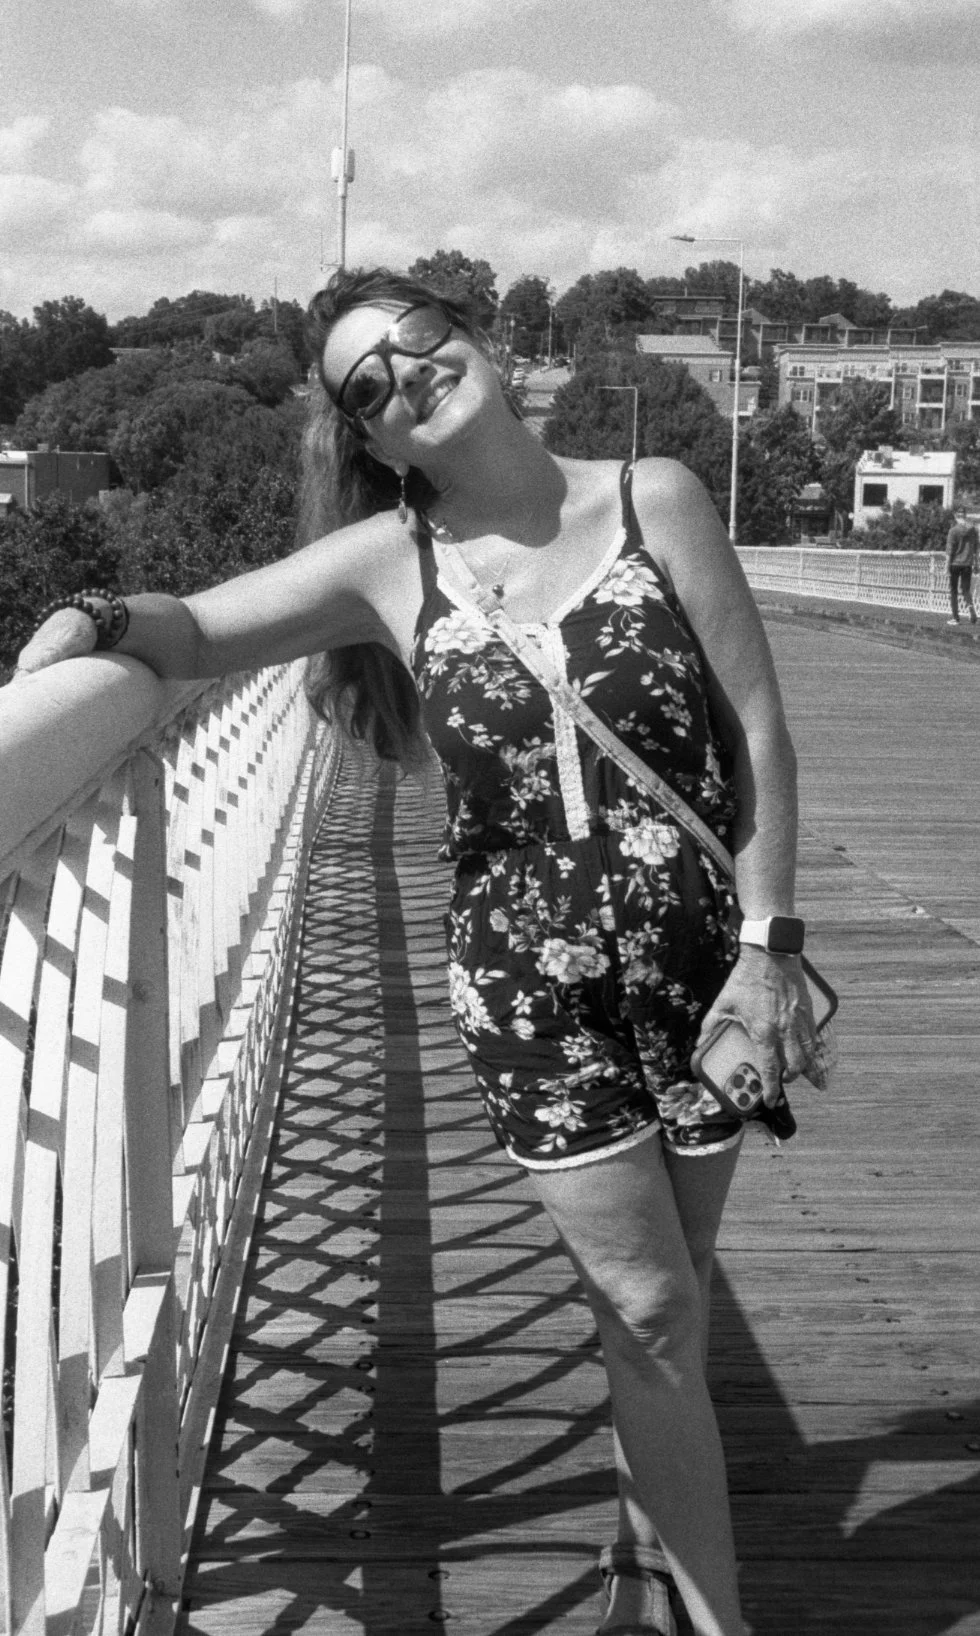
Teresa on the Walnut Street Pedestrian Bridge in Chattanooga TN shot on the Zeiss Ikon contina camera. Ilford HP5 Film
Once I used it for about an hour I would start to choose estimated focus distances to try to land better focus. We will see once I get the film developed and scanned…

All three exposure controls are on the lens itself. The narrow front ring is focus, the middle ring is shutter speed, and the large rear ring is aperture. The depth of field scale between the focus and shutter rings is essential for zone focusing.
Another thing you will notice in this photo is that all three major functions of the camera are on the lens, the focus is the first and smallest ring, then the shutter speed is the middle ring and the rear most and largest ring is the aperture ring. All the controls on the top are used to control film exposure and movement. The shutter release button, the film advance, frame counter, and rewind knob are in this area. There is a cold shoe and a light meter in the center area on top. That’s it. I love the simplicity, but wow, photos made in that period were worked for.
Going forward I will now have a brand new appreciation for my modern cameras with all their conveniences. I have learned that our forefathers had it much harder and that we should be more appreciative of the photos from that period. I will continue to use this warhorse of a machine but plan to get some lower ISO film first and we will see what we get over time.
Frequently Asked Questions About the Zeiss Ikon Contina
What kind of camera is the Zeiss Ikon Contina? The Zeiss Ikon Contina is a fully manual 35mm viewfinder camera produced in West Germany in the 1950s. It has no rangefinder and no automatic exposure system. All focus, shutter speed, and aperture settings are set manually by the photographer. The built-in selenium light meter is a reference tool only and is not connected to the camera's exposure system in any way.
Does the Zeiss Ikon Contina need batteries? No. The Contina uses a selenium light meter which generates its own small electrical current from ambient light. There are no batteries required anywhere in the camera, which is one of its great practical advantages as a vintage shooter.
What film should I use in a Zeiss Ikon Contina? Because the Contina's built-in meter only goes up to ISO 320 and the fastest shutter speed is 1/300 second, lower ISO films work better in most lighting conditions. Ilford HP5 at ISO 400 is usable but can be tricky in bright sun. A 100 or 200 speed film like Kodak T Max 100 or Ilford Delta 100 gives you more flexibility with aperture and shutter settings in daylight.
How do you focus a Zeiss Ikon Contina? The Contina uses estimated zone focusing rather than a rangefinder. You set the distance on the focus ring based on your best estimate of how far away your subject is, then use the depth of field scale on the lens to confirm your focus zone. Stopping down to f8 or f11 significantly increases depth of field and makes zone focusing much more forgiving. At f22, everything from about 1 meter to infinity is in focus, which effectively eliminates the need to focus at all.
What is a CLA and does the Zeiss Ikon Contina need one? A CLA stands for Clean, Lubricate, and Adjust. It is a service performed by a camera repair technician that cleans the internal mechanisms, replaces dried lubricants, and adjusts the shutter speeds and aperture blades to factory spec. Most vintage cameras benefit from a CLA before heavy use, especially if the shutter feels sluggish or sticky. Zack's Camera is a well regarded shop for vintage camera service.
Is the Zeiss Ikon Contina good for street photography? It can be, but it requires patience and practice. The lack of a rangefinder means you need to get comfortable with zone focusing before you can shoot quickly and confidently. Once you learn the camera's quirks and develop a feel for estimating distances, it produces sharp images with the characteristic look of mid-century German optics. It is better suited to slower, more deliberate street photography than fast-moving candid work. Unless, once again, you stop down to f22 where everything is essentially in focus and you can simply point the camera and take photos.

Zeiss Ikon Contina vintage camera missed focus of the cat…
Support this website by using these affiliate links to shop on Amazon:
Nikon AF-S FX NIKKOR 105mm f/1.4E ED Lens
Voigtlander Nokton 35mm f/1.4 II
Sandisk 128GB Extreme Pro memory cards
Nikon 50mm f1.8 S Lens for Z mount
So until next time, get your camera out!
Nikon Zf Full Frame Concept Camera Rumor Discussion
Well here we are. Talking about fictitious cameras again… lol.

Of course this is my satire photo I cobbled together for a concept, I kind of like the aesthetic though.
When I heard this rumor I thought about it and dismissed it almost immediately, but then I started thinking about it more and more and came to realize that I would really like a camera like the rumored Nikon Zf mirrorless retro camera. Let’s take a walk down “Wishful Lane” and cobble together the main features I would like to see in such a camera.
David Saylors Nikon Zf Full Frame Rumor Street Photography Camera Livestream
First off we need to establish something, Nikon is no newcomer to the retro camera space, if anything they are a leader in this space in my opinion. You see, they have already tried this several years ago. The Nikon Df was a full frame DSLR retro styled camera that first came out in late 2013. Here is the problem with the Df, it was ahead of its time. The Df came out at the height of the DSLR period in camera history and nobody wanted to go back in time to the cameras that looked like that… yet. To say it simpler, nobody wanted it…

Reference photo scraped from the internet courtesy of B&H Photo.
The Nikon Df was a really cool camera too, sporting a full frame sensor in a stylish retro body. It was simply just too soon. Fast forward to mid 2017 and Fujifilm launches arguably their most important camera to date…the XT3. Sure the XT1 and XT2 had done fairly well, but this camera propelled them into the Street, Reportage, Lifestyle camera space like a rocket. Everybody had an XT3 at one point, shoot I even used one for several years. It is a great camera.

Another image scraped from the internet for reference.
Fuji had been chumming the waters for several years at this point in the street photography niche and a strong marketing campaign combined with a period in time when youtubers were the main game in town for getting the word out and the XT3 took over this game…for a time. The point had been finally made that the photography world was in fact ready for a retro styled camera.
Next in this story came the Zf-c from Nikon, this little power house of a camera was basically a test run, in my opinion, to see if Nikon had enough market segment clout to pull users from Fujifilm, Olympus and Leica over to their court. They even released it with a retro styled 28mm lens to go with it. Pure genious in my opinion as the 28mm f2.8 Ai-s was one of their best lenses ever made. This has to be the most blatant shot across the bow of Fujifilm in the company’s history… Just look at the two cameras in the comparison below.

Sceen capture from Cameradecision.com, a website that will allow you to compare many cameras.
I grabbed this image above from CameraDecision.com as it has the measurements to show how close they actually are in physical size and appearance. Just look at it and then try to tell me with a straight face this wasn’t a test shot at improving Nikon's street photography market share…lol
You know what though, it worked. Zfc sales soared and the cameras flew off the shelves. People loved the tiny little camera but it wasn’t without its shortcomings. These shortcomings will be what is fixed in the Zf if I am right… You see Leica has already figured it out. The dropped the CL from their lineup entirly due to the fact that people that want crop sensor street cameras simply buy the Fujifilm machines. Fujifilm owns this market outright now. It is common knowledge that if you shoot crop sensor street photos it is probably on a Fuji… So Leica simply leaned into their full frame machines and focused on them more, this proved to be the right move for them too. Nikon is also starting to see this in my opinion and the Zf will be the camera that they use to show it.
The things I am lookng for in the Zf that will make me choose it will be:
24Mp full frame, stacked, BSI sensor - Low light is what I am wanting here.
IBIS - slow shutter speeds are so much easier with good stabilization.
The same battery as the other full frame machines.
Dual card slots - not a deal breaker but overflow is nice.
High quality EVF - A hi-res EVF is important to me.
Released with a set of fast primes like 28mm, 35mm, & 50mm.
A tilting screen is a must. A side swinging (flip out) design is not important though.
Shutterless design like the Z8 & Z9
Weather resistant in the rain.
You will notice that video is not on this list. That is because I don’t think this camera will be used by video enthusiasts and good video specs will not really matter. Sure, give it 4K 30p or some such if you want. That way you can capture the occasional B roll clip of shoot off of a tripod or what have you, but 90 percent of the people that will choose this camera will be choosing it for the stills experience.
I think that if they lean into the stills side of the game on this machine and integrate the external controls from something like an F3, that they will have a solid winner on their hands. I know I would love to have one. I bought the XT3 back in the day because Nikon didn’t have what I wanted. The Zfc was a near miss for me, I almost bought one when my buddy Phil Thach did, but I was able to keep my resolve to hold out for the full frame version…lol.
You see, I already have a crop sensor street camera with my Leica CL, so I just didn’t see the point in another crop sensor machine that didn’t have IBIS. If I buy another APS-c camera it will have IBIS. The tech is there, just look at the Fujiifilm XH2 for instance. The IBIS makes a big difference for me in that I like to shoot with fairly slow shutter speeds to capture motion blur and in low light or even at night. This is why I want the 24MP sensor, the larger photo-sites will make noise control a lot easier for the processor. Also killing shadow noise at the same time. Another point that needs expanding is that I like the EVF in my Leica cameras as I use glasses and with the EVF I can see the camera display7 information as well as the scene exposure and I can focus it to be able to not need to use my glasses. This matters in that if I looked through my glasses, I have to press the lens against the rubber eye cup and this usually has skin oils on it which in turn makes my glasses useless… Hence the reason for being able to focus the viewfinder to my un-aided eye. I simply look directly into the EVF and I can see everything, including image review if needed. I have grown to NEED a good EVF at this point instead of wanting it.
What do you think would make the perfect retro styled camera? Let me know in the comments below!
Test driving the Leica Q2...sorta.
I went for a little stroll in downtown Chattanooga and decided that on this photowalk that I wanted to simulate the Leica Q2 to see if i really wanted on. Photography is a funny thing, some photographers will buy one camera and use it all their life and others will change out lenses and camera bodies numerous times.
If you want to see more photos and some more discussion on the idea, follow this link to the video where I do this walk. Other wise, read on friend!
I went for a little stroll in downtown Chattanooga and decided that on this photowalk that I wanted to simulate the Leica Q2 to see if i really wanted on. Photography is a funny thing, some photographers will buy one camera and use it all their life and others will change out lenses and camera bodies numerous times.
My simulated Leica Q2 for the day: Leica SL2 + Asahi Optical 28mm f/3.5 prime lens. Not as compact as the real Q2, but it's got the same 47MP sensor and 28mm focal length to test the shooting experience!
I am a little of both as I love to play with new gear as well as use gear that has become my favorite kit so to speak. Well, I have the Leica SL2 and I also have a nice little Asahi optical 28mm prime lens that I have an adapter for so I figured I would put this together and see if the shooting experience would be close enough to the Q2 to give me an idea of what it would be like without having to spend 6000$ on it.
Breaking Down the Numbers: Q2 vs My Simulation Setup
Before I headed out for this photowalk, I wanted to understand exactly what I'd be testing. Here's how the Leica Q2 stacks up against my Leica SL2 with a 28mm lens setup.
The Leica Q2 has a 47.3 megapixel full-frame sensor, a fixed 28mm f/1.7 Summilux ASPH lens, weighs about 718 grams (1.58 lbs), measures 130 x 80 x 91.9mm, and costs around $5995. It's got fast contrast-detect autofocus, built-in macro mode (focus down to 17cm), weather sealing, and that famous Leica build quality with brass top and bottom plates.
My simulation setup used the Leica SL2 with a 47 megapixel full-frame sensor (nearly identical to the Q2), an Asahi Optical 28mm f/3.5 prime lens on an adapter, total weight of about 850+ grams with the adapter, much larger body dimensions, and total cost of what I already owned. This setup meant manual focus only, f/3.5 maximum aperture (two stops slower), no macro capability, and definitely not as compact or refined!
The key similarities were the sensor resolution and the 28mm focal length. The key differences were autofocus capability, maximum aperture, size and weight, and overall shooting experience. But for testing whether I'd actually enjoy shooting with a fixed 28mm for street photography? This simulation was close enough to give me real answers!
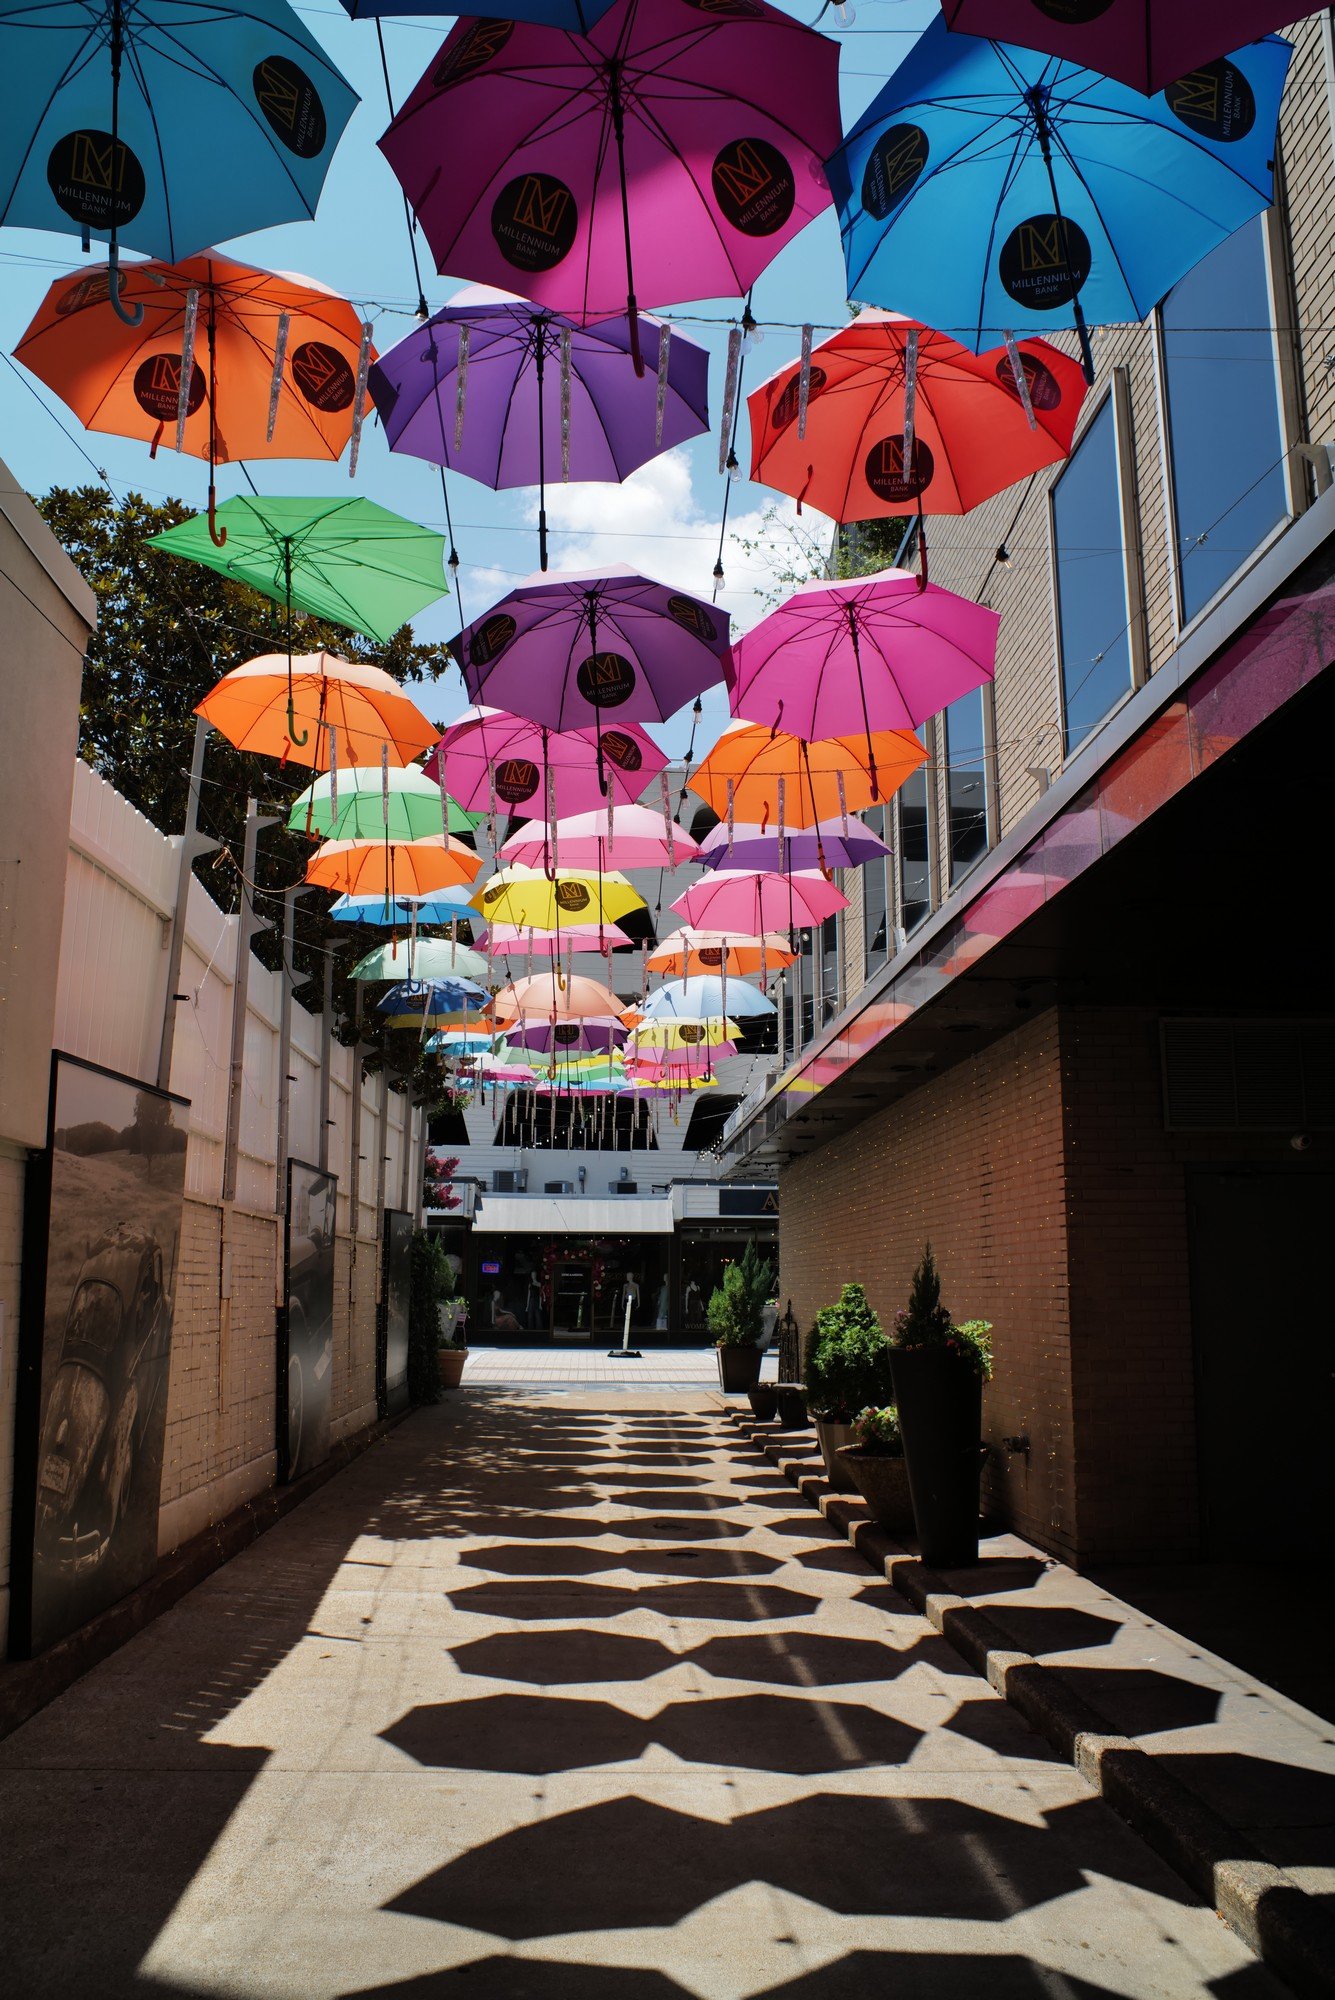
Shooting street photography in downtown Chattanooga with the SL2 + 28mm combo. I really love those Leica colors - the images just seem more rich in color to me! Maybe it's bias, maybe it's real, but these results have me happy.
I really love those Leica colors for some reason, maybe it is a bias I have towards the brand but to me the images just seem more rich in color. I really love how they turned out though and the idea of the Q2 is a great one for a general street camera. The high megapixel sensor combined with the 28mm lens is a potent street combination as you can see below where I shot the image as a candid just in passing and was able to adjust the composition later in post to get what I was looking for.
Is the Leica Q2 Worth $6000? Let's Do the Math
Here's the question that started this whole experiment: is the Leica Q2 worth $6000? To answer that, I needed to figure out what I'd be paying for versus what I could achieve with gear I already own.
The Leica Q2 at $5995 gets you a complete, ready-to-shoot system! One camera, one lens, no decisions about what to bring. You're paying for that Summilux lens (which would cost $4000+ if sold separately), the compact integrated design, Leica's legendary build quality, and the refined shooting experience. If you shot nothing but 28mm street photography, that's actually pretty reasonable for a professional tool!
My alternative approach using the SL2 I already own plus a vintage 28mm lens (which I picked up for about $150 used) costs essentially nothing additional. I already had the SL2 body, I already had the adapter, I just needed a good 28mm lens. Total additional investment: under $200. The compromise? Manual focus, slower aperture, bulkier setup, and no integrated refinement.
So is the Q2 worth the extra money? If you're starting from scratch and you know you love 28mm, absolutely! The convenience, the autofocus, that f/1.7 aperture, the compact size - those are real benefits worth paying for. But if you already own a camera body with a similar sensor and you can adapt lenses? You can get 80% of the Q2 experience for a fraction of the cost. That's what this test proved to me!

This photo was shot about 10 feet away with the 28mm on a full frame sensor - it looks MUCH further away than it actually is! But through the power of cropping with 47 megapixels, I can make it take on a couple of different looks. This is the original uncropped frame.
This photo was shot about 10 feet away and with the 28mm on a full frame sensor it looks MUCH further away. But through the power of cropping… I can make it take on a couple of different looks as you can see below.

This is a 12 megapixel crop of the original image - still plenty of resolution for web or print! Notice how the tighter crop changes the entire mood? This version has a lonely, almost bleak feeling to it. Same photo, completely different story.

This is a 16 megapixel crop of the original image - a slightly wider crop than the 12MP version above. This one has a warmer, almost restful feel to it. That's the power of 47 megapixels - you can change the entire dynamic of the image with a simple crop!
As you can see I can get two very different feeling images from this single frame. That is kinda powerful to be honest. I mean, you can change the entire dynamic of the image with a simple crop. That is actually liberating to be honest. I mean just look at the two again. One has this lonly, almost bleak feeling to it while the other has a warmer almost restful feel to it. That is really cool to me. So this is a perk of the Leica Q2 in my book.
So what else comes with the Q2 that I didnt have today? Well, autofocus is one, another is larger aperture. This lens is f3.5 which is two full stops slower than the lens on the Q2. This would matter more in low light as I was shooting most of this day at f11 to reduce the need to adjust focus. Range focus at f11 on a 28mm prime is basically 4 feet (1.3 meters) to infinitiy. So it literally was point the camera, press the shutter and the image was in focus. But if I wanted to shoot indoors or in the evening, the f1.7 aperture would be nice to have to keep my ISO down some or be able to raise the shutter speed a little to freeze action better.

What I really liked about the 28mm was that it made me interact with people more! These two guys were walking by and I just asked them if I could grab a quick photo - they were stoked and so was I. The 28mm forces you to get closer if you want the detail, which means you have to actually talk to people. This is helping me overcome my shyness about street photography!
Is the Leica Q2 Right for You? Here's My Honest Assessment
After this simulation experiment, I've got a pretty clear picture of who the Leica Q2 is perfect for and who should probably look elsewhere. Let me break this down based on what I learned!
You should seriously consider the Q2 if you primarily shoot street photography at 28mm, value compact size and don't want to carry multiple lenses, are willing to pay for premium build quality and refinement, want that f/1.7 aperture for low light, love the idea of a one-camera solution for travel, and appreciate Leica's color science and shooting experience.
The Q2 really shines for minimalist photographers who've already decided 28mm is their focal length. If you know you love this field of view and you want the best possible 28mm compact camera, the Q2 is hard to beat! The autofocus, the aperture, the size, the build - it's all there. You're paying a premium, but you're getting a refined tool that just works.
But you should probably skip the Q2 if you already own a high-megapixel full-frame camera (just buy a 28mm lens like I did!), like to switch between different focal lengths regularly, aren't sure if 28mm is your preferred street photography focal length, are on any kind of budget, or want the flexibility of interchangeable lenses for different situations.
For me personally? I do really like the ergonomics of the SL family of camera bodies, so I will keep my SL2 and use a 28mm lens when I want to have the Q2 experience. The simulation proved I'd enjoy the Q2, but it also proved I don't need it! I get most of the benefits with gear I already own, and I get to keep lens flexibility for other types of shooting.
The key is being honest about your actual shooting style versus your aspirational shooting style. Do you really shoot primarily at 28mm, or do you just like the idea of being a minimalist street photographer? If it's the former, the Q2 might be worth every penny. If it's the latter, save your money!
What I really liked about the 28mm was that it made me interact with the people more. The photo above is a great example of this, these two guys were walking by and I just asked them if I could grab a quick photo, they were stoked and so was I. This is honestly a problem I have that I am working to get past. I don’t like bothering people and will walk by potentially great photos simply because I don’t want to bother them. The 28mm forces you to get closer if you want the detail in the photos so I have to get closer to do that. So I think honestly, this is going to have be a perk of the 28mm Summilux lens after all…
All in all, this kit performed really well for me and I think the Leica Q2 would perform equally as well. BUT I do really like the ergonomics of the SL family of camera bodies so for me I will keep my SL2 and use a 28mm lens when I want to have the Q2 experience in a camera. So until next time, get your camera out and go take a photo with it.
Just capturing everyday life…
When I decided to take some time away from youtube and just explore my photography, I didnt know how much fun it would be to just take the camera and an extra battery. It blew my mind to be honest.
Still I found myself starting to look for more interesting photos when I am out and about these days. Something else I have really come to realize is that you cant get the photo if you dont go out with your camera.

Here is an example of what I mean by getting out and shooting more. You are not going to be where the action is if you dont get out and shoot. Just being out in the field greatly increases your chances of getting a photo. That being said, I am the worlds worst at failing to get the shot. I got the one about due to range focus being set on the lens so I didnt need to even bring the camera to my eye. I literally saw it unfolding and just raised the camera and snapped the frame. It is also heavily cropped too so I can get the composition I wanted. That is a luxury of the 47mp sensor on the Leica SL2 that I was using that day, it gives you options.
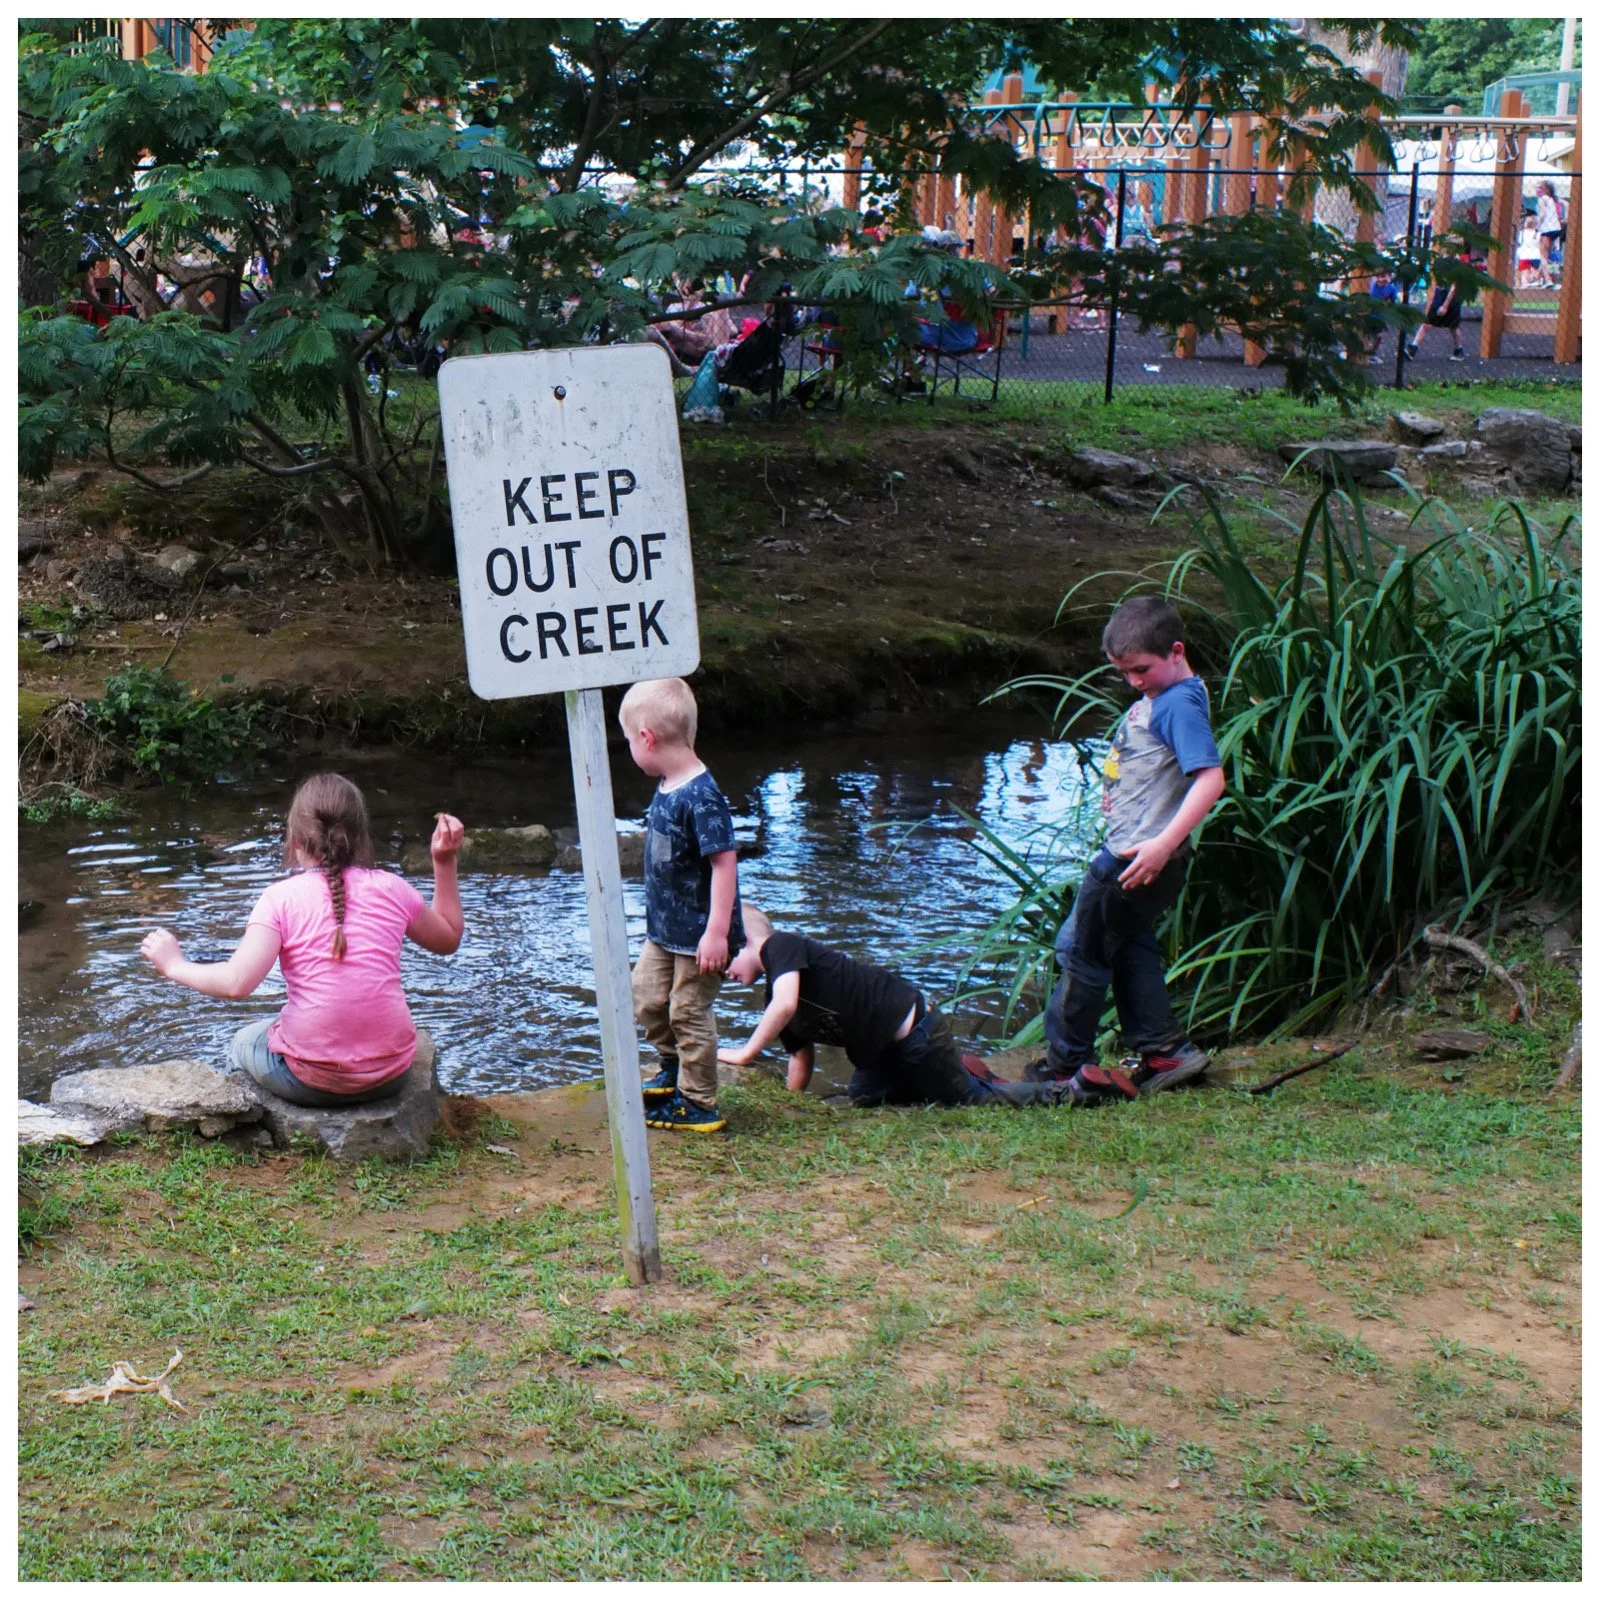
Here we have a photo I have taken a couple of times now. Every year our hometown has an event in this park and the kids play in the creek is flagrant defiance of the posted sign. It is such a cliche photo that I can’t pass it up. Obvious civil disobedience to signage if a fun photo so if you see one of these scenarios just get your camera out and take the picture. You just might like what you end up with.

Here we have a scene of “small town Americana” that I thought was kinda interesting. These little carnival foodie trucks are a common sight in rural America and I wanted to capture that essence if possible. I am not sure if I was successful but to me it is a cool photo.
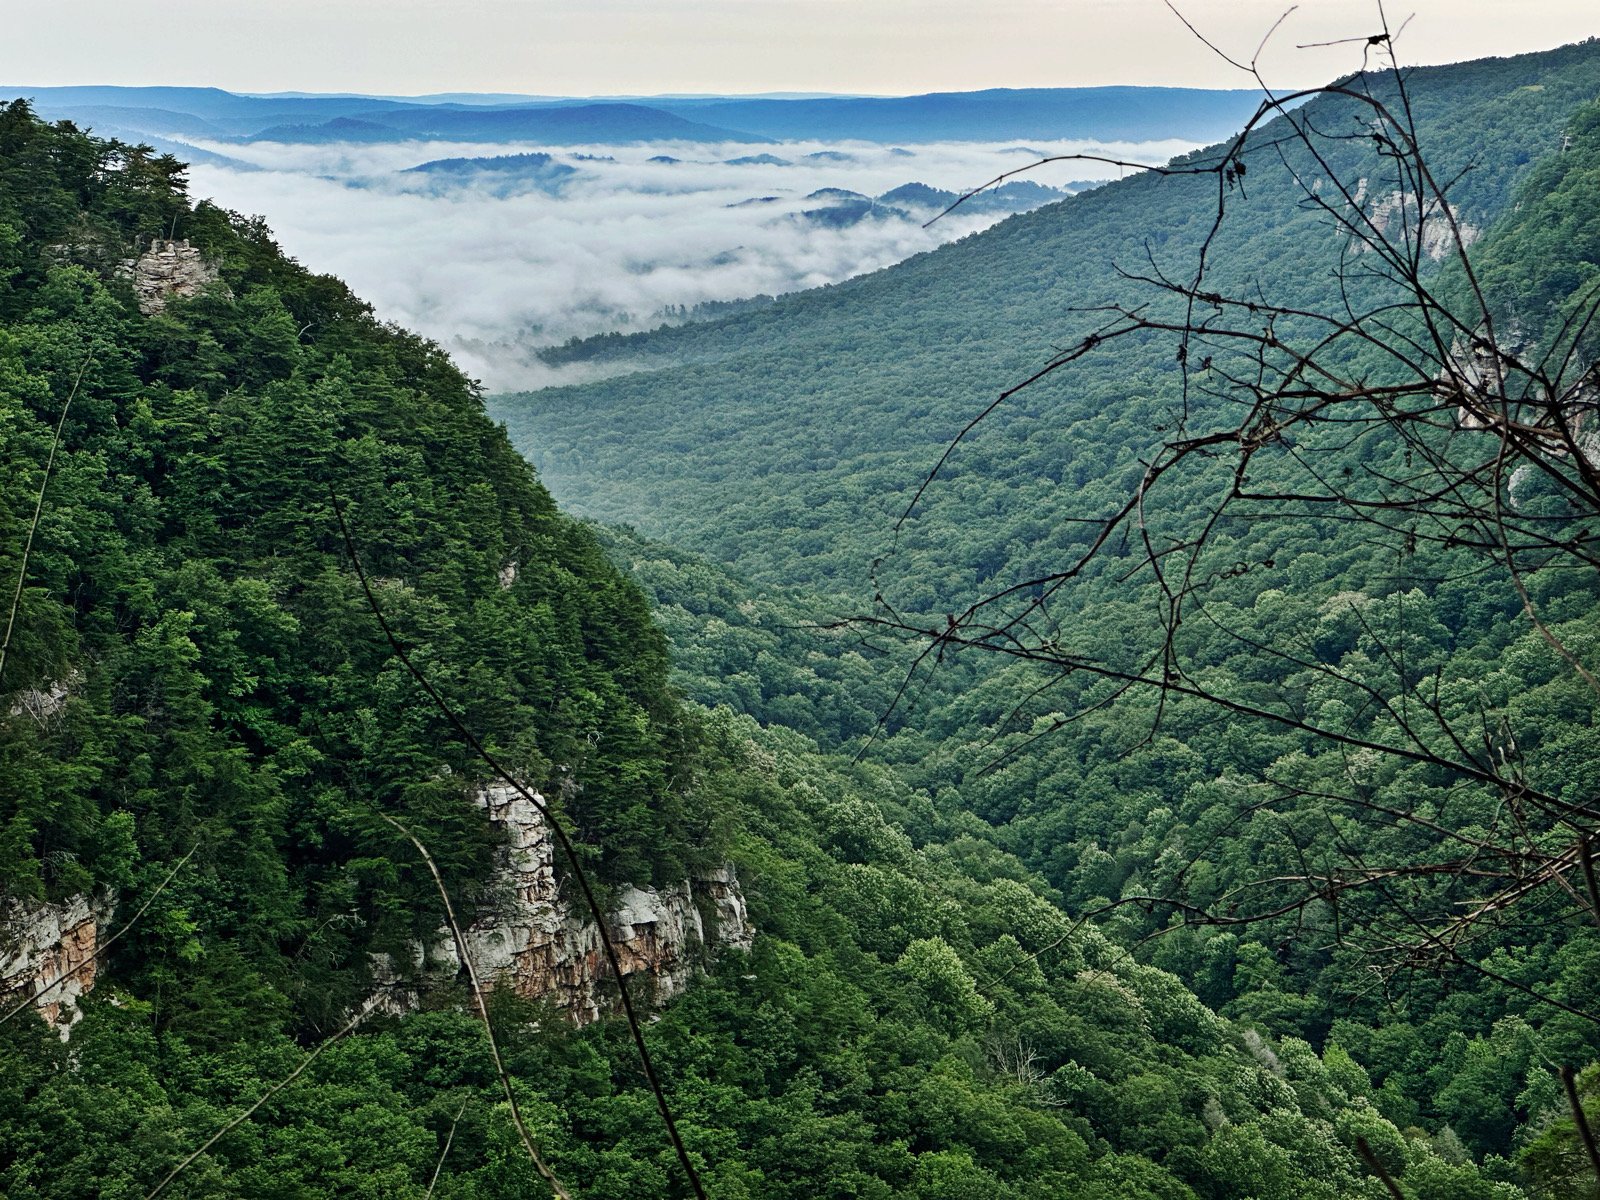
Here I found something interesting when I went to Cloudland Canyon State Park to setup a POTA activation the other morning. A cloud inversion isnt real common until the fall, but conditions were apparently just right. So I grabbed a photo before turning on the radio and now I have this photo.
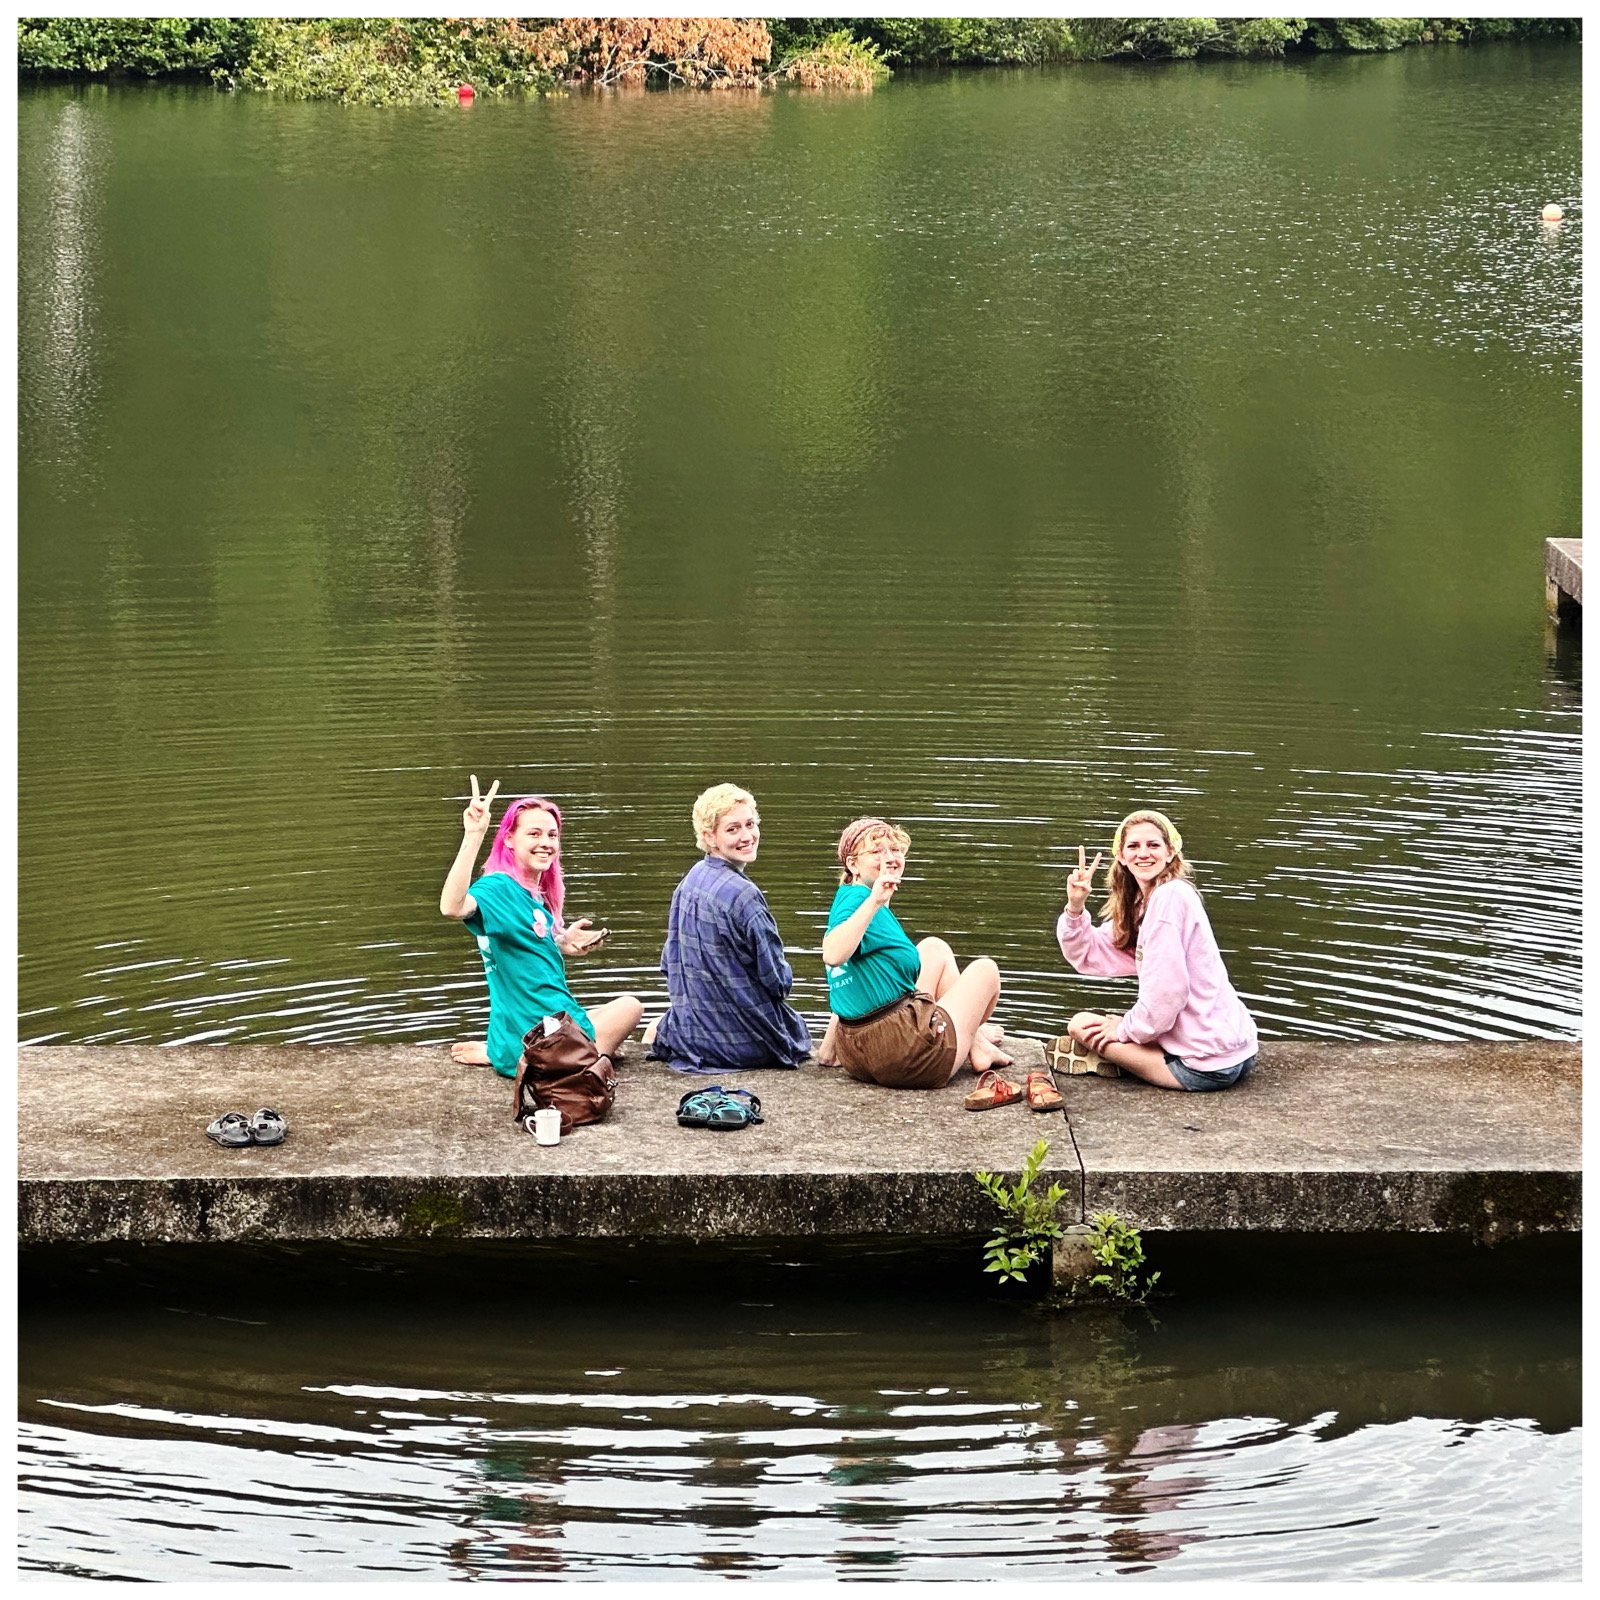
Here is the last photo I want to talk about. This was a quickie iPhone capture that I saw and just had to get right quick. Use what you have and get the photo, that is the rule of the day. I have come to learn that when you get something like this in your head just go take the photo and be done with it, it will gnaw at you forever if you dont. I think some of the best photos, street or otherwise, come from just capturing everyday life. What do you think?
Is Leica right for you?

Since moving to the Leica camera system I have learned that the brand is super polarizing in the photography community and the odd part is there is no one other competing brand, except maybe Fujifilm and Ricoh in some genres.
You see there is the Nikon vs. Canon rivalry which everyone knows about. People either love Leica or hate them and there seems to be no middle ground. What I hear the most has to do with the extreme price of Leica cameras and what I usually hear second is how (insert their favorite brand here) had a list of features that Leica lacks. By far these are the two main complaints I hear with there being a few odd things otherwise.
Let’s take a look at some speculation on this topic and see if we can get a better understanding. Now, this next part is pure speculation on my part with only a little actual research behind it. But I did make a simple questionnaire for a few people to see what they thought.
Here is my question list:
Why dont/do you currently own any Leica gear? (Cameras and lenses)
What is your opinion of Leica in general?
Why do you have that opinion?
Armed with these questions let’s see what we get. I got the following answers…
————————————————————————————-
Why don't you own any Leica gear?
1. Between the price point and lack of a body geared towards sports there wasn't a setup that fit into my shooting needs.
What is your opinion of Leica Gear?
2. From my limited experience the camera I used felt well built and the quality I have seen produced by Leica cameras and glass is as good as other brands but seem more geared towards fine art, street or portriat style photography.
Why do you have that opinion?
3. Most photos produced where Leica has been identifed as the camera in my opinion have fit into the fine art, street or portrait categories.
————————————————————————————-
Why don't you own any Leica gear?
1. I have thought about buying a Leica as a street camera or personal camera, but the cost, even used, is a bit prohibitive for me.
What is your opinion of Leica Gear?
2. In general, I have a very favorable opinion about Leica. They are well-built, feel good when holding them, and take most excellent images. I am especially enamored with the M10 that only shoots monochrome. That is my dream, money is no object camera. And I love the look of those square frames lenses. They are quite aesthetically pleasing.
Why do you have that opinion?
3. I have this opinion partly from trying one out previously, but mostly from watching them used on YouTube. They are/were the camera of choice for some of the most famous photographers in the world.
————————————————————————————-
1.Why don't you own any Leica gear?
I would love to own some Leica gear. It’s a little on the expensive side, but I think they truly are pieces of quality kit. Lenses I think are pretty top notch. Also quality of lens construction seems to be pretty great.
2.What is your opinion of Leica Gear?
I think that Leica is focused towards a certain type of photographer. One that wants no compromises, while being methodical and authentic at the same time. They produce a different shooting experience for a more niche audience. But for those who enjoy Leica, they know exactly what they want from a camera. And Leica seems to know what their shooters want as well.
3. Why do you have that opinion?
I met a friend through a friend who was obscenely wealthy and he only shot on Leica. That, and general impressions based off of YouTube and other avenues where stereotypes are routinely expressed. I’m certainly open to change if and when I shoot on one!
————————————————————————————-
1.Why don't you own any Leica gear?
Leica doesn't make a single camera that interests me.
2. What is your opinion of Leica Gear?
I respect the brand and the company. I think they make really great lenses. Their bodies, while well made don't have the features that I look for in a camera body. I like their simplistic beauty. That's just not what I'm looking for. I think they are probably great street photography cameras but not too good for sports and wildlife. On the other hand, there are other brands that make great sports and wildlife cameras. The difference is, these great sports and wildlife cameras can also handle street, portraits and basically any kind of photography with no worries. So I need a camera that can do everything as opposed to a camera that can only do a few things.
3. Why do you have that opinion?
You don't see a lot of Leica shooters on the sidelines of a sporting event or at the wildlife refuge. There is a reason for that.
————————————————————————————-
1.Why do you currently own Leica gear?
What drew me to Leica is it’s history and mystique. Leica is the originator of the 35mm camera, and a great deal of great photographers have used Leica. I wanted a piece of that mystique, not that it would make me a better photographer but it was very enticing. I started with the Leica Q, probably the most affordable full-sensor Leica and I was hooked the color science of that camera is godly, better than any other Leica camera I have owned. Then the Q2 Monochrome, I have always wanted a monochrome camera, so why not. Followed by the Q2 because I wanted more megapixels for cropping, The color science on the Q2 is not in my opinion as good as the Q but it improves on the Q in many other ways. Then finally the M10p, I don’t any Leica glass except for the lenses mounted on the Qs which are all 28mm. I have always said I can afford the camera but not the lenses.
PS. The real reason is David Saylors, I had beaten the bug to get a Leica, then I met David and ended up with a Leica Q
2. What is your opinion of Leica in general?
My first thought is a prestige brand for the affluent. In reality, it is much more than that. I see them as an extremely high-quality brand manufactured in Germany for the most part, you have to pay for that labor and Leica is not a high-volume brand. They need to charge that kind of money to stay in business.
I am lucky enough to have a Leica store near me and I have learned how much they do to promote up-and-coming photographers, free gallery openings, and photo walks and that is at the local level. World wide they have awards to promote photographers no matter what brand they use. They look at photography as an art form and help to cultivate new photographers.
3. Why do you have that opinion?
On the built quality of Leica, all you have to do is pick one up. They are solid and rugged. I could use my M10P to protect myself and still use it to take a photo of the attacker. You can still buy old M2 and earlier that still work perfectly well and they will service them.
Regarding fostering photographs look at the Leica Oskar Barnack Award or the countless events available on Eventbrite for free.
————————————————————————————-

As you can see, the price is what gets most people right away. To be fair to both the consumer and the manufacturer let’s take an honest look at what makes these cameras cost so much. I have been given a unique perspective to see both sides of the transaction event so to speak. For Leica I understand what they have done over the century of their operation as a camera manufacturer.
They were “first movers” in that they invented using 35mm movie projector film in a still frame camera. This gives them a market advantage of sorts… or it did… that is until Nikon released the SLR in 1959. The SLR changed the game, no longer did you worry about your camera getting out of calibration and the photos being out of focus as you are actually looking straight through the taking lens directly for your composition. A large portion of the world that was using Leicas at this point wanted this new technology and went over to Nikon and Canon (who saw the light and jumped into the SLR game as well as many others). Leica stuck to their roots though and this almost proved fatal by the 1970s.
They tried making an SLR in conjunction with Minolta but it was too little too late and the R series never did really take off even though they made them for over 20 years. Leica on the other hand, always stayed focused on the M system. They also spent a lot of time cultivating their target audience as well. But since their company could not employ large scale manufacturing and the mechanical complexity of the M system makes them costly with skilled labor to manufacture, they could never compete in the world of high volume, mass production like the big players. How do you sell something that by its very nature has to have a high retail price due to high fixed costs in manufacturing? Market to the wealthy is how… The mantra of “exclusivity has its price” is true and if you make low volume but yet high quality products you can market to a niche group like the wealthy. There is a reason people joking say Leica is the brand of dentists and lawyers. Because Leica realized they could not compete with Nikon and Canon on low price/features, they had to figure out where they fit in the photography space. This turned out to be in reportage and street photography mainly. This and the aforementioned exclusivity adds up to a potent mixture for a brand that is for the affluent.
The reasons for the cameras price is multifaceted and I am straight speculating here too. I am pretty sure that I am right though as I have worked in the field of manufacturing and selling of products. You see, first the cameras they make are basically like fine mechanical watches, in that they are hand assembled and tuned individually. All this meticulous labor runs the score WAY up. Especially when you consider that it takes a skilled craftsman to build one of these and not just someone off the street trailed to do an assembly line job. Henry Ford figured out that low skill labor can complete complex tasks if there is enough people to break down the job into small enough tasks. Problem with Leica is that they don’t have the business model or the sales volume to be able to setup this sort of operation, so they instead lean into the individual craftsman concept even harder.
Today though, you are starting to see a lot more people shooting on Leica cameras and it is because the world has improved (whether we like it or not, the industrialized “1st world countries” are, over all, wealthier than they have ever been). People have learned that they have enough disposable income to be able to get that M6 with the 35mm Summicrion now, and the do! I am starting to see more and more youtubers using Leica cameras…shoot, even good ole Pete has a Q2 now!
Now does this mean that people need to add one to their arsenal to be cool? No. Absoloutly not, they should use whatever makes them happy and gives them the results that they want. If this means shooting a Leica M11 with a 12,000$ Summilux lens, then you do you. If it means shooting on a Sony RX100, then that is the camera for you.
In the end Leica will never be a cheap camera system, nor will it ever have the bleeding edge features like Sony or Canon, but it will continue to serve a dedicated niche market that they have carefully cultivated over decades. For me, that fact alone makes them an awesome company. They are out there doing there own thing and really dont care about the rest of the market.
Prime lens primer
So you have never used a prime lens before… well let’s change that.

Leica CL with the TTArtisan 35mm f0.95 APS-C prime lens
A prime lens is like a window into another world of photography. They can be had in much larger apertures than zooms usually, they are smaller under most circumstances, and if you get vintage ones…they can produce very unique results.
Another thing that prime lenses are good for is they teach you to compose based on the environment. You have to work within the confines of the focal length which means you will have to either move closer or further away to “zoom” with your feet to get your composition. Sometimes this means not getting a certain shot at all because you would have to stand in the middle of a river to get the composition or something like that. But I rarely run into this problem and once I start seeing in focal length it seems I filter out these problems subconsciously anyway.

Leica CL with the TTArtisan 17mm f1.4 APS-C lens.
You will also learn to see in your chosen focal length over time as well. That is, once you shoot a while with just one focal length… You hear street photographers talk about the 28 or the 35 and they know what the photo is going to look like based on experience.
I will be honest here, it is really liberating to have such a small and potent setup when I run prime lenses. Zoom lenses give you versatility, but I see people that use zoom lenses still carrying a camera bag. This seems overly redundant to me, I use the one lens all day and get out in the environment, but I am not everyone. Some people prefer to have all the options on hand so they can setup and shoot whatever comes their way I guess. Maybe they have missed a opportunity in the past while using a prime and now want the versatility of a zoom to give them better odds in the future should that happen again, I don’t know. Those are some of the speculations I have had, but for me, I just like having something dedicated like the prime brings to the table.
Zoom lenses do serve a purpose though, they are the work horses of the professional photography world. Giving the professional the ability to change focal lengths instantly on demand to fulfill the job at hand. Primes force the professional to move around a lot more to build the composition that the zoom makes short work of. This is important when you are on a clock. Anything that saves time also saves money so zooms have their uses.
So what makes a prime appealing over a zoom? That large aperture and the small size are some of the magic that the zoom lens lacks.

Lenses like the one above with it’s f0.95 maximum aperture can create an effect that nothing else can produce. The “Bokeh” or blurred out background is something that large apertures are well known for. The portrait below is a prime example of the feature. The background was probably 15 feet behind him when I shot this photo.

Primes lenses come into their own when it comes to vintage lenses too. This is where I have found my passion. The old Pentax glass along with the Nikon and early Canon stuff is all phenomenal. I do have some early Leica stuff but the Pentax / Asahi branded glass is just awesome. I also will try about anything to see what the photos are like as well. I have even adapted some glass that should not be able to be adapted like some Argus lenses. I documented that process on my YouTube channel if you want to see how I was able to make that work. Argus had a unusual way to drive the focus on the lens and it posed a challenge to get it to work.

One of my favorite vintage lens brands is Pentax and the Asahi Optical company.
With the advent of the mirrorless camera, we now have a flange distance that is conducive to adapting these vintage lenses to our cameras easily and the electronics in the camera make using these lenses even easier than ever as well. Things like focus magnification and focus peaking as well as exposure preview to see how the image will look before you press the shutter are great for coupling vintage primes to your new shiny mirrorless camera. Some even allow image stabilization via sensor stabilization so you even get that feature with vintage glass sometimes.
So if you have not used prime lenses in the past, I implore you to get a simple one, like the 50mm f1.8 on full frame (affectionately named the “nifty fifty”) or it’s APS-C little brother, the 35mm f1.8 DX (Nikon uses the term DX for their APS-C cameras) and put it on your hobby camera and leave it there for a month. It will either make you hate primes or fall in love with them. For me I got the 35mm f1.8, installed it on my Nikon D7000 and left it for almost a year without removing it. I really loved that lens.
So until next time, get your camera out and go take some photos with it!
Astrhori 18mm F8 Tilt Shift Lens Review
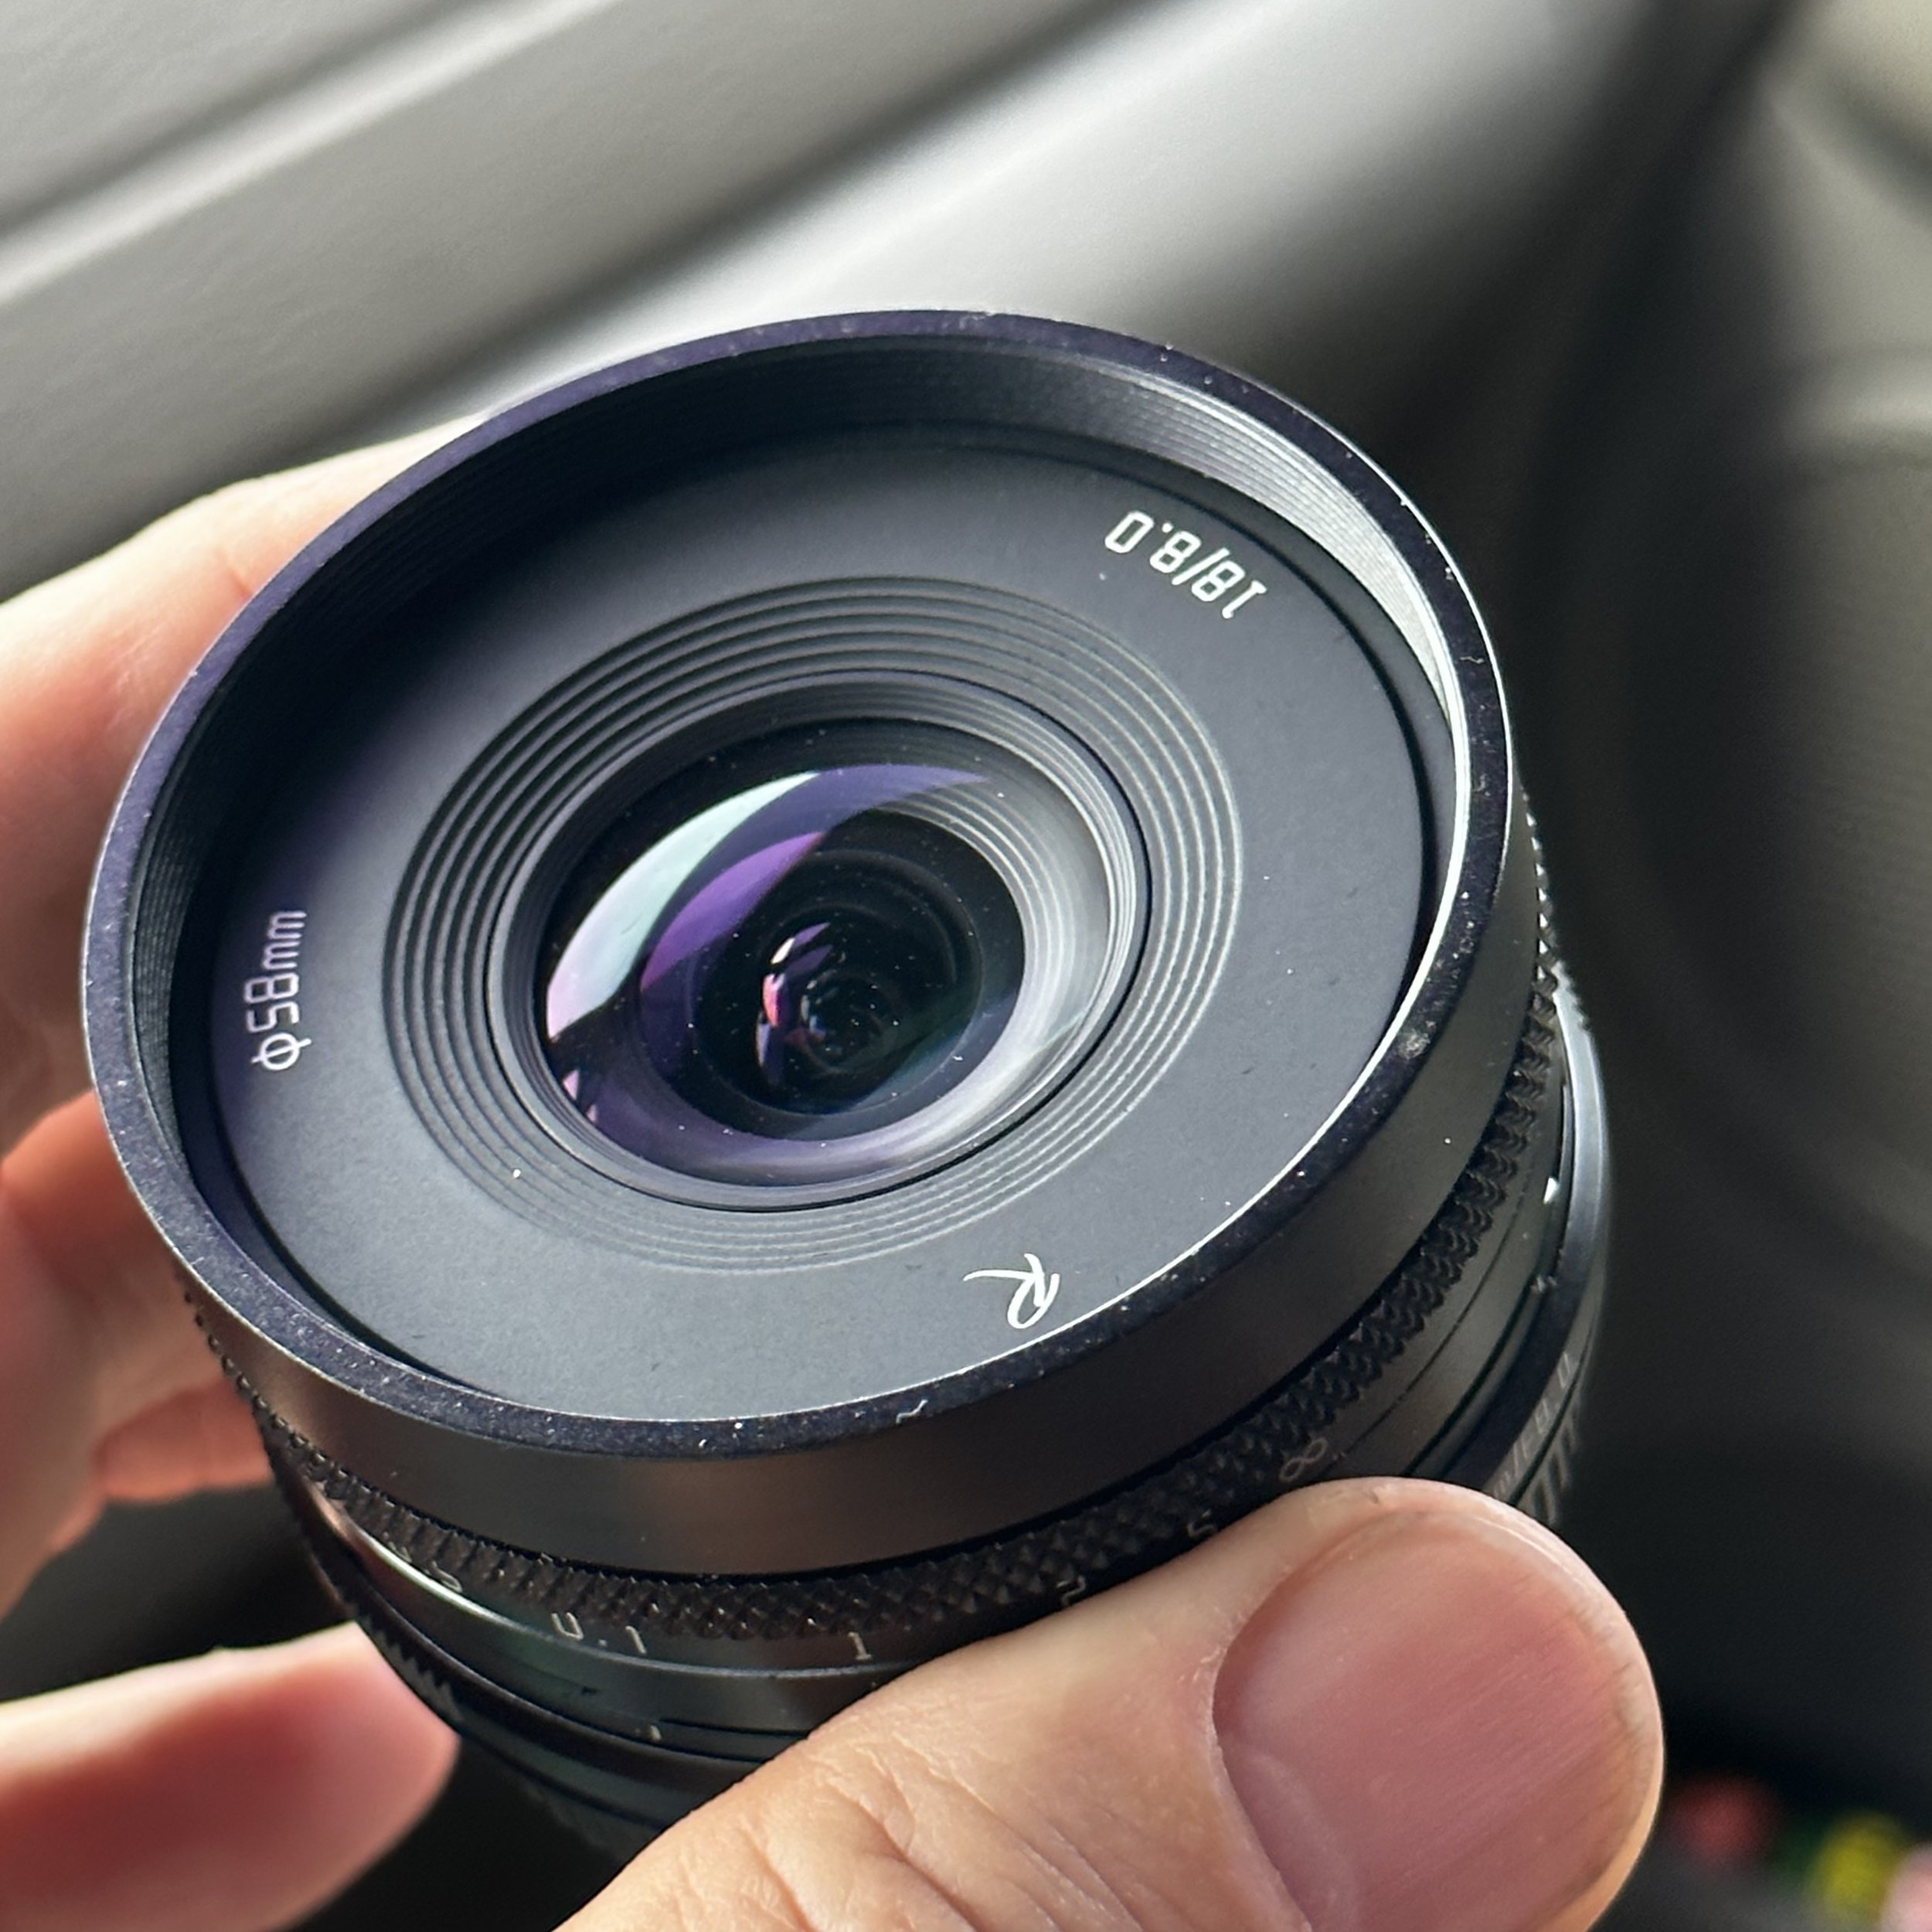
Camera gear is a interesting thing. ESPECIALLY for photographers as they love collecting it for some reason or another. I have reviewed quite a few lenses over the years on this channel, but never a tilt-shift version of anything. This is because these lenses are very specialized and usually very expensive too. Not having a focal length that I normally use is also another reason I have not bought one before.

Well, Phil Thach was contacted by Pergear about a lens they we’re launching and he recommended me to them. Thank you Phil, I appreciate the contact.
So after some emails, they sent me the sample lens for review. This particular unit did not come in a box but rather just a heavy ziplock bag. I am pretty sure the actual retail variant will be in a really nice box, so don’t worry about that. The lens is really neat for what is happening with it. You see, this little guy has a couple of cool features that most other lenses in the range do not have and it lacks on feature that almost all of the others does have.
The lens has the shift feature from “tilt/shift” lenses without the tilt function. It also has a rotation feature that allows the user to index the shift feature in 45 degree increments. So if you need it to correct vertically, you can do that. It will only shift in one axis at a time as well. This isn’t a real problem though as the intended use case for this lens is correcting converging lines on architecture and such. So you set the shift axis to match you framing and there you have it.
It will shift 6mm in each direction from center and this is more than enough for almost all scenarios. It does vignette the corners on full frame at the extreme ends of this range but carerful application of photo editing software should be able to fix this.
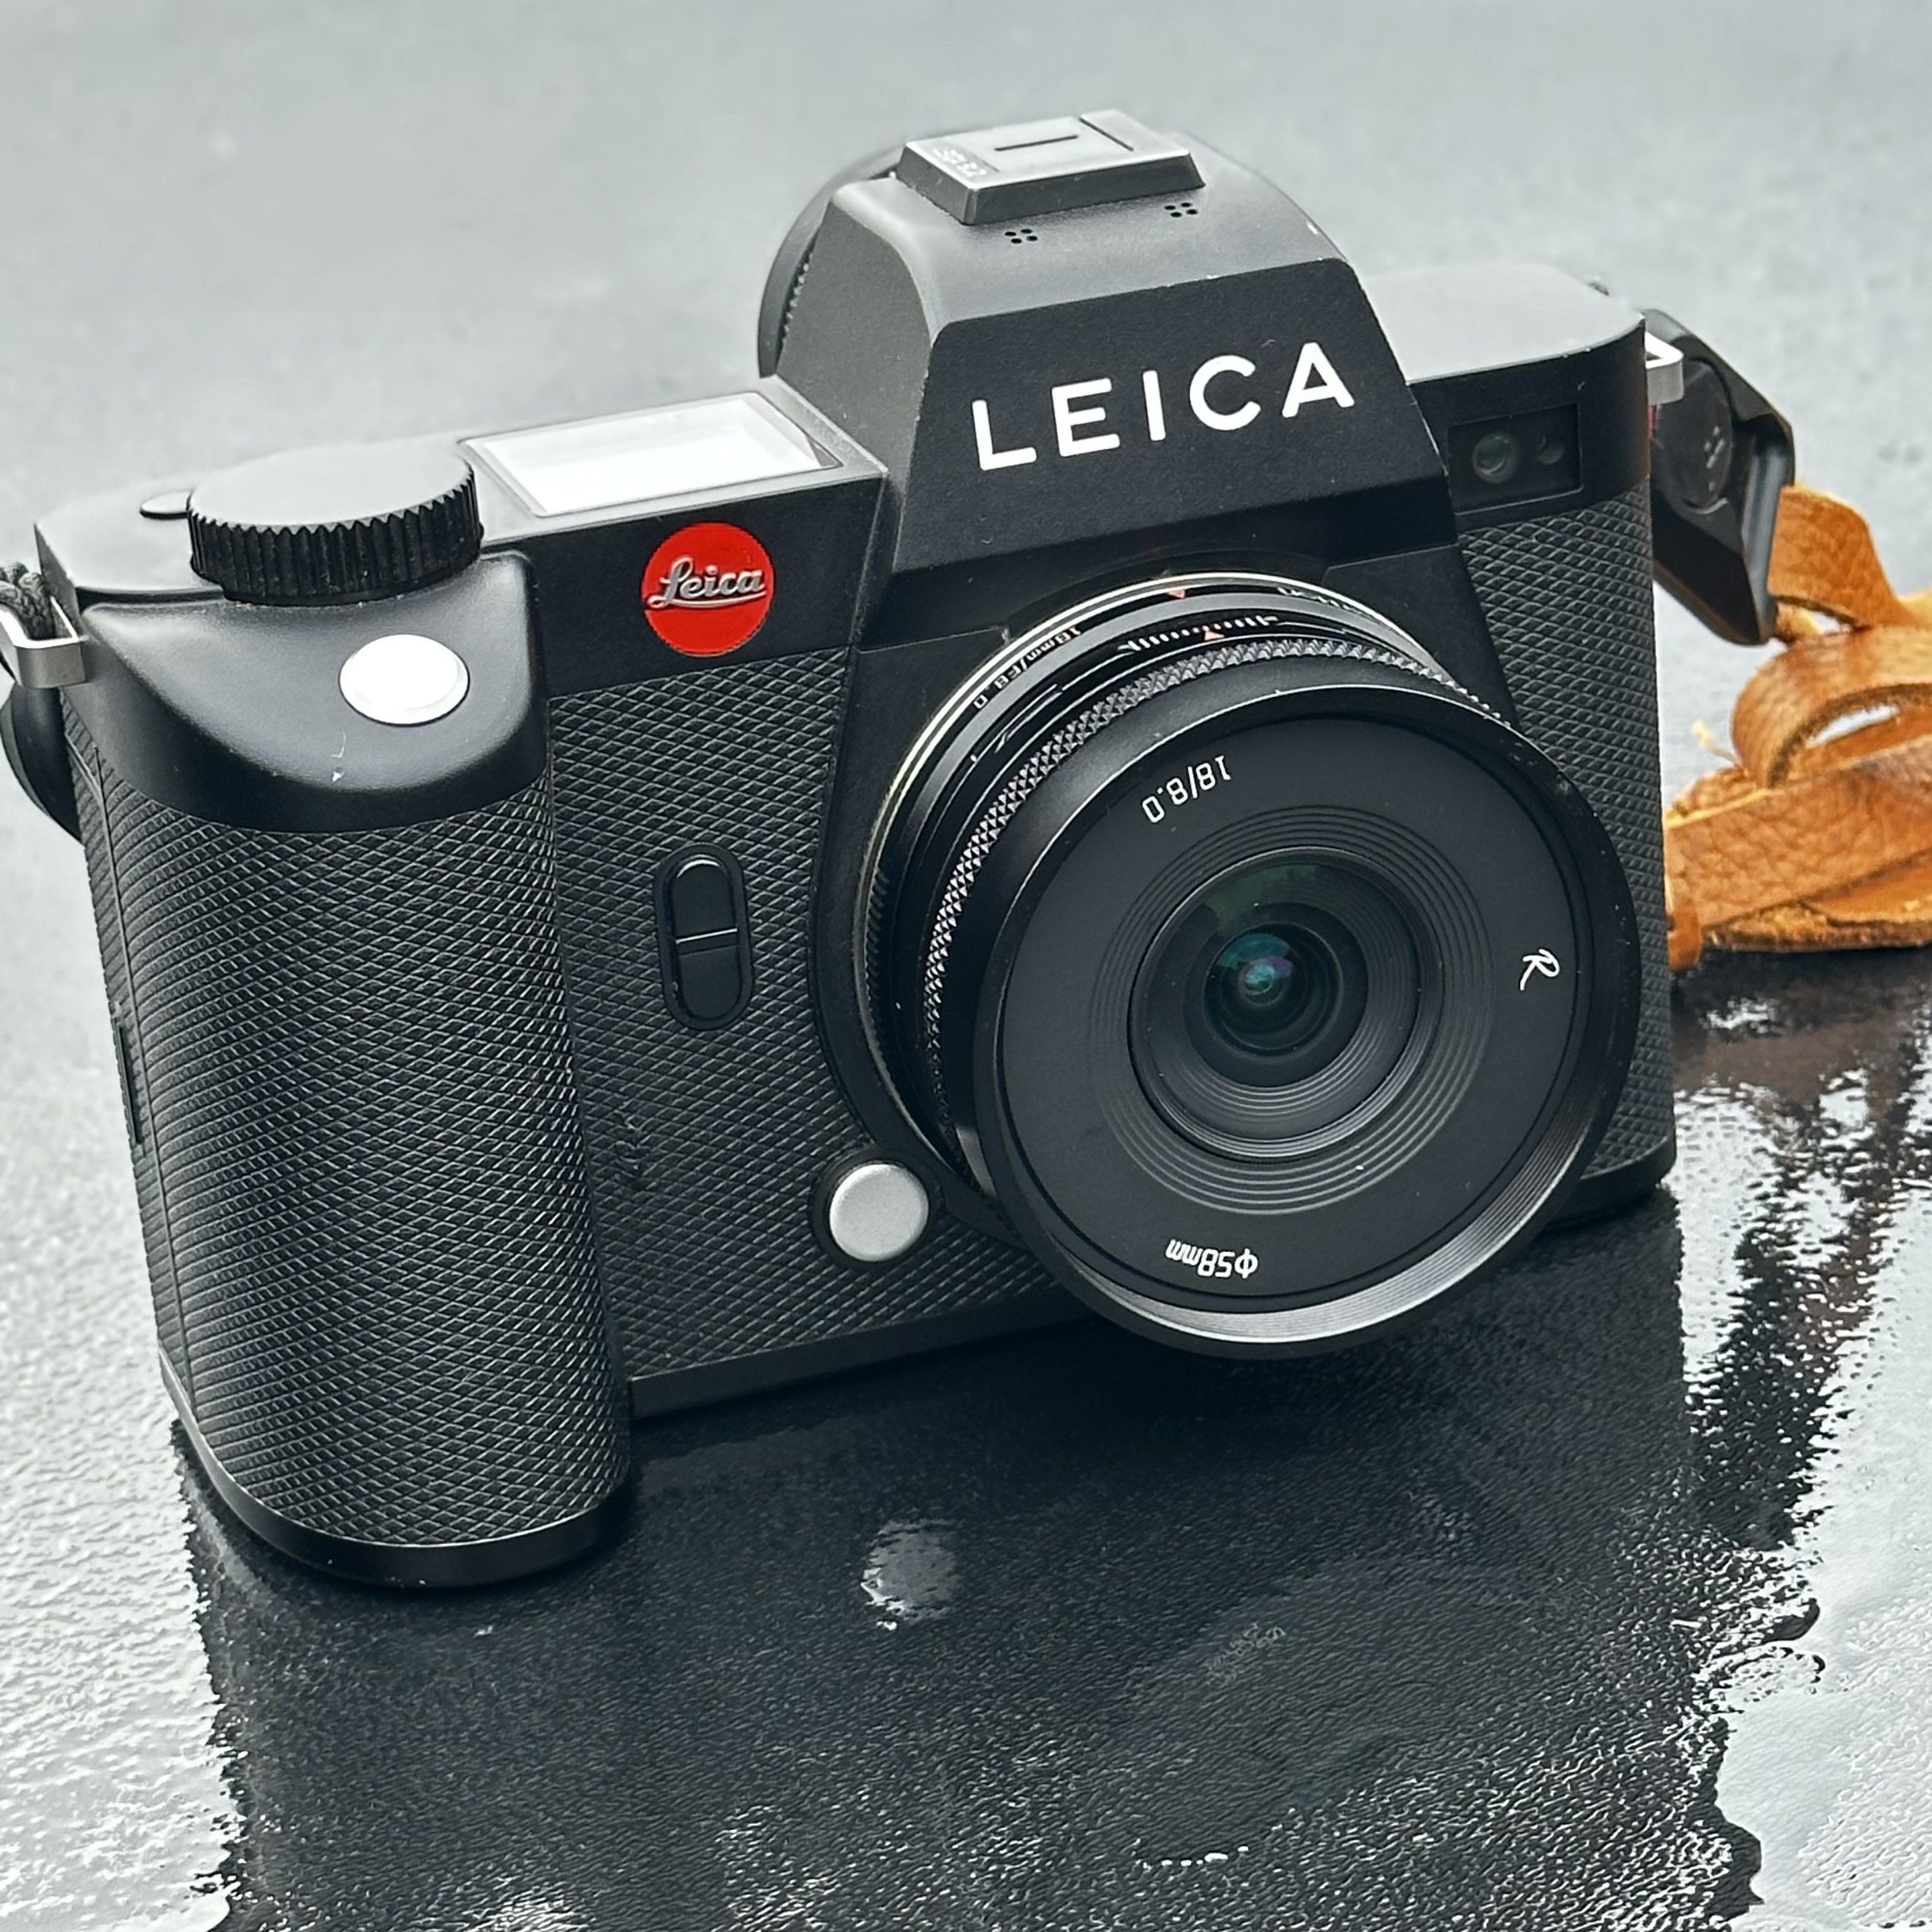
While using this lens, I have learned a few things about it though that I would like to share with you if you are consider getting one of these lenses for architectural photography. Honestly, I cant recommend it. If you plan to be a serious architectural photographer, it is worth the money if you want to dabble in this type of photography, just to see if you are interested because it is a cheaper alternative than a full on tilt/shift lens from any of the major manufacturers. But it lacks certain features that those lenses possess and that makes it more difficult to work with. Also, the build quality is lower than the Nikon and Canon alternatives and makes this lens less desirable in that manner as well. Another problem is that it is a fixed f-stop lens and it is 18 mm only. Traditionally, tilt shift lenses can be had in multiple focal lengths other than 18mm and variable F stops, this one has neither of those functionalities. It is a neat little pancake lens that is easy to use as a street photography lens on a crop sensor camera though, so when I put it on my Leica CL it worked wonderfully for just point shooting.

The F8 aperture and the 18 mm focal length gives you very deep depths of field that makes most everything in focus in your photos. So simple that it only required you to do little more than point the camera at the subject and fire the shutter. This is very beneficial for street photography purposes. A problem kept arising though, when I was shooting street photography with it using my Leica CL was that if I bump the lens, it would shift it or just letting it ride on a camera strap around my neck would be enough inertial force to shift the lens off axis. This is a problem as you could guess. So I really do not recommend this lens unless you were into novelty lenses or you were wanting to dabble in architectural photography with a little correcting shift lens, otherwise I would honestly say do not buy this lens and spend your money on something else.
My loadout for flying with camera gear.
Traveling over the years to locations that require flying commercial has taught me a few things about what to take.
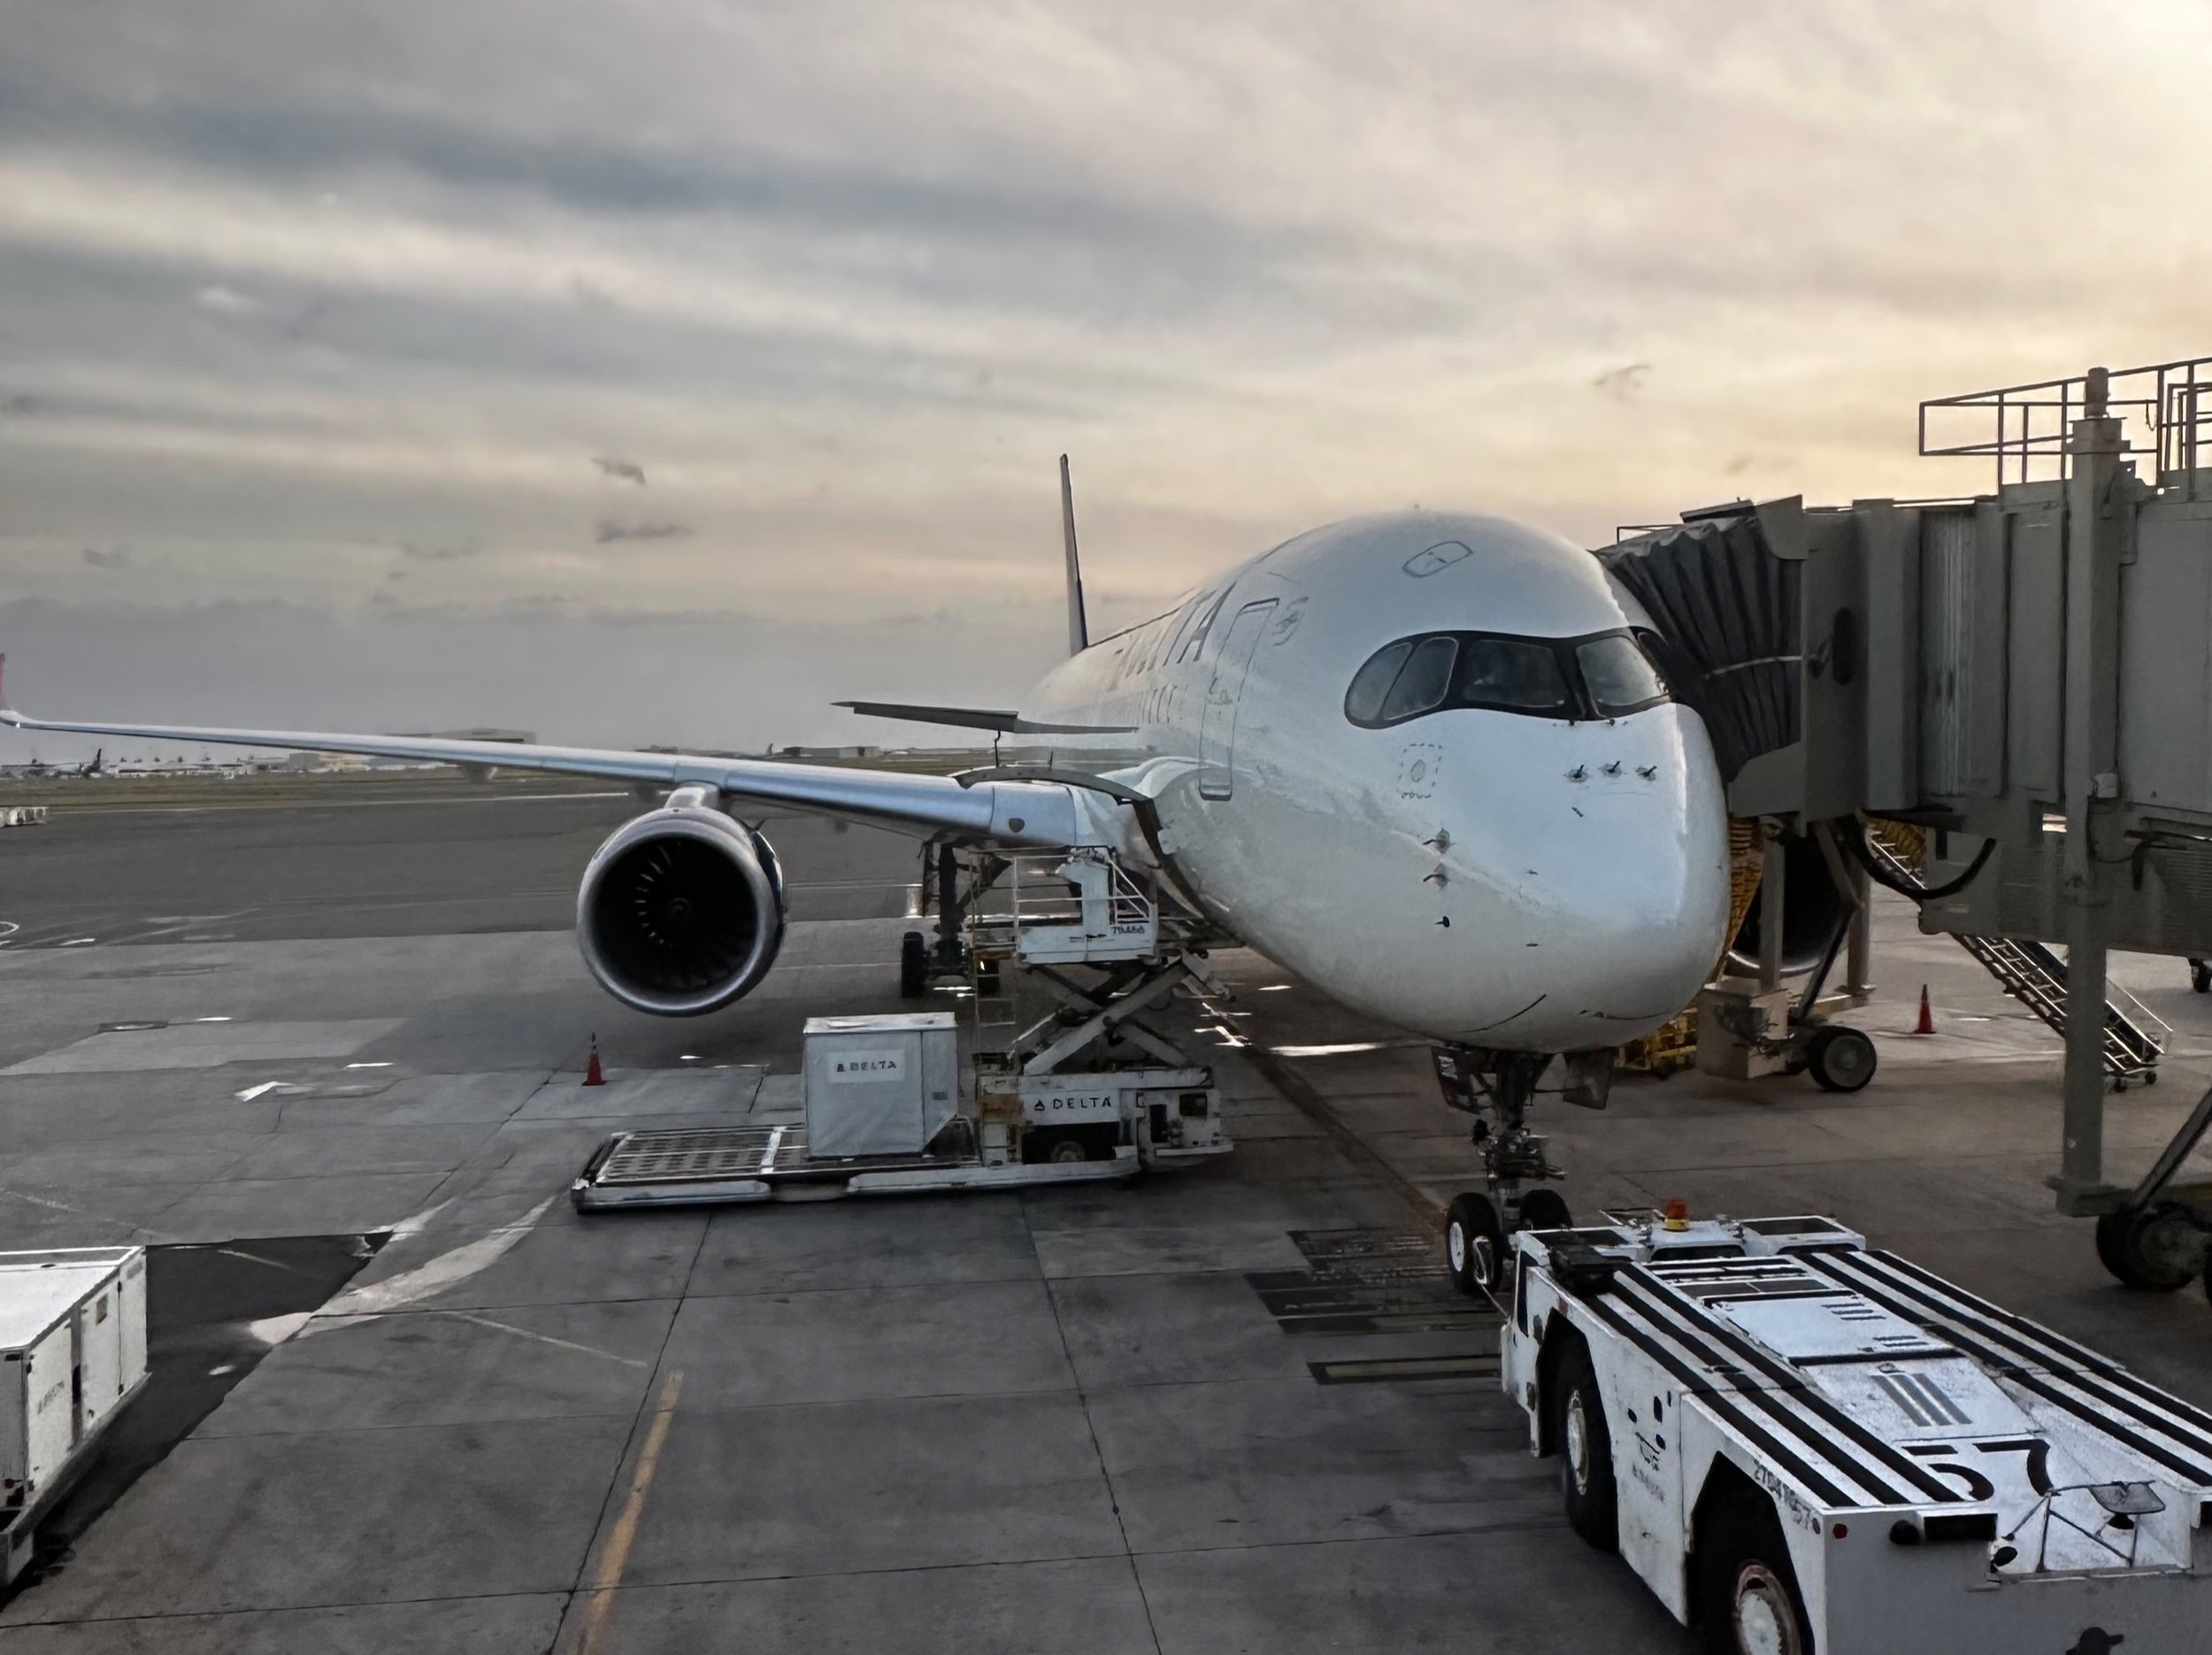
I once carried almost everything I owned when I traveled so I was sure to have whatever I needed for a certain photographic event. Well, with time comes wisdom… I have been adjusting the loadout and searching for the best solution as far as bags go and have finally found the perfect setup…FOR ME. You see, different people have different needs and your loadout will vary depending on your personal needs and wants.
When I traveled early on, I carried a large shoulder bag, very large mind you and a ton of kit in it. I had to fill it up you know! Lol.
Well after a couple of trips like that, I learned that I needed a different bag. So the giant Vanguard bag was retired and replaced with a Thinktank Airport International v2. This was a nice upgrade and allowed me to travel with more confidence in knowing my gear was protected better and it was also a roller bag! No more lugging that massive shoulder bag all over creation!!!
Well, I still use this bag from time to time, but only for roadtrips in my truck. The irony of this statement is not lost on me. I bought a literal aircraft carry own style, camera bag and now I dont even take it when I fly at all.

Thinktank Photo Airport International 2.0
So I learned the hard way something about marketing with this bag. Thinktank Photo will tell you, probably with an asterisk, that this bag will fit in standard overhead spaces. This isn’t so and I learned this the hard way on a trip coming home from Hawaii one year. On the last leg of our long journey, we boarded a small commuter jet and the overhead storage bins were just too small. This is when I got a VERY sick feeling in the pit of my stomach. You see, this meant I had to valet check this bag at this point. If you have never watched baggage handlers loading luggage then you dont know the horror movie I was imagining my expense and fragile camera gear was about to experience. They can be quite rough with check bags, we have had them arrive at baggage claim with wheels missing and such. So I tell the flight attendant my plight and she saves the day by stowing my roller bag of camera gear in what amounts to her broom closet. I almost cried in appreciation. That was the straw the broke the cameras back of roller bags for me.

Pictured here are the Peak Design Everyday Messenger bag and the Thinktank photo street walker backpack.
After the Airport International “incident”, I decided I needed to downsize my kit for multiple reasons. The main one being that I didn’t want to have to valet check my bag because it wouldn’t fit in the overhead bin.
The next reason is the most important though. I was tired of carrying gear I didn’t use or even need.

Taken with the Nikon Z50 handheld and using the kit lens.
So I decided to get something new and smaller. I chose something that had been on the market for just a short time at this point. I chose a Peak Design Everyday Messenger Bag. It is a wonderful way to carry camera gear for the most part with one exception. I cant really carry my big telephoto lens I use for wildlife. I tried it for a couple of years and at the time, I was using a large system consisting of a Nikon D810 with battery grip and the 200-500mm super zoom lens. This combination is very large and would leave me with room for just a couple of smaller lenses. It also came with another problem…pain. Single strap bags are great as long as they are not heavy, which is exactly what mine was at this point in time. So the search continues and I found another Thinktank Photo bag.
The next bag I chose was the Streetwalker v2. This is a smaller bag that is backpack style and is really comfortable. The single shoulder strap on the messenger bag would make my shoulder incredibly sore after just a couple of hours of carry. I tried this for a couple of years and paid the price. The streetwalker solved that problem in short order. It was at this point in my photography journey that I was finding smaller cameras like the Fuji XT3. I took this camera to Israel for a ten day trip and it was on this trip that my eyes were opened to carrying excessive equipment is wasteful. I took three lenses with me and only used one of them. Yes, I used the KIT LENS for the whole trip and it worked gloriously!!! All the while I was carrying around all this other crap and just getting back to the kibbutz tired every day.
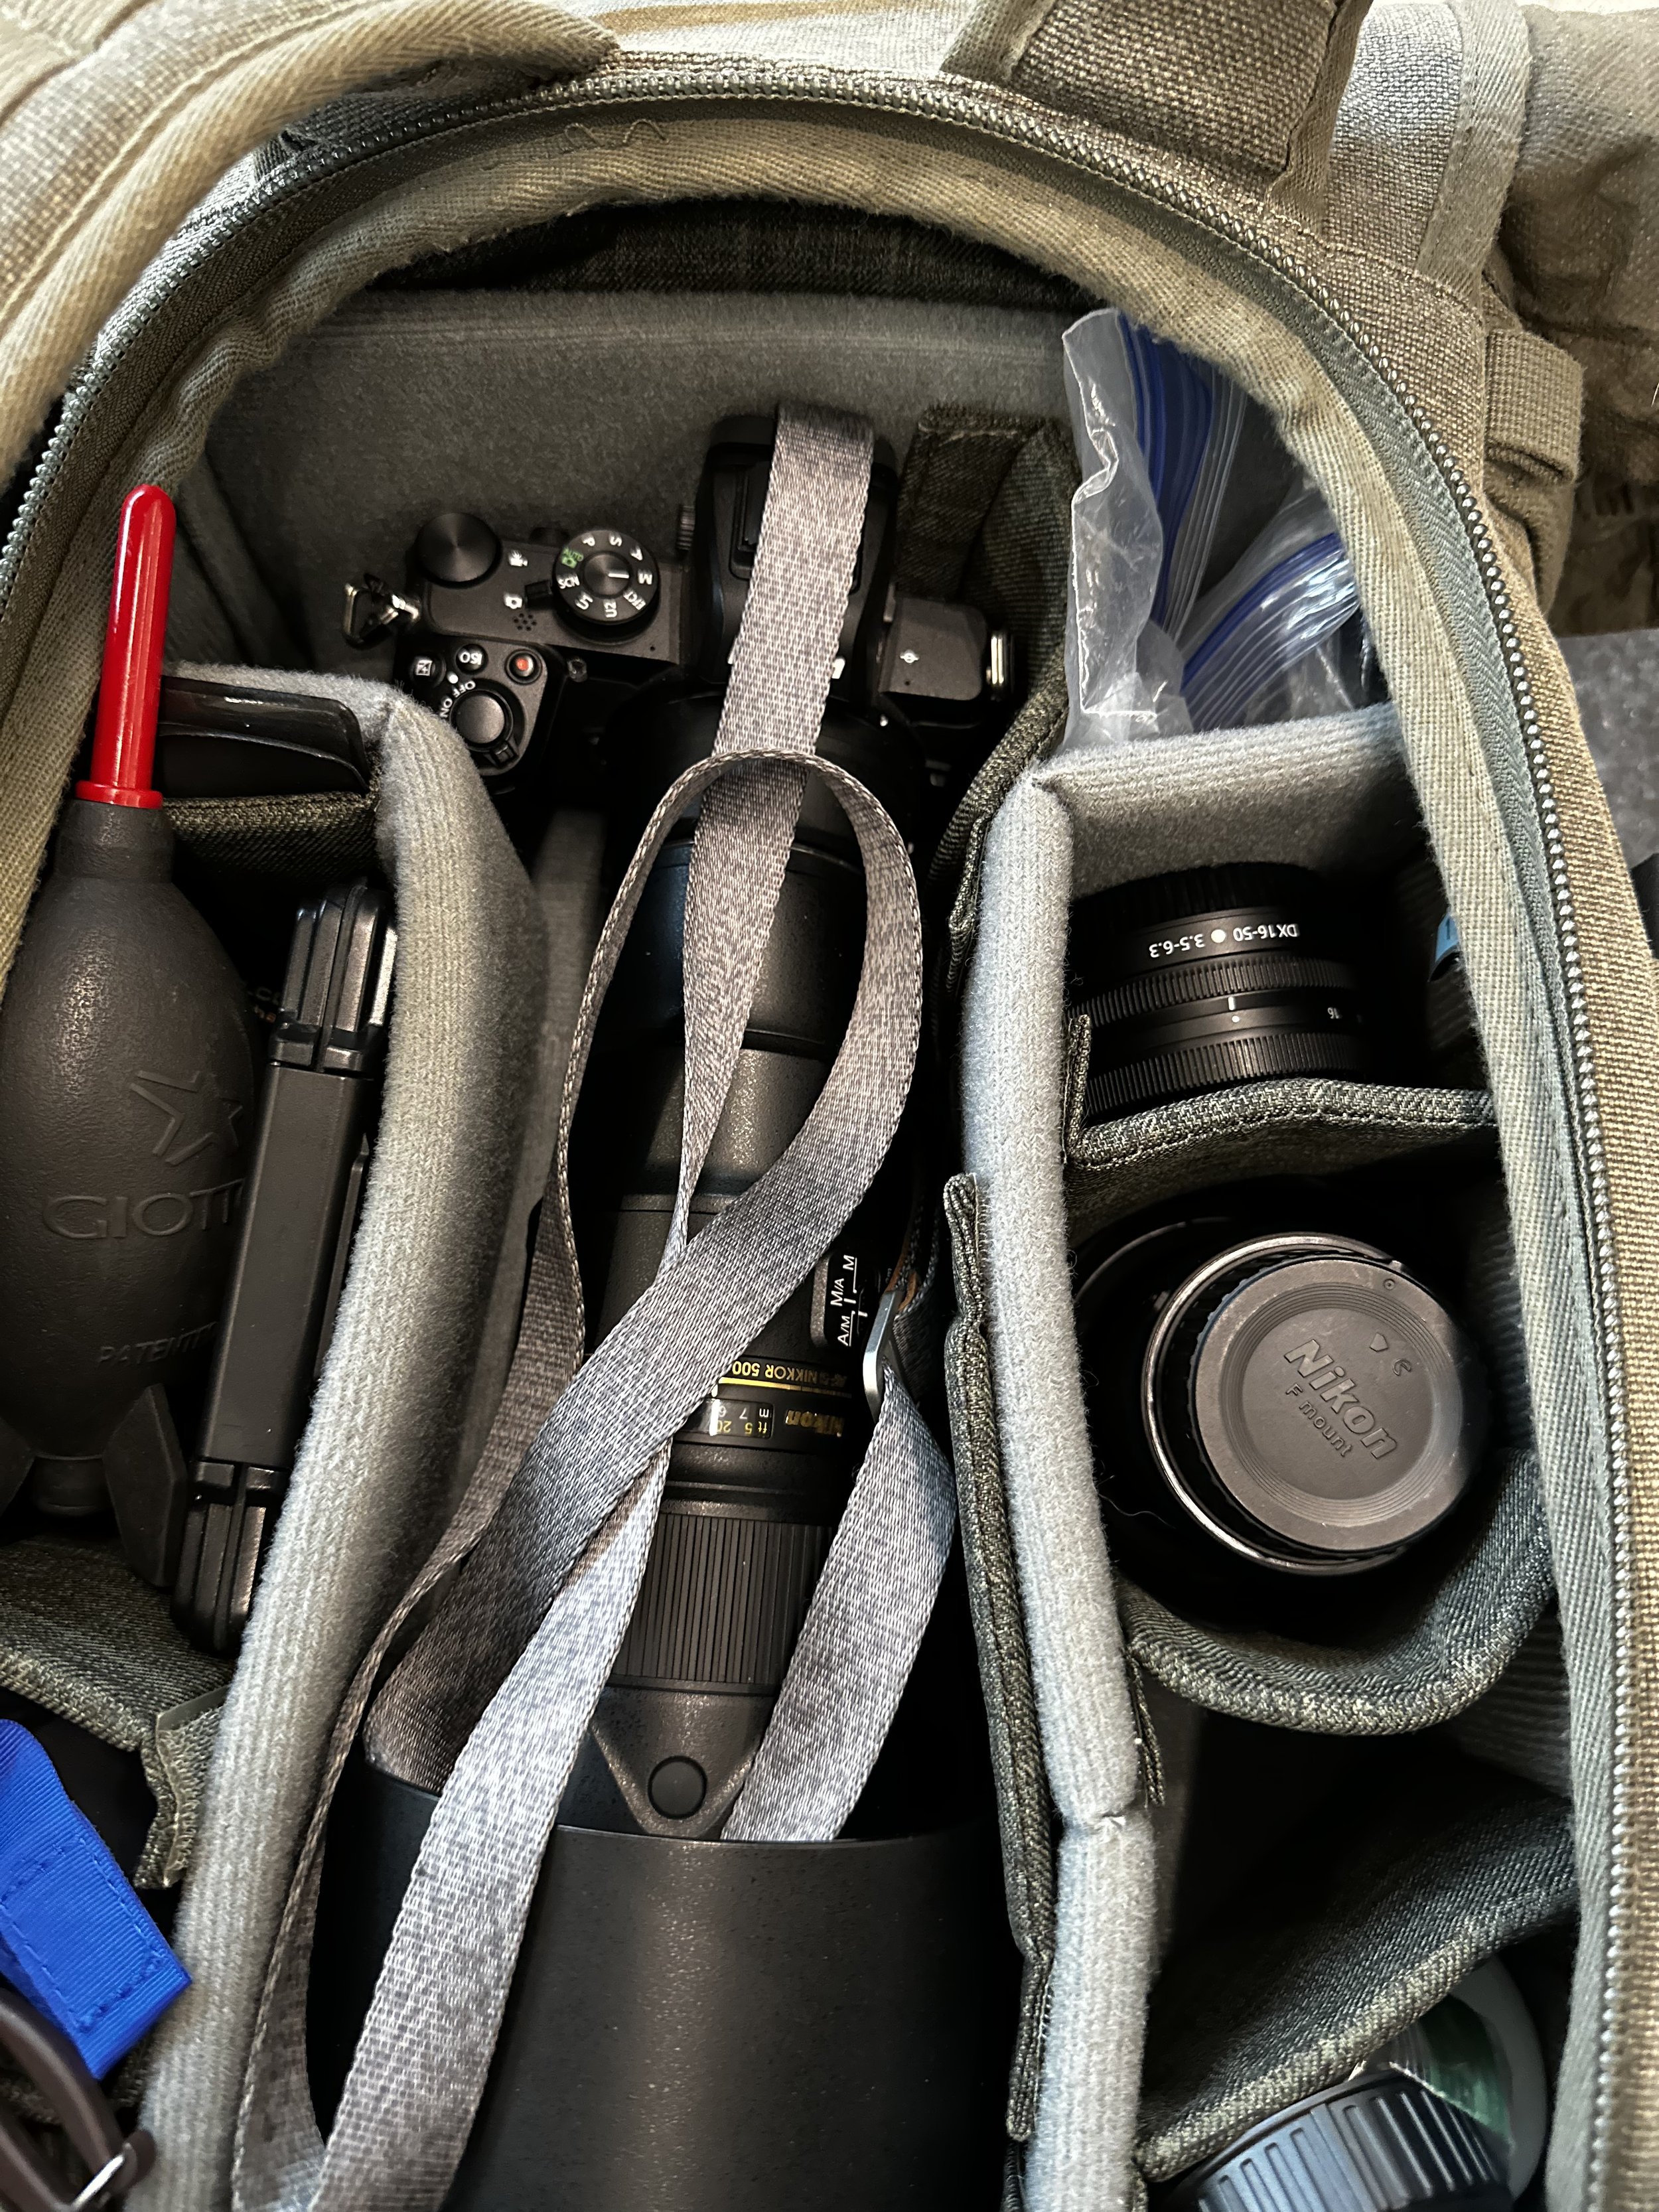
Current travel load out, Z50, 500mm PF, 16-50mm Z Kit, and 10-20mm F mount Nikkor/FTZ adapter.
Well, I finally figured out that the smaller pack was the way to go, but it really didn’t have room for the big wildlife rig I liked to use… It also had one other critical shortcoming that I noticed from regular use. The pack opened to the top when unzipped. What this means is you take off the pack and lay the side that normally sits against your back, on the ground facing down to access the gear area. At this point, I was doing a great deal of photowalks and hikes to waterfalls and such and this caused lots of dirt on the back of my shirt… To say this was frustrating is an understatement but I carried on till…

Enter the Thinktank Photo Retrospective 15L. For my needs, this is as close to perfect for a camera bag as I have ever found. It opens from the back, the side against my body which means you lay to outside one the ground, keeping all the leaves, twigs and dirt off of my shirt. It is slightly larger (15 liters in size) so there is room for my wildlife kit. It is REALLY comfortable and it is made of stone washed canvas. So it has a nice look (it doesn’t look like a nylon camera bag) and has a great feel. This is a hallmark of Thinktank Photo from what I have seen. Their backpacks are very comfortable. So now that I have landed on the perfect camera bag after almost a decade of searching, I can now shift focus to the gear I put in it.

Taken with the Nikon Z50 with the FTZ Adapter and the 500mm PF Amount lens.
The gear loadout for my photography usually involves at least two bodies, three general purpose lenses and then my special purpose lenses and all the support gear too. Like a whole cleaning kit complete with blower bulb, dry wipes, wet wipes and solution and sensor swabs… way too many batteries, like I must have thought I was going to take 10,000 photos per day or something. I never needed most of this crap either. I mean almost none of it. What I had was a case of “fill’er up” syndrome. If there was bag space I felt compelled to put something in that space for some reason. This is a terrible way to operate if I must say. You end up tired, sore and resentful of the hobby as you brought all this kit for nothing.

The Nikon Z50 with kit lens makes for a powerful little general photography kit.
So this trip, the bag is scaled WAY back. I mean, there is room in the bag for stuff and nothing is in those pockets. This is a milestone for me, as I am a prepper at heart and want to cover every conceivable contingency under my normal mindset. To be honest, I probably brought at least one lens more than I will need and could have lightened the load some more there, but we will see. So my takeaway from all this is, your hobby is a journey and you will have to figure out your kit for that hobby as you go. For me, it is still an ongoing journey to be honest. Hopefully I can stop spending tons of money on it and just enjoy it. Let’s be realistic though, probably not…Lol.