WK4DS Amateur Radio Blog
Search Posts
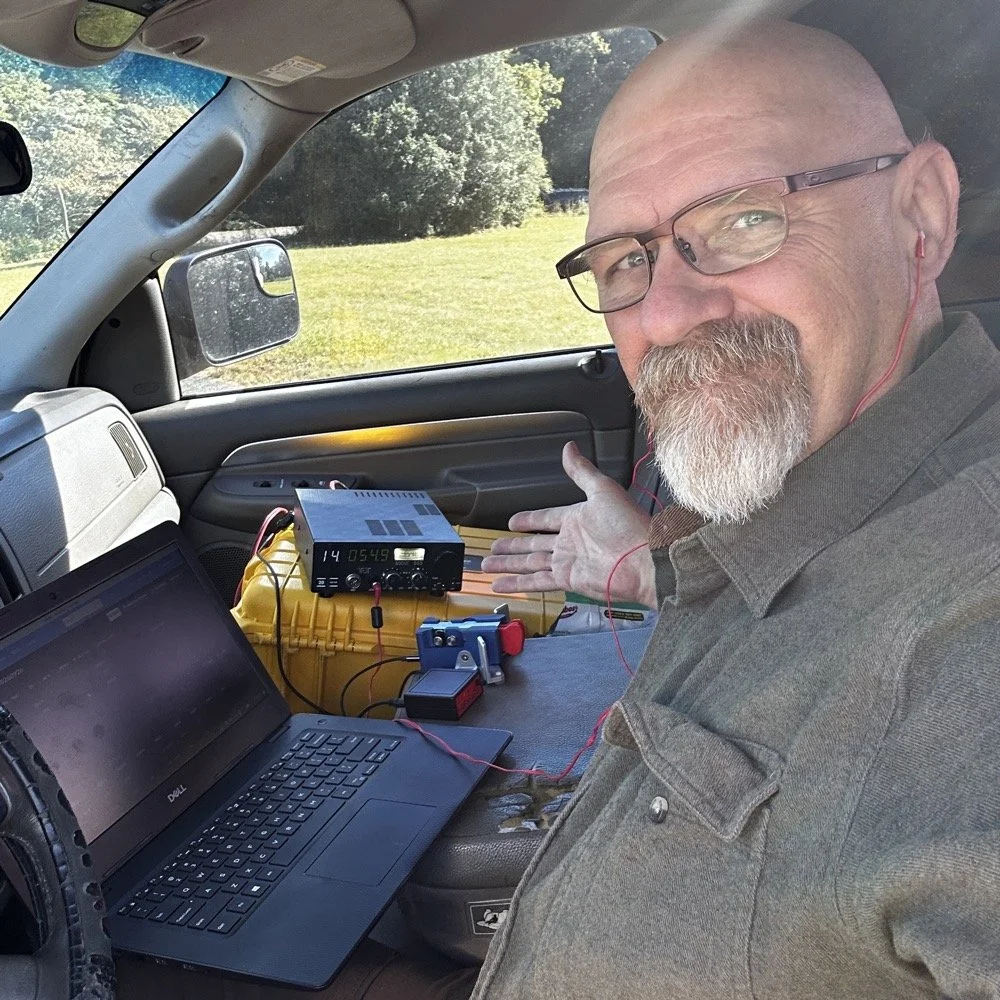
The POTA Scout is good to go!
Today finds me at Cloudland Canyon State Park again but this time on remote battery power! After testing the scout on the bench supply and finding that the radio was fine and my energy in the truck was bad. I decided to test that theory in the field.
Today finds me at Cloudland Canyon State Park again but this time on remote battery power! After testing the scout on the bench supply and finding that the radio was fine and my energy in the truck was bad. I decided to test that theory in the field.
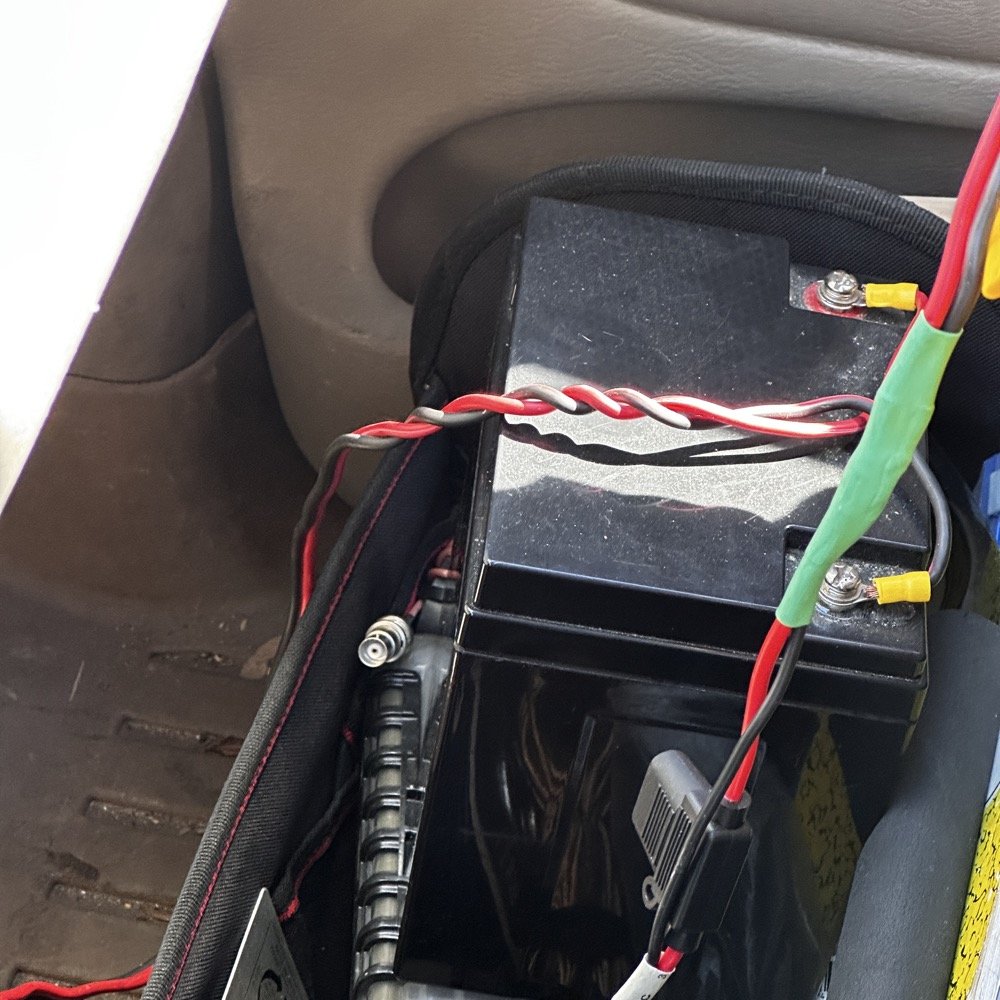
So I grabbed the 36Ah lithium iron phosphate battery I have, charged it for a while, then went to the field with it. I set up the vertical on the back of the truck as I was pressed for time today. I only had about an hour and a half to activate so I figured this would be the more expedient way of doing things.
When I got to the park, there was a few Frisbee golf players on the scene, but nothing else and it was still very quiet, which is great. Today I used a set of antenna radials that are cut slightly different in length, as I wanted to experiment with that too to see if the SWR on the antenna would change with the length of radial changes. It actually does change the SWR as the characteristic impedance to the antenna is dependent on the radial field supporting it from what I can see.
Once the antenna was set up and the radio was hooked up to power, I decided to start on 20 m and see what I could find there. It seemed like a contest was happening so I figured there would be plenty of ops on today.
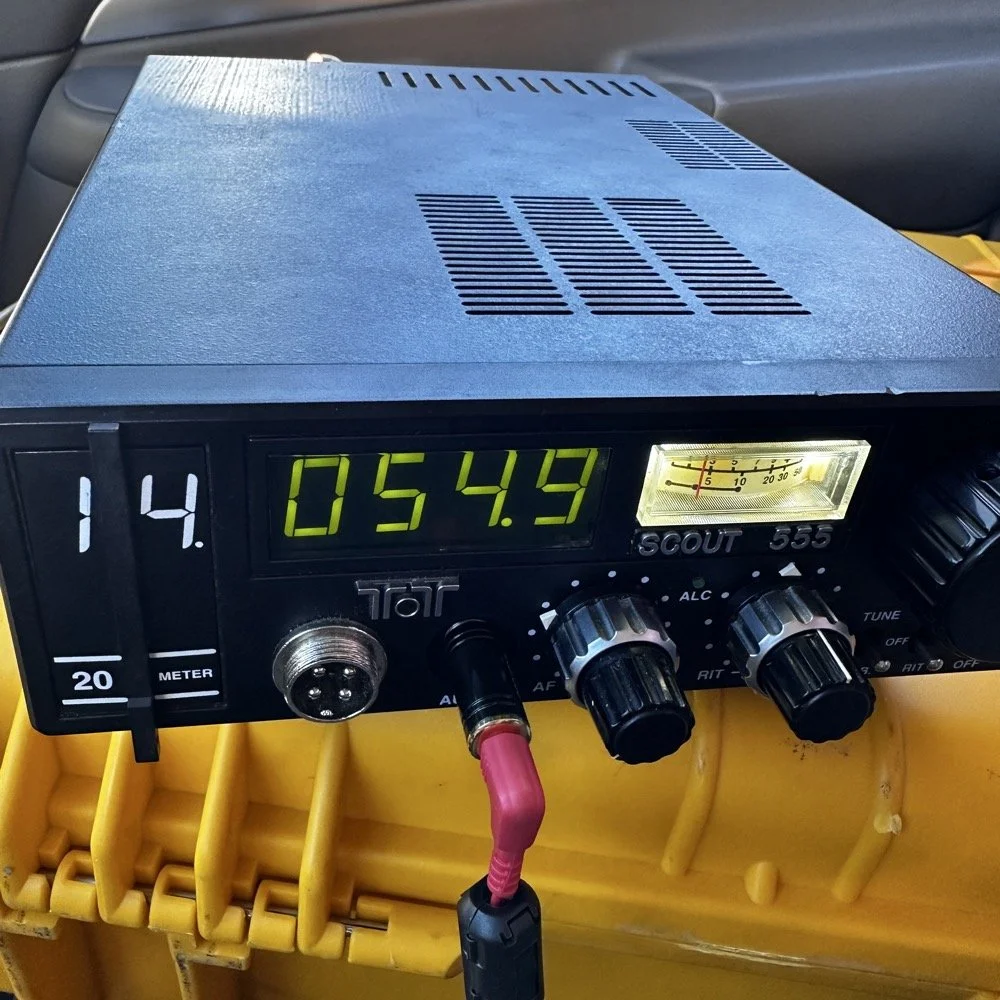
The Scout, as it turns out, works just fine as long as your power source is up to the task. Since I had tested it in the shack on the Astron RS-35M and it worked perfectly, I decided to use the battery so the radio would work like it should. This also afforded me the ability to have fun other than be frustrated over a problem with the system. Sometimes I just want to play radio and not go into diagnostic mode… So I hop on 20 meters like I mentioned and there is some sort of contest happening. I am thinking it was something to do with Germany as they would call CQ DL or something like that…I don’t remember at this point exactly. Point is that I had to find a open spot on the and and from what I was hearing when I powered up the radio, that was going to be hard. I could not have been more wrong… Turns out, that I dialed up something like 20kc and the band was a ghost town! So I find a good spot and get started. The radio shows 14.0549mhz but the radio was operating on 14.0555 in reality. The radio has automatic centering for SSB but on CW, which is where this radio shines…, it has to be adjusted off by the amount of the side tone frequency. That is supposed to be 700hz but the Scout also has another problem, it drifts a little until it is warm. Once the old girl gets warmed up, she is rock solid on frequency, but until then is will crawl up slowly and I have to keep an eye on it to keep dialing it back down over time. It is just one of the little quirks of using an older radio compared to using a new one. My sBitx never drifts because it is an SDR and the program wont let it. It doesn’t sound as good as the Scout though so there is that.
You know what else was at the operating position today? Cool weather is what! I finally didn’t have to run the air conditioner to be able to activate in peace and a little comfort! It was cool enough to start with today that I even wore a long sleeve shirt for a while…haha. As you can see in this photo, there is just what I need to work and nothing else. No spare this or that cluttering the work area. The key, keyer, radio and logging computer and that is all. A simple setup will work for me much better as I am not struggling to find things when I need them or having problems because I don’t have enough space to work.
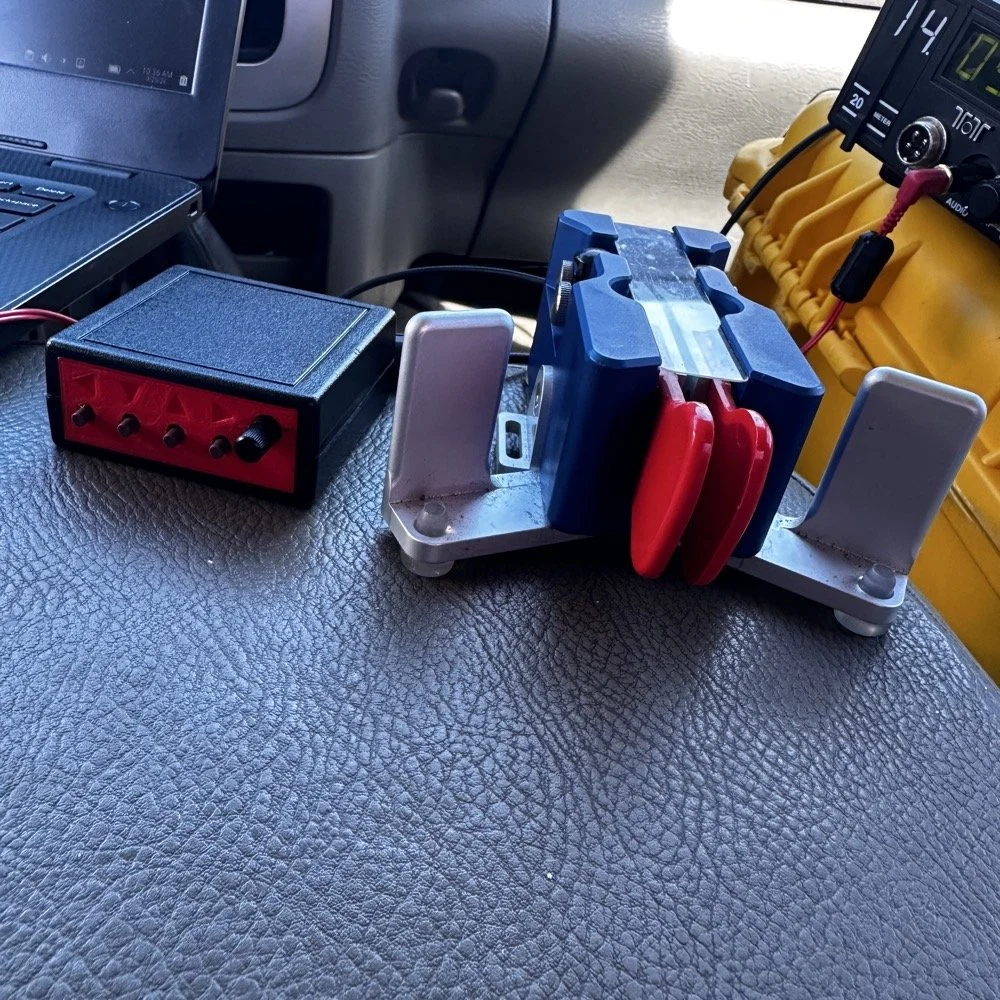
After a while, you will start to optimize your stuff for better or more conformable operating. This key/keyer layout is a result of that process. The keyer is on the left side on purpose. I can see the buttons clearly and I know what the buttons do based on their position on the keyer. Truth is I pretty much only use the first one to send CQ with and the rest almost never get used. One is setup for signing off at the end and the other two are setup for signal reports. I need to repurpose the signal report section as that idea fell apart almost immediately. I found I wanted to send reports that reflected what I heard and not just one of two common values. There was almost no time savings when using them either so those go unused. There was a time when I used the closing a good bit though. When I paper log contacts, it helps to have that little bit of time at the end to write information about the QSO so I use that one when paper logging. Computer logging is instantaneous so it doesn’t have the same need as a paper log book does.
I also us HAMRS to this day for my logging. When I log FT8 contacts, I just key them in manually. I don’t have an integrated software based log to auto-log them and then integrate them into my conventional contacts as well. This leaves me to keying them in by hand later. This really isn’t too bad though and I don’t have hundreds of contacts to worry with when I come home from a park. My log MIGHT have 100 total QSOs if I have an exceptional day out. I think I have broken 100 contacts 2 or 3 times total. FT8 will never be 100 contacts either since I am using the sBitx and it takes time to get a contact in the log with that radio. So I will just sit down at the table and build the log out right quick. If I am computer logging in the park, then I enter them in real time as the radio finishes the QSO. Paper logs are the only reason I have to do it at home now. Back to what I started out explaining here…the CW paddle is on the right as this puts it a little further from my torso as I have long arms and also makes it easier to see the keyer. I also like having a nice key to use when I work parks. I hear people talk about how they don’t want to take their nice key to the field, I am the opposite. I have taken my hand made, custom, one-of-a-kind CW paddles out to the parks numerous times over the years now! I want to use my good paddles. I recommend you do it as well, just pack them well for travel so they don’t get damaged. That was what drew me to the Begali Traveler, the legs fold to protect the handles. On top of that feature, I also store the paddle in a foam lined hardshell case. You can see the case in the photo below.
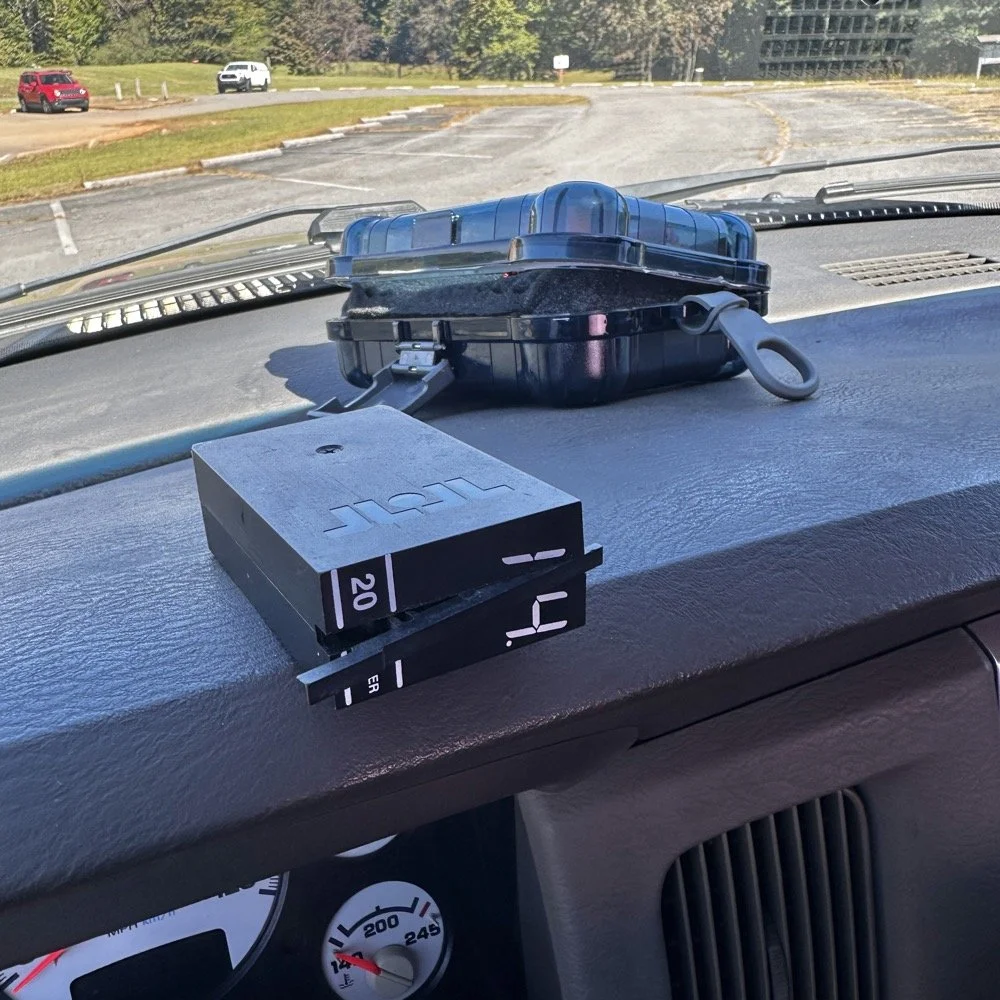
The 20 meter band module was the work horse today, pulling in the lions share of the contacts! I also ran a while on 15 meters and made over half a dozen contacts there as well. 15 meters affords me contacts on the west coast and the desert states. I made contacts with California, Washington, Arizona, and New Mexico today not to mention several in British Columbia as well as nabbing Puerto Rico today too! That is the magic of 15 meters for me when the band opens. I am normally too late in the morning to run 40 meters so I don’t get any local stations like Tennessee or Alabama, but 20 meters will normally net me as close as Texas, south Florida and Kentucky and further. I will occasionally get a local ham on ground wave or line of sight, but it is actually kinda rare. Today saw 34 QSOs come into the log, wit hone dupe, so 33 counted towards my goals. This was also my 240th activation at US-2169 as well! I am currently working towards 10,000 QSOs at this park and I am almost to 8,000 now. So it should happen by the end of next year if I have it my way. 34 QSOs is a good day for me most of the time. The days I get 100 in the log are the days where I spend almost the entire afternoon at the park and the bands are hopping… So if you are a casual operator like me, don’t expect a kilo in one sitting. That kind of performance takes a lot more dedication and skill than what I have. For me, getting a kilo in 20 activations is the norm…haha.
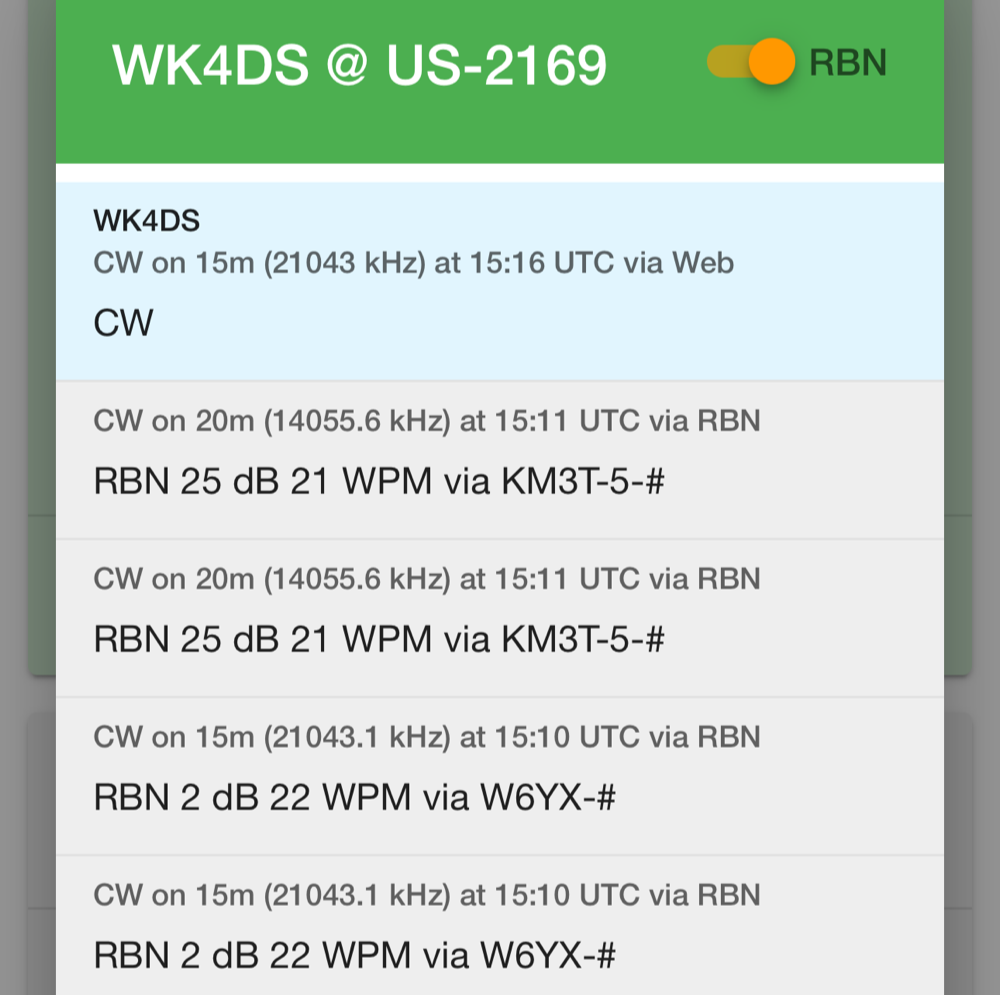
I grabbed this screen capture of the POTA spot log for my call on the POTA site today. Notice anything strange about it? To the casual or uninformed observer, nothing looks out of place. I personally know though that I didn’t hop up on 20 meters once I moved to 15 meters then right back to 15 meters. You see, the antenna takes too long to adjust and I loathe making those adjustments when I could be on the air. So I normally don’t go back to a band I left, but will instead go on to another band I have not used yet. It is a rare occasion for me to go back to 20 meters once I leave it. This was a glitch in the website somehow. I had spotted on 15 meters, then the RBN spotted me many times there, then out of no where the RBN moves me back to 20 meters for some reason! Notice that isn’t someone maliciously spotting me somewhere else to throw off the hunters, it is the RBN glitching out for some reason. I manually re-spotted myself again and it went back, but that was really odd. I don’t think it was a pirate either as those numbers look like what the numbers were when I was on 20 meters, I really believe the RBN simply had a bug in it today, but it is worth checking your spot if you are getting zero calls after a few minutes of calling CQ.
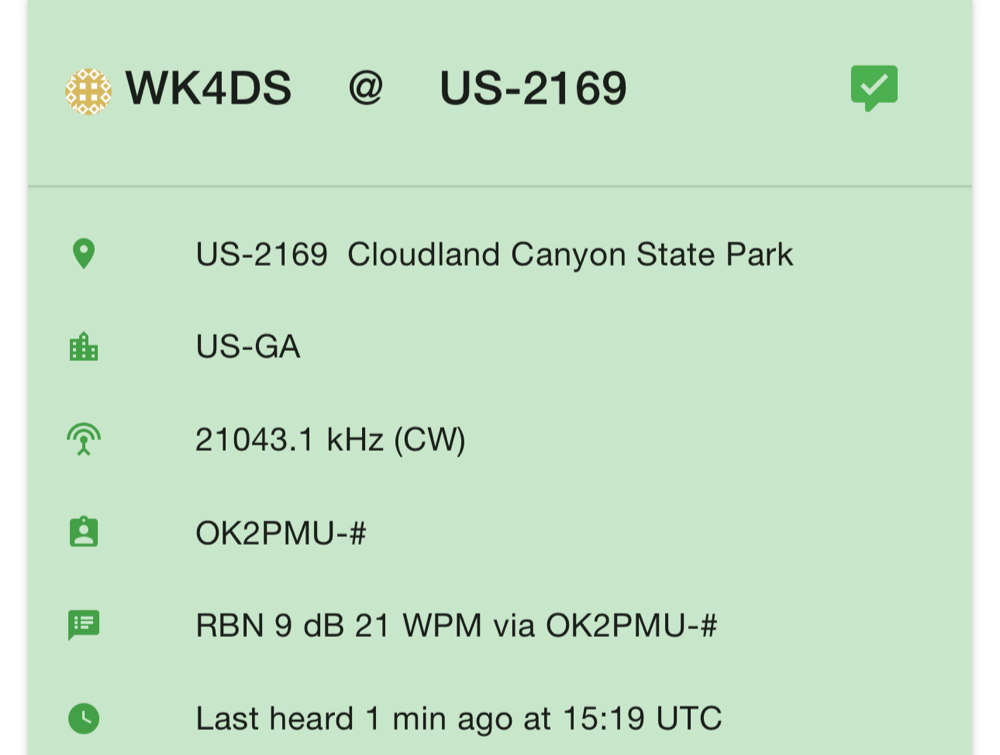
Last thing I noticed today that I want to discuss. This is the perfect example of why I say to go to the higher bands and just give it a try. This is the RBN (Revers Beacon Network) showing me that my CQs were being picked up in the Czech Republic almost 5000 miles away with a signal strength of 9dB. That ain’t bad! That also tells me that I could be heard in the UK, the Netherlands, Germany (this explains why I was hearing that German contest so well) probably a lot more of eastern Europe too. This is kinda cool with a 50 watt TenTec Scout 555 portable HF radio with minimal features. Just take a look at the map below to get a better idea of the distance to that listening station.
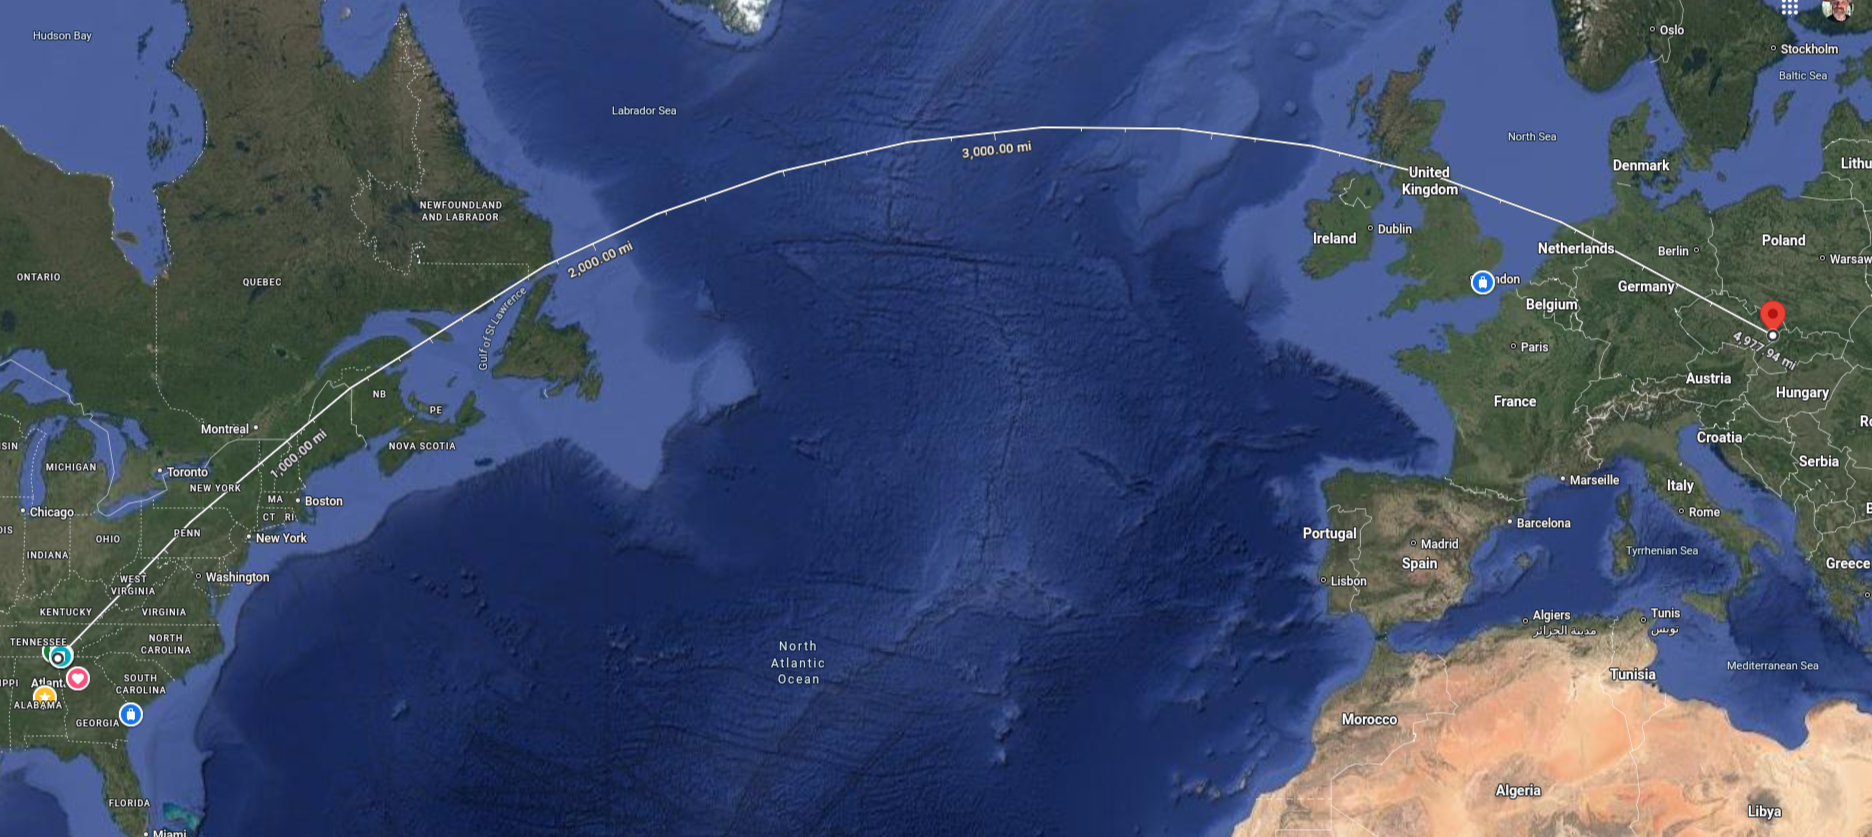
Screen capture of Google Maps showing the path to get to the listening post in the Czech Republic
All in all it was a great day at the park even if I had to wrap up in a shorter time that what I would have liked. I also liked paying attention to the little details and learning some new things like this beacon report and what it tells me about 15 meters on a day when the band is supposed to not be great…
73
WK4DS-David
POTA tip for a CW op…
Just scroll down a couple of posts to see my thoughts on this new release. I setup on 15 meters first as it looked like it was doing well. I only got one CW and one FT8 contact on that band! Well, deflated by this reailty check, I went to 20 meters to get the activation locked in before I wandered off to the higher bands to play. Well, even 20 meters was not that great, I finally got the ten I needed to lock n the activation while there, but it took a while. A lot longer than it normally takes me to land 10 contacts from Georgia, that is for sure.
Today I activated US-2169 with my trusty TenTec Scout 555 using CW and realized I needed to share a “trick” I use every time I go out…almost. But first I wanted to share an update with the shack…
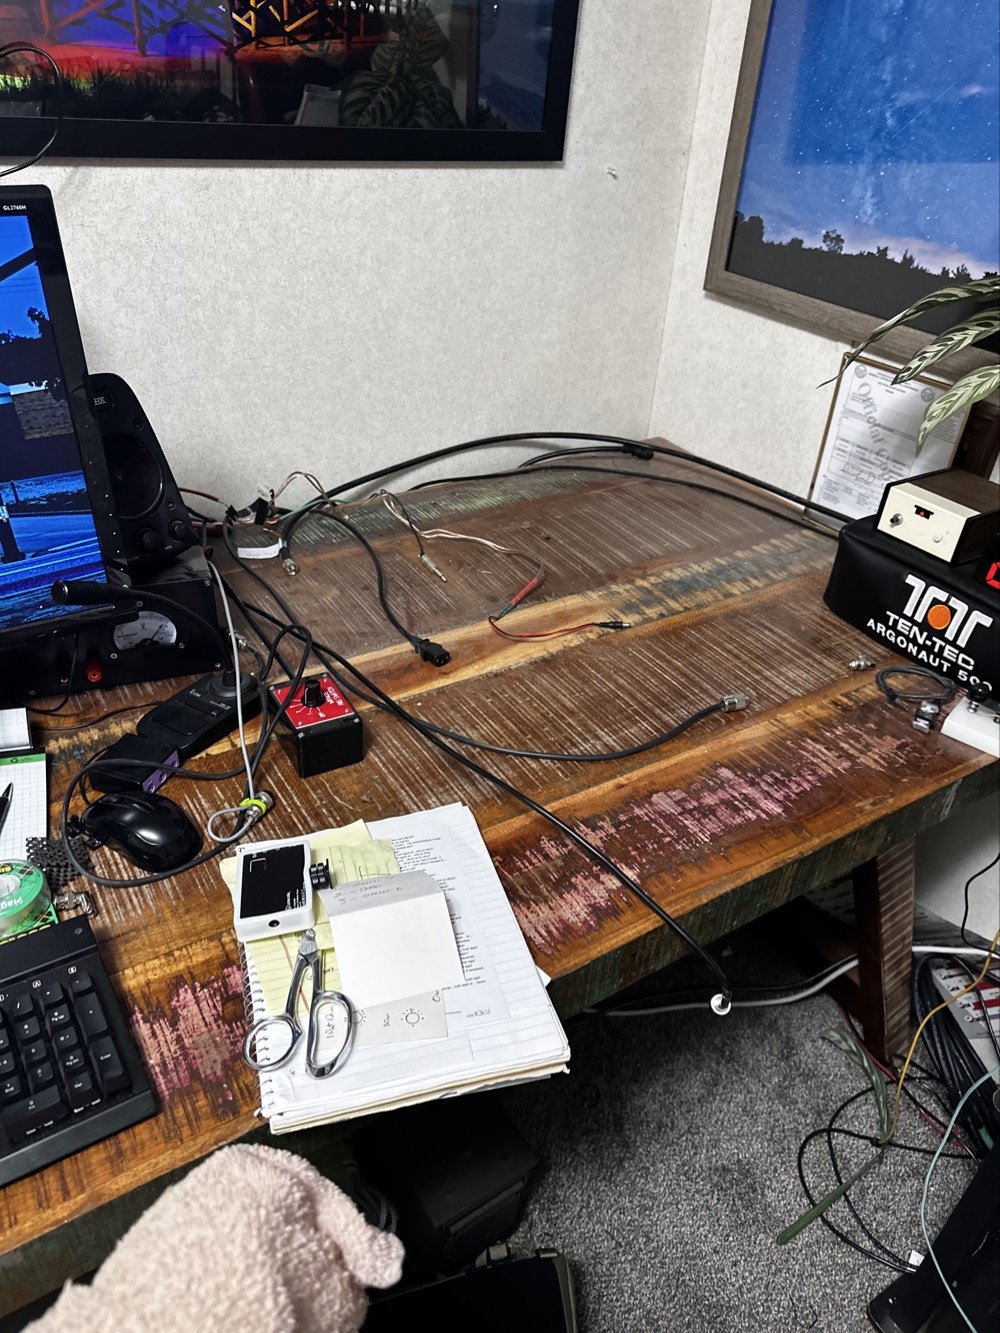
So, to lead off, my “hunter” station finally went through an update. I tore out the entire system to get the TenTec Omni 6+ station out as it needs some service.
This took three days to get it broken down, sorted and separated and finally reassembled without the Omni 6+ station so it can goto the Radiosmith for repairs. I was going to just sell it for parts, but since posting about it I have had several Hams email me about what is probably the problem. This isnt near as bad as I first thought so I will hopefully be able to use it soon.
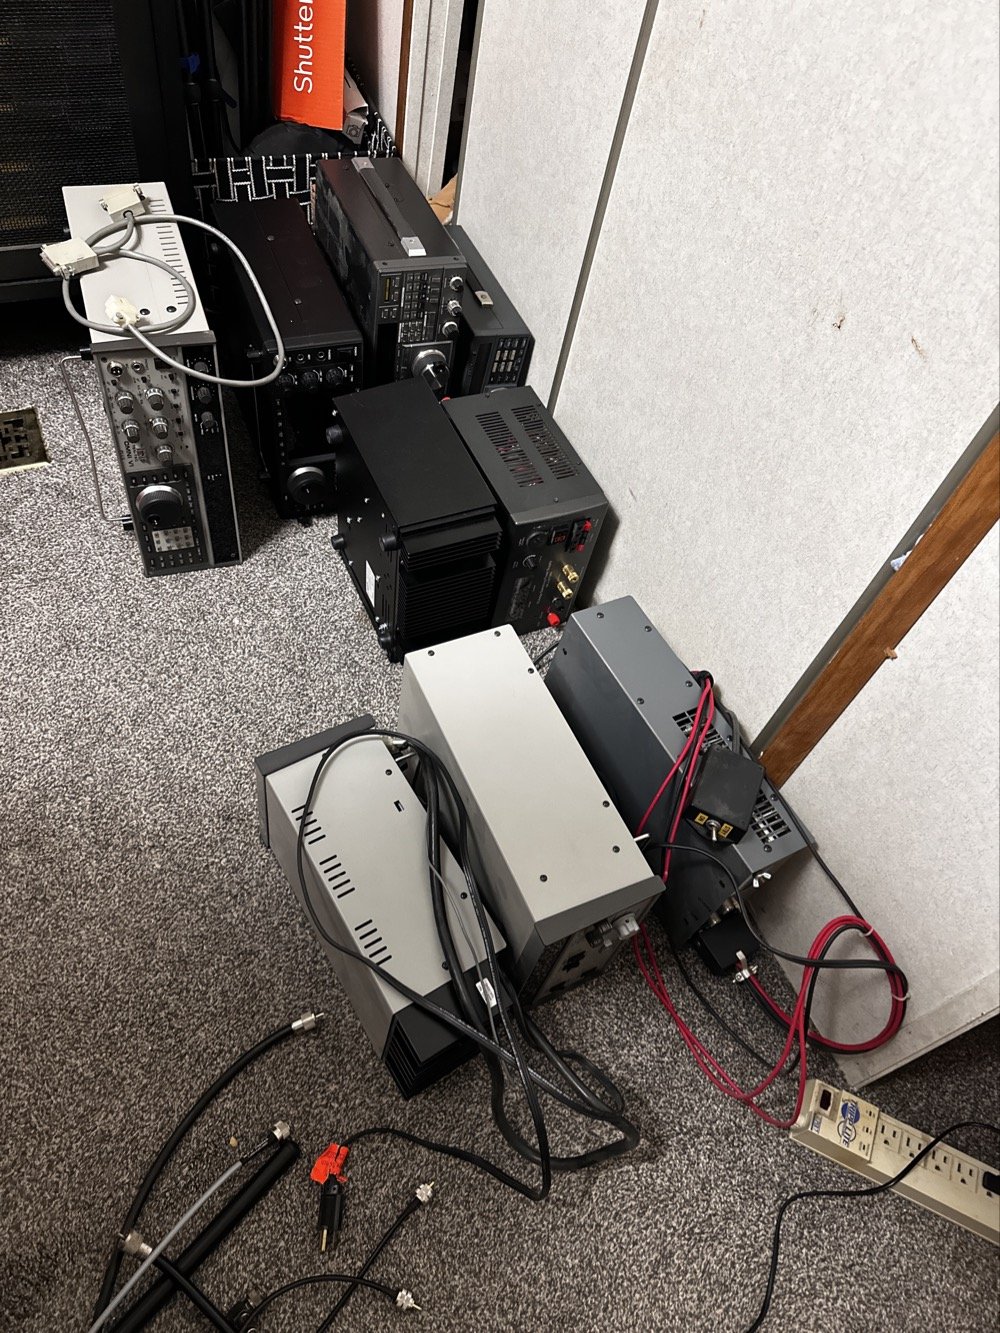
This is what it looks like to break down a normal ham shack so you can remove a part THAT IS ON THE BOTTOM! Haha. It figures that the bottom radio would be the one to fail on me first. It was during this transition that I had the Yaesu FT-736 go down too. Coincidentally at this exact time…. Hmmm.
Here is a link to a short video about what I found, Link to video: https://youtube.com/shorts/pQbP4yRiXAg?is=4TWSAL9qMet0UAhd
The long and short of it is that I did some troubleshooting with my oscilloscope and found that I had audio coming into the audio processing board at a low level but the board was essentially dead. The audio amplifier IC only had .556 volts instead of 13.8vdc which is what it was supposed to be… So I tore the radio apart and had trouble with the connectors on the board. The connectors were really tight and I was chewing them up to get them to release. Instead of destroying it in the attempt to get it apart, I started looking at the power delivery and found that it was probably a bad solder joint or something like that. I decided to run a fresh power wire and solder it directly to the audio amp IC. I added a 1 ohm resistor as that was in the original print so it would work properly and POOF! It came back to life!
Once this repair was done, I was able to reassemble the stack and get the radios back on the air.
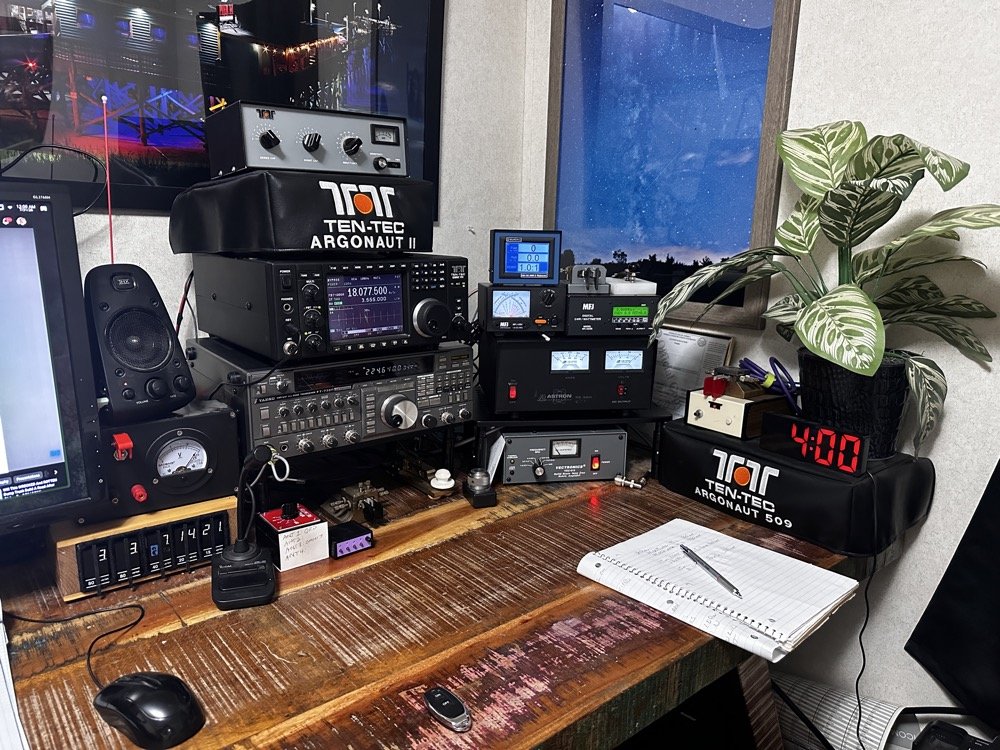
This is what the station looks like right now. Once the Omni 6+ is out of the shop and back in operation, I plan to sell the Omni 7 as I really want an Elecraft rig in the shack. I am thinking a K3 or K3S, but I am without an Elecraft radio at this time and that bothers me a little. I like the Omni 7 but it just doesnt scratch the itch for me like the Omni 6+ does. You can also see the Scout 555 band modules in this photo, I finally got the holder out an added to the shack for those too. Look at all that space that I have now, thanks to a tip from KG4WBI about some adjustable stands, I was able to elevate the radios and that allowed me to store the CW gear underneath them…
On to the park activation!
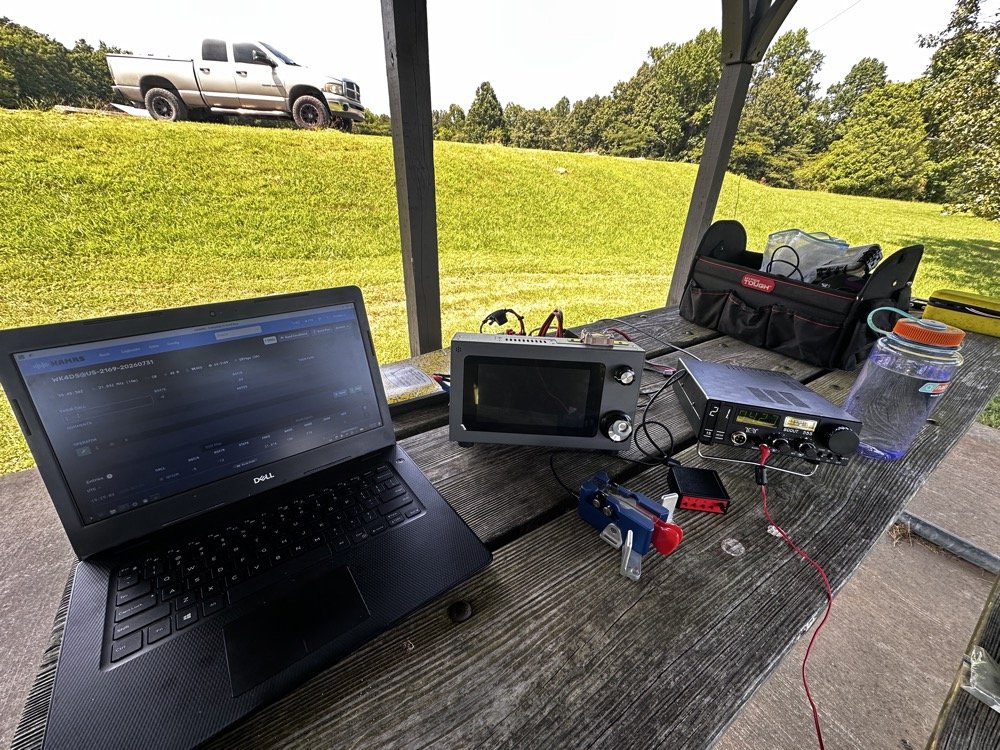
Today, I chose to operate on just two modes, but. I wanted to run 5 bands. this can be accomplished with just one of the radios I used, the sBitx, but I love using my TenTec Scout 555 for CW so I brought it out for that mode. The sBitx is a joy to use on FT8 now and JJ’s crew has it working even better on the current release of the software package.
Just scroll down a couple of posts to see my thoughts on this new release. I setup on 15 meters first as it looked like it was doing well. I only got one CW and one FT8 contact on that band! Well, deflated by this reailty check, I went to 20 meters to get the activation locked in before I wandered off to the higher bands to play. Well, even 20 meters was not that great, I finally got the ten I needed to lock n the activation while there, but it took a while. A lot longer than it normally takes me to land 10 contacts from Georgia, that is for sure.
After that I moved up to 12 meters where I worked quite a few DX stations as well as several US ops on FT8. I dont remember if I worked anyone on CW, I really dont think I did, maybe one… The bulk of the QSOs was on FT8, I finally decided to give 10 meters a shot… this went really bad. I think I made one contact on 10 meters before I gave up and went to 17 meters to see what I could do. I worked a few stations there and finally called it quits after about 2 hours with 23 calls in the log.
I have absolutely fallen in love with these silly little radios. They make such great CW machines! They also work pretty good for SSB too but I dont use that very often. I think this was a great idea from TenTec and I for one am glad to be able to have a few of these radios.
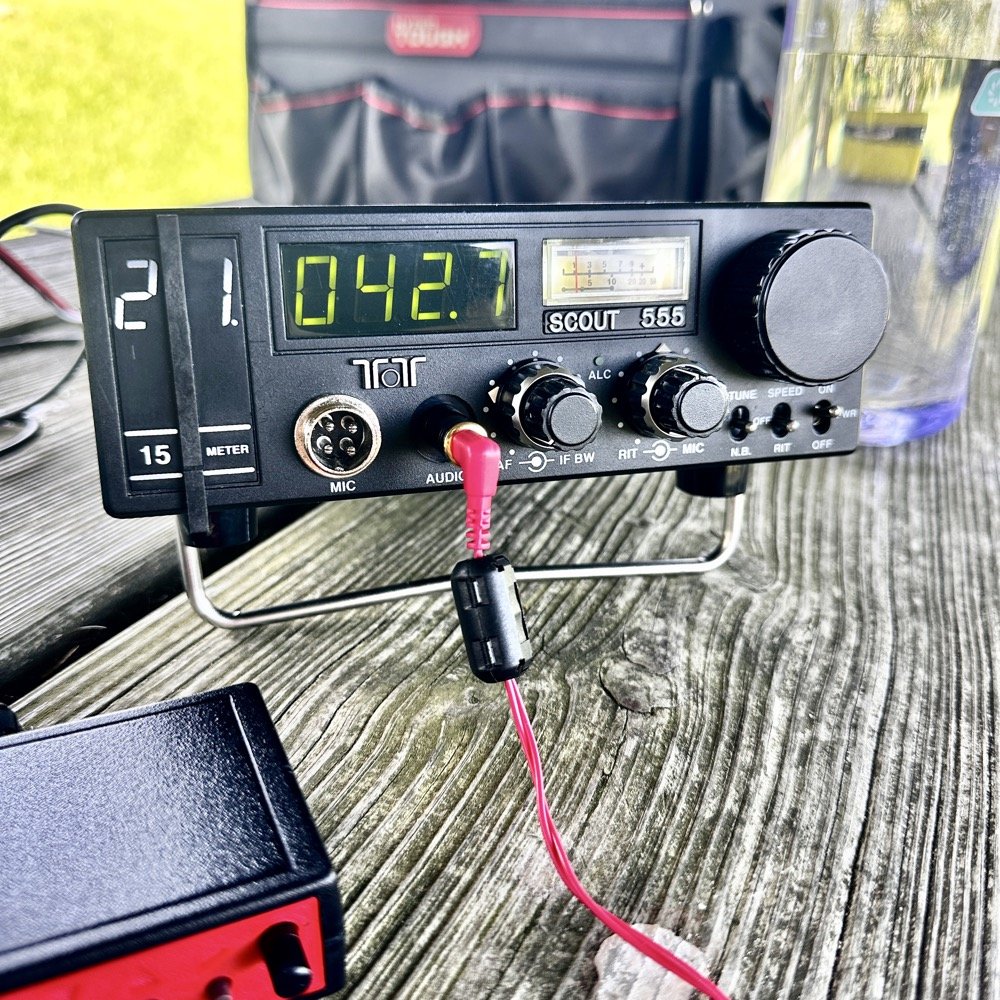
They do have a fault at this age though. The audio from the speaker is not great for weak signals. All of my Scouts exhibit the same issue. There is a low level “whine” on the audio. Something inside the radio is adding this noise. The answer for this is simple…ear buds and minimum volume. That is my trick. Use earbuds and turn the volume way down… This is an old trick I was taught years ago to be able to hear weak signal CW…….
Could I tear into the radio and find the problem in the radio audio chain? Yeah…is the juice worth the squeeze? Not really when I can use this trick instead. Ear buds work better than headphones as they require a much lower level of power. What happens is the internal radio noise is not amplified in the later audio chain when you do this. It is really neat how the signal will just float to the surface as you get the volume just right. It acts almost like a rf gain of sorts. There is a sweet spot as minimum volume will just show you the audio noise in the radio. But it you look at the volume knob in the above photo, you can see where I was running it at. I also find that if you open up the Jones filter a little, weak signals will get louder too. You can see where I run this adjustment as well in the photo above.
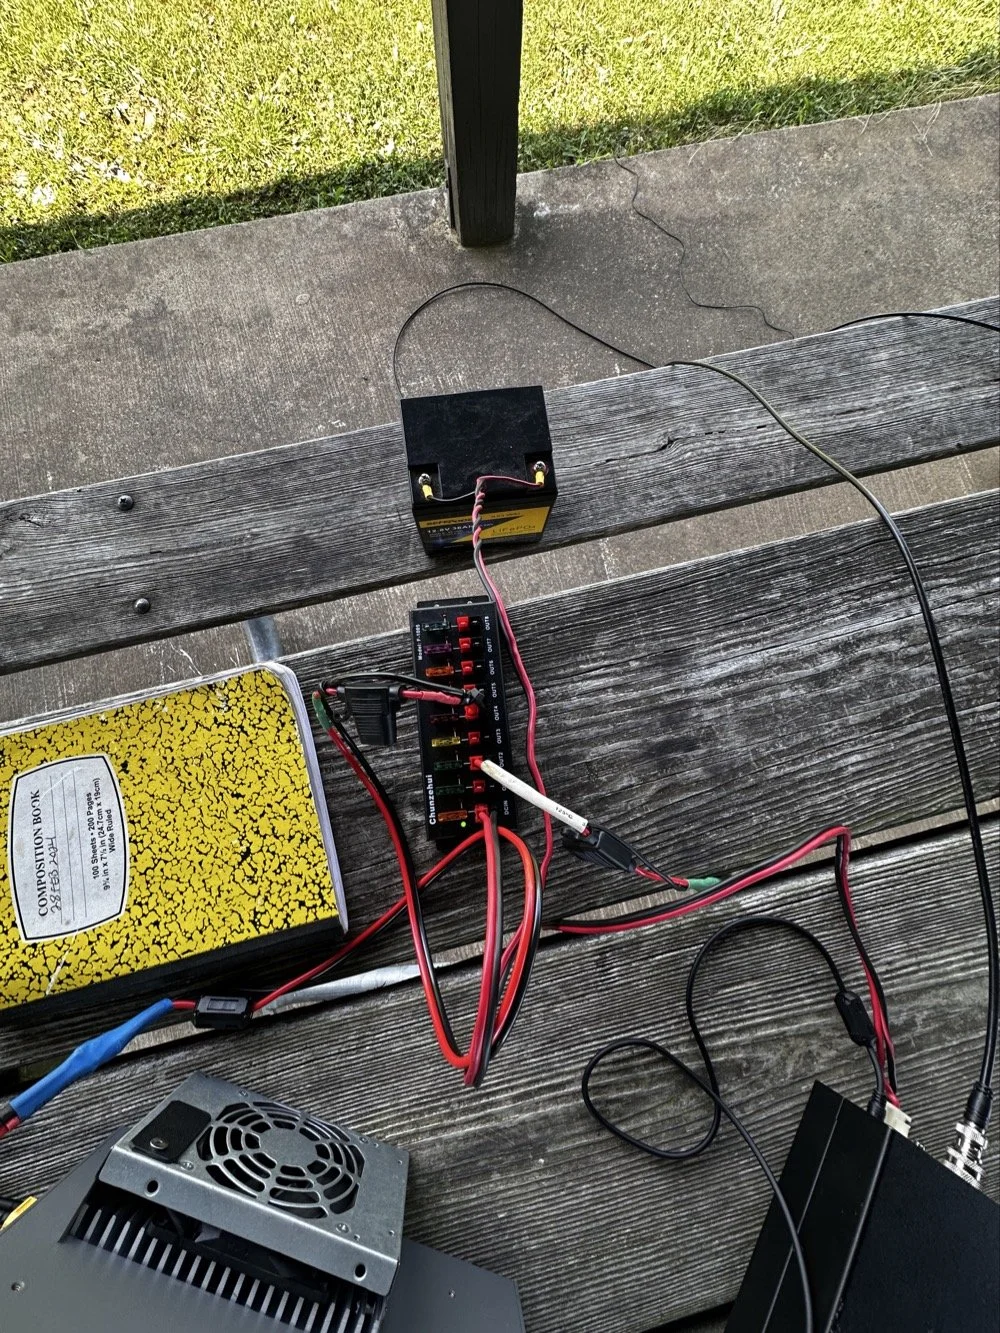
These two photos show the power system and the antenna matching system. The power was delivered via a 36aH LiFeP battery from Amazon, which is plenty of power for a radio running 40 watts. Like 4 hours of constant transmit levels of energy. All day for normal operation…
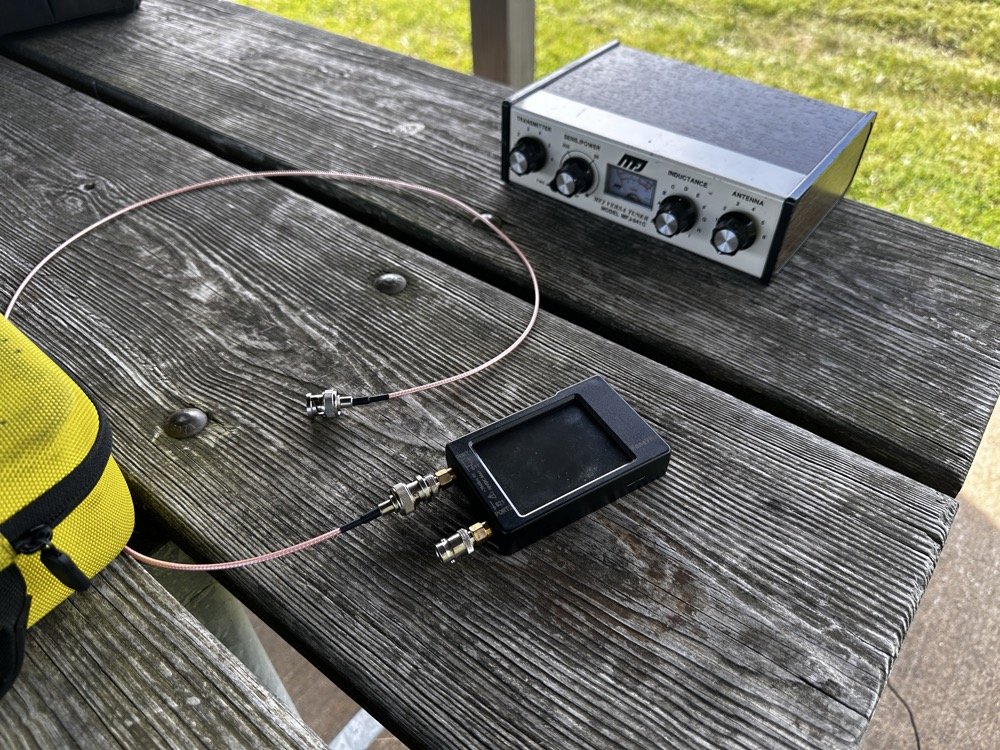
The antenna tuner is the MFJ941 as it has connections for a wire antenna built into it. I like this tuner as it will match a pretty bad antenna to your radio pretty easily. I use the nanoVNA to set the tuner and just plug the radio back into it when I get the trace happy on the VNA. These things are the best antenna analyzers on the market in my opinion. I can buy litearlly a half a dozen of these instruments for the cost of one commercial antenna analyzer. Not to mention they willl do many more things that a analyzer will not do…lots of things.
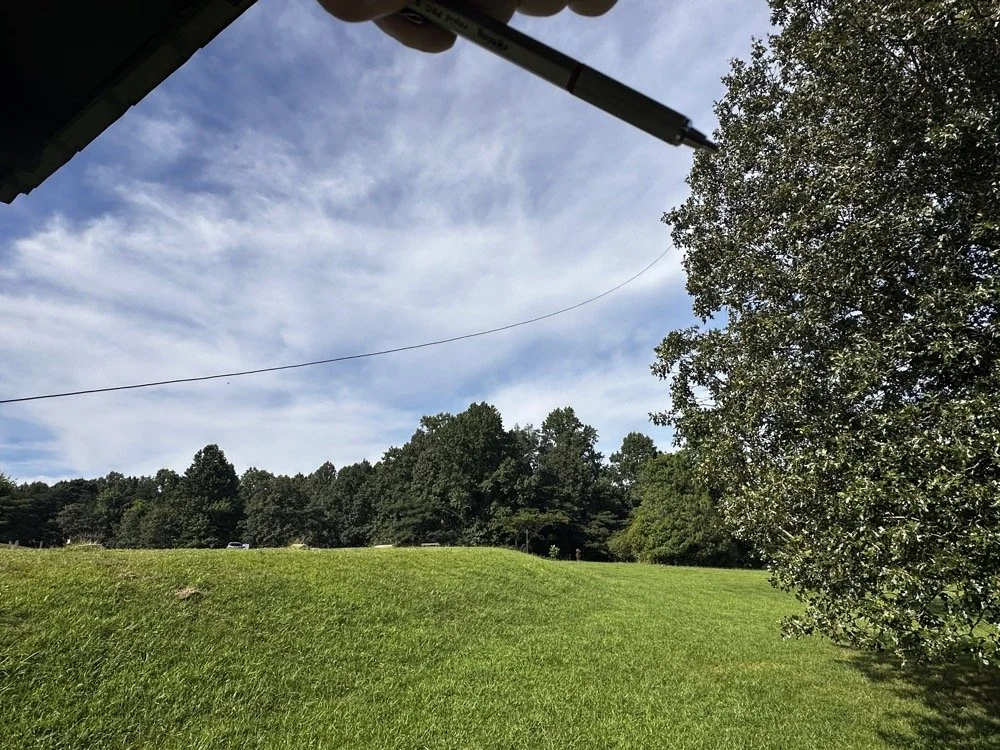
Below shows the antenna and I am pointing out where it is attached to the tree. The top of the wire is probably 25’ off the ground and comes down to the corner of the pavilion at about 7’ above grade. This worked well today but I have no idea what the radiation lobes look like. Since the wire is 41’ long, it has to be crazy on 12 and 10 meters but I was able to make some contacts so it was good enough. I like running wire antennas when I can, they seem to pull in weak signals better than my telescoping vertical.
The next two photos show the display of the sBitx running version 5.4 software. There is alot of data, but it isnt too much. I am running the native FT8 application here and the bottom photo shows me working PU7MJD in Brazil on 12 meters. This is why I wanted this radio. When the other modes are dead (no one was running CW on 12 meters) then I can still work someone.
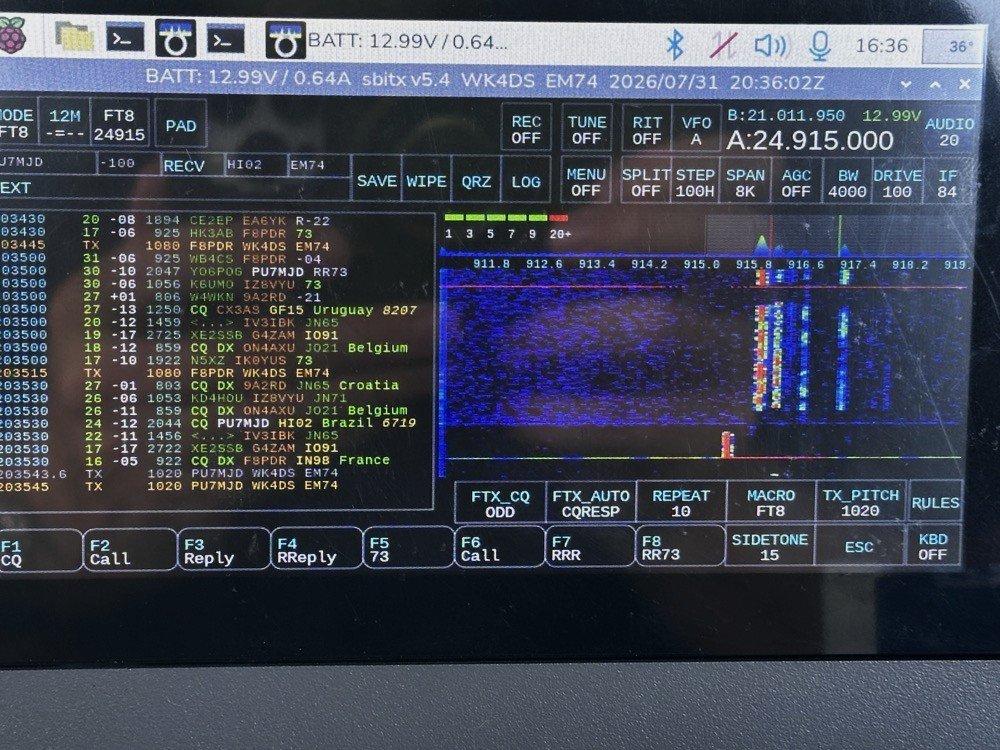
The color coding of the display is great and easy to use!
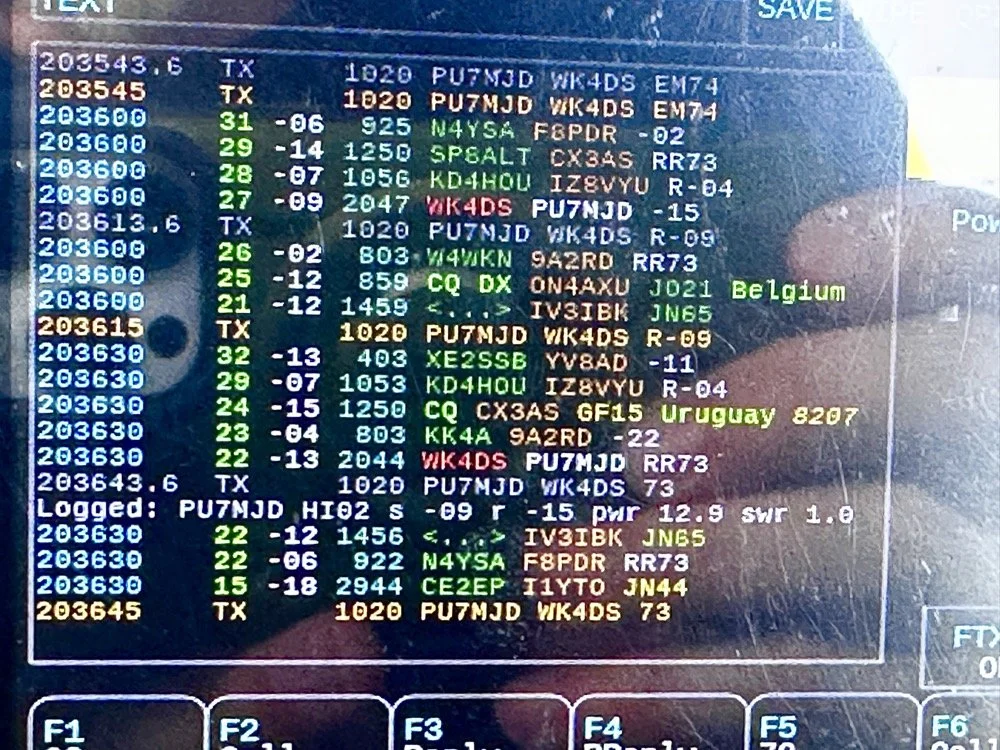
After a couple of hours of operating, I called it quits for the day and packed up. These are the kinds of activations that I actually enjoy. There was no pile ups today and I made over 20 QSOs too. FT8 is an easy mode to use on the sBitx and allows me to do things like get photos for my blog while it sends CQ and such. I still like to drive the radio though so I dont just let it run free. I need to test the CW keying on my next outing to see how much it also improved.
You can help support this channel by using these Amazon Affiliate Links as well:
QRP/Portable Radios:
Antennas & Tuning:
CW Equipment:
Power & Accessories:
Organization & Transport:
BONUS ITEMS (Optional 16-20):
Until next time…73,
David
WK4DS
UPDATE - sBitx V3 with Firmware version 5.4
So the dev team working on the sBitx software suite (unpaid I might add so I suggest you drop in on them and give them a donation for all this time and enegry they have put into this for the community) has dropped ther latest version of the sBitx SDR firmware and it is version 5.4 and let me tell you, this is incredible!
Highlights of the new firmware for the sBitx Software Defined Radio
This is taken directly from the drexjj GitHub repo page so I dont get something wrong. Goto this link to see more about this project and to help support the team.
Here is the list for JUST THIS RELEASE!
v5.4
New Features:
sBitx IQ improvements
enhanced VFO, complex mixing and down-converting
improved processing of I and Q data in the sBitx receiving pipeline
AGC function and AM detector changes to work in updated pipeline
FM Mode and Squelch
Added FM mode and squelch control for use on 10M and transnverters
Text console can scroll back to view and work with up to 500 lines of history, in all modes
Added support for Touch Display 2 and larger displays
Makes it easier to touch and see the buttons on a Touch Display 2 or external display
New file is read upon sbitx startup called display_settings.ini where you can set the display type or resolution
display_type=1 is for the original, older 7 inch touch display
display_type=2 is for the newer 7 inch touch display
ui_scale can be changed for use with a larger display
Added styles option to customize the sBitx application.
Text size, font, color, and types are now supported.
Styles templates are stored in the data folder as tpl files.
If there is a file named user_style.tpl in the sbitx data folder, then it will load it on sbitx startup.
If the user_style.tpl file is not found then it will load default_style.tpl if it is present.
If none of these files are located, then it will load the factory style we are all used to.
There are sample styles in the data folder that can be loaded. Just have to rename one of them to user_style.tpl
Added mode_bal to hw_settings.ini to balance LSB and CWR to USB and CW.
0.8 is a reasonable value.
Also harmonized filter band edges.
removed old ssb_val
Controlled Envelope Single Sideband (CESSB)
enable via the button in menu 1 or the 'cessb on' command
Added Tune function to FTx modes
Added NBFM mode with CTCSS and Squelch
Added squelch control to AM mode
Added option to use USB audio devices for sound routing (speaker/phones and mic input)
The options are in the Set dialog box in Menu 1
Added Out-Of-Band and license class indicators
Shows color strips or shading for bands edges and US license class
Each file can be customized outside the USA
More details and instructions in the oob_limits files in the data folder
Added ALC power limits by band, if RF power exceeds limit it is folded back to limit
Default is off until a limit is set in hw_settings.ini by adding line max_watts=nn to band data after f_stop
When activated message is given in spectrum between Power and VSWR
Power reduction is released when RF power drops below bamd limit
Added swrsweep
usage: select a band then either
enter cmd swrsweep n, n where n is the number of sample frequencies or
in menu 1 set SWRSTEP to the number of samples and click on SWRSWP
uses TNPWR to sample vswr at the n sample points evenly spaced between band limits
displays results in console
esc key cancels sweep
Added time out feature to SWR alert
SWR alert ends after 10 seconds without needing to first transmit with SWR less than max_vswr
Added HPSDR 'Protocol 1' support to provide sbitx I and Q data to external SDR apps over WiFi or ethernet
Starts when sbitx starts, console will show "hpsdr: streaming STARTED" when SDR app discovers and connects
Good support for SDR app receiver functions
XMIT not yet supported, will require CAT/Hamlib connection
Changes:
GUI
Moved Direct Frequency Keypad to a new button called PAD and added quick buttons
Swapped button placement on main display
Moved eptt & vfolock to menu 2
Menu 1 is reserved for mostly audio related controls
CW Decoder
Fixed colors of sent and received text on console, use new lines when doing T/R switch
Only displays cw stats (WPM, dot/dash ratio) when they are meaningful
Less garbage ouput when only noise is present
Replace sliding window in denoise function with EMA filter
Improved accuracy with better weak signal performance
Replaced viterbi with simpler classifier
Simplified code of own TX decode process
Set BW to 50 when using decoder is recommended
Web interface
Added more controls
Gridmap new options: Square or round Grid dots; Seen Grids; Unlogged Grids;
Power and VSWR readings updated more often, from every second to every 1/2 second
Updates are now as fast as bridge reads allow
Minimum power for VSWR calculation increased to help eliminate invalid reads at very low powers
Fixes:
APF init Bug
Fixed a bug where APF would not initialize properly
Audio Cleanup
Made a small change to cleanup the static between TX to RX
APM sampling improved for better regularity
VSWR initialization when user disabled fixed
max_vswr=0 now restored as no max vswr protection at startup
Fixed scope intensity where it now loads and restores previous setting
Fixed Macro loading and F1-F8 buttons when changing modes
Web Gridmap red Grid dots now shown when QSO is logged
Fixed expansion of SENTRSTCUT in macros
Downloading and burning an image to your microSD card
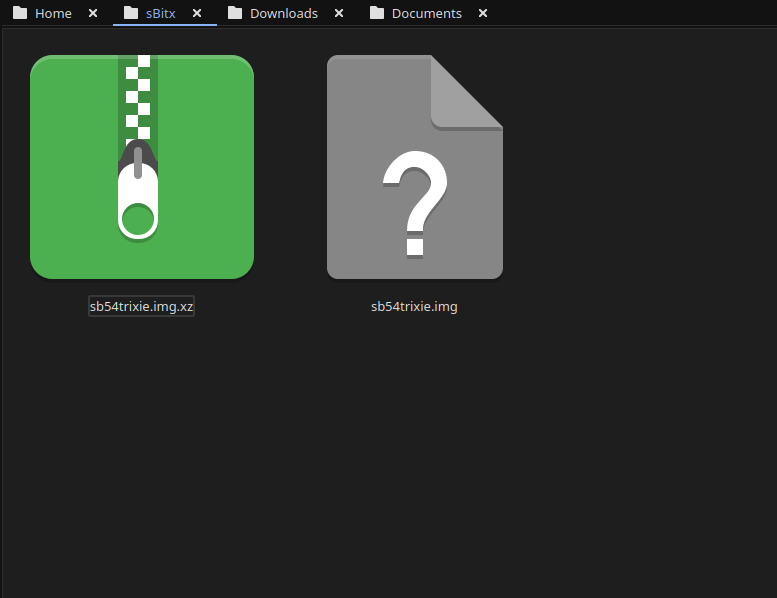
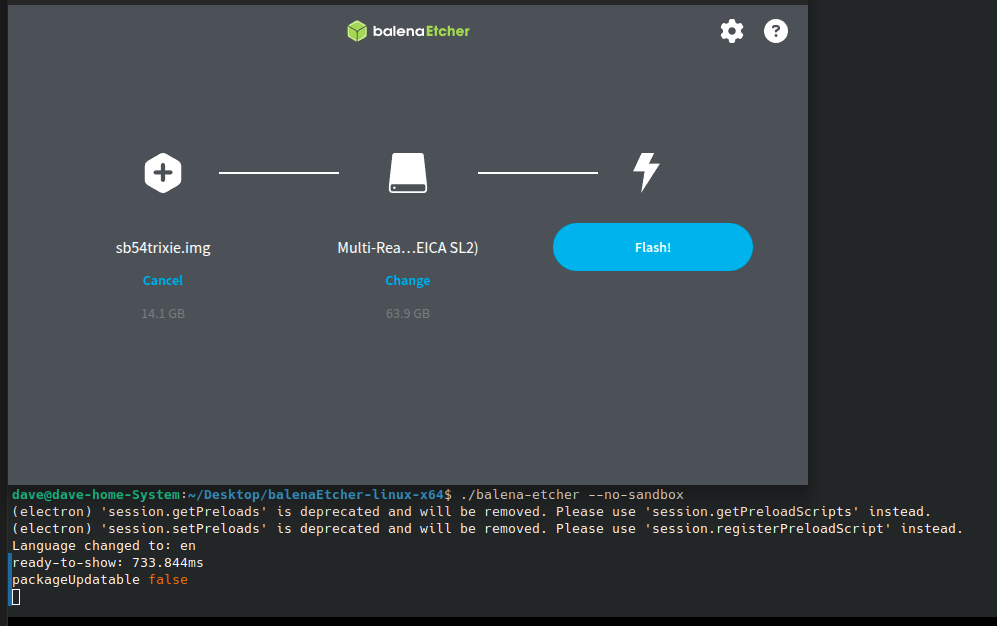
Firs thing you need to do is go download the new image. The new image is a zip file so you have to extract it and then you can move on to step 2… This is where you use a tool like Balena Etcher to write the disk image to a micro SD card. I use 32GB cards since it is what the radio started out with. They seem to work just fine to be honest. I did have to write the image twice for some reason. The first time the image would not boot past the splash screen so I re-burned it and then it worked fine. Balena Etcher is an easy to learn tool that makes this process pretty simple to be honest. If your using Linux it might take a little to get it running, but google will tell you what to do here as well. I ended up running it in my terminal so I could shutoff the sand box feature. I know this is probably a bad idea to remove the sandbox but I have confidence in Etcher so I am good with it. Launching it from the terminal, you are presented with this panel. The first one is where you choose the disk image you want to burn, the second one chooses the media (hard drive, memory card or the like) and then you click flash and wait… It will take a few minutes and you are presented with a ready to use version of the sBitx software ver. 5.4. You still need to copy a couple of files from your existing version of the sBitx you are using. It is not a big deal to do this as you just need to copy them to a USB memory stick so you can later put the back when you swap micro SD cards in the radio.
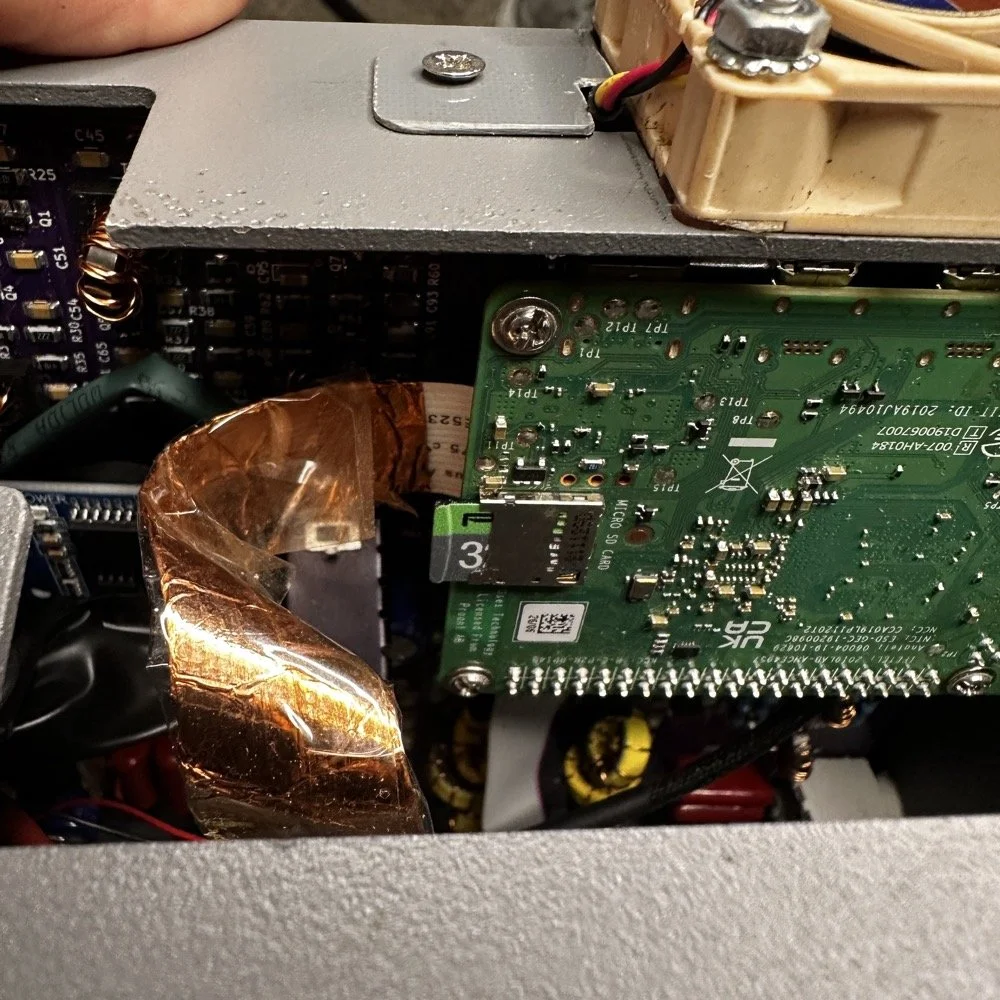
The next step for me, involved me taking my radio apart some what. I use the on board Raspberry Pi micro SD card slot on the Pi. This means I have to take the front of the radio loose from the chassis and open the radio enough to be able to swap out the two sd cards. Dont make my mistake and use the same card for both images. Make sure you use a new card for the new image and save the old one in case something goes wrong so you can go back to the working version while you solve the problem. This is pretty easy and only requires you to remove 4 screws to succeed. Once the new card is installed, you are off to the races! Just power up the radio as normal, being sure to have either a dummy load or a tuned antenna attached as it will auto launch the radio app and if it is on FT8 it just might start answering a CQ if your not ready! HaHa! The card really is easy to reach, just be careful to not unplug anything like the video cable you see right next to the card. I have my cable wrapped in copper tape and grounded to help reduce RF hash from the Pi, this is a hack that actually works really well. This cable is one of the prime culprits of rf hash in this radio so just doing this one mod will improve your experience a lot.
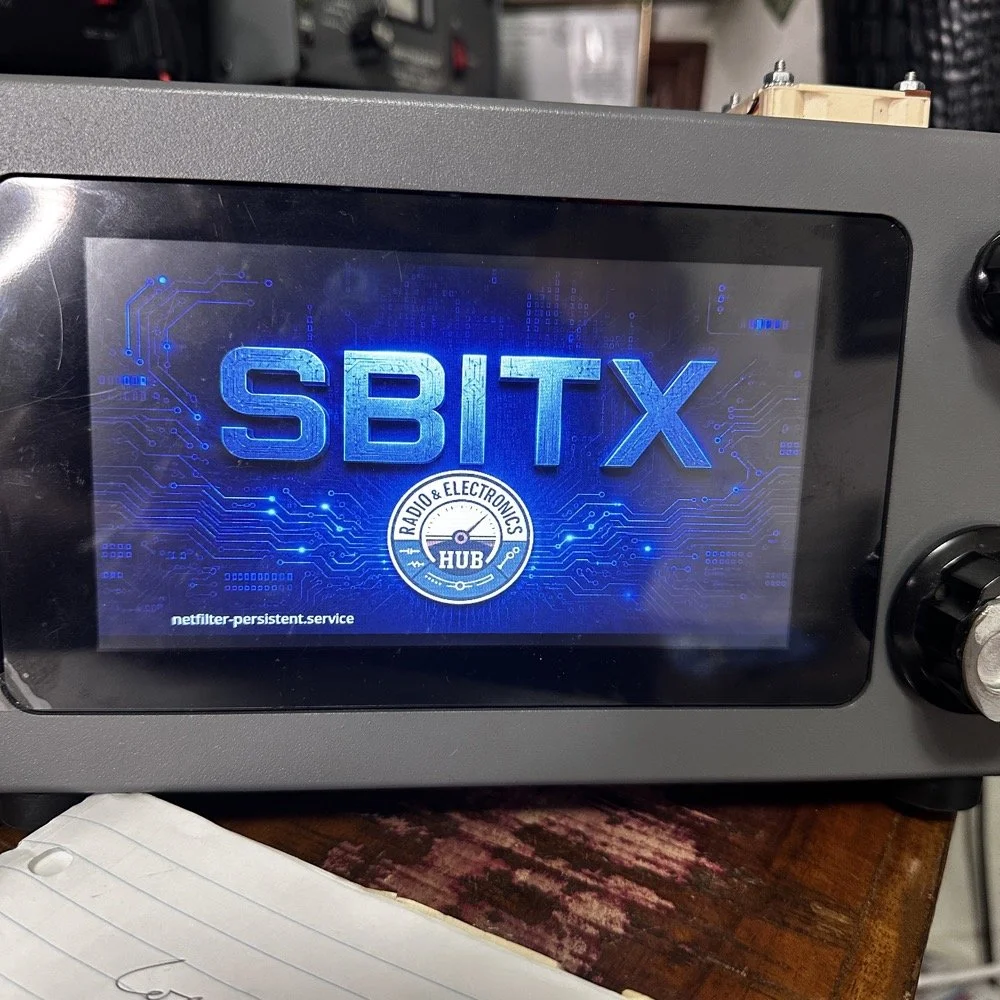
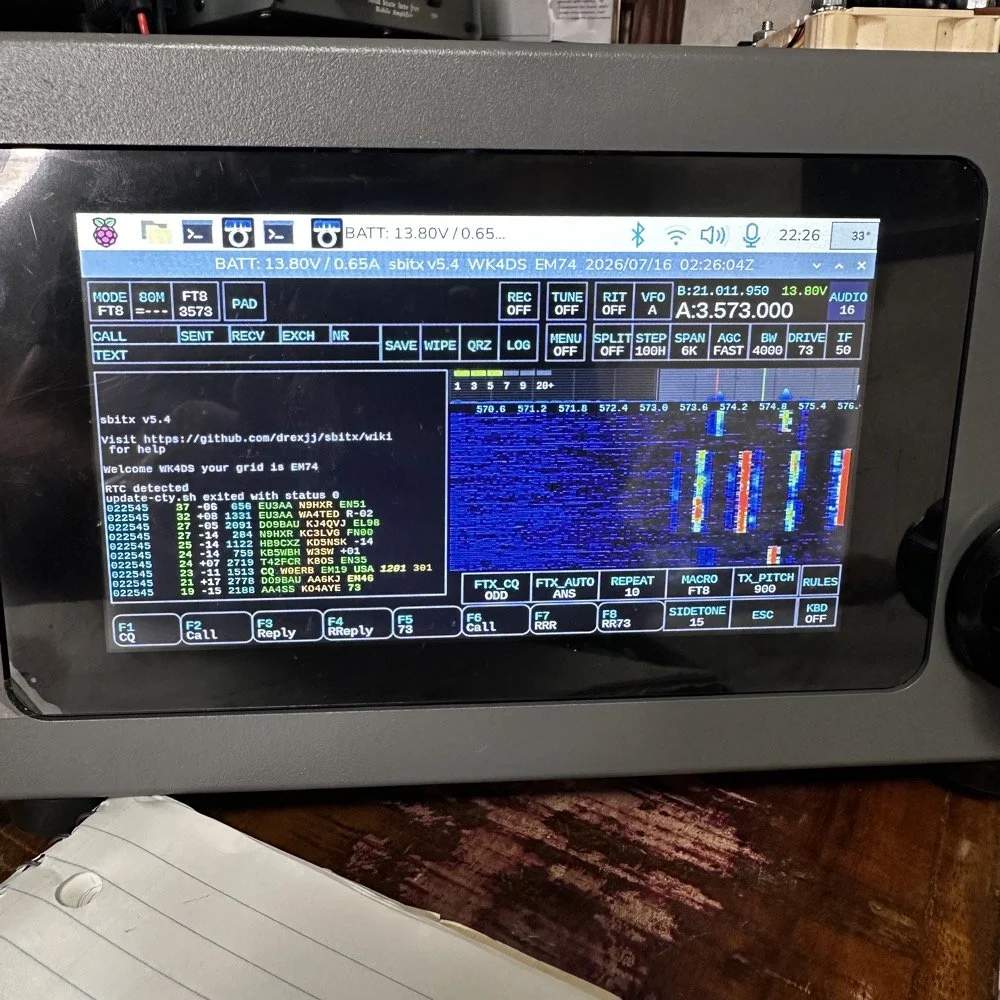
This is the new splash screen that you are greeted with while the software package loads everything. I really like this new look the dev team brought to this release. Once the software loads, it will auto launch the sBitx radio app and you will have the view below. It is in FT8 mode here since I was last using this mode and band. There are some things you need to do before you start using the radio, such as entering into Menu 1, then touching the “Set” button and in here you will enter your callsign and grid locator you are currently operating in. This is used for logging and digital modes. But it helps to do this first thing so you dont forget. I also keep a note about this in my case so I dont forget to do this step when I am out traveling and activating POTA parks with this radio.
Personal thoughts about the HF Signals sBitx SDR radio
I only use my sBitx for a couple of modes. FT8, FT4 and CW. I rarely use SSB or any other voice mode for that matter. I just prefer CW to be honest. That being said, I tested out the keying on the current release and it works perfectly for me. I normally dont run over about 22WPM though so if you work faster than me, just know I wont be speeding up with this radio…lol. I can get decent code out of it at 25WPM, but now we are getting into the realm of my skills not being up to the task too… sooooooo. I dont know which is to blame past this point.. HAHA!
I like FT8 as it will work when the bands seem to be closed for even CW. That is nice if you are activating a POTA park and the band closes on CW with 8 calls in your log. This way I can hop over on to FT8 and more often than not, I will get those needed calls in the log and probably more, in spite of the fact that the output power on a band like 15 meters will only be about 12 to 15 watts depending on battery level. I can get a lot more output power on the low bands but on the higher bands I will not get a lot of power out. This just further solidifies my stance on using FT8 in poor band conditions and the ability to make contacts with it natively in the radio. I would like to say something else about this radio. I really like the community around it. Sure there will be the occasional disagreement here and there. It is a group of humans after all… But for the most part, it is a group of experimenters and coders and general operators that love to tinker with their machines as much as operate them.
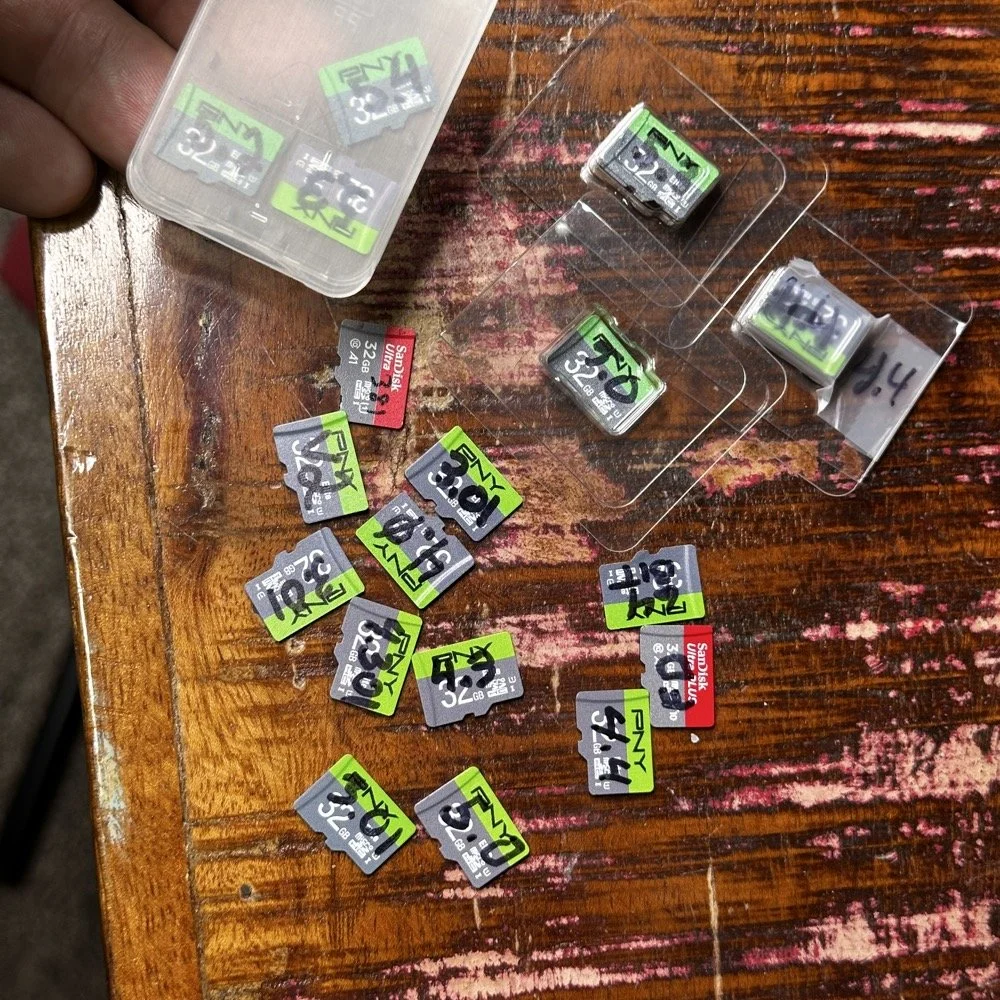
Speaking of images on disks. Over the last few years I have amassed a small collection of different images. You might think this is silly, but there is a method to this madness. You see, for one, I have a full collection of images starting with the factory shipped version that came with the radio. The factory version is the one with 381 written on it, as this is the serial number of my radio. I have a copy of the Field Day release and the first 64 bit release. As time passed and new versions were released, I get them and burn them to a new card and save the old one. I can install any one of these cards and it will instantly become that version radio again. That is pretty cool. Honestly though, the other reason I keep them all is that there is logbook data stored on them as well as the later versions all have my config files on them that I can get to should the card in the radio die for some odd reason.
Another really good idea for a person getting one of these radios is to use the disk copier app and make a backup of your image on a new micro SD card. This way should the one in the radio die, you can simply replace it and keep going…right after you make a new back up. The reason I keep circling back to this is that these card are not the most reliable on earth. All of mine have worked well, but there has been some people that have had their card get corrupted and dont have a backup. That is tough spot to be in to be honest. Anyway, I thought I would share a little about one of my favorite radios and what is going on with it.
You can help support this channel by using these Amazon Affiliate Links as well:
QRP/Portable Radios:
Antennas & Tuning:
CW Equipment:
Power & Accessories:
Organization & Transport:
BONUS ITEMS (Optional 16-20):
73
WK4DS - David