Activating an Off-road Vehicle Area is not always a great idea.
Sometimes things look better on paper…
But in execution, they are not a great ideas.
This is the story of me (WK4DS) at K-5493 Franklin-Marion State Forest.

On my way over to the park, I passed through South Pittsburg, Tennessee to shoot a little photography first since it was on the way to the top of the mountain to do an activation…
When I arrived at the park location I liked, it was perfect weather and quiet and as you see from the photo, I had the place all to myself. Well, that changed in about 15 minutes from the time I took this photo. You see, this “park” on the POTA map is actually a state forest with OHV trails on it. I parked in a clearing that is about 100 yards off of the paved road and is next to an old forest service fire tower. The luxury to this site is that it is literally on top of the mountain and 100 yards of gravel road from the pavement. So I have a great elevation profile because of that and easy access to a good site.

This is an old forest service fire tower. It was on the other side of the clearing and is so old that it had trees growing through the framework and the building at the top had no floor in it anymore. I remember these in use as a kid, but at some point they stopped using them, and from the looks of this one, it was probably in the 90s. There was another feature that I noticed as well… Have a look at the photo below and take a guess what made all those holes…
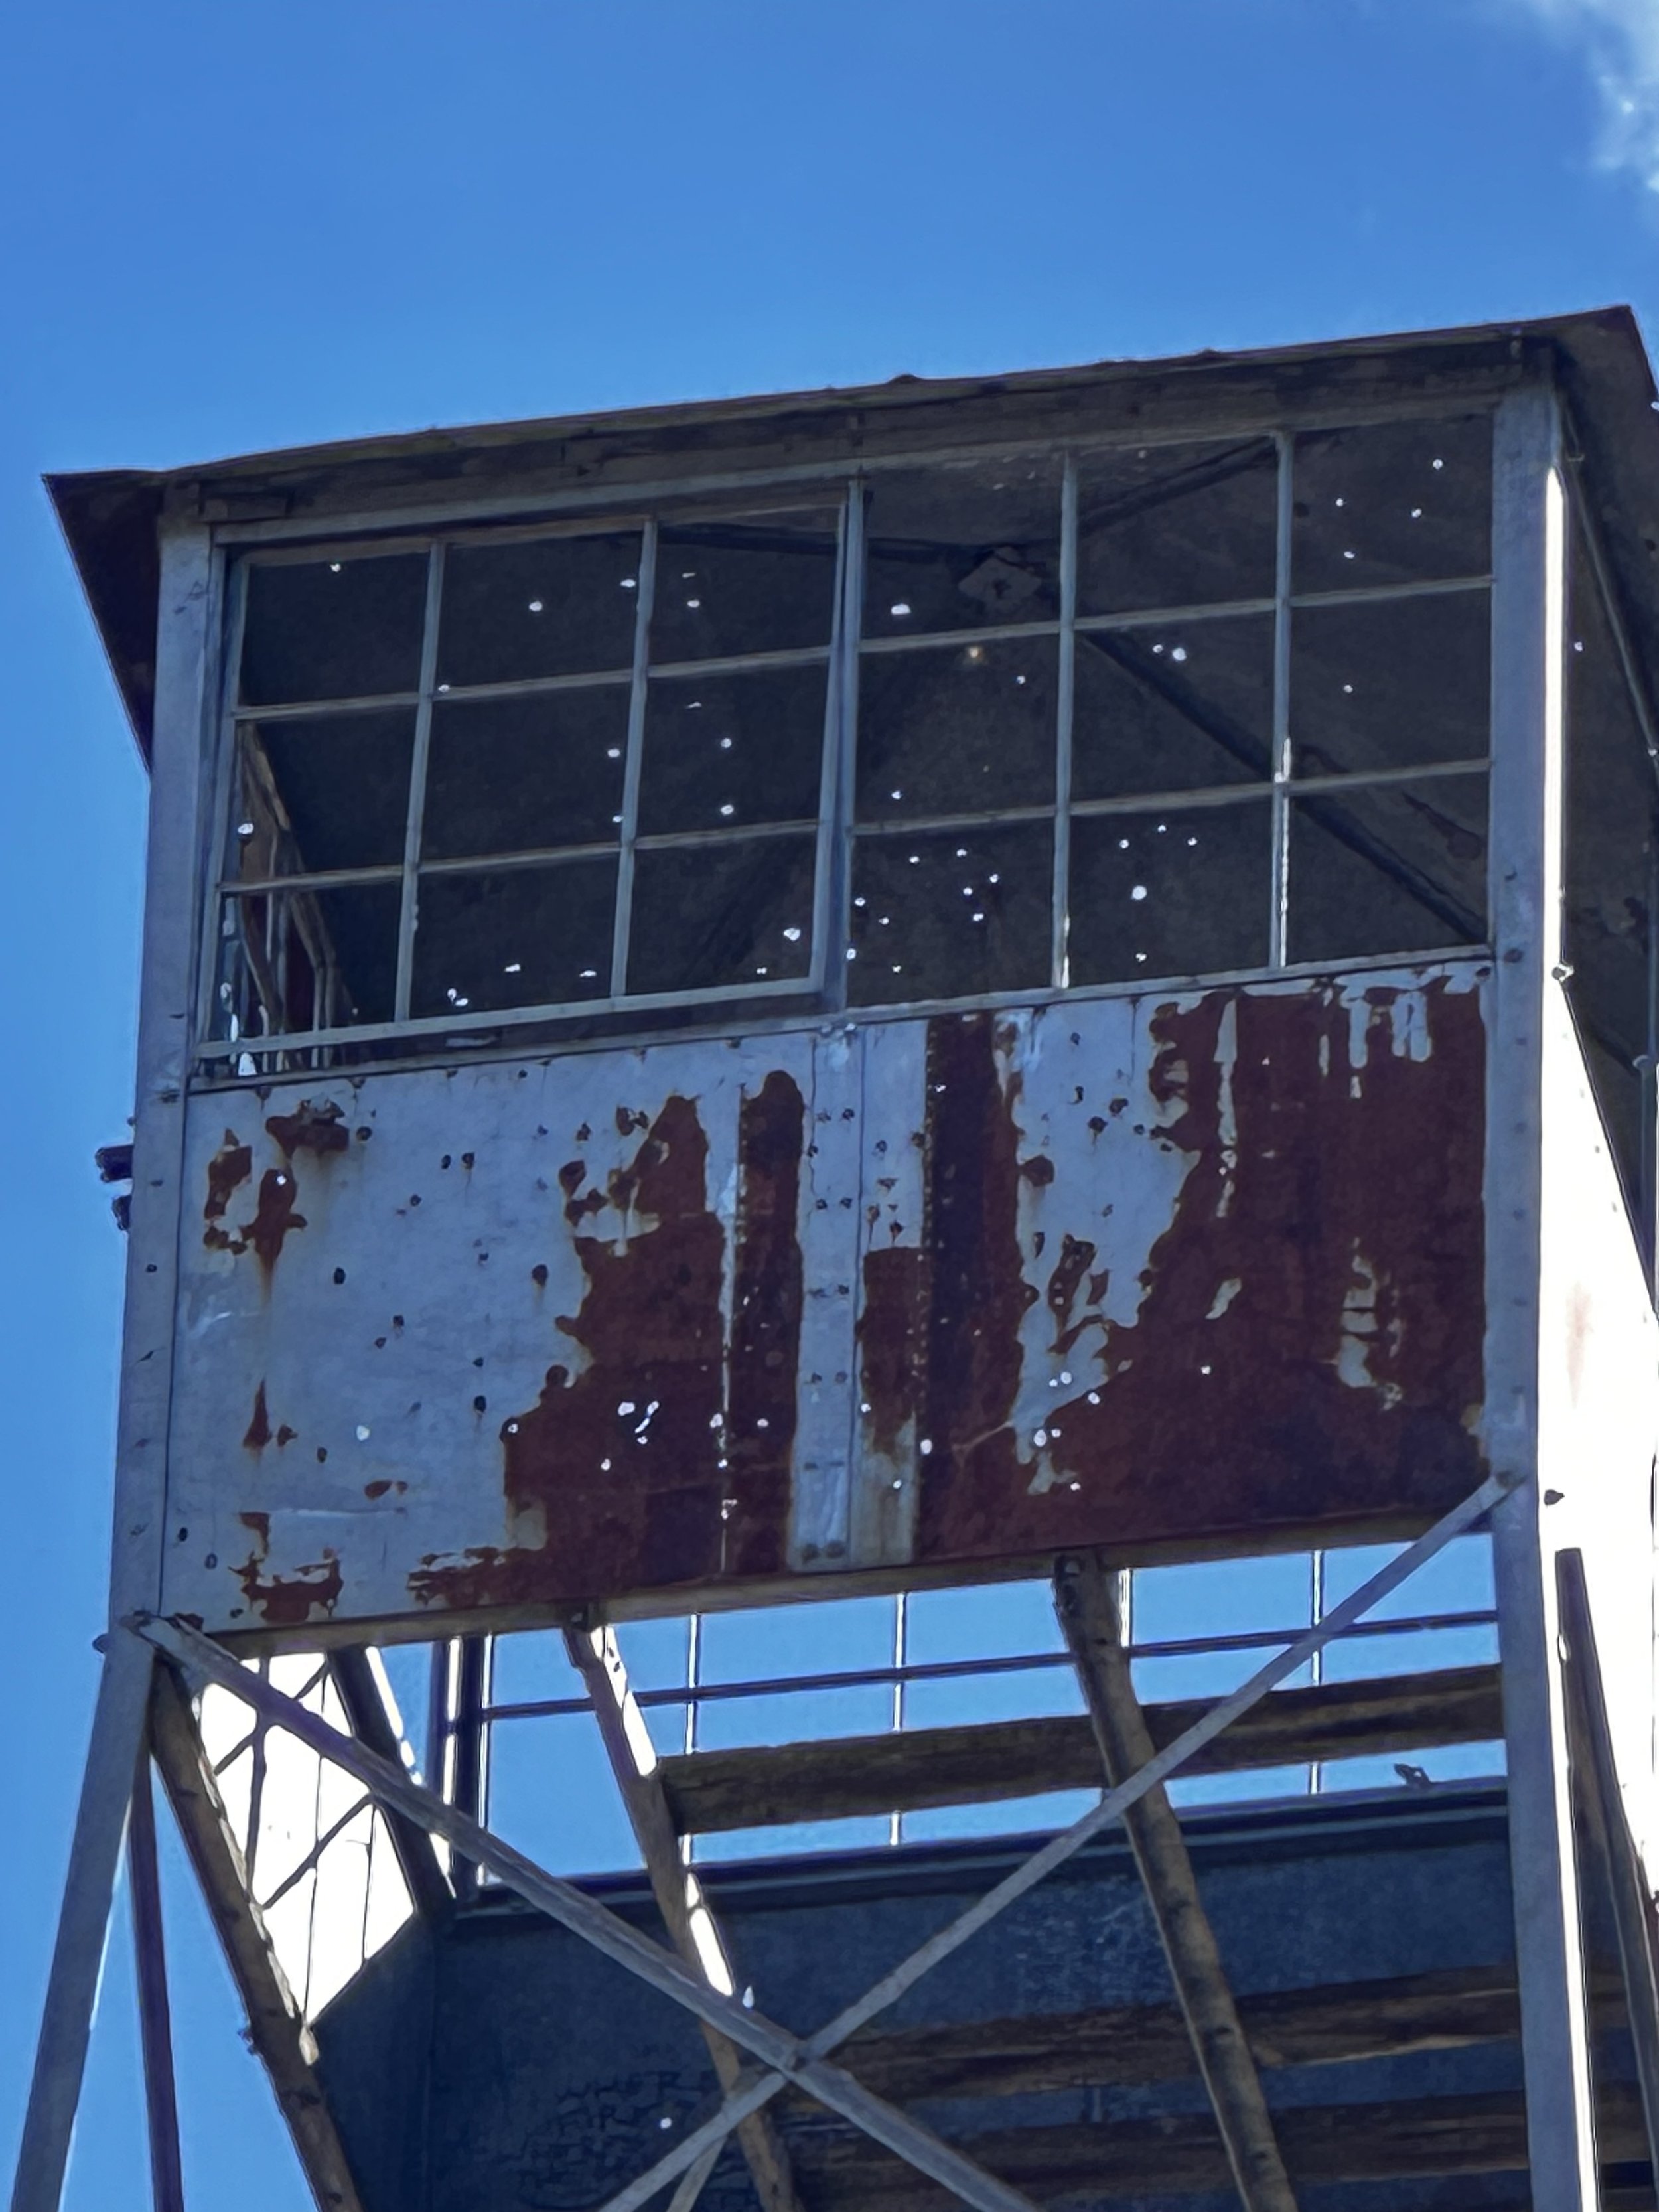
I cant go up there and see, but I am pretty certain those are bullet holes. That is one thing that “rednecks” are good for, shooting things like this… I don’t know where this mindset comes from, but they tend to do things like this. It is unfortunate too as this is basically destroying relics from our local history for simple entertainment.
Another thing that I ran into on this trip was that the little adapter shown below that goes on my headphones has failed. It was causing some heavy shorting issues and I ended up figuring out that if I spun it to the right position it would not cause a problem, but spin it just a little and it would make terrible feedback. I didn’t have a spare either so I ended up using it and just being super careful with it…Always have a spare is the lesson here.

In the photo below you can see what I am talking about when I say there were ATVs going by while I was operating. Lots of ATVs would pass through at times, like 4 to 6 in a group at once. These vehicles also don’t have great mufflers either so it would be hard to hear while they were going by…


Since it was nice weather, I wanted to use the truck bed cover for my operating position and because of this, I was right next to the antenna. Also if you will notice, there was a couple more hamstick antennas this time. I picked up a 17m, 30m, and a 40m Shark brand hamsticks from Chatt Radio and spent the morning before the activation today tuning the 17 and 40m antennas. I didn’t do the 30m unit yet because I ran out of time as I wanted to try an activation today and I still had to make all the parts for the radials for the 30m antenna from scratch… Once I got the 17m radials made and tuned and then cobbled my 40m hamstick radials together so it would work (I think I need to revisit this one at some point and make better radials for it), I was off to the races! This design of antenna and mount work extremely well for their size.

Today’s weapon of choice is the Penntek TR-35. This radio has everything you need and nothing you don’t. It is just a great little CW rig that is simple to use and works really well.

This is a close up of my 17meter radial tie down, that I dubbed “Gen 2”, ground weight design. I can remove the weight easily from this plastic connection plate and use it on a different radial if I wanted to change bands or something like that. This worked really well and was easy to setup and tear down too. My old design coupled the weight to the radial making it a dedicated weight, which is simpler to make, but not as versatile to use as the weight is part of the radial.

Below is the complete antenna kit as of today. This doesn’t show the mounting bracket that I made to install these on, you know the big yellow one, right? But here are the radials and antennas that I currently have tuned and are ready to get on the air. Once I get time to work on the 30m antenna, I will add it to the stable. The ham-stick is a very viable option for the QRP POTA op. I used these today to get the contacts below and you can see that the signal reports show it works just fine. If you have one, this is something that I suggest you try to use. They need the radials though to get the best performance. I have found that is important. Supposedly they are designed to not need them, using the coax as the counterpoise but they just get out so much better with them tuned to the band with a proper counterpoise.

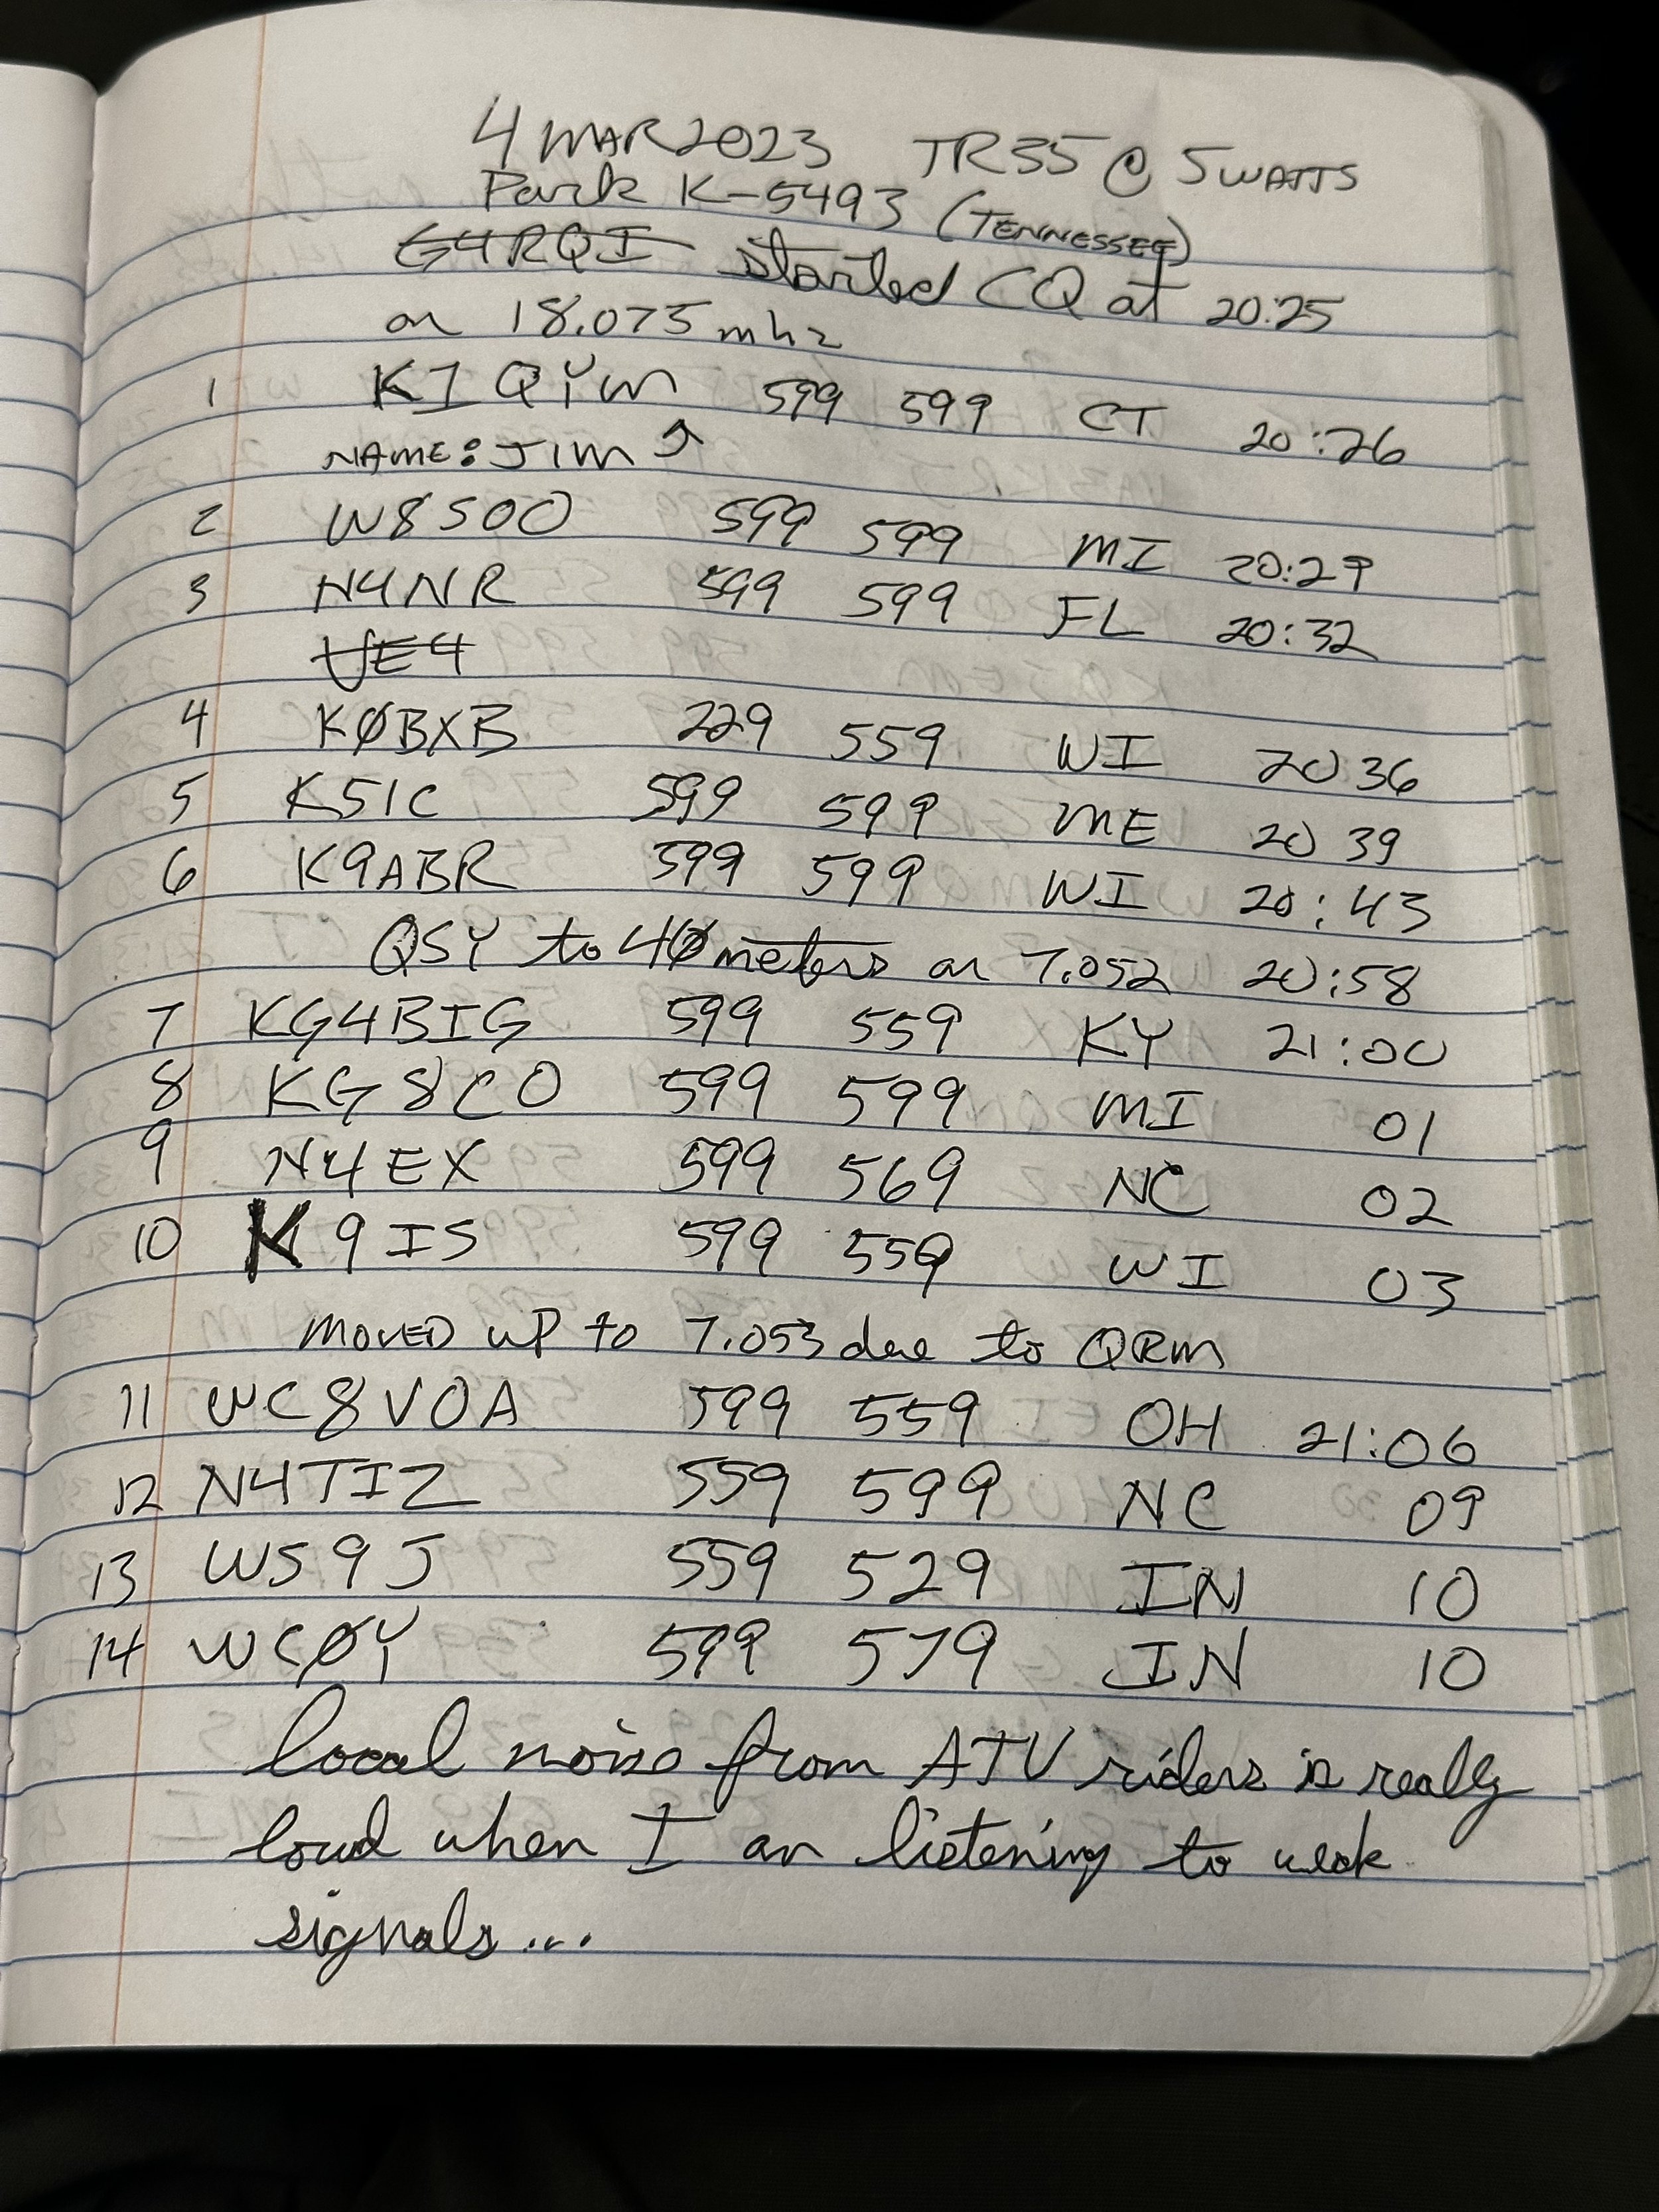
If you will notice, I make lots of notes as I go in my log, but I had a great day on all three bands. It was cool to get some contacts on 17 and 40 meters today, but if you will notice, all the magic happens on 20 meters… That is where the bulk of my contacts happened today. I also was able to work the same ops on multiple bands which is kind of cool.


So even if you run into problems with the location like I did, just get the radio out anyway as it just might be the day you put over 70 QSOs in the log! So till next week, get that radio out and throw a wire up into a tree!!!