
Nikon Zf Review: Why I Switched from Leica CL for Travel Photography
When I got into the Leica cameras I use, I had built a kit around street photography, urban photography, urbex photography, and travel photography. The next thing I started doing was adapting vintage lenses to them. Then I started using TTArtisan glass on the Leica CL and loved it! My Leica SL2 now carries the 50mm APO Summicron L pretty much all the time as well. I love the SL2, but for a backpacking trip, it is probably not the best choice.
After years of using the Leica CL for travel photography, I finally switched to the Nikon Zf—and I should have done it sooner. The breaking point? Getting caught in English rain on the Pilgrims Way with my non-weather-sealed Leica CL. In this Nikon Zf review, I'll explain why I chose this retro-styled mirrorless camera over the Leica CL for hiking trips and travel photography, covering weather sealing, IBIS, battery life, and real-world performance.
Why I Needed a Weather Sealed Travel Camera
When I got into the Leica cameras I use, I had built a kit around street photography, urban photography, urbex photography, and travel photography. The next thing I started doing was adapting vintage lenses to them. Then I started using TTArtisan glass on the Leica CL and loved it! My Leica SL2 now carries the 50mm APO Summicron L pretty much all the time as well. I love the SL2, but for a backpacking trip, it is probably not the best choice.
That experience changed everything for me. I realized I was babying my camera instead of using it. Every time clouds rolled in, I'd pack it away. Every time I saw a stunning scene but it was drizzling, I'd pass on the shot. That's not why I bought a camera—I bought it to use it, to capture moments, to not miss opportunities because I'm worried about weather. That's when I knew I needed weather sealing as a non-negotiable feature in my next travel camera.

The Leica CL served me well for years, but lack of weather sealing was a deal-breaker for hiking trips in unpredictable weather.
Why the Leica CL Didn't Work for Hiking Trips
The Leica CL, while perfect in size for travel, is not weather sealed… I came to this realization while hiking the Pilgrims Way in England a while back. (I did a small series of videos on this trip if you are interested) and this is when I came to realize that while the Leica CL is really small and lightweight, it is also not my favorite for hiking trip travel. Rain is a real threat in England and I was fortunate that my camera did not get caught in a cloud burst.
So knowing all of this, I started down the path of finding a new travel camera to shoot with…
My Requirements for the Perfect Travel Photography Camera
So knowing all of this, I started down the path of finding a new travel camera to shoot with. I looked at several factors to guide my choice:
The first was it had to be weather sealed or it was a no go for me.
The next is it had to have IBIS as I love shooting with vintage glass and this allows me to shoot at much slower shutter speeds while handheld.
I also wanted a full frame, 24MP sensor if possible as these (in 2024) have much better low light performance due to the larger photo sites on the sensor.
It also needed good battery life as these Leica mirrorless cameras just don't have great battery life for me.
These weren't just nice-to-have features. These were requirements based on real frustrations I'd experienced in the field. Weather sealing because of England. IBIS because I shoot vintage glass and hate carrying a tripod on hikes. Full-frame 24MP for those low-light church interiors and evening shots. Battery life because running out of power halfway through a hiking day is unacceptable.
Nikon Zf Features That Changed My Travel Photography
After searching for a year or so with no luck, Nikon drops a bomb on me with the launch of the Nikon Zf retro styled camera. You could have just as easily called it the "Nikon Special Custom Built Camera For Dave" and the name would have been accurate. HaHa!
I immediately fell in love with it…before I even laid eyes on one in person. When I see a new camera that I am interested in, I will search all about it that I can and see if it will fit my needs and do that at a price point that I am comfortable with.
The Nikon Zf mirrorless camera is a camera that checks all those boxes and more. You see I am in love with the retro-style camera design aesthetic like the Fujifilm XT-3 and now the Nikon Zf (as well as to a lesser degree the Nikon Zfc too). I owned the Fujifilm XT-3 for several years and it had two main shortcomings that made me want to move away from it over the years.
The crop sensor had pretty bad low light performance (it was 26 mega pixels so it was doing a lot of work to get it all in there) and the lack of IBIS in a mirrorless camera. Cameras at this time were coming standard with IBIS (In Body Image Stabilization) and I felt this was a huge misstep for Fujifilm on this camera. I, none the less, used it for several years anyway and to great effect too, but the lack of these two features was a nagging thought at the back of my mind the whole time.
Then Nikon came out with the Zfc and I initially was in love with it, but upon closer inspection, it was simply an XT-3 in a Nikon shell. Yeah, it had a few things that were newer and (debatably) better, but it still lacked certain things I wanted. I had resigned myself at this point to wait for a replacement to the Nikon Df or maybe something by Leica that was closer to what I was wanting. Well as fate would have it, Nikon saw the demand for the retro camera design and came out with the Zf—a full frame, IBIS, 24 megapixel, mirrorless camera loaded with all the magic that they could cram into the beautiful Nikon retro shell.
Nikon Zf vs Leica CL: Key Differences for Travel Photography
Let me break down the key differences between these two cameras for anyone facing the same decision I did:
Weather Sealing: The Nikon Zf is fully weather sealed; the Leica CL is not. This was the deal-breaker for me. If you're hiking in unpredictable weather or traveling to places with rain, dust, or humidity, the Nikon Zf gives you peace of mind. The Leica CL requires constant babying in anything but perfect conditions.
IBIS: The Nikon Zf has 5-axis in-body image stabilization; the Leica CL does not. This makes a massive difference when shooting with vintage manual focus lenses or in low light. I can handhold shots at 1/15th second with the Nikon Zf that would be impossible with the Leica CL. For travel photography where you can't always use a tripod, IBIS is a game-changer.
Sensor Size: The Nikon Zf has a full-frame 24MP sensor; the Leica CL has an APS-C crop sensor. The full-frame sensor gives you better low-light performance (larger photosites), shallower depth of field control, and generally more flexibility. The crop sensor on the Leica CL is excellent, but the full-frame advantage is real when you're shooting in challenging light.
Battery Life: The Nikon Zf's battery lasts significantly longer than the Leica CL. With the Leica CL, I'd carry 3-4 batteries and still worry about running out. With the Nikon Zf, two batteries get me through a full day of shooting with power to spare.
Size and Weight: This is where the Leica CL wins. It's noticeably smaller and lighter, which matters on long hikes. The Nikon Zf is not a huge camera, but it's definitely more substantial. For me, the practical advantages of the Nikon Zf outweigh the size disadvantage, but this is a personal choice.
Price: The Leica CL (when it was still in production) was more expensive than the Nikon Zf. Now that it's discontinued, you'd be buying used. The Nikon Zf offers better value for the features you get.
The Nikon Zf's weather-sealed body and IBIS make it ideal for unpredictable travel conditions and hiking with vintage lenses.
Real World Nikon Zf Performance: Travel and Hiking
So to be honest, I was still skeptical that this would be the next camera for me. I have gotten really comfortable using my Leica cameras and the thought of learning a new camera was really not that appealing to me. But the more reviews I watched on YouTube and the more I just looked at the camera in general, the more I liked it.
Since getting the Nikon Zf, I've put it through its paces on several trips, and it's delivered every time. The weather sealing proved itself on a rainy morning shoot where I would have packed the Leica CL away. The IBIS let me shoot handheld in a dimly lit museum with a vintage 50mm f/1.4 lens at 1/15th second and still get sharp images. The battery lasted an entire day of hiking without needing the spare.
The retro physical dials are more than just aesthetic—they're genuinely useful in the field. Being able to glance down and see my shutter speed and ISO without turning on the screen saves battery and makes adjustments faster. On a hike, every second counts when you're trying to catch changing light or a fleeting moment.
The full-frame sensor's low-light performance is noticeably better than the Leica CL's crop sensor. I can comfortably shoot at ISO 3200 or even 6400 when needed, and the files are clean. With the Leica CL, I tried to stay under ISO 1600 whenever possible. That flexibility matters when you're traveling and can't always control the light.
So for now, this is my new travel/street machine. It has wonderful rendition and is a joy to shoot with. I look forward to taking it on outings now and I have the 50mm f1.8 S lens if I want auto focus and to be able to access all the special features that have to do with the auto focus system. So going forward, there will be more about this machine as well as the two Leica camras I use as well. You see, those two machines are also wonderful cameras and I still enjoy using them too, I use them for certain things as I have found. But I still love getting them out and using them.
Nikon Zf vs Leica CL: Which Should You Choose?
Choose the Nikon Zf if:
You need weather sealing for hiking, travel, or unpredictable conditions
You shoot with vintage manual focus lenses and want IBIS
You value battery life and don't want to carry multiple batteries
You want better low-light performance (full-frame advantage)
You're comfortable with a slightly larger/heavier camera for the features
Choose the Leica CL if:
Size and weight are your absolute top priorities
You primarily shoot in good weather or controlled conditions
You're already invested in the Leica L-mount ecosystem
You prefer the Leica color science and rendering
You can find one used at a good price (it's discontinued)
For me, the practical advantages of the Nikon Zf outweigh the size advantage of the Leica CL. But I still appreciate what the Leica CL offers for lightweight urban photography.
Recommended Gear for Travel Photography
Support this website by using these affiliate links to shop on Amazon:
Leica M11 Digital Rangefinder Camera because the Leica CL is out of production now.
Nikon AF-S FX NIKKOR 105mm f/1.4E ED Lens
Voigtlander Nokton 35mm f/1.4 II
Sandisk 128GB Extreme Pro memory cards
Nikon 50mm f1.8 S Lens for Z mount
Frequently Asked Questions About the Nikon Zf for Travel Photography
Is the Nikon Zf good for travel photography?
Yes, the Nikon Zf is excellent for travel photography. After switching from the Leica CL, I've found the Nikon Zf addresses all the key requirements for serious travel work: weather sealing protects it in rain and dust, IBIS (In-Body Image Stabilization) allows handheld shooting with vintage lenses and in low light, the full-frame 24MP sensor delivers outstanding image quality even at high ISOs, and the battery life is significantly better than my Leica mirrorless cameras. The retro design with physical dials makes it quick to adjust settings on the fly, which is crucial when you're hiking and need to shoot fast.
How does the Nikon Zf compare to the Leica CL for travel?
The Nikon Zf and Leica CL serve different needs. The Leica CL is smaller and lighter (perfect for ultralight backpacking), but lacks weather sealing and IBIS, which are deal-breakers for hiking trips where rain is a possibility. The Nikon Zf is heavier but offers weather sealing, IBIS, a full-frame sensor with better low-light performance, and much longer battery life. I switched from Leica CL to Nikon Zf specifically because I got caught in English rain on the Pilgrims Way and realized I needed weather protection. If you're doing casual city travel, the Leica CL's compact size is nice. For serious hiking and unpredictable weather, the Nikon Zf is the better choice.
Is the Nikon Zf weather sealed?
Yes, the Nikon Zf is weather sealed. This was one of my primary requirements when searching for a travel camera to replace the Leica CL. The weather sealing on the Nikon Zf protects against rain, dust, and moisture - essential for hiking trips and travel photography where you can't always control the conditions. After hiking the Pilgrims Way in England with my non-weather-sealed Leica CL and worrying about rain the entire time, having weather sealing gives me peace of mind to shoot in any conditions.
Does the Nikon Zf have IBIS?
Yes, the Nikon Zf has 5-axis In-Body Image Stabilization (IBIS). This was another critical requirement for me. IBIS allows me to shoot with vintage manual focus lenses at slower shutter speeds while still getting sharp handheld images. It's also invaluable for travel photography when you're shooting in low-light situations like churches, museums, or evening street scenes where you can't use a tripod. The Leica CL lacks IBIS, which was one of the main reasons I switched to the Nikon Zf.
What is the battery life like on the Nikon Zf?
The Nikon Zf has significantly better battery life than my Leica mirrorless cameras. While Leica mirrorless cameras have notoriously short battery life (I always carried 3-4 batteries), the Nikon Zf's EN-EL15c battery provides enough power for a full day of travel photography on a single charge. This is a huge advantage for hiking trips where you might not have access to power for recharging. I typically carry two batteries for the Nikon Zf and rarely need the second one, whereas with the Leica CL I'd go through multiple batteries in a day.
Can you use vintage lenses on the Nikon Zf?
Absolutely! The Nikon Zf is fantastic for vintage lenses, which is one reason I love it. With the FTZ II adapter, you can use Nikon F-mount lenses, and with various adapters you can mount Leica M, M42, Canon FD, and many other vintage lenses. The combination of focus peaking, IBIS, and the high-resolution EVF makes manual focusing a joy. I regularly shoot with vintage glass on my Nikon Zf when traveling, and the IBIS compensates for the lack of optical stabilization in older lenses. This was impossible with the Leica CL which lacks IBIS.
Is the Nikon Zf worth it over the Leica CL?
It depends on your priorities. The Nikon Zf is worth it if you need weather sealing, IBIS, better low-light performance (full-frame vs crop sensor), and longer battery life. These were all critical requirements for my hiking and travel photography. The Leica CL is worth considering if you prioritize extreme portability, the Leica color science, and compact size above all else. For me, the practical advantages of the Nikon Zf (weather sealing especially) outweighed the Leica CL's size advantage. After nearly losing my Leica CL to rain in England, the choice became clear.
What focal lengths work best for travel photography on the Nikon Zf?
For travel photography on the Nikon Zf, I primarily use the Nikon 50mm f/1.8 S lens because it's lightweight, sharp, and versatile. The full-frame sensor means you get the classic 50mm field of view, which works for everything from street scenes to portraits. I also adapt vintage lenses, particularly 35mm focal lengths, when I want a wider perspective for landscapes or architecture. The beauty of the Nikon Zf's IBIS is that I can handhold even at slower shutter speeds, so I'm not limited by the lack of stabilization in vintage glass. For hiking trips, I keep my kit minimal - usually just the 50mm f/1.8 S and maybe one adapted vintage lens.
So for now, this is my new travel and street machine. It has wonderful rendition and is a joy to shoot with. I look forward to taking it on outings now and I have the 50mm f1.8 S lens if I want auto focus and to be able to access all the special features that have to do with the auto focus system.
Going forward, there will be more about this machine as well as the two Leica cameras I use. You see, those two machines are also wonderful cameras and I still enjoy using them too—I use them for certain things as I have found. The Leica CL still comes with me on city trips where weight matters. The Leica SL2 is my studio and portrait camera. But for travel photography where weather and versatility matter? The Nikon Zf is now my go-to.
Are you considering the Nikon Zf for travel photography? Or have you made a similar switch from one camera system to another? I'd love to hear about your experiences in the comments below!
Want more honest camera reviews and travel photography tips? Subscribe to my photography blog for weekly posts about real-world gear testing, not just spec sheets and studio tests.
Support this website by using these affiliate links to shop on Amazon:
Leica M11 Digital Rangefinder Camera
Nikon AF-S FX NIKKOR 105mm f/1.4E ED Lens
Voigtlander Nokton 35mm f/1.4 II
Sandisk 128GB Extreme Pro memory cards

Canterbury Pilgrimage AAR: 2-Week Hike from Winchester to Canterbury (England)
When my friend Kelly first mentioned hiking the Canterbury Pilgrimage, I'll admit I was skeptical. I'd never done a long-distance hike before, and two weeks walking across England seemed ambitious at best. But Teresa and I said yes anyway, and that decision led to one of the most memorable adventures of my life.
When my friend Kelly first mentioned hiking the Canterbury Pilgrimage, I'll admit I was skeptical. I'd never done a long-distance hike before, and two weeks walking across England seemed ambitious at best. But Teresa and I said yes anyway, and that decision led to one of the most memorable adventures of my life.
The Canterbury Pilgrimage follows the historic Pilgrims Way from Winchester to Canterbury, the same route immortalized in Chaucer's Canterbury Tales. Over two weeks in June of 2023, we hiked through some of the most beautiful countryside England has to offer, stayed in quaint villages, explored ancient churches, and learned valuable lessons about packing light, staying hydrated, and stopping to smell the flowers.
This is our complete guide to the Canterbury Pilgrimage, including planning, packing, daily experiences, gear that worked (and didn't), and practical lessons for anyone considering this trek.
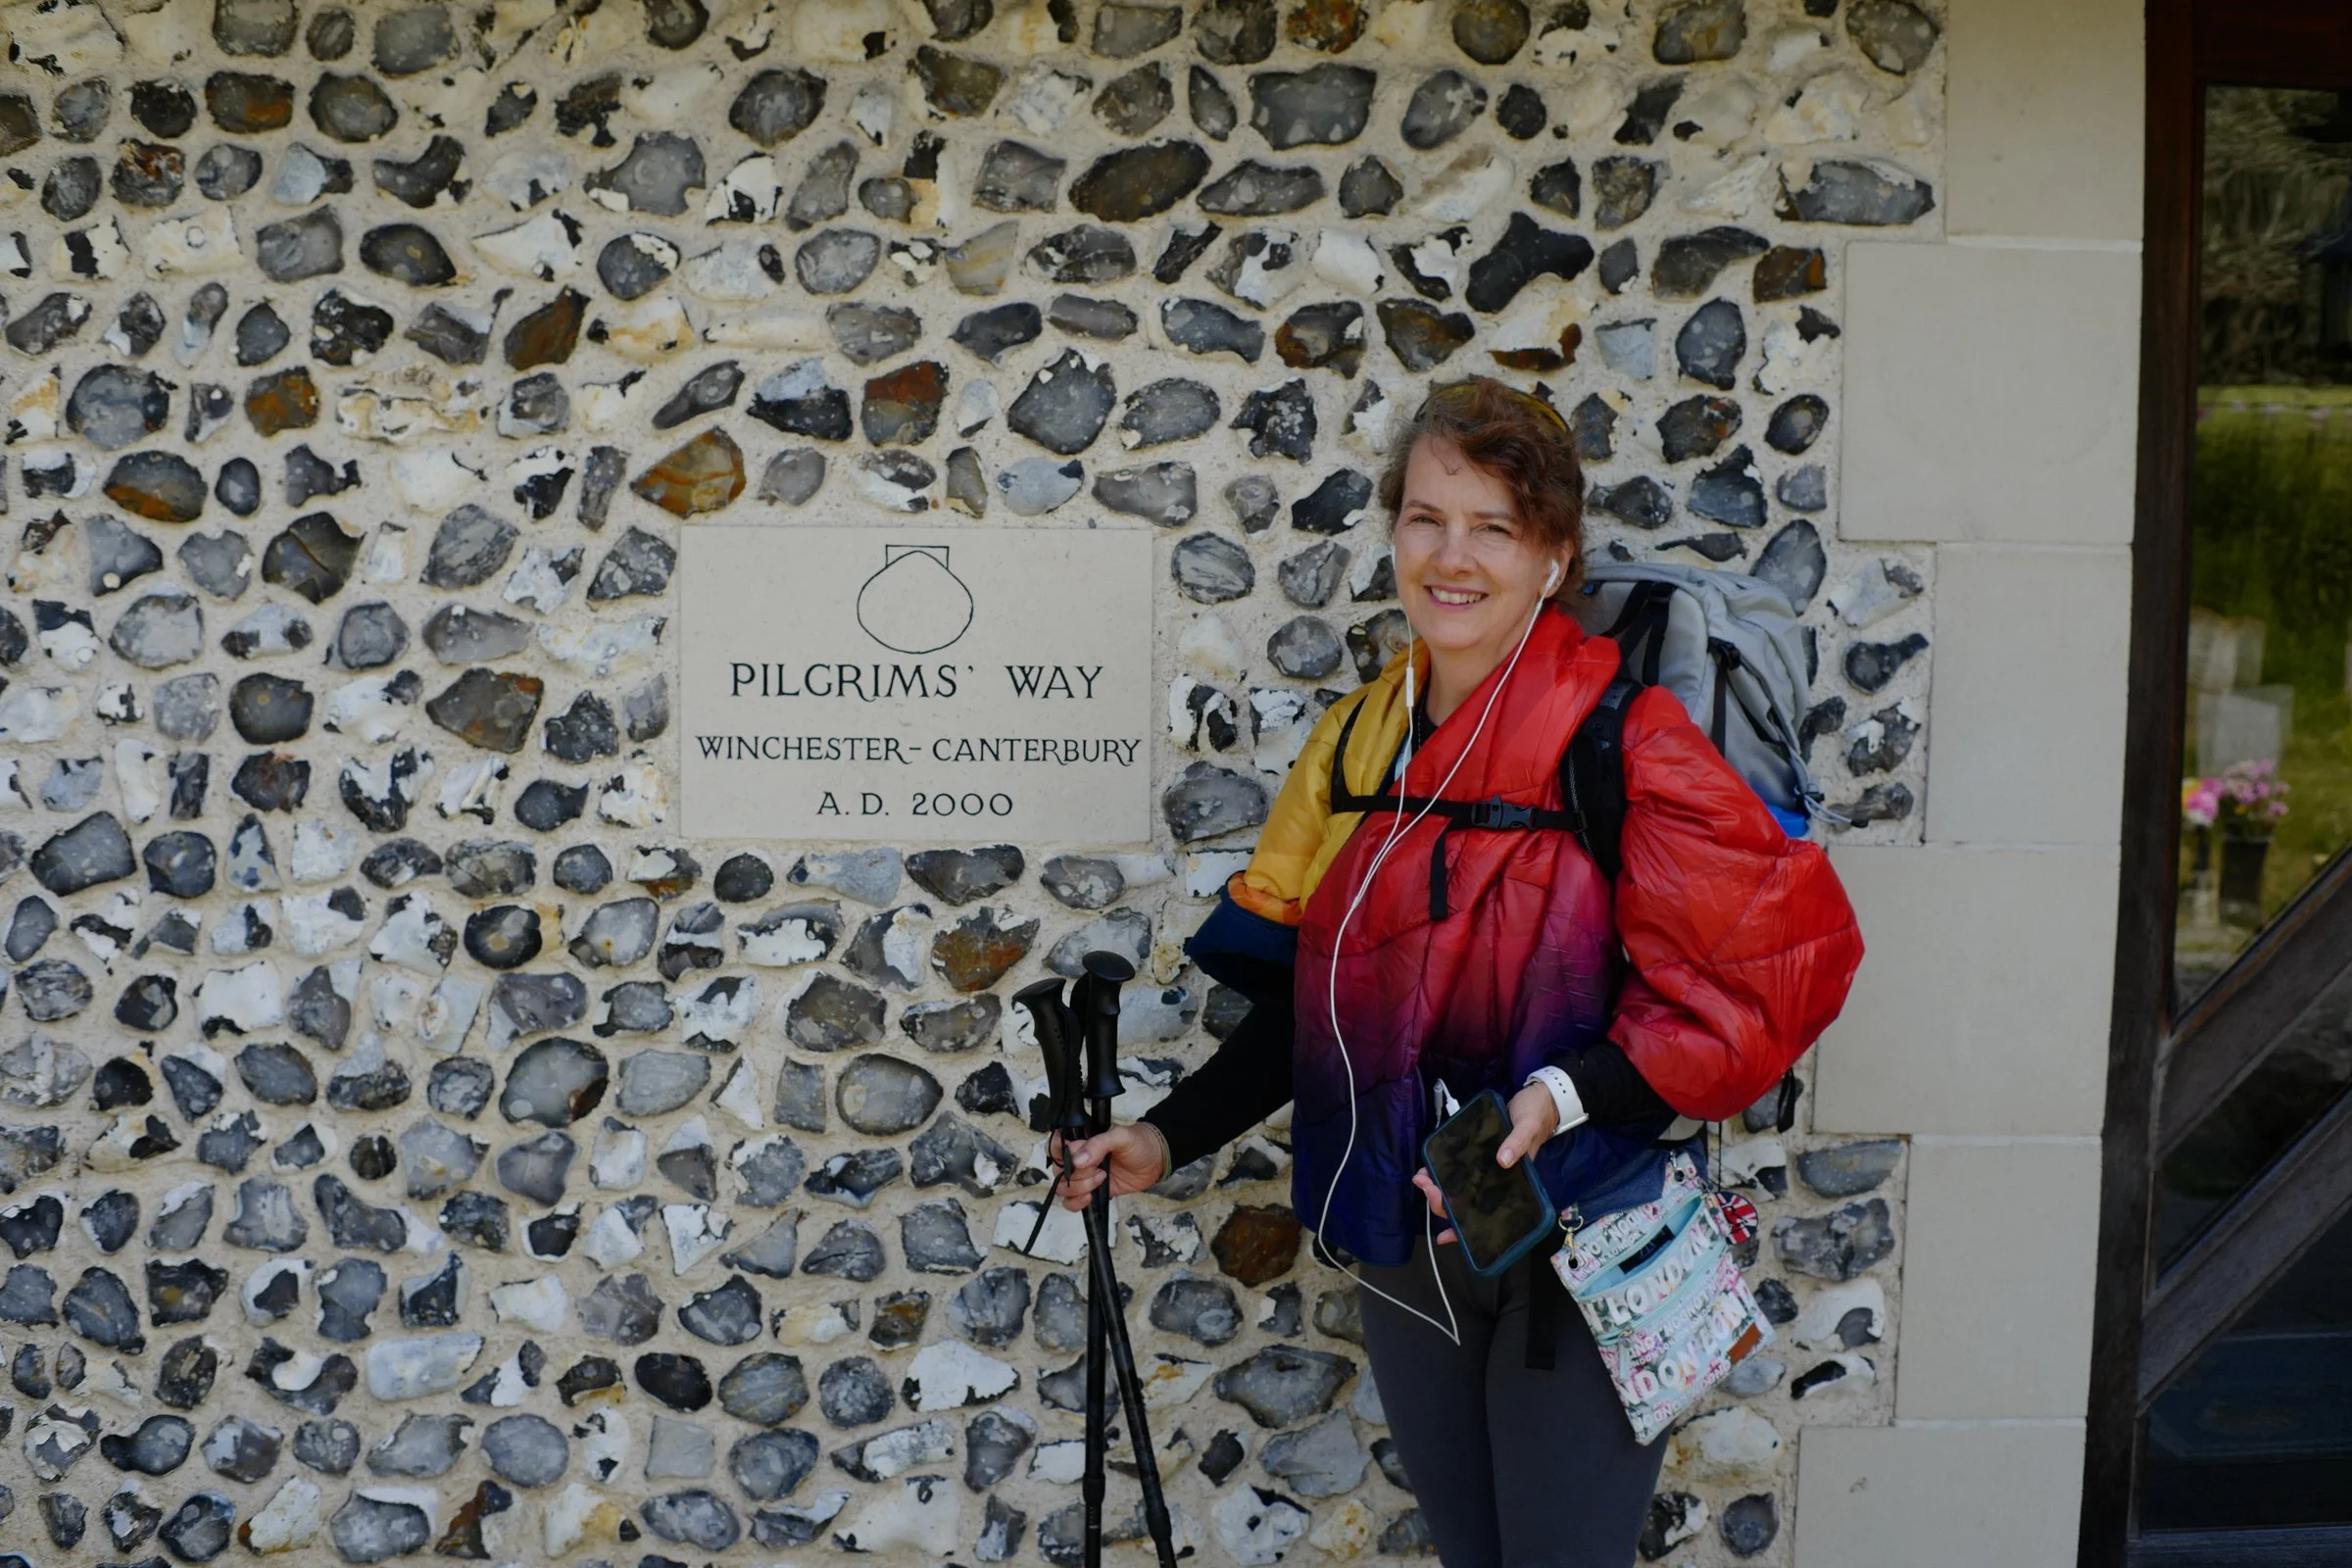
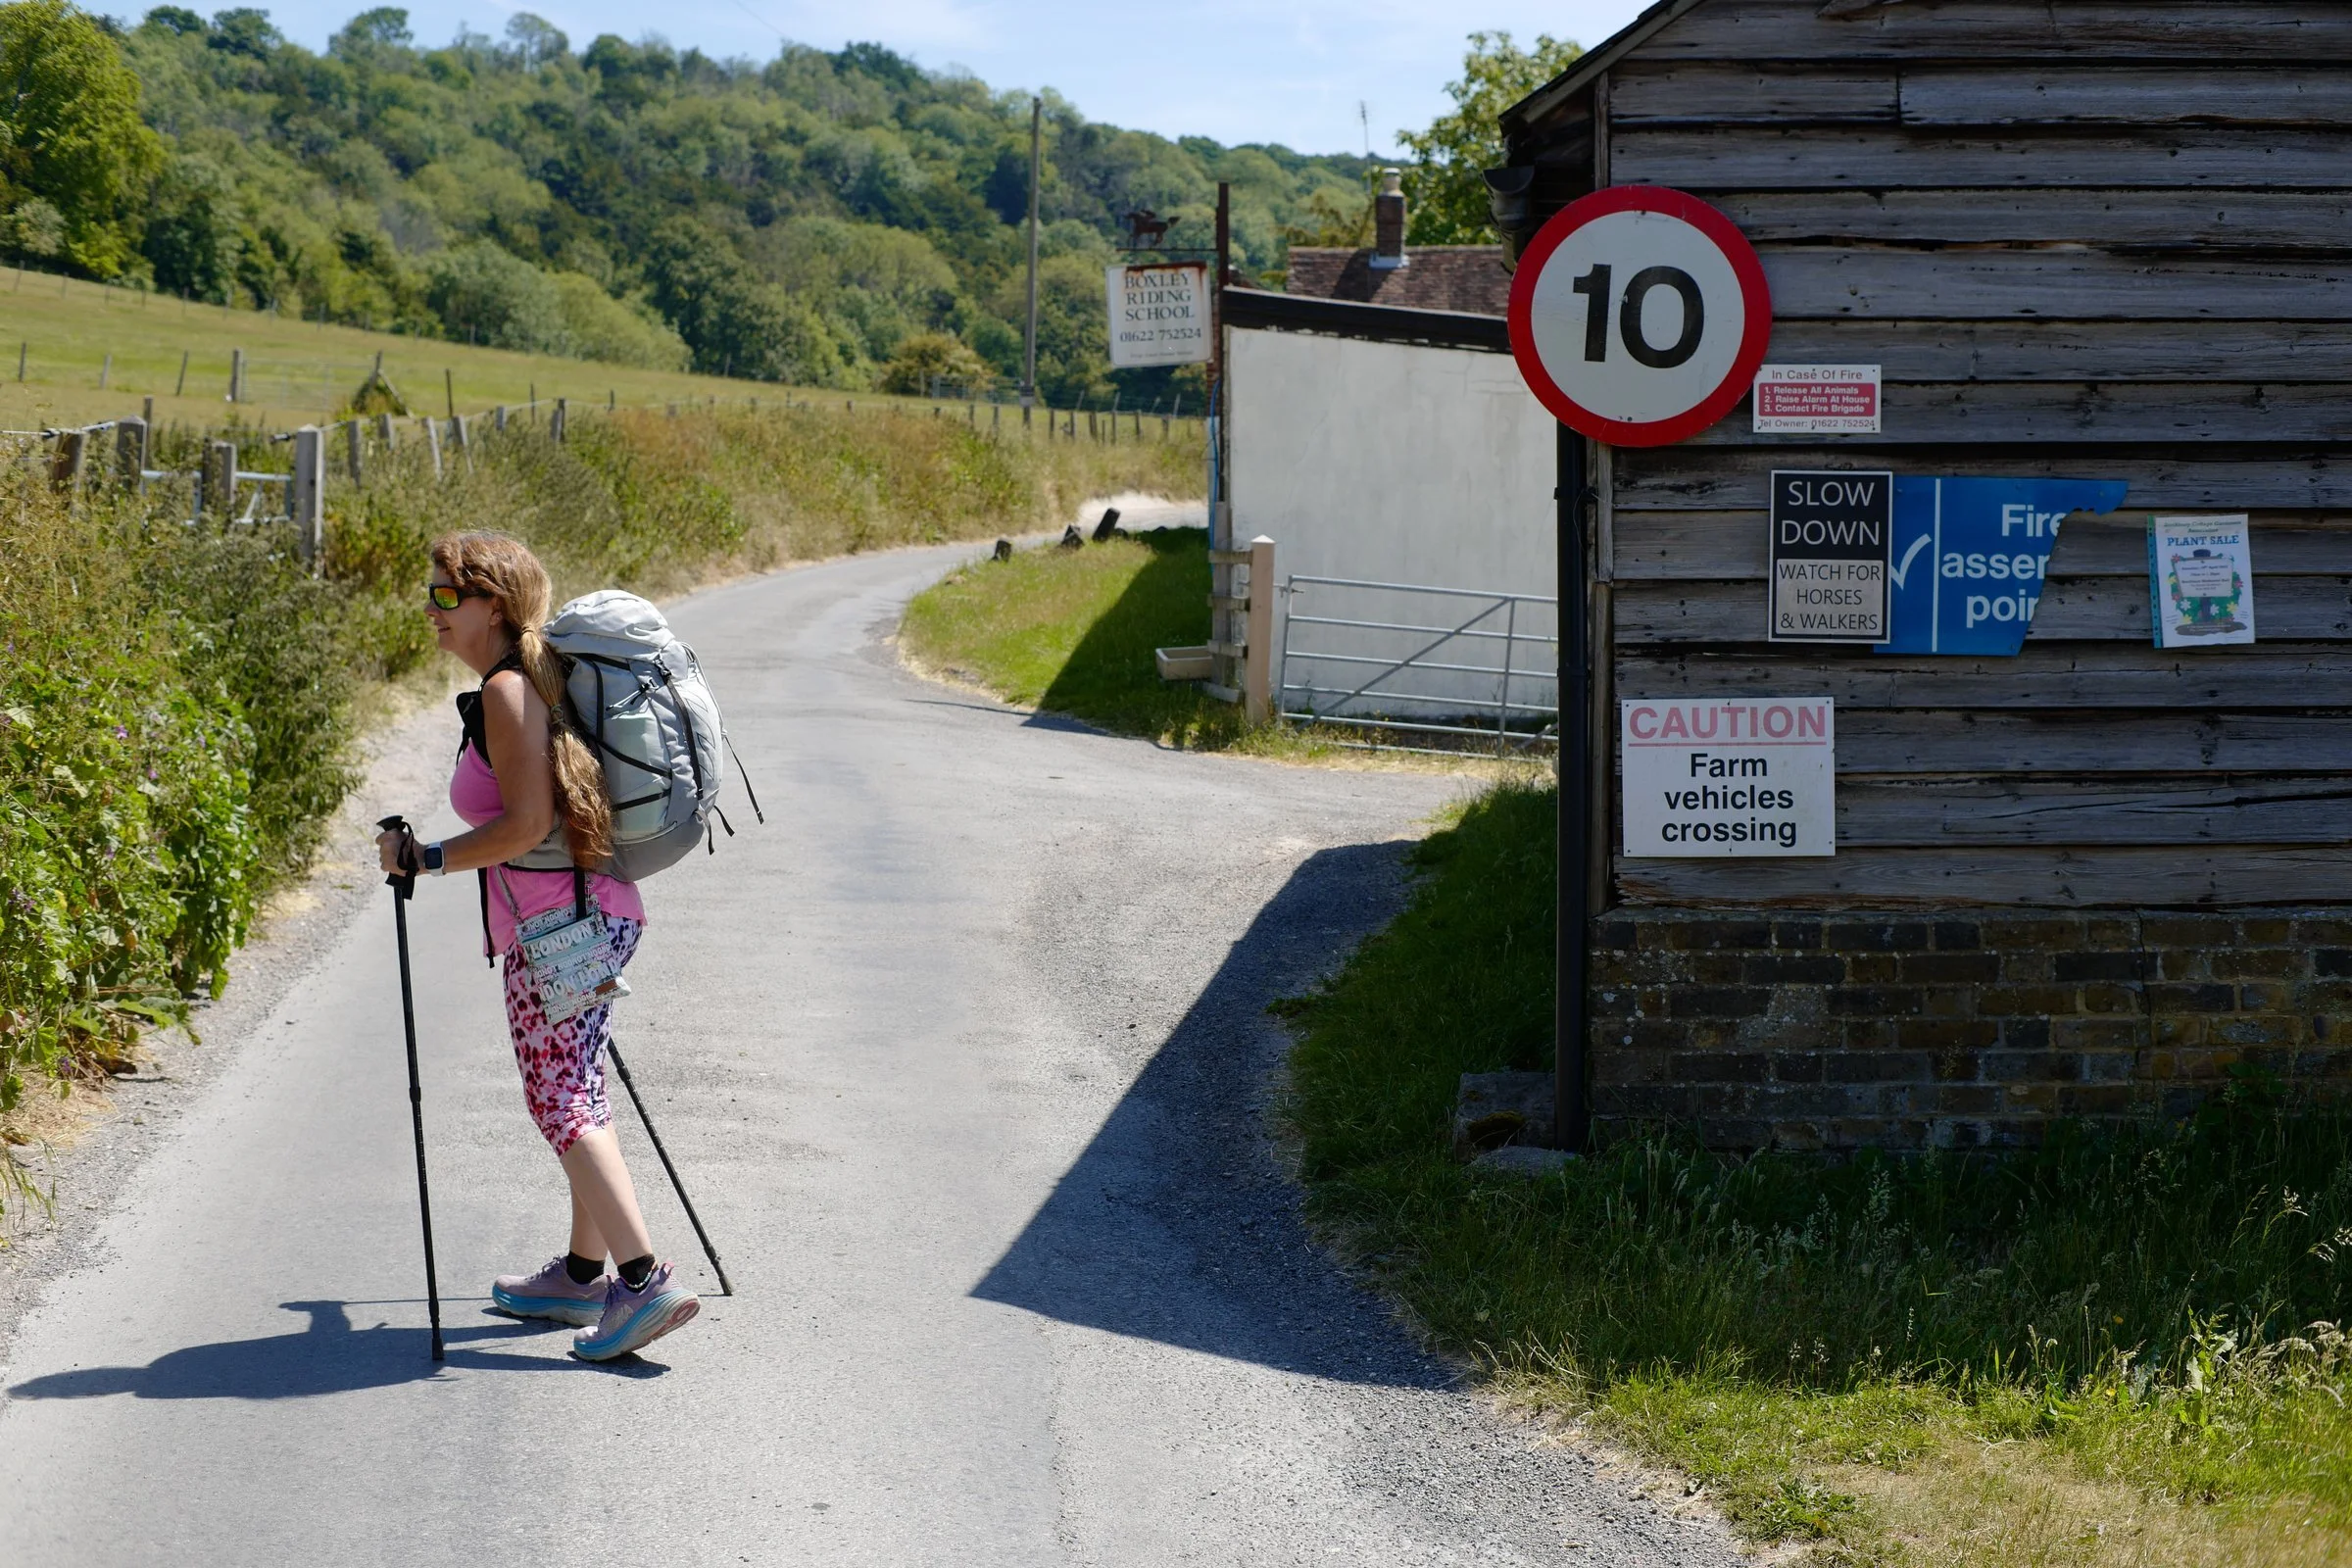
Teresa on the Pilgrims Way or AKA The Canterbury Pilgrimage in southern England
Planning Our Canterbury Pilgrimage: How It Started
When I first heard about this I was intrigued to say the least. I had never really considered doing a pilgrimage before or even doing extended length hiking trips of any kind. Enter Kelly, a lifelong friend and adventurer(she married one of my best friends in high school and was in our Dungeons and Dragons group). She tells of this adventure in England where she was planning to hike from town to town and follow the original Pilgrims Way laid out in the Canterbury Tales as well as a few notable stops while in London as well. (We also saw The Phantom of the Opera while in London!)
Well, us being the adventurous types that we are, we asked if there was room in the group for us too! As it turned out, the three of us would be the WHOLE group which actually worked out really well. So we started planning the adventure of a lifetime.
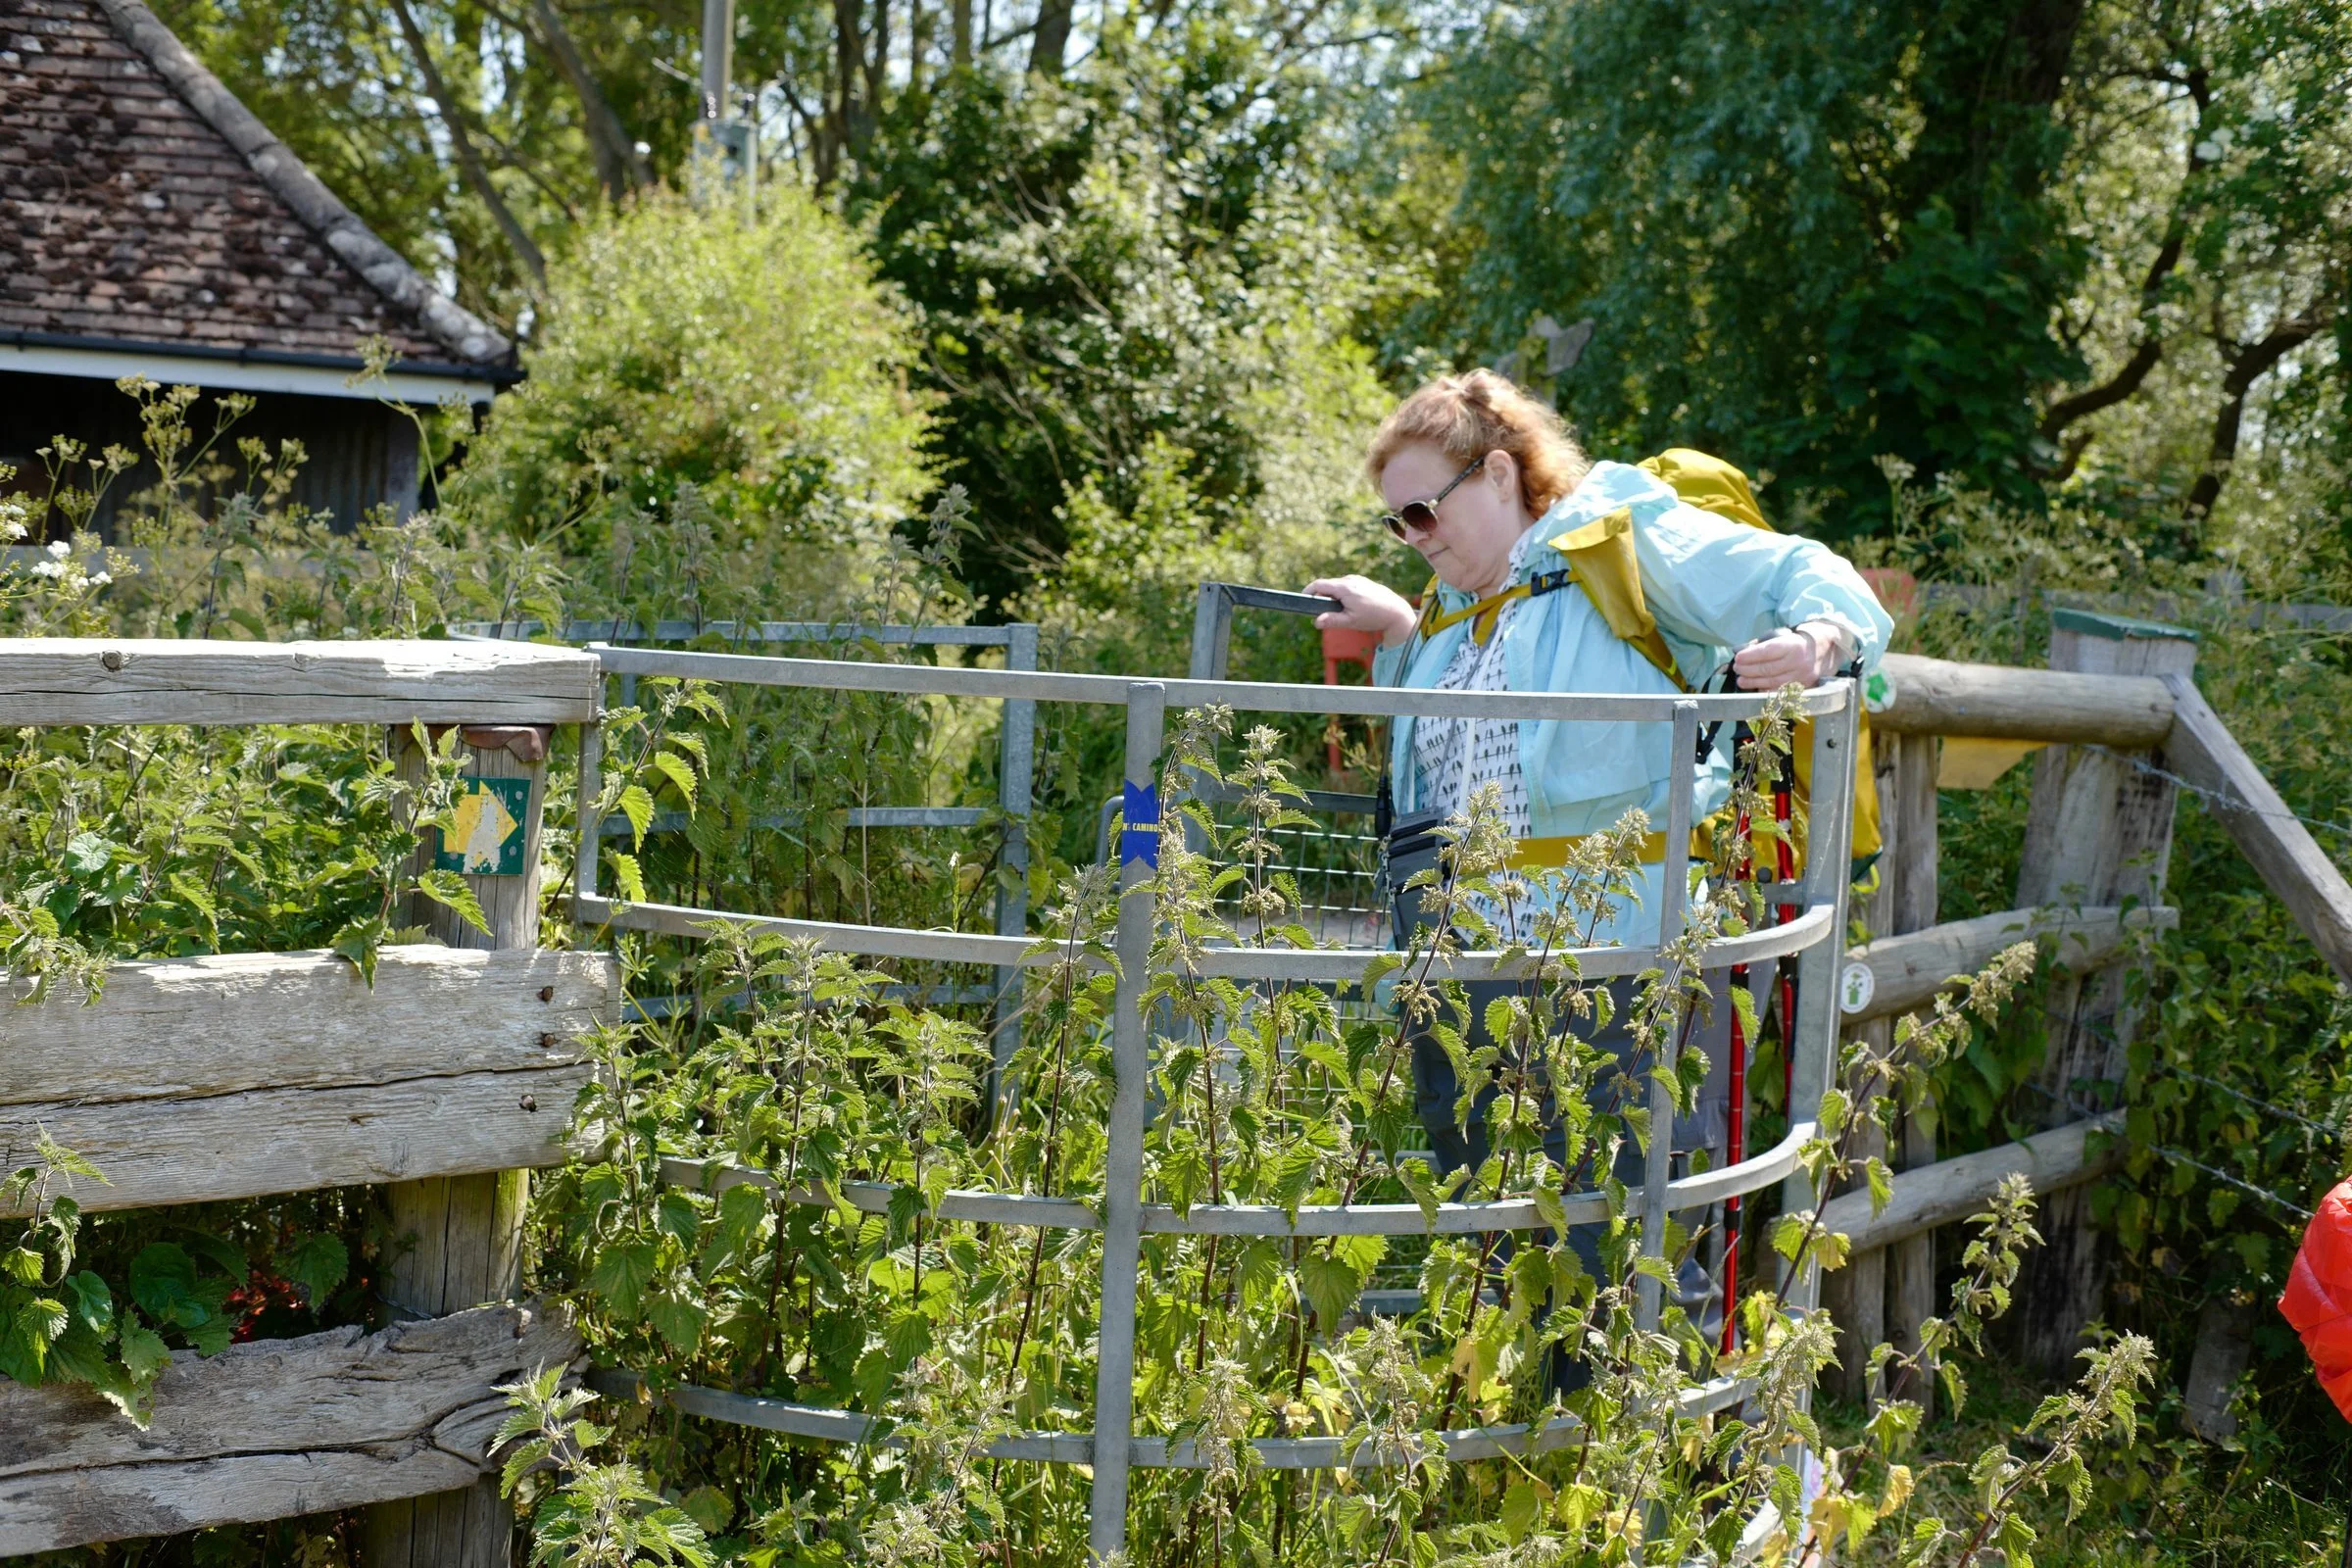
Our friend Kelly working her way through a "kissing gate" amid a veritable sea of Stinging Nettle!
Packing Light: The Backpack-Only Strategy
We decided early on to only bring what we could carry in our backpacks. Gone would be the "checked bag" at the airport as well as bringing computers and the associated baggage required for their operations. This actually made the airport part of the journey very easy as we didn't have to stand in lines for the check bag counter nor did we have to deal with baggage claim at all. It was very liberating to be honest.
The first thing we decided to do was limit our equipment to what we could carry in our respective backpacks. This eliminated a literal mountain of gear that we had deemed needed but optional. It also made the journey much nicer. We finally decided on a couple of changes of clothes, I took a small amount of camera gear in a dry bag (since it rains in the UK a lot), and a water bottle. We would pick up snacks along the way and add that to our loadout as we needed it.
Lightweight travel concept of only taking what fits in a backpack and nothing more is very liberating.
This also generated another benefit with our travel: the airport processing got A LOT simpler this way. We literally didn't check anything, so we just went through the TSA checkpoint and carried our packs right to the gate. Our hands were free to do things like buy coffee or get out credit cards! It made traveling so much less stressful to be quite honest that I might be adjusting my future travel to operate in this mode. You never lose your luggage as you walk onto the plane with it and it fits into the overhead space without issue... every time. This was glorious for me as I worry about the luggage making it to the same place as me or even worse, not arriving at all.
Just consider this a travel hack that actually works if you can live without all the stuff in your check bag…
Camera Gear for 2 Weeks of Travel Photography
Since we had decided to travel so light, I took a hard look at the camera kit I would use on the trip as well. I whittled it down to just the Leica CL, the TTartisan 17mm f1.4 L mount lens and the 35mm f0.95 L mount lens. That's it, no other gear whatsoever. Well... there were batteries and a charger, but you get the point here. So I quickly learned that I liked the 17mm in London and then once we got to Winchester I switched to the 35mm and left it in place almost the rest of the trip. To be honest, I could have left he 17mm at home and it would have been fine…lesson learned.
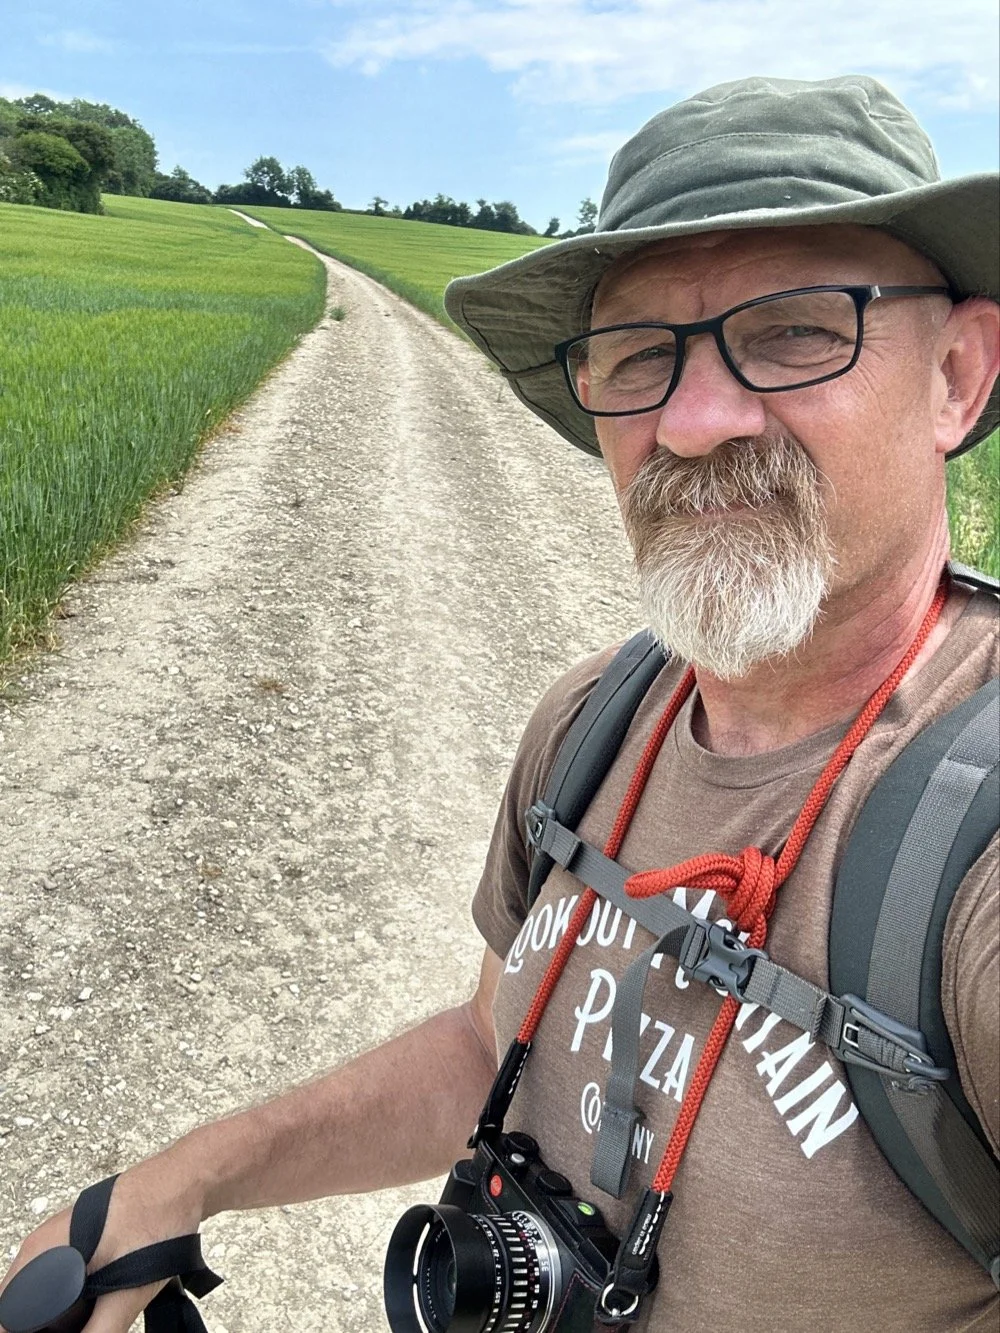
The author with the Leica CL mirrorless camera and the TTArtisan 35mm f0.95 lens on the Pilgrim's Way
For this trip I decided to travel light so I took my Leica CL and two prime lenses: the 17mm f1.4 and the 35mm f0.95 prime lens. Turned out I wished I had taken the 35mm f1.4 as it is smaller and lighter than the 0.95 aperture lens and would have saved me some weight. I don't know if I even once opened up to f0.95 on this trip, even at night. I just didn't need it, so it was wasteful to bring it.
I took a dry bag to protect the camera gear since it rains in the UK a lot. Smart decision, as we did hit some wet weather!
Mystery Ranch Backpack Review: 25-30 Pounds, No Back Pain
As for hiking gear, my loadout for this trip was as follows: I had a full change of clothes plus extra socks, I also took my phone charging gear, a Katadyn water filter as I was not sure if I would have ready access to clean water. Sometimes you don't have that access to be honest, and I wished I had taken another water bottle as well... I took a single Nalgene quart water bottle, a ziplock bag of snacks from the grocery store, a rain coat, and my dry bag with my camera gear in it, and that’s it.
I picked up a set of trekking poles in Winchester that I almost wore out by the end of the trip. My backpack that I used on this trip is a Mystery Ranch Pitch 40, which is actually geared toward rock climbing but worked just fine for this trip. I am going to take a moment here to point out that a really well-engineered backpack makes all the difference in the world. I was carrying about 25 to 30 pounds from day to day and my back was NEVER sore or painful from the pack, not even once. I can absolutely, and with certainty recommend Mystery Ranch backpacks after this trip. They work.
I never really understood how to properly use a backpack, but after using this one, I figured it out and got it dialed in. It is not really designed for this kind of trek, but rather it is engineered for route climbing and carrying rope and chalk and harnesses and such instead. I just used it anyway as it is what I had at the time. This didn’t seem to be a problem though as the load bearing system puts the load on your waist and not your shoulders. This is where people get things wrong because small bags and haversacks place the load on the shoulders and this causes fatigue unnecessarily. If you adjust your pack properly, you can carry it for hours and you will just be tired from the trekking and you will be sweaty from the physical workout, but your back will not hurt.
Arriving in London: Tourist Mode Before the Trek

Big Ben in London England is an incredible iconic landmark that is a must see if you are in London. We did the usual tour and then went for a walk, which is how I was able to get this photo with the Leica CL and the TTArtisan 35mm f0.95 lens.
Once in England we started in London where we did the usual tourist stuff for a couple of days ahead of starting the pilgrimage proper. This included a bus tour and a short trip to the British Museum as well. We even took in the Phantom of the Opera while in town. What a treat that was! I was wholly unprepared for the experience that is the Phantom of the Opera, totally worth it.
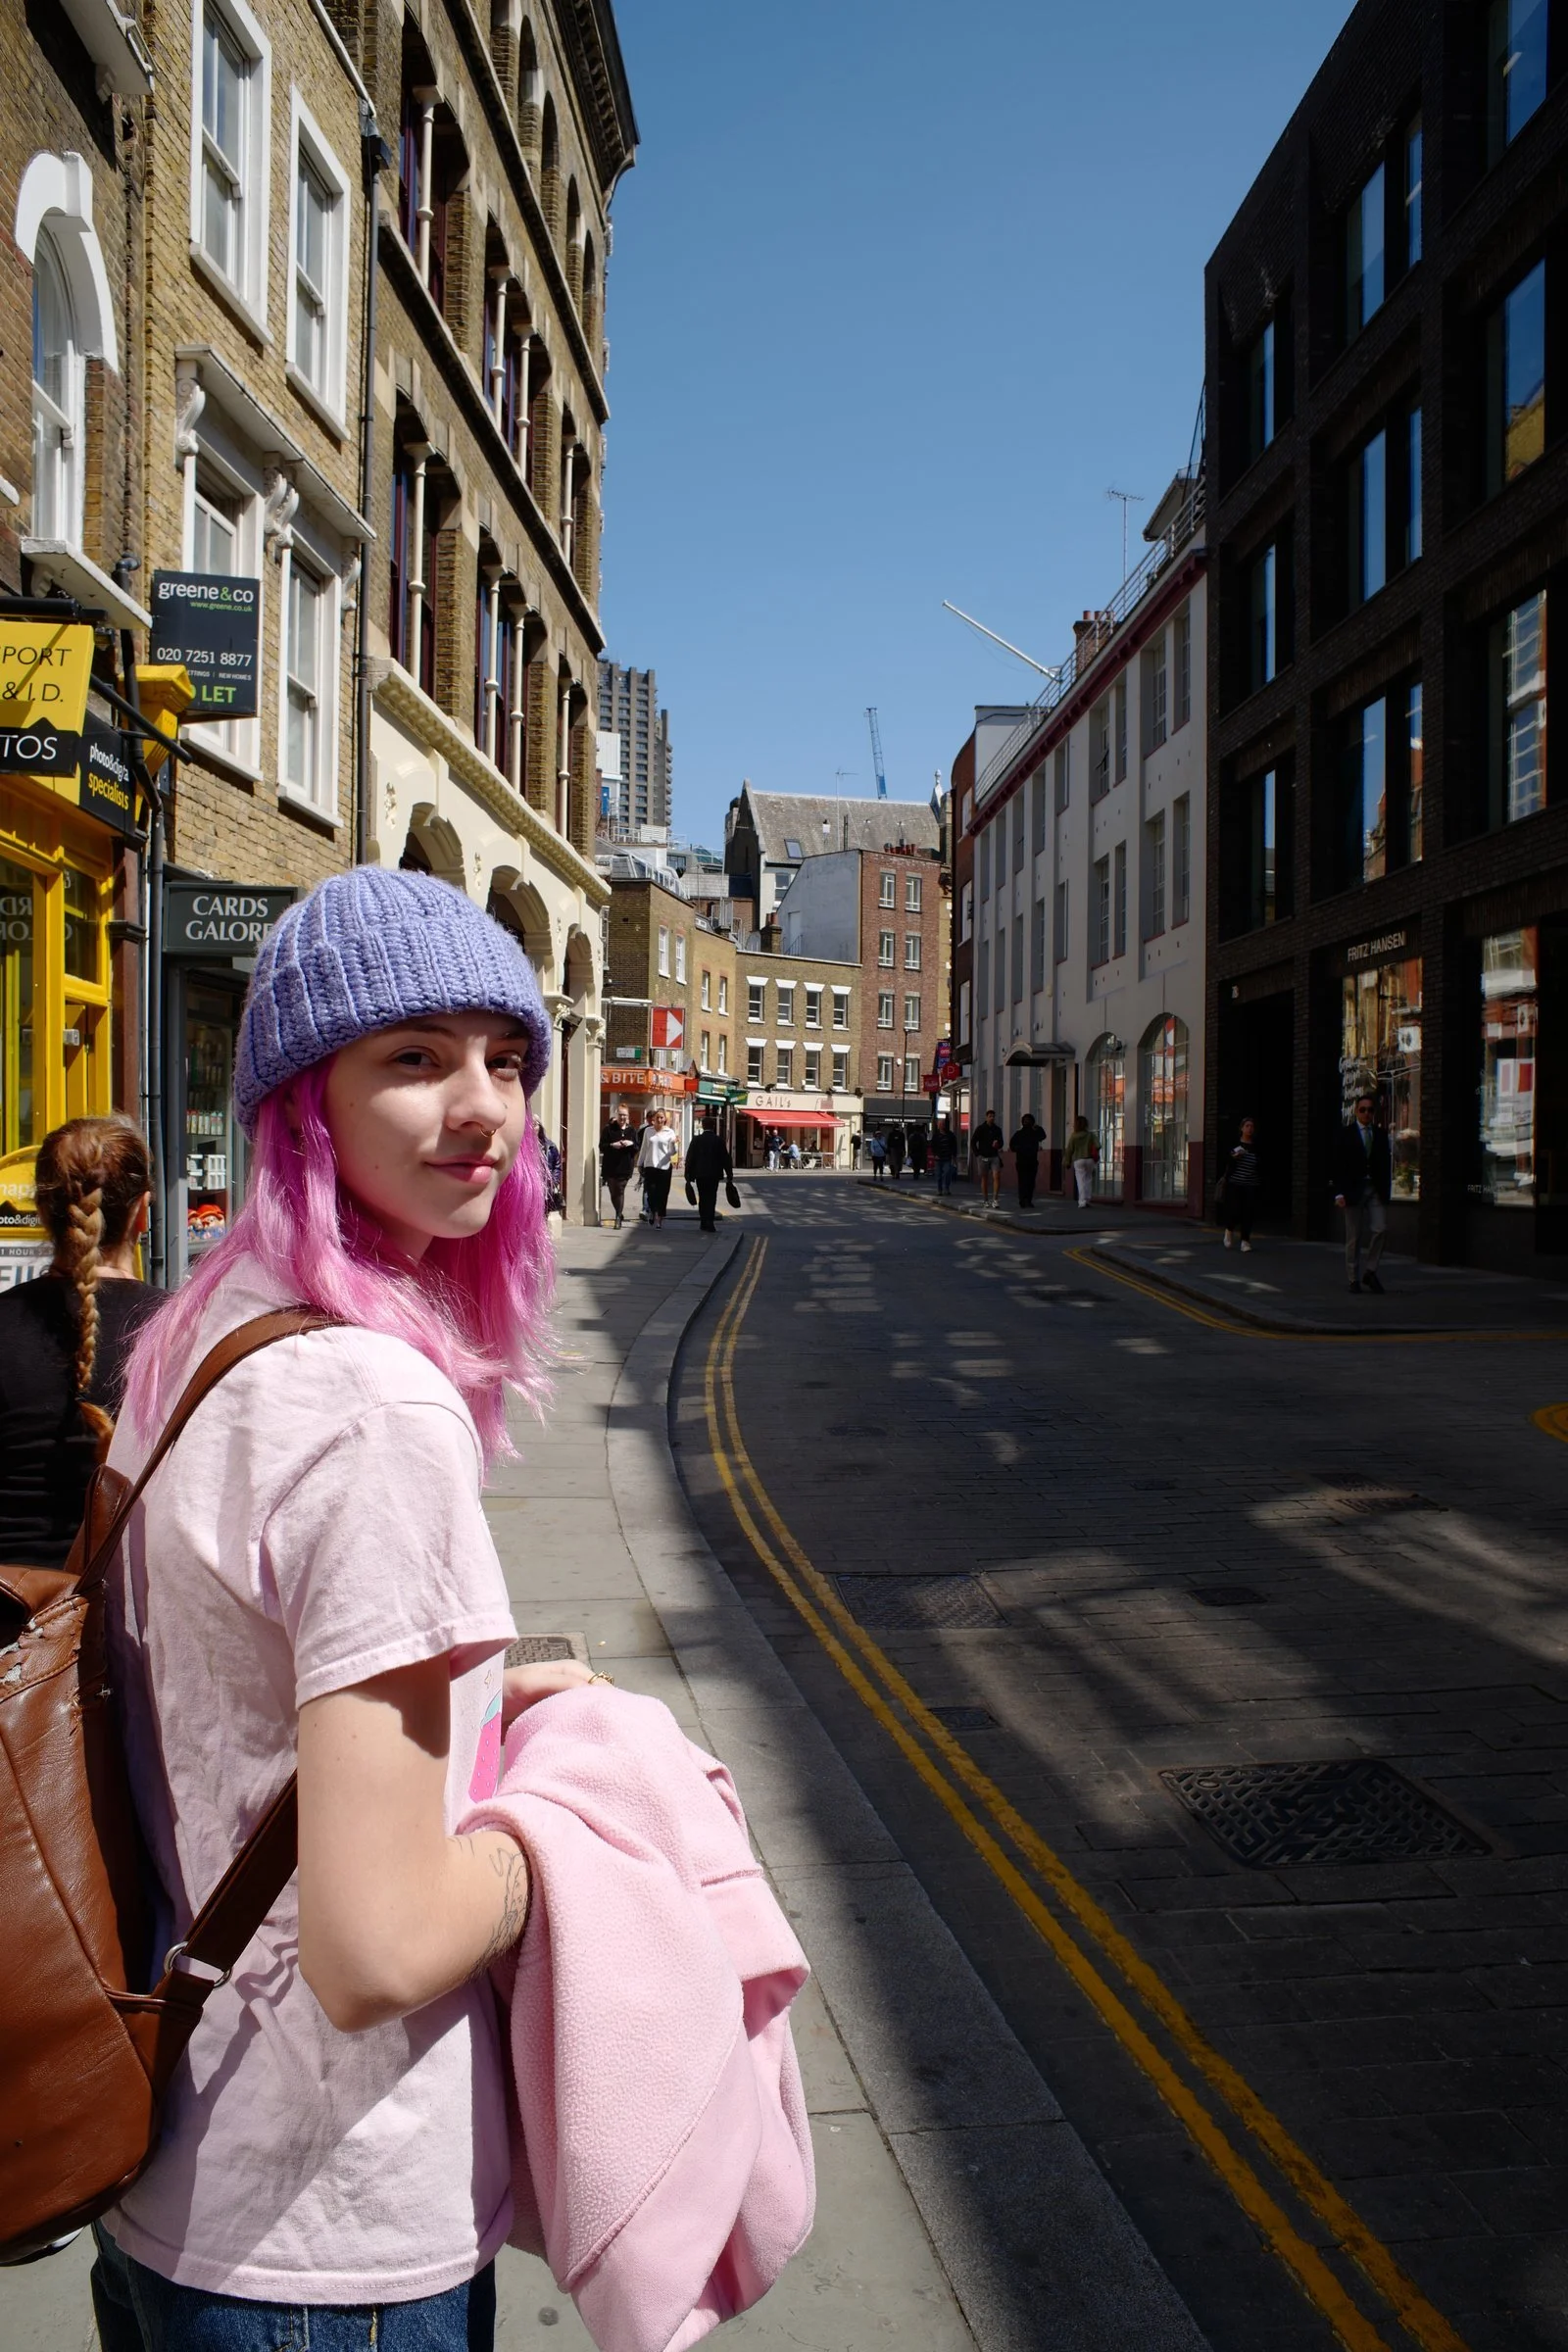
The daughter went with us to visit London and to hand out with us for the first few days of the Canterbury Pilgrimage, even though she cheated…
Well, once on the ground in England we checked into our hotel and went for some food. What we found is that the food in the UK is... different... from what we are accustomed to here in the US. We had to adjust to this as it seemed that they have a very specific diet and do not vary from it for any reason. We joked about how for a country that conquered most of planet earth at one point for spices…. doesn’t know how to use them! I will never understand this whole “beans on (soggy) toast” thing either…
We spent the next couple of days being tourists in London for the sake of brevity, then we embarked on the mission to Winchester to start the pilgrimage. We saw all the usual stuff, like Piccadilly Circus and Trafalgar Square and Westminster Abby and such, but it was only for a day or so, then it was off to Winchester!
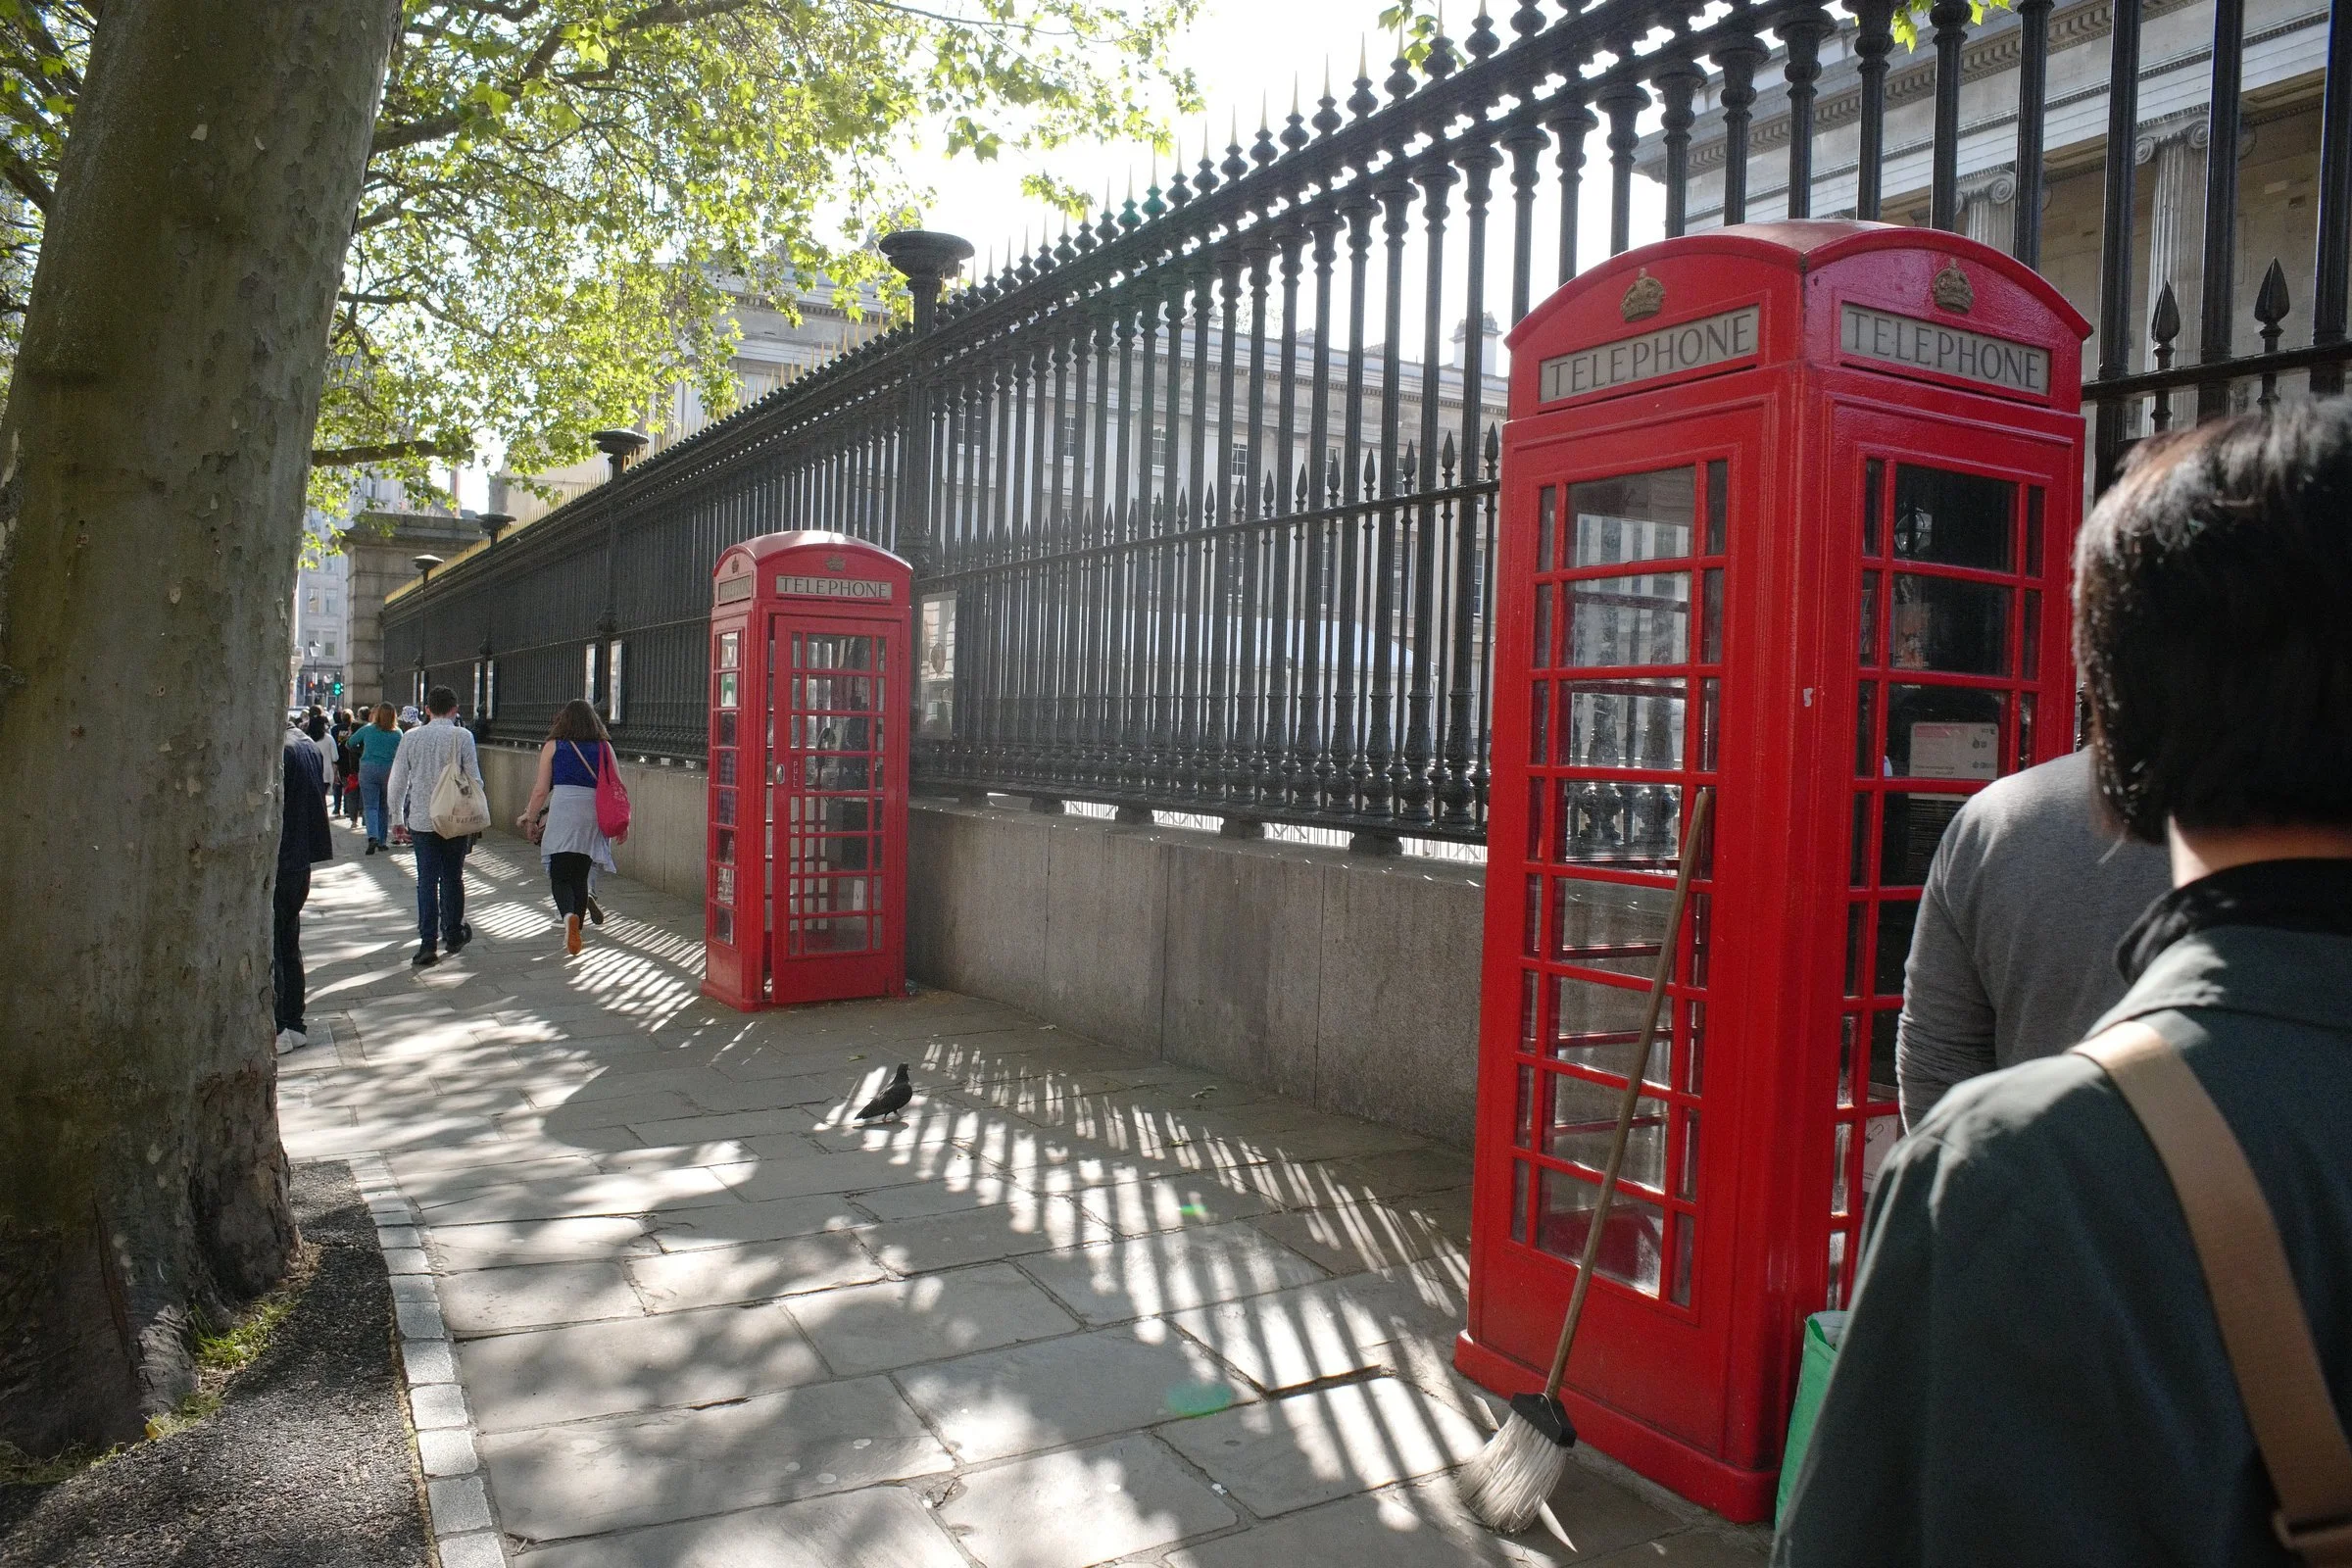
The fence outside the British Museum showcasing the iconic telephone booths in London.
Winchester Cathedral: The Official Start
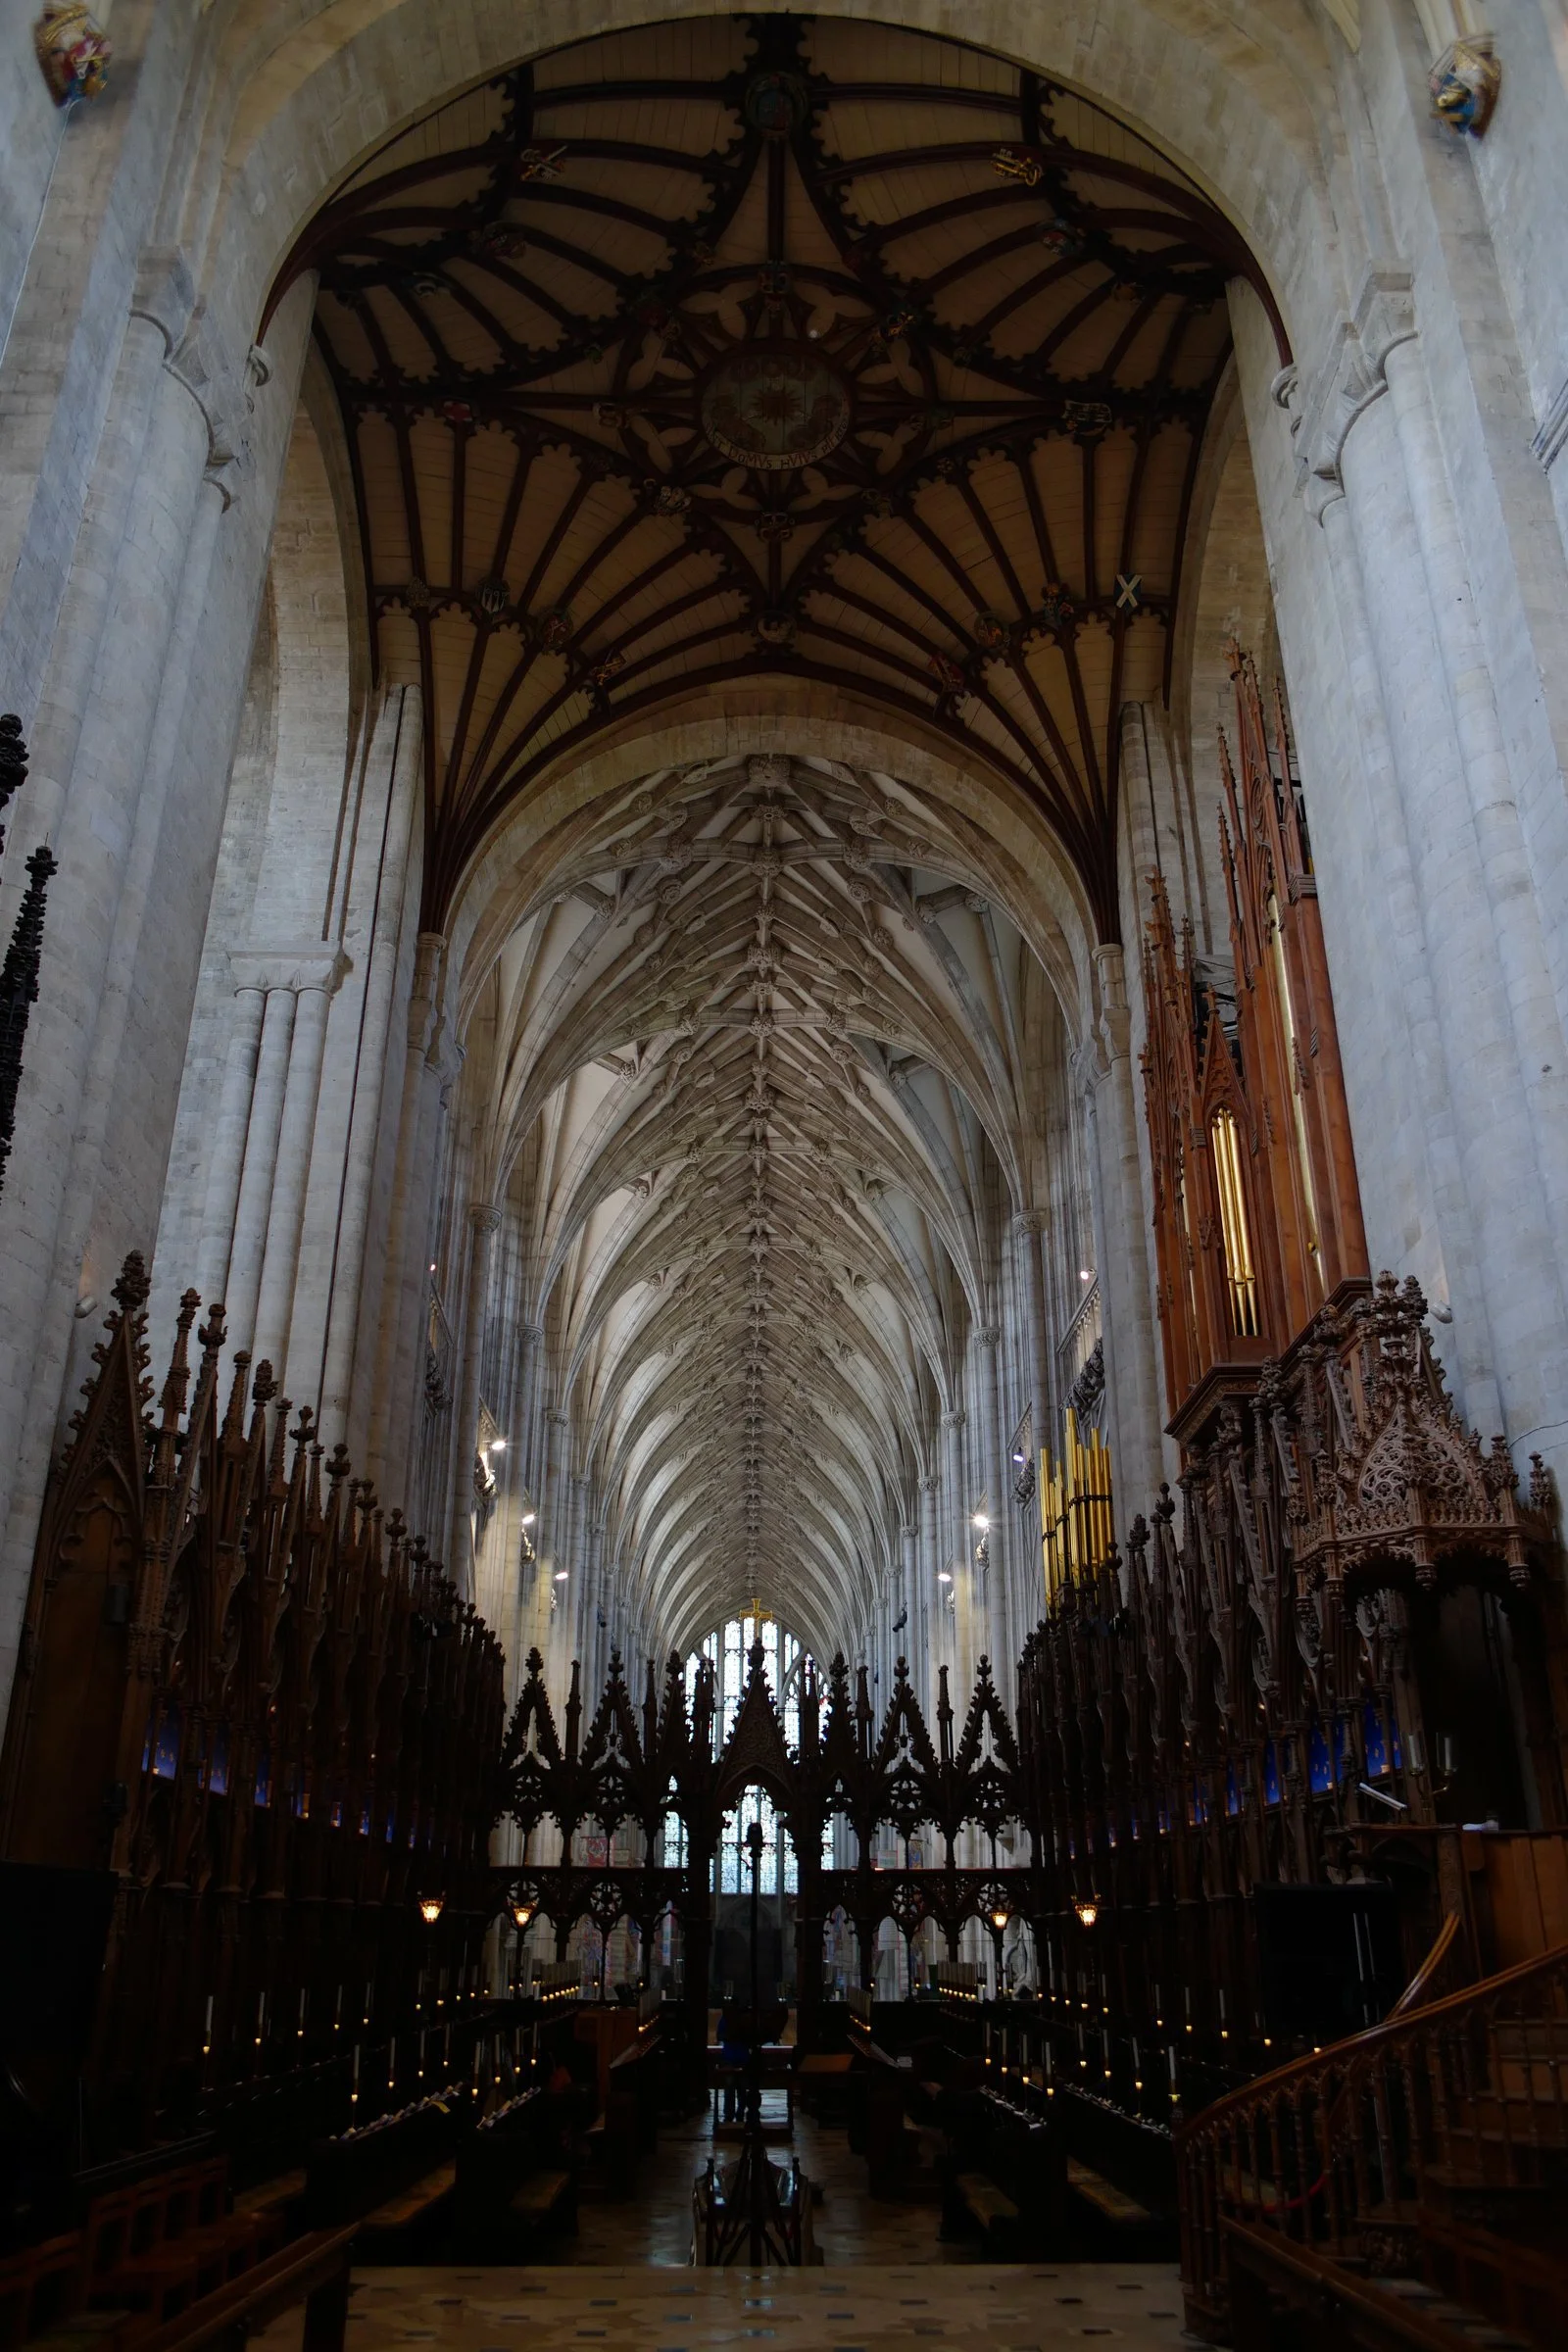
Interior of Winchester Cathedral in Winchester England.
Once in Winchester we attended a service at Winchester cathedral and received a blessing from the priest before we started, which was a really nice touch to add to the whole experience to be honest. If you do this hike, I recommend attending a service at the cathedral even if you're not really religious and hear the boys choir. The singing is beautiful. It also just adds a little something special to the trip in my opinion. I think the evening service is called “Evensong” or something like that, it is beautiful. We also found an outfitter in town (who would have guessed that there would be a HIKING outfitter at one end of the Canterbury Pilgrimage? HaHa) and this is where we learned about the value of trekking poles and decided to get a couple of sets for me and Teresa. I am really glad we did too, they helped so much! I will not do long hikes without them anymore. Once you see how much they help with load distribution as well as balance, you will never want to hike without them again too.
Now the adventure officially begins…
Winchester to Arlesford (First Steps)
Well, we strike out and head for the next town and I must say at this point that the English countryside is absolutely gorgeous! We couldn't get over how everywhere we looked that it looked like a postcard! We walked by beautiful fields, streams and all these little communities with some of the nicest people we have ever met!
The first “destination” was Alresford which is a quaint little village in the countryside that has several really old buildings (which becomes a recurring theme on this trip). One of which was constructed before the USA even existed. I point in out in one of the videos listed below actually. It turns out that it takes a lot longer to cover 8 to 10 miles than I thought it would too, we were complete neophytes at this and were REALLY over ambitious about how fast we would move on the trail, turns out we go ALOT slower than we thought… this resurfaces later in the blog, but just keep that in mind if you think you want to do this hike.
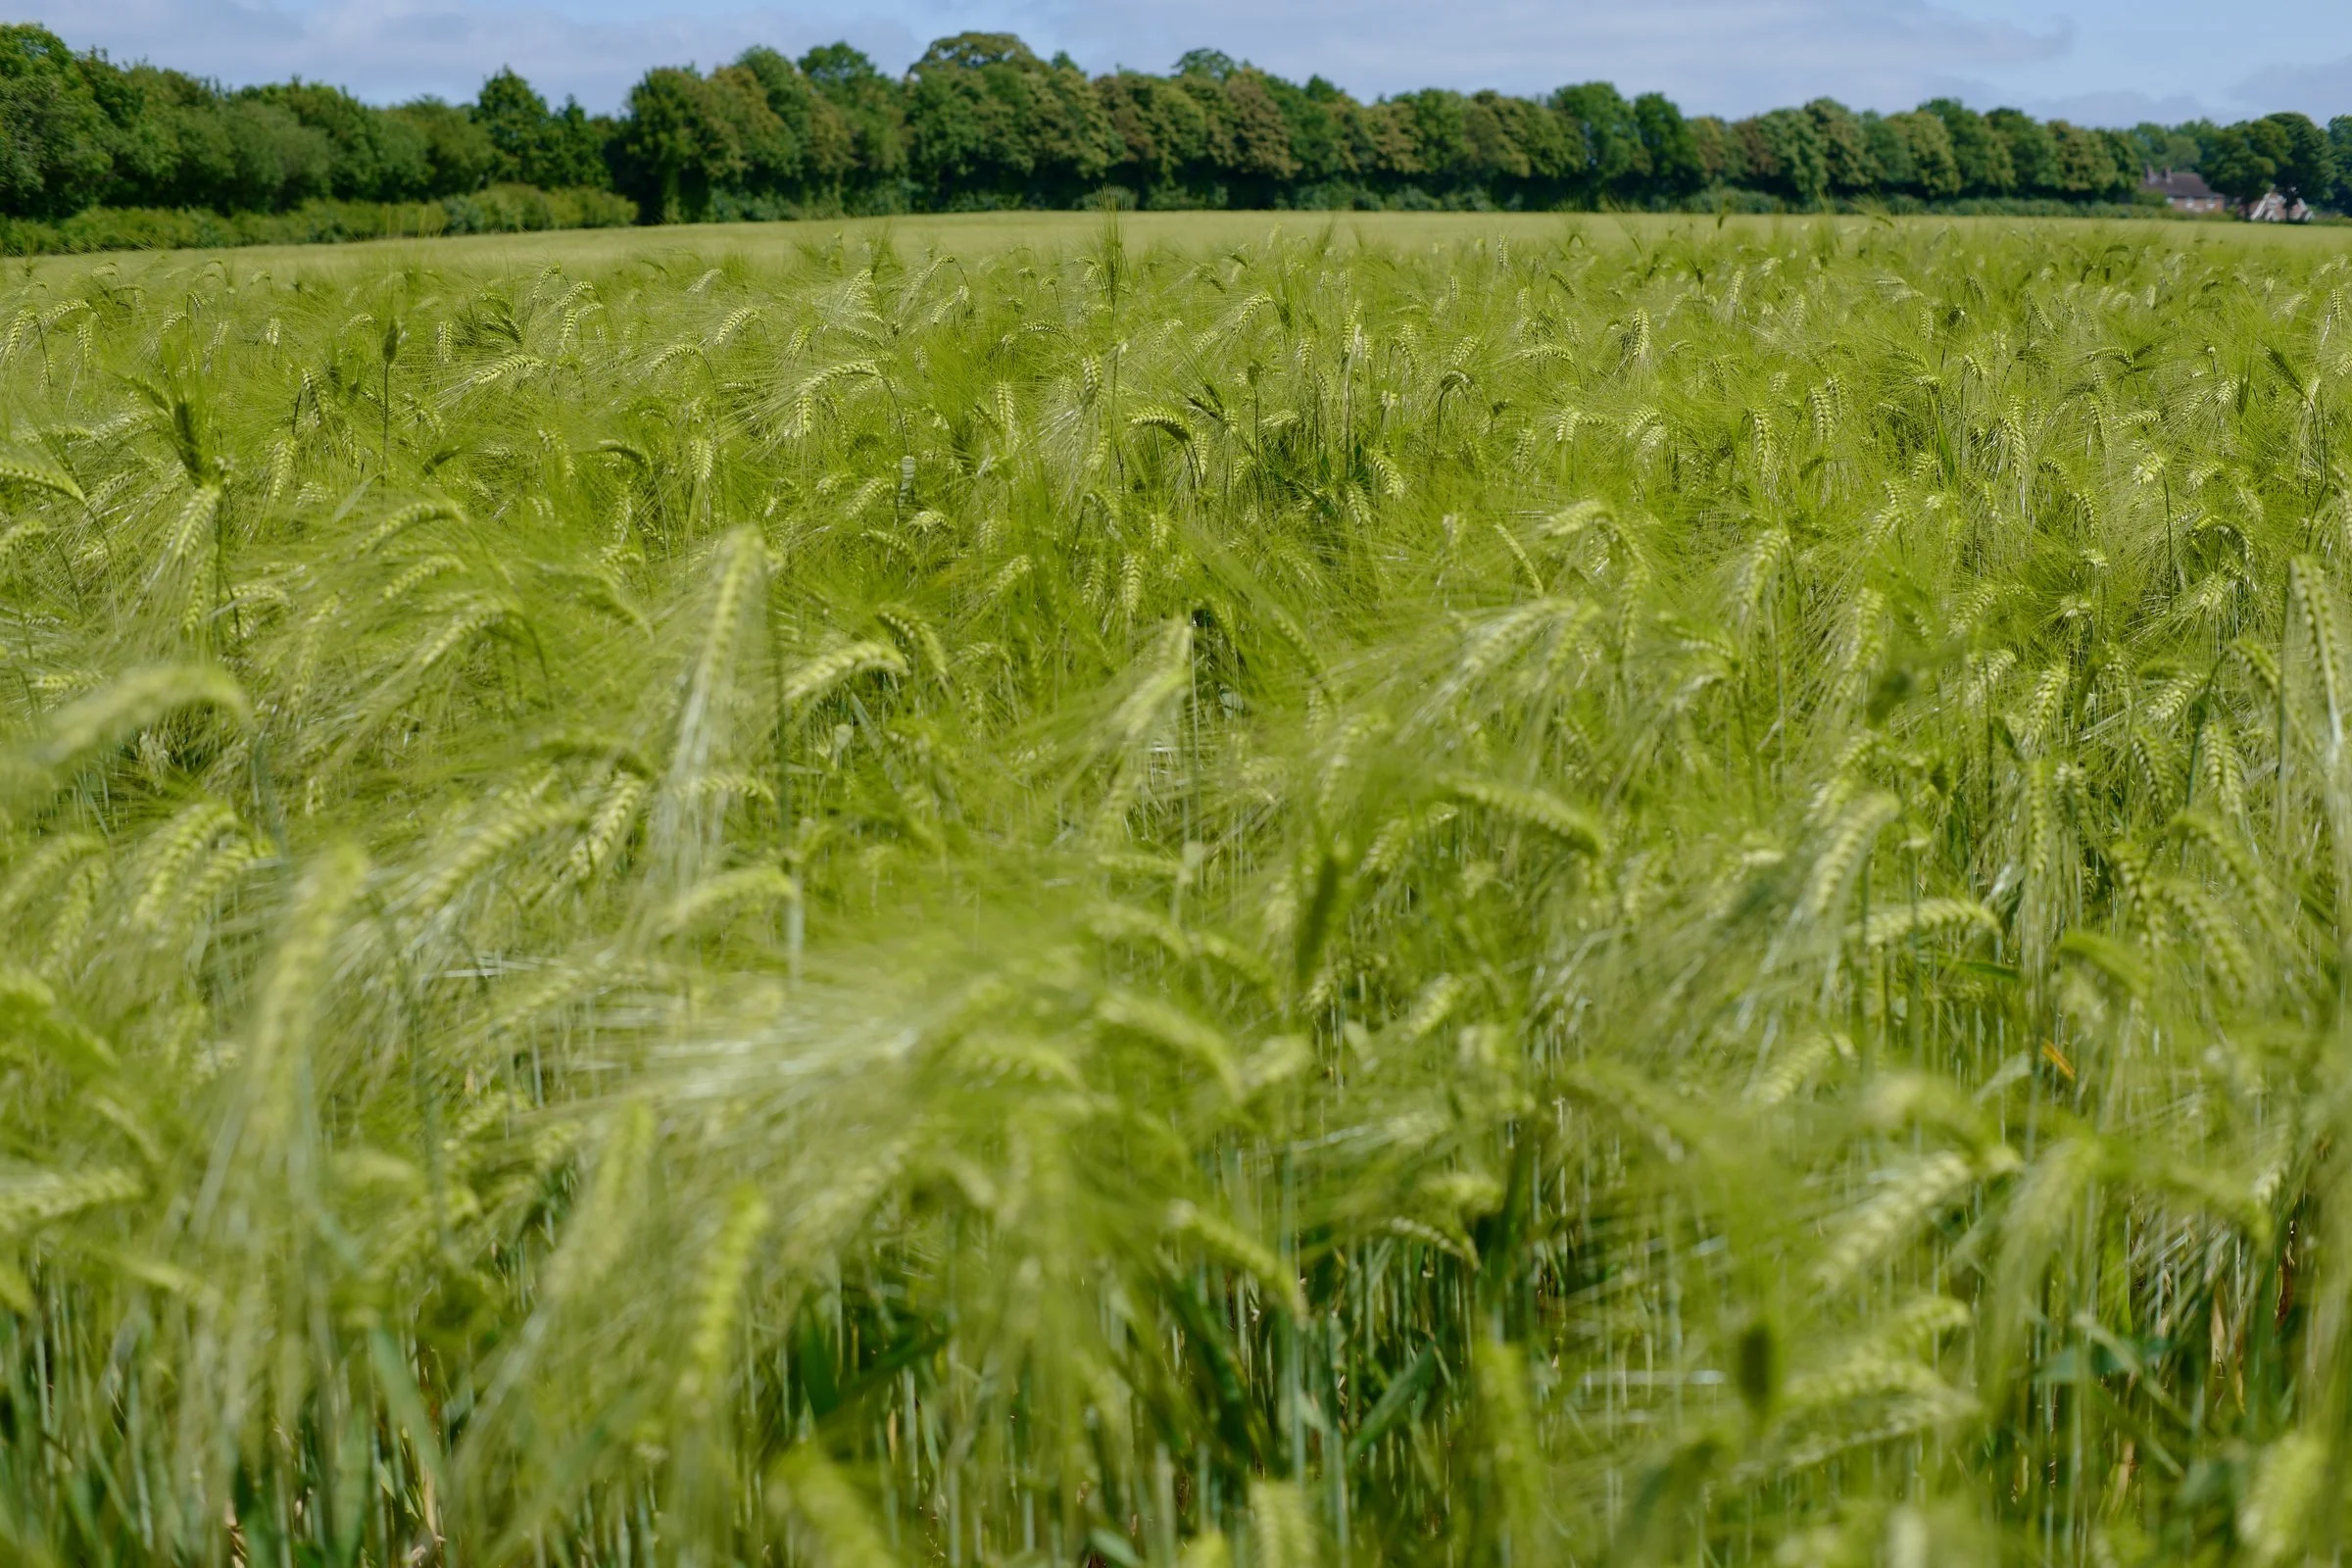
Wheat field south of London England on the Pilgrim’s Way of the Canterbury Pilgrimage.
Some of the things we have learned are that stinging nettle is a legit plant you don't mess with and it is literally EVERYWHERE. Another one is that the locals are very friendly, especially the older ones, and are a real treat to chat with when you find them here and there. They loved my accent most of the time and would call me “the Yank” when they would hear me talk…it was almost comical as I have a very strong Appalachian accent as you can hear in the video as well. The trail also isn't just a hiking trail through the woods, but more of a "way" which will cross fields, go down designated paths or even along roads at times. You really have to pay attention to make sure you don't miss your turn...ask me how I know.
All that aside we had a wonderful first day on the trail, albeit a long one where we ran into really interesting people and also learned a few things about the local flora and fauna we didn't know either.
English Countryside: Why It Looks Like Postcards
The English countryside is some of the most picturesque terrain I have ever laid my eyes on, and for the locals it is just...home... I have seen a lot of beautiful places on this earth and they all have a charm. The charm here is the people and how they groom the landscape for agriculture beautifully. It is literally a postcard in almost any direction you look. So I did just that, took photos in every direction, and wound up with something like 1400 unique images when I got home two weeks later.
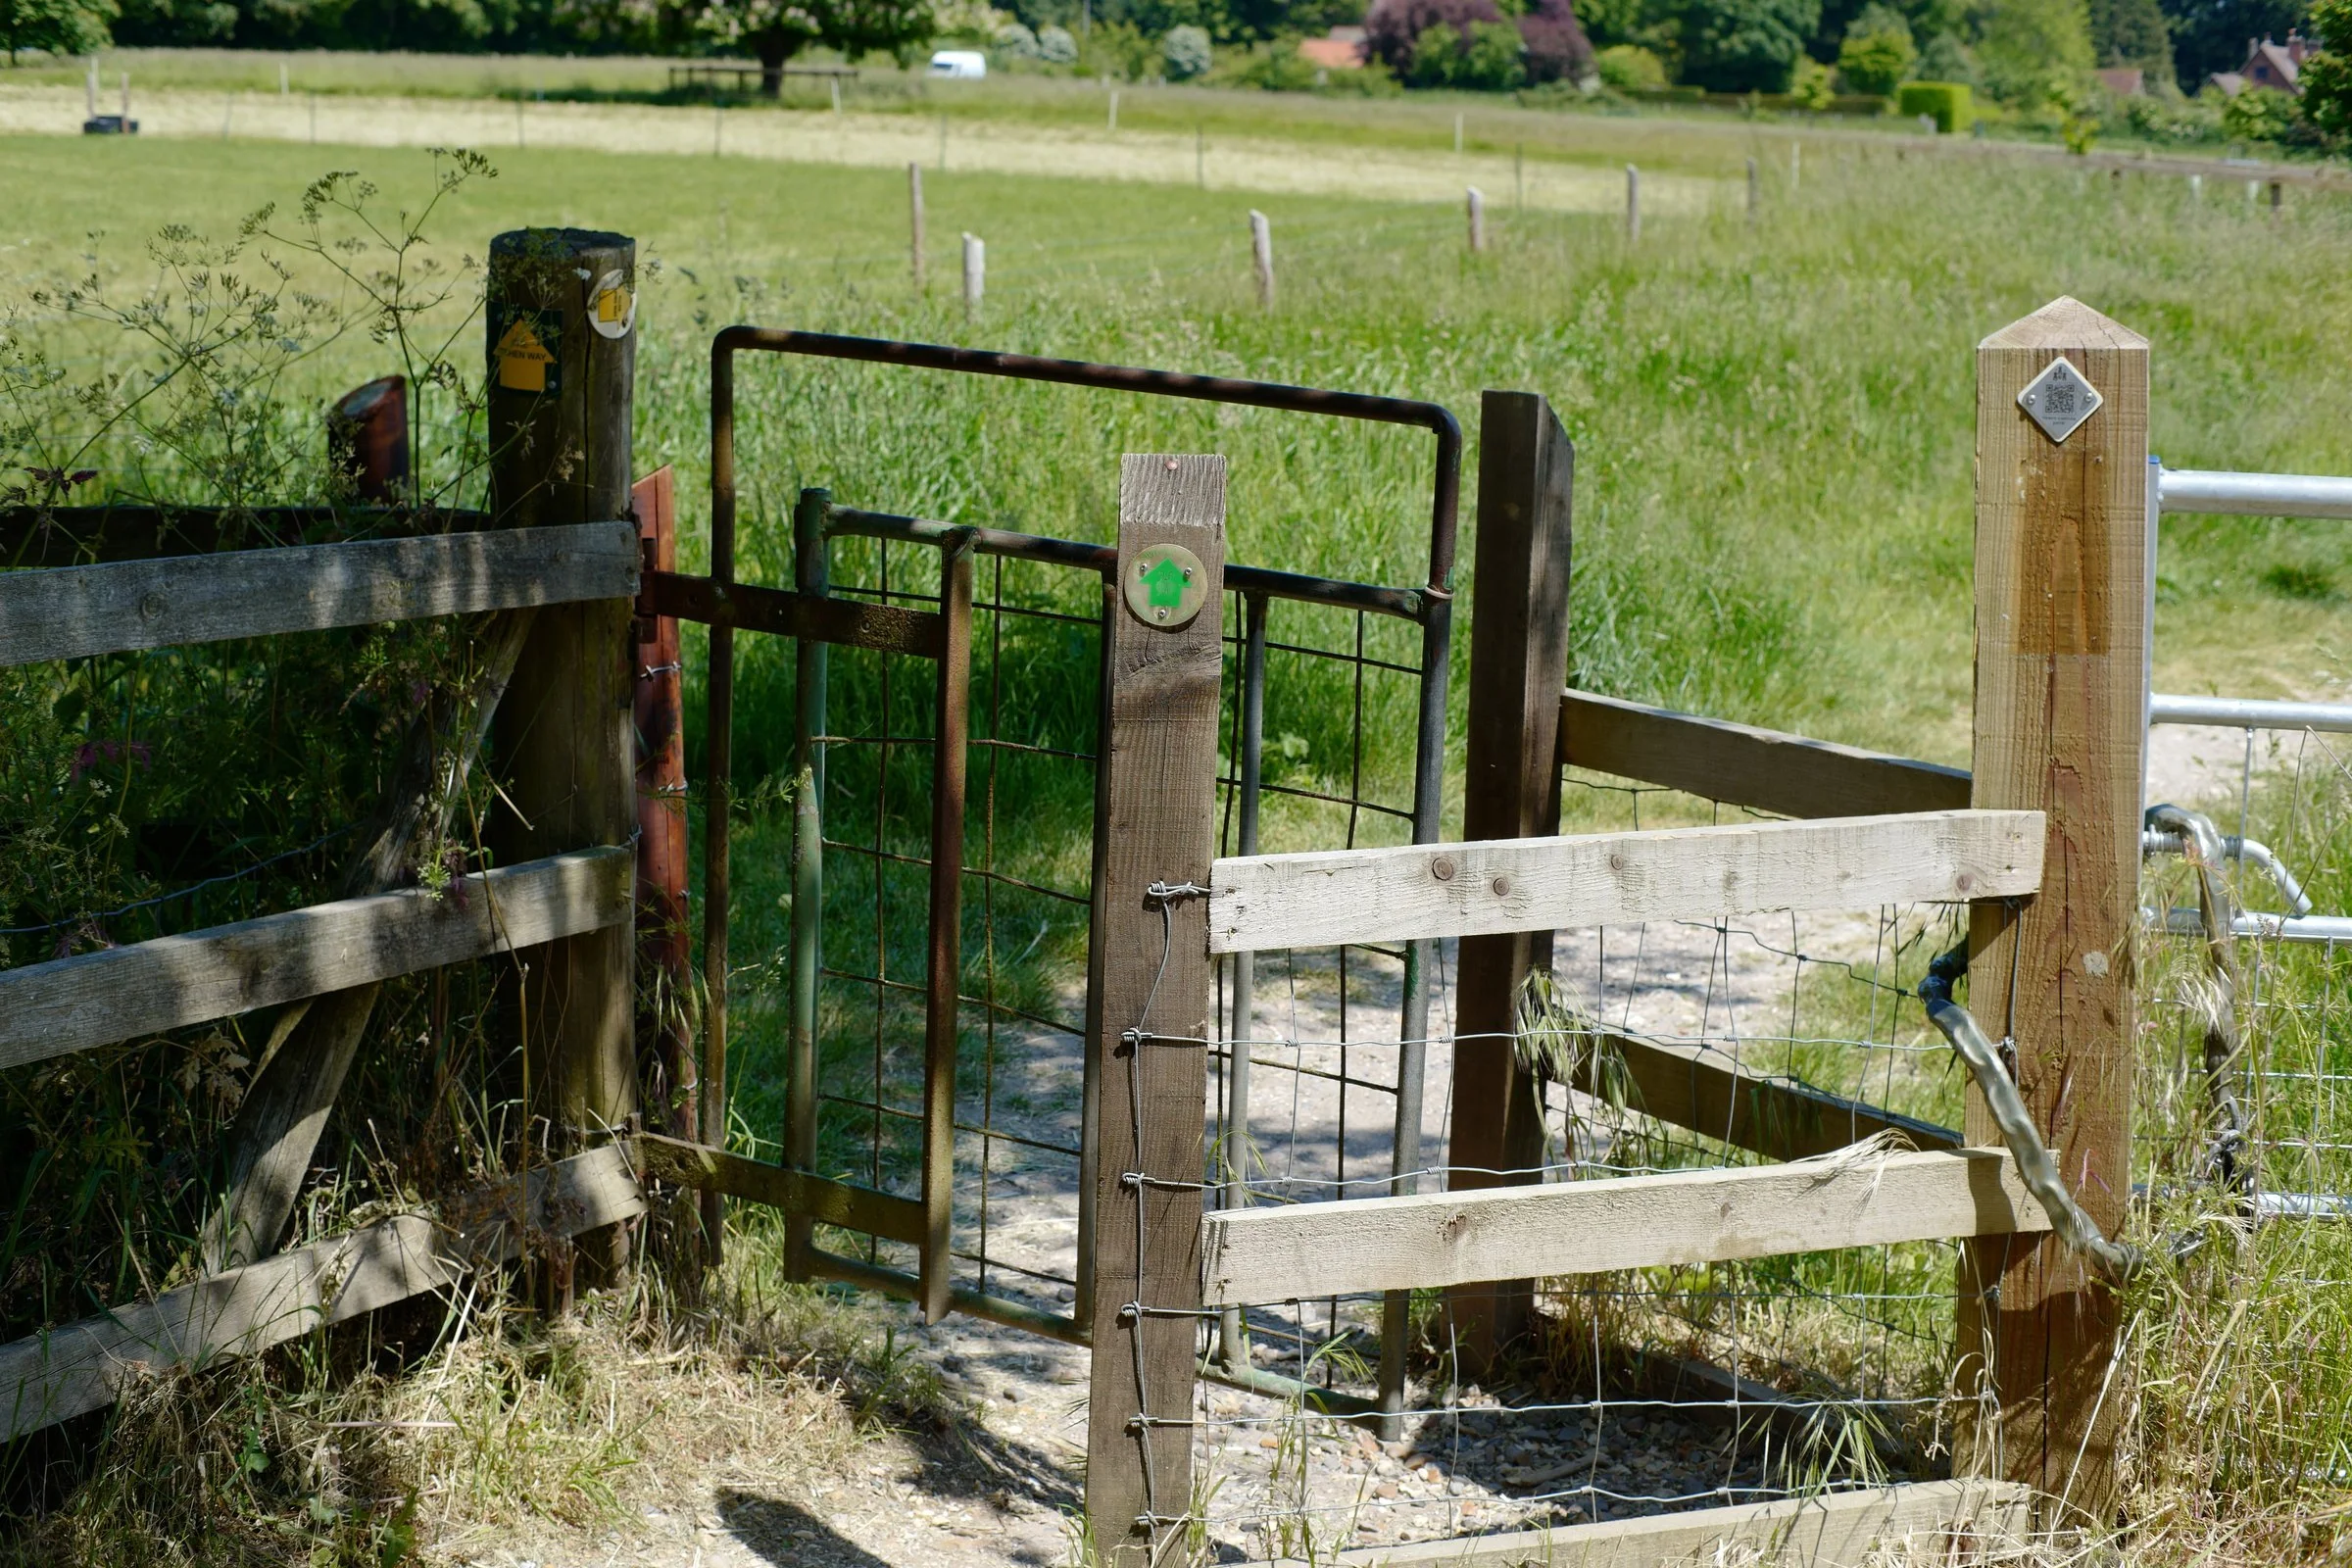
When you would cross from one field to another or maybe pass from the forest to the fields, you would come to one of these gates in a variety of forms, all of them would work in a pretty similar fashion, but nonetheless, it would be there. This is a simple cattle gate but in the United Kingdom, it is called a kissing gate for some reason. Above you can see Kelly passing through a modern steel kissing gate and they are all over these trail systems in England.
So first things first, hiking this trail is actually really fun. It could be monotonous for someone who isn't comfortable with their own thoughts for hours at a time, but it was fine to me. I didn't even listen to music on this trip, I was just...there...
Day 2: Arlesford to Alton (The 13-Mile Mistake)
From Post 2: This is the hotel we stayed in and it was simply adorable. The whole first floor of the part you see here is a restaurant/pub and the hotel is L shaped with a significant portion out back behind this street facing portion. The rest of the town is also really neat to me as well.
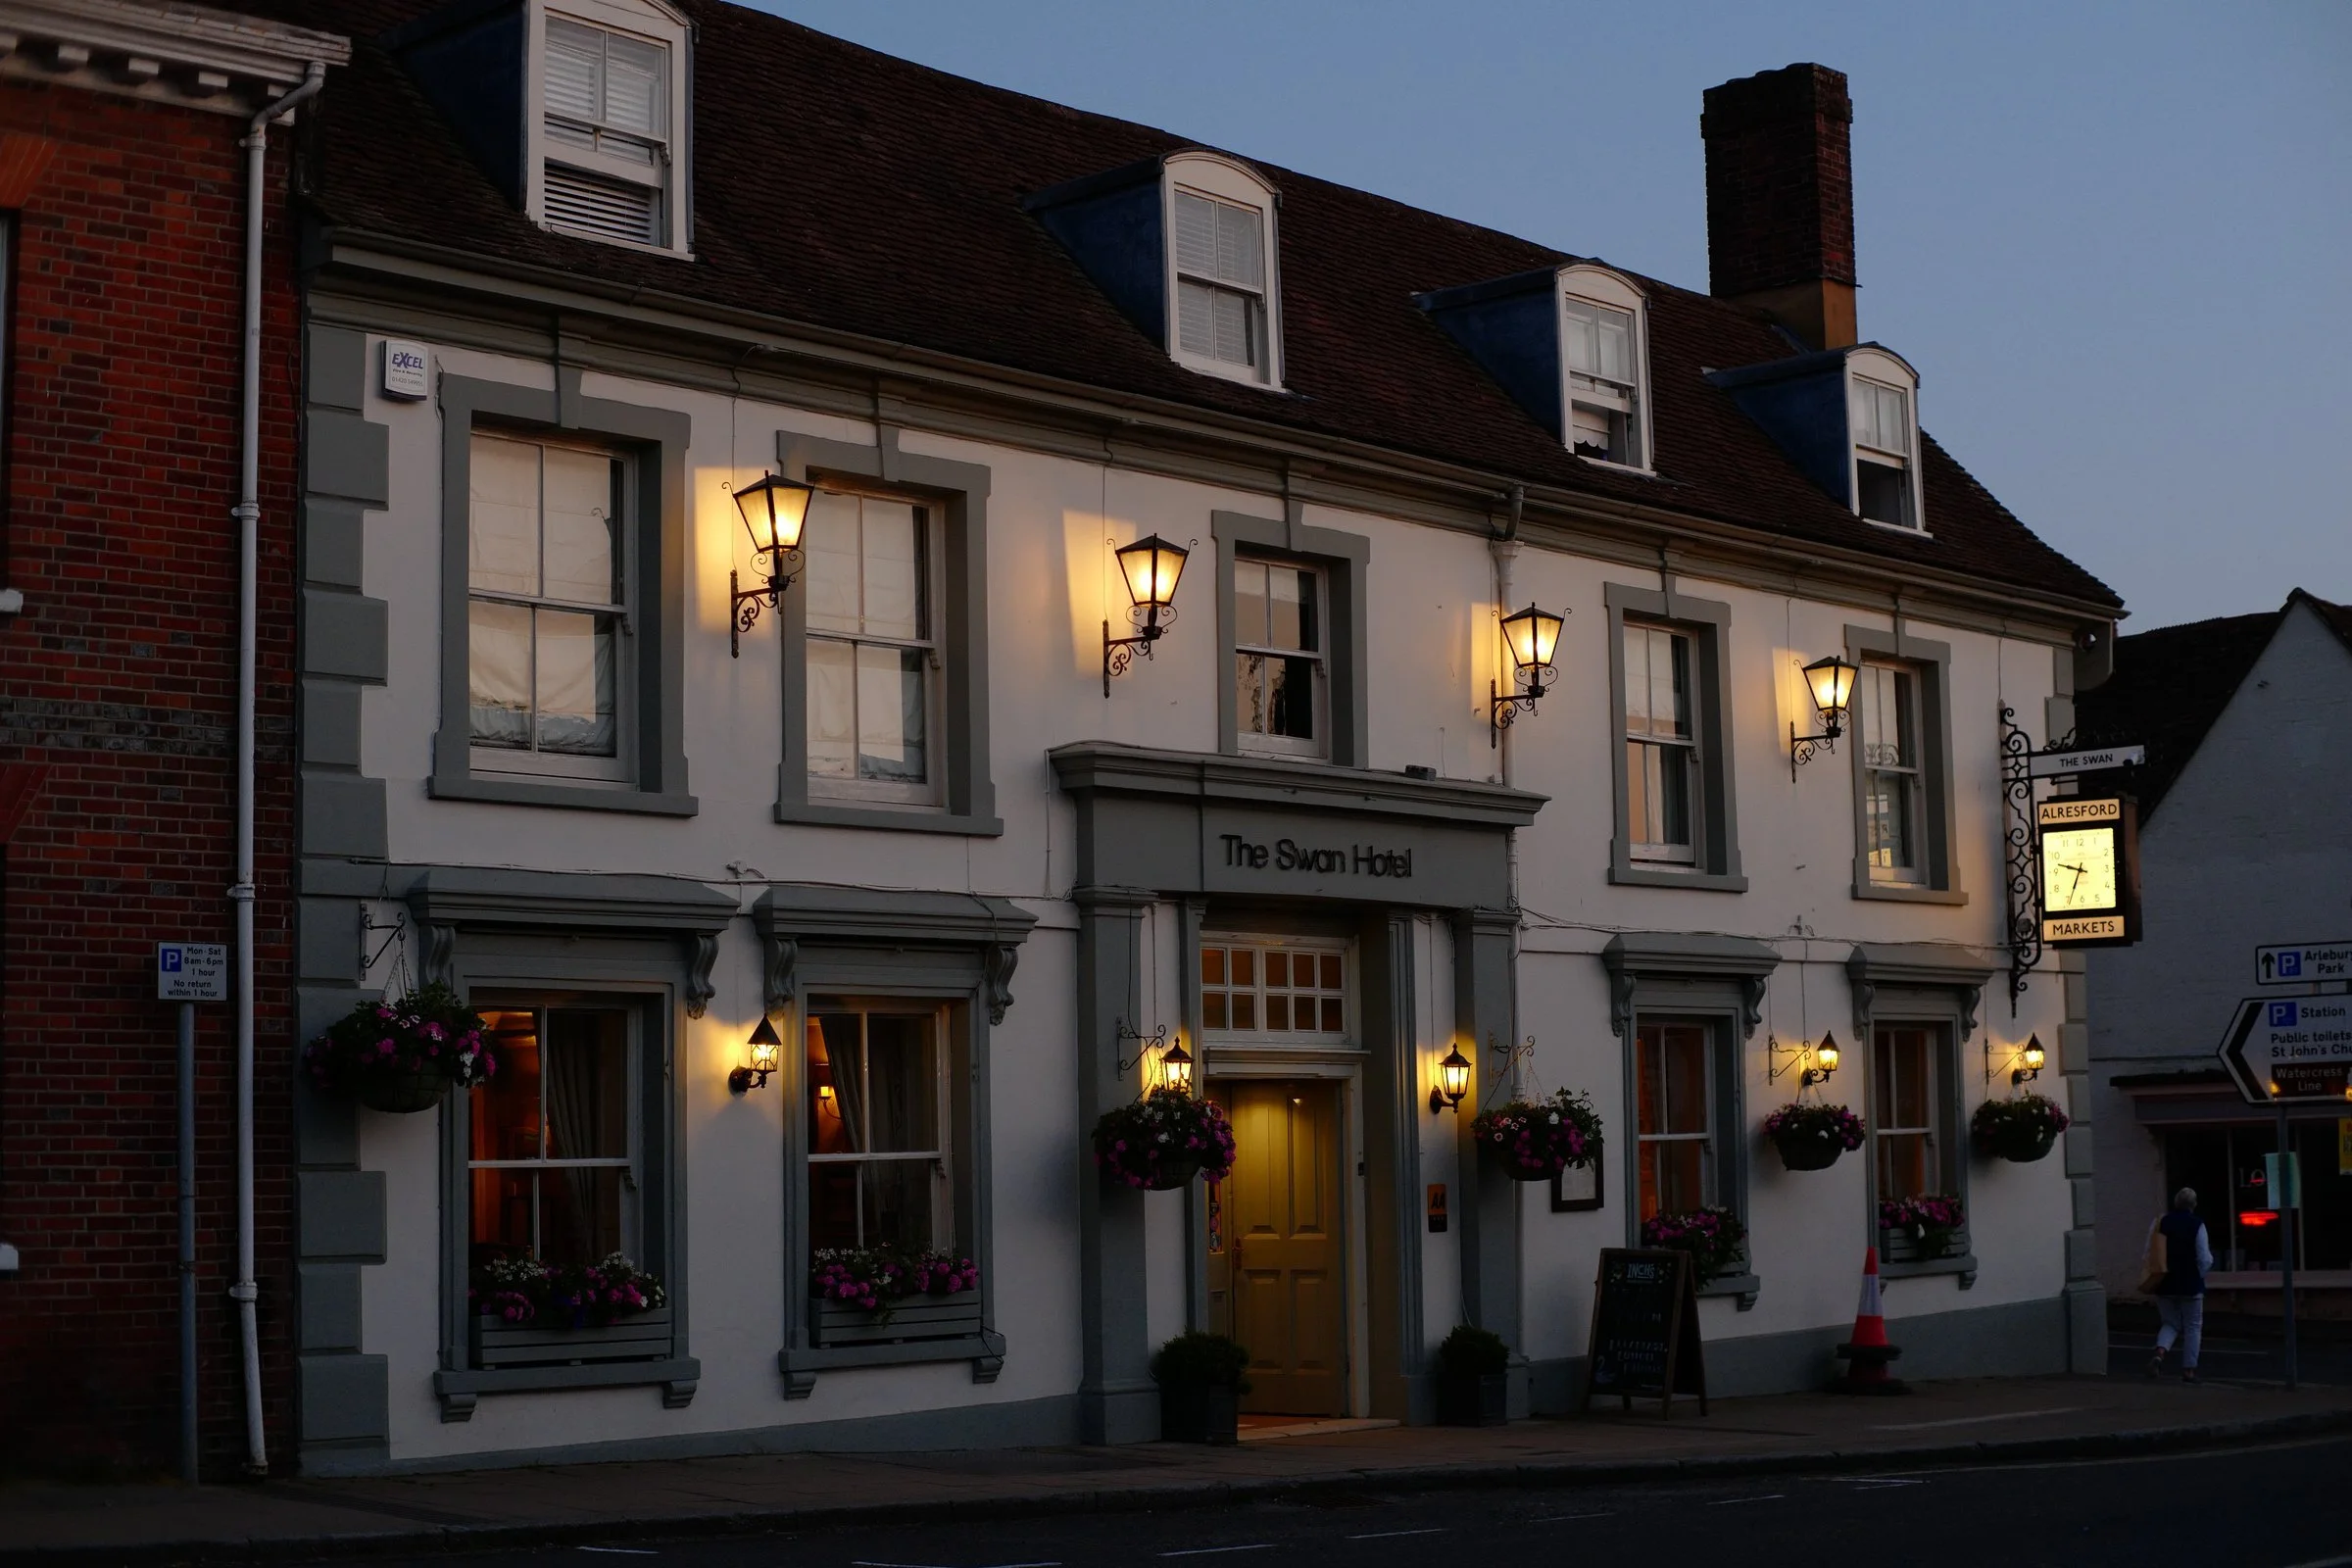
Swan Hotel Alresford England is a beautiful and very old hotel on the Pilgrim’s Way trail.
So the next morning we leave out for the next town and make pretty good time. Alton is a larger town and we are hoping to be there by lunch. Well, turns out the girls decided to take public transportation after about 5 miles or so and I decided to leg it on in... this would prove to be painful.
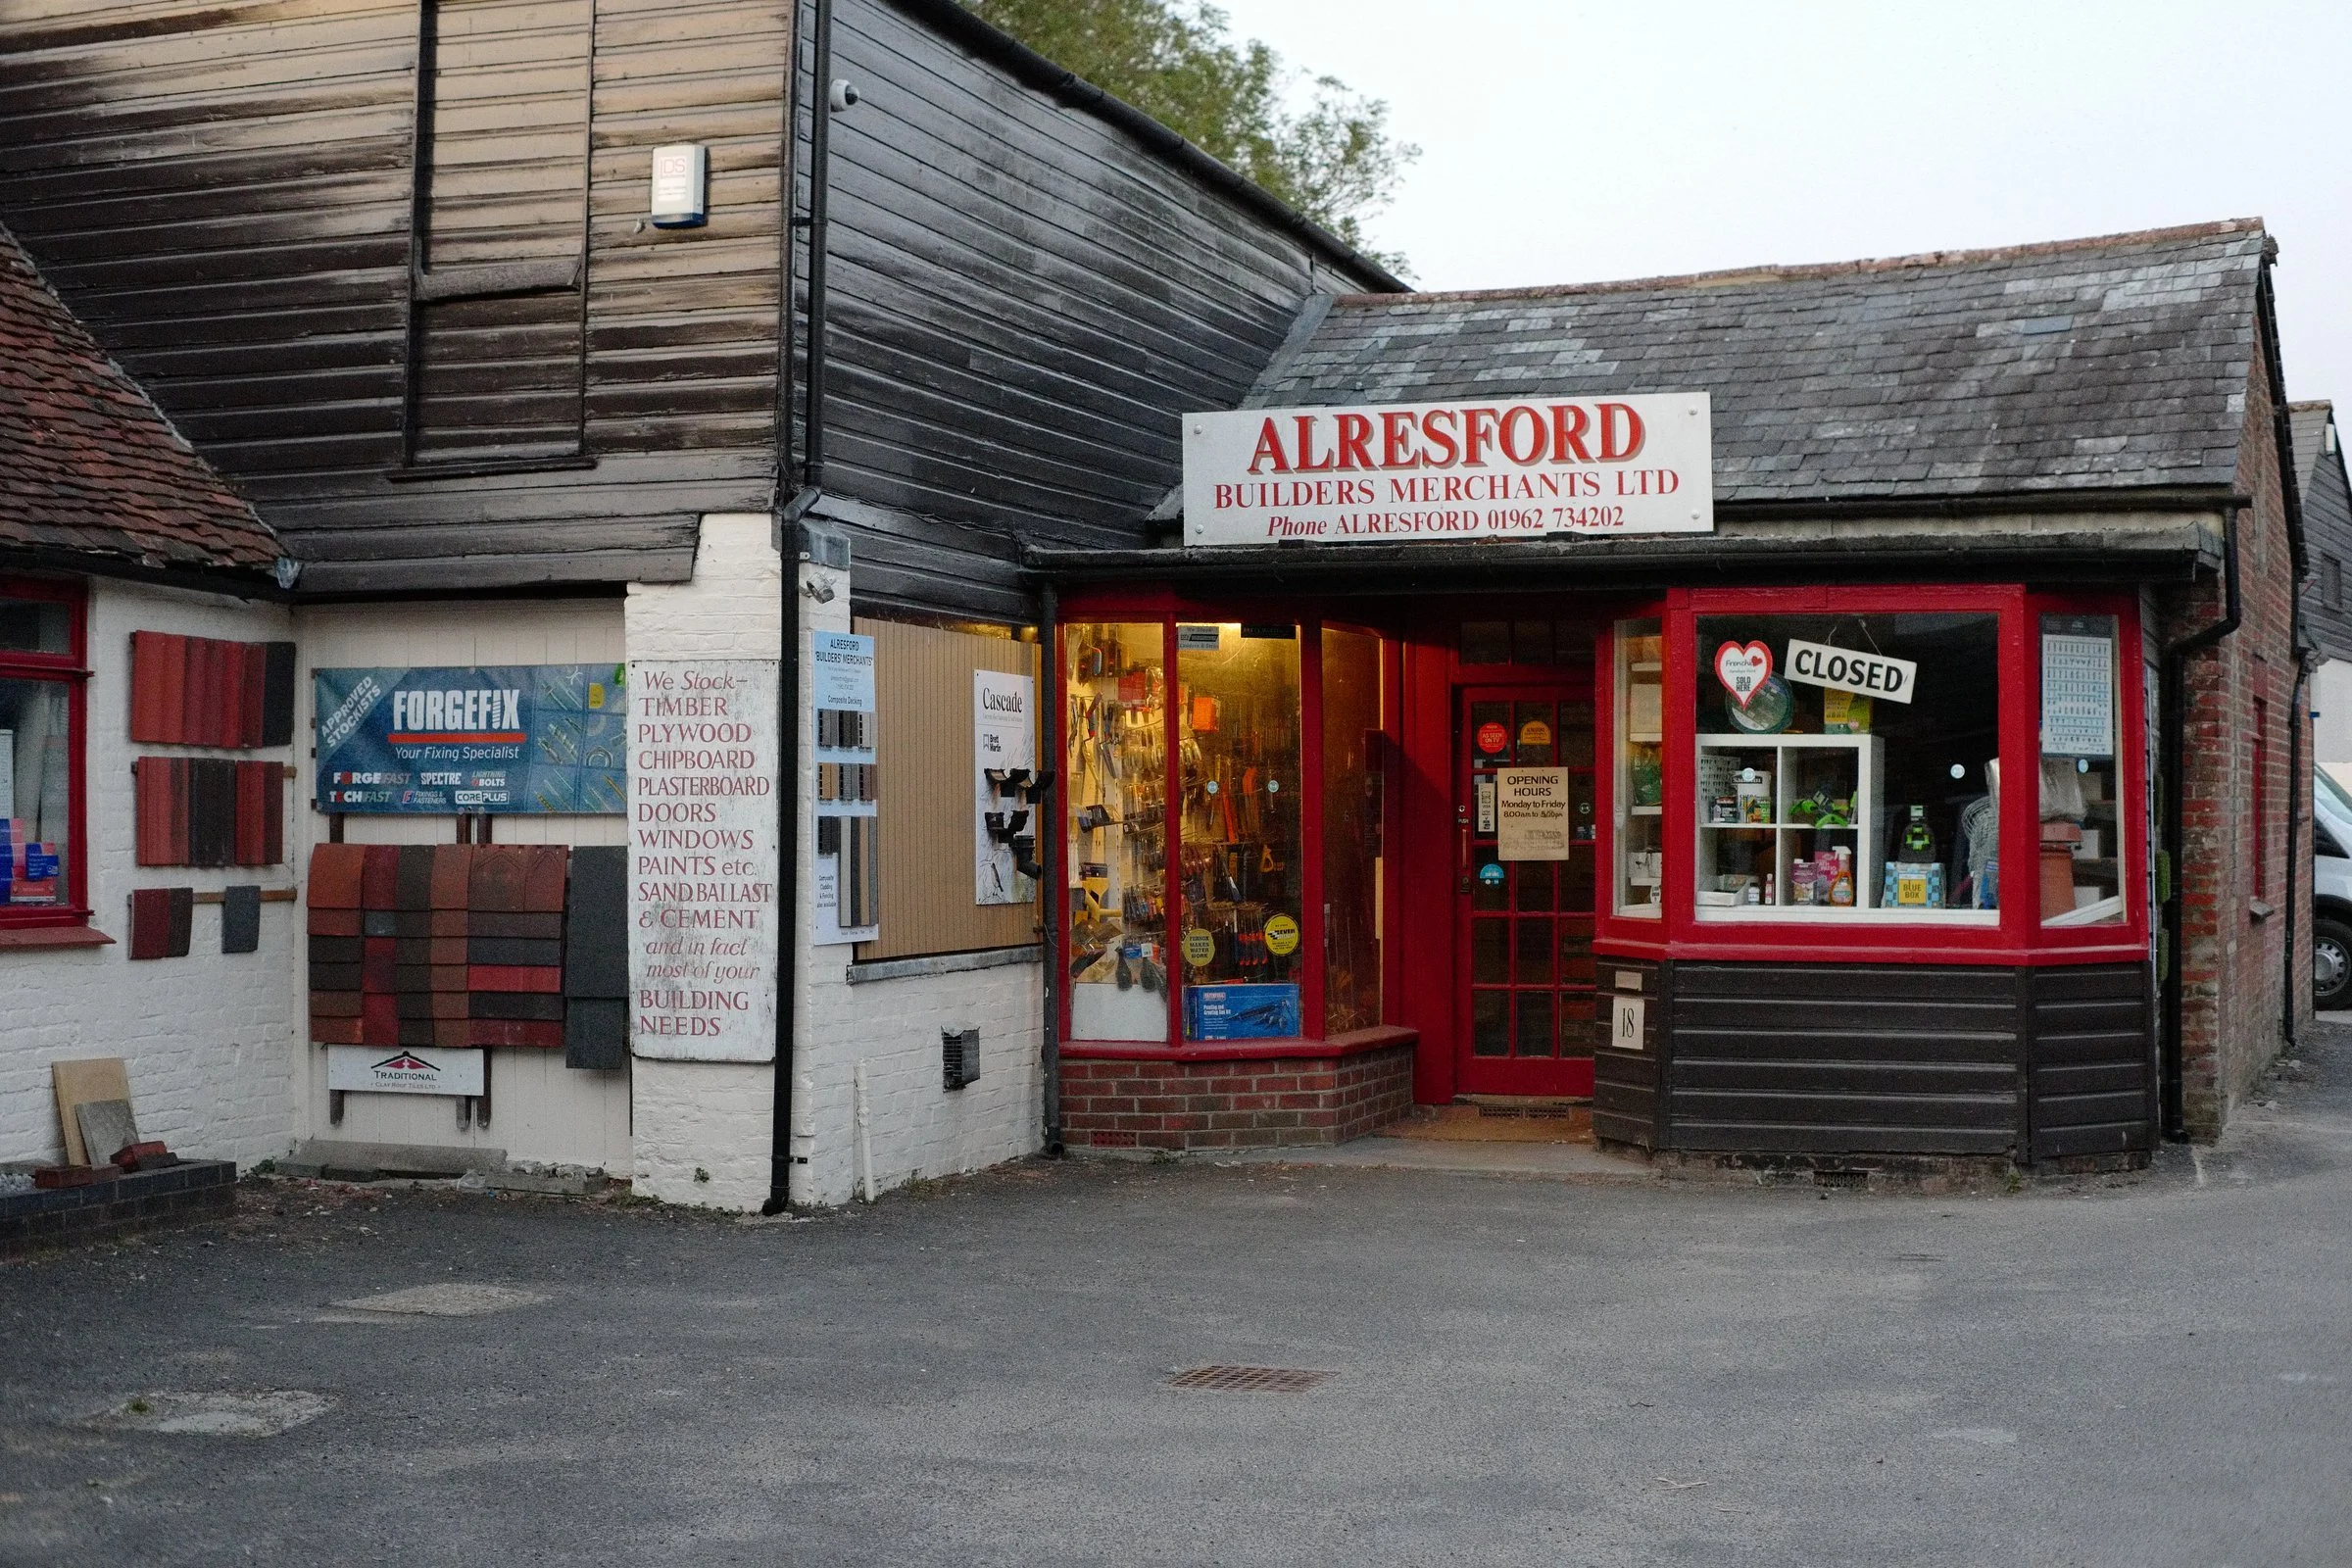
Hardware store in Alresford England is typical of the types of buildings you will find on the Pilgrim's Way.
I had looked at the map and speculated it to be about 10 miles to Alton and figured I would probably cover the remaining 5 miles in about 3 hours since I would be stopping to get photos and the erratic nature of the trail layout and such as that. Well, this turned into a 6-hour slog that added up to an additional 13 miles for the day! It even got to the point where I realized I needed to cover ground more rapidly or I would miss supper so I stopped capturing video for the YouTube channel all together and just grabbed the occasional photo instead. You read that right, 18 total miles in a single day, for a beginner trekker who had done almost no train up for this trip. What I had also forgot to account for was the fact that a lot of it was in the direct sun an really hot. I ran out of water probably with 2 hours left to hike if memory serves me and there was no where to stop and get more without trespassing on farmland. This is important as the trail passes through all this beautiful countryside and we are given special permission to use these trails, but we can not deviate from the trails, you have to stay on the trail. So if the trail doesn’t cross a stream, then there is no water. On this day, it didn’t even pass by houses hardly at all, it was just one field to the next, over and over, with occasional diversions down the country roads (that didn’t have shoulders at all in places).
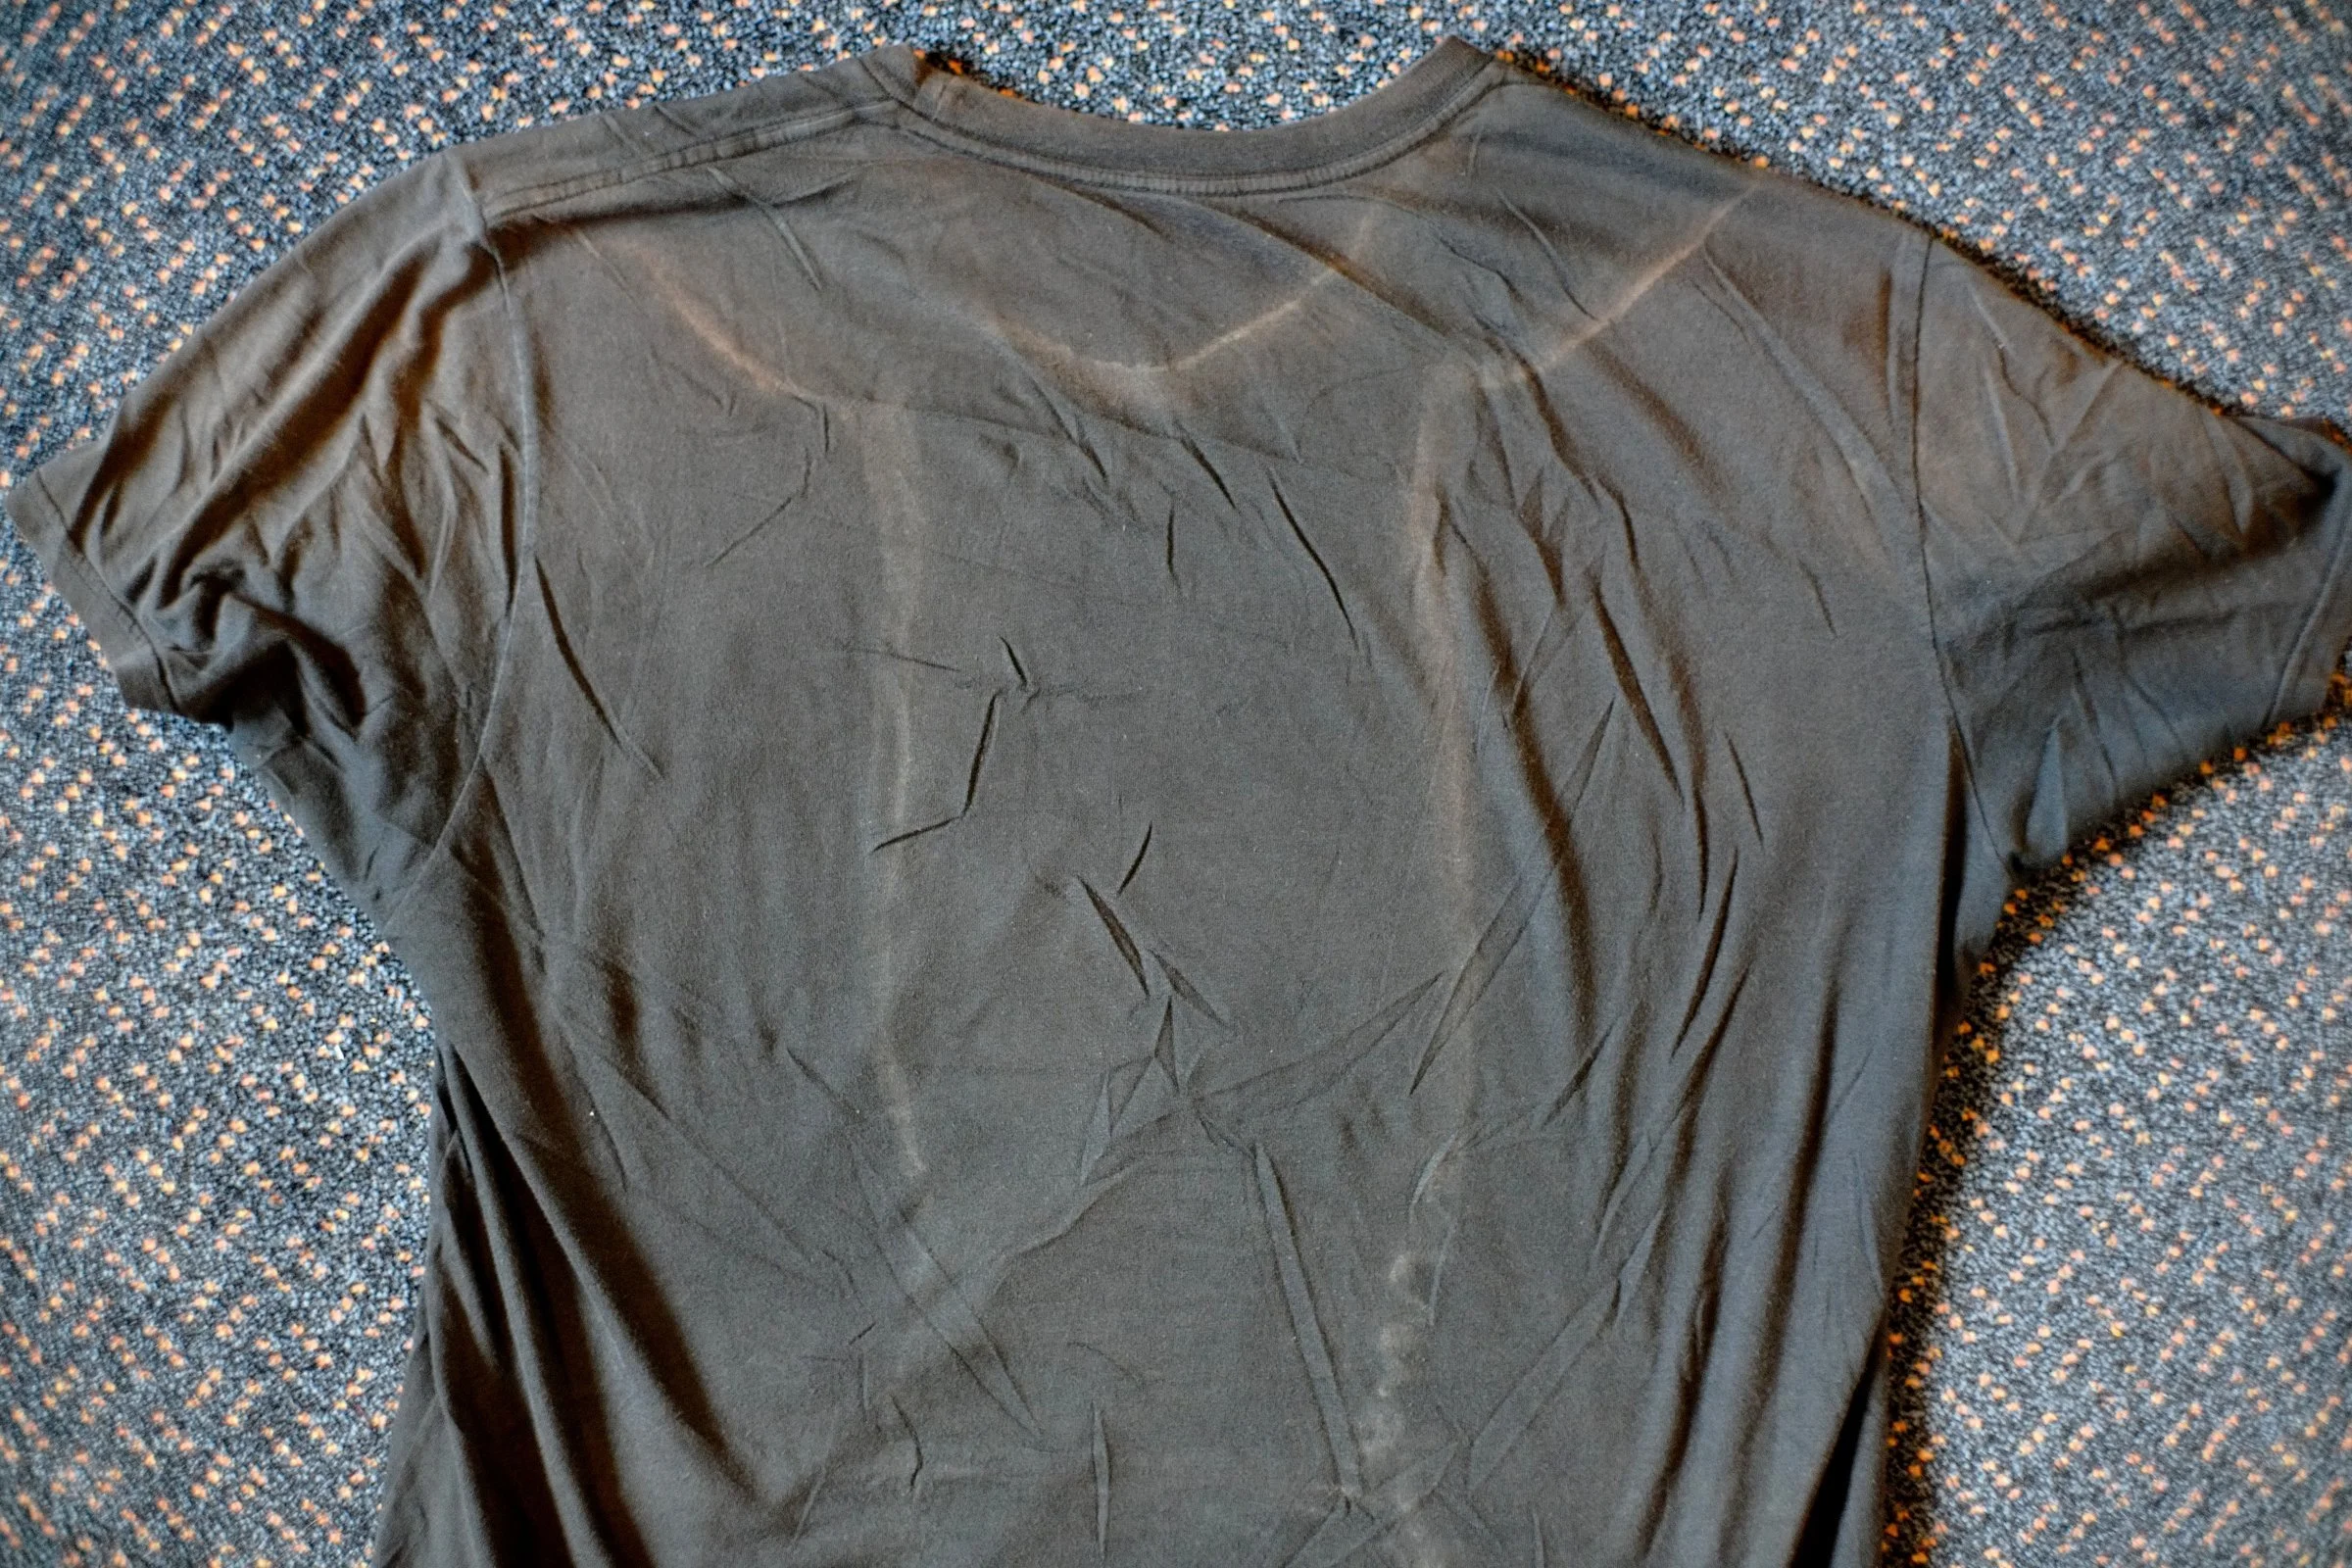
Hydration on a hike is critical and also taking in electrolytes too. I lost a lot of electrolytes on the Pilgrim’s Way trail to Canterbury as this shirt can attest!
Now to be fair, I did cross a lot of beautiful countryside on this leg of the trip and I don't regret making the trek this day, but I failed to drink enough water and had debilitating cramps later that night from dehydration. The lesson here is to drink more water, especially if you are doing an activity that is physically demanding in any way.

I grabbed this photo about midway through my 18 mile day with a single quart of water…lesson learned.
Over the course of the next two weeks we would explore numerous old churches as well as eat in many of the most quaint pubs you have ever seen! The bulk of the trek though is through the country with some parts being out in farmland for hours at a time on trail. You really need to make sure you take enough water when you leave too, as there are times when water just isn't available. I ran out on the 18 mile day and had debilitating leg cramps later that night because of dehydration. It is a thing y'all, don't scoff at this part: drink electrolytes and water, it matters…
Infrastructure and Details: What Makes England Special
Here we have the road crossing (well, more like a tunnel under the road actually)heading into Alton where you walk under the road to get into the town proper. This is the kind of thing you don't see much where I live and I found interesting. The footpaths are so important to the English that they build this kind of infrastructure to keep them operational. I wished we would have done this with the old hiking trails from our country's early settlements and made them into hiking trails today...just a thought.
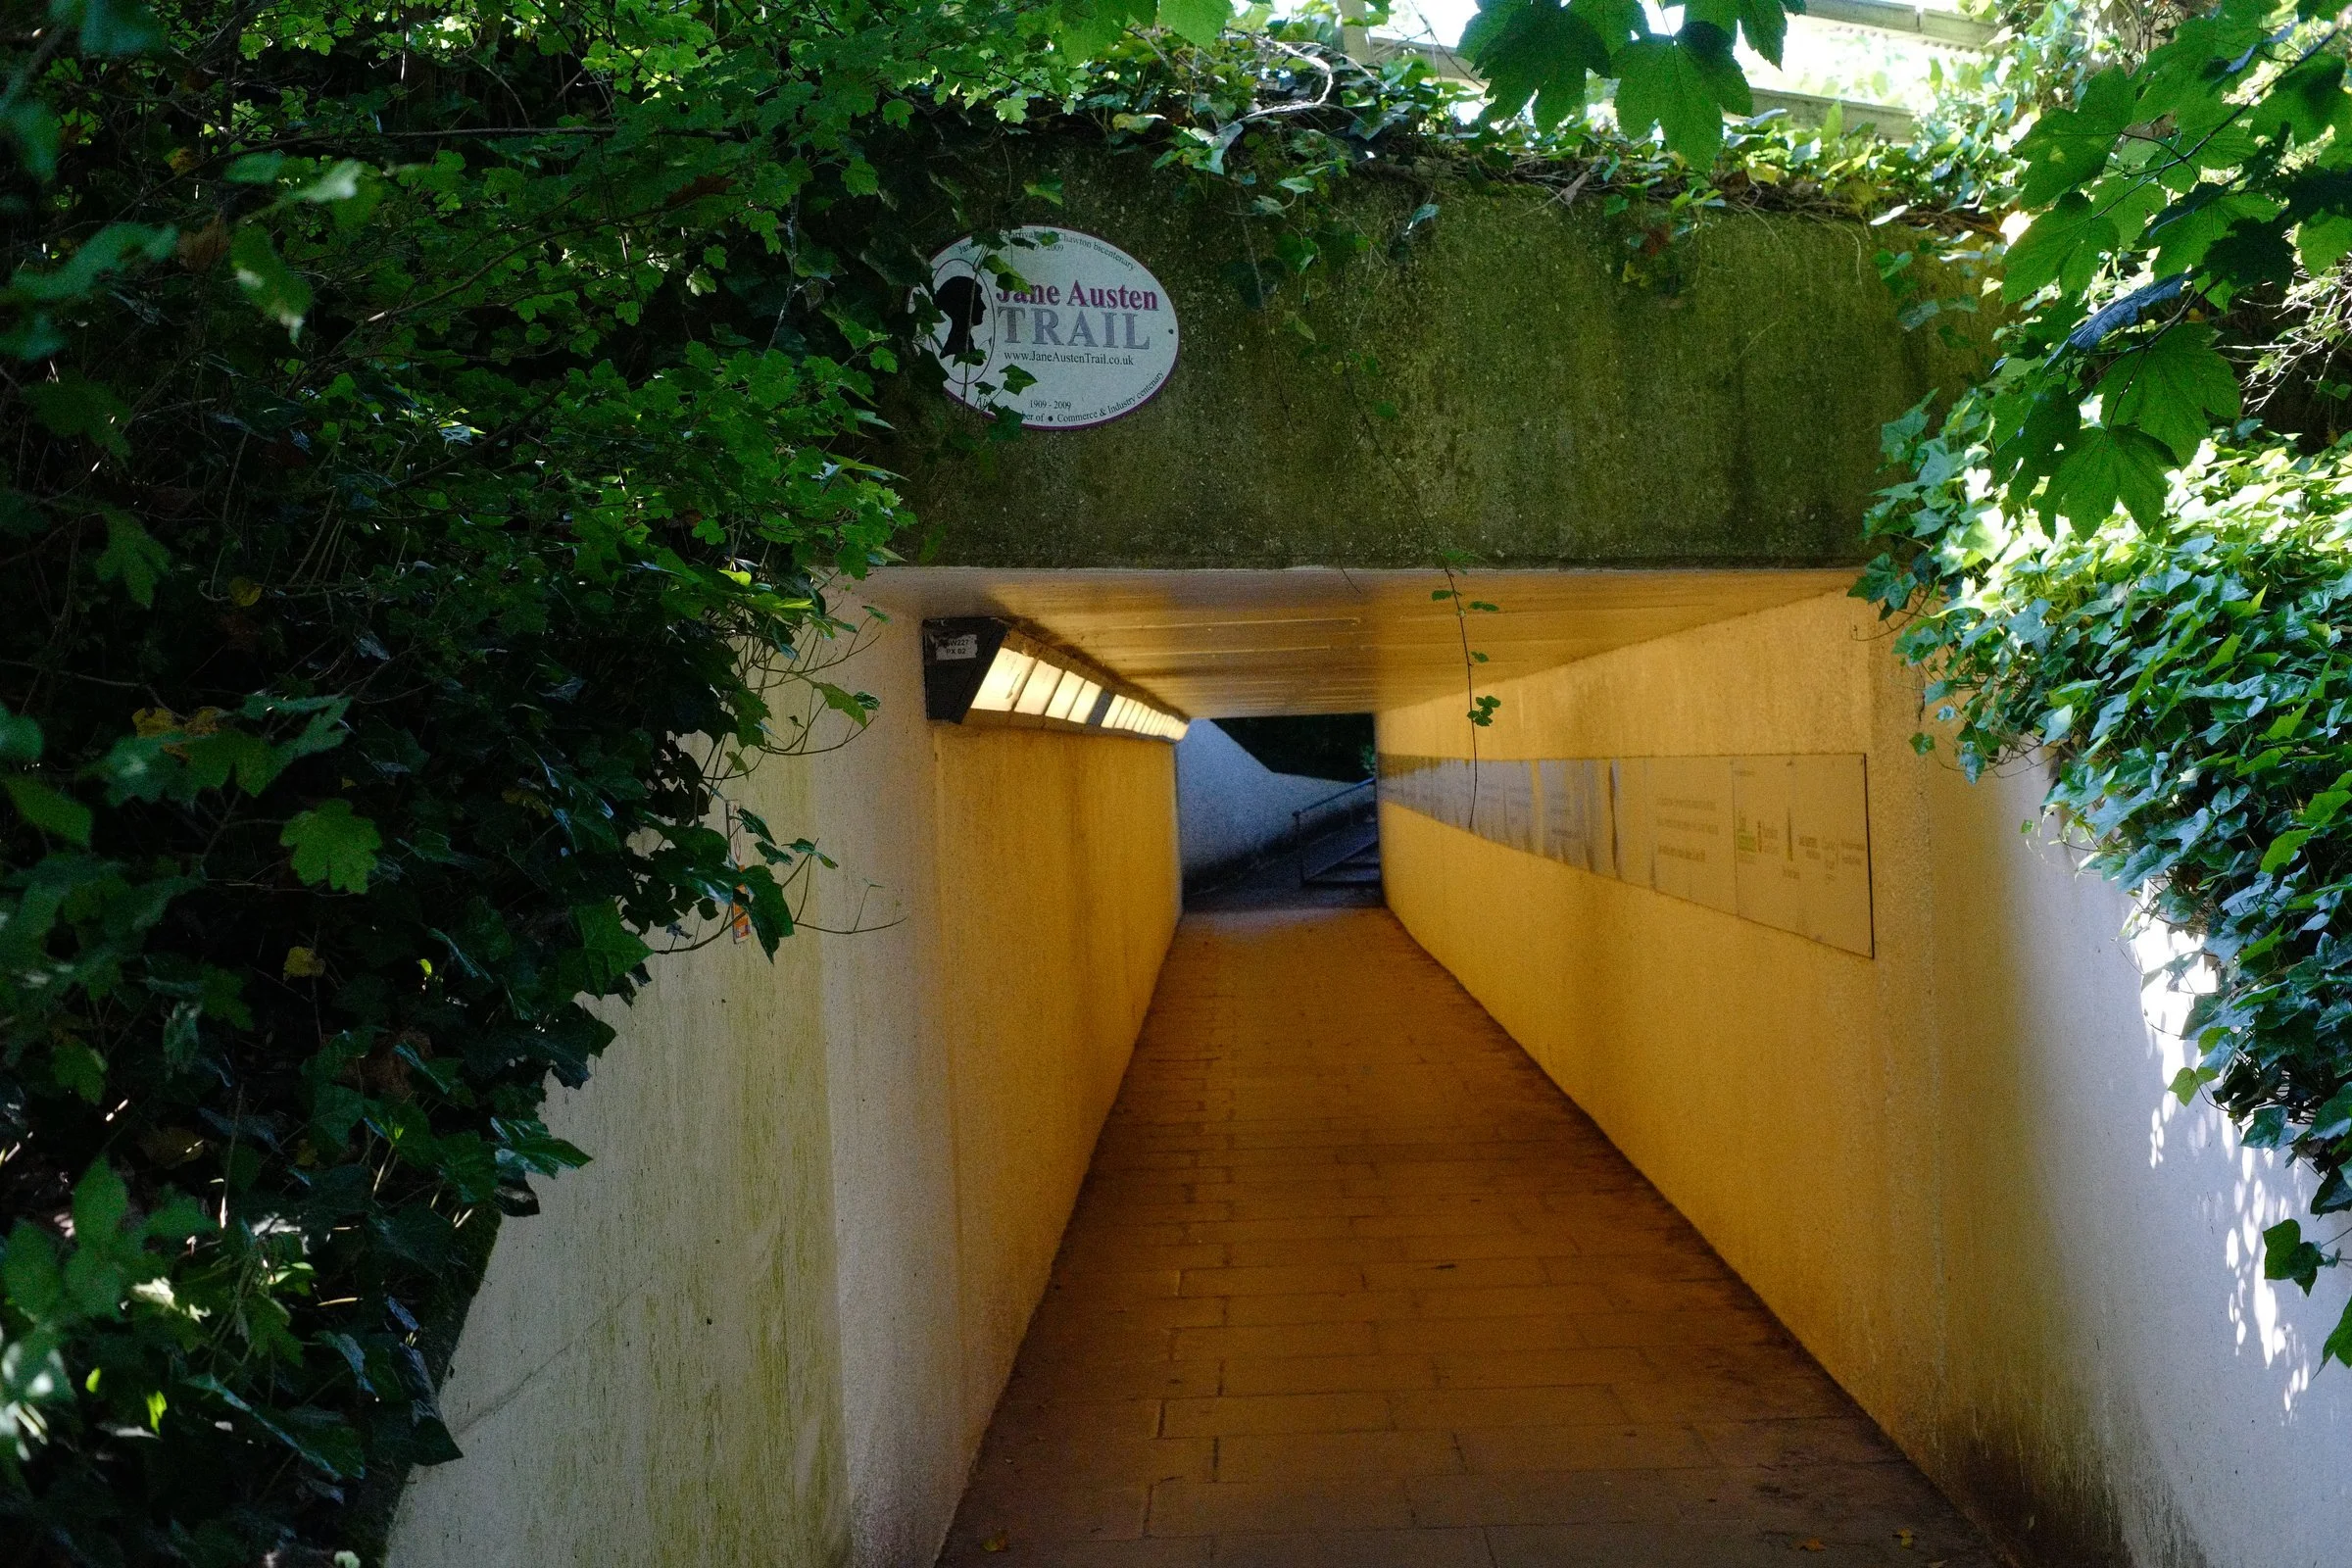
Trail tunnel under a main highway for the Pilgrim's Way heading into Alton England
Here is a perfect example of what I am talking about. This bridge is pre-war era construction. The reason I know this is because the whole thing is riveted together. Any other modern form of metal joining would be significantly cheaper than rivets. Arc welding wasn't really common place till after World War 2 so rivets were used everywhere till then. If I had been a typical traveler heading to the next destination, I most likely would not have noticed this.
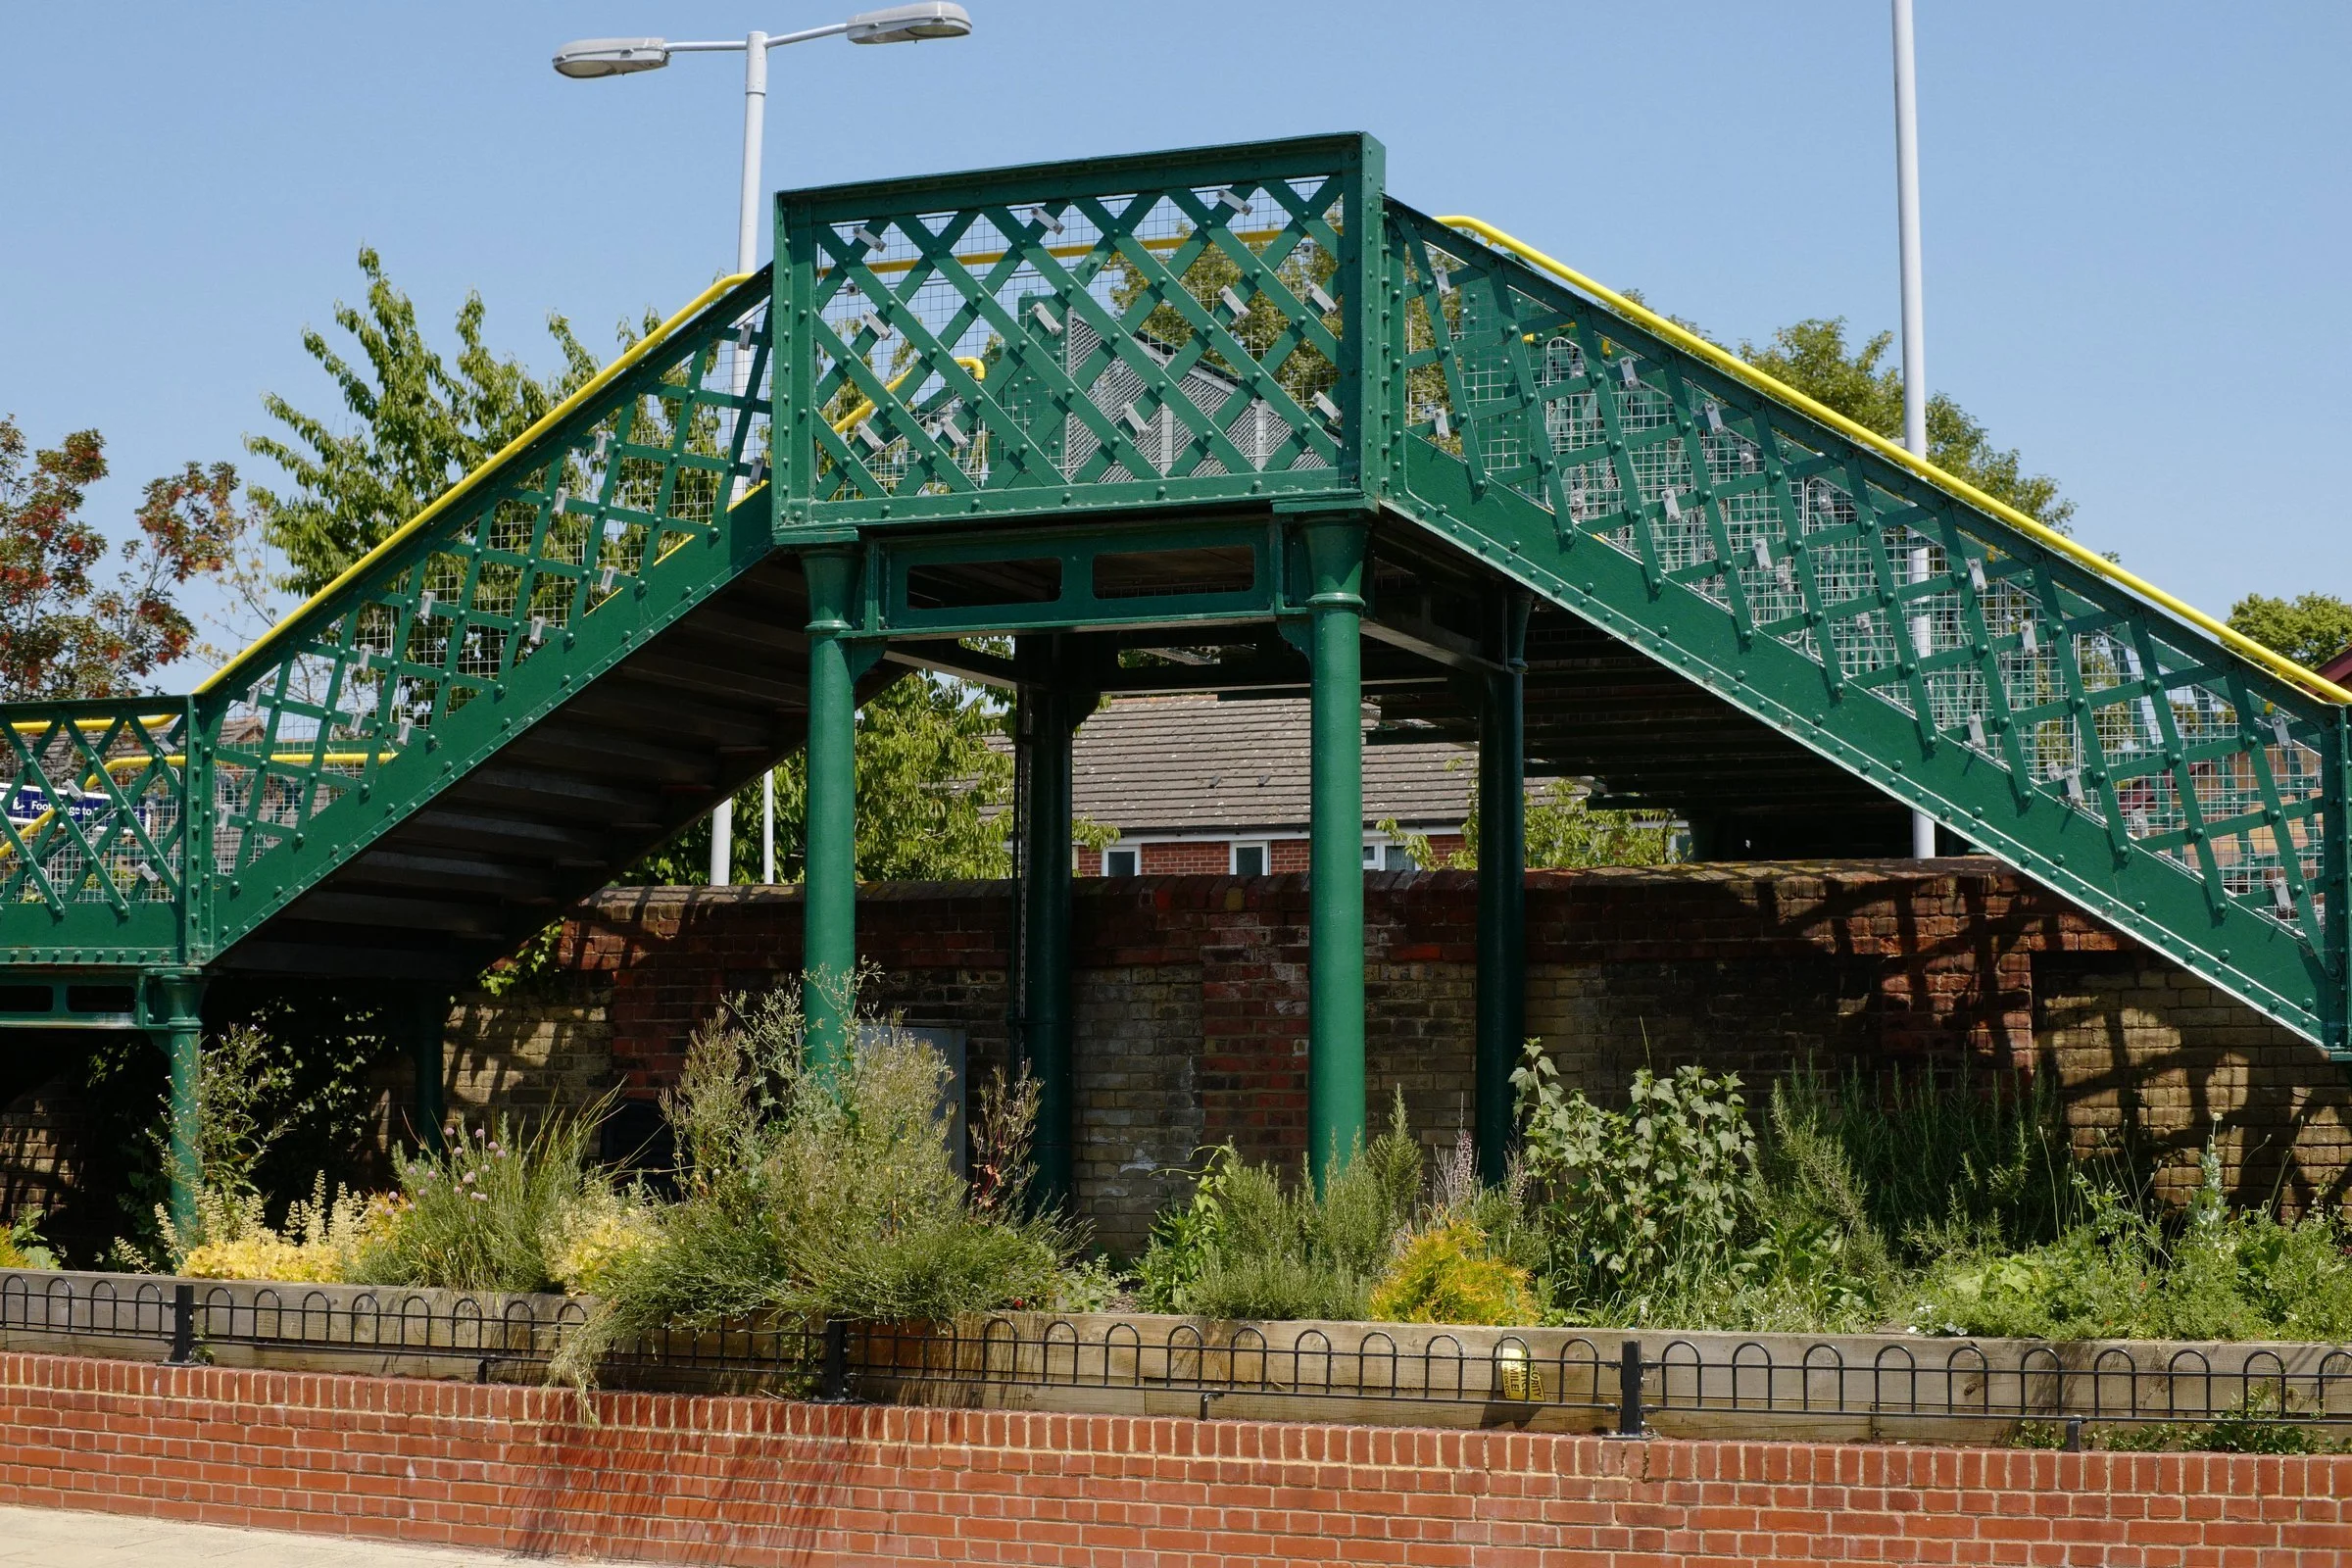
Pre-war riveted foot bridge to a train station in southern England.
Mid-Journey: Farnham and the Stepping Stones
The next day we really didn't do much hiking as I escorted Sierra to the airport and then went back and linked up with Teresa and we made our way by train over to Farnham. We really wanted to explore the town and Kelly had already went ahead on her own so it was the perfect opportunity. We had a great time in Farnham and found Kelly later so it all went great.
Then the next day we leave Farnham and make our way over to the stepping stones which is a huge deal on this trail and I didn't even know about it till this morning. These stepping stones are part of the trail system and when we found them we decided to make a small event of it and enjoy a few minutes at this location to make it a little more memorable. If you would like to see the stepping stones just watch the video linked above. I didn't get my camera out of the dry bag here for obvious reasons so I only have video from this location.
These kinds of treks are not just about seeing how fast you can cover ground or seeing how many miles you can hike in one day, but about stopping and smelling the flowers or grabbing some photos. This is what this pilgrimage was about for me.
One of the many old churches in southern England on the Pilgrim's way (Canterbury Pilgrimage)
The Pilgrimage Experience: Disconnecting and Reflecting
This hike was a twofold event. First it was a way to explore England in a more intimate way than seeing the usual tourist sites and then hopping on a plane for the states. This way we get to talk to the locals and see parts of the country that other visitors will never see, eat food that they will never taste, and just enjoy the country like a traveler should.
The second part or probably what should be considered the first part is the pilgrimage part of the trip. A pilgrimage is a trek to a significant location for the purpose of reflection and to be able to spend time with the Lord. I had ample time for this too. You get to be with your own thoughts a lot if you keep your cell phone put away, which I did, this will give you a lot of time to reflect. I am glad I did this as it allowed me to just disconnect from life for a while and to be able to just enjoy where I was at the time without having to think about what I was going to do the next day or whatever.
This was so important to me that I didn't even post much about the trip while on it. I used the map function most of the time (there is a website where you can get the route and it overlays on Google maps). This was wonderful for someone who has grown VERY accustomed to using their phone a lot.
Above is one of the many churches we explored on our pilgrimage to Canterbury. Over the course of the next two weeks we would explore numerous old churches as well as eat in many of the most quaint pubs you have ever seen!
The Pilgrim's Way to Canterbury England is a beautiful hike. A quality backpack will make all the difference too.
Canterbury and completing the pilgrimage
After about two weeks we finally walked out of a field, into an old road and there it was…Canterbury! We had finally made it and the sense of completion is hard to describe. The long days on the trail, the injuries, the dehydration cramps, all those photos to sort through… It was surreal to be honest about it. We stopped at a pub to get a bite to eat and had a wonderful time chatting with the locals before heading into the old city to check into our hotel. The Cathedral Gate Inn (I think that is the name) is ANCIENT!!!! There were all sorts of oddities associated with this Inn, but aside from that we have made it to the Cathedral! We went to the ticket office to go into the Cathedral grounds and when the attendant figured out we were Pilgrim’s he personally escorted us FREE OF CHARGE (at this point I don’t know if there is a charge, but he got real excited when he figured out we were pilgrims) to the courtyard to the marker that signifies the official end to the hike.
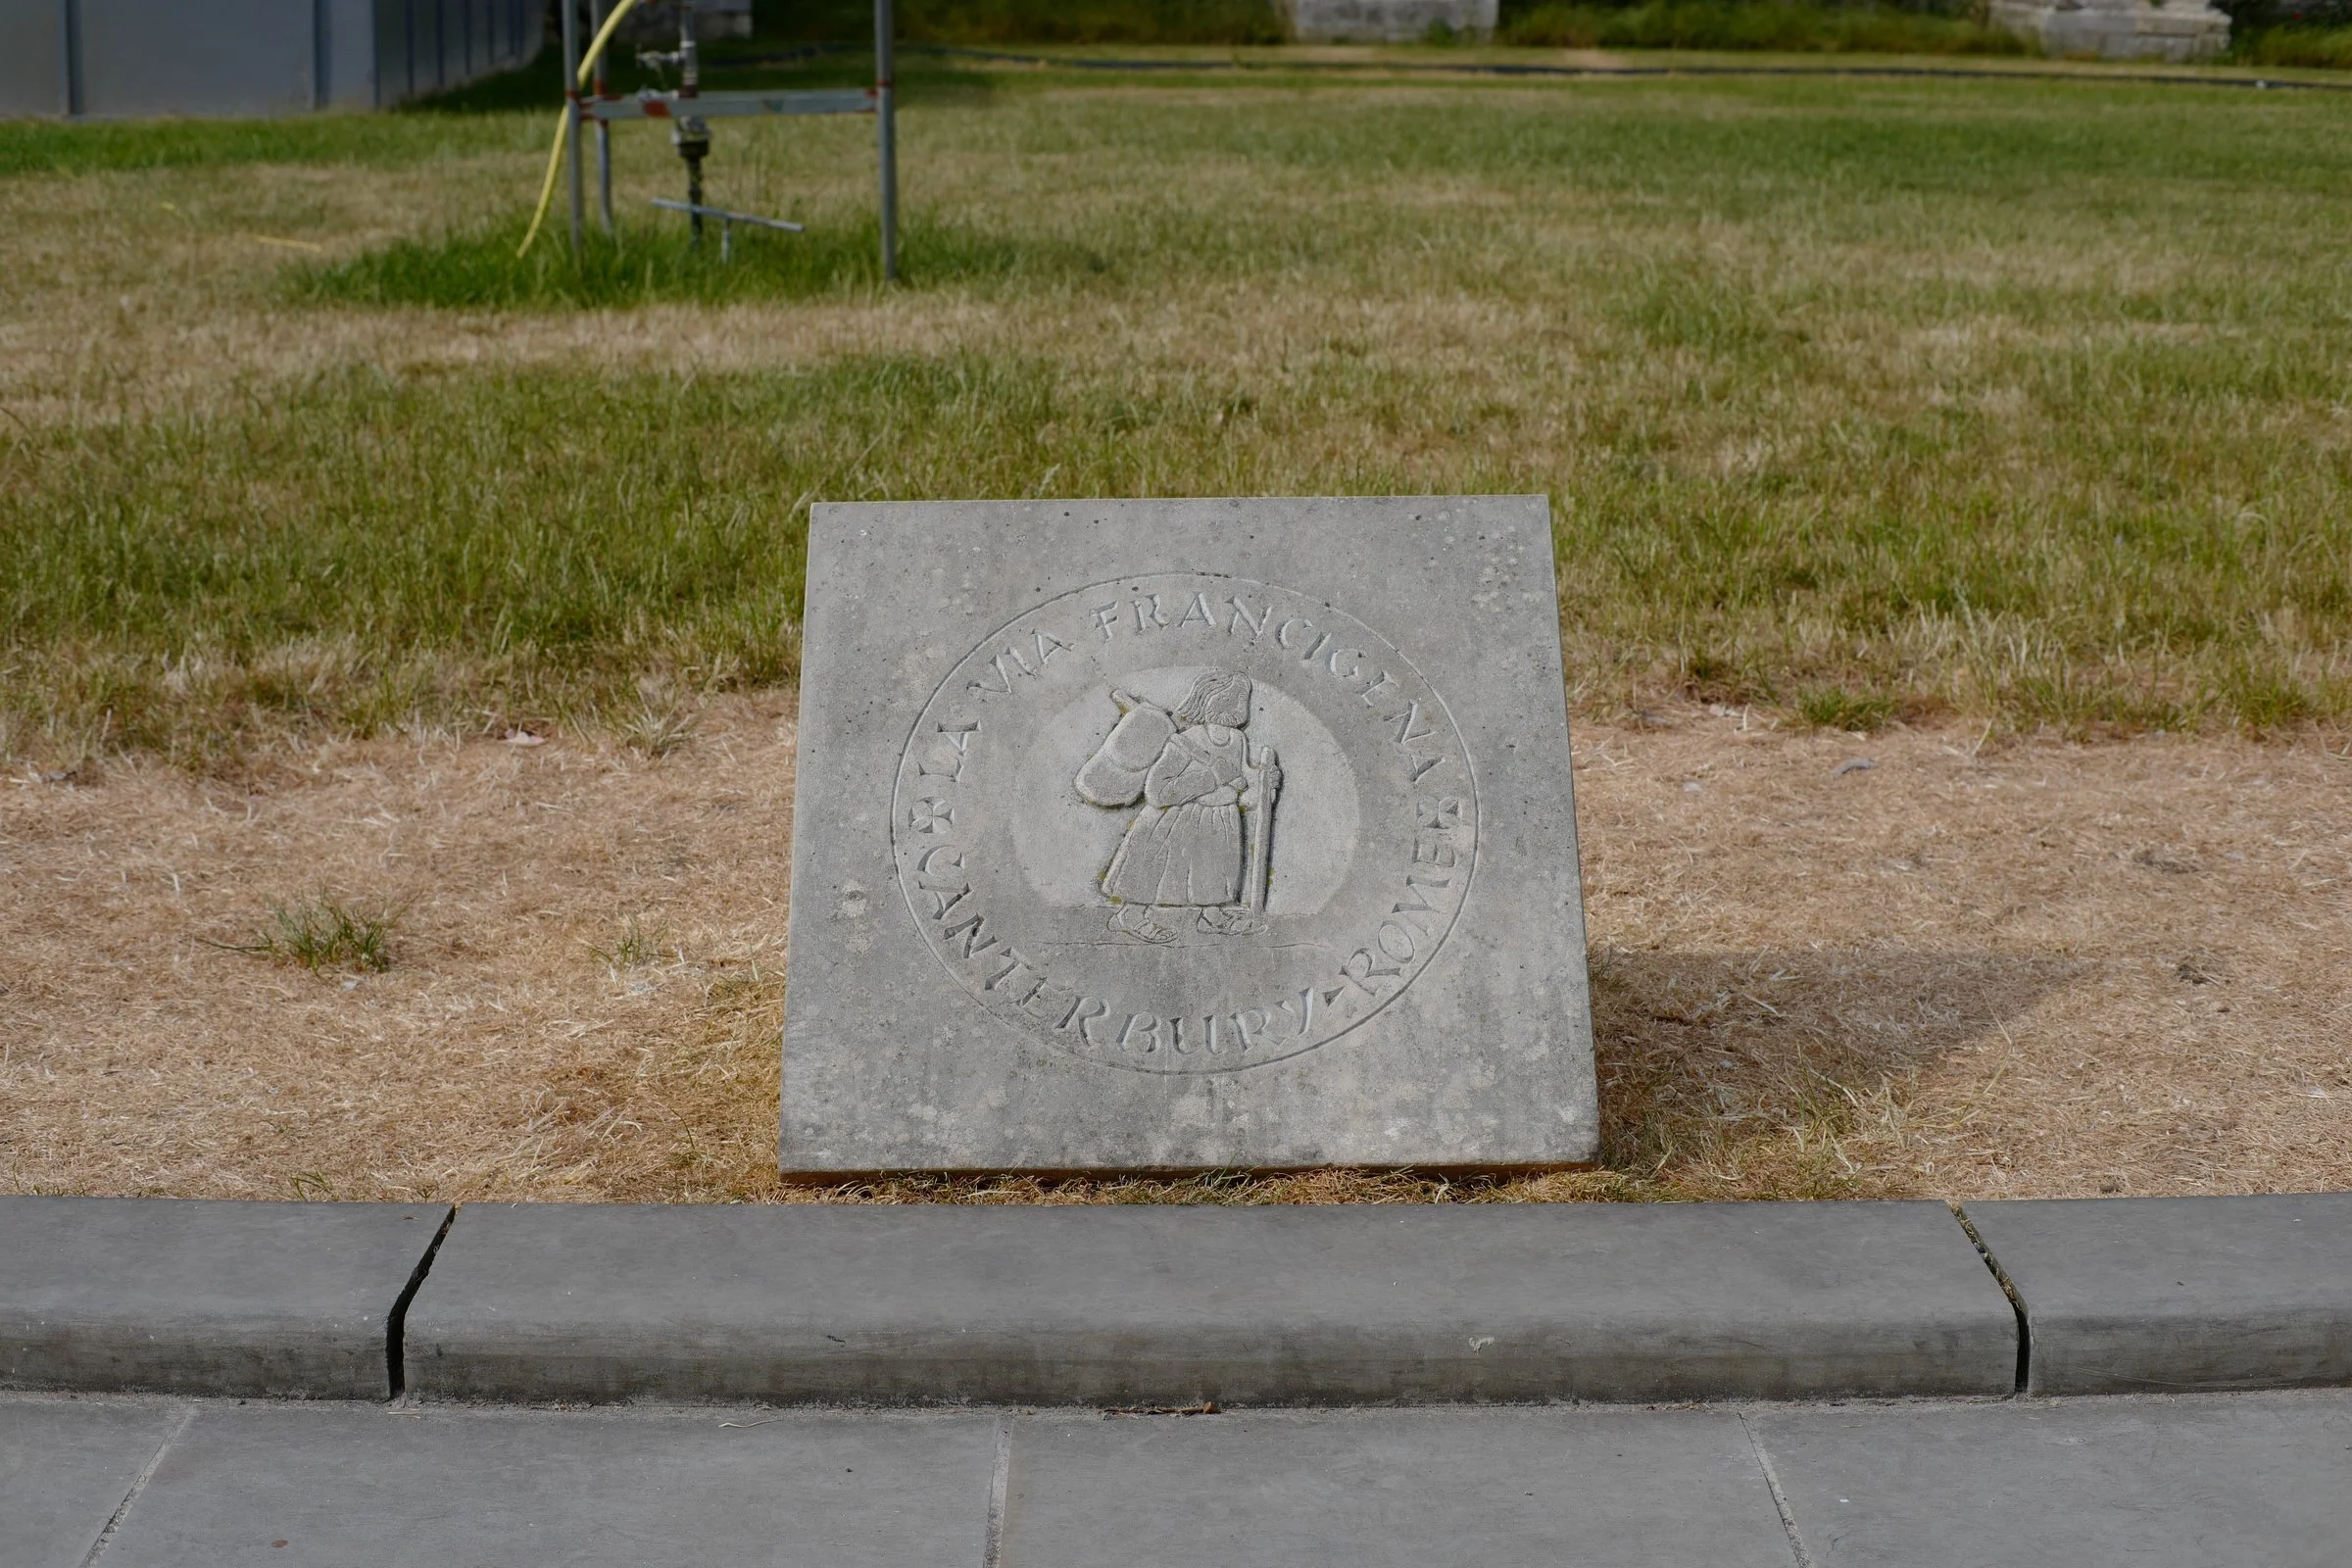
Trail End Stone at Canterbury Cathedral in Canterbury England
We all made our photo with the stone and then went for supper. Later we were treated to a special blessing from the priest at Canterbury Cathedral as well as being personally escorted to the Pilgrim’s Sanctum in the far back of the church. The story is that all the stained glass in the other churches are of Christ, the Saints and biblical events BUT here all the stained glass is of PILGRIMS to honor those who make the journey and we were the latest ones to get there. This was after Evensong service with the boys quire and the pipe organ. If you have never heard this and you have the chance, you really should experience it for yourself. It was incredible.
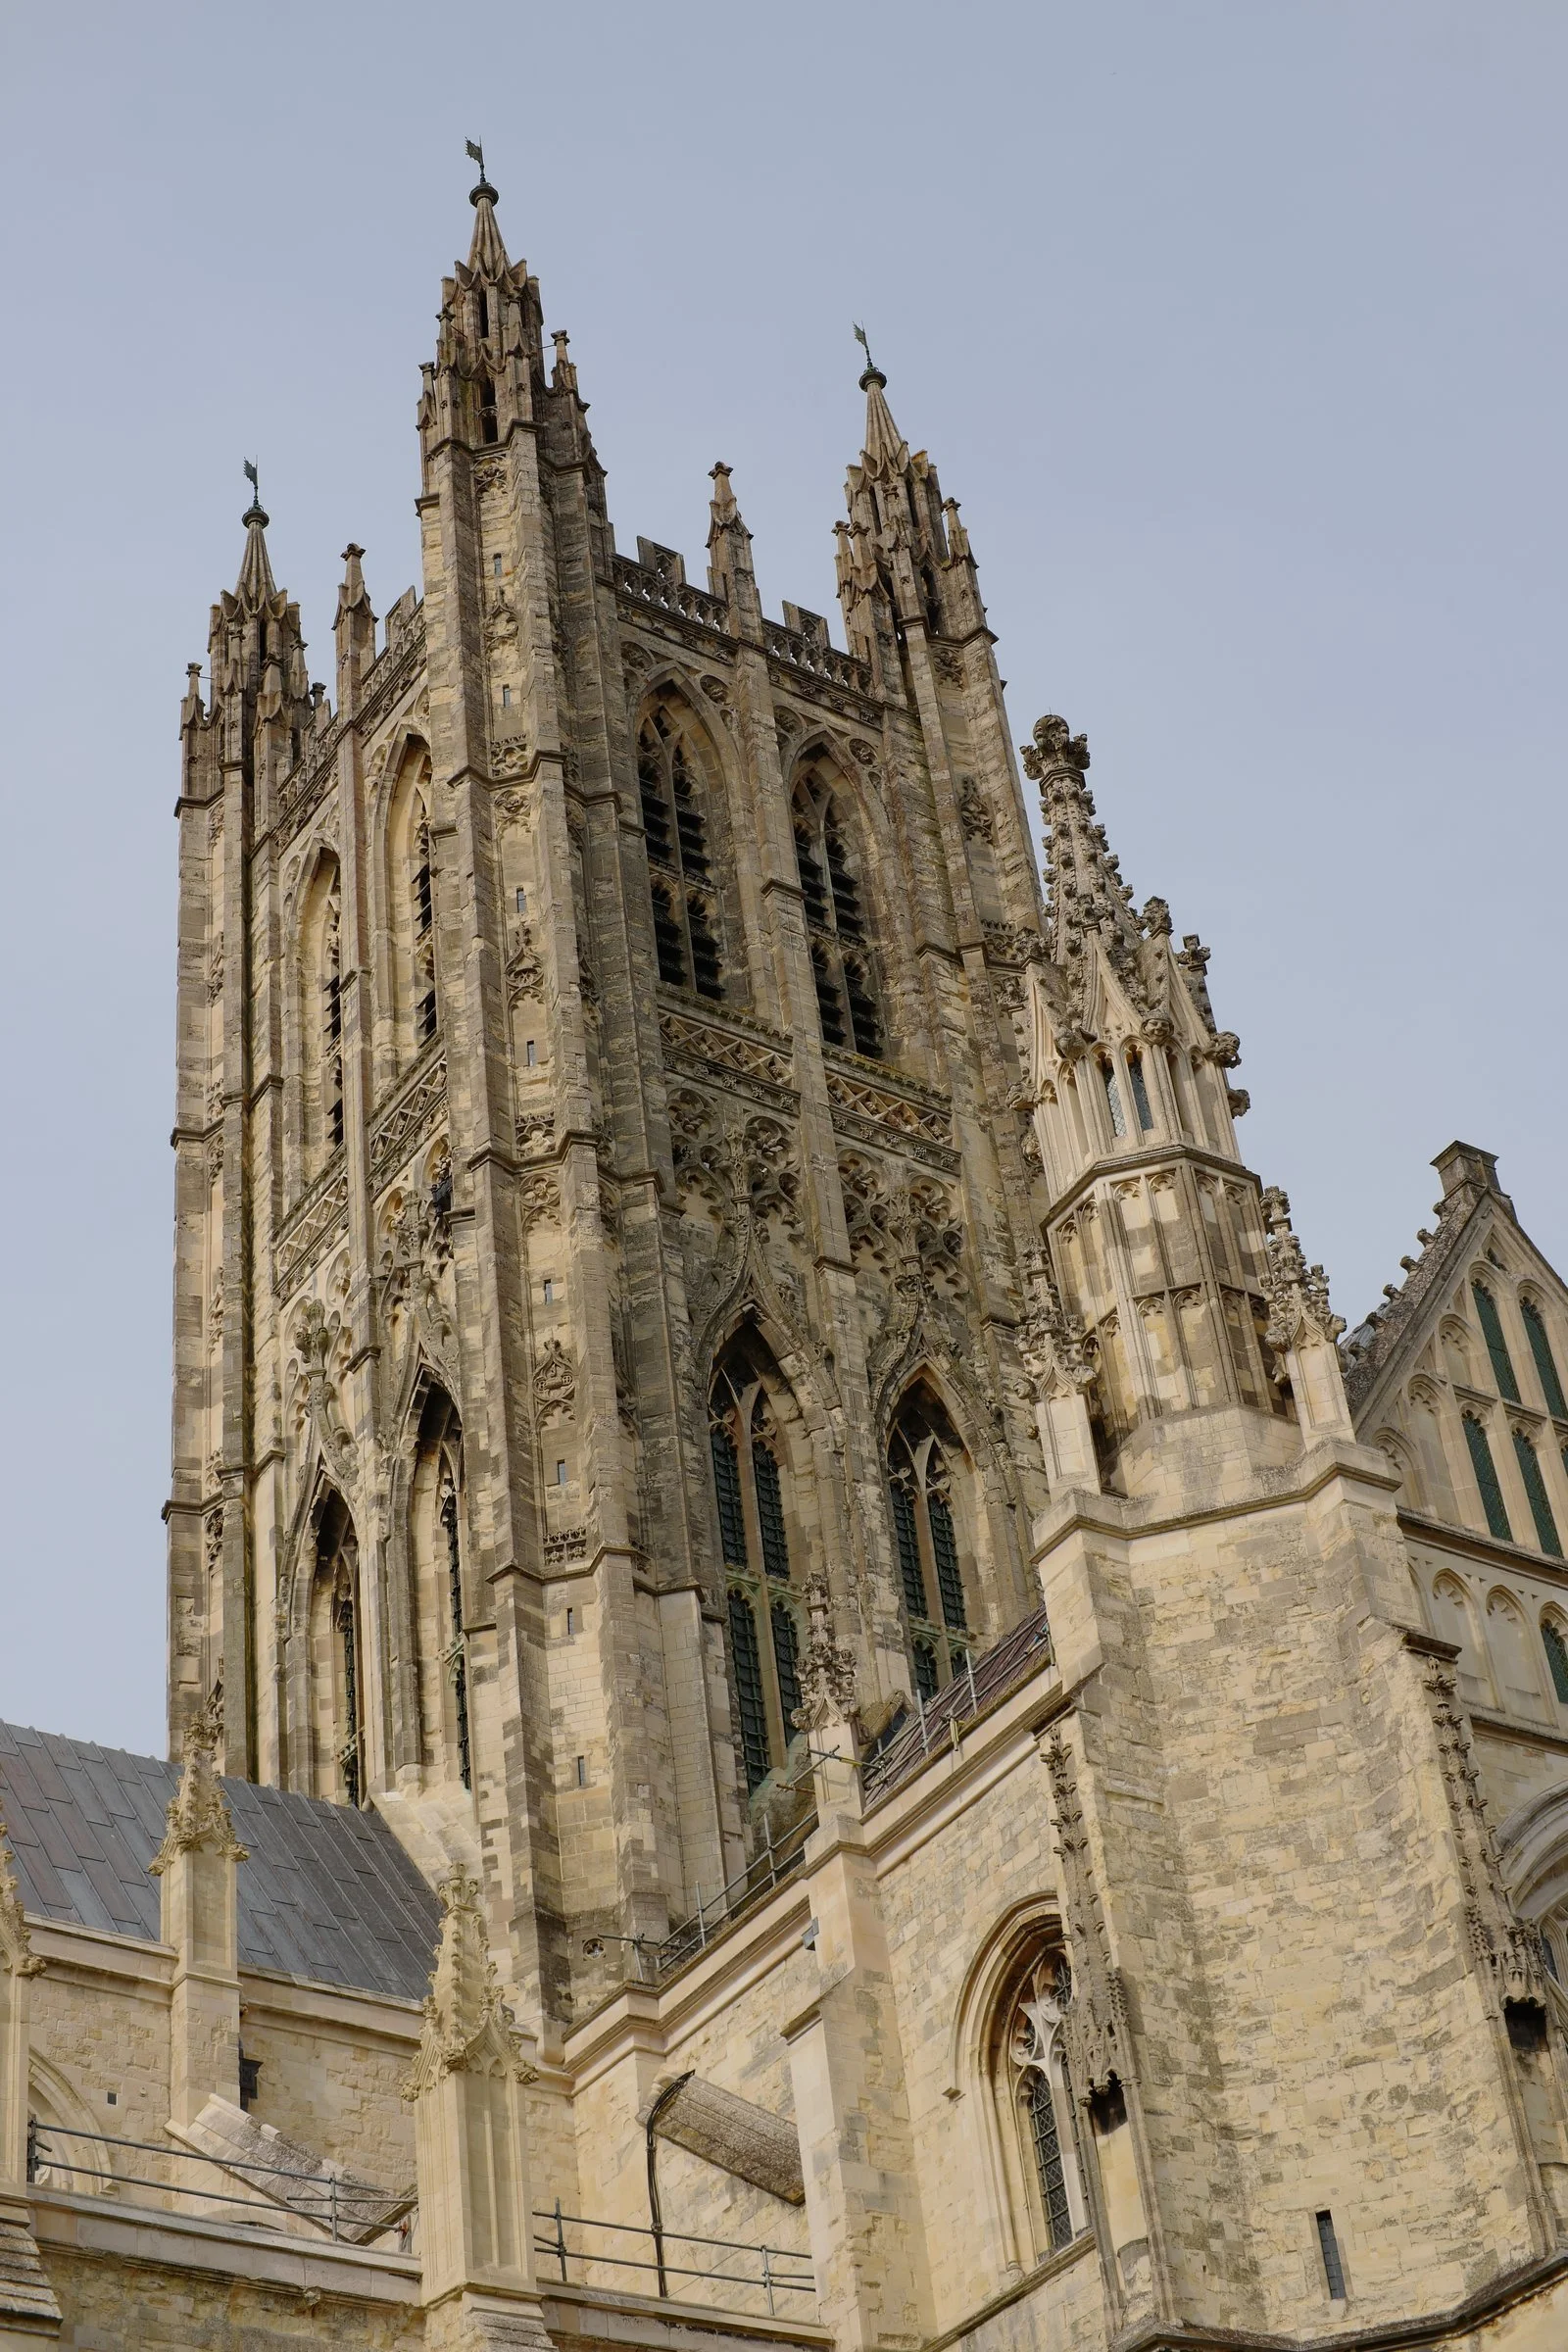
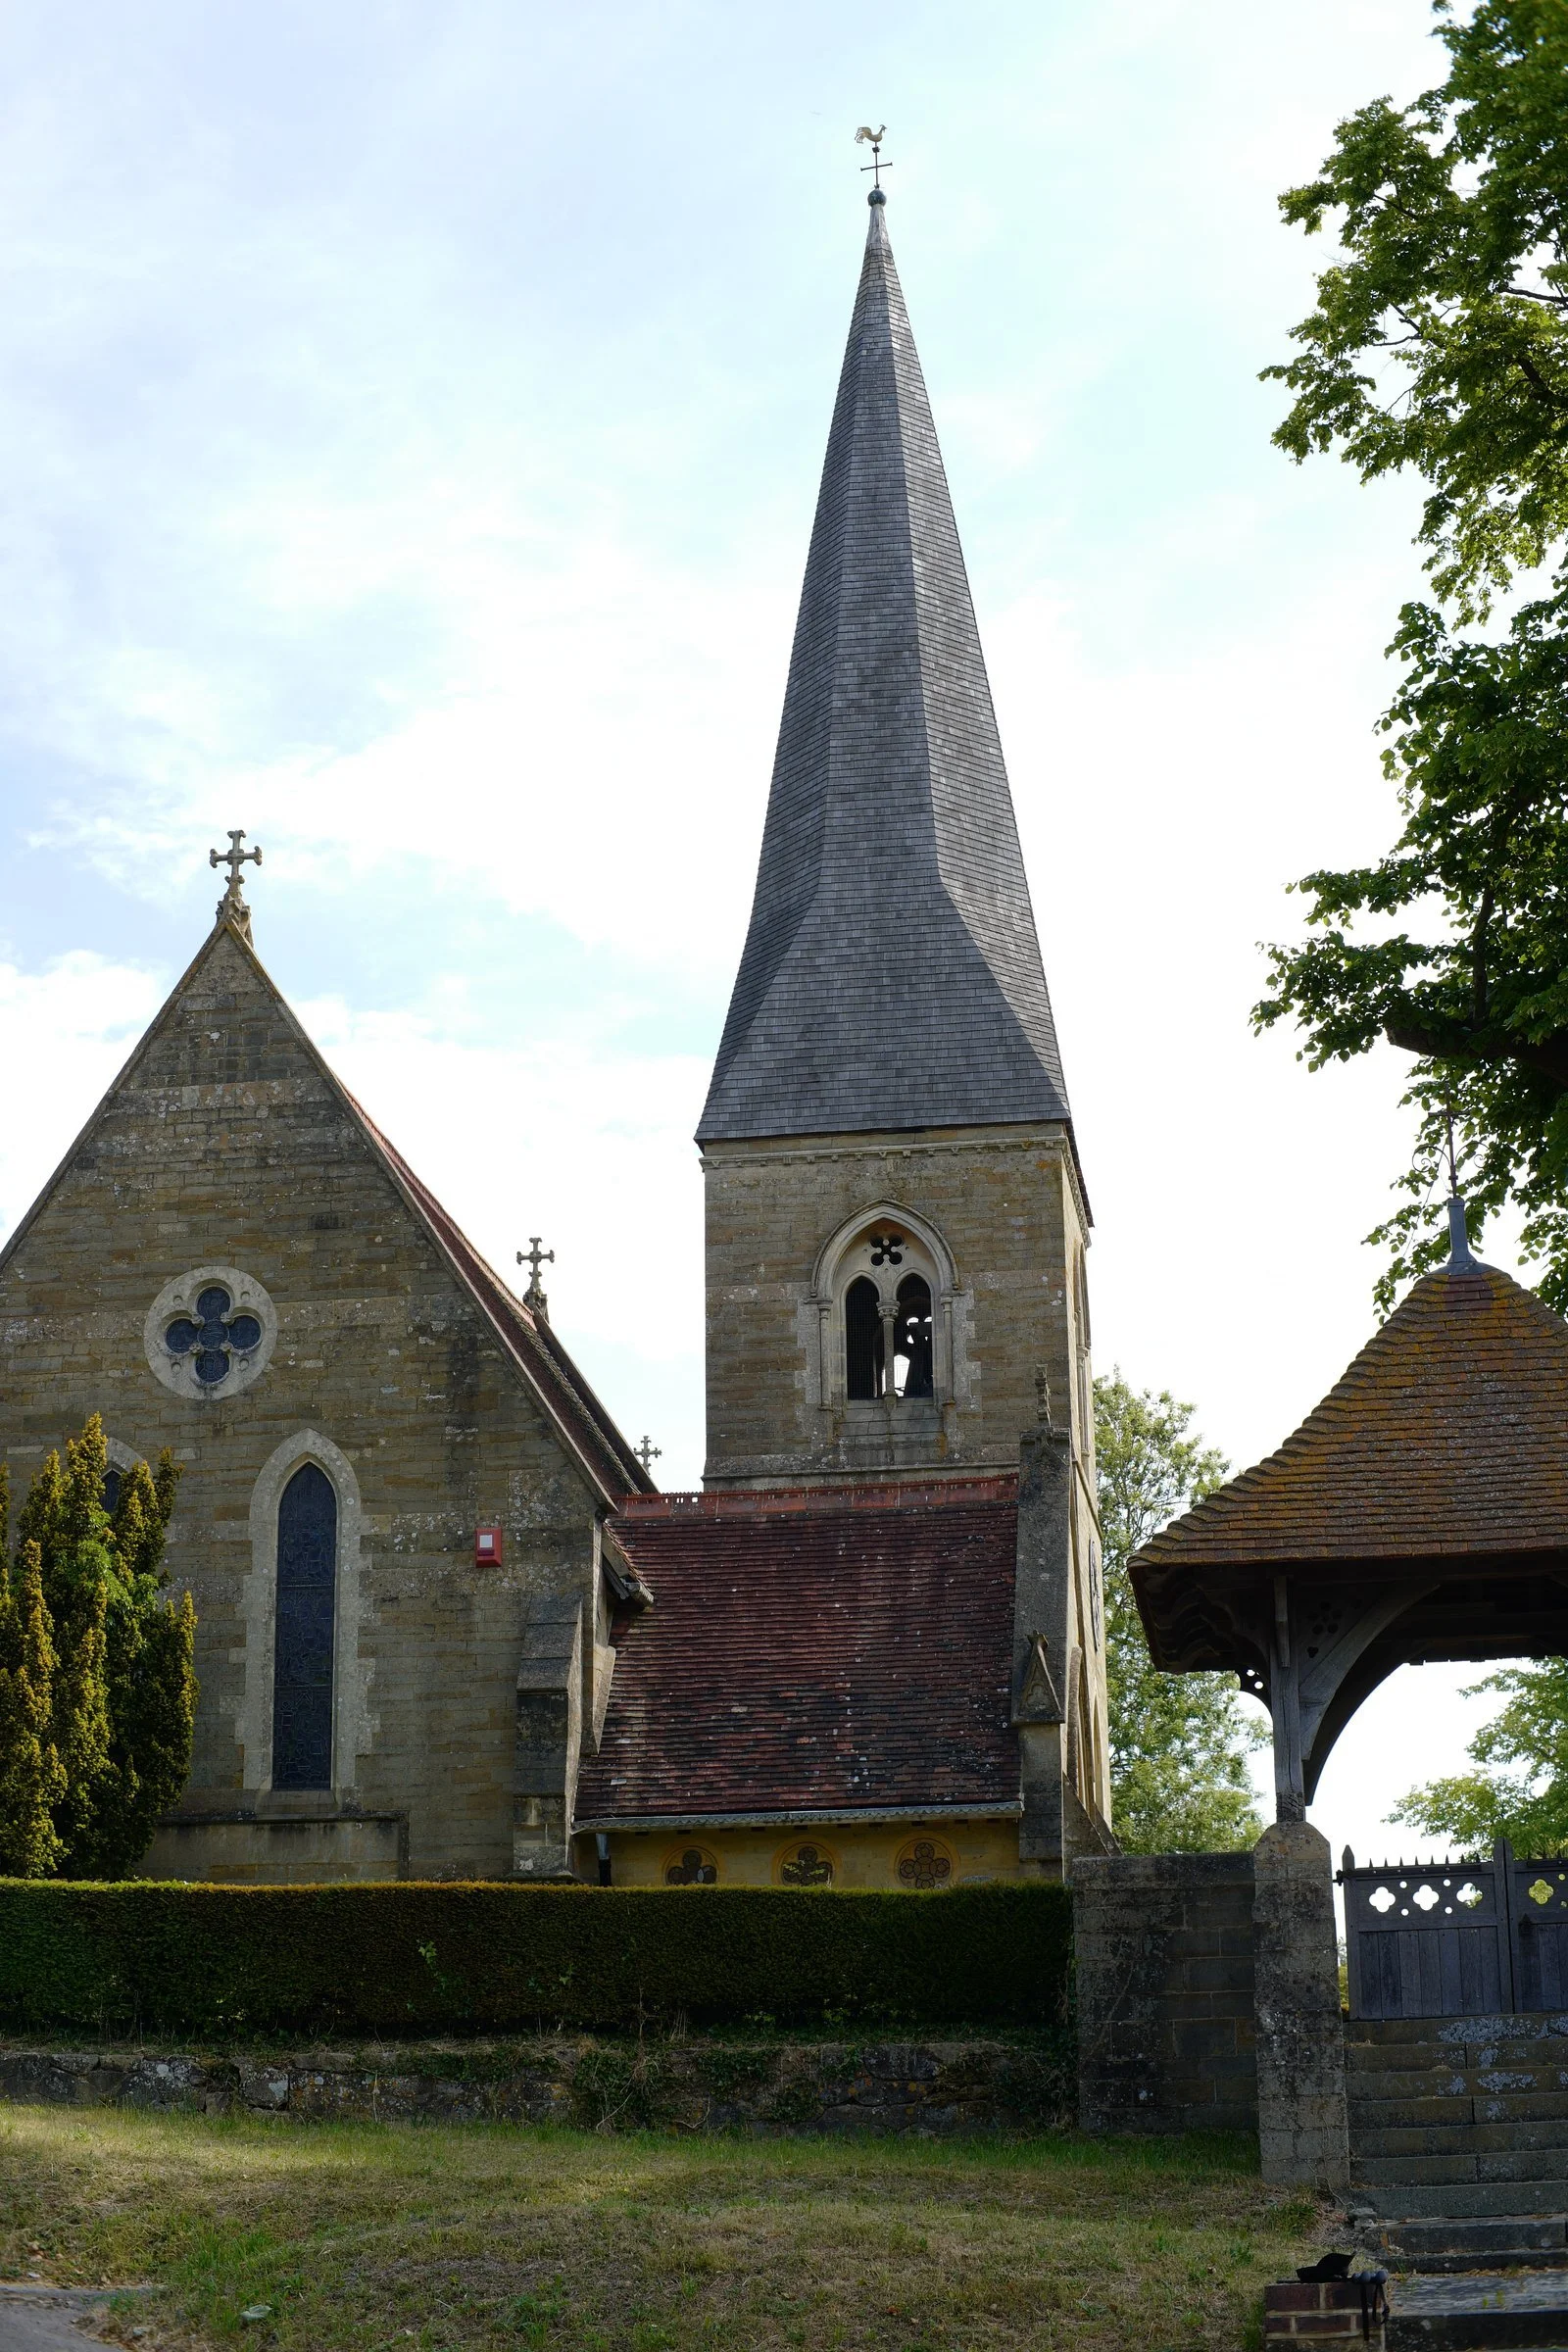
Canterbury Cathedral is so large and ornate that it is impossible to capture it in one photo. I opted to just get this one spire as some of it was obscured by scaffolding and the rest was just so large. This photo shows the level of detail and the sheer scale in just one photo. It is hard to imaging a Cathedral can be so large. Canterbury has to hold some sort of record for this…
What I Learned: Practical Lessons for Future Pilgrims
Let's talk about what really matters. In closing, I am going to wrap this with the following quote that I made up just for this blog, but it does seem fitting to me: "If you don't stop to look at the flowers along the way, you wasted part of your trip."
I am really one of those people that likes the journey as much as the destination and this was the perfect blend for me. Daily goal-oriented activity with lots to do and see along the way...
Key lessons:
Drink more water than you think you need (I learned this the hard way with debilitating leg cramps!)
Pack lighter than you think (I should have taken the 35mm f/1.4 instead of the heavier f/0.95)
Stop to smell the flowers (literally and figuratively)
The journey IS the destination (don't rush through beautiful countryside)
Backpack-only travel is liberating (no checked bags, less stress!)
A good backpack matters (Mystery Ranch saved my back)
Support this website by using these affiliate links to shop on Amazon:
Nikon AF-S FX NIKKOR 105mm f/1.4E ED Lens
Voigtlander Nokton 35mm f/1.4 II
Sandisk 128GB Extreme Pro memory cards
Nikon 50mm f1.8 S Lens for Z mount
Canterbury Pilgrimage FAQ: Planning Your Own Trek
How long does the Canterbury Pilgrimage take?
The complete Canterbury Pilgrimage from Winchester to Canterbury is about 120-130 miles depending on your exact route. Most people take 10-14 days to complete it, averaging 10-15 miles per day. We took two weeks and found that pace comfortable for stopping to explore villages, photographing the countryside, and actually enjoying the journey rather than just grinding out miles. If you're a strong hiker you could do it faster, but I'd recommend taking your time! The whole point of a pilgrimage is reflection and experiencing the journey, not setting speed records.
What's the best time of year to hike the Canterbury Pilgrimage?
Late spring through early fall (May through September) is ideal for the Canterbury Pilgrimage. The weather is milder, days are longer, and most of the pubs and accommodations are fully operational. We went in [season] and had great weather overall. That said, England is England, so expect rain regardless of when you go! I carried my camera gear in a dry bag the entire trip and I'm glad I did. Winter is possible but you'll face shorter days, colder weather, and some accommodations might be closed.
Do I need to be religious to do the Canterbury Pilgrimage?
Absolutely not! While the Canterbury Pilgrimage has deep religious roots (it's been walked by pilgrims for centuries), plenty of people hike it for the history, the beautiful countryside, or just the challenge of a long-distance trek. I approached it as both a spiritual journey and an adventure, but you can focus on whichever aspect appeals to you. That said, I do recommend attending the service at Winchester Cathedral before you start, even if you're not religious. The boys choir is beautiful and it adds something special to the experience!
How much does the Canterbury Pilgrimage cost?
Budget varies widely depending on your accommodation choices and eating habits. We stayed in hotels and B&Bs and ate at pubs every meal (since we didn't pack cooking gear), which probably ran $100-150 per person per day including accommodation and food. If you camp or stay in hostels and cook your own meals, you could do it much cheaper. The trail itself is free to walk. Don't forget to budget for getting to Winchester and from Canterbury back to London. Flight from US to London obviously adds to the cost, but we saved money by only carrying backpacks (no checked bag fees!).
What should I pack for the Canterbury Pilgrimage?
Pack lighter than you think you need! We went backpack-only (no checked bags) and it was liberating. My essentials: full change of clothes, extra socks, rain jacket, water bottle (I wished I'd brought two!), water filter, trekking poles (bought in Winchester), phone charging gear, camera gear in a dry bag, and snacks. I carried 25-30 pounds in a Mystery Ranch Pitch 40 backpack and my back never hurt. The key is a well-engineered backpack with proper weight distribution. Pack for the reality that you'll be carrying everything on your back for two weeks, not for every possible scenario!
Where do you stay on the Canterbury Pilgrimage?
You have options! We stayed in hotels and B&Bs in the towns along the route (Arlesford, Alton, Farnham, etc.). The advantage is comfort, hot showers, and you can just show up without reservations in most cases. The disadvantage is cost. Other options include camping (England has lots of campsites), hostels, or even churches that offer pilgrim accommodation. Some people book everything in advance, others wing it day by day. We were somewhere in between and it worked fine. The towns are spaced reasonably for daily hiking distances.
How hard is the Canterbury Pilgrimage physically?
If you're in reasonable shape and can walk 10-15 miles a day, you can do this! I'd never done long-distance hiking before and I completed it fine. The trail is well-marked and not technically difficult (no rock scrambling or anything like that), but it's still physically demanding to walk day after day. The biggest challenge for me was my 13-mile mistake day where I hiked farther than planned and didn't drink enough water. I had debilitating leg cramps that night from dehydration. Learn from my mistake: drink more water than you think you need, especially on long days!
What's the trail like? Is it easy to navigate?
The Pilgrims Way isn't a single continuous trail through the woods. It's more of a "way" that crosses fields, follows designated footpaths, and sometimes goes along roads. You'll encounter lots of kissing gates (cattle gates) when crossing between fields. The trail is generally well-marked but you do need to pay attention to avoid missing turns. We used a website that overlays the route on Google Maps which was incredibly helpful. The countryside is absolutely gorgeous, literally like postcards in every direction!
Do I need special hiking gear or can I use regular stuff?
You don't need ultra-technical gear! I used a rock-climbing backpack (Mystery Ranch Pitch 40) and it worked great. Trekking poles are highly recommended (I bought mine in Winchester and almost wore them out). Good hiking boots or trail shoes are important for two weeks of daily walking. Rain gear is essential. A water filter is nice to have but not strictly necessary. Camera gear is optional but highly recommended—the English countryside is stunning! I took my Leica CL with two lenses and got 1,400 photos. Looking back, I wish I'd packed my 35mm f/1.4 instead of the heavier f/0.95 lens.
What's the deal with stinging nettle?
Stinging nettle is a plant that's literally EVERYWHERE along English trails and you do NOT want to mess with it! It causes a stinging, burning sensation if you brush against it. The locals just accept it as part of life, but as an American, it was something I had to learn about quickly. Wear long pants when hiking through overgrown sections, and don't grab random plants for support. The stinging sensation is temporary but annoying. This was one of our first lessons on Day 1 and we got much better at avoiding it after that initial encounter!
Until next time, get your camera out and go take a picture with it.
An updated treatise on my travel camera gear.
When I wrote the last blog post about flying with cameras gear, I had only considered the airport and airplane overhead space only.
Well, here I am again in a different scenario and this time the kit looks very different. The overarching theme here is apparently that you should tailor the kit to suit the trip. Lol. I have done just that.
For this trip we are being tourists more or less, so the camera kit will reflect that. I am taking the Leica CL and just two prime lenses. The 17mm and the 35mm lenses are perfect for tourist type photography and there is two more reasons for taking two primes over a single zoom… read on to learn why.
When choosing kit for trips now, I start with the premise of the trip. For a long time, I would have these illusions of grandeur and would take all this gear for events that never happened. You see, I dont plan the trips, the wife does so she plans on things the I don’t consider. She will arrange tours and such and I am just too busy with other things to pay much attention. Well, I finally learned and now I dont bring hardly any of that stuff and this makes travel SO much easier. Some types I have encountered are tourist, wildlife, street, and such as that. Once this is nailed down then I choose a camera that best fits that type of trip. Usually between crop sensor and full frame first as this gets me the right camera. For wildlife I prefer my crop sensor Z50 but for architectural purposes I prefer a full frame sensor. Things like street photography can be shot with either but on long days, the little crop sensor Leica CL is a much better choice over the much heavier Leica SL2.
Now that I have a camera picked out, I will decide what is the most likely scenario I will be shooting in and choose a lens for that. Next I will look at what else there is and choose a lens that will work for this as well as loosely backup for the main lens.
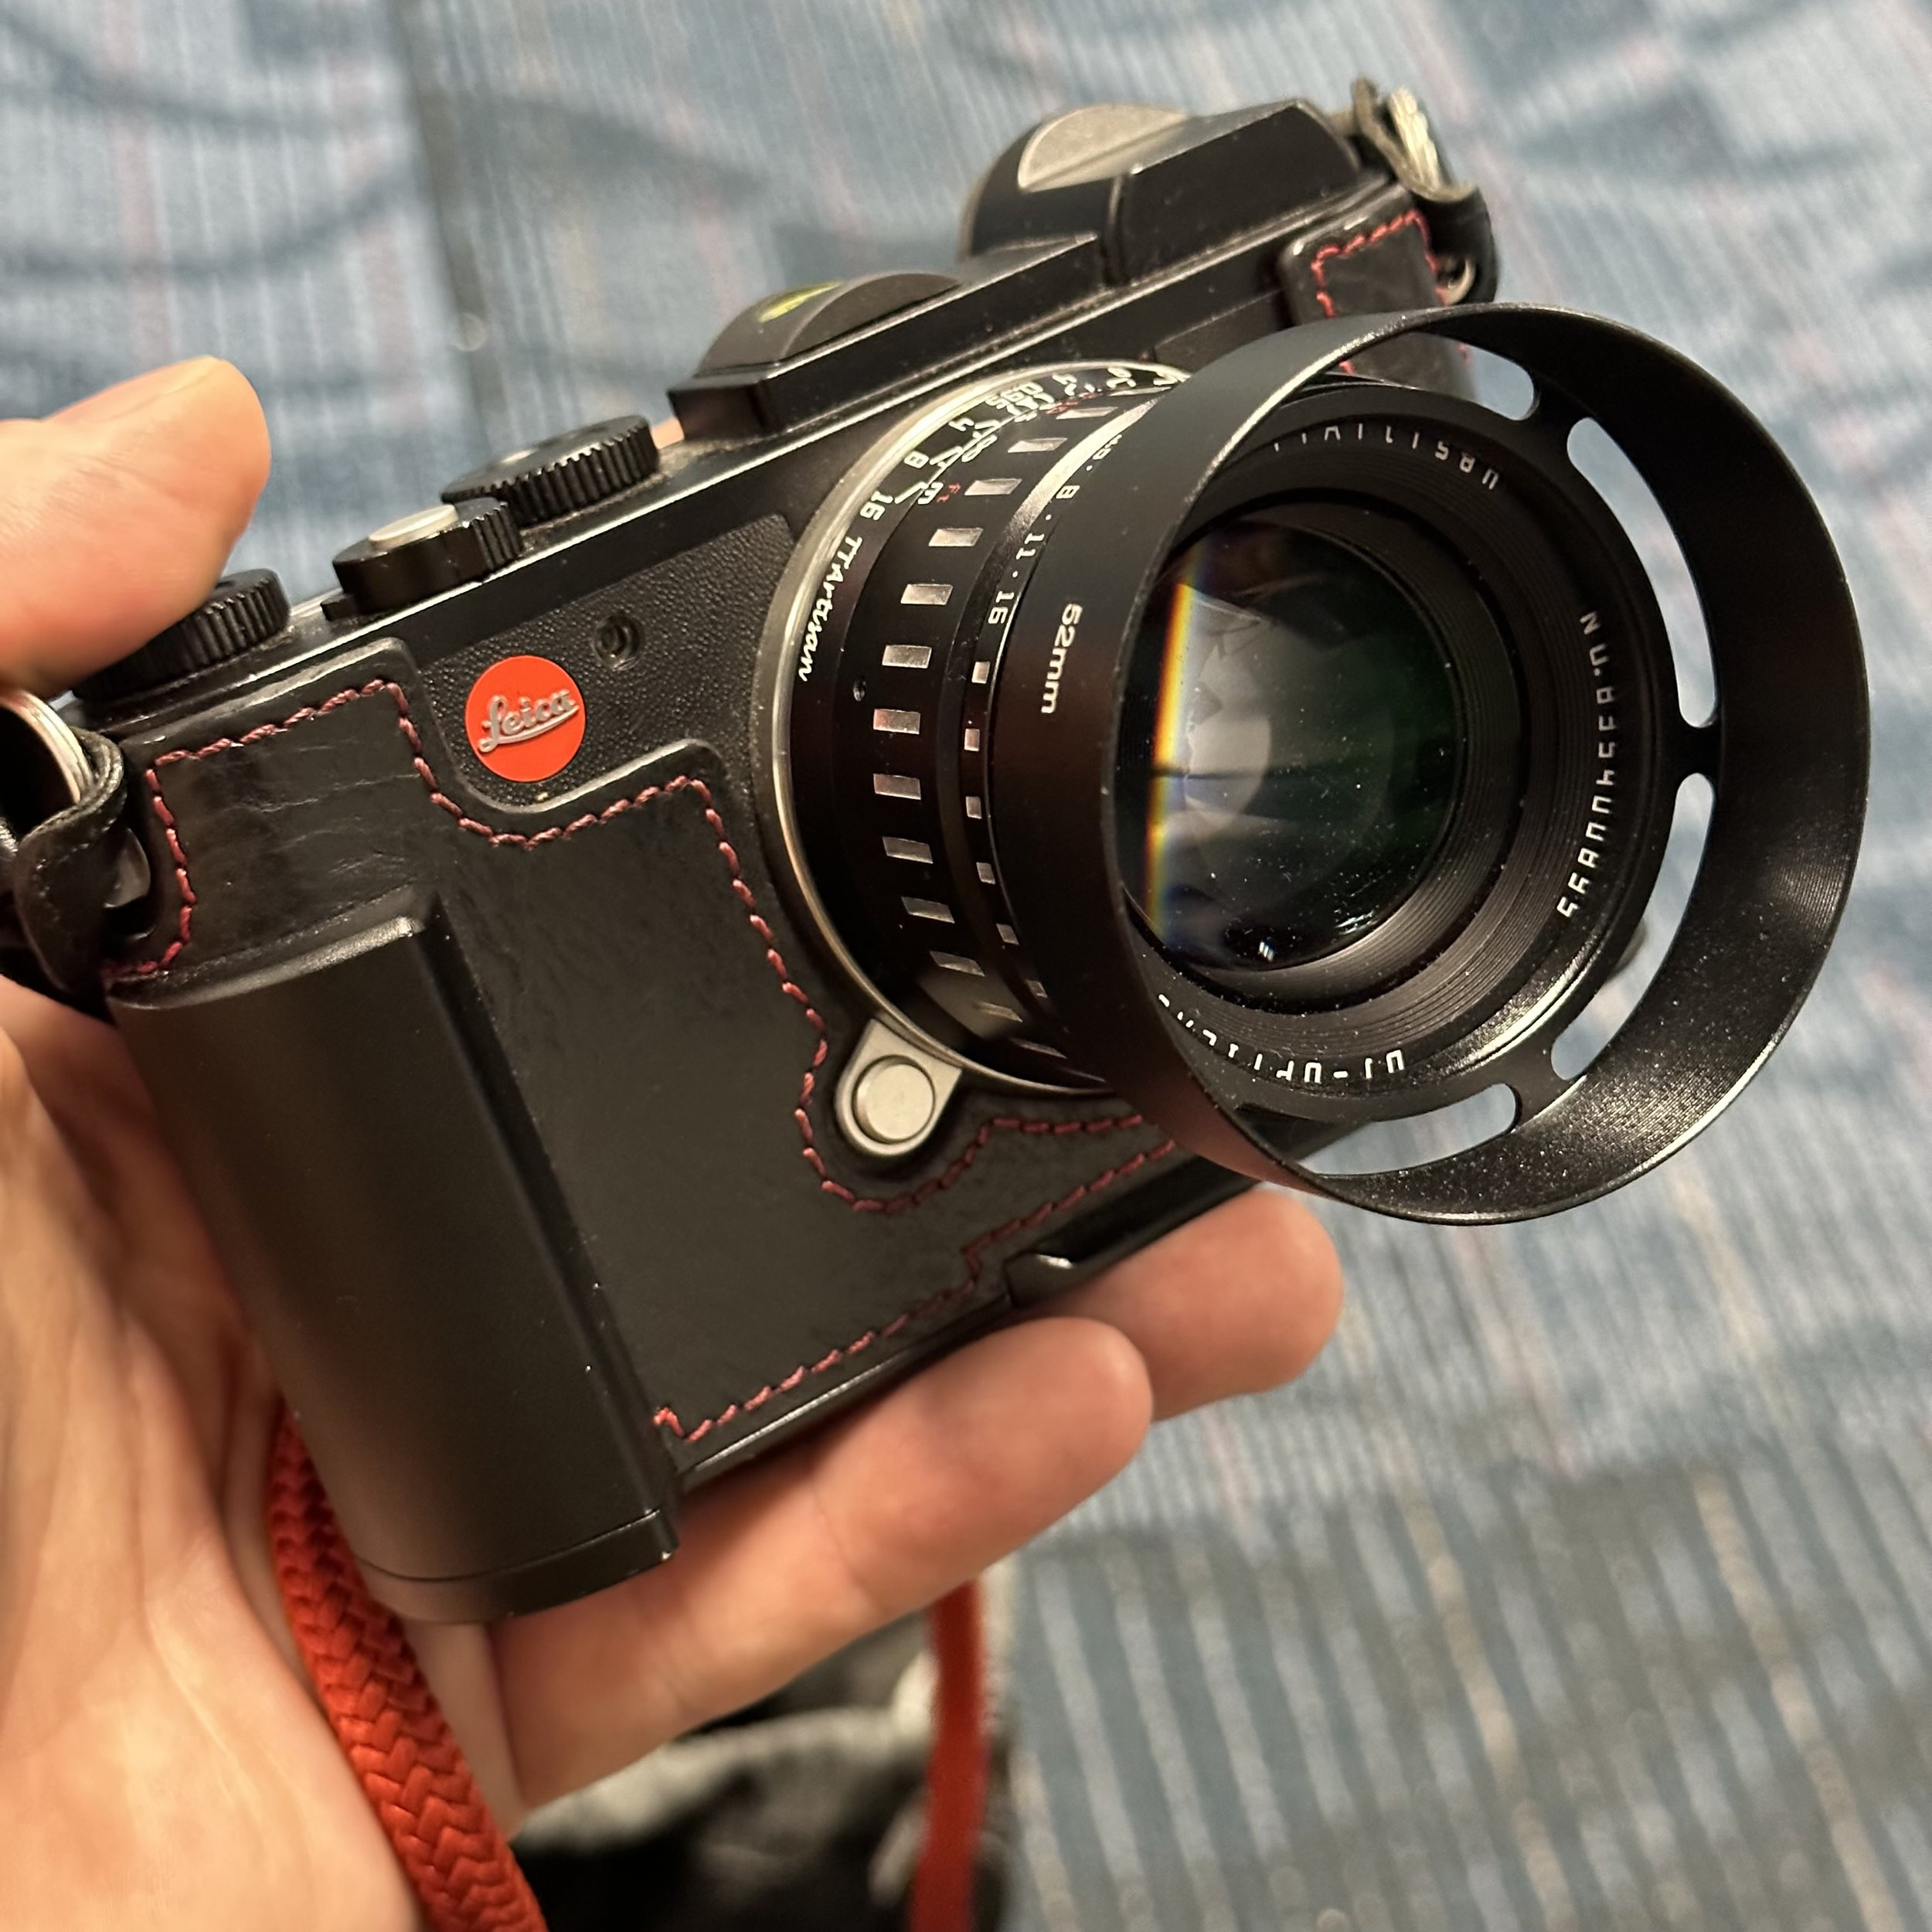
Using this process, I chose the 35mm f0.95 TTArtisan lens as my main lens and the TTArtisan 17mm f1.4 lens as the backup. These are designed for the Leica CL which is a crop sensor camera so the equivalent field of view for these lenses is 50mm and 28mm respectively. These are two VERY useable focal lengths for a travel kit. These will also both work just fine if one or the other gets damaged at some point. I might have to adjust my shooting style a little but the trip is not a loss…
I want to take a moment here to mention TTArtisan and how they are making some amazing lenses for crazy low prices. The quality of all three of the lenses I currently have that they made are just stellar. I have one they gave me as a review sample but I bought the other two on my own. They are great little manual lenses.

Another reason I like using prime lenses for trips is the maximum aperture is much larger than on general purpose zoom lenses. General purpose lenses work great in broad daylight but the lack of large apertures make them less than desirable for me in the evening and early morning.
What this means is I will end up with a really compact kit with this camera and two lenses. These being native L mount lenses also means they are smaller than adapted lenses as well. (This is something that I do regularly and dont sweat it and that is how I know.) Native mounted glass means they are more compact though and that is what I wanted.
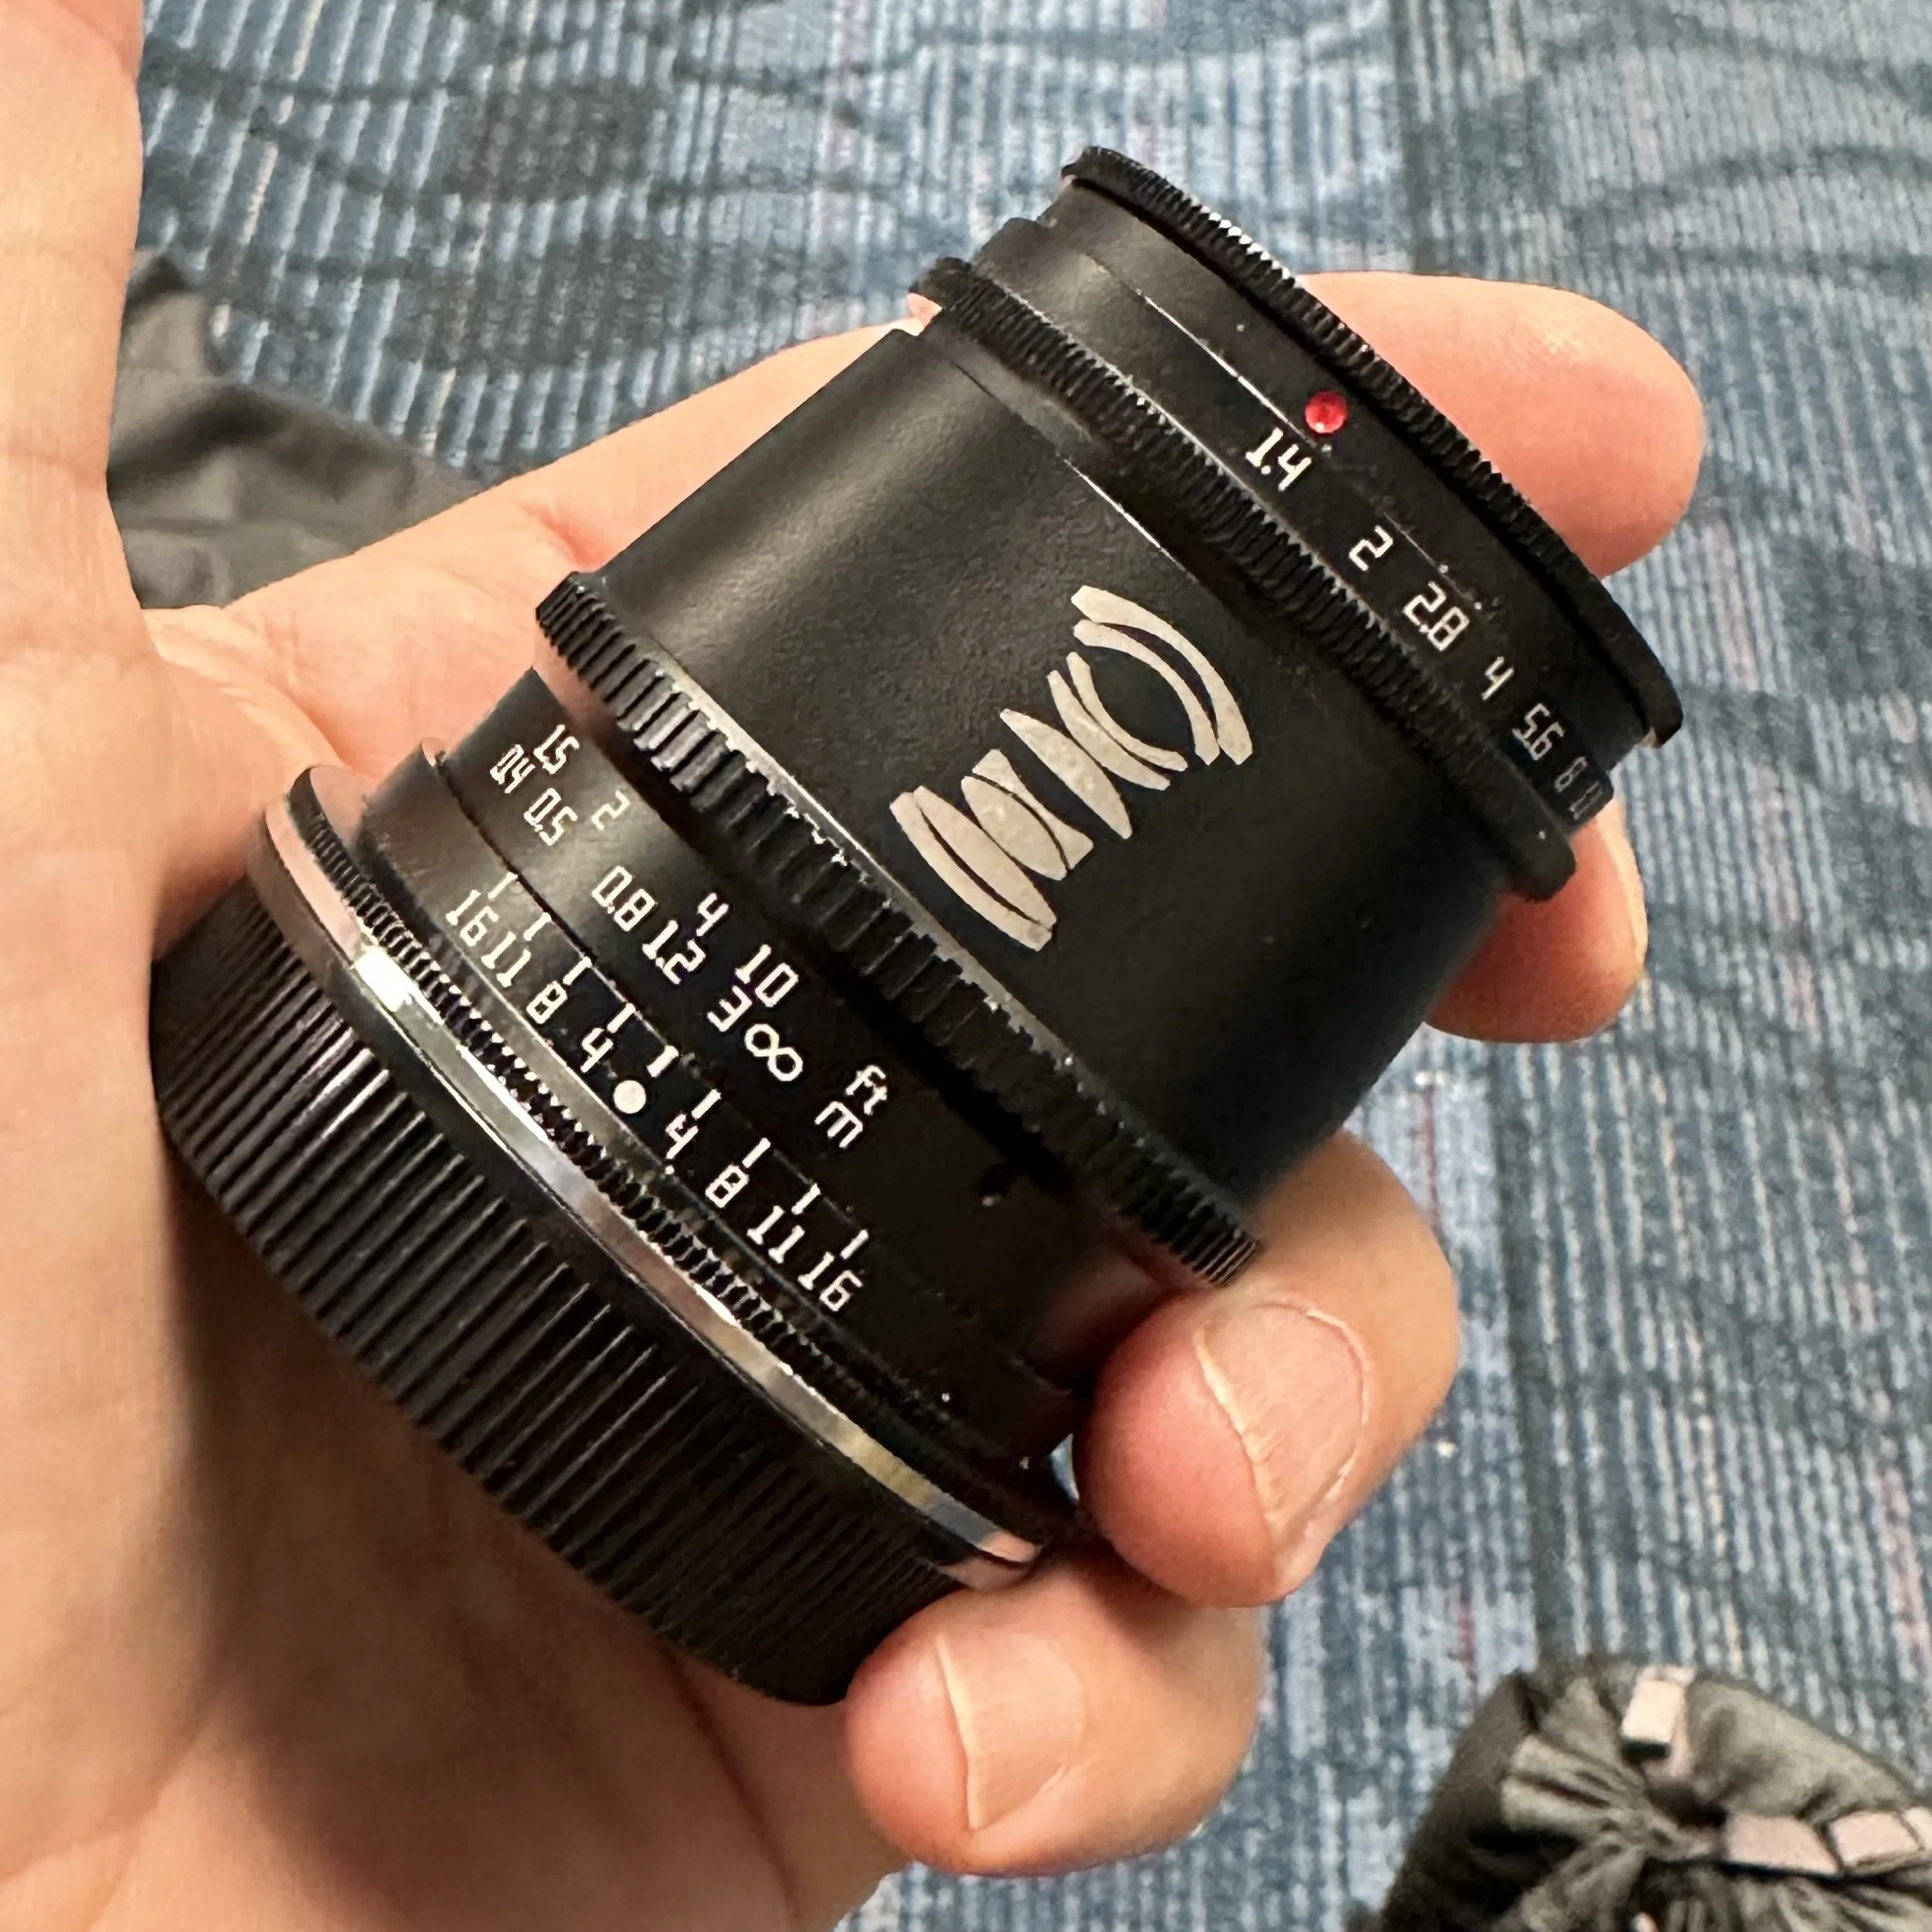
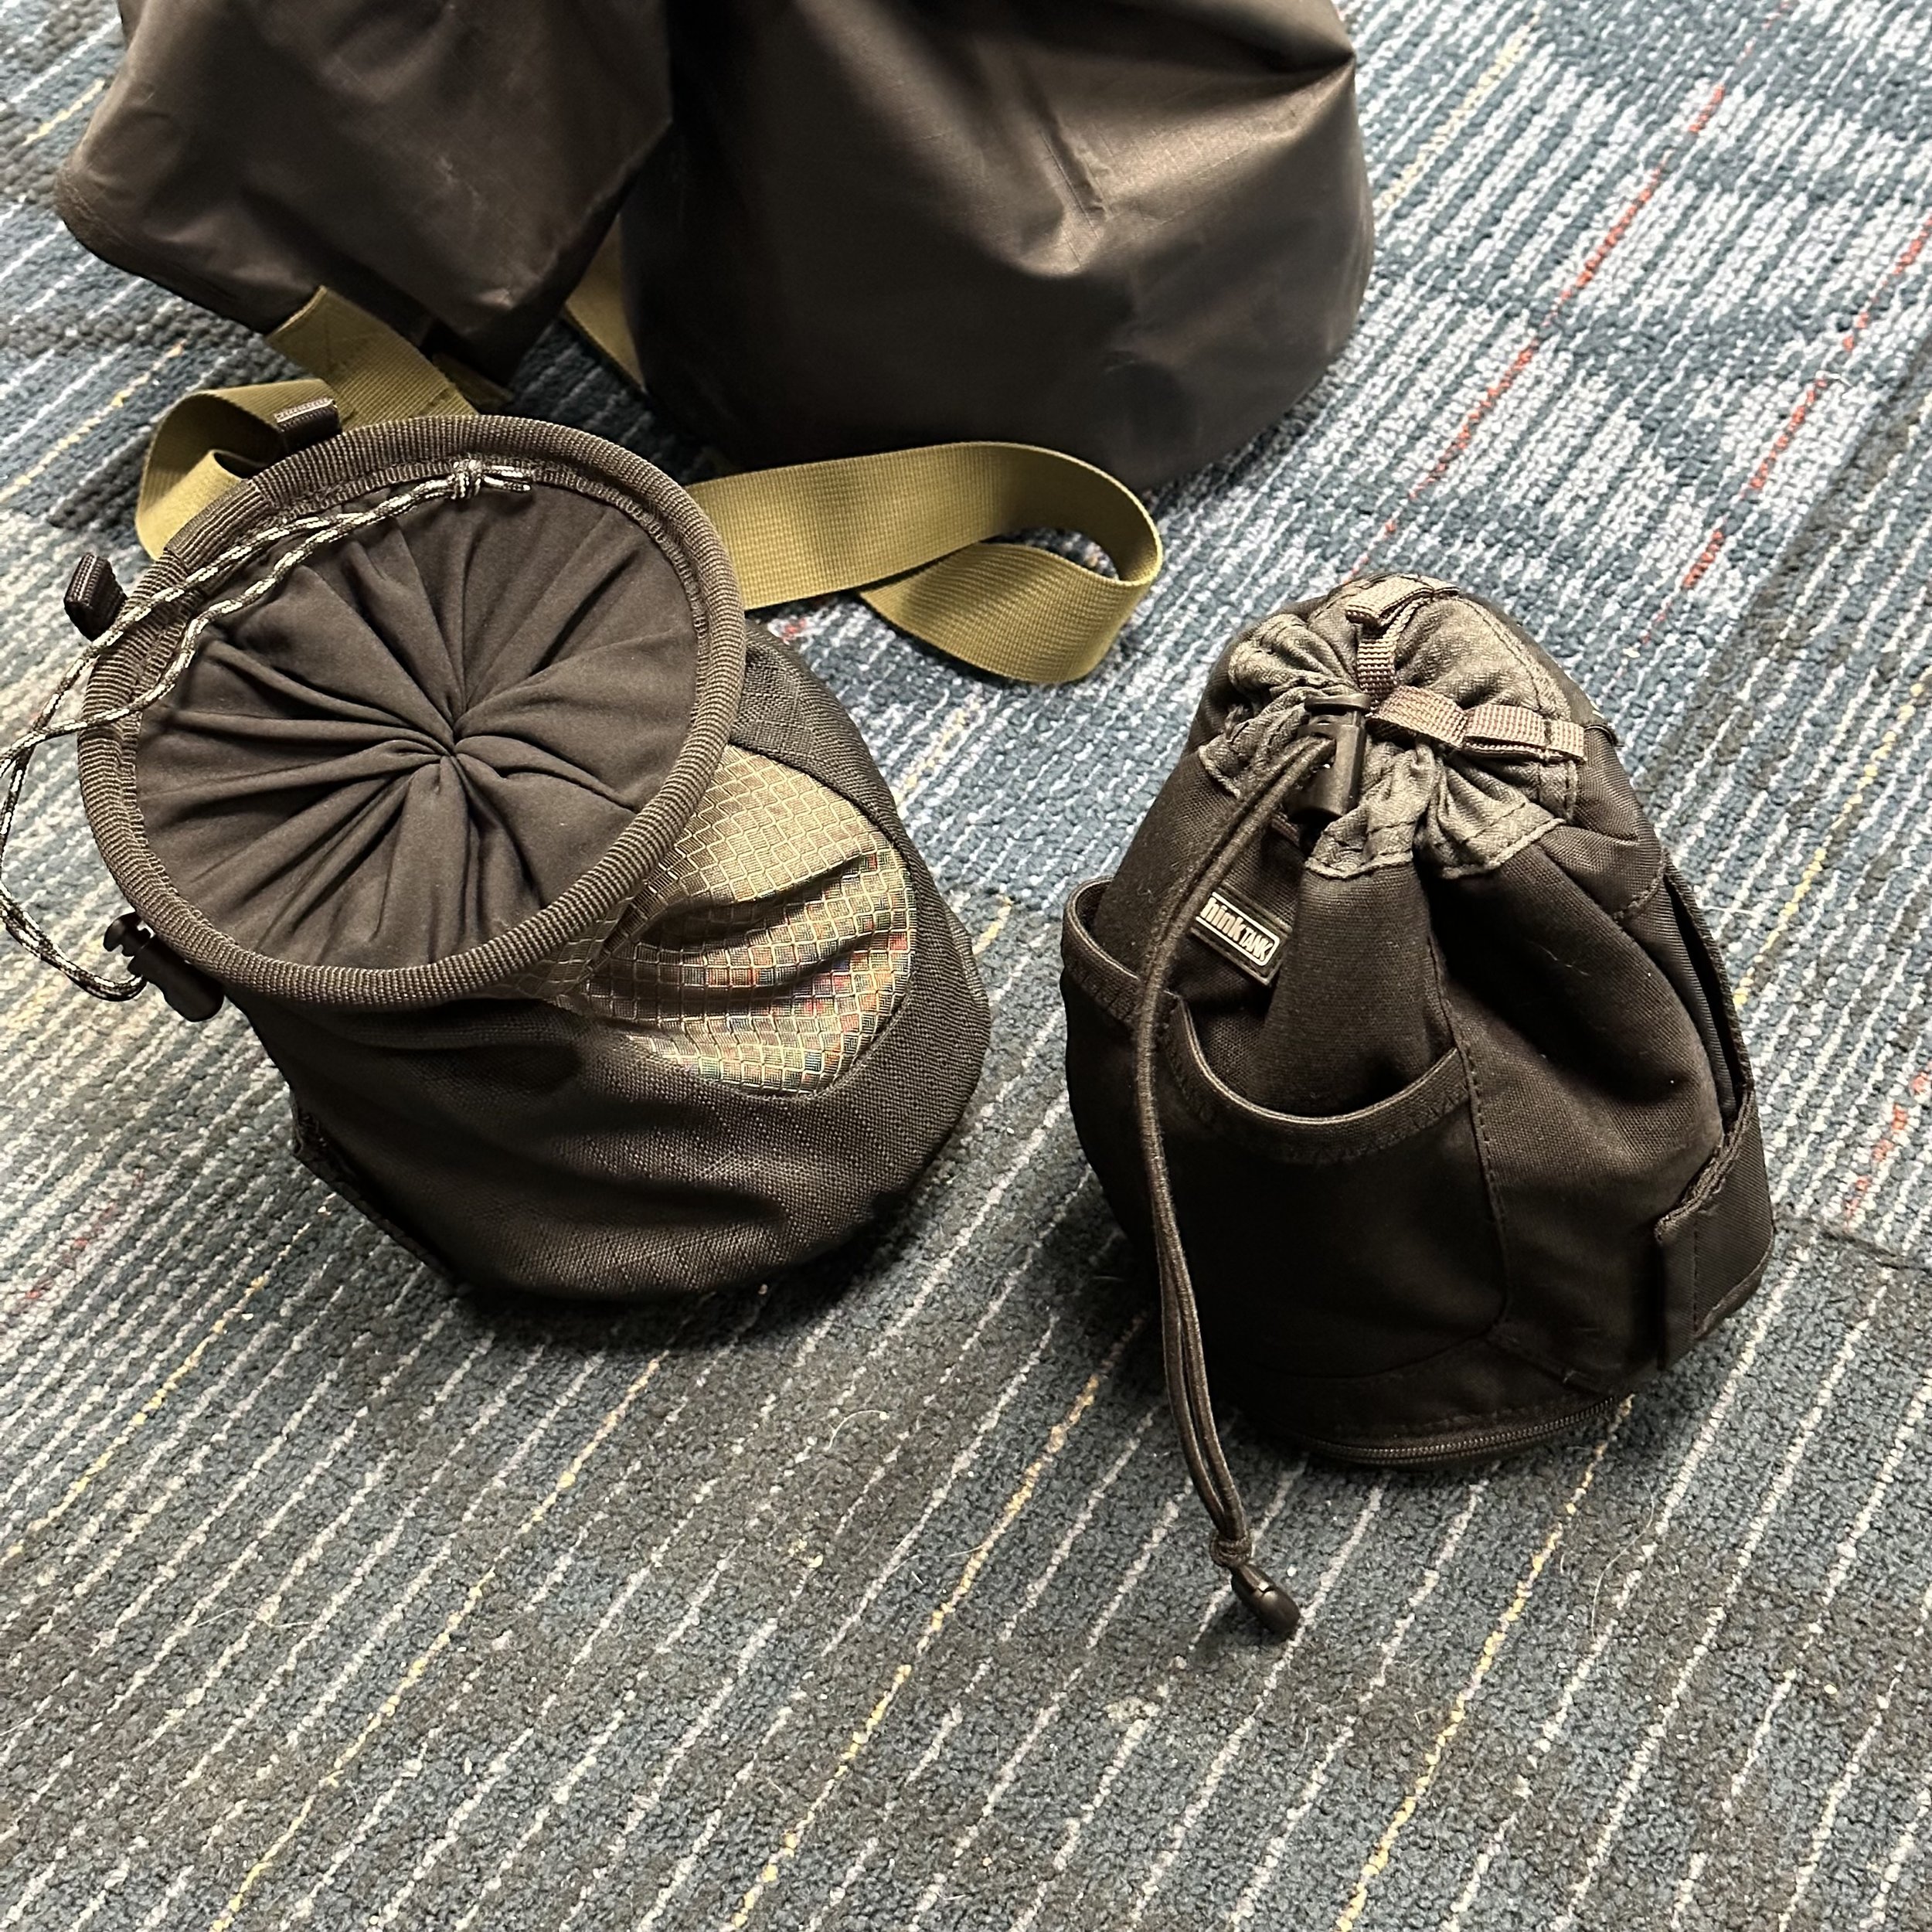
Since we are hiking this trip, I wanted to make sure that rain didn’t ruin my camera gear. This is why I put all my camera gear into a dry bag and then put that inside my backpack.

Once inside the dry bag, they are divided into three different lens “dump” bags I used for this trip to organize this gear loadout. These are made by Thinktank Photo and are great for street photography photo walks as you can stick batteries and a spare lens, business cards and lens wipes and such in them and they are still small and lightweight.

I realize now that I desperately need to clean my lens! Will do that asap!!!
Armed with this kit I am ready to take on just about any tourist, street, or even landscape type photo with hood confidence that I will come away with something reasonable. The next blog post in regards to this kit will be a photo spread describing what I found to photograph.
Until next time, get your camera out!!!
My loadout for flying with camera gear.
Traveling over the years to locations that require flying commercial has taught me a few things about what to take.
I once carried almost everything I owned when I traveled so I was sure to have whatever I needed for a certain photographic event. Well, with time comes wisdom… I have been adjusting the loadout and searching for the best solution as far as bags go and have finally found the perfect setup…FOR ME. You see, different people have different needs and your loadout will vary depending on your personal needs and wants.
When I traveled early on, I carried a large shoulder bag, very large mind you and a ton of kit in it. I had to fill it up you know! Lol.
Well after a couple of trips like that, I learned that I needed a different bag. So the giant Vanguard bag was retired and replaced with a Thinktank Airport International v2. This was a nice upgrade and allowed me to travel with more confidence in knowing my gear was protected better and it was also a roller bag! No more lugging that massive shoulder bag all over creation!!!
Well, I still use this bag from time to time, but only for roadtrips in my truck. The irony of this statement is not lost on me. I bought a literal aircraft carry own style, camera bag and now I dont even take it when I fly at all.

Thinktank Photo Airport International 2.0
So I learned the hard way something about marketing with this bag. Thinktank Photo will tell you, probably with an asterisk, that this bag will fit in standard overhead spaces. This isn’t so and I learned this the hard way on a trip coming home from Hawaii one year. On the last leg of our long journey, we boarded a small commuter jet and the overhead storage bins were just too small. This is when I got a VERY sick feeling in the pit of my stomach. You see, this meant I had to valet check this bag at this point. If you have never watched baggage handlers loading luggage then you dont know the horror movie I was imagining my expense and fragile camera gear was about to experience. They can be quite rough with check bags, we have had them arrive at baggage claim with wheels missing and such. So I tell the flight attendant my plight and she saves the day by stowing my roller bag of camera gear in what amounts to her broom closet. I almost cried in appreciation. That was the straw the broke the cameras back of roller bags for me.

Pictured here are the Peak Design Everyday Messenger bag and the Thinktank photo street walker backpack.
After the Airport International “incident”, I decided I needed to downsize my kit for multiple reasons. The main one being that I didn’t want to have to valet check my bag because it wouldn’t fit in the overhead bin.
The next reason is the most important though. I was tired of carrying gear I didn’t use or even need.

Taken with the Nikon Z50 handheld and using the kit lens.
So I decided to get something new and smaller. I chose something that had been on the market for just a short time at this point. I chose a Peak Design Everyday Messenger Bag. It is a wonderful way to carry camera gear for the most part with one exception. I cant really carry my big telephoto lens I use for wildlife. I tried it for a couple of years and at the time, I was using a large system consisting of a Nikon D810 with battery grip and the 200-500mm super zoom lens. This combination is very large and would leave me with room for just a couple of smaller lenses. It also came with another problem…pain. Single strap bags are great as long as they are not heavy, which is exactly what mine was at this point in time. So the search continues and I found another Thinktank Photo bag.
The next bag I chose was the Streetwalker v2. This is a smaller bag that is backpack style and is really comfortable. The single shoulder strap on the messenger bag would make my shoulder incredibly sore after just a couple of hours of carry. I tried this for a couple of years and paid the price. The streetwalker solved that problem in short order. It was at this point in my photography journey that I was finding smaller cameras like the Fuji XT3. I took this camera to Israel for a ten day trip and it was on this trip that my eyes were opened to carrying excessive equipment is wasteful. I took three lenses with me and only used one of them. Yes, I used the KIT LENS for the whole trip and it worked gloriously!!! All the while I was carrying around all this other crap and just getting back to the kibbutz tired every day.
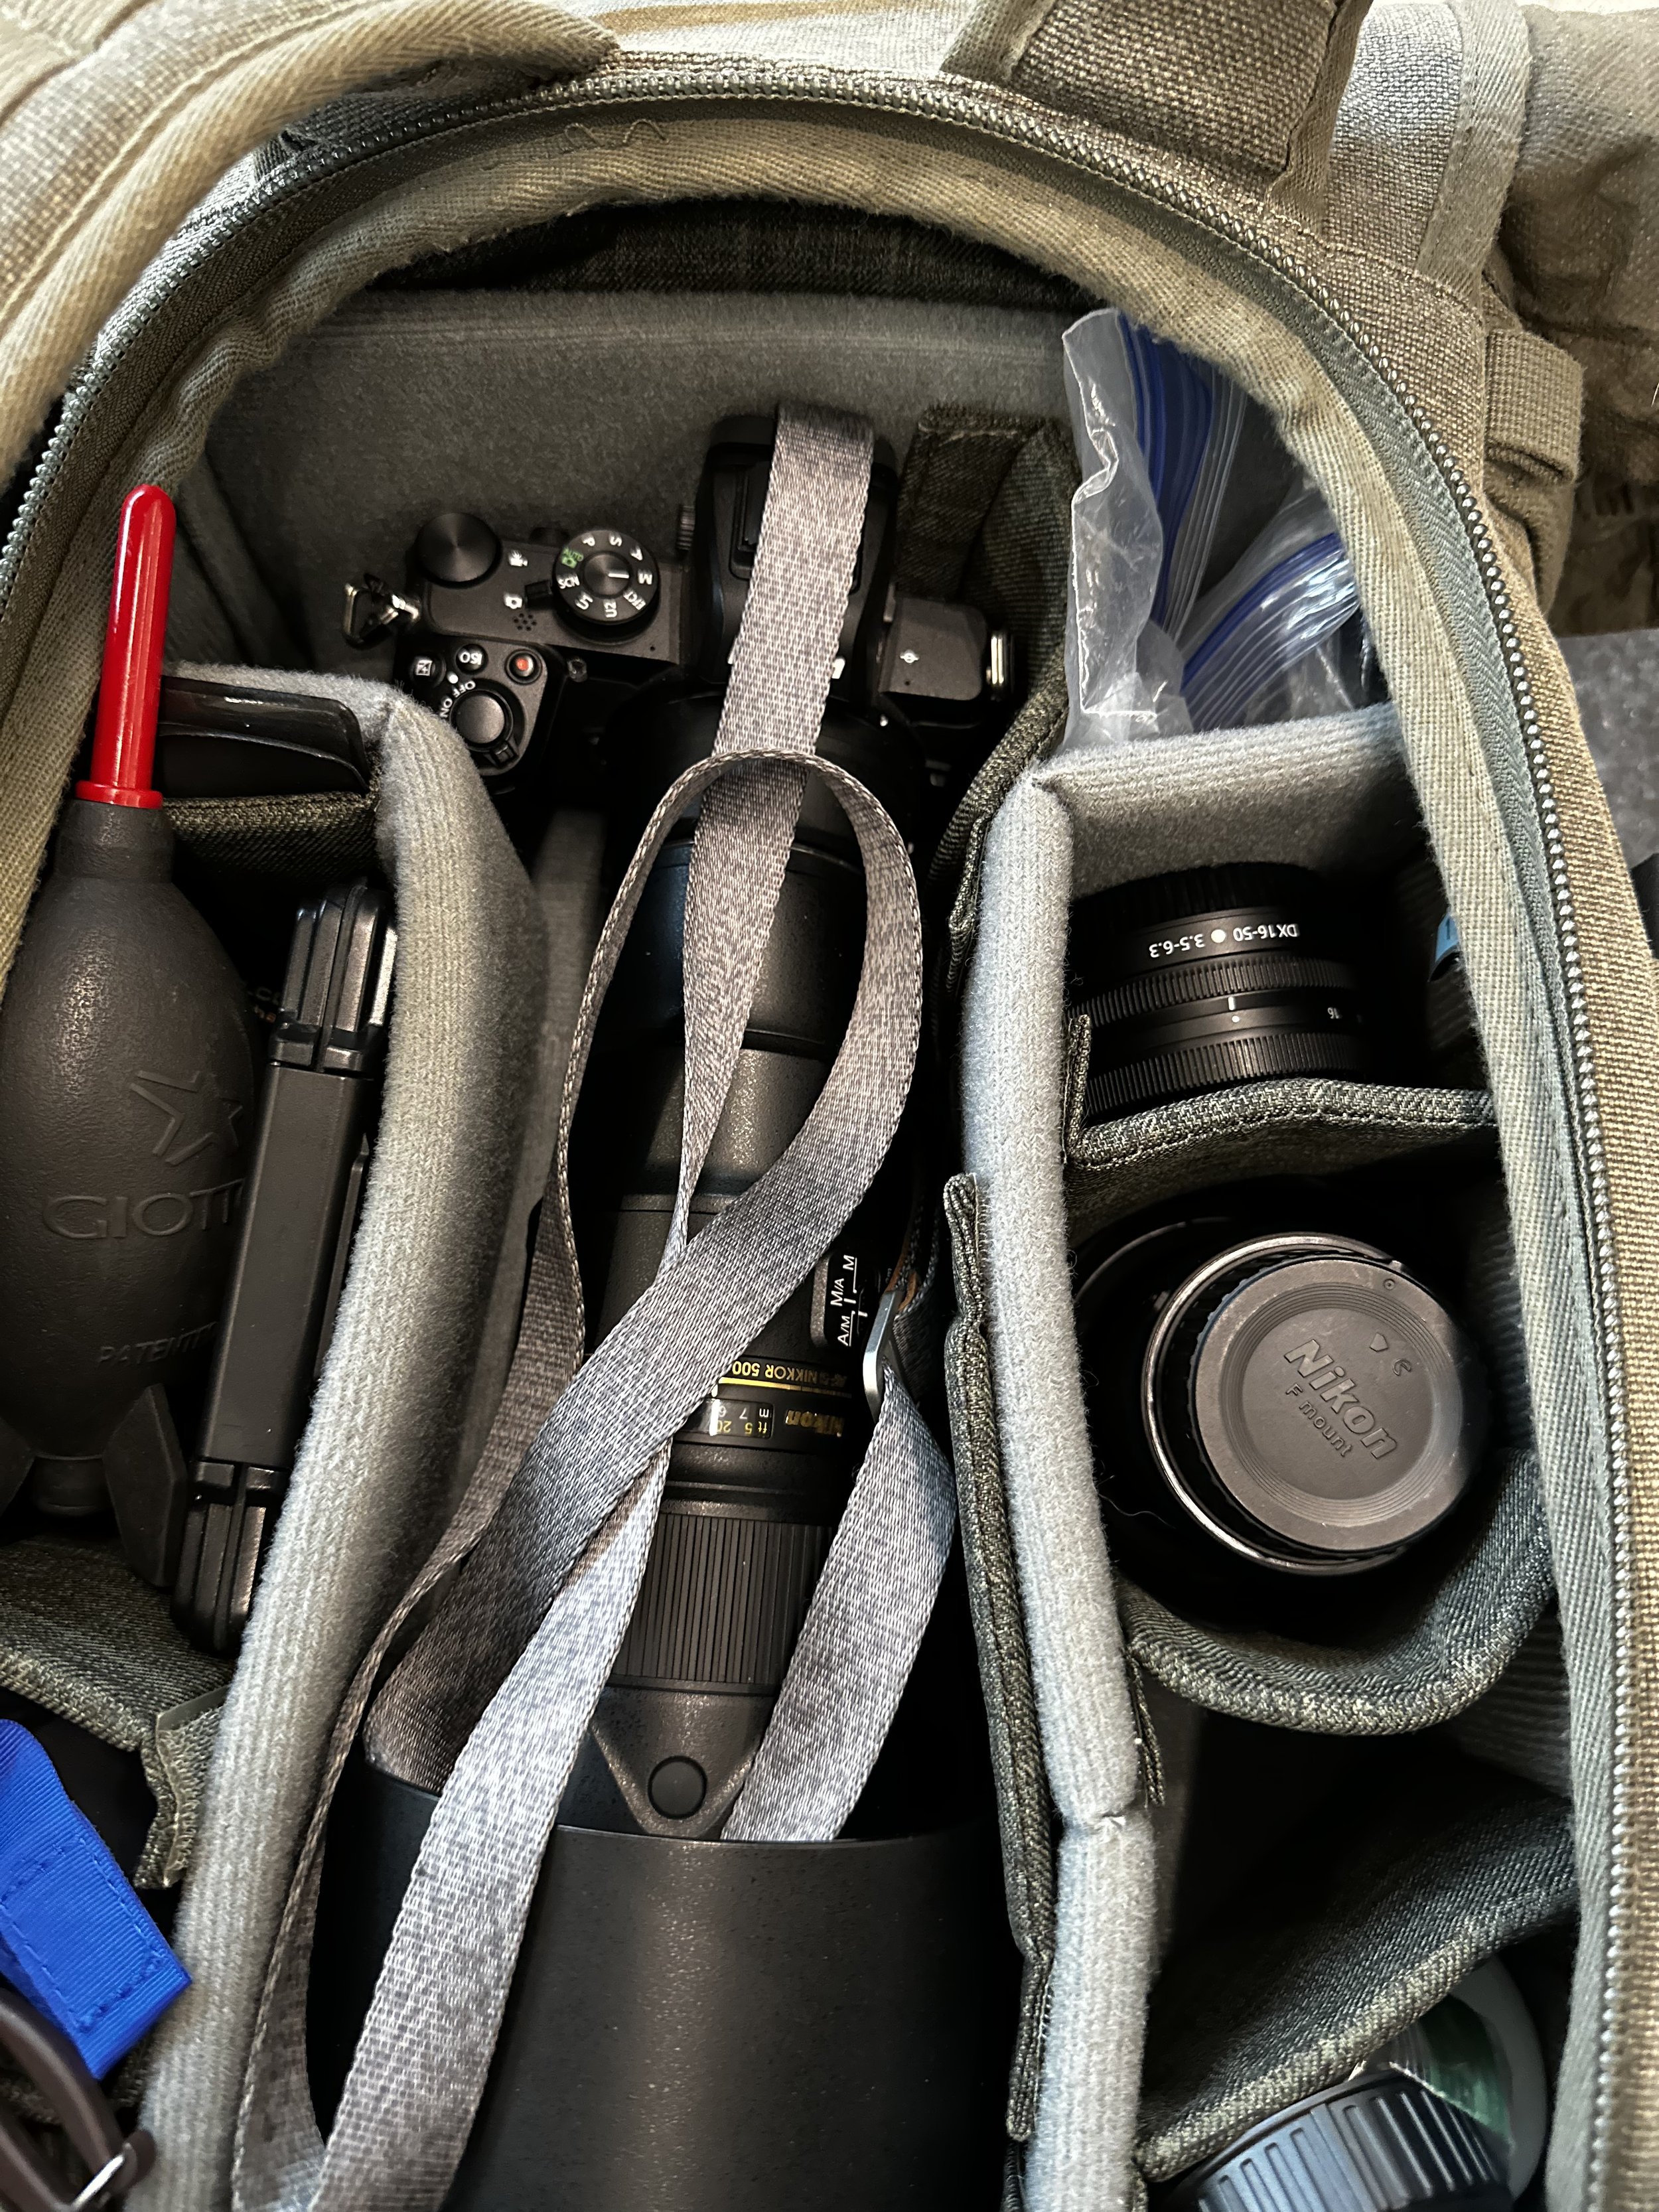
Current travel load out, Z50, 500mm PF, 16-50mm Z Kit, and 10-20mm F mount Nikkor/FTZ adapter.
Well, I finally figured out that the smaller pack was the way to go, but it really didn’t have room for the big wildlife rig I liked to use… It also had one other critical shortcoming that I noticed from regular use. The pack opened to the top when unzipped. What this means is you take off the pack and lay the side that normally sits against your back, on the ground facing down to access the gear area. At this point, I was doing a great deal of photowalks and hikes to waterfalls and such and this caused lots of dirt on the back of my shirt… To say this was frustrating is an understatement but I carried on till…

Enter the Thinktank Photo Retrospective 15L. For my needs, this is as close to perfect for a camera bag as I have ever found. It opens from the back, the side against my body which means you lay to outside one the ground, keeping all the leaves, twigs and dirt off of my shirt. It is slightly larger (15 liters in size) so there is room for my wildlife kit. It is REALLY comfortable and it is made of stone washed canvas. So it has a nice look (it doesn’t look like a nylon camera bag) and has a great feel. This is a hallmark of Thinktank Photo from what I have seen. Their backpacks are very comfortable. So now that I have landed on the perfect camera bag after almost a decade of searching, I can now shift focus to the gear I put in it.

Taken with the Nikon Z50 with the FTZ Adapter and the 500mm PF Amount lens.
The gear loadout for my photography usually involves at least two bodies, three general purpose lenses and then my special purpose lenses and all the support gear too. Like a whole cleaning kit complete with blower bulb, dry wipes, wet wipes and solution and sensor swabs… way too many batteries, like I must have thought I was going to take 10,000 photos per day or something. I never needed most of this crap either. I mean almost none of it. What I had was a case of “fill’er up” syndrome. If there was bag space I felt compelled to put something in that space for some reason. This is a terrible way to operate if I must say. You end up tired, sore and resentful of the hobby as you brought all this kit for nothing.

The Nikon Z50 with kit lens makes for a powerful little general photography kit.
So this trip, the bag is scaled WAY back. I mean, there is room in the bag for stuff and nothing is in those pockets. This is a milestone for me, as I am a prepper at heart and want to cover every conceivable contingency under my normal mindset. To be honest, I probably brought at least one lens more than I will need and could have lightened the load some more there, but we will see. So my takeaway from all this is, your hobby is a journey and you will have to figure out your kit for that hobby as you go. For me, it is still an ongoing journey to be honest. Hopefully I can stop spending tons of money on it and just enjoy it. Let’s be realistic though, probably not…Lol.