
The Hanimex 28mm f2.8 lens is a really interesting little lens...
Sometimes I just throw the dice on a vintage lens and occasionally it comes out really good and sometimes it is a dud. The Hanimex 28mm f/2.8 I picked up for $20 at Ball Photo in Asheville? This time it's a winner.
Sometimes I just throw the dice on a vintage lens and occasionally it comes out really good and sometimes it is a dud. The Hanimex 28mm f/2.8 I picked up for $20 at Ball Photo in Asheville? This time it's a winner.
I paid something like $20 for this lens at Ball Photo. Twenty bucks. For that price, even if it turned out to be terrible, who cares? You're not risking much. But when it turns out to be actually good — sharp, solid build, nice colors, usable on a modern camera — that's when you feel like you found a hidden gem sitting in a used lens bin.
This is why I love digging through vintage gear at camera shops. Most people walk right past this stuff looking for autofocus lenses or the latest Sigma Art prime or whatever. Meanwhile there's a perfectly good 28mm sitting there for the price of lunch. Sure, it's got quirks (the sun flare is real), but it's also got character and it actually works. Can't beat that value.

The Hanimex 28mm f/2.8 on my Leica SL2 — not the prettiest combo, but it works.
Hunting for Glass at Ball Photo in Asheville
I went to Ashville NC on a small trip recently and on this trip I was doing photography. Well, when it is a photography trip I always make it a point to go to Ball Photo and just “go shopping” for something interesting. They have SO much vintage gear to choose from that it is almost overwhelming to be honest. It is not for the feint of heart to be honest about it. But today found me at Ball Photo and while there I started looking for some glass to pick out… Well I found some.
All-metal construction with nice silver accent rings. Built like lenses used to be built.
We all know how much I love to shoot with vintage glass and I am always on the hunt for a new lens to play with. I have Leica glass for the Leica SL2 and use it quite often but I still really enjoy adapting some older lens to the camera and then seeing what I can get with this lens and camera combination when I go out with it. It is almost a challenge to see if I can come away with something good using this old lens… What generally happens is that I slowly build a collection of lenses that I REALLY love to use and I am starting to collect a full set of these lenses. Some examples would be the 28mm f3.5 Asahi Optical M42 mount lens that I keep in the camera bag, this lens is literally one of my favorite lenses of all time for some reason. I just love the results I get with it on the Leica SL2 camera. Well today finds me using a lens that is 2/3 of s top faster and a little bigger too.
What Makes the Hanimex 28mm f/2.8 Special
The Hanimex 28mm f2.8 is a well made lens with the whole thing made of metal (probably brass from the way it feels but it could be anodized aluminum too I really am not sure) and has some really nice accents like the little silver bands around the focus ring which also has a faux leather appearance but I am almost certain is rubber. The range focus scale is graduated for every aperture marked (sans f4 for some reason) on the aperture ring, which is a nice touch for street photography. The detent clicks on the aperture ring are nice and pronounced as well as solid, no mushy aperture detents on this lens! All in all, it is a great little lens by design engineering standards. It is even a well designed attachment scheme as well with the M42 mount as it is easily adapted to about all mirrorless cameras on the market.

The M42 mount adapter — see those three tiny set screws? That's how you time the lens if you care about that kind of thing.
Adjusting M42 Adapters (If You Care About That Sort of Thing)
Many people also don’t realize that the M42 adapter can be adjusted to get the lens top dead center of the adapter too. There are three tiny set screws on the adapter that hold the threaded ring in place on the lens adapter to adjust this. To make this adjustment is simple, just screw the lens into the mount till it seats and snug it well so it wont work loose while in use. Next get the Allen key that came with the adapter and loosen the three set screws till the lens can spin in the mount and simply turn the lens till the center mark is top dead center of the adapter and then push in on the mount while tightening the set screws back down to make it hold the ring again and your done. It is that simple. Mine is slightly off center here and I have simple been too lazy to adjust it as it is close enough for me to be able to get out and shoot anyway. I don’t normally worry about it too much as once you set the adapter once, then all the lenses will time up and you don’t have to mess with it again. Installing lenses over the years on this adapter and tightening them has slipped the timing a little and this is why it is slightly off center. Once again, it is no big deal to me and i just go out and shoot…
Look, I know there are "better" lens mounts out there. But M42 is just so easy to adapt to basically anything. You can throw these lenses on Leica, Sony, Fuji, whatever — and they cost pennies compared to native glass. Plus there's something satisfying about the all-manual experience. No electronics, no autofocus hunting, just you and the glass trying to get the shot. It's photography the way it used to be, which sounds pretentious when I say it like that, but honestly it's just fun. There's a directness to it that I appreciate.
And here's the thing: M42 lenses were made by so many different manufacturers over the years that there are hundreds of options out there. Some are great, some are terrible, and part of the fun is just digging through used lens bins at places like Ball Photo to see what you find. It's like thrift shopping for camera gear.

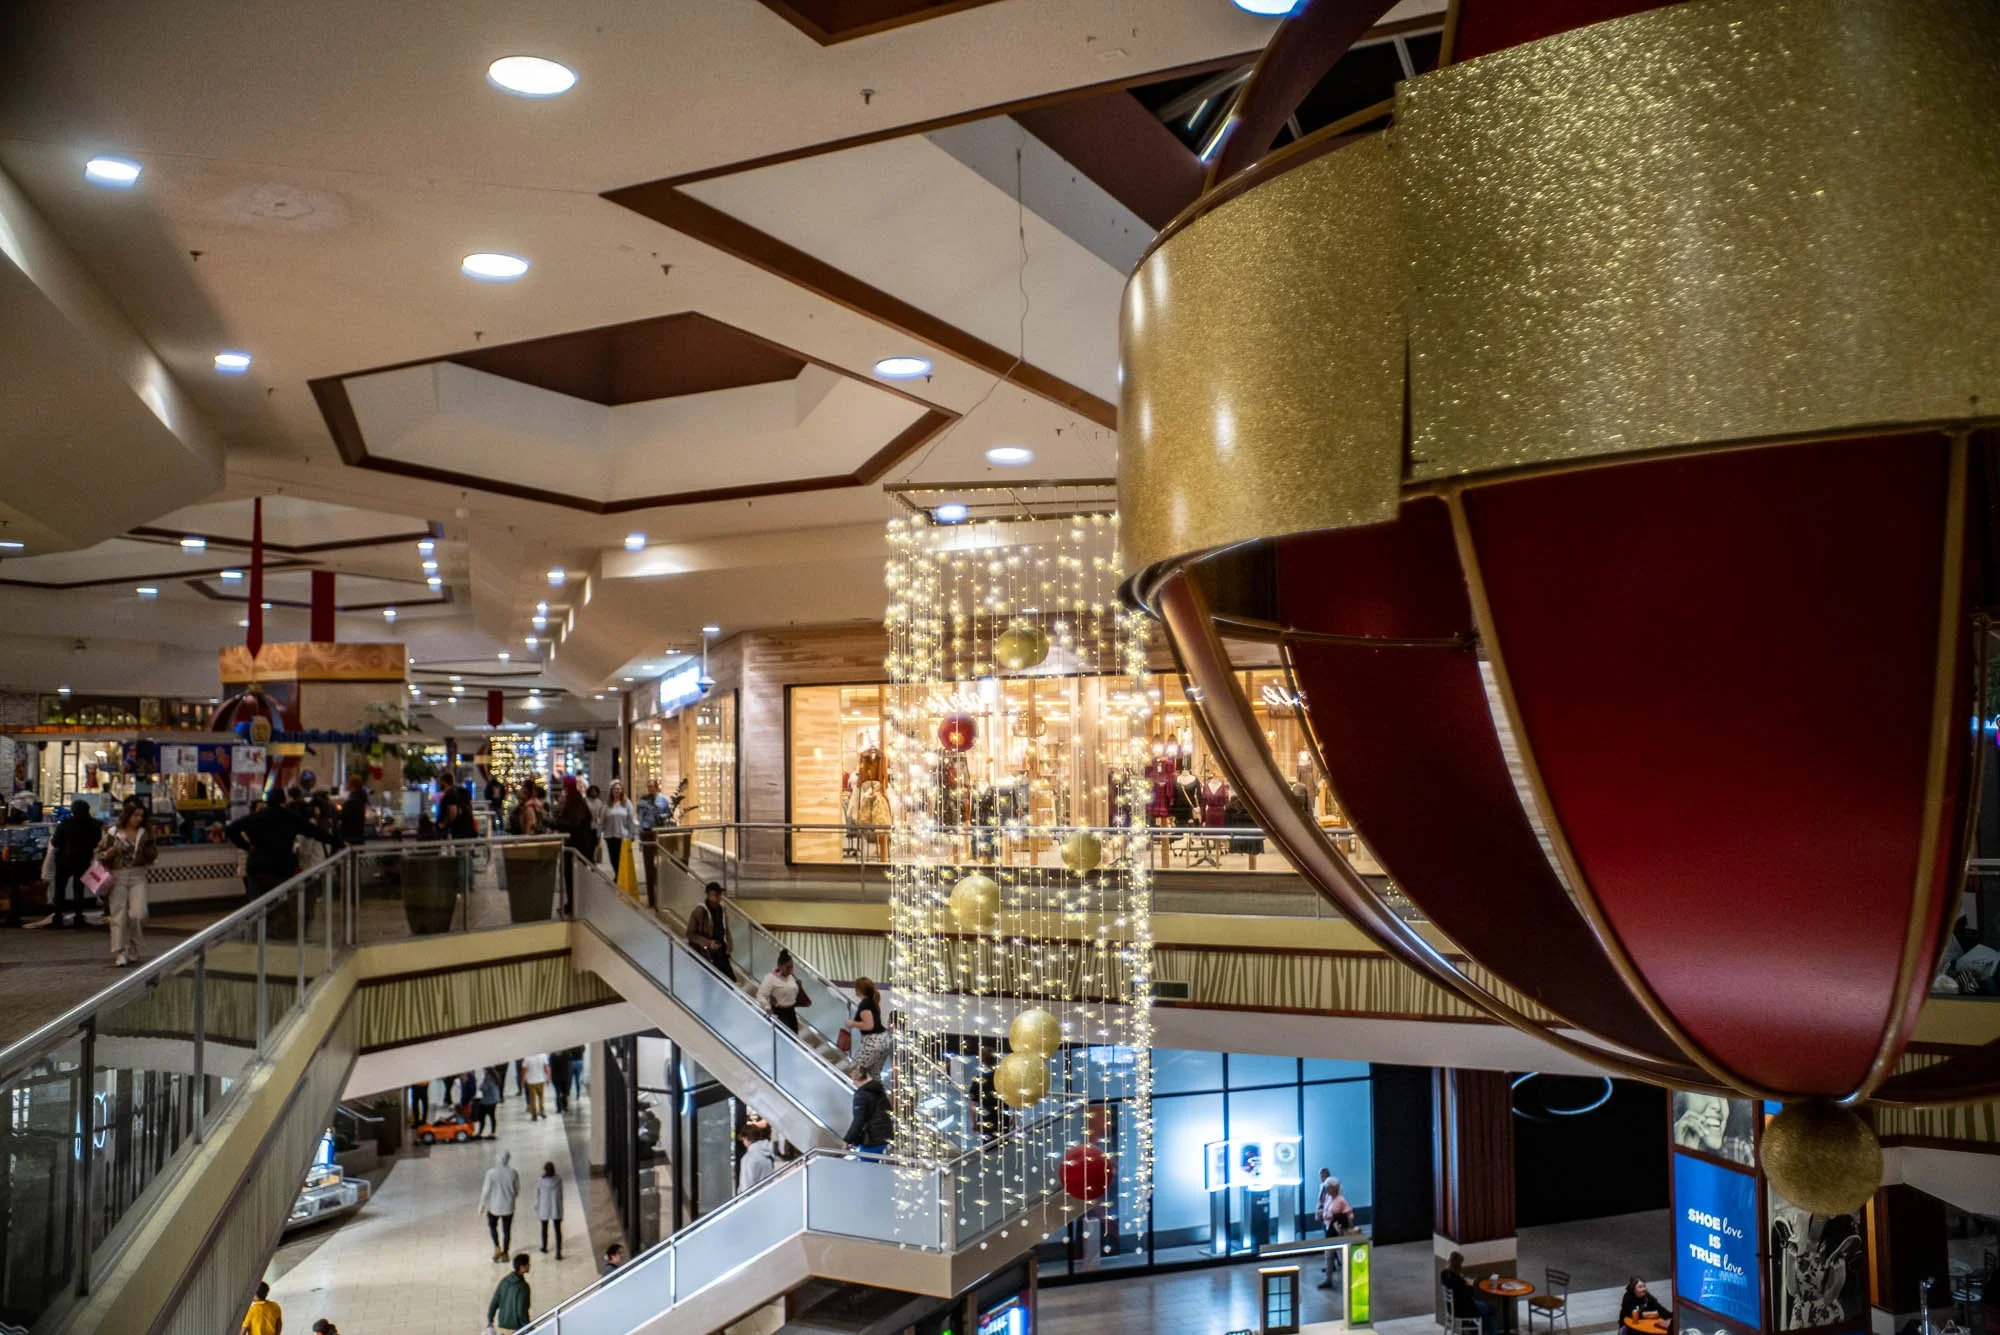
First outing at Hamilton Place Mall in Chattanooga on Black Friday. The Hanimex handled it just fine.
Taking It to the Mall on Black Friday (Because Why Not)
So the first official outing with this lens was to go to the mall in Chattanooga TN with it and capture some Christmas spirit with it…on black Friday no less.
Well to be quite honest, it performed wonderfully. Now to be fair, the camera does have IBIS in it and this allows me to shoot at pretty slow shutter speeds without the need for a tripod. As long as you go into the camera settings and tell the camera it is a 28mm lens, the camera can compensate for movement really well allowing for incredibly slow shutter speeds like the last photo in this string from the mall where it was 1/10 of a second…hand held. Most of the other photos are shot at 1/250 second to freeze the people so that I can show the current clothing styles as well as the general appearance of the mall in 2023.
The Leica SL2's IBIS is genuinely a game-changer for vintage glass. Without it, that 1/10 second handheld shot at the mall would've been a blurry mess — the old "reciprocal rule" says you need at least 1/30 second for a 28mm lens, and that's being optimistic. But with IBIS doing its thing, I can get away with shutter speeds that should be impossible with a manual lens.
This is why I keep coming back to the SL2 for adapted lenses. It makes old glass way more usable than it has any right to be. You're essentially taking a lens from the 1960s or 70s and giving it capabilities it was never designed to have. Nikon didn't build this Hanimex thinking someone would hand-hold it at 1/10 second in a mall forty years later.

1/250 second to freeze the people and capture 2023 fashion in all its glory.
The Christmas decorations at the mall — shot handheld at 1/10 second thanks to the SL2's IBIS.
1/250 second to freeze the people and capture 2023 fashion in all its glory.
The Christmas decorations at the mall — shot handheld at 1/10 second thanks to the SL2's IBIS.

1/250 second to freeze the people and capture 2023 fashion in all its glory.
The Christmas decorations at the mall — shot handheld at 1/10 second thanks to the SL2's IBIS.

1/250 second to freeze the people and capture 2023 fashion in all its glory.
The Christmas decorations at the mall — shot handheld at 1/10 second thanks to the SL2's IBIS.
All in all, the Hanimex performed extremely well in this role. The images are sharp and the colors are easily adjusted in post processing to give any look you want. It also doesn’t hurt to have that Leica “look” from the camera processing the colors before saving the RAW file too, Leica does something special with their processing to give the colors a look that is unique to Leica cameras. It is hard to explain, but it is a thing.
The Sun Flare Problem — Yeah, It's Bad
In the next photos I didn’t show all the images as they just reflect what it is like to shoot indoors where there is controlled light and no sun to deal with. The following photos show what happens when you have the sun shining on the front element.

Same shot as the next one but the lens is shaded from the sun — clean and sharp.
Above is the same photo as the one right under this text except that I shaded the lens from the sun. This lens cant handle the sun shining on it from any angle without showing you that it was happening with some sort of sun flare in the image. In the below image there is geometric artifacts as well as a overall glare from the sun.

What happens when the sun hits the front element. Vintage lenses and coatings don't play nice with direct sunlight.
In the below photo you can also see the geometric glare in the center of frame, this could be used to your advantage in some applications like vintage style portraits where you position the subject to where the flare adds to the aesthetic of the image. Here the flare doesn’t do that though and is more of a nuisance that anything else. So this is something to keep in mind when using vintage glass, you will run into these kinds of problems from time to time like the older generation has to do…lol.

That geometric glare in the center? Classic vintage lens behavior. Could be useful for portraits if you position it right.
Can You Shoot Portraits with a 28mm? Actually, Yes
Lastly, can you make portraits with the 28mm lens? The answer is yes, you can as long as you are careful with the composition and keep the subject centered like I did here. The 28mm lens can distort toward the edges so it is imperative to keep the person in the center of the photo as much as humanly possible if you want the image to turn out like anything you want at all. Maria was gracious and allowed me to make her portrait at the mall using one of the advertising lights as a “studio light” to give us nice diffused side light and I think the image turned out really well for a 60 year old lens with improvised lighting.

Maria at the mall using an advertising light as improvised diffused side lighting. Not bad for a 60-year-old lens.
Now, shooting portraits with a 28mm isn't what most people would recommend. The conventional wisdom is 50mm or 85mm for portraits, and there's good reason for that — longer focal lengths are more flattering and don't distort faces. But if you keep your subject centered and don't get too close, a 28mm can work. The key is composition and knowing the lens's limitations.
Maria's portrait here is proof that it's doable. I kept her in the center of the frame where distortion is minimal, used the advertising light for nice diffused side lighting, and shot from a reasonable distance. If I'd moved her to the edge of the frame or gotten right up in her face, it would've looked weird. But treated carefully, a 28mm can give you a portrait with some environmental context in the background, which can be a nice look.
Just know what you're getting into. This isn't a portrait lens. But it can make portraits if you're intentional about it.
As well as this blog post, I also have a video sharing some of these points and showing more of the old Sitton’s mill location should you want to go check that out at the link below.
Thanks and if you are into vintage glass, this is a keeper in my book — and for pennies too. Twenty bucks for a solid 28mm that actually performs? I'll take that deal every time. Sure it doesn't like the sun and you probably won't shoot portraits with it every day, but as a walkaround lens for street photography or just messing around? It's great.
So with that, get your camera out and go take a picture with it. Maybe even throw the dice on some weird vintage lens you've never heard of. You might just find a winner.
Questions People Ask About the Hanimex 28mm f/2.8
Is the Hanimex 28mm f/2.8 any good?
Yeah, it's actually pretty good for the price. Sharp in the center, solid build quality, and it handles well on modern mirrorless cameras with IBIS. The biggest issue is sun flare — this lens does NOT like having the sun anywhere near the front element. You'll get geometric artifacts and overall loss of contrast if you're shooting with the sun in or near the frame. But for $20-30, it's absolutely worth picking up if you see one. I mean, at that price, even if it's just okay, who cares? But when it turns out to be actually good, you feel like you found a hidden gem.
What mount is the Hanimex 28mm f/2.8?
M42 screw mount, which is great because you can adapt it to basically any mirrorless camera. I use it on my Leica SL2 with an M42-to-L adapter, but it works just as well on Sony E-mount, Fuji X-mount, Canon RF, whatever you've got. M42 is one of those universal old-school mounts that just adapts to everything. Plus the adapters are cheap and plentiful, so you're not spending a fortune to use these lenses on modern cameras.
Can you use vintage lenses on the Leica SL2?
Absolutely. The Leica SL2's IBIS makes vintage glass way more usable than it used to be. You can hand-hold at slower shutter speeds that would normally require a tripod, and the camera's focus peaking makes manual focusing pretty straightforward once you get used to it. Plus the L-mount has a short flange distance so you can adapt almost anything — M42, Nikon F, Canon FD, Leica M, you name it. I actually prefer shooting with adapted vintage lenses on the SL2 sometimes because it's just more fun than using modern autofocus glass.
How do you deal with sun flare on vintage lenses?
Use a lens hood or just shade the lens with your hand when the sun is hitting the front element. Vintage lens coatings from the 60s and 70s aren't anywhere near as good as modern multi-coatings, so direct sunlight will give you all kinds of flare, ghost images, and loss of contrast. If you're shooting into the sun or with bright light hitting the lens at an angle, expect problems. It's just how old glass behaves. Sometimes you can use it creatively for that vintage look, but most of the time it's just annoying. I literally had to shade the lens with my hand at Sitton's Mill to get clean shots.
Is 28mm good for street photography?
It's a little wider than the classic 35mm or 50mm focal lengths most people use for street, but yeah, it works. You get more context in the frame, which is good for environmental portraits or showing a whole scene instead of isolating subjects. The trade-off is that 28mm has more distortion at the edges, so you need to be careful about composition. Keep important stuff — especially people's faces — toward the center of the frame. I shot a portrait of Maria at the mall with this lens and it turned out great, but I made sure to keep her centered. If I'd put her at the edge of the frame, her face would've looked stretched and weird.
Where can I buy a Hanimex 28mm f/2.8?
I got mine at Ball Photo in Asheville, North Carolina for about $20. They have an absolutely overwhelming amount of vintage gear if you're ever in the area. Otherwise, check eBay, KEH Camera, or local camera shops that carry used gear. These lenses aren't rare or collectible, so they're usually pretty cheap when you find them. Don't overpay — if someone's asking more than $30-40 for one, keep looking. There are plenty of them out there.
Support this website by using these affiliate links to shop on Amazon:
Leica SL2 Mirrorless Camera Body
K&F Concept Lens Mount Adapter M42-L Manual Focus
Actual Lens Adapter in this Blog Post
One of my favorite camera straps
Sandisk 128GB Extreme Pro memory cards
Nikon 50mm f1.8 S Lens for Z mount
Have you shot with the Hanimex 28mm or other obscure vintage glass? Drop a comment below — I'd love to hear what hidden gems you've found digging through used lens bins.

A day out with Aaron in Chattanooga
It was time...
We have not gathered to shoot photos in quite some time now so Aaron found there was a beard competition happening in Chattanooga and decided to make his way down for it.
It was time...
We have not gathered to shoot photos in quite some time now so Aaron found there was a beard competition happening in Chattanooga and decided to make his way down for it.
The Setup: What I Shot With
For this day out with Aaron, I kept my setup simple:
Camera: Leica SL2 (full-frame mirrorless) Lens: Leica 50mm APO-Summicron Mode: Aperture priority with -2/3 exposure compensation ISO: Auto (probably ranged between 200-800) Settings: Wide open or close to it (f/2 to f/4 for subject separation)
Aaron was shooting with his new Nikon Z8, and we kept comparing how our cameras metered the scenes differently. The Leica wanted to overexpose about 2/3 stop compared to his Nikon, which meant I had to dial in negative exposure compensation the whole time. This is something you learn when shooting different camera systems together!
The SL2 is heavy (like really heavy compared to smaller mirrorless cameras or rangefinders), but it makes stunning images and the build quality is tank-like. I don't baby it on the streets, which is exactly how a street camera should be used!

Shot with Leica SL2 and 50mm during our Chattanooga day out with Aaron at the beard competition.
When he arrived we spent the evening playing with stuff (his new Z8 in particular) and catching up. But then it was off to bed so we could get up and start our big day of photography.
The next morning comes around and we down some coffee and make a plan to meet up about lunchtime as I had to go to our Church’s Association as a delegate. Seems I made a mistake and assumed I didn’t need to go… lol, I see what that got me. Anyway, I really enjoy Association so it wasn’t like a chore, it meant changing plans a little from the original plans for the day.
So after I finish with business at association, I head over to the Harley Davidson dealership which is where the beard competition is being held. There I find Aaron is short order and it is really crowded. He basically tells me to get my camera out and take a picture with it so I sheepishly do as I am told.

The beard competition at Harley Davidson in Chattanooga. This event was perfect for breaking down personal barriers to photographing strangers! People were there to be seen and photographed, making it easy practice for someone like me who's normally shy with the camera. Shot with Leica SL2 + 50mm.

This fellow was more than happy to pose for me at the beard competition! Events like this are perfect for overcoming shyness in street photography because people expect cameras and are happy to participate. Shot with Leica SL2 and 50mm. The afternoon light gave great contrast for portraits like this!
The atmosphere at the beard competition was incredible! Crowded but friendly, with people everywhere happy to get their photos taken. Aaron was right when he told me to just get my camera out and shoot. Sometimes you need that push from a friend! Leica SL2 + 50mm, aperture priority mode.

The atmosphere at the beard competition was incredible! Crowded but friendly, with people everywhere happy to get their photos taken. Aaron was right when he told me to just get my camera out and shoot. Sometimes you need that push from a friend! Leica SL2 + 50mm, aperture priority mode.
You see I am not very aggressive with my photography especially when it involves people. I will ask at times but most of the time, this is why I don’t shoot aggressive street stuff. So now I am starting to get some photos and it is exactly as he mentioned. People happy to get their photos captured are everywhere. Like this fellow below, he was more than happy to pose for me. I will be honest, this kind of event is the perfect thing to break down your personal barriers to shooting photos of people you don’t know.

The Leica SL2 with the 50mm APO Summicron is the perfect camera for a beard Competition!

Even the girls got in on the fun at the beard competition! Not everyone there had a beard, lol. Shot with Leica SL2 + 50mm at Harley Davidson in Chattanooga. This is why I love event photography as practice for street work!
Why Events Are Perfect for Shy Street Photographers
I mentioned I'm not very aggressive with my photography, especially when it involves people. This is something a lot of photographers struggle with! We want to capture candid moments and interesting people, but we don't want to be intrusive or make anyone uncomfortable.
Events like the beard competition are the perfect training ground because:
People expect cameras. They're there to be seen and photographed, so you're not the weird person with a camera. You're just another photographer at an event.
Subjects are willing. Most people will happily pose if you ask, and many will even seek you out to get their photo taken. This builds your confidence!
Low stakes. If someone says no or looks uncomfortable, there are dozens of other subjects around. You're not losing a once-in-a-lifetime shot.
Practice makes perfect. The more you shoot people at events, the more comfortable you get approaching strangers in regular street situations.
Aaron's advice was simple: "Get your camera out and take a picture with it." Sounds obvious, but when you're standing there feeling shy, you need someone to tell you it's okay to just shoot!
Start with events. Work up to regular street photography. Your shyness will fade as your confidence grows! Back to the story in progress…
Well the beard competition winds down about 3 or so in the afternoon and we decide to rearrange the rest of the day to shoot some street photography in downtown and also to go have supper at a great Italian restaurant later on.
The streets of Chattanooga were busier than usual with it being a holiday weekend but it still wasnt really bad where we went for our walk.

We found this mural with light reflecting from the building across the alley and it was just something we couldn't pass up! This is what afternoon light does in downtown Chattanooga. The light spill creates scenes you don't get at other times of day. Leica SL2 + 50mm on our photowalk route through Main and Broad Streets.
We started on Main Street and then headed down Market Street to about 7th where we turned over to Broad Street and then back towards Main eventually diverting over to Cowart street before arriving at the truck.
So now you have the route, let see what we got. I kept joking about channeling my inner Eggleston as I would take photos of the mundane. Another thing I have learned is my Leica wants to shoot about 2/3 stop over exposed compared to my friends Nikon cameras. I kept -2/3 stop exposure compensation dialed in the whole time. I did this to keep the sky from being blown out as the shadows would be dark due to the bright afternoon sun. I will dig into the setup on my camera more to see if I can find out why it is doing that.

The Tivoli Theater is an iconic landmark in downtown Chattanooga Tennessee and never disappoints for a photograph.
Along the way we saw a lot of cool stuff to photograph, like in the images below where it is different light so the images come out different from my usual time of day. With the light further over to the west we kept getting these awesome light spill shots like the one below of the old Rone Regency Jewelers location. This location will be sorely missed by me when they finally do something with this building. I love the gritty nature of the old signage and it wasn’t long ago that the windows were not boarded up so you could actually see inside the store. Even so, the black painted plywood makes a nice contrast to the lighter color of the upper section of the building bringing balance to the image.

The old Rone Regency Jewelers location with afternoon light spilling across the facade. This location will be sorely missed by me when they finally do something with this building. I love the gritty nature of the old signage! The black painted plywood makes a nice contrast to the lighter color of the upper section, bringing balance to the image. Shot with Leica SL2 + 50mm Summicron on our downtown Chattanooga photowalk with Aaron.
We also found a few people to photograph as well. It was not quite as busy as I had figured it would be for a holiday weekend in the downtown area, but there were a few people out and about and I was able to grab a few photos of them. The Leica SL2 is a great camera for this kind of photography as it makes stunning portraits as well as makes for a wonderful, albeit heavy, street camera.
Why Afternoon Light Changed Everything
I usually shoot at different times of day (mid-morning usually), so this late afternoon session was different for me. With the sun further over to the west, we kept getting these awesome, direct sun light spill shots that I don't normally see.
What made afternoon light special:
Hard shadows: The bright afternoon sun created strong shadows and high contrast. Great for black and white or dramatic color shots.
Light spill: Buildings reflecting light into alleys and onto other buildings. This is what made the Rone Regency Jewelers shot work so well!
Window light: Storefronts and windows become light sources, creating interesting reflections and secondary lighting.
Challenge mode: Protecting highlights meant I had to underexpose a bit (-2/3 stop), which made shadows darker. This forced me to look for scenes that worked with that contrast.
Different light means different photos. Don't just shoot at the same time every day! Mix it up and see what you discover.
All in all we had a great time and then even got to go eat wonderful Italian cuisine later too. What more could you ask for? Well, there is one more thing I could ask for…
Lightroom Classic… I did it, I went over to the dark side and installed Lightroom back on my system again. It has the power to edit like I need finally and I kept running into problems that Exposure couldn’t easily solve for me so it was time to upgrade…or move over laterally to or what ever you call it…So going forward, I will be learning how to use Lightroom to edit my photos…wish me luck.
If you want to see more abotu this day, I made a vlog cideo about the photowalk portion of the day and it can be watched here.
What I Look For in Street Photography
During the photowalk, Aaron joked about me "channeling my inner Eggleston" as I photographed mundane things. But that's what street photography is about! Here's some of the things that I look for:
Light: Always first. How is the light hitting the subject? Is there interesting shadow play? Is it spilling from one building to another?
Layers: Foreground, midground, background. The best street photos have depth and multiple elements working together.
People: Not always necessary, but human presence adds scale and story. Even just a silhouette or someone walking through the frame.
Color or contrast: Bright colors that pop, or strong black and white contrast. Something that makes the eye stop.
Geometry: Leading lines, patterns, shapes, architecture. The bones of a good composition.
Moments: Candid expressions, interesting gestures, unexpected juxtapositions.
The mundane: Everyday things that become interesting when you isolate them with your camera.
Don't overthink it! Just walk and shoot what catches your eye. You can analyze it later when you're editing. Then you can take inventory of what you shoot the most and see if those images have some meaning or if it is just what you like to shoot…either way, it is good to get out and shoot photos so go have some fun.
Frequently Asked Questions About Street Photography and Chattanooga Photowalks
How do you overcome shyness when photographing strangers?
Honestly, I still struggle with this! I'm not aggressive with my photography, especially when people are involved. I'll ask permission sometimes, but most of the time I just shoot what feels natural without getting in people's faces. What helped at the beard competition was that people were already there to be seen and photographed. They were happy to pose! Events like this are perfect for breaking down those personal barriers to shooting photos of people you don't know. Start with events where people expect cameras, then work your way up to regular street photography. Aaron's advice of "get your camera out and take a picture with it" is the best cure for shyness, even if it feels awkward at first!
What's the best time of day for street photography in downtown Chattanooga?
The afternoon worked great for us! With the sun further over to the west, we kept getting these awesome light spill shots bouncing off buildings. The light was different from my usual shooting times, and it created some really interesting shadows and contrasts. Late afternoon (around 3-5pm) gives you that warm golden light that looks great for both architecture and people. Early morning works too, but afternoons tend to have more people out and about, which is what you want for street photography. Avoid harsh midday sun if you can, unless you're going for high-contrast black and white work!
What's a good street photography route in downtown Chattanooga?
The route Aaron and I took worked really well: Start on Main Street, head down Market Street to about 7th, turn over to Broad Street, then back towards Main, and eventually divert over to Cowart Street. This gives you a good mix of architecture, street scenes, and people. You'll pass old buildings like the Rone Regency Jewelers location (which has great gritty signage), modern storefronts, alleys with interesting light, and public spaces where people gather. The whole loop is maybe 2-3 miles depending on how much you wander, perfect for a couple hours of shooting!
Is the Leica SL2 too heavy for street photography?
Yes and no, lol. The SL2 is definitely heavy compared to smaller mirrorless cameras or rangefinders. But it makes stunning portraits and the image quality is just incredible. I kept it paired with just the 50mm lens to keep things simple. Is it the "ideal" street camera? Probably not if you're walking all day. But does it work? Absolutely! The weight actually helps stabilize handheld shots, and the build quality means I don't baby it. If you've got one, use it for street photography. Don't let the weight stop you. Your shoulders might complain, but the photos will be worth it!
Why was your Leica exposing differently than Aaron's Nikon?
Great question! I noticed my Leica SL2 wants to shoot about 2/3 stop overexposed compared to Aaron's Nikon cameras. I kept -2/3 stop exposure compensation dialed in the whole time to keep the sky from being blown out. The shadows would be dark anyway due to the bright afternoon sun, so I was protecting the highlights. Different camera brands meter scenes differently, and Leica tends to be a bit generous with exposure to preserve shadow detail. This is something you learn when shooting with multiple camera systems. Just dial in the compensation and keep shooting! I need to dig into my camera setup more to see if there's a metering mode that matches my shooting style better.
What camera settings do you use for street photography?
For this photowalk with the Leica SL2, I was shooting mostly in aperture priority mode with the 50mm lens. I kept -2/3 exposure compensation dialed in (as mentioned above). ISO was probably auto, and I let the camera pick the shutter speed. For street photography, I like to shoot wide open or close to it (f/2 to f/4) to get that subject separation, but I'll stop down if I need more depth of field. The key is to keep your settings simple so you're reacting to moments, not fiddling with dials. Set it and forget it, then just focus on composition and timing!
Can you photograph people at public events without permission?
At events like the beard competition where people are specifically there to show off and be seen? Yes! Most people were happy to be photographed and many posed for us. That said, I still try to be respectful. If someone looks uncomfortable or waves me off, I move on. For regular street photography, it's trickier. I generally don't ask permission before shooting (it kills the moment), but if someone objects after I've taken their photo, I delete it. Know your local laws, be respectful, and don't be creepy. Events are the easiest place to start because people expect cameras!
What makes a good subject for street photography?
Honestly? Almost anything! During the photowalk I kept joking about channeling my inner Eggleston as I would take photos of the mundane. Look for interesting light (like that spill on the Rone Regency Jewelers building), patterns, textures, people doing everyday things, architectural details, reflections, shadows... anything that catches your eye. Don't overthink it. I shot everything from bearded bikers to boarded-up buildings to random street corners. The beauty of street photography is finding the interesting in the ordinary. Just walk around and let things reveal themselves to you!
Should I shoot RAW or JPEG for street photography?
I shoot RAW because I like having the flexibility in post-processing. For this shoot, I ended up using Lightroom Classic to edit (I went back to the "dark side" after trying to use Exposure, lol). RAW gives me the power to recover highlights, lift shadows, and adjust colors the way I want them. That said, if you're comfortable with your camera's JPEG processing and you don't want to spend time editing, shoot JPEG! The best format is the one that gets you shooting. Street photography is about being out there capturing moments, not agonizing over file formats!
How do you choose which photos to keep from a street photography session?
I wish I had a good systematic answer for this, lol. Honestly, I just go through them and keep the ones that speak to me. Does the composition work? Is the light interesting? Did I capture a genuine moment or expression? Is there something about the image that makes me want to look at it again? I'm pretty ruthless in culling, especially with street photography where you might shoot hundreds of frames. If it doesn't grab me immediately, it gets deleted. The photos I shared in this post were the ones that stood out when I was editing. Trust your gut, and don't be afraid to delete mediocre shots. Only keep the good stuff!
BONUS QUESTION: What's the best way to learn street photography?
Go out with a friend like Aaron who will tell you to "get your camera out and take a picture with it"! Seriously, having a photography buddy makes a huge difference. You push each other, share ideas, and it's way less awkward than being alone with a camera on the street. Start with events (like the beard competition) where cameras are expected, then work up to regular street shooting. Use a simple setup (one camera, one lens), set your camera to aperture priority or full manual, and just walk. Don't overthink it. The best teacher is just getting out there and shooting. Oh, and watch Aaron's work or other street photographers you admire, but then go do your own thing. Your style will develop over time!
Support this website by using these affiliate links to shop on Amazon:
Leica M11 Digital Rangefinder Camera
Nikon AF-S FX NIKKOR 105mm f/1.4E ED Lens
Voigtlander Nokton 35mm f/1.4 II
Sandisk 128GB Extreme Pro memory cards
Nikon 50mm f1.8 S Lens for Z mount
Thanks for stopping by, now get your camera out and go take a photo or two with it!
Sigma 65mm f/2.0 Review: 98% of Leica Quality for $700 (L-Mount)
The Goldilocks Focal Length: 65mm sits right between the standard 50mm and the classic portrait 75mm. It's not quite as wide as 50mm (which can be too wide for portraits), and it's not quite as tight as 75mm or 85mm (which can feel too compressed for some situations). It's just right!
So a good friend loaned me his lens. One of my subscribers that I have grown to know over the years offered to send me a couple of his Sigma lenses and let me use them for a while as review samples for you guys.
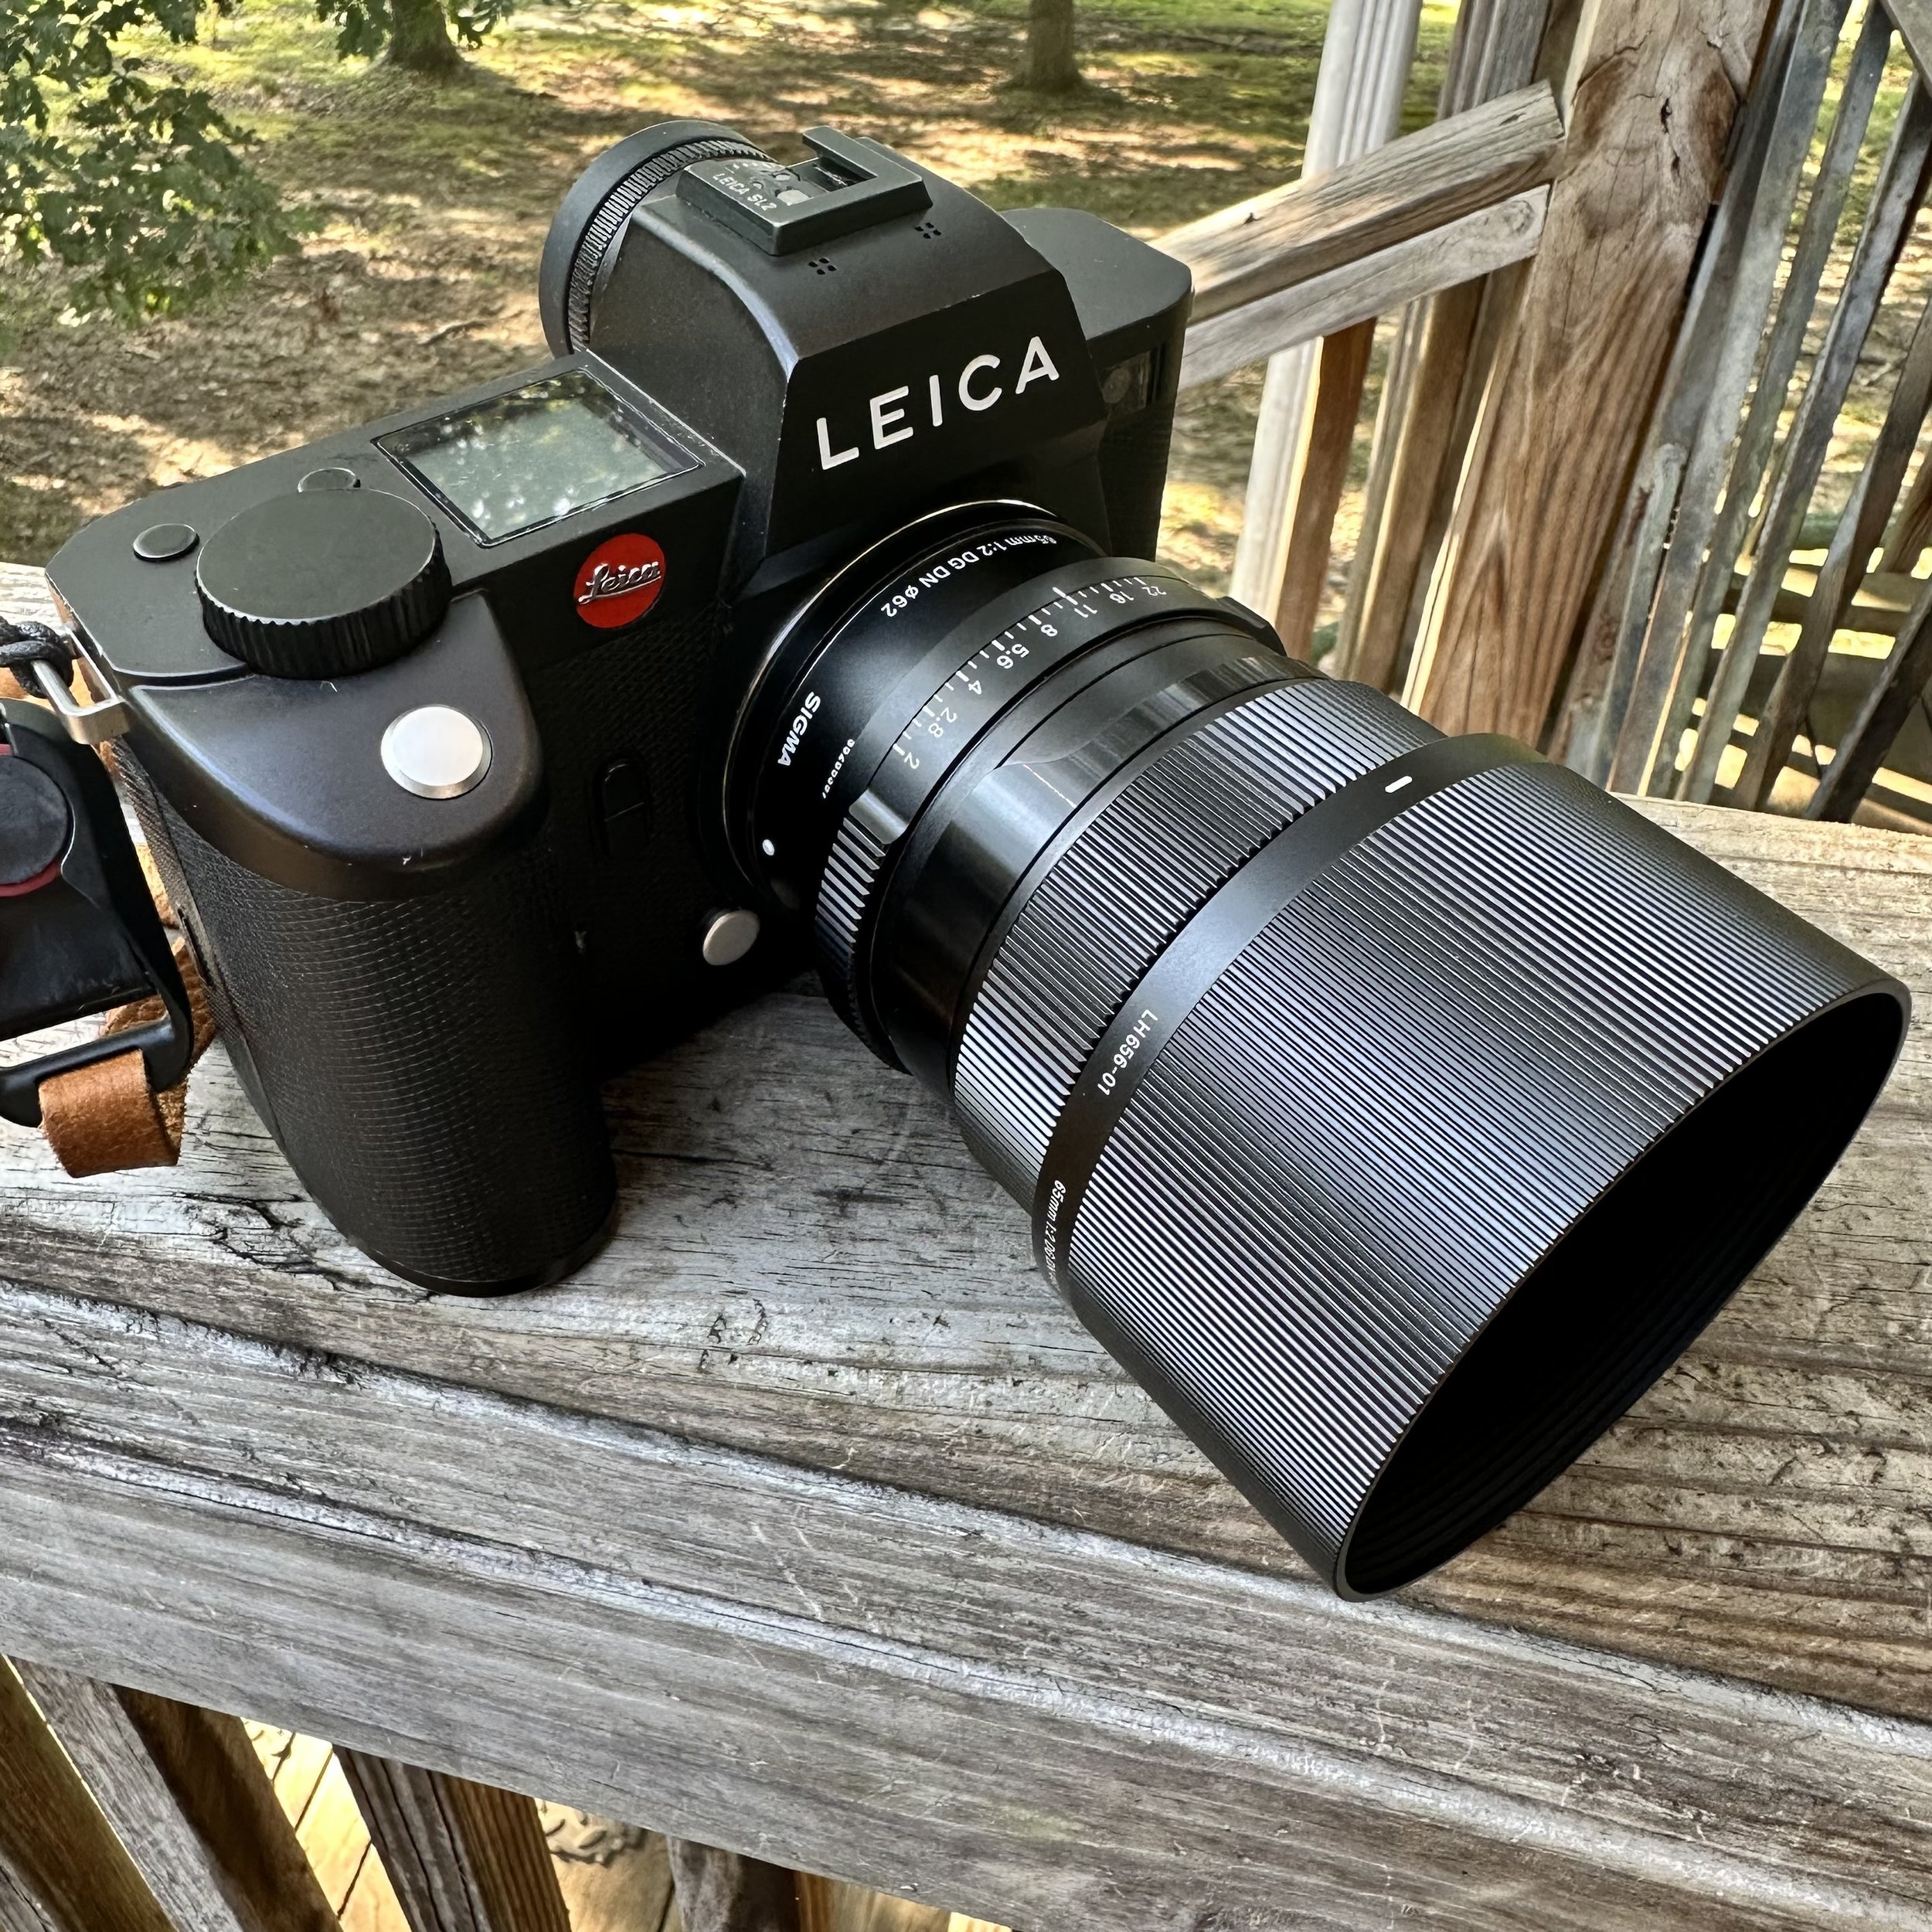
The Sigma 65mm f/2.0 mounted on my Leica SL2. You can see the physical aperture ring with 1/3 stop detents (one of my favorite features!). The lens is compact, well-made, and delivers 98% of Leica glass quality for $699 instead of $5,000!
Technical Specifications and Pricing
Before we dive deeper, here are the specs for the Sigma 65mm f/2.0 DG DN:
Optical Design:
Focal length: 65mm
Maximum aperture: f/2.0
Minimum aperture: f/22
Aperture blades: 9 (rounded for smooth bokeh)
Optical design: 14 elements in 11 groups
Physical Specs:
Mount: L-mount (Leica SL/CL, Panasonic S-series)
Filter size: 62mm
Length: 2.8 inches (72mm)
Weight: 14.3 oz (405g)
Minimum focus distance: 21.7 inches (55cm)
Construction:
All-metal barrel
Weather-resistant construction
Aperture ring with 1/3 stop detents
AF/MF switch on lens barrel
Smooth focus ring (encoder design)
Price:
Sigma 65mm f/2.0 DG DN: ~$699
Leica APO-Summicron-SL 75mm f/2 ASPH: ~$4,995
Yeah, you read that right. The Leica costs seven times more than the Sigma. And yet, as I'll explain, the Sigma delivers 98% of the image quality! Let's dig into that comparison.
Why 65mm? The Perfect In-Between Focal Length
If you're not familiar with 65mm as a focal length, let me explain why this is such a sweet spot:
The Goldilocks Focal Length: 65mm sits right between the standard 50mm and the classic portrait 75mm. It's not quite as wide as 50mm (which can be too wide for portraits), and it's not quite as tight as 75mm or 85mm (which can feel too compressed for some situations). It's just right!
Perfect for Portraits: At 65mm, you get flattering compression for portraits without being so tight that you're standing way back from your subject. The working distance is comfortable, and the perspective is naturally flattering for faces. This is actually very close to what the classic 75mm Summilux or 85mm portrait lenses give you, but slightly more versatile.
Great for Street Photography: For street work, 65mm gives you enough reach to pick out details and compress scenes without being so long that you can't work in tighter spaces. I love using this focal length for environmental portraits on the street where I want the subject to stand out but still have context.
Comparison to Other Focal Lengths:
50mm: Wider, more environmental, great for general use but can be too wide for portraits
65mm: Perfect balance, flattering for portraits, good for street, versatile!
75mm/85mm: Tighter compression, classic portrait lenses but less versatile for general use
90mm: Even tighter, requires more working distance, more specialized
The 65mm focal length is honestly underrated. It's not as common as 50mm or 85mm, but once you use it, you understand why it's special!
I really appreciate your offer Hassan and look forward to the day when we finally get to link up and go out on a photowalk together!
Hassan packed up two of his beautiful Sigma primes and sent them up for a look. He sent his 65mm f2 DG DN and his 90mm f2.8 DG DN. Both of these are in Leica’s L mount as Hassan has a Panasonic Lumix camera that is also in L mount due to the L mount alliance between Leica, Sigma and Panasonic.
The first impression of this lens is the darn thing is tiny. This lens is really small, this is awesome as it means it makes the system really compact. The next thing I noticed right away is how nice the build is, all metal construction for the major parts, including the lens hood from what I can tell. Really nice fitment of the lens components so there really is no play in the mating parts. Parts designed to move, like the aperture ring, move only in the direction they are designed to move in. The machine work and fitment is nicely executed from what I can tell.
The next thing I noticed is how fast the focus works, just understand this…it is fast. How fast? Well, it is fast enough to get the shot for me. it is not as fast as my native Leica glass, but it is plenty fast enough for my personal use. I don’t have a way to measure the focus speed, but it works great and I have no complaints about it.
Sample Photos: What This Lens Can Do
Let me show you what this lens actually produces in real-world use. This is shot with the Sigma 65mm f/2.0 on my Leica SL2 during a photowalk around Chattanooga:
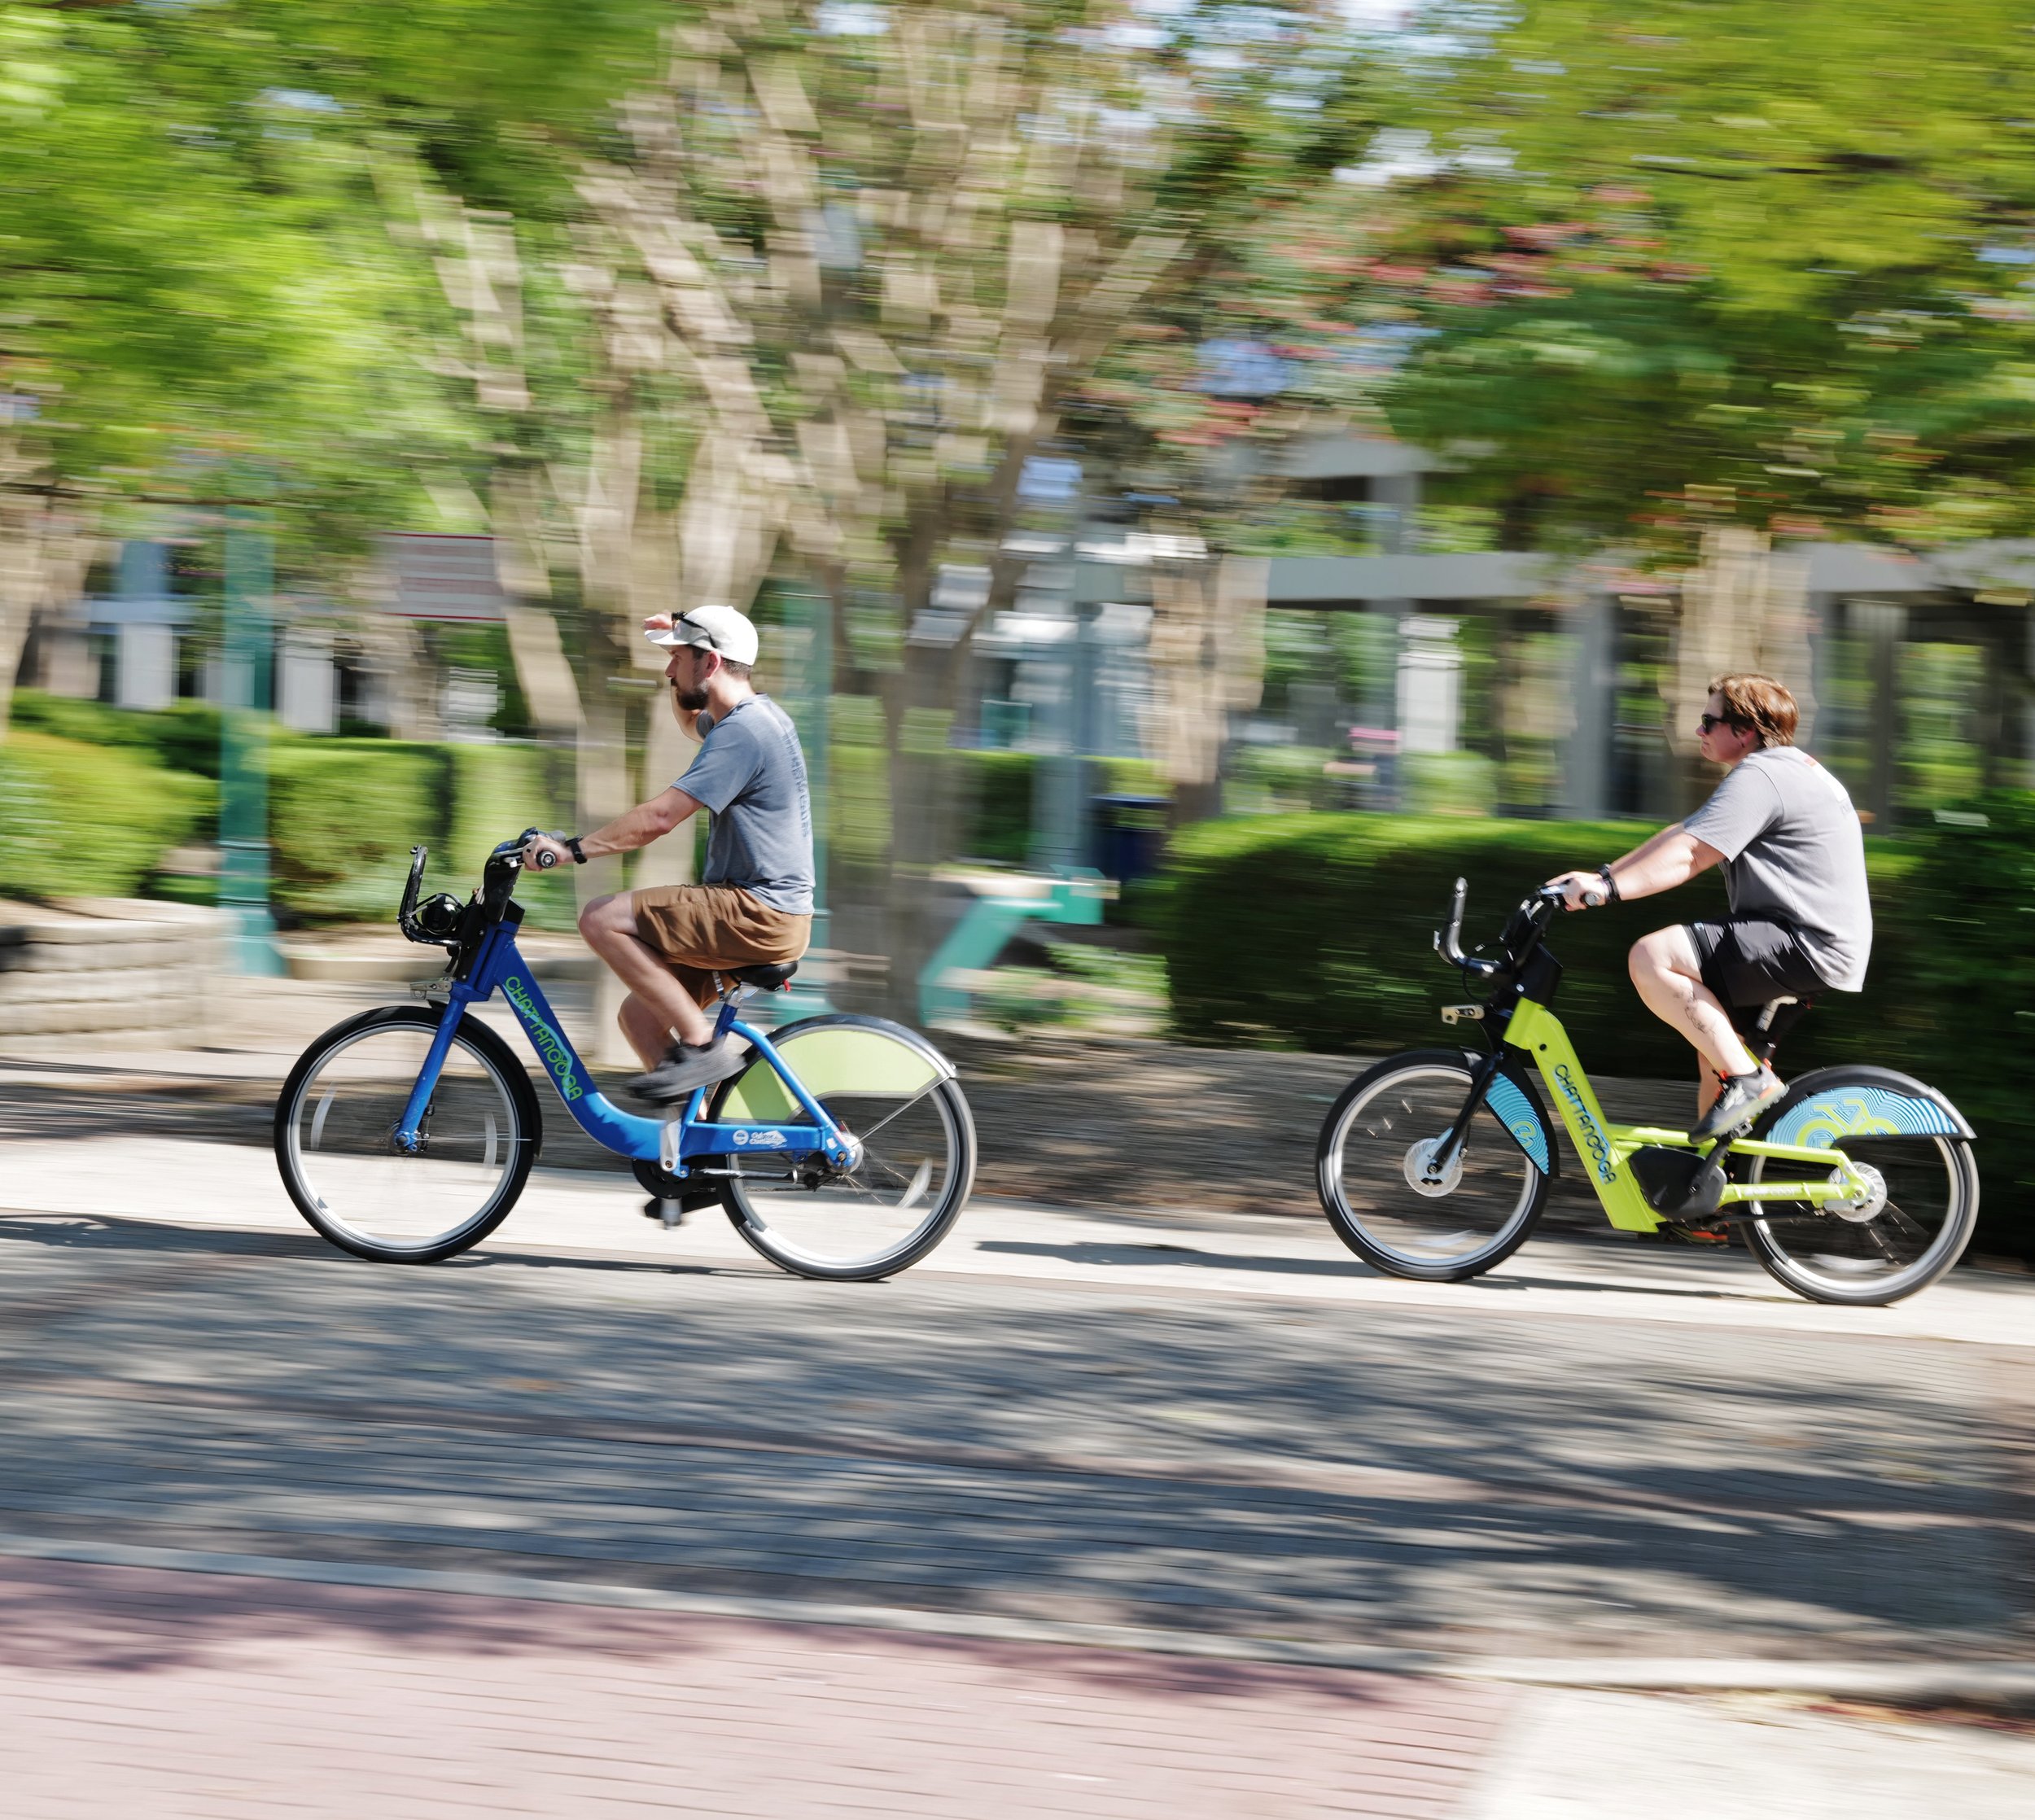
Panning blur shot of bicycle riders at Coolidge Park in Chattanooga. This demonstrates how fast and accurate the Sigma 65mm autofocus is! Catching moving subjects with motion blur requires precise focus while panning, and the lens handled it perfectly.
This photowalk sample shows what I meant by "98% of Leica glass." Look at the sharpness, the rendering, the color! This is what you're getting for $699. Not "budget lens performance." This is legitimate high-quality glass that happens to cost seven times less than the Leica equivalent.
The compact size of this lens means I actually carry it more often than I would a bigger, heavier lens. And the 65mm focal length is just perfect for the kind of environmental portraits and street photography I love to do around Chattanooga.
Sigma vs Leica: 98% of the Quality at 14% of the Price
Let me be really clear about something: I said this lens is 98% of my Leica glass in every conceivable way. That's not marketing speak. That's my honest assessment after using both extensively.
The Price Difference is Staggering:
Sigma 65mm f/2.0 DG DN: $699
Leica APO-Summicron-SL 75mm f/2 ASPH: $4,995
That's a $4,296 difference. The Sigma costs 14% of what the Leica costs. Let me repeat that: you're paying seven times less for the Sigma!
What Does the Leica Give You?
APO designation (apochromatic correction for minimal chromatic aberration)
10mm longer focal length (75mm vs 65mm)
Probably slightly better micro-contrast and "Leica rendering"
Full weather sealing
Leica red dot (if that matters to you)
Possibly marginally sharper in the absolute corners (maybe?)
What Does the Sigma Give You?
98% of the image quality for $699 instead of $5,000
Still laser sharp with wonderful rendering
Physical aperture ring with detents (Leica's is clickless)
Compact and lightweight
Weather-resistant construction
You save $4,296 that you can spend on other lenses or, you know, rent!
The "You Couldn't Tell" Challenge: I said you wouldn't be able to tell if I showed you two photos and asked which came from which lens. I stand by that! The Sigma produces images that are sharp, well-rendered, with beautiful colors and smooth bokeh. Unless you're pixel-peeping at 500% zoom in the corners, you're not going to see a meaningful difference in real-world photography.
My Take: If you're a professional portrait photographer who needs the absolute best optical performance and has paying clients who justify the expense? Maybe the Leica makes sense. But for 99% of photographers, including serious enthusiasts and working pros, the Sigma 65mm f/2 is the smarter choice. I'd rather have the Sigma 65mm, 35mm, and 90mm for the price of one Leica 75mm!
The Sigma isn't "almost as good as Leica." It's "actually just as good for any practical purpose, and you save $4,300."
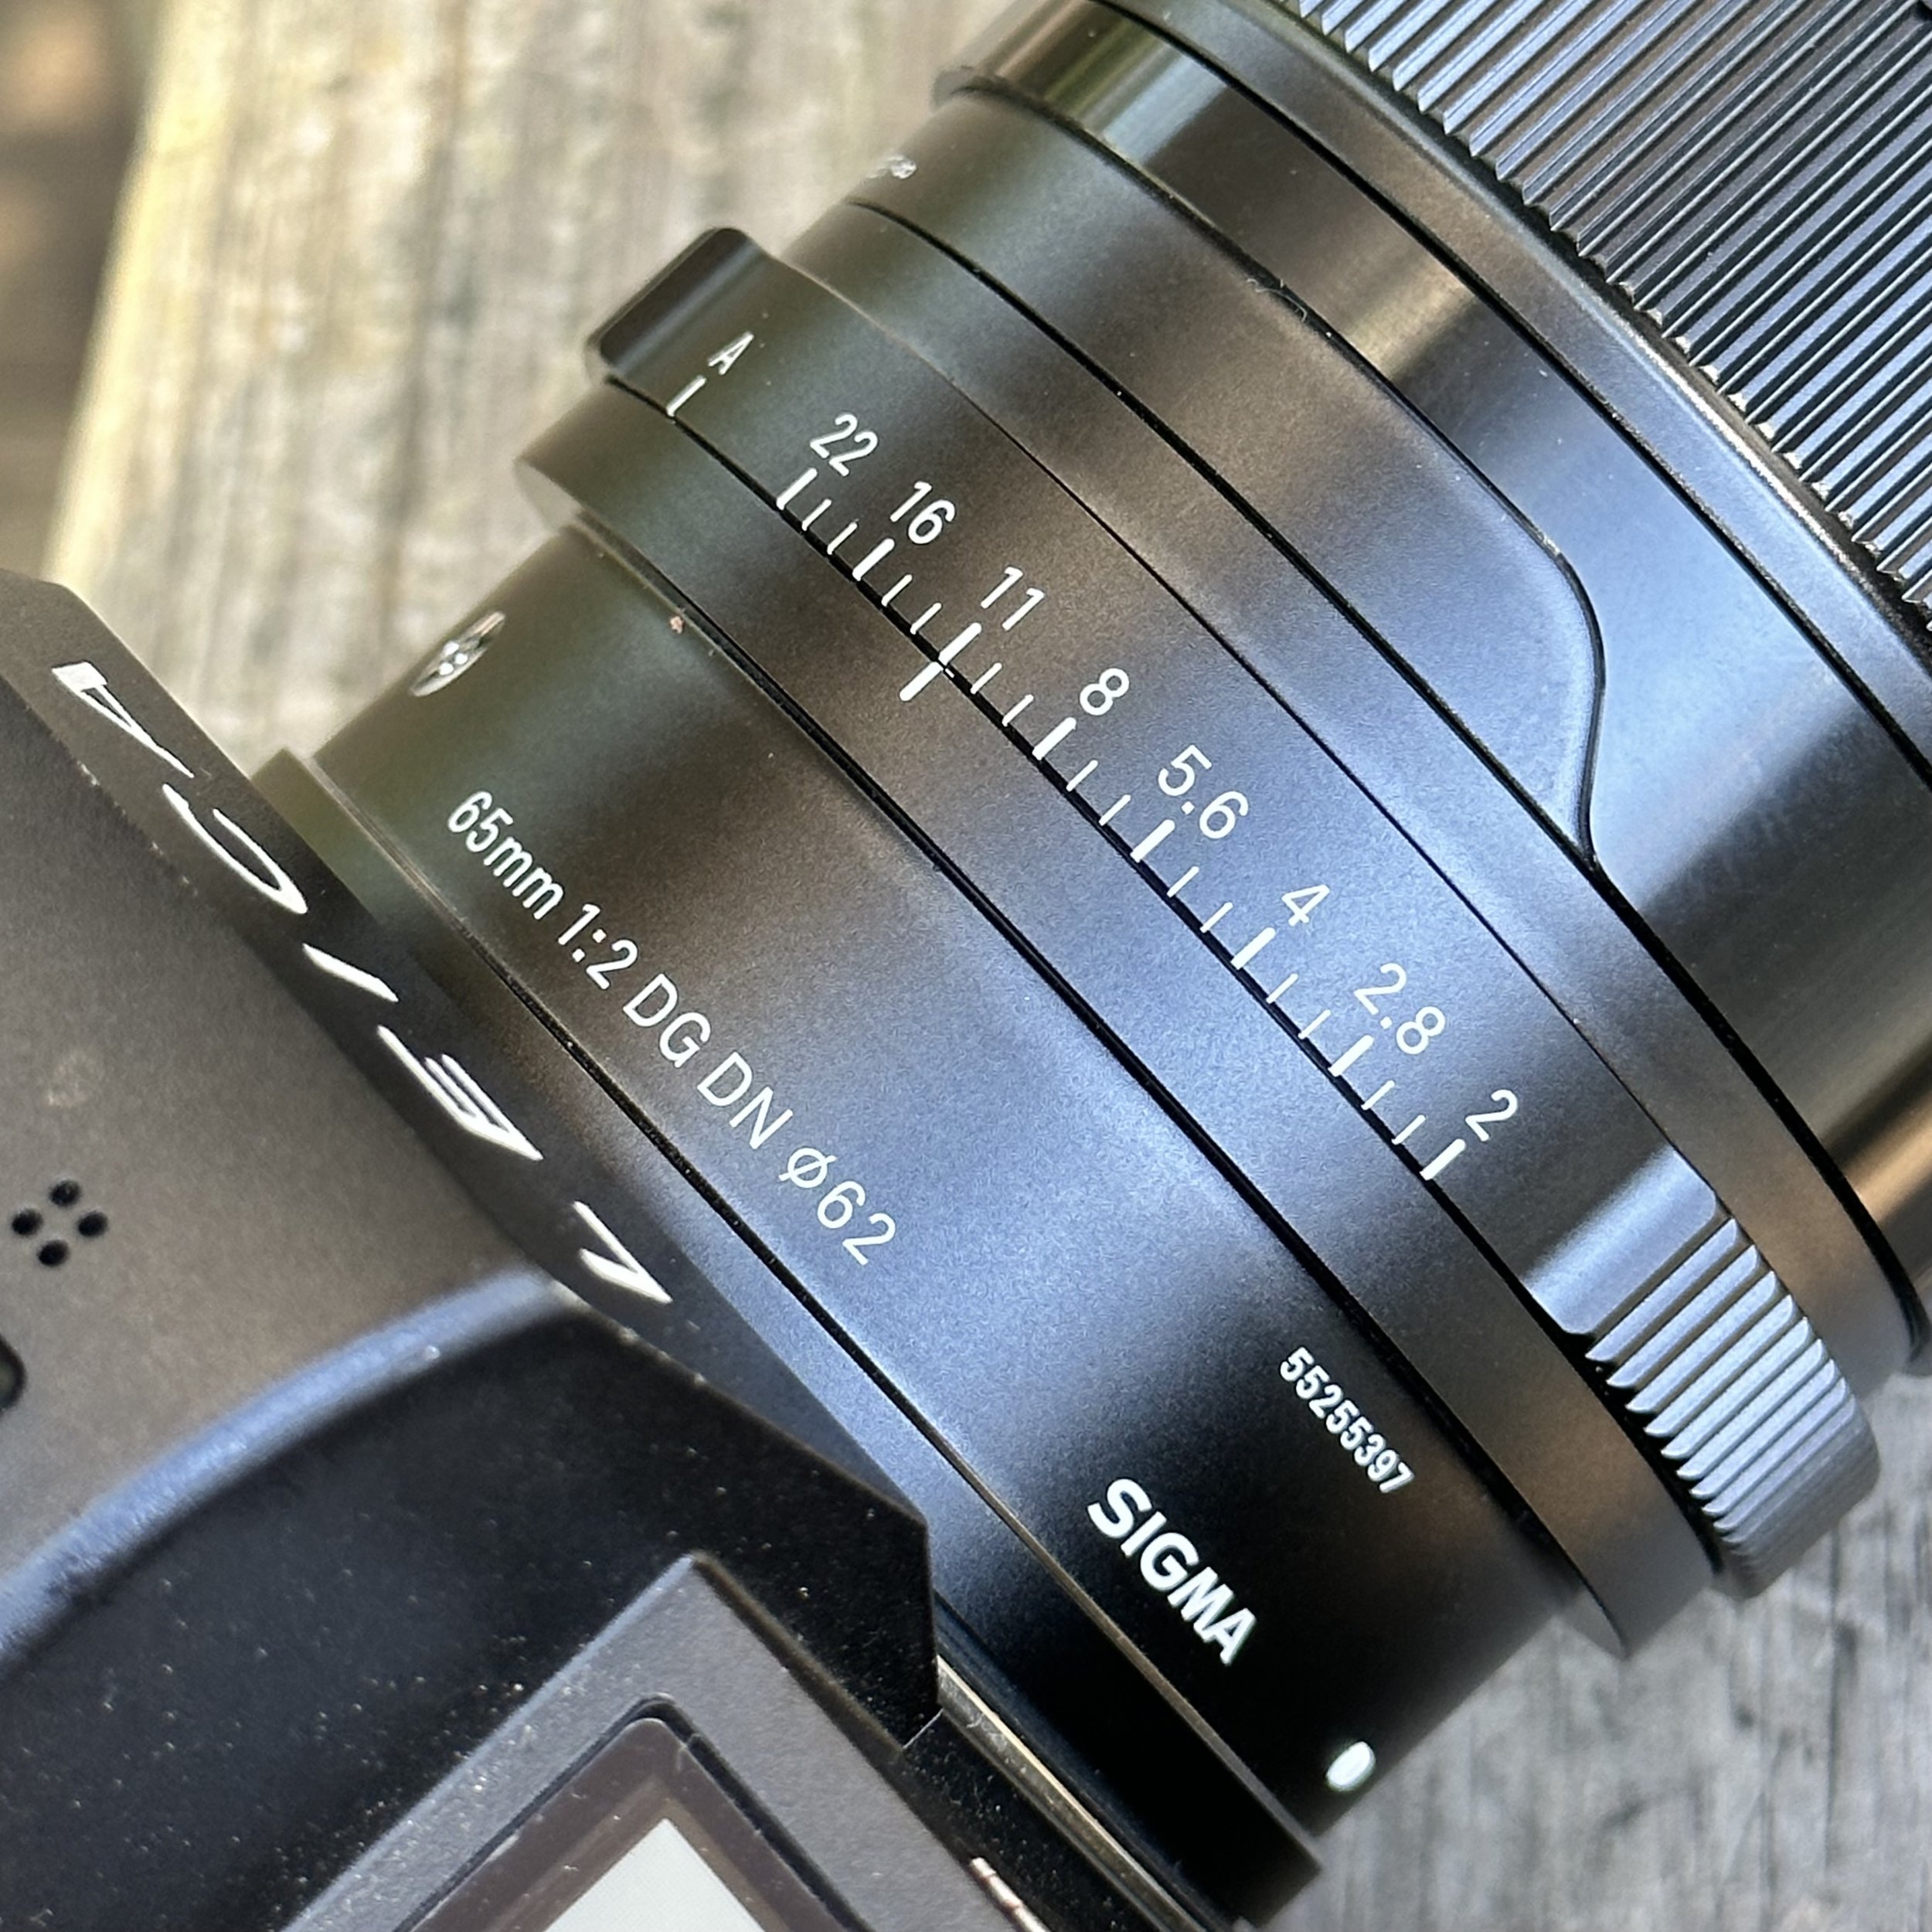
The Sigma 65mm f/2.0 mounted on my Leica SL2 with the aperture ring showing the 1/3 stop detents (one of my favorite features!). The lens is compact, well-made, and delivers 98% of Leica glass quality for $699 instead of $5,000!
Another thing I want to mention here is that the interaction with the lens is different than my Leica glass. Sigma approaches the aperture and the manual focus modes differently that Leica. I will be honest here, I kinda like the Sigma approach to aperture better too. The Leica lens is all software controlled, there are no external controls on Leica L mount glass except for the focus ring, so you use the camera’s controls to adjust everything. On the Sigma, the aperture control is on the lens, which is nice in my opinion. It has aperture choices in 1/3 stop clicks from f2 to f22 and then you can roll the aperture ring around to “A” for auto mode and the camera now has full control of the aperture just like the SL primes.
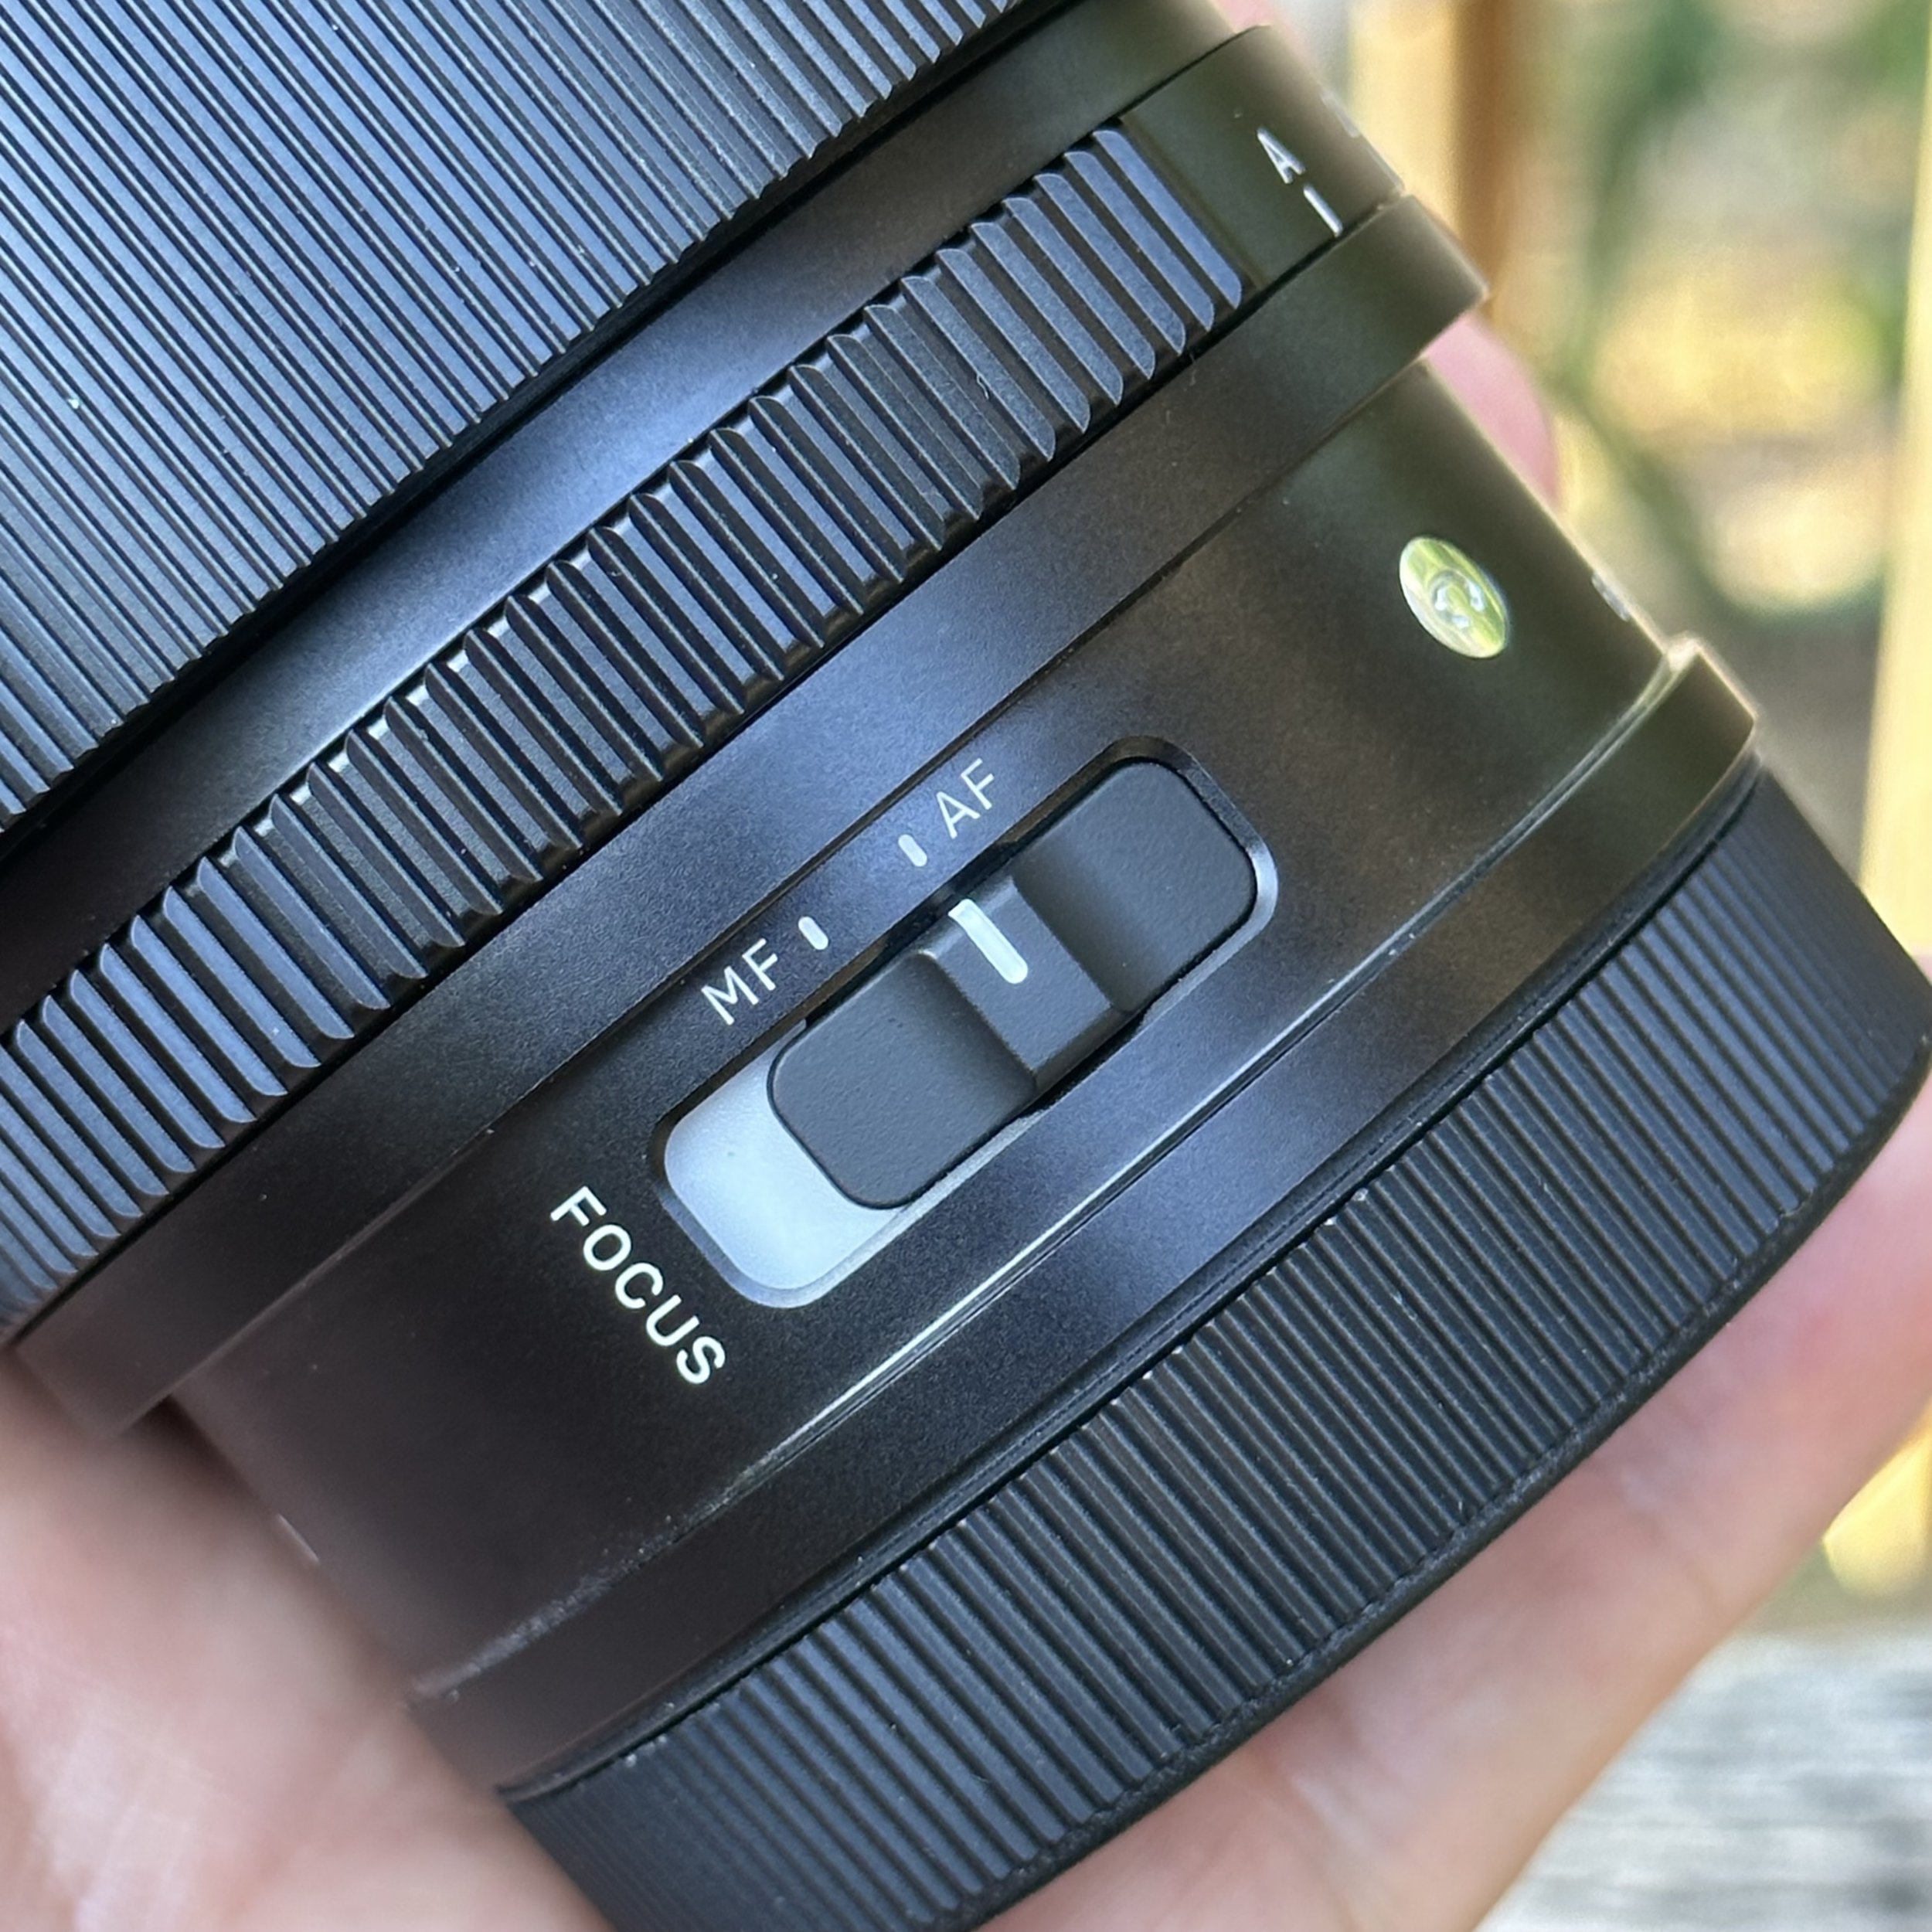
The manual /. auto focus switch is not one of my favorite features, but it works none the less.
The other thing that Sigma does is something I am on the fence about. The manual focus is a switch selection on the lens itself. I dont know why they chose this way to control this function and to be honest, it is not my favorite way of doing this function. It might be that Leica’s firmware prevents Sigma from exploiting manual focus without it. I really don’t know why, but the focus ring is an encoder design which means it is not mechanically connected to the focus helicoid in the lens. One would think this would be how it would be designed if there was a mechanical switch separating the two modes. All that to say my thoughts of this lens are that it is a great lens, especially for the money and you can get them about anywhere. Well done Sigma, well done.
Pros, Cons, and Who Should Buy the Sigma 65mm
Let me break down the good and the not-so-good about this lens:
What I Love (Pros):
Image quality is 98% of Leica: Laser sharp, wonderful rendering, you couldn't tell the difference
Compact size: "Darn thing is tiny" makes the system really portable
Aperture ring with detents: I prefer this over Leica's all-software control
All-metal construction: Feels solid and well-made
Price: $699 vs $4,995 for the Leica equivalent (seven times less!)
Fast autofocus: Fast enough for real use, no complaints
Build quality: Nice fitment, no play in parts, professional feel
65mm focal length: Perfect sweet spot between 50mm and 75mm
What I Don't Love (Cons):
AF/MF switch on lens: I'm on the fence about this vs Leica's software-only approach
Slightly slower AF than native Leica: Not as fast as Leica glass (but still plenty fast!)
Focus ring is encoder design: Not mechanically connected to focus helicoid
No dedicated "Art" line features: This is the DG DN "Contemporary" line, not Art
Who Should Buy This Lens:
Leica SL2 or Panasonic S-series shooters on a budget
Portrait photographers who want 65mm/75mm without spending $5,000
Street photographers who love the 65mm focal length
Anyone building an L-mount kit and prioritizing value over badge
Photographers who appreciate physical aperture rings
People who want Leica-quality images without Leica prices
Who Should Skip This Lens:
People who absolutely need the fastest autofocus for sports
Photographers who already own the Leica 75mm f/2 (obviously!)
Anyone who values brand prestige over practical performance
People who need weather sealing for extreme conditions (Sigma is weather-resistant, not fully sealed like Leica)
Frequently Asked Questions About the Sigma 65mm f/2.0 DG DN
Is the Sigma 65mm f/2.0 really 98% as good as Leica glass?
Yes! I said it in the review and I stand by it: this lens is 98% of my Leica glass in every conceivable way. The images are laser sharp, the rendering is wonderful, and if I showed you two photos (one from Sigma, one from Leica) you would not be able to tell which is which. The Sigma 65mm f/2 costs $699 versus $4,995 for the Leica APO-Summicron-SL 75mm f/2. You're getting 98% of the performance at 14% of the price. Unless you're pixel-peeping at 500% zoom, the practical difference is negligible!
Does the Sigma 65mm work with Leica SL2?
Absolutely! The Sigma 65mm f/2.0 DG DN is made specifically for L-mount, which includes Leica SL, SL2, SL2-S, CL, and Panasonic S-series cameras. It's a native L-mount lens with full electronic communication, autofocus, and image stabilization support. No adapter needed. I've been using it on my Leica SL2 and it works perfectly. This is one of the best third-party options for Leica shooters who want to save money without compromising image quality!
Why 65mm instead of 50mm or 75mm?
65mm is the perfect in-between focal length! It sits right between the standard 50mm and the classic portrait 75mm. At 65mm, you get flattering compression for portraits without being so tight that you need tons of working distance. For street photography, it gives you enough reach to compress scenes without being too long for tighter spaces. Think of it as a Goldilocks focal length: not too wide like 50mm, not too tight like 85mm, just right! Once you use 65mm, you'll understand why it's special.
How is the Sigma 65mm autofocus speed?
The autofocus is fast! I said in the review "it is fast enough to get the shot for me." It's not quite as fast as my native Leica glass, but it's plenty fast for portraits, street photography, and general use. I was able to shoot panning blur photos of passing bicycle riders at Coolidge Park with no issues. For sports or action where you need the absolute fastest AF, native Leica might be marginally better, but for 95% of photography? The Sigma is more than fast enough!
What's the difference between Sigma Contemporary and Art lenses?
The Sigma 65mm f/2.0 DG DN is part of Sigma's "Contemporary" line, which focuses on compact size and portability while maintaining excellent optical quality. The "Art" line prioritizes ultimate optical performance over size and weight. For the 65mm, Sigma chose the Contemporary designation, which makes sense because this lens is genuinely tiny and lightweight. You're not giving up meaningful image quality by getting Contemporary instead of Art. This lens punches way above its weight!
Does the Sigma 65mm have an aperture ring?
Yes, and it's one of my favorite features! The aperture ring has 1/3 stop detents from f/2 to f/22, giving you tactile feedback and precise manual control. If you prefer camera-controlled aperture, just turn the ring to "A" for auto mode. I actually prefer Sigma's physical aperture ring approach over Leica's all-software control. It's faster to adjust and you get physical feedback. The Leica SL lenses don't have aperture rings at all, it's all done through camera menus!
Is the Sigma 65mm sharp?
Laser sharp! I said it in the review and the sample photos prove it. The Sigma 65mm f/2.0 is sharp wide open at f/2, and stopped down to f/4 or f/5.6 it's incredibly sharp across the entire frame. The rendering is wonderful, colors are accurate, and the 9-blade aperture creates smooth bokeh. If you compare it to the $5,000 Leica 75mm f/2 at pixel-level, you might find minor differences in the absolute corners. But for real-world photography? You won't see a difference. This lens is sharp enough for any professional application!
Should I buy the Sigma 65mm or save up for the Leica 75mm?
Buy the Sigma unless you have $4,300 burning a hole in your pocket! The Leica APO-Summicron-SL 75mm f/2 costs $4,995. The Sigma costs $699. That's a $4,296 difference! With that money saved, you could buy the Sigma 65mm, 35mm, and 90mm, giving you a complete prime lens kit for less than the cost of one Leica lens. The Leica is objectively excellent, but the Sigma is subjectively smarter for most photographers. Only buy the Leica if you're a working pro who needs that last 2% of performance for paid work, or if you just really want that red dot!
How compact is the Sigma 65mm?
It's tiny! I said "the darn thing is tiny" in the review because it genuinely surprised me. At 2.8 inches long and 14.3 ounces, it's significantly more compact than comparable lenses. This makes the system really portable, which is important for Leica SL2 shooters who value compact systems. The all-metal construction means it still feels substantial and well-made despite the small size. It's the perfect travel lens because it doesn't weigh down your bag!
What's the AF/MF switch issue you mentioned?
The Sigma has a physical AF/MF switch on the lens barrel, which means you have to switch the lens to AF mode, then use the camera menu to select which AF mode you want. Leica lenses do everything in software with one step. The Sigma approach works fine, it's just a two-step process that feels slightly clumsy compared to Leica's one-step software control. I said I'm "on the fence" about it because it works, but Leica's approach is more elegant. It's a minor user interface quirk, not a deal-breaker!
Pros, Cons, and Who Should Buy the Sigma 65mm
Thank you for reading my thoughts on the Sigma 65mm f2 DG DN lens that Hassan loaned me for my Leica SL2. It has been an adventure for me.
Here's my bottom line: The Sigma 65mm f/2.0 DG DN is 98% of Leica glass quality at 14% of the price. That's not hyperbole. That's my honest assessment after extensive use.
Hassan, thank you for trusting me with your beautiful lenses! This 65mm has honestly made me reconsider my lens buying strategy. Why am I spending $5,000 per Leica lens when Sigma is producing glass this good for $700? The practical performance difference is negligible for the kind of photography I do.
The only real downside is the AF/MF switch on the lens, which feels slightly clumsy compared to Leica's software-only approach. But that's a minor user interface quibble, not a deal breaker. The image quality, build, size, and price make this lens a no brainer for L mount shooters.
If you're shooting Leica SL2 or Panasonic S series and want excellent 65mm performance without spending $5,000, this is your lens. Period. Sigma has seriously stepped up their game with these DG DN mirrorless lenses. They're not just "good for the price." They're genuinely excellent, full stop.
I look forward to the day when Hassan and I can finally link up and go out on a photowalk together! Maybe by then I'll have bought my own copy of this lens because honestly? It's earned a permanent spot in my bag…or should I say “on my shelf” lol.
Now get your camera out and go take a picture with it!
Support this website by using these affiliate links to shop on Amazon:
Sigma 65mm f2.0 DG DN Lens L mount
Nikon AF-S FX NIKKOR 105mm f/1.4E ED Lens
Voigtlander Nokton 35mm f/1.4 II
Sandisk 128GB Extreme Pro memory cards
Sometimes, when I go for a photowalk, I don’t want to be a loner…
When I go out to shoot photos I normally go alone as it fits my time table perfectly and I dont have to do any coordination with anyone else. I just grab my kit and go. Well, today is different.

So on this day I linked up with Tim Childers at Mean Mug coffee on Main street in Chattanooga TN and started out with a cup of coffee and some chatting about our youtube channels. Then it was off to find interesting photos and explore some of the old industrial part of the city.
We begin by making our way down to the old foundry turned farmers market. On the way I noticed some interesting stuff at a local processing plant before getting to the farmers market. After grabbing a couple of shots there we headed over to the market space and make some photos of the skate park.

The skate park was basically abandoned so once we worked the scene over as best we could we decided to head over towards the river. From the skate park we make our way to the riverfront industrial area where we grab some photos occasionally while walking down to the aquarium. This is a unique are as it is being converted to modern condominiums and there is a huge development project slated later to construct a park and such as well.

Once we got downtown, we decided to get out of the heat for a little while and grab some lunch at Taco Mac before making our way back to our cars on Main Street. The longer we walked, the hotter it got on this day and by the time we got to Taco Mac I was soaked. We stayed there till I dried out and then went back out in it for more. Haha. Market street has a fair bit of shade fortunately so we was able to avoid most of the sun while heading back to the car.

Some notable stops along the way for me were the intersection of Main and MLK, the HWY 27 bridge, the skate park and the processing plant for me. I hope you enjoyed this little AAR about our photowalk and if you haven’t done it yet, go check out both of our videos from this day at the links below.
Links to both videos are here:
Also, wanted to thank you for following my blog as well as my videos, It means the world to me.

Test driving the Leica Q2...sorta.
I went for a little stroll in downtown Chattanooga and decided that on this photowalk that I wanted to simulate the Leica Q2 to see if i really wanted on. Photography is a funny thing, some photographers will buy one camera and use it all their life and others will change out lenses and camera bodies numerous times.
If you want to see more photos and some more discussion on the idea, follow this link to the video where I do this walk. Other wise, read on friend!
I went for a little stroll in downtown Chattanooga and decided that on this photowalk that I wanted to simulate the Leica Q2 to see if i really wanted on. Photography is a funny thing, some photographers will buy one camera and use it all their life and others will change out lenses and camera bodies numerous times.
My simulated Leica Q2 for the day: Leica SL2 + Asahi Optical 28mm f/3.5 prime lens. Not as compact as the real Q2, but it's got the same 47MP sensor and 28mm focal length to test the shooting experience!
I am a little of both as I love to play with new gear as well as use gear that has become my favorite kit so to speak. Well, I have the Leica SL2 and I also have a nice little Asahi optical 28mm prime lens that I have an adapter for so I figured I would put this together and see if the shooting experience would be close enough to the Q2 to give me an idea of what it would be like without having to spend 6000$ on it.
Breaking Down the Numbers: Q2 vs My Simulation Setup
Before I headed out for this photowalk, I wanted to understand exactly what I'd be testing. Here's how the Leica Q2 stacks up against my Leica SL2 with a 28mm lens setup.
The Leica Q2 has a 47.3 megapixel full-frame sensor, a fixed 28mm f/1.7 Summilux ASPH lens, weighs about 718 grams (1.58 lbs), measures 130 x 80 x 91.9mm, and costs around $5995. It's got fast contrast-detect autofocus, built-in macro mode (focus down to 17cm), weather sealing, and that famous Leica build quality with brass top and bottom plates.
My simulation setup used the Leica SL2 with a 47 megapixel full-frame sensor (nearly identical to the Q2), an Asahi Optical 28mm f/3.5 prime lens on an adapter, total weight of about 850+ grams with the adapter, much larger body dimensions, and total cost of what I already owned. This setup meant manual focus only, f/3.5 maximum aperture (two stops slower), no macro capability, and definitely not as compact or refined!
The key similarities were the sensor resolution and the 28mm focal length. The key differences were autofocus capability, maximum aperture, size and weight, and overall shooting experience. But for testing whether I'd actually enjoy shooting with a fixed 28mm for street photography? This simulation was close enough to give me real answers!
Shooting street photography in downtown Chattanooga with the SL2 + 28mm combo. I really love those Leica colors - the images just seem more rich in color to me! Maybe it's bias, maybe it's real, but these results have me happy.
I really love those Leica colors for some reason, maybe it is a bias I have towards the brand but to me the images just seem more rich in color. I really love how they turned out though and the idea of the Q2 is a great one for a general street camera. The high megapixel sensor combined with the 28mm lens is a potent street combination as you can see below where I shot the image as a candid just in passing and was able to adjust the composition later in post to get what I was looking for.
Is the Leica Q2 Worth $6000? Let's Do the Math
Here's the question that started this whole experiment: is the Leica Q2 worth $6000? To answer that, I needed to figure out what I'd be paying for versus what I could achieve with gear I already own.
The Leica Q2 at $5995 gets you a complete, ready-to-shoot system! One camera, one lens, no decisions about what to bring. You're paying for that Summilux lens (which would cost $4000+ if sold separately), the compact integrated design, Leica's legendary build quality, and the refined shooting experience. If you shot nothing but 28mm street photography, that's actually pretty reasonable for a professional tool!
My alternative approach using the SL2 I already own plus a vintage 28mm lens (which I picked up for about $150 used) costs essentially nothing additional. I already had the SL2 body, I already had the adapter, I just needed a good 28mm lens. Total additional investment: under $200. The compromise? Manual focus, slower aperture, bulkier setup, and no integrated refinement.
So is the Q2 worth the extra money? If you're starting from scratch and you know you love 28mm, absolutely! The convenience, the autofocus, that f/1.7 aperture, the compact size - those are real benefits worth paying for. But if you already own a camera body with a similar sensor and you can adapt lenses? You can get 80% of the Q2 experience for a fraction of the cost. That's what this test proved to me!

This photo was shot about 10 feet away with the 28mm on a full frame sensor - it looks MUCH further away than it actually is! But through the power of cropping with 47 megapixels, I can make it take on a couple of different looks. This is the original uncropped frame.
This photo was shot about 10 feet away and with the 28mm on a full frame sensor it looks MUCH further away. But through the power of cropping… I can make it take on a couple of different looks as you can see below.

This is a 12 megapixel crop of the original image - still plenty of resolution for web or print! Notice how the tighter crop changes the entire mood? This version has a lonely, almost bleak feeling to it. Same photo, completely different story.

This is a 16 megapixel crop of the original image - a slightly wider crop than the 12MP version above. This one has a warmer, almost restful feel to it. That's the power of 47 megapixels - you can change the entire dynamic of the image with a simple crop!
As you can see I can get two very different feeling images from this single frame. That is kinda powerful to be honest. I mean, you can change the entire dynamic of the image with a simple crop. That is actually liberating to be honest. I mean just look at the two again. One has this lonly, almost bleak feeling to it while the other has a warmer almost restful feel to it. That is really cool to me. So this is a perk of the Leica Q2 in my book.
So what else comes with the Q2 that I didnt have today? Well, autofocus is one, another is larger aperture. This lens is f3.5 which is two full stops slower than the lens on the Q2. This would matter more in low light as I was shooting most of this day at f11 to reduce the need to adjust focus. Range focus at f11 on a 28mm prime is basically 4 feet (1.3 meters) to infinitiy. So it literally was point the camera, press the shutter and the image was in focus. But if I wanted to shoot indoors or in the evening, the f1.7 aperture would be nice to have to keep my ISO down some or be able to raise the shutter speed a little to freeze action better.

What I really liked about the 28mm was that it made me interact with people more! These two guys were walking by and I just asked them if I could grab a quick photo - they were stoked and so was I. The 28mm forces you to get closer if you want the detail, which means you have to actually talk to people. This is helping me overcome my shyness about street photography!
Is the Leica Q2 Right for You? Here's My Honest Assessment
After this simulation experiment, I've got a pretty clear picture of who the Leica Q2 is perfect for and who should probably look elsewhere. Let me break this down based on what I learned!
You should seriously consider the Q2 if you primarily shoot street photography at 28mm, value compact size and don't want to carry multiple lenses, are willing to pay for premium build quality and refinement, want that f/1.7 aperture for low light, love the idea of a one-camera solution for travel, and appreciate Leica's color science and shooting experience.
The Q2 really shines for minimalist photographers who've already decided 28mm is their focal length. If you know you love this field of view and you want the best possible 28mm compact camera, the Q2 is hard to beat! The autofocus, the aperture, the size, the build - it's all there. You're paying a premium, but you're getting a refined tool that just works.
But you should probably skip the Q2 if you already own a high-megapixel full-frame camera (just buy a 28mm lens like I did!), like to switch between different focal lengths regularly, aren't sure if 28mm is your preferred street photography focal length, are on any kind of budget, or want the flexibility of interchangeable lenses for different situations.
For me personally? I do really like the ergonomics of the SL family of camera bodies, so I will keep my SL2 and use a 28mm lens when I want to have the Q2 experience. The simulation proved I'd enjoy the Q2, but it also proved I don't need it! I get most of the benefits with gear I already own, and I get to keep lens flexibility for other types of shooting.
The key is being honest about your actual shooting style versus your aspirational shooting style. Do you really shoot primarily at 28mm, or do you just like the idea of being a minimalist street photographer? If it's the former, the Q2 might be worth every penny. If it's the latter, save your money!
What I really liked about the 28mm was that it made me interact with the people more. The photo above is a great example of this, these two guys were walking by and I just asked them if I could grab a quick photo, they were stoked and so was I. This is honestly a problem I have that I am working to get past. I don’t like bothering people and will walk by potentially great photos simply because I don’t want to bother them. The 28mm forces you to get closer if you want the detail in the photos so I have to get closer to do that. So I think honestly, this is going to have be a perk of the 28mm Summilux lens after all…
All in all, this kit performed really well for me and I think the Leica Q2 would perform equally as well. BUT I do really like the ergonomics of the SL family of camera bodies so for me I will keep my SL2 and use a 28mm lens when I want to have the Q2 experience in a camera. So until next time, get your camera out and go take a photo with it.
Just capturing everyday life…
When I decided to take some time away from youtube and just explore my photography, I didnt know how much fun it would be to just take the camera and an extra battery. It blew my mind to be honest.
Still I found myself starting to look for more interesting photos when I am out and about these days. Something else I have really come to realize is that you cant get the photo if you dont go out with your camera.

Here is an example of what I mean by getting out and shooting more. You are not going to be where the action is if you dont get out and shoot. Just being out in the field greatly increases your chances of getting a photo. That being said, I am the worlds worst at failing to get the shot. I got the one about due to range focus being set on the lens so I didnt need to even bring the camera to my eye. I literally saw it unfolding and just raised the camera and snapped the frame. It is also heavily cropped too so I can get the composition I wanted. That is a luxury of the 47mp sensor on the Leica SL2 that I was using that day, it gives you options.
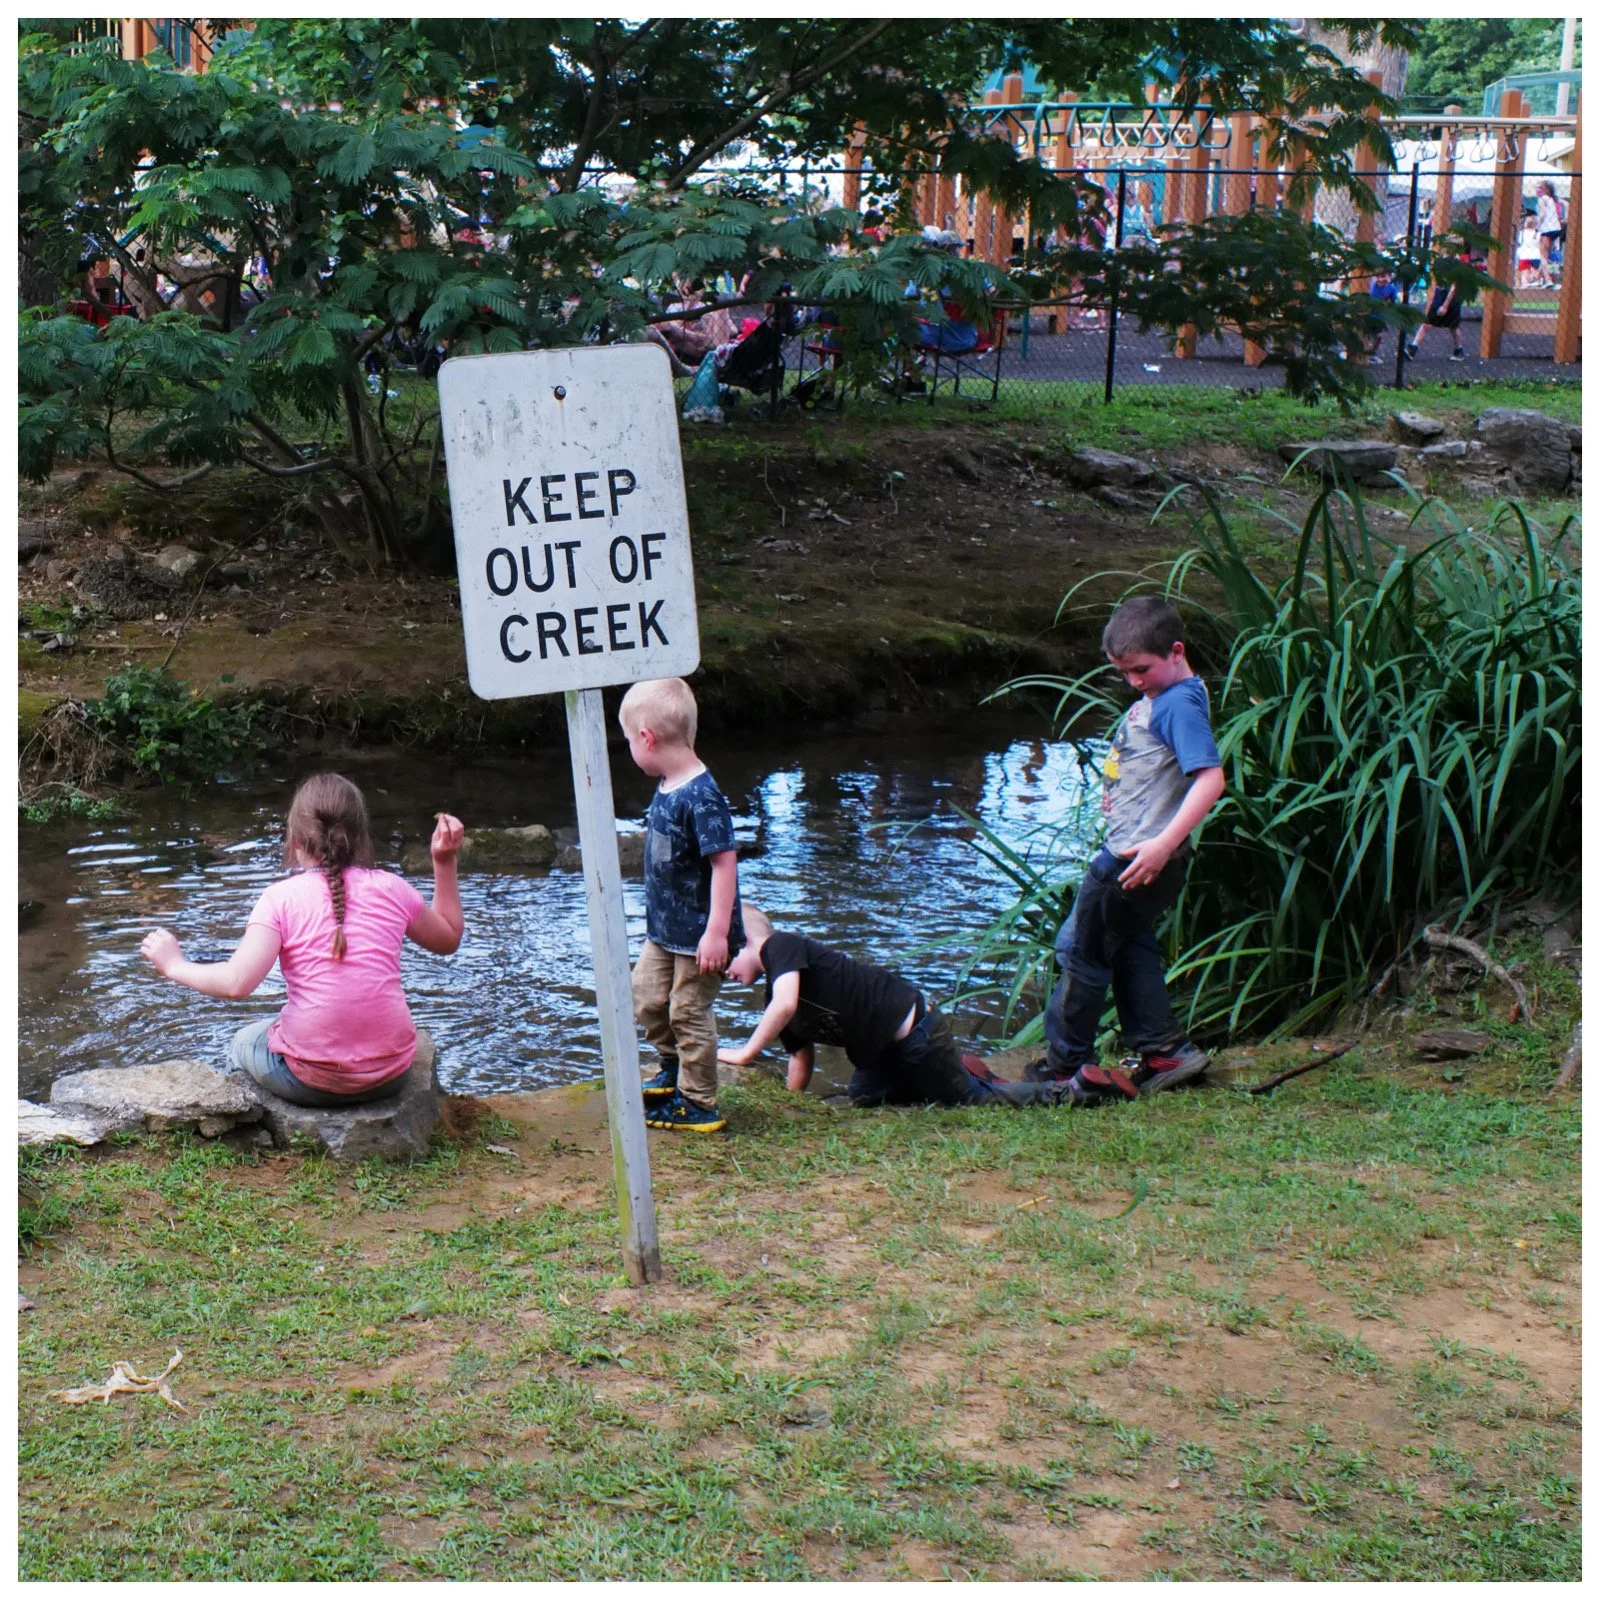
Here we have a photo I have taken a couple of times now. Every year our hometown has an event in this park and the kids play in the creek is flagrant defiance of the posted sign. It is such a cliche photo that I can’t pass it up. Obvious civil disobedience to signage if a fun photo so if you see one of these scenarios just get your camera out and take the picture. You just might like what you end up with.

Here we have a scene of “small town Americana” that I thought was kinda interesting. These little carnival foodie trucks are a common sight in rural America and I wanted to capture that essence if possible. I am not sure if I was successful but to me it is a cool photo.
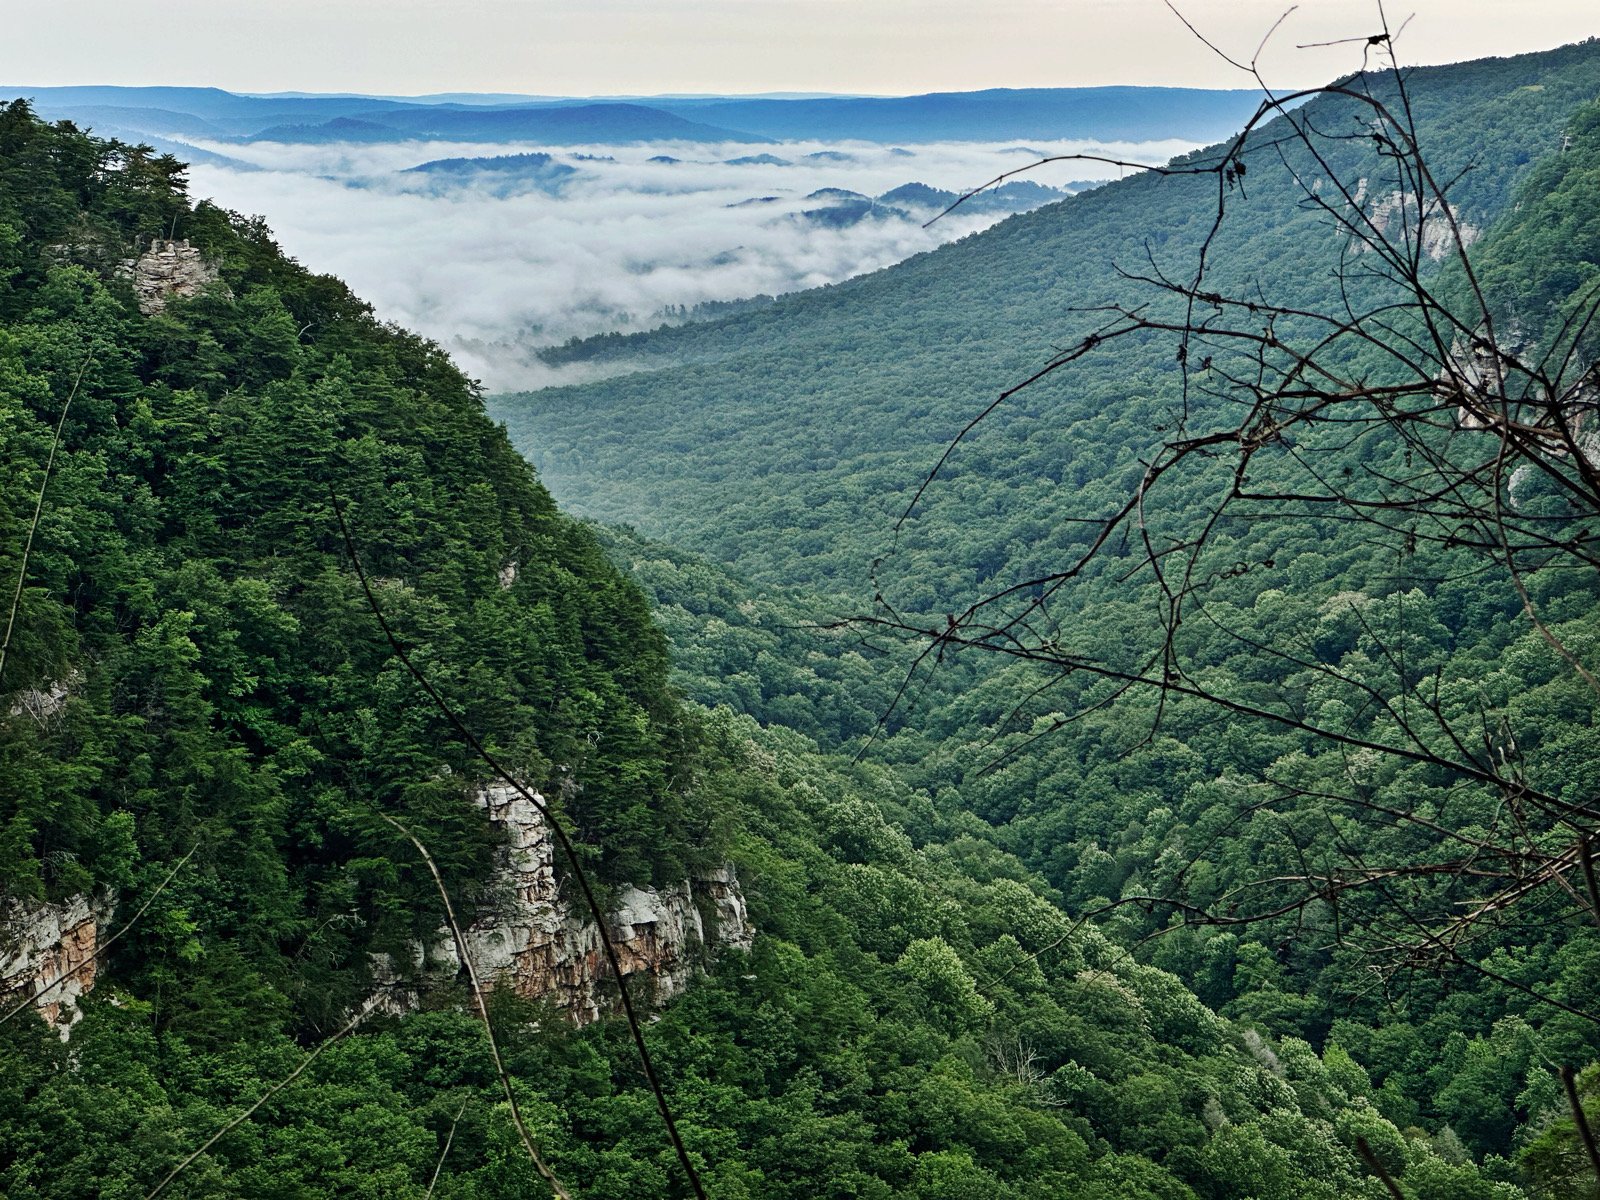
Here I found something interesting when I went to Cloudland Canyon State Park to setup a POTA activation the other morning. A cloud inversion isnt real common until the fall, but conditions were apparently just right. So I grabbed a photo before turning on the radio and now I have this photo.
Here is the last photo I want to talk about. This was a quickie iPhone capture that I saw and just had to get right quick. Use what you have and get the photo, that is the rule of the day. I have come to learn that when you get something like this in your head just go take the photo and be done with it, it will gnaw at you forever if you dont. I think some of the best photos, street or otherwise, come from just capturing everyday life. What do you think?
Prime lens primer
So you have never used a prime lens before… well let’s change that.

Leica CL with the TTArtisan 35mm f0.95 APS-C prime lens
A prime lens is like a window into another world of photography. They can be had in much larger apertures than zooms usually, they are smaller under most circumstances, and if you get vintage ones…they can produce very unique results.
Another thing that prime lenses are good for is they teach you to compose based on the environment. You have to work within the confines of the focal length which means you will have to either move closer or further away to “zoom” with your feet to get your composition. Sometimes this means not getting a certain shot at all because you would have to stand in the middle of a river to get the composition or something like that. But I rarely run into this problem and once I start seeing in focal length it seems I filter out these problems subconsciously anyway.

Leica CL with the TTArtisan 17mm f1.4 APS-C lens.
You will also learn to see in your chosen focal length over time as well. That is, once you shoot a while with just one focal length… You hear street photographers talk about the 28 or the 35 and they know what the photo is going to look like based on experience.
I will be honest here, it is really liberating to have such a small and potent setup when I run prime lenses. Zoom lenses give you versatility, but I see people that use zoom lenses still carrying a camera bag. This seems overly redundant to me, I use the one lens all day and get out in the environment, but I am not everyone. Some people prefer to have all the options on hand so they can setup and shoot whatever comes their way I guess. Maybe they have missed a opportunity in the past while using a prime and now want the versatility of a zoom to give them better odds in the future should that happen again, I don’t know. Those are some of the speculations I have had, but for me, I just like having something dedicated like the prime brings to the table.
Zoom lenses do serve a purpose though, they are the work horses of the professional photography world. Giving the professional the ability to change focal lengths instantly on demand to fulfill the job at hand. Primes force the professional to move around a lot more to build the composition that the zoom makes short work of. This is important when you are on a clock. Anything that saves time also saves money so zooms have their uses.
So what makes a prime appealing over a zoom? That large aperture and the small size are some of the magic that the zoom lens lacks.

Lenses like the one above with it’s f0.95 maximum aperture can create an effect that nothing else can produce. The “Bokeh” or blurred out background is something that large apertures are well known for. The portrait below is a prime example of the feature. The background was probably 15 feet behind him when I shot this photo.

Primes lenses come into their own when it comes to vintage lenses too. This is where I have found my passion. The old Pentax glass along with the Nikon and early Canon stuff is all phenomenal. I do have some early Leica stuff but the Pentax / Asahi branded glass is just awesome. I also will try about anything to see what the photos are like as well. I have even adapted some glass that should not be able to be adapted like some Argus lenses. I documented that process on my YouTube channel if you want to see how I was able to make that work. Argus had a unusual way to drive the focus on the lens and it posed a challenge to get it to work.

One of my favorite vintage lens brands is Pentax and the Asahi Optical company.
With the advent of the mirrorless camera, we now have a flange distance that is conducive to adapting these vintage lenses to our cameras easily and the electronics in the camera make using these lenses even easier than ever as well. Things like focus magnification and focus peaking as well as exposure preview to see how the image will look before you press the shutter are great for coupling vintage primes to your new shiny mirrorless camera. Some even allow image stabilization via sensor stabilization so you even get that feature with vintage glass sometimes.
So if you have not used prime lenses in the past, I implore you to get a simple one, like the 50mm f1.8 on full frame (affectionately named the “nifty fifty”) or it’s APS-C little brother, the 35mm f1.8 DX (Nikon uses the term DX for their APS-C cameras) and put it on your hobby camera and leave it there for a month. It will either make you hate primes or fall in love with them. For me I got the 35mm f1.8, installed it on my Nikon D7000 and left it for almost a year without removing it. I really loved that lens.
So until next time, get your camera out and go take some photos with it!
How important is the time of day when you shoot a photo?
When you take the photo is just as important as what you photograph
Seems there is all sorts of information out there about what to take pictures of, but no one (other than landscape photographers) talk much about the TIME you take your photo. In this article, I want to explore this a little with a simple location that is right down the road from my apartment and show the difference that just a few hours can make in the mood and feel of a location that is being captured.
The camera of choice with my the Leica CL with the TTArtisan 17mm f1.4 lens shot off of a tripod so shutter speed isn’t a problem. I will be maintaining an ISO of 100 for all photos and an aperture of f11 on all photos, so shutter speed will be what I have to change to keep the exposures to where I like them.
The time of day is something that a lot of people think about a little but really don’t put much effort into the planning of the photo. It takes a good bit of reconnoitering to get the location scouted with the vibe you are wanting in the photo. I see these locations all the time, when I am driving around in the day time and when I see them at night it is a completely different scene. Some people like shooting in the daytime, some like the blue hour or golden hour and some, like me, prefer the night… So seeing a night photo while viewing the scene lit by the sun is a problem. I can get somewhat of a visual based on previous photos I have taken of other locations, but until you see it lit by the street lights and 8’ fluorescent tubes, you just don’t know what you will be getting.
I don’t know why I like shooting at night so much, but I do. The low light and the negative space just do something for me and the photos reflect it.

Ybor City has some interesting light that is only available at night.
I do like some blue hour stuff to add the touch of blue sky to my images at times, but not always. Another perk to shooting at night is that it is cooler in the summer months, with temps being generally lower and the sun in not beating down on me, I am more inclined to stay on a location longer and get better images. Street photos at night are a little tougher as I need larger apertures to keep ISO manageable, and this means focus is a lot more of an issue as depth of field is significantly shallower than in the daytime, but it is manageable if you think about it first.
I normally set focus traps and shoot in burst mode and this will usually net me a sharp photo of a scene at night at even crazy large apertures like f1.4 or f0.95… It just takes a bit of practice and patience.
The gear matters…
The gear you use at night matters just as much as the subject you are shooting. If you have the wrong equipment, you simply won’t get the shot.

Fast glass gives you options.
Take for instance, street photography, this is dynamic and has movement in it. For most human movement, a shutter speed of 1/250 second will freeze action sufficiently. 1/200 in a pinch if the subject isn’t moving too much will net sharp photos. Well, to get a decent exposure, you will need fast glass, shot wide open and will still probably need a fair amount of ISO to compensate.
Now, if you are shooting static subjects like buildings or scenes and motion isn’t an issue, you can just let the shutter stay open until the exposure is good, but once you cross about 10 seconds, humans tend to vanish from the scene… Cars make long lines with their headlights as they drive by and things begin to look different. So you can see it all depends on what you want to capture to drive your gear choices here.

I personally like to have fast glass if possible as this is the most versatile lenses. These lenses can still be stopped down for times when you want deeper depth of field and opened up when you need the extra light gathering power of “fast glass”. So whenever possible, I will always opt for the larger aperture option over the smaller, if just makes sense to me to have that extra optional aperture when needed. The old adage “better to have it and not need it than to need it and not have it” comes to mind…
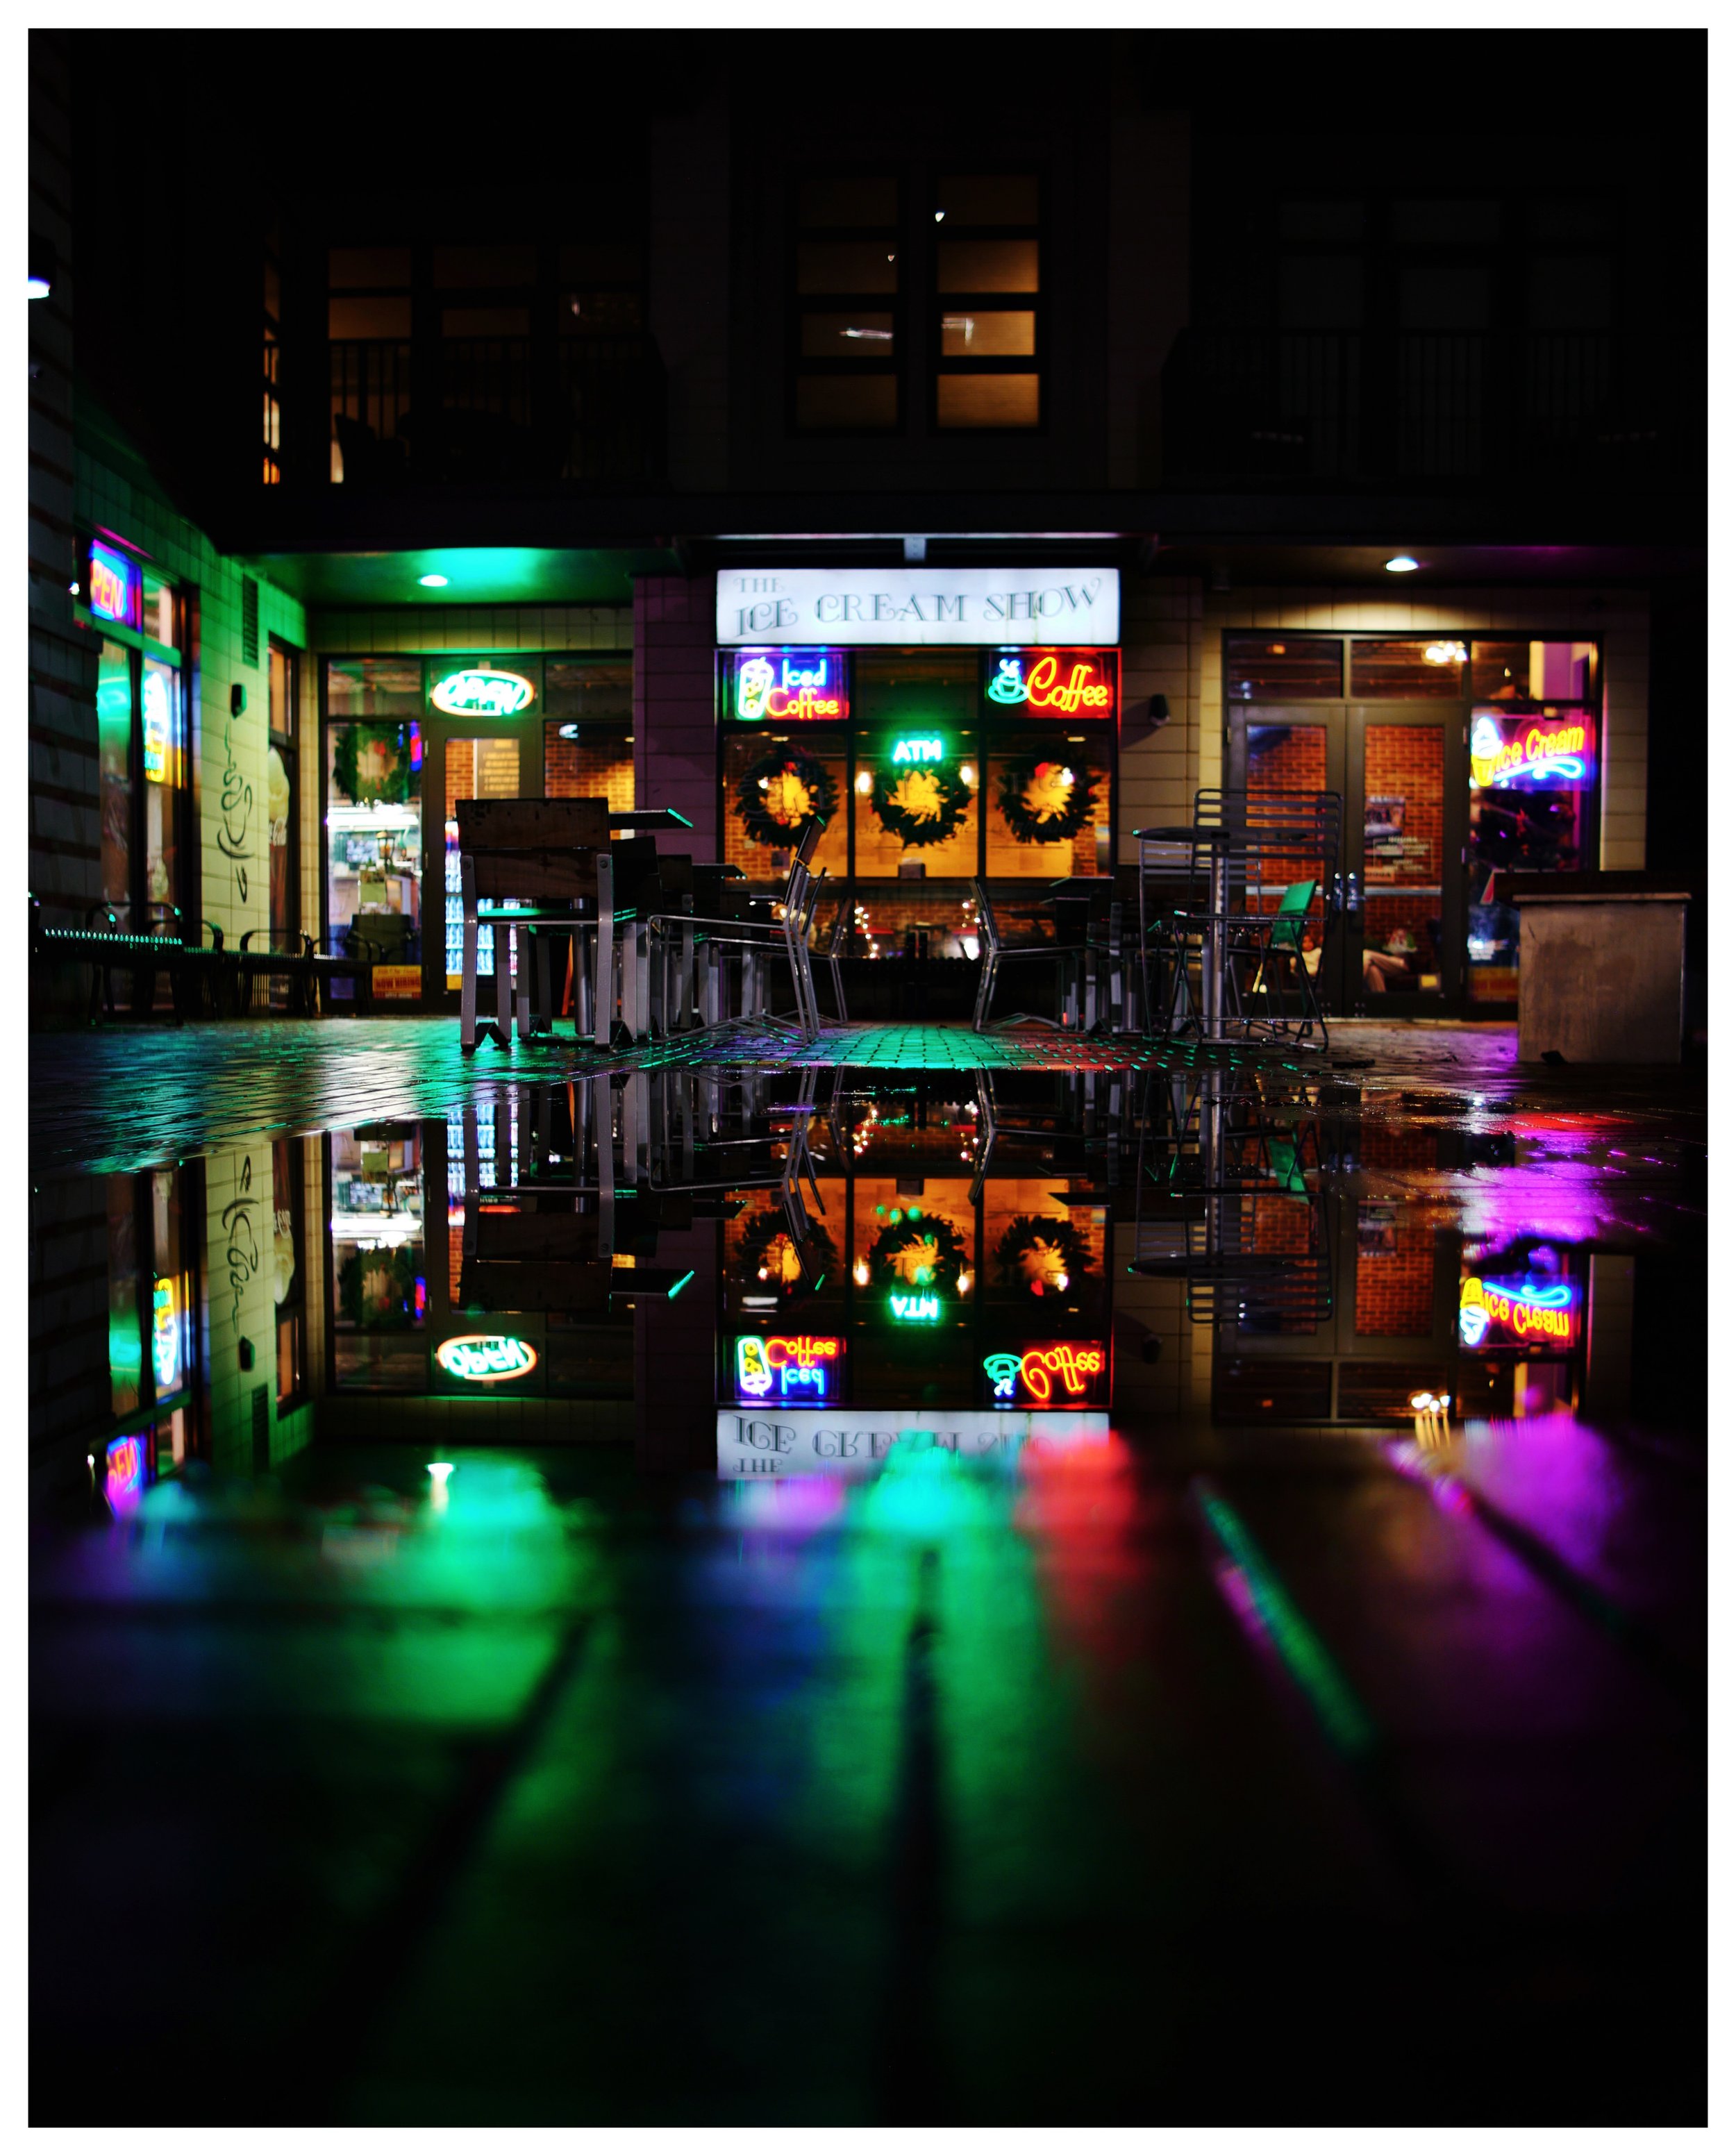
Water reflections are magical in low light or night photos.
Now that lenses are talked to death, what about the camera? Well, honestly any camera will do. It is the least important part of the equation to be honest. As long as it can be controlled manually for all three major functions, it will do. You see, it must be able to adjust shutter speed, ISO and aperture manually to be able to get creative results at night. The camera running in automatic mode will make choices in these controls that will not be what the photographer wants most of the time. It is guessing and will most likely guess wrong… But just about all reasonable cameras will let you control these functions and this is where it gets good…
The time of day.
Back to the original subject. Here are two photos taken from the same location, with the same camera and lens combination, at two different times of day.

Here we have a daytime scene of a garage.
Here is the same composition at night. Notice the change in mood.

Here is the same scene, but the overhead lights are turned off (different day). This changes the mood even more and gives the scene a different feel. Take a look at the scene below of the Dutch Motel sign I found the other evening. The daytime photo isn’t much to look at, but the night time one has all sorts of interesting features that make it unique and otherworldly since it is distorting time so much with the incredible shutter time of 10 seconds!

The Dutch Morel sign isn’t much to ponder during the day…
1/400 second ISO 100 f8
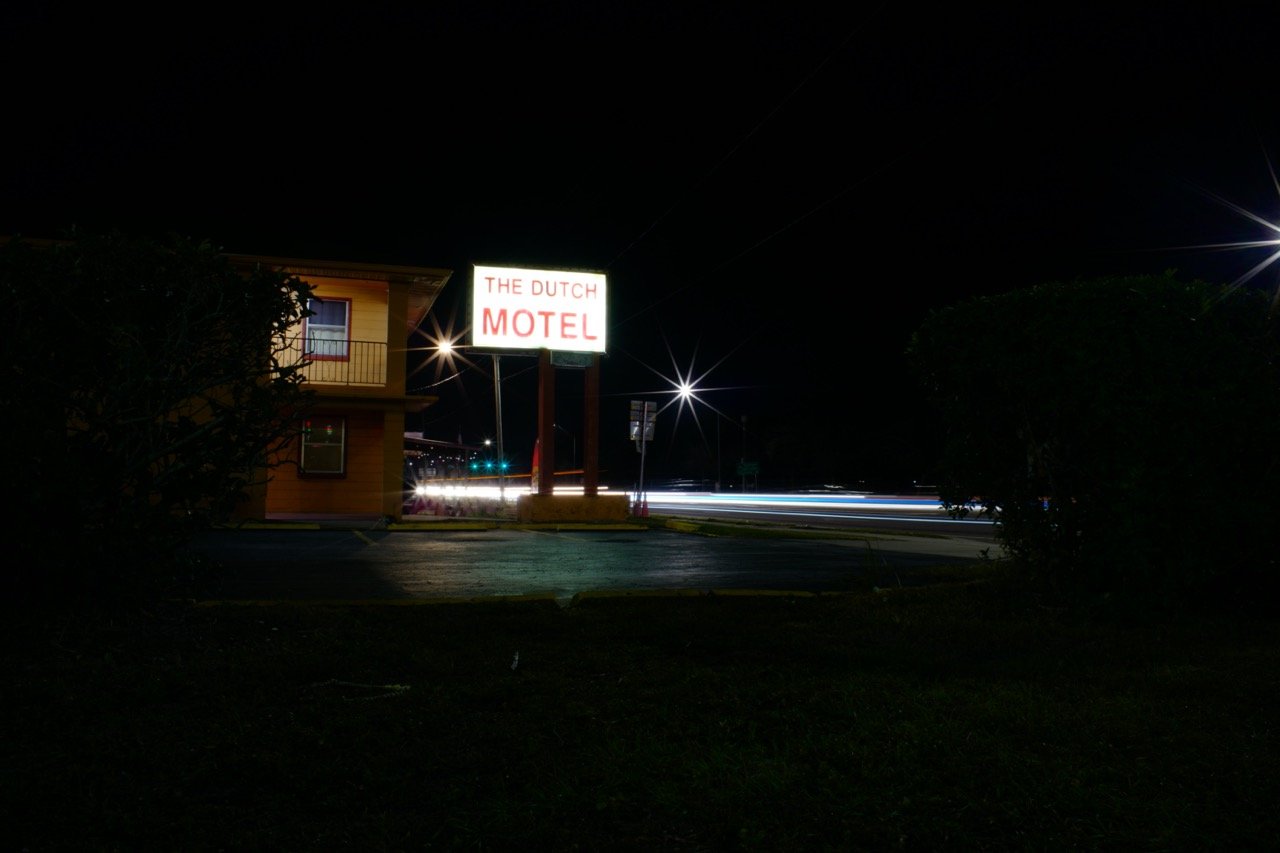
Once nightfall comes and you slow down the shutter, the magic happens
10 seconds ISO 100 f8
This is just a couple of examples too, there are many others that I have noticed over the years. So if you want a certain feel from an image, the time of day absolutely matters. There are some things that a strobe just won’t overcome and the sun is one especially if you are shooting buildings and not portraits.
So if you want to learn more about low light photography, check out my youtube channel here. David Saylors Youtube Channel.
What does lens focal length do to me psychologically when shooting street photography?
Photography and the human mind…
I have found that when I put on a wide lens, I suddenly loose the fear of getting close to people for some reason. I am still guarded with people and don’t approach a lot of them, but I will still get closer. This is a real struggle for me and I find it even harder due to time constraints that I have to shoot street. I don’t normally get to go shoot street when the large crowds are out and about. I end up being in the areas when there is little to no activity. So for me to get a good candid street photo is pretty special. I don’t get dozens a week like some photogs I see, but maybe one a month…maybe.

17mm APS-C photo on the Leica CL
I find that I like to get two kinds of photos when I shoot wider than 35mm and a different kind of photo when I shoot 35mm or longer. I didn’t even realize it until the other day when I put the 17mm on my Leica CL (like a 28mm on full frame) The 28mm is also what happens to come on the Leica Q series cameras. This particular machine is quite costly and you can’t change the lens either. But for street photography , the 28mm is a great choice and lots of people LOVE the Leica Q2 and Q2 Monochrome just for this reason!
17mm APS-C photo on the Leica CL
When I put the 17mm TTArtisan APS-C lens on the camera I consciously know that the lens is very wide and that I am going to have to get close if I want to fill the frame. Then I fill the frame with images that make me happy for some reason. It is really strange that if you want better photos, sometimes you just have to get closer… Photography is strange, people have all sorts of different ideas about what it is. You know what? They are all correct. Every single one of them. What is that all about? LOL

35mm APS-C photo on the Leica CL
When I put on the 35mm (50mm equivalent) The mindset shifts to scenes with people in them or portraits on the street when I use longer lenses for some reason. It just happens too, I don’t even think about it, I just do it. I start looking for interesting things across the street when running the 35mm or longer lens. I also noticed that I like to compose from different view points too. I will end up shooting from a lower angle with the wide lens and from my eye level with the longer lenses. I think this is because of the viewing angle when I look at the photos in post, but it is a very strong phenomenon.

The Leica CL has become my de-facto street camera with either the 35mm or the 17mm as of late. I really like the form factor of the Leica CL and I also use a grip frame on it. This grip frame is made by LIMS that is currently out of production from everything I have seen. This grip frame is awesome because it has a ARCA SWISS tripod adapter on it and there is an opening for the battery door in the bottom plus it has the grip extension on the right side that makes this basically the perfect street camera for me. I like the form factor of this machine the most, it being very unassuming yet has exceptional image quality, makes this a wonderful little street camera. My only thing I would like better would be to have the Leica Q2 Monochrome as I love monochrome AND the low light power of that camera is phenomenal! But for now, I really want to use the CL all the time.
I say that with a bit of sarcasm, you see as as of late I have really started to embrace color photography more and more and have not shot in monochrome on my digital machines in ages. So the monochrome might not be the best solution for me, but I really like the idea of the low light powerhouse that it is. That is the real appeal for me to be honest about it.

The Leica CL adorned with the TTArtisan 17mm f1.4 APS-C manual lens.
So there you have it, a small treatise on my thoughts about the focal length and what I instinctively shoot with each one. I am odd and I know it, so this is by no means a definitive explanation about anything, but rather just an observation into what I do when I use certain lenses and what kind of gear I tend to lean towards when I go shoot.
Now get your camera out and go take a photo with it!
TTArtisan 35mm f0.95 APSC Manual Lens Review
Ok, yall. This has been in the works for a few weeks now and I am finally ready to publish it.
The short answer… it is totally worth the money if you like manual glass.
The long answer… read on.
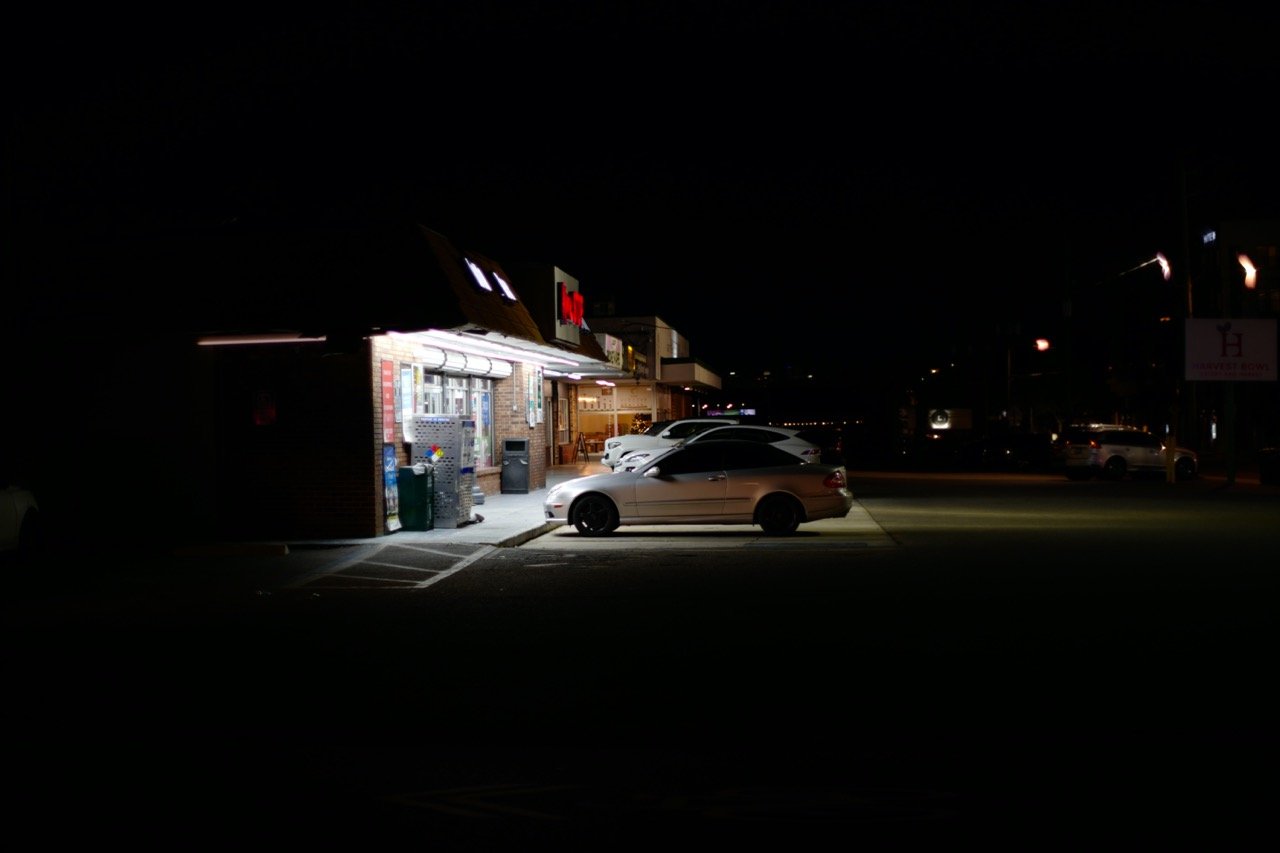
Handheld at f0.95 at night shutter speed is 1/80 second. The image is nice and sharp.

Shot at f8 with the focus trap method.
This little lens is a wonder of modern engineering with how they kept the size so small and also kept the optics so clear at the same time. I unboxed this lens and noticed immediately the packaging is top tier, reminiscent of the iPhone styling but in a nice grey/cloth texture for the cover with the lens nomenclature clearly on the top of the box. If the box is a clue to the lens quality then this is going to be a real winner! (Spoiler: It is)
It is no secret that I like to shoot 50mm on my full frame cameras like my Leica SL2 and the 35mm is about as close as it gets on APSC, so I shoot a lot with 35mm on my Leica CL when I am out just shooting street for me. So when TTArtisan reached out to me and asked if I would like to take a look at this beast, I quickly agreed and they sent me a lens.
Now for the whole disclosure part: They(TTArtisan) did give me the lens for free. They also told me that they had no “rules” they wanted me to follow or anything at all to be honest. They just said that if they liked my review that they would like to have permission to share it on their social media. Which I also though was a great idea. So I am free to say what ever I want as I come to this review. With all that said, let’s get started.
I deliberately wanted to shoot with it for a few weeks before rendering judgement as this will allow the “honeymoon” phase of getting something new to wear off a little and I can be more objective in the review for you guys. I have shot a variety of subject matter with it and have come away loving this lens immensely. It only has a couple of things that I dont like all that much and they really are not deal breakers.

Shot at f0.95 in the dark… hand held and manually focused on the bottles.
What do I like about this lens?
Well for starters… THE APERTURE GOES TO f0.95!!! You just have to love some fast glass and this little guy has it, and then some! At one point I stopped down to f4 for a photo that needed some depth of field and realized I had stopped down 4 1/3 stops to do this! That is lunacy! I am just blown away that they can pack that much aperture into such a small package. Speaking of aperture, the aperture blades are nice and round but when stopped down it still produces some glorious sun stars!

The light stars are pretty epic in my book. (I love light stars though)
Stopped down to f16 & 12 second exposure, for this extreme example.
The double bladed one on the left is because there are two bulbs in the street light.

The physical appearance of the lens is really nice. It has a 52mm filter thread. The text is Leica styled with deep, clean engraved characters throughout (yes, the text, all of it, is engraved into the lens pretty deep, it will not wear off…ever) and painted really well for ease of reading. The external controls are easy to find and use. The focus throw is just right, there is a good amount of dampening in the focus barrel and it is smooth. The aperture detents are not like the other two lenses I have from them. My other two lenses are smaller than this one (the 35mm f1.4 and the 17mm f1.4) so there might not be room for a very strong aperture detent system in them, but on this little guy, the detents are perfect. They even have a nice little click as they slip from one detent to the next. I was so happy to see this issue I have with the other lenses, to be resolved in the new lens. This lens contains zero electronics of any kind so the semi-conductor shortage shouldn’t affect your ability to get your hands on one of these little guys. This is also part of the reason it is so small, there isn’t need to make room for a focus motor or any other electronics.
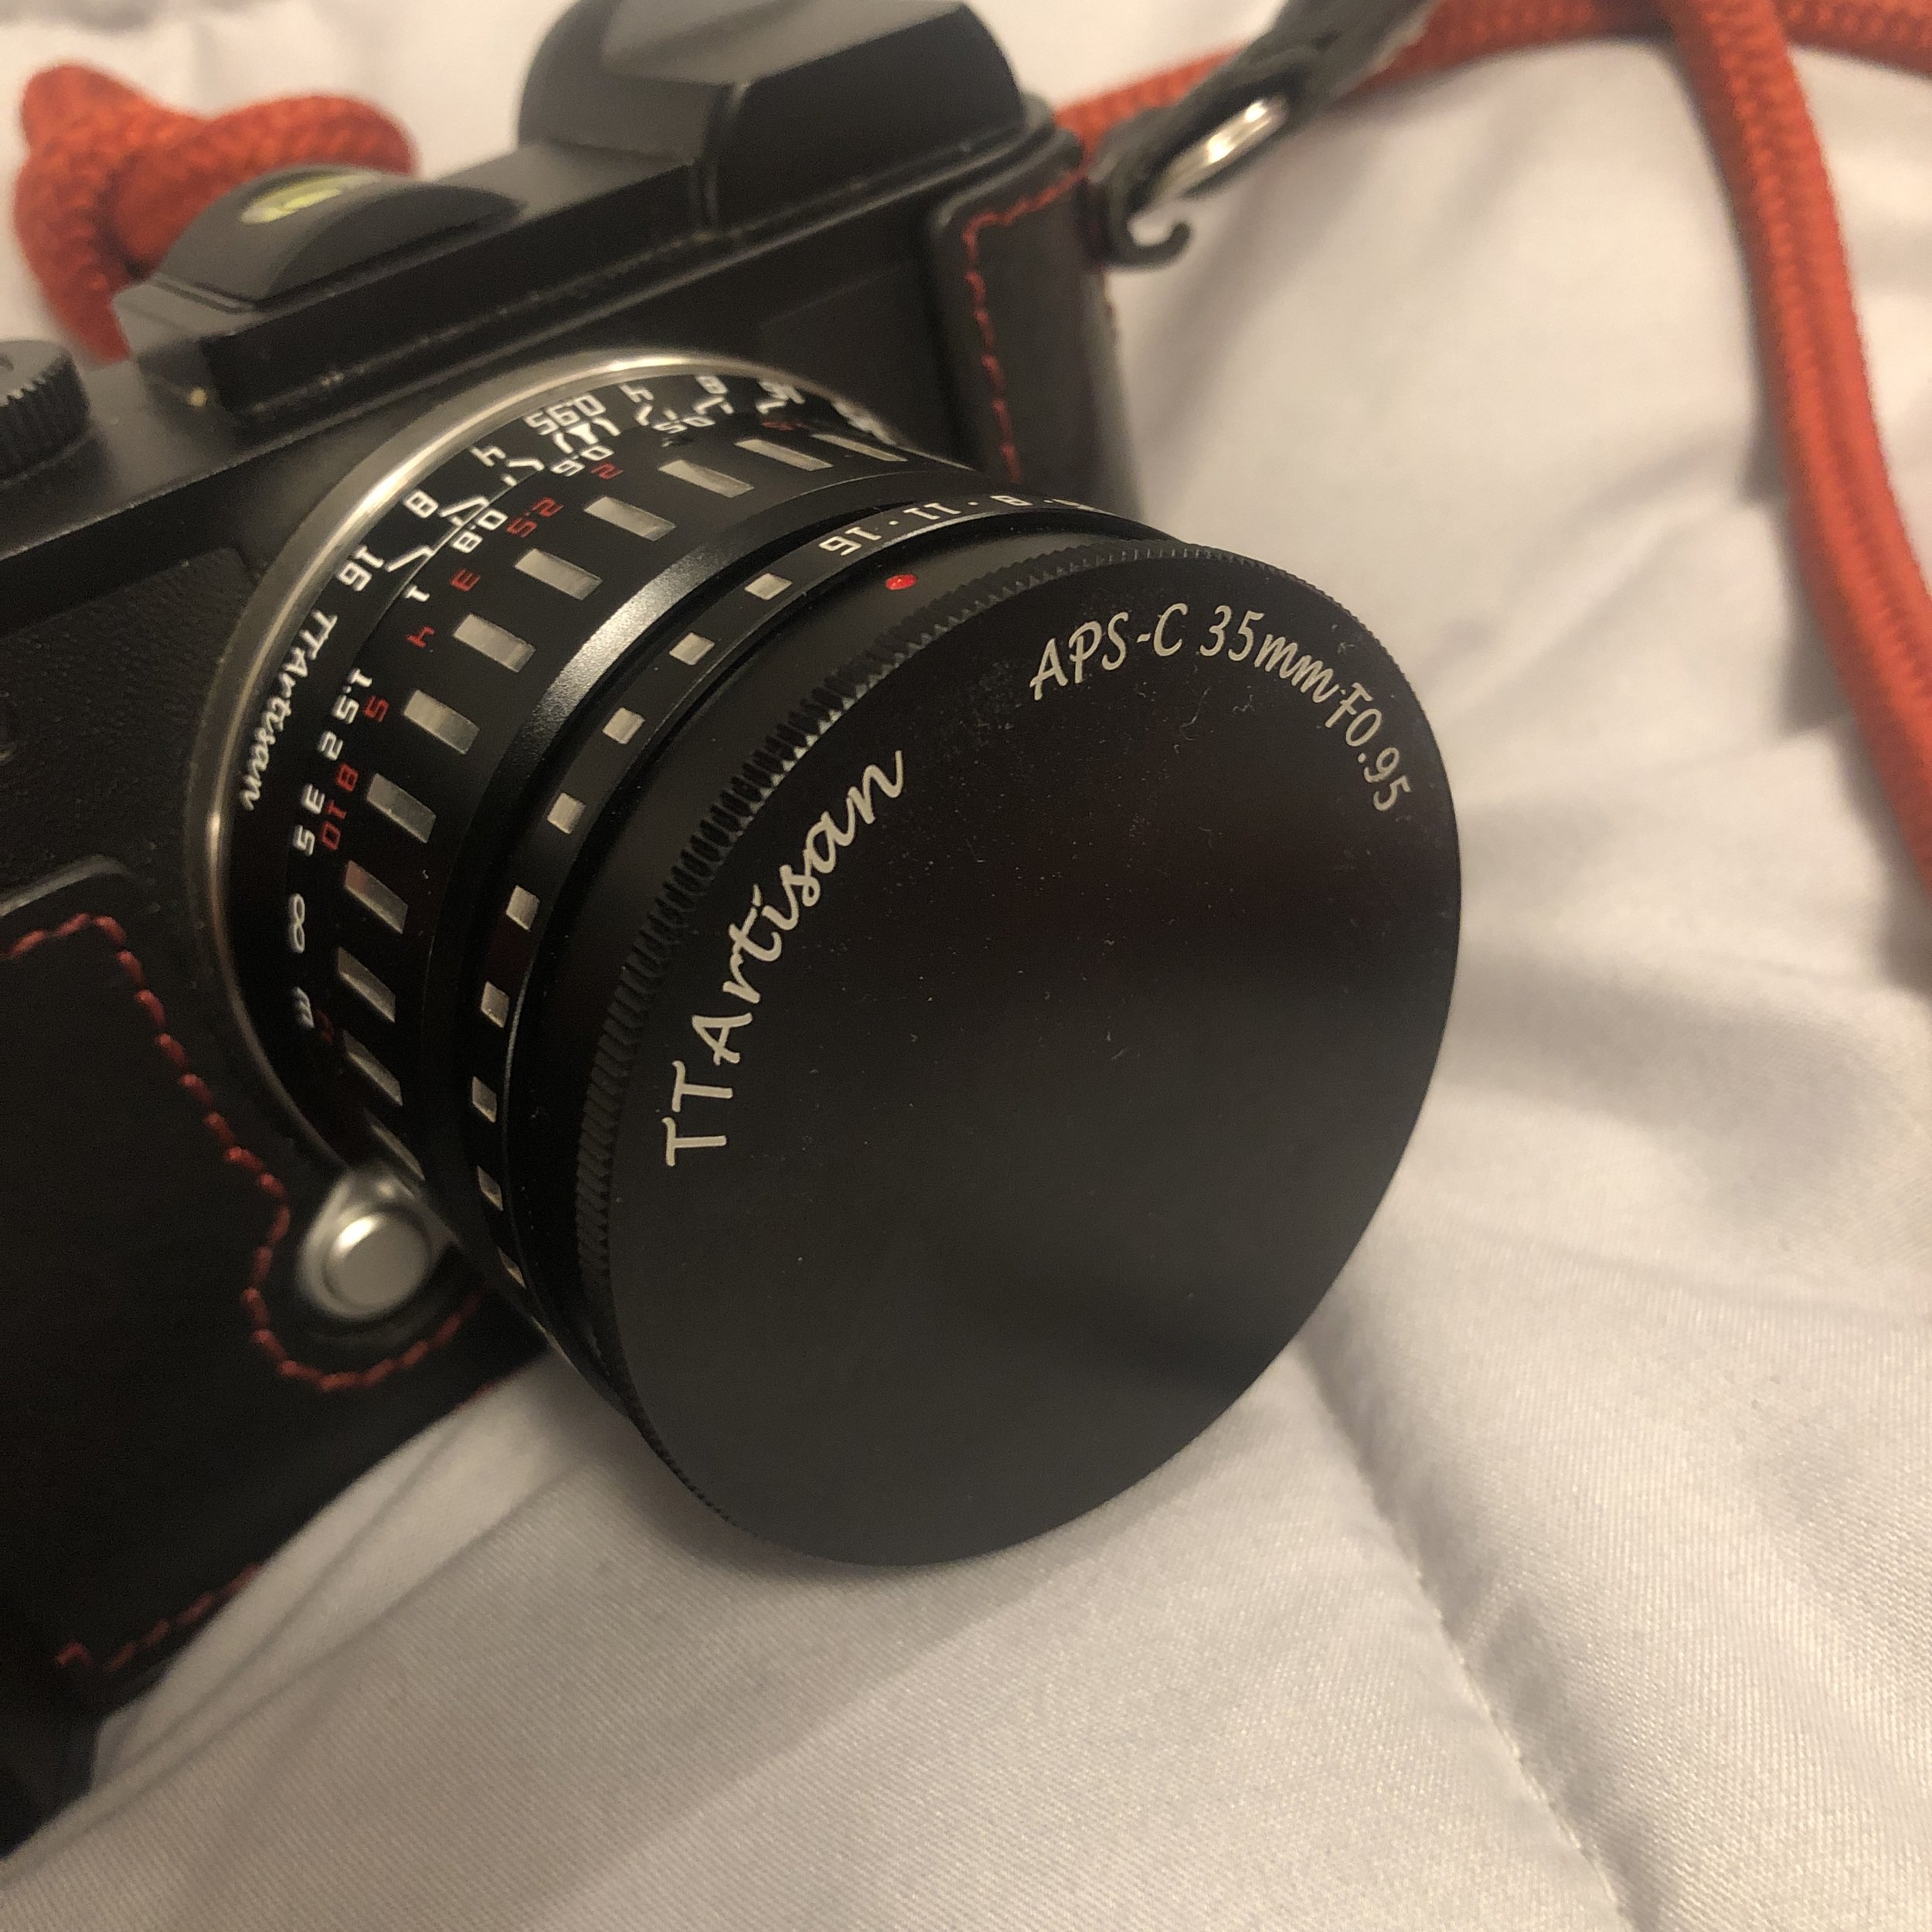
The lens cap is one of their signature solid metal threaded lens cap that screws on to the filter threads, this is good as it protects the lens glass AND the filter threads at the same time. Even so, I do not prefer them and the only real reason is the time to deploy the camera is much longer as it takes some time to remove the lens cap. On top of that, I can never seem to get them to go back on easily, it takes me a couple of tries every time to get the cap back on. Is there a trick to this I am not aware of? Leave me a comment if you have a trick on the lens cap, I need it!
Now, if I was worth two pennies, I would just remove the lens cap before I start shooting and then reinstall it when done…and this is exactly what I do most of the time. We have gotten spoiled to the quick deploy “pinch” style caps, so can I really call this a detractor? The level of protection these caps brings is unmatched by anything made of plastic so there is that to consider…

Shot at f0.95 in the daytime. This car was moving… Shutter speed is 1/400 sec.
The next thing that I noticed is how nice the images are coming out of this lens. The guys over at TTArtisan have really done their homework here as most super fast glass is in one of two categories…crazy expensive or not great image quality wide open. These guys seem to have broken through that glass ceiling (see what I did there? LOL) and have brought us a super fast lens, with really nice image quality, for really, really reasonable money. I dare say that these little lenses they sell are under priced and once they figure it out, the price will go up, so you better get your copy now.

So is there anything I DONT like about this lens?
The grip area on the aperture ring and the focus ring are not knurled (which is what I would have preferred) but instead is a mill cut series of notches. Now, I come from a machine shop background and understand the reasoning for this past the aesthetic look of the lens. These are easier to make, faster to make, more consistent when run at speed, and are less abusive on the machine to make as well. Knurling is one of the highest strain operations on an engine lathe/turning center and if not flooded with copious amounts of coolant or oil, the little tools that make the diamonds will clog up and destroy the part quite easily. By milling the shallow notches it was a simple mill op repeated a number of times, as the part is indexed a few degrees between cuts. This makes manufacturing VERY fast and produces beautiful results…that just don’t feel as good to me. Because I am accustomed to the rough texture of the knurled rings and these are not like that. That is not to say that they don’t work, quite the opposite, they work really well actually, but may post a problem with gloves into the winter. But now I am splitting hairs, so let’s look at some photos!

f0.95 basically in the dark with the shutter speed at 1/400sec.
Some notes about shooting with this lens. It is easy to use for street photos and the such when stopped down. It is not as easy when wide open… The reason is because all large aperture lenses have super shallow depth of field when shot wide open, well f0.95 is so wide open that you have to take a few shots as the subject will move in and out of focus pretty easily. Don’t just shoot one and call it done, it is probably out of focus… lol. I laughed here, but it probably is out of focus… It is the nature of fast glass with manual focus. I am not bothered by this, but some people are, so if you need tack sharp on the first try, then maybe you should buy the native autofocus glass for your brand of camera.

With the previous said, it seems that the more you practice doing it, the easier it gets to get sharp photos. I guess practice does matter… lol. Another thing to remember is that since the lens has no electronics, there is no meta data nor is there anything to help meter, other than the newer mirrorless machines can meter off the sensor, and the only mode of operation on the camera is manual mode. I can get away with automatic ISO as the camera meters off of the sensor in my Leica CL so it doesn’t need the lens to know the metering, but you might need to keep this in mind on your camera. The lens also comes in a plethora of mounting solutions so it should be able to be installed on pretty much any APSC camera out there, just check their website HERE for more info about it.
So there you have it, another wonderful little lens from the fine folks over at TTArtisan and I am not surprised to be honest, they have come on the scene and are taking over the 3rd party lens market by storm. Hope you have a wonderful day and get your camera out and go take some photos with it!
Tips for Low Light Street Photography in Chattanooga TN
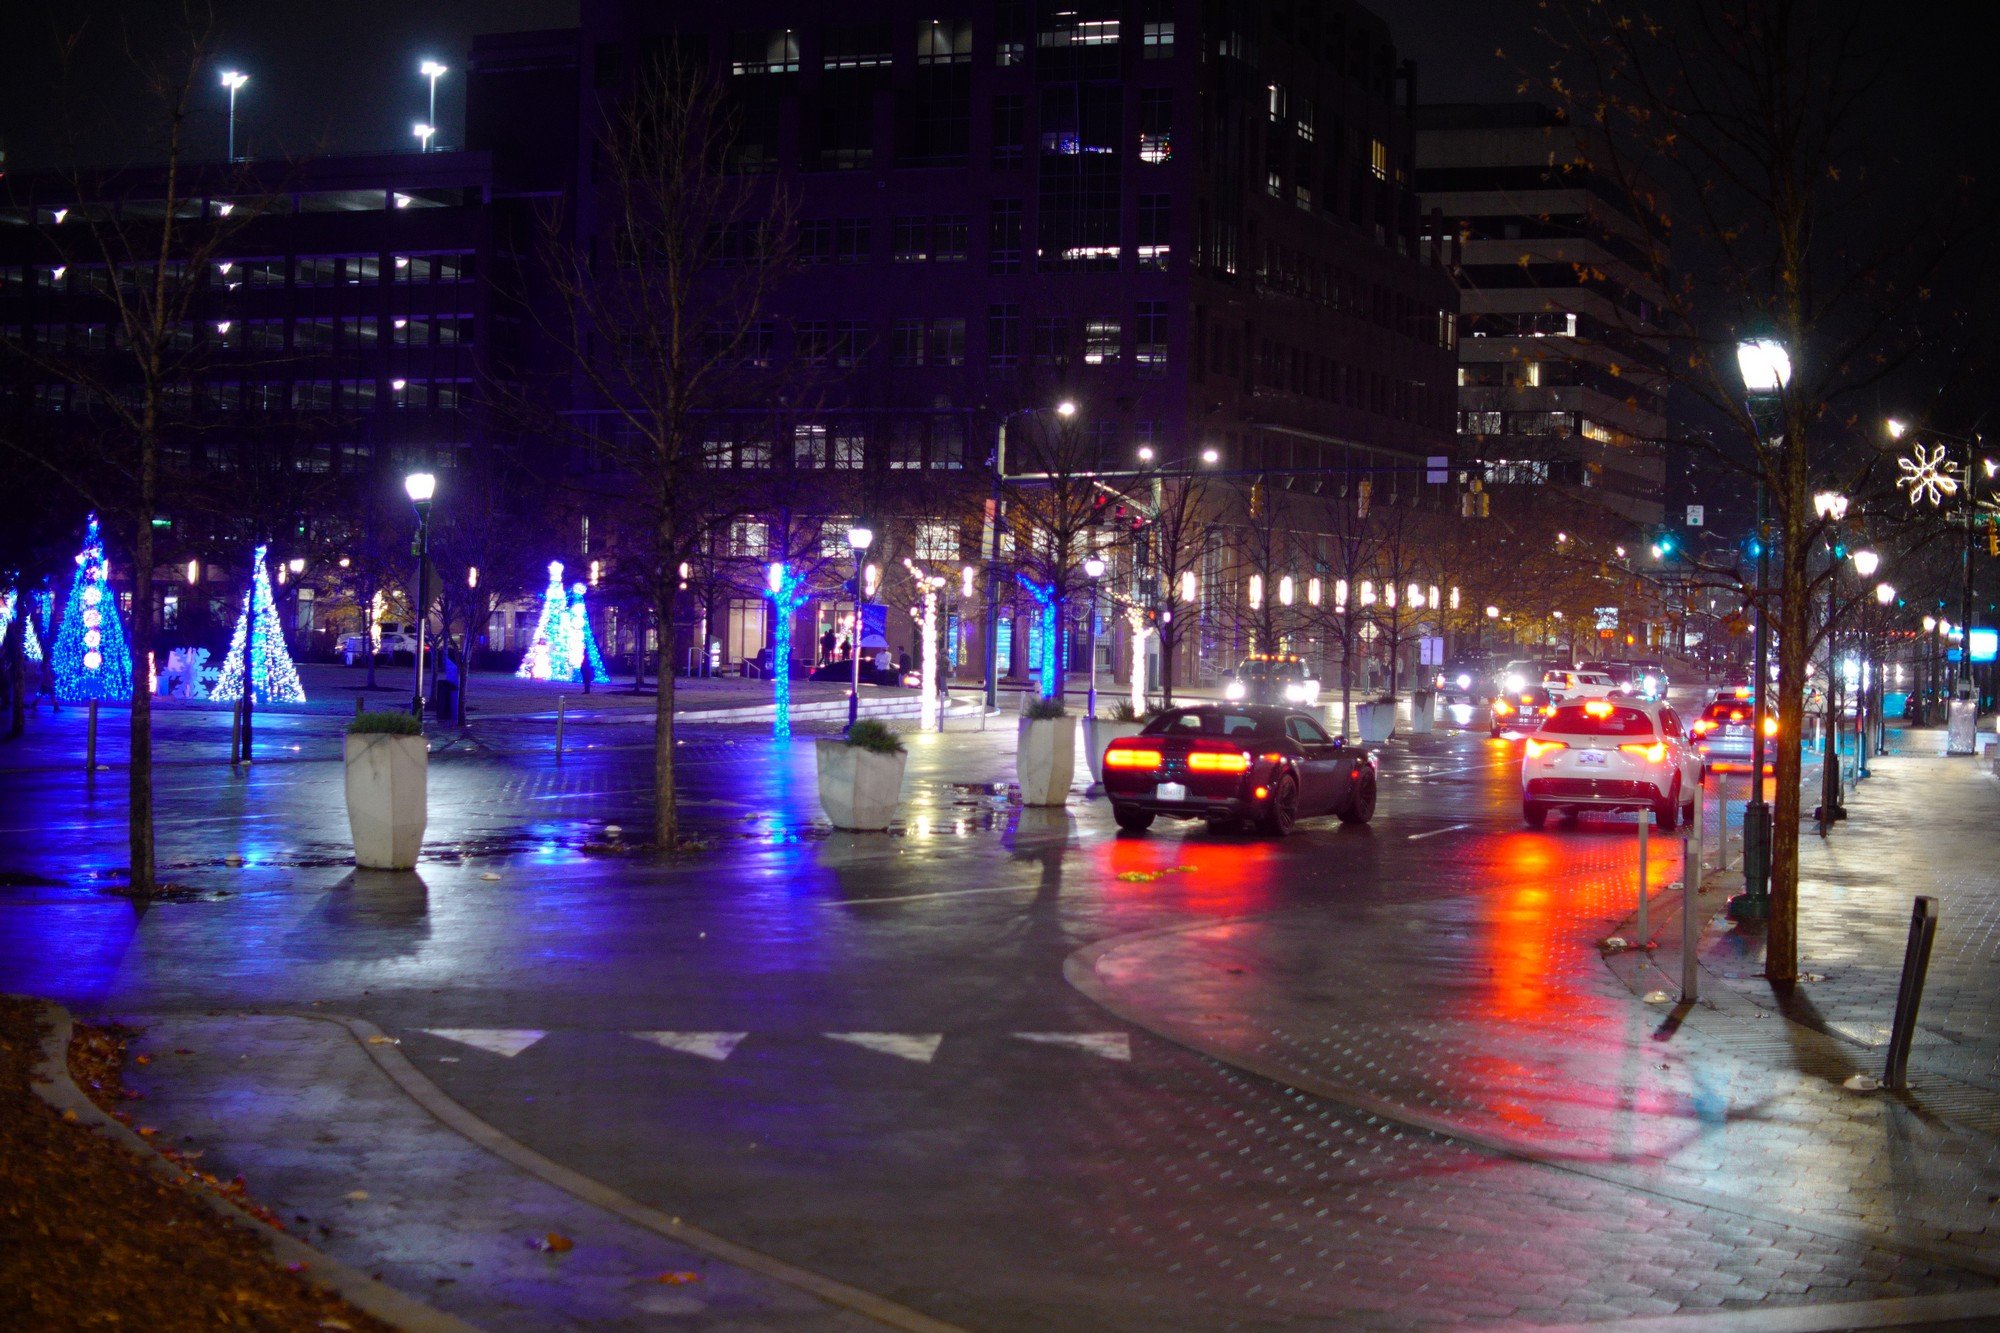
I love low light street photography in Chattanooga, TN because it allows me to capture the city's vibrant and diverse culture in a unique and exciting way. With its diverse architecture, colorful murals, and bustling nightlife, Chattanooga offers endless opportunities for me to experiment with different techniques and styles. In this blog post, I want to share some tips and techniques that I've found helpful for capturing stunning low light street photography in Chattanooga.
First and foremost, it's important to have the right equipment for the job. I always make sure to have a camera with a fast lens and good low light performance. I look for a lens with a wide aperture, ideally f/2.8 or lower, which allows more light to enter the camera and helps me capture sharp, detailed images even in low light conditions. I also prefer to use a full frame camera because it has a larger image sensor, which performs better in low light compared to a crop sensor camera.
In addition to a fast lens and a full frame camera, I find it helpful to invest in a tripod to steady my shots and prevent camera shake. A tripod also allows me to use longer exposures, which can be useful for capturing light trails or blurring movement. If I don't have a tripod with me, I try leaning against a wall or using a lamppost or other stable object to support my camera.

One of the most interesting areas for low light street photography in Chattanooga is the city's historic downtown district. I love exploring this area because it's a mix of Victorian-era mansions, Art Deco buildings, and modern skyscrapers, all lit up at night and surrounded by a lively atmosphere. I always try to find interesting angles and perspectives that highlight the city's unique architecture and history.
Another area I enjoy photographing is the city's growing arts and entertainment scene. From live music venues and breweries to art galleries and theaters, there's always something happening in Chattanooga's nightlife. I love to capture candid moments that showcase the energy and vibrancy of the city's entertainment scene.

In addition to the city's landmarks and nightlife, I always make sure to capture the people of Chattanooga in my low light street photography. I look for interesting characters and personalities, whether they're tourists, locals, or street performers. I use the available light to create mood and atmosphere, whether it's a neon sign or a street lamp. I find that photographing people in these settings adds a layer of depth and humanity to my images, and it helps to tell a story about the city and its inhabitants.

Finally, don't be afraid to experiment and play around with different settings and techniques. Low light street photography can be a creative and rewarding form of photography, and there is no one "right" way to do it. So go out there, get creative, and see what you can capture in the dimly lit streets of Chattanooga or where ever you live.
Until next time, get your camera out and go take a picture with it!
I like fiddling with my camera, do you?

My current street and general photo setup.
Well, there, I said it. I like to fiddle with my camera. Sure, I miss some photos because I am playing with the camera, but to me, that is part of the experience! Getting the photo is a result, but to me the time spent with the camera is as important as the final image.
You see, I am what is referred to as kinesthetic. This means I enjoy engaging with the gear as much as getting the photo, getting to interact with the camera on a deeper level brings me a form of satisfaction and joy that is hard to explain.
I know this goes against the convention of the camera “should disappear” or be so intuitive that you no longer know it is there. This is a bunch of hogwash in my mind. I spent a lot of money on my camera and by golly I want to get my money’s worth out of it!!!

This is my “discrete” film camera! LOL
I have read several of the books on the technical aspect of photography and they all keep saying to get the camera to where it runs almost in automatic so you can “get it out of the way” and focus on getting the shot instead. This is not what brings me joy in photography for some reason. I am just not wired that way. I like to play with the machine and then command it to produce what I ask of it and have it comply. That is a oversimplification, but the point is that I want to have the interaction with the camera as much as getting the photo. I figure it like this too, you get the shot, great, you do your edits say this takes another hour, maybe two if you really want to dial it in. (most people spend way less time than this on the editing process) and then you export it and share it on some website somewhere and wait for the little number to appear by the heart symbol. Then it is basically forgotten and the hunt is on for the next image. I like to get the image I had in my mind, but I ALSO like the interaction with the camera too, it is just fun to mess with it.
I mean, c’mon! Look at my “street photography” rig for crying out loud! All I hear is get a small, unassuming camera like a X100V or a Leica Q2 or some such, and here I was with a Nikon D810 with battery grip and 50mm f1.4 lens or my current rig…the Leica SL2 with 50mm Summicron L…even my film rig is larger than life!!!. HaHa

Back years ago, this was my main goto rig, Nikon D810 with a 50mm f1.4 Nikkor lens.
I do have a smaller camera that I like to use as well, but it is not to “get the camera out of the way” but rather to have a simple camera to grab and have as a backup to my SL2 rig. I have even kitted it out with a focal length lens to simulate the same field of view as my SL2/50mm rig. I do this so the experience using them is similar and I also know pretty much what I am going to be getting when I use them and that they will produce very similar results. It doesn’t allays work out that way, but that is the intention…lol.

This little Leica CL with the 35mm f1.4 M mount lens from Voigtlander makes a great “grab n go” rig.
Something else I have learned is that I like manual mode the best. I once was an aperture priority kind of guy, but I have evolved into a full blown manual shooter now. I just like the fact that the EVF in my camera will show me what the image will be ahead of pressing the shutter and I am able to just dial in the sky till it is blue or up the shadows till I am happy with them. The light meter in the display gives me a point of reference as to how much over or under exposed the image is and I will know then if the highlights are gone or the shadows will be recoverable. most of the time though, I don’t care about either.

My Leica SL2 top display.
As you will notice in this photo, I have set the camera as follows: Manual mode, there is some negative exposure compensation, f8, 1/125 sec shutter, auto ISO at the time (this varies from manual in a static scenario to auto if the light is going to change around constantly), and the rest is “state of the camera” info like both cards are present and set to overflow, there is room for 1937 frames left on the first card, the blue tooth is on so I can connect my phone to the camera, and the battery meter. This is how I run my camera most of the time when I am shooting street photos. Point is, don’t follow conventional wisdom if it doesn’t suit your ideology or normal operational parameters, simplified…you do you. Stop letting other people tell you how to engage in your own hobby. Be like William Eggleston and go against the grain. You are in charge of your life, live it on your terms.
Now, get your camera out and go play with it…I know, I know, I just broke my own advice by telling you what to do, but maybe some of you need a nudge…lol.
Chattanooga Street Photography #6

Well, it has been a while since I have done one of these and for a couple of reasons. I wont run down that rabbit hole right now as the subject is street photography.
Well, maybe a little peek into the rabbit hole is needed. I have been active in my street photography but with an emphasis on video content so the street photos for a long time were mediocre…at best. BUT NOW, video production is not my main priority anymore so the attention on my photos can come to the forefront.
With this also comes my styles and preferences as well and I think they show in the photos I have been capturing.

What I have learned is that I dont want photos of people just walking down the street anymore, I want them doing something more. Anything more than just walking is better than …just people walking down the street…

Well, it seems that getting those photos in Chattanooga, during the windows of time that I have, is pretty tough. This hasn’t stopped me from trying though…it has made the process take longer than I thought it would. I see all the “street” photos of people just walking across intersections and down streets, on side walks, crossing the street and so on.

At least this fellow is multi-tasking…and had no clue I was sitting 5 feet away…
I get it, this is all you have sometimes to get, but what story is it telling the viewer? Now, comes the controversial part, are you shooting for others to view your work or are you shooting photos for your own personal pleasure only? If you do both, you end up letting one or the other down. This is my observation at least, and I base my position simply on social media photo sharing sites. People like a certain photo and literally all the Instagram photogs start shooting those kinds of photos so they will get the engagement on their image as well. This is shooting for the viewer and not yourself. If you choose to shoot what you like, it may never get any traction on social media since it is not the current hotness that everyone seems to like. This is shooting for your self, I mean, if you shoot for yourself, do you even share your photos? If you do, why? You see, shooting for yourself is not to please others, so why share them at all? See my point? This is what Vivian Maier did and is a perfect example of shooting for your own pleasure, as far as I know, she never told anyone about her hobby and it wasn’t even uncovered until after her death and someone bought her photos at a yard sale.

I have a sort of combination of both ideas in what I do. I will share some photos, usually not my personal best either, just something to let people know what I am doing more than anything, but most of my images are kept safe at home on my hard drive and are building into projects over time. I have been building up the courage to see if a gallery will want to host them at some point, but to be honest, this is currently a pipe dream in my eyes as most of my images are simply just snapshots and not gallery material.

Recently I have been looking for specific types of images. There are several types, but in these I am looking for things like large prime color photos (like the ice cream vendor above) , negative space images that drive the eye, some urban decay photos, and even some historical images as I have been shooting in the same area long enough to see buildings come and go and how they are used differently over time. It is interesting to see these changes to be honest about it. Like the building pictured below. I grabbed the first photo of it 5 years ago and even then it was basically the front 40 feet of the old building as the rear portion had already been demolished and removed. Last week they finished the job and now the building looks like the bottom photo…

Old hotel across from Choo Choo circa 2017

This is when I knew I had gotten something historical. They were not going to even attempt to save the building at this point.

This what it looks like as of 5 SEPT 2022… Gone…
I have been doing this as a hobby, as a form of therapy, and I just plain enjoy the interaction with the world around me. Because of these things, I have captured a place in time and saved it from fading into obscurity now. This brings a level of satisfaction that I can not describe. This is why I like finding things other than people walking down the street to photograph when I am out…
What is your favorite thing to photograph when you go out on a walk? Let me know in the comments! Also, like this post if you actually liked it, I am thinking this will help get the word out with google, but I am not sure about that…
Anyway, get your camera out and go take a picture with it.
Low light photos and photo projects with my Leica SL2

I have really become interested in photo projects and have been looking at how to share these projects properly. This is something I have been working on for several months and I have collected quite a few images at this point and am starting to think I have enough for either a showing at a gallery or a book… and that scares me a little.
You see, I am one of those people that takes the safe routes in life… Most people that know me will say I am adventurous but in reality, I will stick to what I know and normally will not venture into things I dont know very fast. I will research a new concept to me for a long time before taking it on myself and step away safely if it is too uncomfortable…
This is just some of the images I have collected for this project so far…
So when I say that I am almost ready to make a book or try to get a gallery to show my work, that is big news coming from me.

I have several projects running in parallel right now, but the main one is a project on negative space that I am almost done collecting images for, then it will be the sorting and seeing if they work better as a book or a gallery. I don’t know a lot about how galleries operate, but I do know that I would like to see my work in one at some point.

Another project I am working on is one on urban decay in the Chattanooga area that I have been working on some. It is not as near close to finished but I have been working on it…
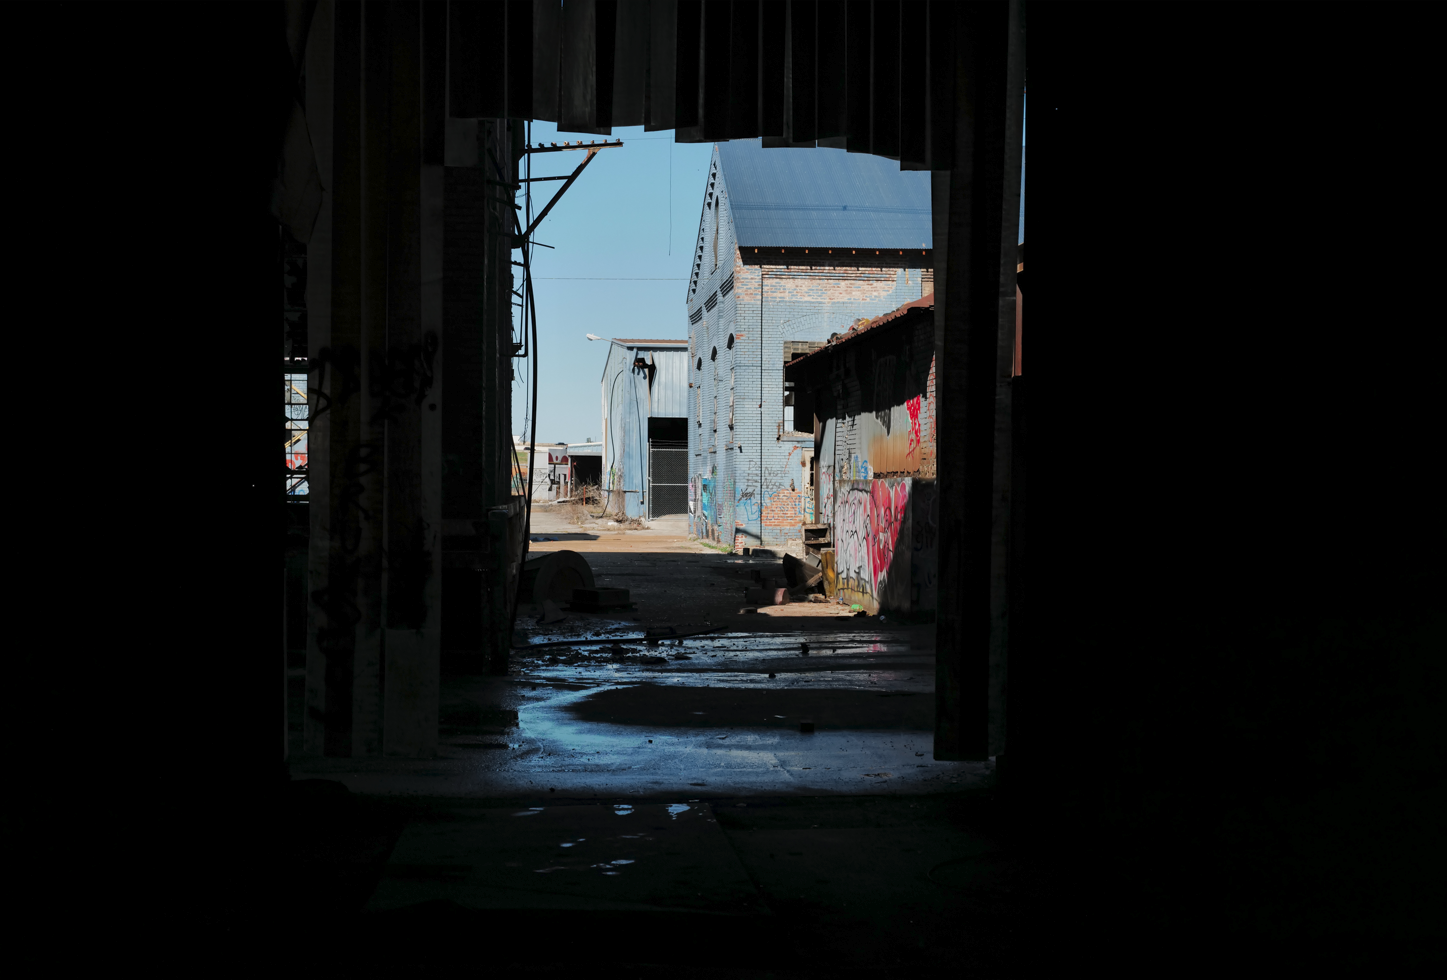
I love negative space photos for some reason, so I am always looking for them.
I have found that if you have a goal with your photography then you will get up and go shoot photos on the days you don’t feel like it. I have tried it both ways and the days that don’t have a goal typically end with nothing constructive coming from them. So it is really important to me to have a goal with the day or I don’t seem to get much done. Maybe it will work different for you, but that is how it works for me.
Do you have any cool projects you have been working on? Are you finished and already have them in a book or gallery? Do you have any tips on how to work with galleries?
Thanks and get your camera out and take a picture with it.
Why I have been slacking on my blog till now...
Why have I been slacking on my blog until now?
In a word…Youtube… Let me explain.
You see I have a channel on YouTube and over the past few years I have been trying to get it off the ground and one thing I have found is that you cant do YouTube and practically anything else at all…

The algorithm is such that you have to basically spend all your free time “feeding the monster” to get it to show your videos, this creates a cycle of content creation for views that leaves little time for anything else, and not being creative to bring joy to my life or anyone else for that matter took a while to realize... SO back in June I decided to take a break from making YouTube videos and to focus on just enjoying shooting photos and it has been wonderful! I have taken so many photos of things I love and have honestly learned what it is that I really like to shoot when I pick up my camera.

I don’t really enjoy photographing people up close all that much and with the new environment post 2020, people are real apprehensive about getting real close on the street anyway. I have found I really like the 50mm focal length, I have other lenses, but this lens has been on my camera for months now with almost no change. I also learned that I like to photograph Sacred Harp singings with a 105mm focal length, I just love the effect this lens gives me...

Isaac Green leading his song at a local singing.
Wanna know what a singing is? go here: FaSoLa Website or click on the photo above.
So going forward, my main outlet for my creative and hobby stuff will be this blog and my YouTube channel will probably get a monthly update video talking about what has been going on. I thought that “video” was the way forward for ALL creatives, but it doesn’t seem like that is the path for me, so I am going to shift my focus to my blog and get this photography blog moving like I should have from the beginning. I kinda enjoy doing this more anyway, so lets have some fun! Now get your camera out and go take a picture with it!
Chattanooga Life #5
Tonight I was waiting on a phone call from the wife about bringing some food to her and thought I would grab a few photos while I was there. I used my Leica CL and the 35mm Elmarit lens and tried to capture what it felt like to be out tonight while it started to rain. This is an example of seeing the setup and taking the time to get the photos while the conditions were right, the time passed pretty quickly and once it was dark, I had to completely change the way I was looking at the scene and come up with new compositions that didnt involve the sky. These photos are not technically in Chattanooga, but Trenton Ga is in the greater Chattanooga area so I consider it basically a suburb of Chattanooga. I had to work the scene pretty hard as the light diminished pretty rapidly due to it being blue hour when I started. Raining is part of street photography and these moody clouds really helped set the mood. What is your favorite time and conditions to capture street photos?


Chattanooga Life #4
Well, some days, the people are outside and some days they are not. This day the people were outside… it is nice to see the people getting back to life as usual and that waiting on the world to “turn back on” is just wasteful. I really enjoyed being out among the people of Chattanooga with my camera and getting street photography style photos. It can be tough in Chattanooga with street photography since the city is more spread out, but some days it just works. I finally got a little longer lens (85mm effective field of view) so I should be able to get a little more going forward.


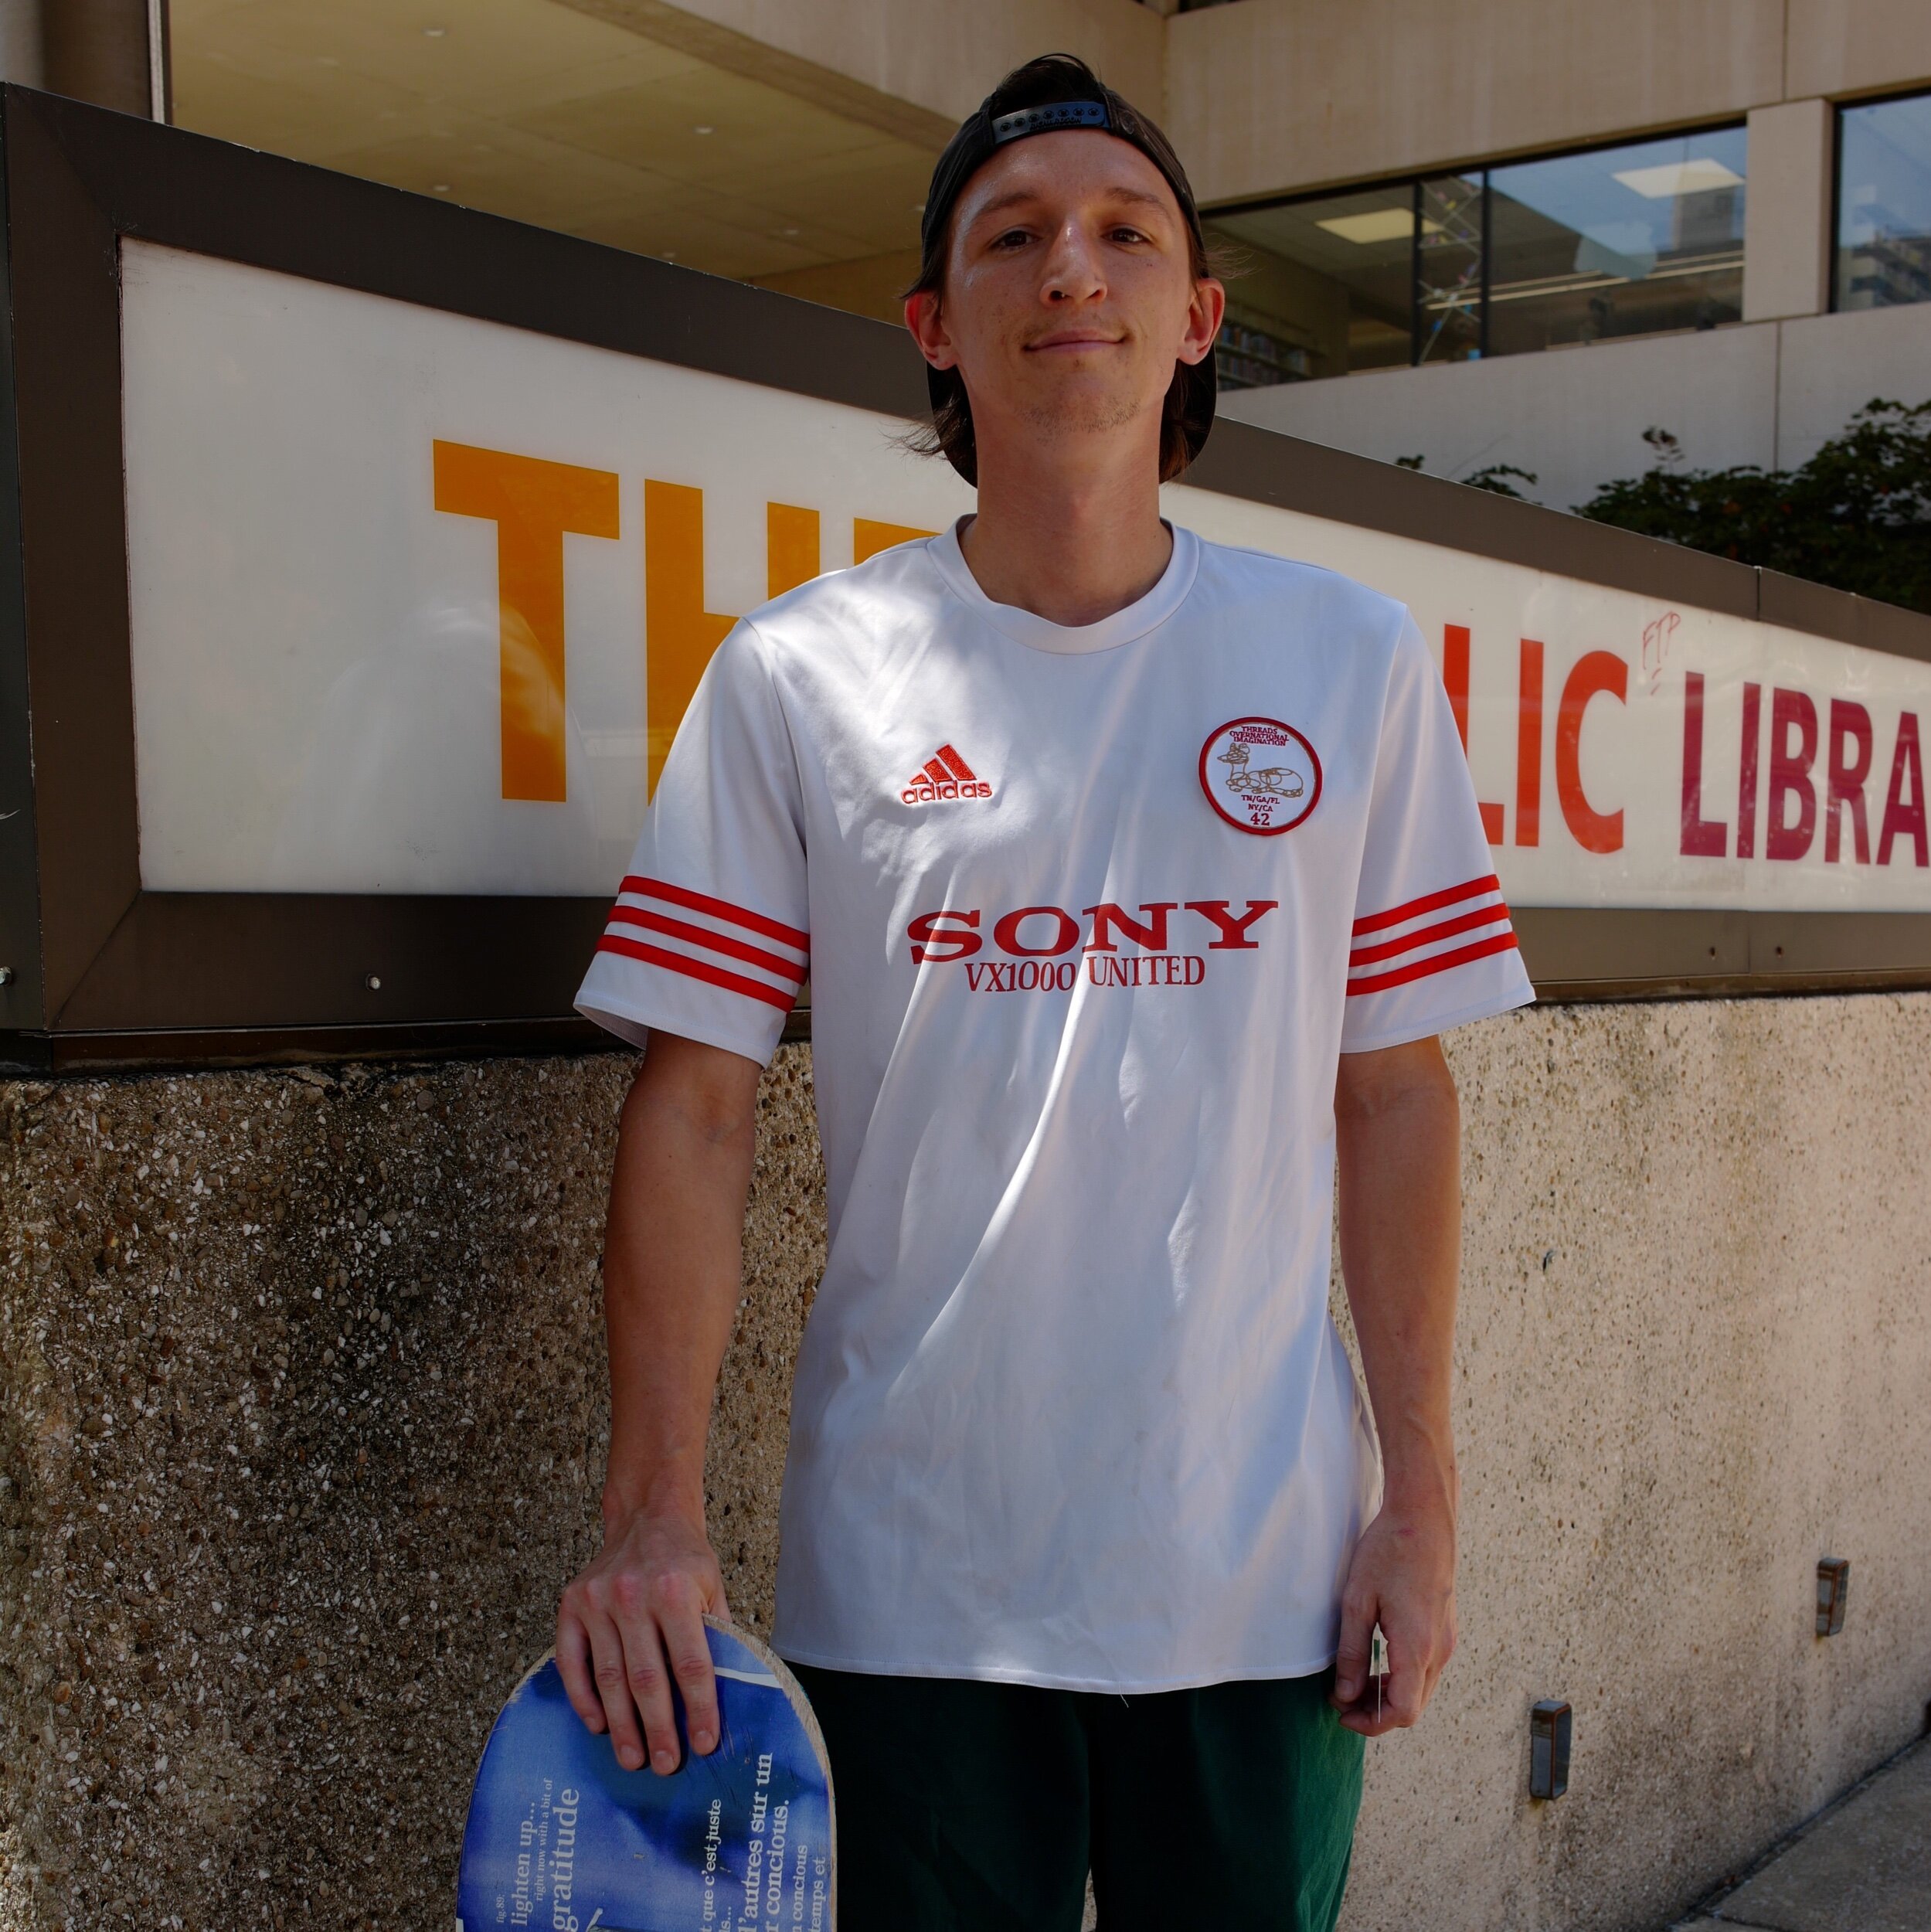

The people here are good people for the most part with a good message… get your camera out and take a picture with it. #streetphotography #photography #chattanooga #camera
Chattanooga Life #3
With the coming of fall in the air, people are starting to get outside a little more, even though the pandemic is far from over… I honestly think people are simply getting tired of being scared of it and are just going back to daily life with the added inconvenience of wearing face coverings. Horse and buggy rides are back in operation and people are enjoying the time spent with them. I’m personally glad to see people getting on with life…#streetphotography #photography


Chattanooga Life #2
“Windowshopping with dad” This image was taken on Market Street 31 JUL 2020
I wonder what she is telling him… Chattanooga street photography is a lot of fun.
Chattanooga Life #1
Ok, so this is going to become something that I work on regularly for the next couple of years. The plan is to post a square photo of something to do with life in Chattanooga as viewed through my lens a few times a week. The first one is of a fellow on a bicycle on Cherokee Street, this city is very “outdoorsy” if you have never been here.

If all goes as I hope, these street photography photos will form a life of their own and might just become a book at some point… I hope you enjoy them as I share them. ~David Saylors