
Nikon Zf Review: Why I Switched from Leica CL for Travel Photography
When I got into the Leica cameras I use, I had built a kit around street photography, urban photography, urbex photography, and travel photography. The next thing I started doing was adapting vintage lenses to them. Then I started using TTArtisan glass on the Leica CL and loved it! My Leica SL2 now carries the 50mm APO Summicron L pretty much all the time as well. I love the SL2, but for a backpacking trip, it is probably not the best choice.
After years of using the Leica CL for travel photography, I finally switched to the Nikon Zf—and I should have done it sooner. The breaking point? Getting caught in English rain on the Pilgrims Way with my non-weather-sealed Leica CL. In this Nikon Zf review, I'll explain why I chose this retro-styled mirrorless camera over the Leica CL for hiking trips and travel photography, covering weather sealing, IBIS, battery life, and real-world performance.
Why I Needed a Weather Sealed Travel Camera
When I got into the Leica cameras I use, I had built a kit around street photography, urban photography, urbex photography, and travel photography. The next thing I started doing was adapting vintage lenses to them. Then I started using TTArtisan glass on the Leica CL and loved it! My Leica SL2 now carries the 50mm APO Summicron L pretty much all the time as well. I love the SL2, but for a backpacking trip, it is probably not the best choice.
That experience changed everything for me. I realized I was babying my camera instead of using it. Every time clouds rolled in, I'd pack it away. Every time I saw a stunning scene but it was drizzling, I'd pass on the shot. That's not why I bought a camera—I bought it to use it, to capture moments, to not miss opportunities because I'm worried about weather. That's when I knew I needed weather sealing as a non-negotiable feature in my next travel camera.

The Leica CL served me well for years, but lack of weather sealing was a deal-breaker for hiking trips in unpredictable weather.
Why the Leica CL Didn't Work for Hiking Trips
The Leica CL, while perfect in size for travel, is not weather sealed… I came to this realization while hiking the Pilgrims Way in England a while back. (I did a small series of videos on this trip if you are interested) and this is when I came to realize that while the Leica CL is really small and lightweight, it is also not my favorite for hiking trip travel. Rain is a real threat in England and I was fortunate that my camera did not get caught in a cloud burst.
So knowing all of this, I started down the path of finding a new travel camera to shoot with…
My Requirements for the Perfect Travel Photography Camera
So knowing all of this, I started down the path of finding a new travel camera to shoot with. I looked at several factors to guide my choice:
The first was it had to be weather sealed or it was a no go for me.
The next is it had to have IBIS as I love shooting with vintage glass and this allows me to shoot at much slower shutter speeds while handheld.
I also wanted a full frame, 24MP sensor if possible as these (in 2024) have much better low light performance due to the larger photo sites on the sensor.
It also needed good battery life as these Leica mirrorless cameras just don't have great battery life for me.
These weren't just nice-to-have features. These were requirements based on real frustrations I'd experienced in the field. Weather sealing because of England. IBIS because I shoot vintage glass and hate carrying a tripod on hikes. Full-frame 24MP for those low-light church interiors and evening shots. Battery life because running out of power halfway through a hiking day is unacceptable.
Nikon Zf Features That Changed My Travel Photography
After searching for a year or so with no luck, Nikon drops a bomb on me with the launch of the Nikon Zf retro styled camera. You could have just as easily called it the "Nikon Special Custom Built Camera For Dave" and the name would have been accurate. HaHa!
I immediately fell in love with it…before I even laid eyes on one in person. When I see a new camera that I am interested in, I will search all about it that I can and see if it will fit my needs and do that at a price point that I am comfortable with.
The Nikon Zf mirrorless camera is a camera that checks all those boxes and more. You see I am in love with the retro-style camera design aesthetic like the Fujifilm XT-3 and now the Nikon Zf (as well as to a lesser degree the Nikon Zfc too). I owned the Fujifilm XT-3 for several years and it had two main shortcomings that made me want to move away from it over the years.
The crop sensor had pretty bad low light performance (it was 26 mega pixels so it was doing a lot of work to get it all in there) and the lack of IBIS in a mirrorless camera. Cameras at this time were coming standard with IBIS (In Body Image Stabilization) and I felt this was a huge misstep for Fujifilm on this camera. I, none the less, used it for several years anyway and to great effect too, but the lack of these two features was a nagging thought at the back of my mind the whole time.
Then Nikon came out with the Zfc and I initially was in love with it, but upon closer inspection, it was simply an XT-3 in a Nikon shell. Yeah, it had a few things that were newer and (debatably) better, but it still lacked certain things I wanted. I had resigned myself at this point to wait for a replacement to the Nikon Df or maybe something by Leica that was closer to what I was wanting. Well as fate would have it, Nikon saw the demand for the retro camera design and came out with the Zf—a full frame, IBIS, 24 megapixel, mirrorless camera loaded with all the magic that they could cram into the beautiful Nikon retro shell.
Nikon Zf vs Leica CL: Key Differences for Travel Photography
Let me break down the key differences between these two cameras for anyone facing the same decision I did:
Weather Sealing: The Nikon Zf is fully weather sealed; the Leica CL is not. This was the deal-breaker for me. If you're hiking in unpredictable weather or traveling to places with rain, dust, or humidity, the Nikon Zf gives you peace of mind. The Leica CL requires constant babying in anything but perfect conditions.
IBIS: The Nikon Zf has 5-axis in-body image stabilization; the Leica CL does not. This makes a massive difference when shooting with vintage manual focus lenses or in low light. I can handhold shots at 1/15th second with the Nikon Zf that would be impossible with the Leica CL. For travel photography where you can't always use a tripod, IBIS is a game-changer.
Sensor Size: The Nikon Zf has a full-frame 24MP sensor; the Leica CL has an APS-C crop sensor. The full-frame sensor gives you better low-light performance (larger photosites), shallower depth of field control, and generally more flexibility. The crop sensor on the Leica CL is excellent, but the full-frame advantage is real when you're shooting in challenging light.
Battery Life: The Nikon Zf's battery lasts significantly longer than the Leica CL. With the Leica CL, I'd carry 3-4 batteries and still worry about running out. With the Nikon Zf, two batteries get me through a full day of shooting with power to spare.
Size and Weight: This is where the Leica CL wins. It's noticeably smaller and lighter, which matters on long hikes. The Nikon Zf is not a huge camera, but it's definitely more substantial. For me, the practical advantages of the Nikon Zf outweigh the size disadvantage, but this is a personal choice.
Price: The Leica CL (when it was still in production) was more expensive than the Nikon Zf. Now that it's discontinued, you'd be buying used. The Nikon Zf offers better value for the features you get.
The Nikon Zf's weather-sealed body and IBIS make it ideal for unpredictable travel conditions and hiking with vintage lenses.
Real World Nikon Zf Performance: Travel and Hiking
So to be honest, I was still skeptical that this would be the next camera for me. I have gotten really comfortable using my Leica cameras and the thought of learning a new camera was really not that appealing to me. But the more reviews I watched on YouTube and the more I just looked at the camera in general, the more I liked it.
Since getting the Nikon Zf, I've put it through its paces on several trips, and it's delivered every time. The weather sealing proved itself on a rainy morning shoot where I would have packed the Leica CL away. The IBIS let me shoot handheld in a dimly lit museum with a vintage 50mm f/1.4 lens at 1/15th second and still get sharp images. The battery lasted an entire day of hiking without needing the spare.
The retro physical dials are more than just aesthetic—they're genuinely useful in the field. Being able to glance down and see my shutter speed and ISO without turning on the screen saves battery and makes adjustments faster. On a hike, every second counts when you're trying to catch changing light or a fleeting moment.
The full-frame sensor's low-light performance is noticeably better than the Leica CL's crop sensor. I can comfortably shoot at ISO 3200 or even 6400 when needed, and the files are clean. With the Leica CL, I tried to stay under ISO 1600 whenever possible. That flexibility matters when you're traveling and can't always control the light.
So for now, this is my new travel/street machine. It has wonderful rendition and is a joy to shoot with. I look forward to taking it on outings now and I have the 50mm f1.8 S lens if I want auto focus and to be able to access all the special features that have to do with the auto focus system. So going forward, there will be more about this machine as well as the two Leica camras I use as well. You see, those two machines are also wonderful cameras and I still enjoy using them too, I use them for certain things as I have found. But I still love getting them out and using them.
Nikon Zf vs Leica CL: Which Should You Choose?
Choose the Nikon Zf if:
You need weather sealing for hiking, travel, or unpredictable conditions
You shoot with vintage manual focus lenses and want IBIS
You value battery life and don't want to carry multiple batteries
You want better low-light performance (full-frame advantage)
You're comfortable with a slightly larger/heavier camera for the features
Choose the Leica CL if:
Size and weight are your absolute top priorities
You primarily shoot in good weather or controlled conditions
You're already invested in the Leica L-mount ecosystem
You prefer the Leica color science and rendering
You can find one used at a good price (it's discontinued)
For me, the practical advantages of the Nikon Zf outweigh the size advantage of the Leica CL. But I still appreciate what the Leica CL offers for lightweight urban photography.
Recommended Gear for Travel Photography
Support this website by using these affiliate links to shop on Amazon:
Leica M11 Digital Rangefinder Camera because the Leica CL is out of production now.
Nikon AF-S FX NIKKOR 105mm f/1.4E ED Lens
Voigtlander Nokton 35mm f/1.4 II
Sandisk 128GB Extreme Pro memory cards
Nikon 50mm f1.8 S Lens for Z mount
Frequently Asked Questions About the Nikon Zf for Travel Photography
Is the Nikon Zf good for travel photography?
Yes, the Nikon Zf is excellent for travel photography. After switching from the Leica CL, I've found the Nikon Zf addresses all the key requirements for serious travel work: weather sealing protects it in rain and dust, IBIS (In-Body Image Stabilization) allows handheld shooting with vintage lenses and in low light, the full-frame 24MP sensor delivers outstanding image quality even at high ISOs, and the battery life is significantly better than my Leica mirrorless cameras. The retro design with physical dials makes it quick to adjust settings on the fly, which is crucial when you're hiking and need to shoot fast.
How does the Nikon Zf compare to the Leica CL for travel?
The Nikon Zf and Leica CL serve different needs. The Leica CL is smaller and lighter (perfect for ultralight backpacking), but lacks weather sealing and IBIS, which are deal-breakers for hiking trips where rain is a possibility. The Nikon Zf is heavier but offers weather sealing, IBIS, a full-frame sensor with better low-light performance, and much longer battery life. I switched from Leica CL to Nikon Zf specifically because I got caught in English rain on the Pilgrims Way and realized I needed weather protection. If you're doing casual city travel, the Leica CL's compact size is nice. For serious hiking and unpredictable weather, the Nikon Zf is the better choice.
Is the Nikon Zf weather sealed?
Yes, the Nikon Zf is weather sealed. This was one of my primary requirements when searching for a travel camera to replace the Leica CL. The weather sealing on the Nikon Zf protects against rain, dust, and moisture - essential for hiking trips and travel photography where you can't always control the conditions. After hiking the Pilgrims Way in England with my non-weather-sealed Leica CL and worrying about rain the entire time, having weather sealing gives me peace of mind to shoot in any conditions.
Does the Nikon Zf have IBIS?
Yes, the Nikon Zf has 5-axis In-Body Image Stabilization (IBIS). This was another critical requirement for me. IBIS allows me to shoot with vintage manual focus lenses at slower shutter speeds while still getting sharp handheld images. It's also invaluable for travel photography when you're shooting in low-light situations like churches, museums, or evening street scenes where you can't use a tripod. The Leica CL lacks IBIS, which was one of the main reasons I switched to the Nikon Zf.
What is the battery life like on the Nikon Zf?
The Nikon Zf has significantly better battery life than my Leica mirrorless cameras. While Leica mirrorless cameras have notoriously short battery life (I always carried 3-4 batteries), the Nikon Zf's EN-EL15c battery provides enough power for a full day of travel photography on a single charge. This is a huge advantage for hiking trips where you might not have access to power for recharging. I typically carry two batteries for the Nikon Zf and rarely need the second one, whereas with the Leica CL I'd go through multiple batteries in a day.
Can you use vintage lenses on the Nikon Zf?
Absolutely! The Nikon Zf is fantastic for vintage lenses, which is one reason I love it. With the FTZ II adapter, you can use Nikon F-mount lenses, and with various adapters you can mount Leica M, M42, Canon FD, and many other vintage lenses. The combination of focus peaking, IBIS, and the high-resolution EVF makes manual focusing a joy. I regularly shoot with vintage glass on my Nikon Zf when traveling, and the IBIS compensates for the lack of optical stabilization in older lenses. This was impossible with the Leica CL which lacks IBIS.
Is the Nikon Zf worth it over the Leica CL?
It depends on your priorities. The Nikon Zf is worth it if you need weather sealing, IBIS, better low-light performance (full-frame vs crop sensor), and longer battery life. These were all critical requirements for my hiking and travel photography. The Leica CL is worth considering if you prioritize extreme portability, the Leica color science, and compact size above all else. For me, the practical advantages of the Nikon Zf (weather sealing especially) outweighed the Leica CL's size advantage. After nearly losing my Leica CL to rain in England, the choice became clear.
What focal lengths work best for travel photography on the Nikon Zf?
For travel photography on the Nikon Zf, I primarily use the Nikon 50mm f/1.8 S lens because it's lightweight, sharp, and versatile. The full-frame sensor means you get the classic 50mm field of view, which works for everything from street scenes to portraits. I also adapt vintage lenses, particularly 35mm focal lengths, when I want a wider perspective for landscapes or architecture. The beauty of the Nikon Zf's IBIS is that I can handhold even at slower shutter speeds, so I'm not limited by the lack of stabilization in vintage glass. For hiking trips, I keep my kit minimal - usually just the 50mm f/1.8 S and maybe one adapted vintage lens.
So for now, this is my new travel and street machine. It has wonderful rendition and is a joy to shoot with. I look forward to taking it on outings now and I have the 50mm f1.8 S lens if I want auto focus and to be able to access all the special features that have to do with the auto focus system.
Going forward, there will be more about this machine as well as the two Leica cameras I use. You see, those two machines are also wonderful cameras and I still enjoy using them too—I use them for certain things as I have found. The Leica CL still comes with me on city trips where weight matters. The Leica SL2 is my studio and portrait camera. But for travel photography where weather and versatility matter? The Nikon Zf is now my go-to.
Are you considering the Nikon Zf for travel photography? Or have you made a similar switch from one camera system to another? I'd love to hear about your experiences in the comments below!
Want more honest camera reviews and travel photography tips? Subscribe to my photography blog for weekly posts about real-world gear testing, not just spec sheets and studio tests.
Support this website by using these affiliate links to shop on Amazon:
Leica M11 Digital Rangefinder Camera
Nikon AF-S FX NIKKOR 105mm f/1.4E ED Lens
Voigtlander Nokton 35mm f/1.4 II
Sandisk 128GB Extreme Pro memory cards

Solo Street Photography with Leica CL: Finding Joy Shooting Alone (Not Following the Rules)
I really like the 50mm perspective of these lenses on a crop sensor camera like my Leica CL. If I use a full frame machine then Iwill usually opt for something in the 50 to 58mm range as well.
After years of feeling pressure to do street photography "the right way," I finally figured something out: solo street photography photowalks with my Leica CL and a 50mm lens bring me more joy than following anyone else's rules. This is the story of how I stopped trying to shoot like Peter McKinnon, quit worrying about YouTube success, and rediscovered why I fell in love with photography in the first place—just grabbing my camera and hitting the streets alone.

My go-to setup: Leica CL with Voigtlander 35mm Nokton—this gives me a 50mm perspective on the crop sensor.
Why I Love Solo Street Photography (And You Might Too)
There's something incredibly freeing about solo photowalks that I didn't appreciate until I tried them consistently. When you're alone, there's no one to impress, no one waiting on you, and no one questioning why you're standing in the same spot for ten minutes watching the light change. You can be completely present with your camera and your surroundings without any social pressure.
I'll admit, at first the idea of walking around with a camera alone felt a bit weird. But then I realized—nobody cares. People are absorbed in their own lives, and you're just another person walking down the street. The freedom this brings is immense. If I see something interesting, I can stop and shoot it from ten different angles without feeling like I'm holding anyone up. If nothing inspires me, I can just enjoy the walk. There's zero pressure to "perform" or justify your creative choices to anyone.
My Leica CL Street Photography Setup: 50mm Perspective on Crop Sensor
It is just plain fun to grab a camera, a spare battery and hit the streets to see what I can find to photograph. My weapon of choice is the Leica CL mirrorless camera with one of several lenses. Usually though, my Leica CL is wearing a Voigtlander 35mm Nokton or a TTArtisan 35mm f/1.4, you never know which.
I really like the 50mm perspective of these lenses on a crop sensor camera like my Leica CL. The 1.5x crop factor means that 35mm lens gives me a 52.5mm field of view—basically a classic 50mm perspective. This is perfect for my shooting style because it gives me comfortable working distance from my subjects while still creating nice compression and subject isolation. If I use a full frame machine then I will usually opt for something in the 50 to 58mm range as well.
The Leica CL itself is the perfect camera for solo photowalks. It's small enough to not be intimidating, quiet enough to be discreet, and produces image quality that rivals cameras three times its size. The electronic viewfinder is bright and clear, the controls are simple and intuitive, and the whole package fits easily in my hand or jacket pocket. I can carry it all day without fatigue, and more importantly, I can carry it without thinking about it—which means I'm thinking about photography instead of gear.
I will take my 28mm lenses for the occasional stroll, but my staples are the 50mm lenses. Shoot, I even have the Leica APO Summicron SL 50mm for my Leica SL2 mirrorless camera as well because I like them so much. That is an insane package to be just strolling around town with slung around your neck…as well as heavy. Haha.
Breaking the Street Photography Rules: Why 50mm Works Better for Me Than 28mm
This literally took me years if not decades to truly figure it out. That is a hard pill to swallow at times too. Looking back, things could have gone a very different way had I followed my real passion instead of thinking I could be like Peter McKinnon… Live and learn I guess.
Before Pete came along and made me think I could be this ultra successful YouTube personality, I did things that other people said were what you should do. Like do street photography with wide glass and get close to people and stuff like that. That works for some people, but not me, I seem to have a real problem getting close to other people. Invading their personal space is such a red flag for me that I will just let the photo go before I attempt something like that.
Here's what nobody tells you about the "get close with a wide lens" approach: it's not just about technical skill, it's about personality. Some photographers are naturally extroverted, comfortable in stranger's personal space, and can pull off that close-up street style. I'm not one of those people. And you know what? That's completely okay. Using a 50mm or even longer lets me capture authentic moments from a respectful distance where neither I nor my subject feels uncomfortable. The photos are different than 28mm shots, but they're not worse—they're just mine.
This made for some truly terrible photos just to be honest about it. Mostly, it made me not want to go out and shoot though… so my very first Nikon DSLR would sit in the closet for months at a time with me not so much as looking at it. Who wants to go to a job and be stressed about that all day THEN make your hobby about "getting out of your comfort zone" and being stressed about that too?!? I almost gave up photography at one point because of this to be honest.
A typical scene from my solo photowalks—natural moments, comfortable distance
I have spent so long making YouTube content that I had actually forgotten how much fun it was to just go shoot. I will now get my camera and a battery or two and just hit the bricks. What I had to learn to do was to make a video about one every so often to share what I am doing with the viewers. I took a “sabbatical” the last two years in the first part of the year so I could do this. It helped dramatically too with my well being and my creativity.


Simple gear for photowalks: one camera, one lens, spare batteries. That's all I need.
From YouTube Pressure to Photography Joy: My Personal Journey
I finally found some joy when my daughter began competing in rock climbing. She joined a team and they would go all over for these events and I got my camera out and started photographing these gatherings and realized that there was more to this hobby than just what others said is good photography. I found a lot of joy in capturing interesting angles of the climbers and going to the trouble of sharing the photos with the team when done. It was really rewarding to be honest.
Then I broke my ankle and at about the same time, Sierra "aged out" of the team and stopped attending the events as life got in the way. Well, I needed a new avenue to focus on and found it in my YouTube channel. I learned over the years that a good YouTube content creator is not a good photographer—they are two very different things and I wandered down that rabbit hole for a while before realizing that it wasn't going to work for me.
The YouTube algorithm rewards consistency, spectacle, and engagement over artistry. It wants you to post weekly, chase trends, and create content that keeps people watching. That's fine if you want to be a content creator, but it's exhausting if you just want to be a photographer. I found myself thinking more about thumbnails and titles than I did about light and composition. I was shooting for the camera review, not for the creative satisfaction. That's when I knew something had to change.
The Joy of Street Photography Photowalks Without Pressure
This is where I am at now… just a guy with a camera out taking some pictures. No YouTube schedule to maintain, no algorithm to please, no gear to review, no style to emulate. Just me, my Leica CL, and whatever catches my eye. Some days that's dramatic light on a building. Other days it's a person waiting for the bus. Sometimes it's nothing at all, and that's fine too.
I have spent so long making YouTube content that I had actually forgotten how much fun it was to just go shoot. I will now get my camera and a battery or two and just hit the bricks. What I had to learn to do was to make a video about one every so often to share what I am doing with the viewers. I took a "sabbatical" the last two years in the first part of the year so I could do this. It helped dramatically too with my wellbeing and my creativity.
The biggest lesson? Photography should add to your life, not drain it. If your hobby is causing you stress instead of joy, you're doing it wrong—not because you're a bad photographer, but because you're following someone else's path instead of your own. Give yourself permission to shoot what you love, how you love, with whatever equipment makes you happy. That's where the good work lives.
Solo Street Photography Tips: Finding Your Own Style
Ultimately I found that I loved to go on photowalks and simply take pictures around me. Here's what I've learned about making solo photowalks work:
Keep your gear simple. I bring one camera, one lens, and two batteries. That's it. No bag, no accessories, nothing to fidget with or second-guess. This simplicity forces you to work within constraints, which actually makes you more creative, not less.
Shoot for yourself first. I used to think about how a photo would perform on Instagram or YouTube before I even took it. Now I shoot what interests me in the moment. Some of my favorite images would probably get three likes on social media, and I don't care. They're mine.
Walk the same routes sometimes. There's this idea that you need exotic locations for good street photography. I've learned more shooting the same three-mile radius around my house than I did traveling to "photogenic" cities. Familiarity breeds understanding. When you know a place well, you start to see the light differently, notice the rhythm of the day, and find moments you'd miss as a tourist rushing through.
Don't force it. Some walks I come home with fifty keepers. Other times I get nothing. Both are valuable. The walks where I don't press the shutter much are still feeding my creative eye, teaching me to see, and giving me time to think. Photography is as much about observation as it is about capture.
Frequently Asked Questions About Solo Street Photography
Is it okay to do street photography alone?
Absolutely! Solo street photography is not just okay—it's often the best way to shoot. When you're alone, you move at your own pace, follow your creative instincts without compromise, and blend into the environment more naturally. I've found that shooting solo actually reduces pressure because there's no one watching, judging, or waiting for you. You can spend five minutes on one corner if that's what feels right, or walk five miles following the light. Some of my best work happens when I'm alone with my camera and my thoughts.
What focal length is best for street photography?
There's no "best" focal length—only what works for your personality and shooting style. The conventional wisdom says 28mm or 35mm, but I prefer 50mm equivalent (which is a 35mm lens on my Leica CL crop sensor). The 50mm perspective gives me comfortable distance from my subjects, creates nice compression, and doesn't make me feel like I'm invading anyone's personal space. If you're uncomfortable getting close to strangers, telephoto focal lengths like 50mm, 85mm, or even 105mm can work beautifully. Don't let anyone tell you there's only one "right" way to do street photography.
How long should a street photography photowalk be?
Your photowalk should be exactly as long as it needs to be. Sometimes I'm out for 30 minutes and come home with great shots. Other times I'll wander for three hours and barely press the shutter. I've learned to follow my energy and creative flow rather than forcing a specific duration. Start with 30-60 minutes if you're new to photowalks, and let it evolve naturally. The goal is joy and creativity, not checking off a time requirement.
Can you do street photography with a Leica CL?
The Leica CL is fantastic for street photography! It's compact, discreet, produces excellent image quality, and the crop sensor actually gives you a nice 50mm perspective with a 35mm lens (or 75mm with a 50mm lens). The quiet shutter, simple controls, and build quality make it perfect for solo photowalks. I love that it doesn't scream "expensive camera" like a big DSLR or even a Leica M, so I can blend in while still getting Leica color and image quality. It's honestly my favorite camera for just grabbing and hitting the streets.
Do I need to follow street photography "rules"?
No! This is the most important thing I've learned: there are no rules, only guidelines that work for some people. You don't have to shoot wide angle, you don't have to get close to strangers, you don't have to shoot in black and white, and you certainly don't have to make yourself uncomfortable to get "good" street photography. Find what brings you joy and shoot that way. The best street photography comes from authentic vision, not from following someone else's rules. If 85mm or 105mm feels right, use it. If you prefer color, shoot color. Make your own rules.
What should I bring on a solo street photography walk?
Keep it simple—that's the beauty of solo photowalks. I typically bring just my Leica CL with one lens (usually my Voigtlander 35mm Nokton or TTArtisan 35mm f/1.4), and one or two spare batteries. That's it. No camera bag, no lens changes, no complicated gear setup. The simplicity is liberating. You can add a small water bottle and maybe your phone for emergencies, but resist the urge to pack heavy. The lighter you travel, the longer you'll walk and the more you'll enjoy it. Less gear equals more photography.
Support this website by using these affiliate links to shop on Amazon:
Leica M11 Digital Rangefinder Camera
Nikon AF-S FX NIKKOR 105mm f/1.4E ED Lens
Voigtlander Nokton 35mm f/1.4 II
Sandisk 128GB Extreme Pro memory cards
Nikon 50mm f1.8 S Lens for Z mount
Thanks for following along on my ramblings here. If you're feeling the same pressure I felt—to shoot a certain way, use specific focal lengths, or build a YouTube following—I hope this gives you permission to just grab your camera and go shoot for the joy of it.
Are you doing solo photowalks? I'd love to hear about your experiences in the comments below. What focal length do you prefer? Do you follow the "rules" or have you found your own path?
Want more honest photography content without the pressure? Subscribe to my photography blog for weekly posts about real creative journeys, not just gear reviews and pixel-peeping.

Micro Nikkor 55mm f/3.5 Review: The Best $50 Vintage Lens for Leica SL2
What if one of the sharpest lenses you could put on your Leica SL2 cost less than $50 and was made in 1976? That's exactly what I discovered when I adapted a vintage Micro Nikkor 55mm f/3.5 to my Leica SL2—and the results genuinely surprised me. This isn't just a macro lens review. It's the story of how a nearly 50-year-old Nikon F-mount lens became one of my favorite walkaround lenses on one of the best modern mirrorless cameras available.
What if one of the sharpest lenses you could put on your Leica SL2 cost less than $50 and was made in 1976? That's exactly what I discovered when I adapted a vintage Micro Nikkor 55mm f/3.5 to my Leica SL2—and the results genuinely surprised me. This isn't just a macro lens review. It's the story of how a nearly 50-year-old Nikon F-mount lens became one of my favorite walkaround lenses on one of the best modern mirrorless cameras available.

The Micro Nikkor 55mm f/3.5 AI variant on the Leica SL2 via F-to-L adapter — an unlikely but exceptional pairing.
Micro Nikkor 55mm f/3.5: What Makes This Vintage Lens Special
I have found over the years that there are a couple of Nikkor lenses in this family that work really well for the task of general purpose photography and this is one of them. This particular copy is an AI variant made somewhere in the late 1976 to early 1977 time frame, so this lens is almost 50 years old—and just look at the image quality it produces. Lens manufacturers were on their A game at this point and Nikon was a force to be reckoned with in this area. This lens isn't even their best macro lens either, which is something that to this day surprises me a little.
What makes the Micro Nikkor special compared to other vintage 50mm lenses is that it was designed for exacting scientific and reproduction photography. That design intent required flat-field sharpness, minimal distortion, and consistent performance from close focus all the way out to infinity. Most vintage 50mm lenses were optimized for portrait distances and can get a little soft or lose contrast at other distances. The Micro Nikkor doesn't play that game—it's sharp everywhere.
It has an external aperture ring that is detented in whole stops, except the very first one where it goes from f/3.5 to f/4 for some reason. Who knows why Nikon did this, but they did, so it is there if you want to use it.
Adapting Nikon F-Mount Lenses to the Leica SL2
Before we get into performance, a quick word on adapting this lens. The Leica SL2 uses the L-mount, and to run Nikon F-mount glass on it you need an F-to-L adapter. I use the Urth version and it works well for fully manual lenses like this one—there's nothing electronic to pass through, so any mechanically precise adapter will do the job. If you want to get fancy, Novoflex makes precision German-engineered adapters that are the gold standard, but they cost considerably more than the budget options and for a manual vintage lens, the results are essentially identical.
What makes the Leica SL2 particularly great for adapted vintage glass is the combination of focus peaking and magnified live view in the EVF. You can dial in focus with real confidence even at close distances, and the IBIS works completely independently of the lens—the camera has no idea what glass is mounted and compensates for shake regardless. This makes lenses that might have been borderline usable in low light suddenly practical for handheld shooting. More on that in a moment.

The external aperture ring with whole-stop detents — classic 1970s Nikon build quality.
Minimum focus distance is a surprising 9 1/2” from the image plane. So this is right at 4.25 inches in front of the lens when mounted on my Leica SL2 camera. This also gives you a reproduction ratio of 1:2 on the image sensor, that is to say that if you have an object that is 1 inch across in reality, it will be 1/2 inch across the sensor. To get to 1:1 reproduction ratio you need help… The PK-3 extension ring will get you half that distance and to the true 1:1 reproduction ratio at minimum focus distance. All of this is conveniently engraved on the lens barrel for you should you need to look it up in the field… Also notice in these two images that the lens “pumps” air which means it has external focus movement, the lens grows and shrinks when you adjust focus, it is common belief that this is where dust gets into the lens from, when you open the lens fully to minimum focus distance the lens intakes a full charge of air and doesn’t have dust seals to prevent dust from entering the lens mechanism, so you get a little internal dust…
The lens 'pumps' air as it extends to close focus — a common trait of this era of optics.
One last thing to note about this focus mechanism is that the reason I like using these lenses for general purpose photography like travel and such is that as you can see in the above photo, the focus throw from infinity to less than 1 meter is short, so focus is fast with this lens. It also has a range focus scale, but since it is 55mm, the scale is rather small and not easy to use, it will give you rough numbers to work with but that is all.
Enough with all this tech talk, let’s take it for a spin and see what the photos look like on my Leica SL2 mirrorless camera since it has IBIS on the sensor and I can hand hold photos at unheard of shutter speeds with it.
First thing I notice when using this lens is how good it feels in the hand. The location and feel of the controls are literally in the perfect location.
Another thing I noticed was that it is sharp, like incredibly sharp. To this point, it makes sense that it would be this good due to the design intent of the lens but it has a really nice general purpose focus throw too. This lends itself to being a wonderful walk about lens. The following photos were shot on my Leica SL2 using this lens as a walkable lens. I have used another Nikon macro lens before in this same capacity, the 60mm Micro Nikkor once lived on my D810 as a general purpose lens. It works flawlessly in this capacity.
Using the Micro Nikkor 55mm as a Walkaround Lens on Leica SL2
The following photos were shot on my Leica SL2 using this lens as a walkable lens. I have used another Nikon macro lens before in this same capacity—the 60mm Micro Nikkor once lived on my D810 as a general purpose lens and it works flawlessly in that role. The 55mm is similar in character.
For street photography and travel, the 55mm field of view on full frame is about as classic as it gets. You're not cramped like you can be with a 35mm in tight spaces, and you're not zooming in on subjects from far away like you would with 85mm or 105mm. It sits right in the middle of the world as you see it, which makes composition intuitive. The short focus throw means you can adjust focus quickly as subjects move, which is more important for this kind of use than it would be in a controlled macro environment.
Where it struggles a bit is in low light. The f/3.5 maximum aperture isn't going to win any awards for low-light capability compared to fast primes. But combined with the Leica SL2's excellent high-ISO performance and the IBIS, you can push it further than you'd expect—as you'll see in the next section.

Shot handheld at 1/30 second — the Leica SL2's IBIS makes this kind of exposure possible with a vintage manual focus lens.
In the above photo you can see what I love about a camera with stabilization in it. The camera sensor is rock steady so I can capture shutter speeds like in the photo above where I was running something like 1/30 second and some of my water blur shots were 1/4 second!!! Like the one below is a 1/4 second handheld exposure and if you will look, the rocks are crisp and the water has a really nice blur to it. This is at f32 as well so there will be some diffraction in the image from that but all in all, it looks really nice.

Shot handheld at 1/30 second — the Leica SL2's IBIS makes this kind of exposure possible with a vintage manual focus lens.
1/4 second handheld at f/32 — diffraction softens things slightly but the IBIS still produces usable results.
Below is a crop from this image. As you can see, the spider webs are even visible and this is handheld no less! As long as you have some decent light this combination is really nice. When you move to a mirrorless camera body that has IBIS on the sensor, it unlocks so many possibilities with lens / camera combinations. I dont know why hobbyists dont see this sooner but a lot dont.

100% crop showing spider web detail — handheld with IBIS. This lens resolves more than you'd expect for its age and price."
Leica SL2 IBIS + Vintage Glass: A Game-Changing Combination
In the above photo you can see what I love about a camera with stabilization in it. The camera sensor is rock steady so I can capture shutter speeds like in the photo above where I was running something like 1/30 second, and some of my water blur shots were at 1/4 second! The one below is a 1/4 second handheld exposure and if you look, the rocks are crisp and the water has a really nice blur to it. This is at f/32 as well, so there will be some diffraction in the image from that, but all in all it looks really nice.
I don't know why hobbyist photographers don't recognize this sooner, but when you move to a mirrorless camera body that has IBIS on the sensor, it unlocks so many possibilities with vintage lens combinations. You're essentially giving a 50-year-old lens a set of capabilities it was never designed to have. Nikon didn't design this lens to be hand-holdable at 1/4 second—but the Leica SL2 makes it so.
Think about what this means practically. That f/3.5 maximum aperture that looks modest on paper suddenly becomes much more workable. Instead of needing a tripod for anything in shade or indoors, you can hand-hold at much slower shutter speeds and let the IBIS do the work. In a museum, a church, a dimly lit market—anywhere a tripod isn't practical—this combination keeps you shooting. It's the kind of capability that used to require carrying a tripod and a fast prime. Now you can do it with a $50 vintage lens and good technique.
Image Quality: What to Expect from a 50-Year-Old Lens
Below is a crop from one of my sample images. As you can see, the spider webs are even visible and this was handheld. As long as you have some decent light, this combination is really nice.
Let me put some numbers to what you're seeing. The Leica SL2 has a 47 megapixel sensor—a genuinely demanding sensor that will expose any lens weakness. Lesser vintage glass can look acceptable at web resolution but fall apart when you pixel-peep on a sensor this resolute. The Micro Nikkor 55mm f/3.5 doesn't fall apart. Center sharpness is exceptional at every aperture, and corner performance is very good stopped down. The color rendering has that warm, slightly organic character that vintage Nikon glass is known for, which pairs nicely with Leica's color science.
The one area where you see the lens's age is bokeh at close focus distances. When shooting macro-close, out-of-focus areas can look a bit busy—it's not the smooth, creamy blur you'd get from a modern lens optimized for portrait work. But for general photography at normal distances, the rendering is pleasant and natural, never clinical or harsh.
Who Should Buy the Micro Nikkor 55mm f/3.5 for Leica SL2?"
This lens is a fantastic choice for:
The budget-conscious Leica shooter. Leica glass is expensive—there's no way around that. The Micro Nikkor 55mm f/3.5 gives you exceptional optical performance for a fraction of the cost of any L-mount prime. If you're building a kit and want quality glass that doesn't break the bank, vintage adapted lenses like this one are the answer.
Travel photographers who want a dual-purpose lens. One lens that handles landscapes, street photography, and close-up detail shots? That's what this is. Pack light and still have versatility.
Vintage lens enthusiasts. If you enjoy the tactile experience of manual focus and appreciate the history of classic glass, this lens is deeply satisfying to use. It's mechanically solid, beautifully made, and feels like a precision instrument.
Anyone curious about adapted lenses on the SL2. If you haven't explored the world of adapted vintage glass on your Leica SL2, this lens is an inexpensive, low-risk way to discover what IBIS + manual focus vintage glass can do. You might find, as I did, that you love it.
Frequently Asked Questions About the Micro Nikkor 55mm f/3.5
Is the Micro Nikkor 55mm f/3.5 good for general photography (not just macro)?
Yes — and this is the thing most people don't realize about this lens. While it was designed as a macro lens, the Micro Nikkor 55mm f/3.5 is an outstanding general-purpose walkaround lens. The focus throw from infinity to under one meter is short and smooth, making it fast to use in the field. The 55mm focal length gives you a classic "normal" field of view, and the sharpness holds up beautifully at all distances — not just close focus. I've used mine for street photography, travel, landscapes, and waterfall shots, and it handles all of them with ease. The f/3.5 maximum aperture is slower than dedicated portrait lenses, but for anything in decent light, this lens is genuinely excellent.
Can you adapt Nikon F-mount lenses to the Leica SL2?
Yes, and it works very well. The Leica SL2 uses the L-mount, and with an F-to-L mount adapter you can use almost any Nikon F-mount lens on the camera. Since the Micro Nikkor 55mm f/3.5 is a fully manual lens with an external aperture ring, you control the aperture on the lens itself and the camera handles exposure metering in aperture-priority mode. The Leica SL2's focus peaking and magnified live view make manual focusing accurate and enjoyable. There are no electronic connections needed for this vintage lens — it's a fully mechanical pairing that works remarkably well.
Does Leica SL2 IBIS work with adapted vintage lenses?
Yes, and it's one of the best reasons to use vintage glass on the Leica SL2. The 5-axis IBIS works independently of the lens — the camera compensates for camera shake regardless of whether the lens communicates electronically. With the Micro Nikkor 55mm f/3.5, I've successfully hand-held shots at 1/30 second and even 1/4 second, which would be nearly impossible without stabilization. This opens up a whole new world for vintage lens shooters — lenses that were borderline impractical in low light suddenly become viable handheld options. The combination of Leica SL2 IBIS and vintage Nikon glass is genuinely one of my favorite pairings in photography.
What adapter do I need to use Nikon F lenses on the Leica SL2?
You need a Nikon F to Leica L-mount adapter (sometimes listed as "F to L" or "Nikon F to L-mount"). Several brands make these including Urth, K&F Concept, and Novoflex (premium option). For fully manual vintage lenses like the Micro Nikkor 55mm f/3.5, an inexpensive adapter works perfectly well since there are no electronic connections to pass through — you just need a mechanically precise fit. Novoflex is the gold standard for precision, but budget options from Urth or K&F Concept work fine for manual glass.
How sharp is the Micro Nikkor 55mm f/3.5 on a modern mirrorless camera?
Extremely sharp — almost surprisingly so given the lens is nearly 50 years old. The Micro Nikkor 55mm f/3.5 was designed for close-focus scientific and reproduction photography, which required exceptional flat-field sharpness and minimal distortion. Those same qualities make it outstanding on a modern high-resolution sensor like the Leica SL2's 47MP chip. At middle apertures (f/5.6 to f/11) this lens is genuinely difficult to fault. Wide open at f/3.5 it's already very good, and the sharpness only improves as you stop down. The one caveat is that at f/32 you'll see diffraction softening, but that applies to any lens at very small apertures.
What is the PK-3 extension ring for the Micro Nikkor 55mm f/3.5?
The PK-3 extension ring is a Nikon accessory that mounts between the lens and camera body, moving the lens further from the sensor and allowing it to achieve true 1:1 macro magnification. Without the PK-3, the Micro Nikkor 55mm f/3.5 reaches a 1:2 reproduction ratio at minimum focus — meaning a 1-inch subject appears as half an inch on the sensor. With the PK-3 ring, you get 1:1 reproduction, where a 1-inch subject fills 1 inch of sensor. If you need true life-size macro shots, the PK-3 is the answer. Without it, the lens is still excellent for general macro work like flowers, insects, and small objects — just not true 1:1.
Recommended Gear for Adapting Vintage Lenses to Leica SL2
Support this website by shopping through these affiliate links:
Leica M11 Digital Rangefinder Camera
Nikon AF-S FX NIKKOR 105mm f/1.4E ED Lens
Voigtlander Nokton 35mm f/1.4 II
Sandisk 128GB Extreme Pro memory cards
Nikon 50mm f1.8 S Lens for Z mount
So in conclusion...
The Micro Nikkor 55mm f/3.5 is genuinely one of the best bang-for-buck vintage lenses you can adapt to the Leica SL2. For under $50 on the used market, you get a lens that handles macro work beautifully, doubles as a sharp general-purpose walkaround, and—paired with the SL2's IBIS—lets you hand-hold exposures that should be impossible.
Is it perfect? No. The f/3.5 maximum aperture limits your low-light shooting compared to faster primes, and you won't get smooth, creamy bokeh at close focus distances. But for sharpness, color rendering, close-focus capability, and sheer character? This nearly 50-year-old lens punches well above its weight class on a modern mirrorless body.
Get out there and grab one. You won't regret it.
Have you tried adapting vintage Nikon lenses to your mirrorless camera? Drop your experiences in the comments below—I'd love to hear what combinations you're running.
Want more vintage lens reviews and Leica SL2 content? Subscribe to my photography blog for honest, real-world gear testing without the fluff.

The Hanimex 28mm f2.8 lens is a really interesting little lens...
Sometimes I just throw the dice on a vintage lens and occasionally it comes out really good and sometimes it is a dud. The Hanimex 28mm f/2.8 I picked up for $20 at Ball Photo in Asheville? This time it's a winner.
Sometimes I just throw the dice on a vintage lens and occasionally it comes out really good and sometimes it is a dud. The Hanimex 28mm f/2.8 I picked up for $20 at Ball Photo in Asheville? This time it's a winner.
I paid something like $20 for this lens at Ball Photo. Twenty bucks. For that price, even if it turned out to be terrible, who cares? You're not risking much. But when it turns out to be actually good — sharp, solid build, nice colors, usable on a modern camera — that's when you feel like you found a hidden gem sitting in a used lens bin.
This is why I love digging through vintage gear at camera shops. Most people walk right past this stuff looking for autofocus lenses or the latest Sigma Art prime or whatever. Meanwhile there's a perfectly good 28mm sitting there for the price of lunch. Sure, it's got quirks (the sun flare is real), but it's also got character and it actually works. Can't beat that value.

The Hanimex 28mm f/2.8 on my Leica SL2 — not the prettiest combo, but it works.
Hunting for Glass at Ball Photo in Asheville
I went to Ashville NC on a small trip recently and on this trip I was doing photography. Well, when it is a photography trip I always make it a point to go to Ball Photo and just “go shopping” for something interesting. They have SO much vintage gear to choose from that it is almost overwhelming to be honest. It is not for the feint of heart to be honest about it. But today found me at Ball Photo and while there I started looking for some glass to pick out… Well I found some.
All-metal construction with nice silver accent rings. Built like lenses used to be built.
We all know how much I love to shoot with vintage glass and I am always on the hunt for a new lens to play with. I have Leica glass for the Leica SL2 and use it quite often but I still really enjoy adapting some older lens to the camera and then seeing what I can get with this lens and camera combination when I go out with it. It is almost a challenge to see if I can come away with something good using this old lens… What generally happens is that I slowly build a collection of lenses that I REALLY love to use and I am starting to collect a full set of these lenses. Some examples would be the 28mm f3.5 Asahi Optical M42 mount lens that I keep in the camera bag, this lens is literally one of my favorite lenses of all time for some reason. I just love the results I get with it on the Leica SL2 camera. Well today finds me using a lens that is 2/3 of s top faster and a little bigger too.
What Makes the Hanimex 28mm f/2.8 Special
The Hanimex 28mm f2.8 is a well made lens with the whole thing made of metal (probably brass from the way it feels but it could be anodized aluminum too I really am not sure) and has some really nice accents like the little silver bands around the focus ring which also has a faux leather appearance but I am almost certain is rubber. The range focus scale is graduated for every aperture marked (sans f4 for some reason) on the aperture ring, which is a nice touch for street photography. The detent clicks on the aperture ring are nice and pronounced as well as solid, no mushy aperture detents on this lens! All in all, it is a great little lens by design engineering standards. It is even a well designed attachment scheme as well with the M42 mount as it is easily adapted to about all mirrorless cameras on the market.

The M42 mount adapter — see those three tiny set screws? That's how you time the lens if you care about that kind of thing.
Adjusting M42 Adapters (If You Care About That Sort of Thing)
Many people also don’t realize that the M42 adapter can be adjusted to get the lens top dead center of the adapter too. There are three tiny set screws on the adapter that hold the threaded ring in place on the lens adapter to adjust this. To make this adjustment is simple, just screw the lens into the mount till it seats and snug it well so it wont work loose while in use. Next get the Allen key that came with the adapter and loosen the three set screws till the lens can spin in the mount and simply turn the lens till the center mark is top dead center of the adapter and then push in on the mount while tightening the set screws back down to make it hold the ring again and your done. It is that simple. Mine is slightly off center here and I have simple been too lazy to adjust it as it is close enough for me to be able to get out and shoot anyway. I don’t normally worry about it too much as once you set the adapter once, then all the lenses will time up and you don’t have to mess with it again. Installing lenses over the years on this adapter and tightening them has slipped the timing a little and this is why it is slightly off center. Once again, it is no big deal to me and i just go out and shoot…
Look, I know there are "better" lens mounts out there. But M42 is just so easy to adapt to basically anything. You can throw these lenses on Leica, Sony, Fuji, whatever — and they cost pennies compared to native glass. Plus there's something satisfying about the all-manual experience. No electronics, no autofocus hunting, just you and the glass trying to get the shot. It's photography the way it used to be, which sounds pretentious when I say it like that, but honestly it's just fun. There's a directness to it that I appreciate.
And here's the thing: M42 lenses were made by so many different manufacturers over the years that there are hundreds of options out there. Some are great, some are terrible, and part of the fun is just digging through used lens bins at places like Ball Photo to see what you find. It's like thrift shopping for camera gear.

First outing at Hamilton Place Mall in Chattanooga on Black Friday. The Hanimex handled it just fine.
Taking It to the Mall on Black Friday (Because Why Not)
So the first official outing with this lens was to go to the mall in Chattanooga TN with it and capture some Christmas spirit with it…on black Friday no less.
Well to be quite honest, it performed wonderfully. Now to be fair, the camera does have IBIS in it and this allows me to shoot at pretty slow shutter speeds without the need for a tripod. As long as you go into the camera settings and tell the camera it is a 28mm lens, the camera can compensate for movement really well allowing for incredibly slow shutter speeds like the last photo in this string from the mall where it was 1/10 of a second…hand held. Most of the other photos are shot at 1/250 second to freeze the people so that I can show the current clothing styles as well as the general appearance of the mall in 2023.
The Leica SL2's IBIS is genuinely a game-changer for vintage glass. Without it, that 1/10 second handheld shot at the mall would've been a blurry mess — the old "reciprocal rule" says you need at least 1/30 second for a 28mm lens, and that's being optimistic. But with IBIS doing its thing, I can get away with shutter speeds that should be impossible with a manual lens.
This is why I keep coming back to the SL2 for adapted lenses. It makes old glass way more usable than it has any right to be. You're essentially taking a lens from the 1960s or 70s and giving it capabilities it was never designed to have. Nikon didn't build this Hanimex thinking someone would hand-hold it at 1/10 second in a mall forty years later.

1/250 second to freeze the people and capture 2023 fashion in all its glory.
The Christmas decorations at the mall — shot handheld at 1/10 second thanks to the SL2's IBIS.
1/250 second to freeze the people and capture 2023 fashion in all its glory.
The Christmas decorations at the mall — shot handheld at 1/10 second thanks to the SL2's IBIS.

1/250 second to freeze the people and capture 2023 fashion in all its glory.
The Christmas decorations at the mall — shot handheld at 1/10 second thanks to the SL2's IBIS.

1/250 second to freeze the people and capture 2023 fashion in all its glory.
The Christmas decorations at the mall — shot handheld at 1/10 second thanks to the SL2's IBIS.
All in all, the Hanimex performed extremely well in this role. The images are sharp and the colors are easily adjusted in post processing to give any look you want. It also doesn’t hurt to have that Leica “look” from the camera processing the colors before saving the RAW file too, Leica does something special with their processing to give the colors a look that is unique to Leica cameras. It is hard to explain, but it is a thing.
The Sun Flare Problem — Yeah, It's Bad
In the next photos I didn’t show all the images as they just reflect what it is like to shoot indoors where there is controlled light and no sun to deal with. The following photos show what happens when you have the sun shining on the front element.

Same shot as the next one but the lens is shaded from the sun — clean and sharp.
Above is the same photo as the one right under this text except that I shaded the lens from the sun. This lens cant handle the sun shining on it from any angle without showing you that it was happening with some sort of sun flare in the image. In the below image there is geometric artifacts as well as a overall glare from the sun.

What happens when the sun hits the front element. Vintage lenses and coatings don't play nice with direct sunlight.
In the below photo you can also see the geometric glare in the center of frame, this could be used to your advantage in some applications like vintage style portraits where you position the subject to where the flare adds to the aesthetic of the image. Here the flare doesn’t do that though and is more of a nuisance that anything else. So this is something to keep in mind when using vintage glass, you will run into these kinds of problems from time to time like the older generation has to do…lol.

That geometric glare in the center? Classic vintage lens behavior. Could be useful for portraits if you position it right.
Can You Shoot Portraits with a 28mm? Actually, Yes
Lastly, can you make portraits with the 28mm lens? The answer is yes, you can as long as you are careful with the composition and keep the subject centered like I did here. The 28mm lens can distort toward the edges so it is imperative to keep the person in the center of the photo as much as humanly possible if you want the image to turn out like anything you want at all. Maria was gracious and allowed me to make her portrait at the mall using one of the advertising lights as a “studio light” to give us nice diffused side light and I think the image turned out really well for a 60 year old lens with improvised lighting.

Maria at the mall using an advertising light as improvised diffused side lighting. Not bad for a 60-year-old lens.
Now, shooting portraits with a 28mm isn't what most people would recommend. The conventional wisdom is 50mm or 85mm for portraits, and there's good reason for that — longer focal lengths are more flattering and don't distort faces. But if you keep your subject centered and don't get too close, a 28mm can work. The key is composition and knowing the lens's limitations.
Maria's portrait here is proof that it's doable. I kept her in the center of the frame where distortion is minimal, used the advertising light for nice diffused side lighting, and shot from a reasonable distance. If I'd moved her to the edge of the frame or gotten right up in her face, it would've looked weird. But treated carefully, a 28mm can give you a portrait with some environmental context in the background, which can be a nice look.
Just know what you're getting into. This isn't a portrait lens. But it can make portraits if you're intentional about it.
As well as this blog post, I also have a video sharing some of these points and showing more of the old Sitton’s mill location should you want to go check that out at the link below.
Thanks and if you are into vintage glass, this is a keeper in my book — and for pennies too. Twenty bucks for a solid 28mm that actually performs? I'll take that deal every time. Sure it doesn't like the sun and you probably won't shoot portraits with it every day, but as a walkaround lens for street photography or just messing around? It's great.
So with that, get your camera out and go take a picture with it. Maybe even throw the dice on some weird vintage lens you've never heard of. You might just find a winner.
Questions People Ask About the Hanimex 28mm f/2.8
Is the Hanimex 28mm f/2.8 any good?
Yeah, it's actually pretty good for the price. Sharp in the center, solid build quality, and it handles well on modern mirrorless cameras with IBIS. The biggest issue is sun flare — this lens does NOT like having the sun anywhere near the front element. You'll get geometric artifacts and overall loss of contrast if you're shooting with the sun in or near the frame. But for $20-30, it's absolutely worth picking up if you see one. I mean, at that price, even if it's just okay, who cares? But when it turns out to be actually good, you feel like you found a hidden gem.
What mount is the Hanimex 28mm f/2.8?
M42 screw mount, which is great because you can adapt it to basically any mirrorless camera. I use it on my Leica SL2 with an M42-to-L adapter, but it works just as well on Sony E-mount, Fuji X-mount, Canon RF, whatever you've got. M42 is one of those universal old-school mounts that just adapts to everything. Plus the adapters are cheap and plentiful, so you're not spending a fortune to use these lenses on modern cameras.
Can you use vintage lenses on the Leica SL2?
Absolutely. The Leica SL2's IBIS makes vintage glass way more usable than it used to be. You can hand-hold at slower shutter speeds that would normally require a tripod, and the camera's focus peaking makes manual focusing pretty straightforward once you get used to it. Plus the L-mount has a short flange distance so you can adapt almost anything — M42, Nikon F, Canon FD, Leica M, you name it. I actually prefer shooting with adapted vintage lenses on the SL2 sometimes because it's just more fun than using modern autofocus glass.
How do you deal with sun flare on vintage lenses?
Use a lens hood or just shade the lens with your hand when the sun is hitting the front element. Vintage lens coatings from the 60s and 70s aren't anywhere near as good as modern multi-coatings, so direct sunlight will give you all kinds of flare, ghost images, and loss of contrast. If you're shooting into the sun or with bright light hitting the lens at an angle, expect problems. It's just how old glass behaves. Sometimes you can use it creatively for that vintage look, but most of the time it's just annoying. I literally had to shade the lens with my hand at Sitton's Mill to get clean shots.
Is 28mm good for street photography?
It's a little wider than the classic 35mm or 50mm focal lengths most people use for street, but yeah, it works. You get more context in the frame, which is good for environmental portraits or showing a whole scene instead of isolating subjects. The trade-off is that 28mm has more distortion at the edges, so you need to be careful about composition. Keep important stuff — especially people's faces — toward the center of the frame. I shot a portrait of Maria at the mall with this lens and it turned out great, but I made sure to keep her centered. If I'd put her at the edge of the frame, her face would've looked stretched and weird.
Where can I buy a Hanimex 28mm f/2.8?
I got mine at Ball Photo in Asheville, North Carolina for about $20. They have an absolutely overwhelming amount of vintage gear if you're ever in the area. Otherwise, check eBay, KEH Camera, or local camera shops that carry used gear. These lenses aren't rare or collectible, so they're usually pretty cheap when you find them. Don't overpay — if someone's asking more than $30-40 for one, keep looking. There are plenty of them out there.
Support this website by using these affiliate links to shop on Amazon:
Leica SL2 Mirrorless Camera Body
K&F Concept Lens Mount Adapter M42-L Manual Focus
Actual Lens Adapter in this Blog Post
One of my favorite camera straps
Sandisk 128GB Extreme Pro memory cards
Nikon 50mm f1.8 S Lens for Z mount
Have you shot with the Hanimex 28mm or other obscure vintage glass? Drop a comment below — I'd love to hear what hidden gems you've found digging through used lens bins.

Chattanooga Photowalk: Leica SL2 + Yashica 28mm Street Photography
Chattanooga's Rossville Avenue is one of those streets most people drive past without a second thought. But stop and look closer—you'll find pre-WWII architecture, a century-old cafe that's about to close forever, and urban decay that looks like a movie set. That's exactly what I did with my Leica SL2 and a vintage Yashica 28mm f/2.8 lens: parked for one hour of street photography and came away with something worth sharing.
Chattanooga's Rossville Avenue is one of those streets most people drive past without a second thought. But stop and look closer—you'll find pre-WWII architecture, a century-old cafe that's about to close forever, and urban decay that looks like a movie set. That's exactly what I did with my Leica SL2 and a vintage Yashica 28mm f/2.8 lens: parked for one hour of street photography and came away with something worth sharing.
Hamilton Parts Distributors: Pre-War Architecture in Chattanooga
Today we find me in Chattanooga yet again and this time I am setup on a side street off of Main street called Rossville Avenue and this road has some really neat old buildings on it, some of which I have photographed in the past but I like to get photos of them as I go along to show how they change with time. I get parked and pay for one hour of parking so I have to make it count. Putting a little pressure on myself to come away with SOMETHING of value in this time allotment.,,

Rossville Avenue in Chattanooga—one of those streets you drive past but never really see. Time to change that.
My first stop is the Hamilton Parts Distributors building that has been NOT a parts distributor for quite some time as of this point…2023. The building is really starting to show its age too with numerous windows bricked up on the sides as well as the front giving it a sort of dystopian imbalanced look. This could be a set right out of a movie or something. I took several photos from different angles today and some look better than others. I really like the front door and the corner that I get today for some reason… Here they are, what do you think?
I love how the building still has remnants of the signage that was painted on it some time in the past. Also look at the foundation material—today it's all either poured concrete or cement blocks and has been for many decades. So I'm going to speculate this is pre-war construction, meaning before World War II, based on these limestone foundation stones.
These stones look like they were repurposed from another construction site that existed before this building did. I've seen evidence of these cut stones going back to the mid-19th century in Chattanooga, so I know these are probably something left over either from a fire or were just cast off when another building was demolished. The people who built this building saw a chance to save a few dollars on this part of the construction.
Also notice that they didn't think these stones were very appealing—they hid them behind a mortar stucco finish as you can see in the front door photo. Practical, but not pretty.
What I really love about locations like this is that they tell stories about how Chattanooga was built. This isn't some sterile modern construction—this is history you can see and photograph. The bricked-up windows, the deteriorating facade, the repurposed foundation stones—it all adds up to a building that looks like it could be a set piece in a dystopian film. And it's just sitting here on Rossville Avenue where most people never even glance at it.

The corner angle showing all those bricked-up windows. Dystopian and unbalanced—looks like a movie set.

The front entrance of the old Hamilton Parts Distributors building. Notice the limestone foundation stones—likely pre-WWII construction repurposed from an earlier building.
Zarzours Cafe: 100 Years of Chattanooga History (Closing Soon)
My next stop was right next door at Zarzours Cafe.

Zarzours Cafe—over 100 years in business and closing in less than a month. I'll be eating there before they close. How could I not?
This cafe has been in business for over 100 years. Yeah, you read that right—a century, as you can see on their sign. And it's closing in less than a month from when I took these photos.
I'd never eaten there before this photowalk, which honestly is a little embarrassing considering how long they've been around. But I made a promise to myself right then: I'm going to sit at their cafe and enjoy the fine cuisine they've been serving for a century before they close their doors for good. How could I let that slide? A business that survives 100 years in Chattanooga—through the Great Depression, World War II, economic changes, everything—deserves to be experienced and remembered.
This is what urban photography is really about for me. Sure, you can go shoot pretty buildings and interesting light, and that's fine. But when you're documenting places like Zarzours that are about to disappear, you're preserving Chattanooga history. These photos matter in a way that just "pretty pictures" don't. In ten years, twenty years, someone's going to search for Zarzours Cafe and these images will be part of the record of what it looked like before it closed.
Back to the walk at hand. I took a couple of photos of the restaurant and parking area and headed on down the street.

Another angle of Zarzours. A century of Chattanooga history about to become just a memory.
Koch Foods and Lookout Mountain: Iconic Chattanooga Skyline
The next stop was at the Koch Foods Processing plant. This is one of two processing plants inside the city that I am aware of. These have been here for decades too so they are pretty much fixtures of the city at this point. One is on Broad street and the other is here on Rossville Ave. It being such an iconic location coupled with the skyline containing Lookout Mtn as well makes for a cool photo to me.

Koch Foods processing plant with Lookout Mountain in the background—an iconic Chattanooga skyline view that's been here for decades.
Main Street Chattanooga: Urban Photography in Action
After the chicken plant, I made my way over to Main street and did a little photography on Main as well. Main usually has something really colorful as well as interesting too, this is why I usually always make my way over and look around for a little while at a minimum…

Same spot, faster shutter speed to freeze the construction scene. Main Street always has something interesting going on.
Leica SL2 + Yashica 28mm: Why This Combo Works for Street Photography
These two photos just go to show what all can be found on Main street even when it is not having some sort of special event. All it takes is a little creativity and time of your part to come away with some interesting photos. Now you might be thinking these are not interesting photos, and you will be right as the photo interest rate will vary from person to person, but I found that these to be quite interesting so I am sharing them with you…lol. The difference between the two photo primarily is the shutter speed as one is really slow to blur the truck and the other is faster so it will capture the whole construction scene with out any motion blur on my part.

Main Street with a slow shutter to blur the truck. The Leica SL2's IBIS makes this kind of handheld shot possible.
Leica SL2 + Yashica 28mm: Why This Combo Works for Street Photography
The Yashica 28mm f/2.8 is one of those vintage lenses that just works. It's not fancy, it's not expensive, and it doesn't have modern coatings or any electronic connections. But for street and urban photography like this Chattanooga photowalk, it's exactly what I need.
The 28mm focal length gives you enough width to capture environmental context—like the whole Hamilton Parts building facade or the Koch Foods plant with Lookout Mountain in the background—without getting into ultra-wide territory where everything starts looking distorted. It's the kind of focal length where you can work close to your subject or step back and get the whole scene, and either way, the composition feels natural.
Paired with the Leica SL2, this combination is almost perfect for what I'm doing. The SL2's IBIS (in-body image stabilization) means I can hand-hold at slower shutter speeds than I could with any other camera. That Main Street shot where I blurred the truck? That's 1/15 second or slower, handheld, with a manual focus lens. Without IBIS, that would be a blurry mess. With the SL2 compensating for camera shake, it's clean and usable.
The focus peaking on the SL2 makes manual focusing with the Yashica fast and accurate. I set focus peaking to show me exactly where sharp focus is, and between that and the bright EVF, I can nail focus even in challenging light. It's honestly more enjoyable to shoot with than autofocus sometimes—you're more engaged with the process, more intentional about what you're focusing on.
And here's the best part: the Yashica 28mm cost me a fraction of what a native L-mount lens would cost. I get great image quality, I enjoy the process, and I'm not worried about damaging an expensive modern lens while walking around industrial areas of Chattanooga photographing old buildings. It's the perfect urban photography setup.
IBIS and Adapted Lenses: Technical Advantages of the Leica SL2
One thing I want to emphasize about shooting adapted vintage lenses on the Leica SL2 is how much the IBIS changes what's possible. In-body image stabilization isn't just a convenience feature—it fundamentally changes how you can use manual focus lenses in real-world shooting.
With older cameras, the rule of thumb was that your minimum handheld shutter speed should be roughly 1/focal length. For a 28mm lens, that means 1/30 second or faster. Slower than that and you'd get camera shake blur unless you had very steady hands or were bracing against something.
The SL2's IBIS throws that old rule out the window. I regularly shoot at 1/15 second, 1/8 second, sometimes even slower if I'm careful. The sensor is compensating for my hand movement in real-time, which means I can use lower ISOs for better image quality, or shoot in lower light conditions without needing a tripod.
For street and urban photography where you're often in shaded areas or shooting late in the day, this is huge. The Yashica 28mm has a maximum aperture of f/2.8, which is good but not super fast. In dimmer light, without IBIS, I'd be pushing ISO up to 1600 or 3200 to maintain usable shutter speeds. With IBIS, I can stay at ISO 400 or 800 and let the shutter speed drop, knowing the stabilization will keep things sharp.
It's one of those features that doesn't seem like a big deal until you actually use it in the field, and then you wonder how you ever shot without it. Vintage glass on a modern mirrorless body with IBIS is genuinely the best of both worlds.
Some are asking…
Best Time to Shoot Rossville Avenue: Morning light is good for the Hamilton Parts building facade. Late afternoon gives you nice side light on Zarzours and the other buildings along the street. Main Street is active all day, but I prefer shooting there in the afternoon or early evening when the light gets more interesting.
Parking and Logistics: Like I mentioned, metered parking is available right on Rossville Avenue. One hour was enough time for me to hit Hamilton Parts, Zarzours, Koch Foods, and make my way to Main Street. If you want to spend more time, pay for two hours to give yourself breathing room.
Safety: This isn't the touristy part of Chattanooga (it is more for the local crowd in this area) so just be aware of your surroundings. It borders an industrial area, not dangerous, but use common sense. Don't leave gear visible in your car, keep your camera bag close, and stay alert. I've never had any issues, but it's always smart to be aware when you're photographing in less-traveled parts of town.
Support this website by using these affiliate links to shop on Amazon:
Leica M11 Digital Rangefinder Camera
Nikon AF-S FX NIKKOR 105mm f/1.4E ED Lens
Voigtlander Nokton 35mm f/1.4 II
Sandisk 128GB Extreme Pro memory cards
Nikon 50mm f1.8 S Lens for Z mount
Frequently Asked Questions About Chattanooga Photography
Where is the best street photography in Chattanooga?
Main Street and Rossville Avenue are excellent for urban and street photography. Main Street is more polished with events, murals, and restaurants—it's the tourist-friendly side of downtown. Rossville Avenue offers grittier architecture and history. The area around the old Hamilton Parts Distributors building has pre-WWII structures that make for compelling photography if you're into urban decay and architectural history.
For skyline shots, look for locations where you can frame Lookout Mountain in the background—it's iconic Chattanooga and makes for instantly recognizable compositions. The Koch Foods plant area on Rossville gives you that view. Also worth checking: the riverfront, the Walnut Street Bridge, and the side streets off Main where you'll find older buildings and interesting character that don't make it into the tourist brochures.
Is Zarzours Cafe still open in Chattanooga?
As of when I took these photos in late 2023, Zarzours Cafe was preparing to close after over 100 years in business. This century-old Chattanooga institution on Rossville Avenue was a landmark, and I made it a point to photograph it—and eat there—before it closed forever. If you're reading this after 2023, it's likely already closed, which makes these photos even more valuable as historical documentation of Chattanooga's changing landscape.
It's one of those things that makes urban photography meaningful to me. You're not just capturing pretty pictures—you're documenting history before it disappears. Businesses that survive 100 years deserve to be remembered, and photography is how we do that.
Can you use vintage lenses for street photography?
Absolutely. I shot this entire Chattanooga photowalk with a Yashica 28mm f/2.8—a vintage adapted lens on my Leica SL2. The 28mm focal length is great for street photography because it captures environmental context without being too wide or distorted. You get the subject plus the surrounding architecture and scene, which tells a more complete story.
The Leica SL2's IBIS and focus peaking make manual focusing with vintage glass practical and enjoyable even in fast-moving street situations. Plus, vintage lenses have character and cost a fraction of modern glass. For street photography where you're often shooting at f/5.6 to f/8 anyway, vintage lenses perform beautifully. The Yashica 28mm is sharp, handles well, and cost me way less than any modern L-mount 28mm would.
What camera settings work best for urban photography?
For urban photography like this Chattanooga photowalk, I typically shoot in aperture priority mode at f/5.6 to f/8. This gives you good depth of field to keep both foreground and background reasonably sharp while keeping shutter speeds manageable in changing light conditions.
The Leica SL2's IBIS lets me hand-hold at slower speeds than I could with other cameras—like that Main Street shot with the motion-blurred truck. I set a minimum ISO (usually 100-400 depending on available light) and let the camera adjust shutter speed based on the scene. For adapted manual lenses like the Yashica 28mm, I use focus peaking to nail focus quickly and confidently.
If you're shooting architecture specifically, sometimes I'll stop down to f/11 or f/16 for maximum sharpness corner-to-corner, but for general street photography, f/5.6 to f/8 is the sweet spot.
Where can I park for photography on Rossville Avenue in Chattanooga?
There's metered street parking along Rossville Avenue. I paid for one hour of parking which gave me enough time to walk and photograph the Hamilton Parts building, Zarzours Cafe, Koch Foods, and make my way over to Main Street. The parking is affordable and convenient, and the walk between all these locations is pretty short—maybe a quarter mile total if you're hitting everything.
Just be aware of your surroundings. This area is more industrial and local than touristy, so stay alert when you're setting up shots and wandering around. It's not dangerous, but it's also not the Walnut Street Bridge where there are tourists everywhere. Just use common sense like you would in any urban environment.
How do you photograph closing businesses before they're gone?
When I heard Zarzours Cafe was closing after 100 years, I made it a priority to photograph it while I still could. These historical documentation shots become more valuable over time as the city changes. My advice: shoot multiple angles, capture signage clearly, and include contextual details like the parking lot, neighboring buildings, and street views that show where it sits in the neighborhood.
Take both "beauty shots" and straightforward documentary photos. You're not just making art—you're preserving Chattanooga history. The signage, the facade, the surrounding context—all of it matters for the historical record.
And if you can, patronize the business before it closes. I planned to eat at Zarzours before they shut down for good. If something is worth photographing because it's historically significant, it's worth supporting while you still can.
That's one hour of parking on Rossville Avenue in Chattanooga—from pre-WWII architecture at Hamilton Parts Distributors to a century-old cafe about to close forever, to the iconic skyline view at Koch Foods with Lookout Mountain in the background. Not bad for a quick urban photowalk with a Leica SL2 and a vintage 28mm lens.
Chattanooga has so much history hiding in plain sight. You just have to park, get out, and look. Next time you're driving through, skip Main Street for a minute and explore Rossville Avenue. You'll find stories in every building.
Have you photographed Chattanooga or documented historic locations before they're gone? Drop a comment—I'd love to hear about your urban photography spots.
Want more Chattanooga photography and Leica SL2 content? Check out my other photowalks and vintage lens reviews on the blog.

What Should You Photograph? A Documentary Photographer's Philosophy
Ok, this is going to be a short and sweet kind of post. I normally make YouTube videos about things that involve lots of images playing past the viewer and just lay some music over it to more or less inspire the viewer to do what I say at the end…”Get your camera out and go take a picture with it”
Ok, this is going to be a short and sweet kind of post. I normally make YouTube videos about things that involve lots of images playing past the viewer and just lay some music over it to more or less inspire the viewer to do what I say at the end…”Get your camera out and go take a picture with it”
What Do You Really Like to Photograph?

A couple painting down by the Tennessee River in Chattanooga, using iPhone light as the sun sets. The light was just too good to pass up. This is what I mean by chasing interesting light!
Never before has this been a truer statement than today. But we need to ask ourselves an important question…what do we like to shoot?
With world events being what they are and how the physical world around us is changing constantly as time goes on, I am not ready to just let it pass me by without documenting some of it as I go. Armed with this knowledge, I look for two things to photograph, things that will be gone soon or interesting light. That is what drew me to the photo above of the couple painting down by the river by iPhone light. The light was just too good to pass up.
Documentary Photography vs. Art Photography
Look, I need to be honest about something. I'm not trying to make art. I'm trying to make a record. There's a difference, and it took me a long time to be okay with that difference!
Art photography is about creating something beautiful or meaningful that didn't exist before. It's intentional, it's creative, it's about YOUR vision and YOUR interpretation. And that's great! The world needs art photographers.
Documentary photography is different. It's about capturing what IS, not what could be. It's about preservation, about creating a historical record, about showing things that will be gone tomorrow or next week or next year. When I photograph a building that's about to be demolished, I'm not trying to make it beautiful (though sometimes it is). I'm trying to make sure someone, somewhere, sometime in the future can see what it looked like before it disappeared.
Think about old photos from the 1800s or early 1900s. We don't look at those and judge them as "good photography" or "bad photography." We look at them as historical documents. They show us what streets looked like, what people wore, how buildings were constructed. That's what I'm doing, just with better cameras!
The Kinley hotel construction series below? That's not art. That's documentation. But in 50 years, someone researching Chattanooga's development will be glad those photos exist. The ADAMS sign preservation story? Someone doing historical research will use those images. That's the value of documentary photography, and it's a value I'm proud to contribute to my community.
You see, I am not what I would call an artist. I don’t think my photography is that noteworthy. Once I am gone, maybe someone will find these hard drives and then will think they are filled with the coolest photos and video the world has ever seen, just not today. That being said, I do think that I am a decent documentary photographer and that as time goes on I get better with it.
Things I normally photograph will be buildings that are gone now, that I could tell somehow that were probably headed for the wrecking ball or like the series below where I photo-documented the construction of the Kinley hotel and how there is a Coca-cola sign that is now hidden from view between the buildings because of the hotel. For me this is the sort of thing that is simply fascinating for some reason.
The Two Things I Photograph (And Why)
After years of shooting and trying different subjects and styles, I've boiled down what I actually photograph to TWO core things:
1. Things that will be gone soon This includes buildings scheduled for demolition, businesses that are closing, signs that are coming down, and landscapes that are about to change. The world changes fast, especially in cities. If I don't photograph it now, nobody will, and it'll just be gone forever!
The Kinley hotel construction? I knew that Coca-Cola sign would be hidden forever once the hotel went up. So I documented it. The old buildings on Rossville Avenue? Many of them won't be here in 10 years. I'm making sure we have a record of what they looked like.
2. Interesting light Sometimes the light is just too good to pass up. That couple painting by the river using iPhone light? The light was perfect. The sunset reflecting on the river with street lights spilling across the water? Had to stop and capture it. Night scenes with lit marquees and neon signs? Yeah, that's interesting light right there!
Here's the thing: these two categories overlap more than you'd think. Interesting light often happens during times of change. Dawn, dusk, construction lights at night, the golden hour before a storm. Light and change go together in photography!
How to find YOUR two things: Ask yourself: what do I keep photographing over and over? Not what you WANT to photograph or what you think you SHOULD photograph. What do you ACTUALLY photograph when you just go out with your camera for fun?
Look through your last 100 photos. What patterns do you see? For me, it was always buildings and light. For you, it might be people's faces, or textures, or motion, or something I'd never think of. The point is to be honest about what actually draws your attention in the field!
Documenting Chattanooga's Changing Landscape

The Coca-Cola sign that was visible downtown before the Kinley hotel construction. Once the hotel went up, this sign was hidden forever between buildings. This is exactly why I photograph things that will be gone soon!
The Kinley Hotel Construction Series: A Photography Case Study

The Kinley hotel coming out of the ground. I documented this entire construction project knowing it would change the downtown Chattanooga skyline permanently.

Mid-construction on the Kinley. The building taking shape and starting to hide the Coca-Cola sign that was behind it.

The Kinley with its distinctive blue exterior starting to appear. Each stage of construction tells part of the story of how Chattanooga is changing.

Later stage construction showing the ADAMS building sign across the street. Notice how the sign appears in these later photos once I thought to cross the street for a wider angle. That sign has its own story!
The ADAMS Sign: Hidden History Preserved
As an added bonus in these photos there is also another piece of history that undergoes a change as well. If you will notice that the sign on the corner for the ADAMS building appears in the last 4 photos where I thought to go across the street and get the image. This sign survives into the renovation and it is restored and back in place at the end. The ADAMS building no longer exists but the sign somehow survives into the current day…

The ADAMS building sign in its original weathered condition. The ADAMS building itself no longer exists, but somehow this sign survived into the renovation.
Chattanooga is going through massive change right now, and has been for the past 10-15 years. The downtown area is being redeveloped, new hotels are going up, old buildings are being renovated or torn down, and the whole character of certain neighborhoods is shifting.
This makes it perfect for documentary photography! There's always something changing, always some building in transition, always some piece of history that's about to disappear or transform.
The Kinley hotel construction is just one example. That entire block looked completely different five years ago. The Coca-Cola sign that's now hidden between buildings? That was a prominent downtown landmark for decades. Now you can only see it from certain angles, and soon it'll probably be gone entirely when the building it's painted on gets renovated or demolished.
The ADAMS building sign surviving the renovation? That's actually unusual! Most old signs don't make it through development. The fact that someone cared enough to preserve and restore that sign says something about Chattanooga's relationship with its history. That story is worth documenting!
Other Chattanooga locations I've documented that are now gone or changed: the old Terminal Station before its renovation, several restaurants and businesses that closed during COVID, vintage signage that's been removed or painted over, and entire blocks that look nothing like they did five years ago.
If you live in any city or town that's growing or changing, you have the same opportunity. Start photographing what's there NOW, because it won't be there forever. Future historians and your community will thank you!

The same ADAMS sign after restoration. They actually cared enough to preserve and restore it! This is unusual. Most old signs don't survive development.
Chasing Light: Night Photography in Small Towns
Another aspect of my photography is more artistic where I will shoot at night to capture interesting light in different areas of the city, where ever that might be. I have began to look for movie marques in the town square of small towns and get them lit up at night.

The Marietta Square Theatre at night in August 2023. I've started looking for movie marquees in small town squares and photographing them lit up at night. There's something special about these historic theaters!
But the real thing I have started to do it just take photos. Things that happen around me like the photo here of the smoke from local wildfires because it hasn’t rained in something like 2 or 3 months at this point.

Smoke from local wildfires during a 2-3 month drought. Sometimes documentary photography is just capturing what's happening around you, even if it's not pretty. This is what November 2023 looked like in our region.
These next two photos were not taken on the same night, but were captured about 1/4 mile of each other. One is the river front and I just liked the way the light fell that night on the water as well as the light spill from the street lights across the river and the color of the sunset all just came together for a great photo. The next one is simply a photo of a couple of buildings on Market and 5th street. The signage and the lights just made for a cool photo to me so I stopped for a second and grabbed a few images of it at varying exposure levels so I could get the lit signs to expose properly as well as the rest of the stuff. It is just a cool photo to me.
Night Photography Settings and Approach"
Since a lot of what I shoot involves low light and night photography, let me give you the practical details of how I actually do this.
Camera Settings: For night photography like the movie marquee shot, I'm typically shooting at ISO 400-800, aperture around f/2.8 to f/4, and shutter speeds ranging from 1/30 second to several seconds depending on the scene. The key is having a camera with good high ISO performance (my Leica SL2 handles this well) and either using a tripod or bracing against something solid.
For the river reflection shot, I used a longer exposure (probably 2-3 seconds) to smooth out the water and capture the light trails. This means a tripod is basically required unless you want blur!
Equipment: You don't need fancy gear for night photography, but you do need:
A camera that can handle high ISO without too much noise (or just be willing to make really long exposures to make up for it)
A fast lens (f/2.8 or wider is ideal)
A tripod or something to brace against
Patience to let your eyes adjust and find the light
I shoot with the Leica SL2 and various vintage lenses, often wide open or close to it. The in-body stabilization helps for handheld shots at slower shutter speeds.
Finding the Light: The best night photography happens during blue hour (the 20-30 minutes after sunset before it's fully dark). You get ambient light from the sky plus artificial lights from buildings and streets. This creates depth and color that pure darkness doesn't give you.
Also, look for lit signage! Movie marquees, neon signs, storefronts with their lights on. These create natural focal points and add color to night scenes.

The riverfront at sunset with street lights reflecting across the water. Sometimes all the light just comes together. The sunset color, the street light spill, the reflections. This is why I chase the light!

Buildings on Market and 5th Street in Chattanooga. The lit signage and building lights just made for a cool photo that night. I stopped and grabbed a few images at varying exposure levels to get everything exposed properly.
If you have not figured it out yet, I want you to start taking a long hard look at what it is that you enjoy photographing. i mean REALLY boil it down to the simplest components. For me it was the two things I just mentioned, for you it might be saturated colors or people waving at you or blur in your photo. The point is, don’t just generalize your answer, the only person you hurt in this event is yourself if you are not 100% truthful.
If you like to watch videos too, here is the video I did on the same subject.
Your Style Will Evolve (And That's Good)
Here's something important I want you to understand: your photography style WILL change over time, and that's not just okay, it's actually good!
I started out obsessed with urban decay. Abandoned buildings, peeling paint, broken windows, industrial ruins. I thought that's what I wanted to photograph forever. And you know what? It was a good starting point! It got me out shooting, it taught me about light and composition, and it connected me with other photographers who liked the same aesthetic.
But over time, I realized urban decay wasn't the root of what I liked. It was just a symptom of something deeper: I was drawn to things that were disappearing, to the passage of time, to change and transformation. Urban decay just made that visible in an obvious way!
Once I understood that pattern, my photography opened up. Now I photograph construction (the opposite of decay!), historic signs being preserved, changing skylines, and light at different times of day. All of these connect to that same root interest in time and change.
The lesson: Start with what attracts you right now, but stay open to discovering the deeper pattern underneath. Don't lock yourself into "I'm an urban decay photographer" or "I only shoot landscapes" or whatever. Let your interests evolve!
Ask yourself every six months: what am I actually photographing these days? What patterns do I see? What keeps drawing my attention? Your answers might surprise you, and that's when the most interesting growth happens.
For you, it might not be about time and change at all. Maybe you'll discover you're really interested in human connection, or geometric patterns, or the way weather affects a scene. The point is to keep asking the question and being honest about the answer!
So ask yourself what it is that you like and then go out and make photos of that AND don’t let yourself fall into the trap of not being able to change this with time. I started out wanting to shoot urban decay only, but it turned out that was not the root of what I like to shoot, but it led me to it. Anyway, with that said, get your camera out and go take a picture with it!
If you're struggling to figure out what YOU actually like to photograph, here are some questions that helped me:
1. What photos do you KEEP coming back to look at? Not the ones you think you should like, but the ones you actually open and view again. Those reveal something about your real interests.
2. What do you photograph when nobody's watching or judging? Forget Instagram, forget what's popular, forget what other photographers are doing. What do YOU photograph just because you want to?
3. What makes you stop and say "I need to capture this"? Pay attention to that impulse! What triggers it? Light? A specific subject? A moment in time? That's your style trying to tell you something.
4. What do you get excited to show people? When you're showing photos to friends or family, which ones do you genuinely want them to see? Not the "best" technically, but the ones you're proud of or excited about?
5. If you could only photograph ONE thing for the rest of your life, what would it be? This is a hard question, but it forces you to identify what really matters to you in photography.
For me, the answers kept pointing to documentation, preservation, and light. Your answers will point somewhere else, and that's your path forward!
Support this website by using these affiliate links to shop on Amazon:
Leica M11 Digital Rangefinder Camera
Nikon AF-S FX NIKKOR 105mm f/1.4E ED Lens
Voigtlander Nokton 35mm f/1.4 II
Sandisk 128GB Extreme Pro memory cards
Nikon 50mm f1.8 S Lens for Z mount
Frequently Asked Questions About Finding Your Photography Style
How do I find my photography style?
Start by being brutally honest about what you actually photograph, not what you think you should photograph. Look through your last 100 photos and identify patterns. What subjects keep appearing? What situations make you stop and take photos? For me, it was always buildings that were changing or disappearing, plus interesting light conditions. Your patterns will be different! The key is honest self-reflection, not copying what popular photographers are doing. Your style is already there in your work. You just need to identify it and lean into it intentionally.
What is documentary photography?
Documentary photography is about creating a historical record, not about creating art (though it can be both!). When I photograph a building before it's demolished or document a construction project, I'm preserving something for the future. Documentary photography captures what IS, not what you wish it was or what you imagine it could be. Think about old photographs from the 1800s. We value those not as art but as historical documents. That's documentary photography. It serves your community by preserving visual history that will matter to future generations.
What should I photograph as a beginner?
Photograph whatever genuinely interests you right now, even if it seems boring or obvious. Don't worry about finding your "style" immediately. Just shoot! I started photographing urban decay because that's what looked cool to me at the time. Years later, I realized the deeper pattern (things disappearing, interesting light), but I couldn't have discovered that without first spending time shooting what initially attracted me. Start with what interests you, shoot a LOT, and let your patterns emerge naturally over time.
How do you photograph at night without a tripod?
You need a camera with good high ISO performance and the fastest lens you can get (f/2.8 or wider is ideal). I typically shoot at ISO 400-800 for night photography, sometimes higher if needed. Use a wide aperture (f/2.8 or f/4) to let in more light, and brace yourself against something solid like a wall or pole. The Leica SL2's in-body stabilization helps me handhold at slower shutter speeds than I could with other cameras. That said, a tripod is still better for really dark scenes or long exposures! Don't be afraid to carry a small travel tripod.
Can your photography style change over time?
Yes, and it should! My photography style has evolved significantly. I started obsessed with urban decay, then realized I was really interested in things that were disappearing or transforming. That deeper understanding opened up new subjects: construction photography, historic sign preservation, changing skylines. Don't lock yourself into one style forever. Every six months, ask yourself: what am I actually photographing these days? What patterns do I see? Let your style evolve as you grow and learn more about what really interests you.
What makes Chattanooga good for documentary photography?
Chattanooga is going through massive urban development right now. New hotels, renovated buildings, changing neighborhoods, businesses closing and opening. This constant change makes it perfect for documentary photography! There's always something disappearing or transforming. The Kinley hotel covering the old Coca-Cola sign, the ADAMS sign surviving a building renovation, old businesses on Rossville Avenue. These changes are worth documenting because future generations will want to see what Chattanooga looked like during this transformation period. Your town probably has similar changes happening!
How do I know if I'm a documentary photographer or an art photographer?
Ask yourself: when you take a photo, are you trying to capture what's really there, or are you trying to create something new? Documentary photography is about preservation and record-keeping. Art photography is about personal vision and creative expression. Many photographers do both! I'm primarily documentary focused because I care more about preserving history than making beautiful images (though sometimes they're both). There's no wrong answer here. It's just about understanding your own motivations and leaning into what actually drives you to pick up a camera.
What camera do I need for documentary photography?
Any camera works for documentary photography! Documentary is about subject and intention, not gear. That said, certain features help: good low light performance (for night photography), ability to shoot in challenging conditions, and reliability. I use a Leica SL2 with vintage lenses, but I've done documentary photography with everything from DSLRs to smartphones. The best camera for documentary photography is the one you'll actually carry with you when the moment happens. Don't let gear be an excuse for not starting!

Tennessee Fall Color Photography: Finding Colors During Drought
Looking up at the yellow canopy at North Chickamauga Creek WMA, Tennessee. The overcast sky created beautiful soft light filtering through the leaves without harsh shadows. This perspective shows how dense the fall color was in areas where the trees had access to groundwater from the creek.
Well, it sure took long enough, but I finally found a place local to me that had some beautiful fall color photo opportunities.

Looking up at the yellow canopy at North Chickamauga Creek WMA, Tennessee. The overcast sky created beautiful soft light filtering through the leaves without harsh shadows. This perspective shows how dense the fall color was in areas where the trees had access to groundwater from the creek. Just a few hundred yards away from the water, everything was brown and crispy from the drought. The lesson? In dry years, forget the open fields and exposed ridges. Find the water and you'll find the colors! Leica SL2 + Nikkor 28mm f/2.8 AiS handheld.
Tennessee Weather - Fall Color Photography
This is not something I normally have when it is as dry as it has been recently. Let me explain…
I am no scientist but I have stayed in a Holiday Inn before, so here goes. From what I have seen, there are three different scenarios that usually unfold around here in the fall.
The first event is like this, we get plenty of rain in the spring, it dries out a little in the mid summer months and then it starts to rain in late September or early October. This is actually the best possible scenario from what I can tell…
The second scenario is the same as the first one except the rain turns into a thunderstorm storm with heavy rain and usually high winds during peak color season, knocking all the leaves off of the trees.
Then there is option three, this one is where there is rain in the spring but then it is dry for the entirety of summer and fall. This is the type of season we are in now. There has not been enough rain to matter in two months…maybe more. It is so little water that the creek next to my house has no surface water in it as of this writing.
Of the three events, the first one is the preferred for fall color photos as there is sufficient water for the trees to transition normally to their dormant winter state and you get this incredible color display in the fall. This year though, we have event three where everything is a huge tinderbox and the leaves are simply drying out and turning brown then falling off of the trees without passing through their color phase at all…except…in the few places where there is still ground water to water the trees.
Understanding Tennessee's Three Fall Color Scenarios
I mentioned the three fall scenarios briefly, but let me break them down in more detail since understanding these patterns will help you plan your fall photography:
Scenario 1: The Perfect Year (RARE)
What happens:
Spring rains (March-May) give trees plenty of water to grow
Summer (June-August) dries out a little but not too much
Rain returns in late September or early October
Trees get signal to prepare for winter dormancy
Beautiful color transition over 2-3 weeks
Leaves stay on trees long enough to photograph
Photography result:
Incredible color displays everywhere
Colors last for weeks, not days
Can shoot anywhere, not just near water
This is what you see in all the fall color guides!
We get this maybe 1 out of every 4-5 years
Scenario 2: The Stormy Year (FRUSTRATING)
What happens:
Same as Scenario 1 through summer
Rain returns in late September (good!)
But it comes as thunderstorms with heavy rain and high winds
Leaves start to change color (exciting!)
Then a big storm blows through (devastating!)
All the leaves get knocked off before peak color
Photography result:
You get maybe 3-5 days of good color before the storm
Have to act fast when colors appear
After the storm, just bare trees and leaves on the ground
Extremely frustrating if you had plans for the weekend!
This happens maybe 1 out of every 3-4 years
Scenario 3: The Drought Year (CHALLENGING)
What happens:
Rain in spring (so far so good)
Then dry for entire summer and fall (uh oh)
No rain in September or October
Trees are stressed and trying to survive
Leaves dry out and turn brown without color phase
Everything becomes a tinderbox
Exception: Places with groundwater still have colors!
Photography result:
Most locations are brown and crispy, no color
Have to find water sources (creeks, rivers, springs)
Limited locations but concentrated color where water exists
Requires more scouting and research
This is what we had this year (2023)
How to adapt:
Scenario 1: Shoot anywhere, you can't go wrong!
Scenario 2: Have a plan ready, shoot as soon as colors appear
Scenario 3: Follow the water (like I did at North Chickamauga Creek)
The key is recognizing which scenario you're in and adjusting your strategy accordingly. Don't wait for "perfect conditions" that might not come!

A red maple tree standing out in a sea of yellow at North Chickamauga Creek WMA near Soddy Daisy, Tennessee. This was the first scene that greeted me when I started looking for fall colors! After weeks of drought with everything turning brown, finding this color contrast felt like discovering gold. The key during dry years? Follow the water. This gorge has a creek running through it (barely flowing, but still there!), which gave the trees enough water to transition to their fall colors normally. Shot handheld with Leica SL2 + Nikkor 28mm f/2.8 AiS. The overcast light saturated the colors without creating harsh shadows!
Fall Color Photography Secret… Follow the Water
Enter North Chickamauga Creek WMA near Soddy Daisy Tennessee. This is a small WMA (Wildlife Management Area) situated in a gorge next to Mowbray mountain and is a popular spot for the locals to cool off in the summertime in the river. Well, the river is just a brook at this point and is barely moving at all, BUT it is there! If you watch my YouTube video on it you will see what I mean. Even so, there is still enough water to feed the trees so they had a fall color change.
Since I found some colors this year, I now had to figure out what I wanted to use to capture all this color with. I finally settled on my camera being the Leica SL2 as it has a high resolution sensor and several other features that lend itself to being a wonderful landscape photography camera. You see the Leica SL2 is a mirrorless camera so it can be adapted to various vintage lenses really easily and we all know how I love using vintage lenses! So today’s lens of choice for the Leica is the Nikkor 28mm f2.8 AiS. This is one of Nikon’s crowning achievements in lens design as it was as close to optical perfection as they had ever gotten to that point. So naturally I used this lens.
The magic of the Leica SL2 as well is that it has IBIS on the sensor. This basically turns all my vintage lenses into stabilized lenses. I know there are a ton of other cameras that also have these same features but I just like the Leica SL2 for some reason.
Now that the camera setup is settled, next is finding the photo I want. I started out looking for macro level images, vistas and scenes, then I moved in closer to get more detailed image ideas. The first one is shown above of the red maple tree in a sea of yellow. Then I moved to the river bed and found some wonderful colors out in the open.
Looking upstream at North Chickamauga Creek near Soddy Daisy, Tennessee. This is literally what greeted me when I entered the river bottom. Not much water (you can see how low the creek was during this drought!), but the color splash from the trees was incredible! The boulders in the creek bed created great foreground interest, and the overcast sky provided soft, even light that made the colors pop without blown highlights. Shot handheld with Leica SL2 + Nikkor 28mm f/2.8 AiS at f/8. I love the texture and color in this image! So much detail from the rocks to the leaves to the trees. The 28mm wide angle let me include the entire scene from the creek bed up to the canopy. This is why I walked down into the creek rather than shooting from the trail!
This was literally what I was greeted with when I looked upstream from where I entered the river bottom. Not much water, but I got such a color splash from the trees that I didn’t even care. I would have liked for it to not be overcast, but you take what you can get and work with it. I really love this image too, so much texture and color in one image that is is almost overwhelming. I was really starting to embrace the look that the 28mm lens was giving me and then I decided to move upstream to that large boulder you see in the above photo and get a different perspective from that spot.

The valley perspective looking upstream at North Chickamauga Creek WMA, Tennessee. That little smidgen of sky showing the overcast clouds almost makes it otherworldly or something like that! I was blown away with this image when I got it into Lightroom and could see it better. It almost doesn't look real back up in the valley next to the sky. The clouds were epic! Shot handheld from a large boulder I scrambled up to for this perspective. Leica SL2 + Nikkor 28mm f/2.8 AiS, no tripod. The IBIS (in-body image stabilization) let me shoot this at 1/15s handheld and get sharp results. There's something to be said for simplicity - one camera, one lens, no backpack or tripod. Just me and the landscape!
Fall Color Photography and Moody Skies
The little smidgen of sky showing the over cast clouds almost makes it otherworldly or something like that. I was blown away with this image when I got it into Lightroom and was able to see it better. It almost doesn’t look real back up in the valley next to the sky. The clouds were epic! This is also shot hand held with the 28mm lens. What is nice is that it allowed me to be very agile and not have the burden of the back pack and a tripod with me at all. There is something to be said for simplicity…
Frequently Asked Questions About Fall Color Photography in Tennessee
When is peak fall color season in Tennessee?
It depends on where you are in the state! In East Tennessee (mountains), peak fall colors usually hit mid-to-late October. In Middle Tennessee (Chattanooga area and surrounding), you're looking at late October into early November. But here's the thing that most people don't realize: the actual timing depends more on rainfall and temperature than it does on the calendar! If we get a drought like we had this year, the trees just skip the color phase entirely and go straight to brown. If we get too much rain with high winds during peak season, all the leaves get knocked off before you can shoot them. The "perfect" fall color year requires rain in spring, a slightly dry summer, then rain returning in late September or early October. That's when you get the incredible color display that lasts for a couple weeks!
Why do some years have better fall colors than others?
Water! It all comes down to water and how the trees are stressed. I'm no scientist, but I have stayed in a Holiday Inn before, so here goes, lol. Trees need sufficient water to transition normally to their dormant winter state. When they have the right amount of water, they go through that beautiful color change we all love photographing. But when it's too dry (like this year with two months or more of no rain), the leaves just dry out and turn brown without passing through the color phase at all. It's basically a huge tinderbox and the trees are just trying to survive, not put on a show for photographers! That's why you need to find the water sources during dry years. Wherever there's still groundwater feeding the trees (creeks, rivers, springs), those trees will still change color even when everything else is brown.
Where can you find fall colors in Tennessee during a drought?
Follow the water! During dry years like this one, you need to find places where there's still water feeding the trees. Creek beds, river gorges, wildlife management areas near water sources, anywhere with groundwater. For me, North Chickamauga Creek WMA near Soddy Daisy Tennessee saved the day! The creek was barely flowing (just a brook at that point), but there was enough water to keep the trees happy. They had a beautiful fall color change while everything else around the area was brown and crispy. Other good bets: Ocoee River area, any of the gorges in the Cumberland Plateau, state parks with creeks or waterfalls, and anywhere in the Smoky Mountains (they usually have better water retention). Just look for blue on the map and you'll probably find color!
What camera settings work best for fall color photography?
I shot this whole session handheld with the Leica SL2 and Nikkor 28mm f/2.8 AiS lens, so here's what worked for me: aperture priority mode (let the camera pick the shutter speed), probably f/5.6 to f/11 for landscape depth of field, ISO auto (camera adjusted based on light), and I relied heavily on IBIS (in-body image stabilization) since I wasn't using a tripod. For fall colors specifically, you don't want to overexpose or you'll blow out the bright yellows and reds. I tend to expose for the highlights and let the shadows fall where they may, then I can lift them a bit in Lightroom if needed. Shoot RAW so you have flexibility with white balance (overcast days can look weird if you don't adjust). And honestly? Just set it and forget it so you can focus on composition rather than fiddling with settings!
Do you need a tripod for fall color photography?
Not if you have IBIS! I deliberately left the tripod and backpack at the truck because I wanted to be agile and explore without the burden of extra gear. The Leica SL2 has in-body image stabilization which basically turns all my vintage lenses into stabilized lenses. This means I can shoot handheld at slower shutter speeds without camera shake. There's something to be said for simplicity, especially when you're walking a creek bed or scrambling around on boulders like I was doing. That said, if you don't have IBIS or you're shooting in really low light, a tripod will give you sharper images. But for bright overcast days like this? Handheld is totally fine and way more enjoyable!
What's the best lens for fall color photography?
Wide angle! I used the Nikkor 28mm f/2.8 AiS for this session and it was perfect. Wide angle lenses (24mm, 28mm, 35mm) let you include the environment and context around the colors. You can get the creek bed, the trees, the sky, the boulders, everything in one frame. Plus, when you're in a gorge or tight space, a wide lens is the only way to get the whole scene. That said, bring a longer lens too if you want to isolate individual trees or compress distant ridgelines. But if I had to pick just one lens for fall color photography? 28mm is my sweet spot. It's wide enough for landscapes but not so wide that you get too much distortion on the edges.
Is vintage lens photography good for landscape work?
Absolutely! The Nikkor 28mm f/2.8 AiS I used is one of Nikon's crowning achievements in lens design. It was as close to optical perfection as they had ever gotten to that point. Vintage lenses often have character that modern lenses lack (slightly warmer rendering, interesting flare characteristics, smooth bokeh), and they're sharp enough for landscape work when you stop them down to f/5.6 or f/8. The best part? They're cheap! You can get incredible vintage glass for $100-300 that would cost you $1,000+ in a modern equivalent. Just make sure your camera can adapt them (the Leica SL2 is perfect for this with its short flange distance), and you're good to go. Oh, and IBIS makes vintage lenses even better since they don't have built-in stabilization!
What time of day is best for shooting fall colors?
Honestly? Overcast days like I had are actually ideal for fall color photography! Direct sunlight creates harsh shadows and blown highlights on the bright leaves. Overcast light is soft, even, and it lets the colors really saturate without fighting crazy contrast. That said, early morning and late afternoon (golden hour) can be magical if you want warm light on the trees. Avoid midday harsh sun if you can. For this shoot, the overcast clouds were epic and made the colors pop without any harsh shadows. It almost looked otherworldly! So don't skip shooting just because it's cloudy. Embrace it!
How do you compose fall color photos without them looking like every other fall photo?
Great question! I try to find specific elements to anchor the composition rather than just pointing at a bunch of colorful trees. For this session, I looked for: (1) the red maple tree in a sea of yellow (color contrast!), (2) the creek bed with boulders as a leading line through the frame, (3) the valley perspective looking upstream with that little smidgen of sky, and (4) textures and layers (water, rocks, leaves, trees, sky). The key is to have a subject or a story, not just "look, it's colorful!" Find a foreground element, use the colors as supporting cast, and compose with intention. Also, get low! I was walking in the creek bed and scrambling on boulders to get different perspectives. Don't just stand on the trail and shoot at eye level like everyone else!
What are the three fall color scenarios in Tennessee?
From what I've seen, there are three different scenarios that usually unfold around here:
Scenario 1 (BEST): Plenty of rain in spring, dries out a little mid-summer, then rain returns in late September or early October. This gives you incredible color displays that last for weeks! The trees have enough water to transition normally to dormancy and you get the full spectrum of reds, oranges, and yellows.
Scenario 2 (WORST): Same as Scenario 1 except the rain turns into thunderstorms with heavy rain and high winds during peak color season. This knocks all the leaves off the trees before you can photograph them. Super frustrating!
Scenario 3 (CHALLENGING): Rain in spring but then dry for the entirety of summer and fall. This is what we had this year. Everything becomes a huge tinderbox and the leaves simply dry out and turn brown without passing through their color phase at all... except in the few places where there's still groundwater to feed the trees. That's when you have to get creative and find the water!
BONUS QUESTION: What's North Chickamauga Creek WMA like for photography?
North Chickamauga Creek WMA near Soddy Daisy Tennessee is a hidden gem! It's a small Wildlife Management Area situated in a gorge next to Mowbray Mountain. Locals use it to cool off in the river during summertime, but in fall it's perfect for photography! The gorge creates interesting light and the creek provides water for the trees even during drought years. When I shot this, the river was barely moving (just a brook, really), but there was still enough water to feed the trees so they had beautiful fall color change. Easy to access, not too crowded, and if you walk the creek bed you'll find tons of compositions. Just be careful on the rocks, they can be slippery! If you watch my YouTube video about it you'll see what I mean.
So in summary, if you want to find fall colors even when it has been really dry, find the water. Where ever there is water, there will be fall colors. At least that is what I have seen, your mileage may vary.
Support this website by using these affiliate links to shop on Amazon:
Leica M11 Digital Rangefinder Camera
Nikon AF-S FX NIKKOR 105mm f/1.4E ED Lens
Voigtlander Nokton 35mm f/1.4 II
Sandisk 128GB Extreme Pro memory cards
Sigma 65mm f/2.0 Review: 98% of Leica Quality for $700 (L-Mount)
The Goldilocks Focal Length: 65mm sits right between the standard 50mm and the classic portrait 75mm. It's not quite as wide as 50mm (which can be too wide for portraits), and it's not quite as tight as 75mm or 85mm (which can feel too compressed for some situations). It's just right!
So a good friend loaned me his lens. One of my subscribers that I have grown to know over the years offered to send me a couple of his Sigma lenses and let me use them for a while as review samples for you guys.
The Sigma 65mm f/2.0 mounted on my Leica SL2. You can see the physical aperture ring with 1/3 stop detents (one of my favorite features!). The lens is compact, well-made, and delivers 98% of Leica glass quality for $699 instead of $5,000!
Technical Specifications and Pricing
Before we dive deeper, here are the specs for the Sigma 65mm f/2.0 DG DN:
Optical Design:
Focal length: 65mm
Maximum aperture: f/2.0
Minimum aperture: f/22
Aperture blades: 9 (rounded for smooth bokeh)
Optical design: 14 elements in 11 groups
Physical Specs:
Mount: L-mount (Leica SL/CL, Panasonic S-series)
Filter size: 62mm
Length: 2.8 inches (72mm)
Weight: 14.3 oz (405g)
Minimum focus distance: 21.7 inches (55cm)
Construction:
All-metal barrel
Weather-resistant construction
Aperture ring with 1/3 stop detents
AF/MF switch on lens barrel
Smooth focus ring (encoder design)
Price:
Sigma 65mm f/2.0 DG DN: ~$699
Leica APO-Summicron-SL 75mm f/2 ASPH: ~$4,995
Yeah, you read that right. The Leica costs seven times more than the Sigma. And yet, as I'll explain, the Sigma delivers 98% of the image quality! Let's dig into that comparison.
Why 65mm? The Perfect In-Between Focal Length
If you're not familiar with 65mm as a focal length, let me explain why this is such a sweet spot:
The Goldilocks Focal Length: 65mm sits right between the standard 50mm and the classic portrait 75mm. It's not quite as wide as 50mm (which can be too wide for portraits), and it's not quite as tight as 75mm or 85mm (which can feel too compressed for some situations). It's just right!
Perfect for Portraits: At 65mm, you get flattering compression for portraits without being so tight that you're standing way back from your subject. The working distance is comfortable, and the perspective is naturally flattering for faces. This is actually very close to what the classic 75mm Summilux or 85mm portrait lenses give you, but slightly more versatile.
Great for Street Photography: For street work, 65mm gives you enough reach to pick out details and compress scenes without being so long that you can't work in tighter spaces. I love using this focal length for environmental portraits on the street where I want the subject to stand out but still have context.
Comparison to Other Focal Lengths:
50mm: Wider, more environmental, great for general use but can be too wide for portraits
65mm: Perfect balance, flattering for portraits, good for street, versatile!
75mm/85mm: Tighter compression, classic portrait lenses but less versatile for general use
90mm: Even tighter, requires more working distance, more specialized
The 65mm focal length is honestly underrated. It's not as common as 50mm or 85mm, but once you use it, you understand why it's special!
I really appreciate your offer Hassan and look forward to the day when we finally get to link up and go out on a photowalk together!
Hassan packed up two of his beautiful Sigma primes and sent them up for a look. He sent his 65mm f2 DG DN and his 90mm f2.8 DG DN. Both of these are in Leica’s L mount as Hassan has a Panasonic Lumix camera that is also in L mount due to the L mount alliance between Leica, Sigma and Panasonic.
The first impression of this lens is the darn thing is tiny. This lens is really small, this is awesome as it means it makes the system really compact. The next thing I noticed right away is how nice the build is, all metal construction for the major parts, including the lens hood from what I can tell. Really nice fitment of the lens components so there really is no play in the mating parts. Parts designed to move, like the aperture ring, move only in the direction they are designed to move in. The machine work and fitment is nicely executed from what I can tell.
The next thing I noticed is how fast the focus works, just understand this…it is fast. How fast? Well, it is fast enough to get the shot for me. it is not as fast as my native Leica glass, but it is plenty fast enough for my personal use. I don’t have a way to measure the focus speed, but it works great and I have no complaints about it.
Sample Photos: What This Lens Can Do
Let me show you what this lens actually produces in real-world use. This is shot with the Sigma 65mm f/2.0 on my Leica SL2 during a photowalk around Chattanooga:
Panning blur shot of bicycle riders at Coolidge Park in Chattanooga. This demonstrates how fast and accurate the Sigma 65mm autofocus is! Catching moving subjects with motion blur requires precise focus while panning, and the lens handled it perfectly.
This photowalk sample shows what I meant by "98% of Leica glass." Look at the sharpness, the rendering, the color! This is what you're getting for $699. Not "budget lens performance." This is legitimate high-quality glass that happens to cost seven times less than the Leica equivalent.
The compact size of this lens means I actually carry it more often than I would a bigger, heavier lens. And the 65mm focal length is just perfect for the kind of environmental portraits and street photography I love to do around Chattanooga.
Sigma vs Leica: 98% of the Quality at 14% of the Price
Let me be really clear about something: I said this lens is 98% of my Leica glass in every conceivable way. That's not marketing speak. That's my honest assessment after using both extensively.
The Price Difference is Staggering:
Sigma 65mm f/2.0 DG DN: $699
Leica APO-Summicron-SL 75mm f/2 ASPH: $4,995
That's a $4,296 difference. The Sigma costs 14% of what the Leica costs. Let me repeat that: you're paying seven times less for the Sigma!
What Does the Leica Give You?
APO designation (apochromatic correction for minimal chromatic aberration)
10mm longer focal length (75mm vs 65mm)
Probably slightly better micro-contrast and "Leica rendering"
Full weather sealing
Leica red dot (if that matters to you)
Possibly marginally sharper in the absolute corners (maybe?)
What Does the Sigma Give You?
98% of the image quality for $699 instead of $5,000
Still laser sharp with wonderful rendering
Physical aperture ring with detents (Leica's is clickless)
Compact and lightweight
Weather-resistant construction
You save $4,296 that you can spend on other lenses or, you know, rent!
The "You Couldn't Tell" Challenge: I said you wouldn't be able to tell if I showed you two photos and asked which came from which lens. I stand by that! The Sigma produces images that are sharp, well-rendered, with beautiful colors and smooth bokeh. Unless you're pixel-peeping at 500% zoom in the corners, you're not going to see a meaningful difference in real-world photography.
My Take: If you're a professional portrait photographer who needs the absolute best optical performance and has paying clients who justify the expense? Maybe the Leica makes sense. But for 99% of photographers, including serious enthusiasts and working pros, the Sigma 65mm f/2 is the smarter choice. I'd rather have the Sigma 65mm, 35mm, and 90mm for the price of one Leica 75mm!
The Sigma isn't "almost as good as Leica." It's "actually just as good for any practical purpose, and you save $4,300."
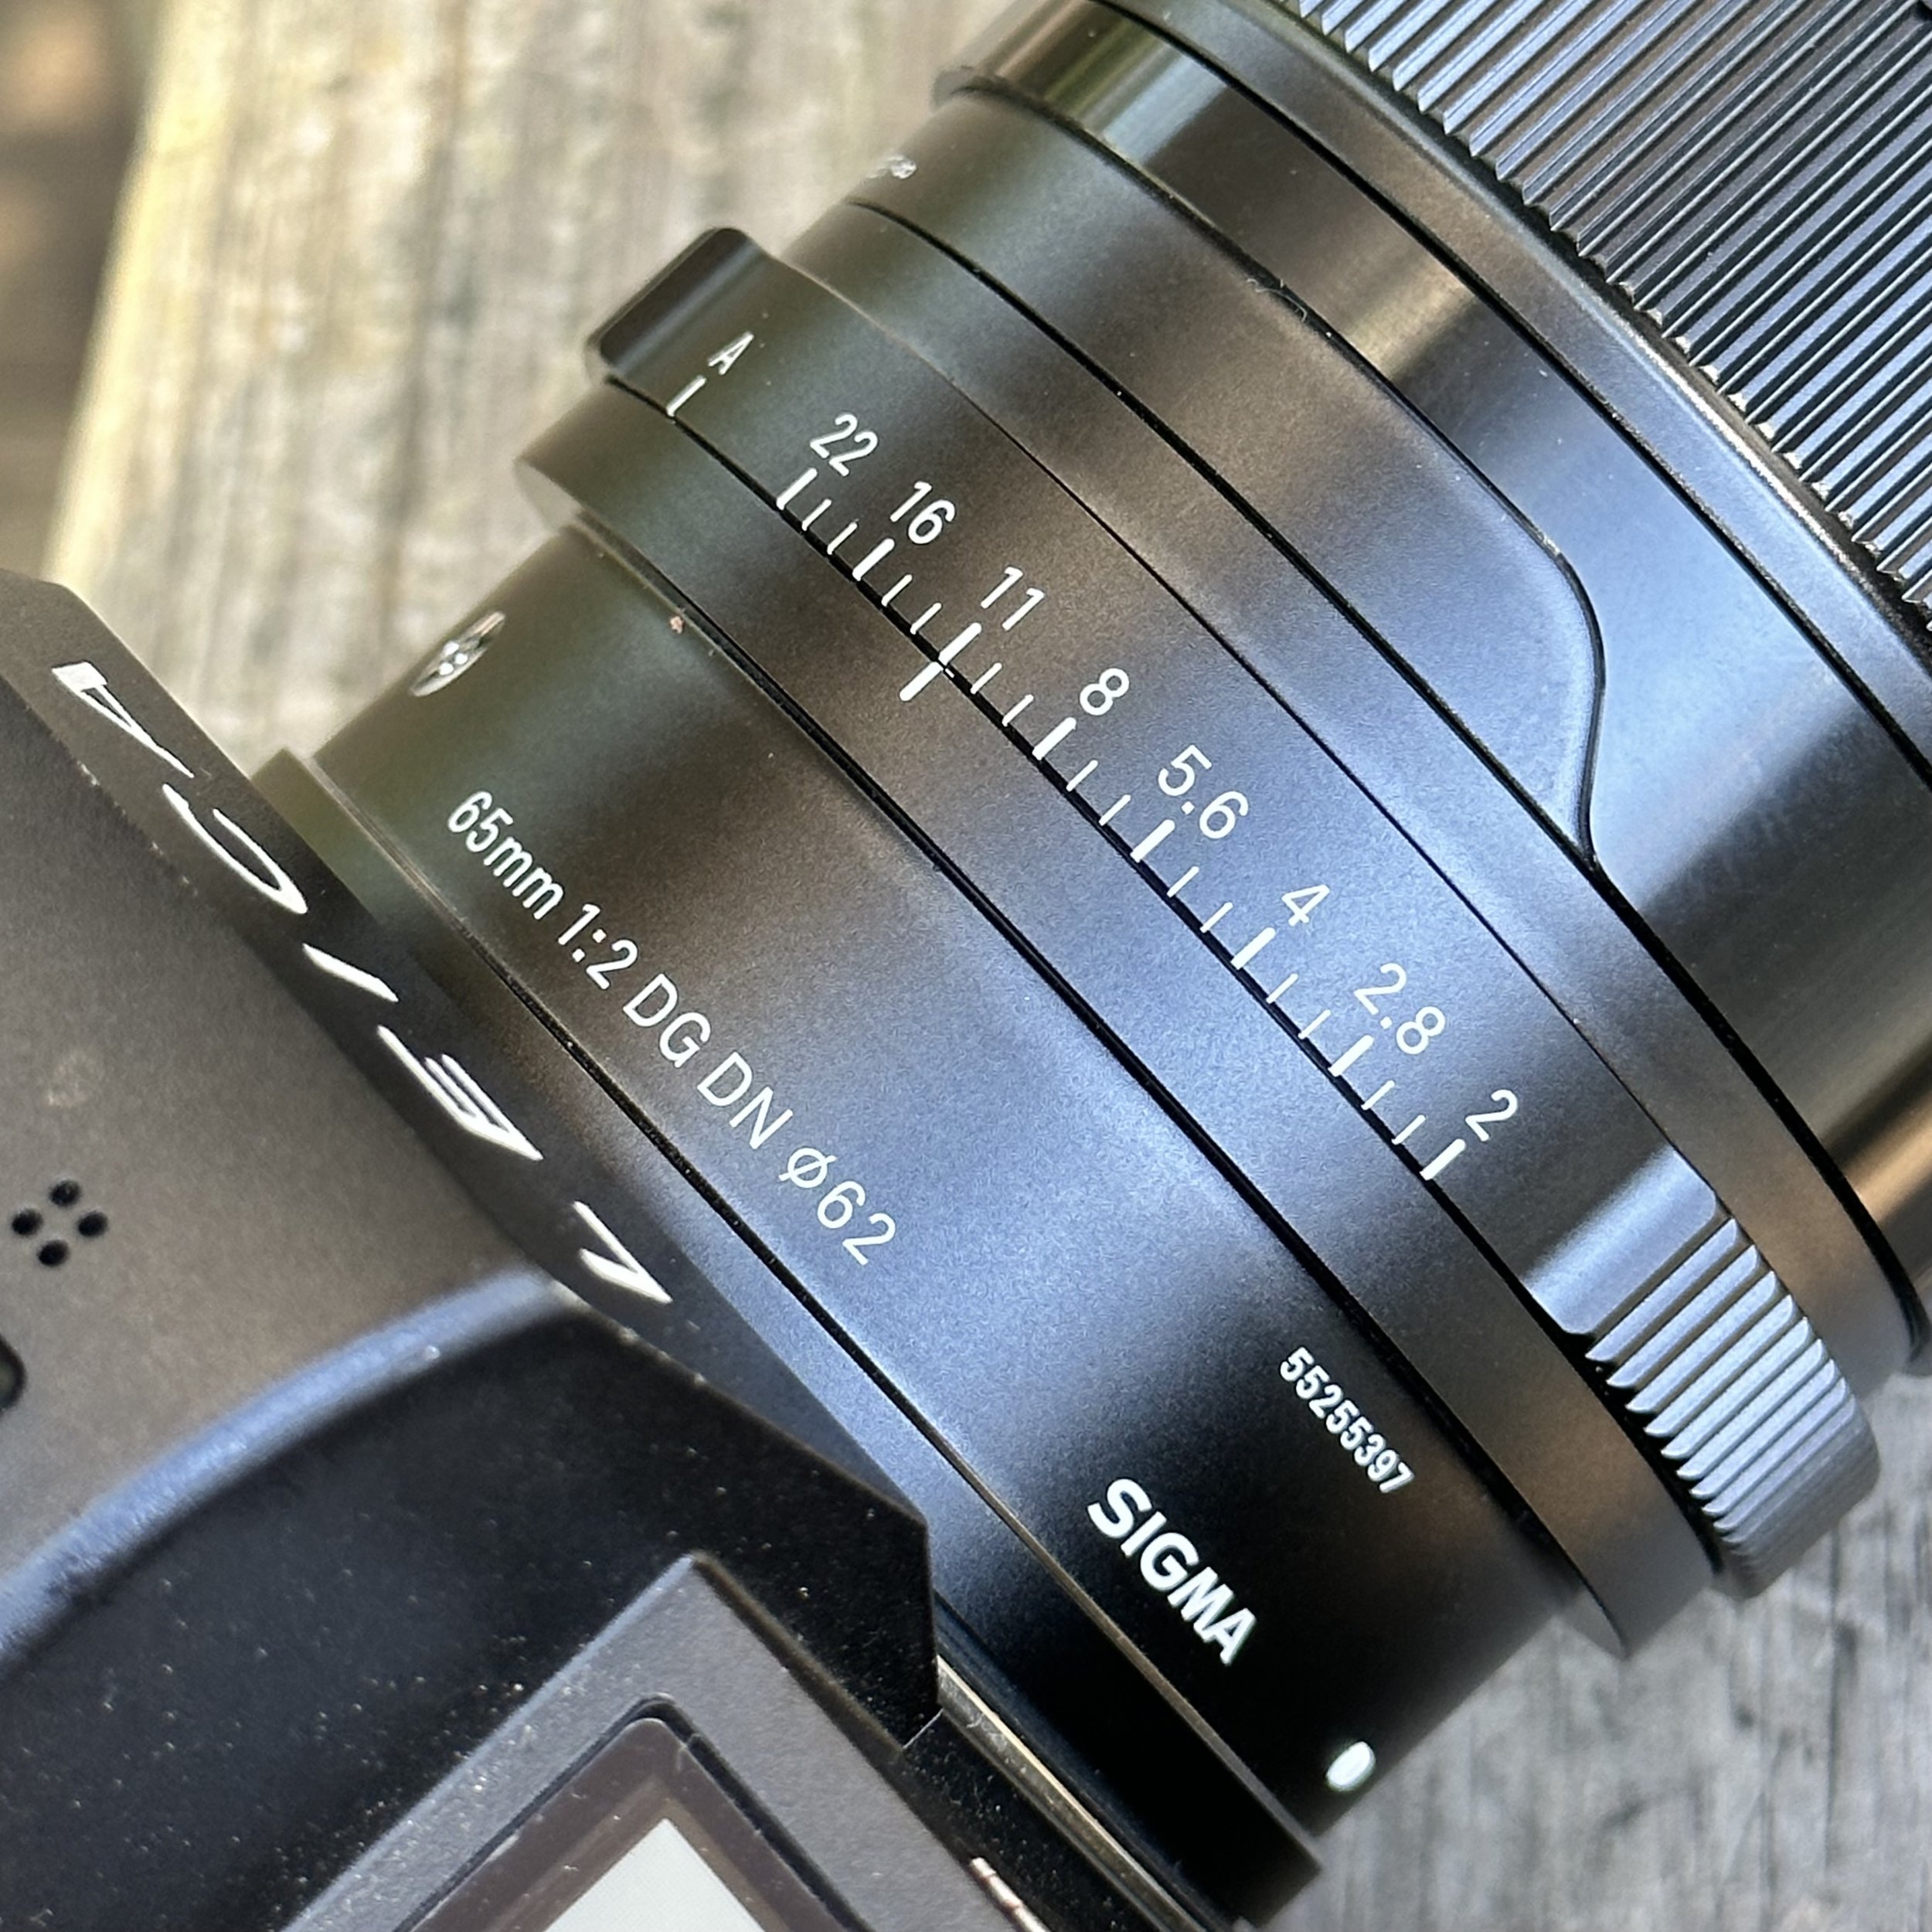
The Sigma 65mm f/2.0 mounted on my Leica SL2 with the aperture ring showing the 1/3 stop detents (one of my favorite features!). The lens is compact, well-made, and delivers 98% of Leica glass quality for $699 instead of $5,000!
Another thing I want to mention here is that the interaction with the lens is different than my Leica glass. Sigma approaches the aperture and the manual focus modes differently that Leica. I will be honest here, I kinda like the Sigma approach to aperture better too. The Leica lens is all software controlled, there are no external controls on Leica L mount glass except for the focus ring, so you use the camera’s controls to adjust everything. On the Sigma, the aperture control is on the lens, which is nice in my opinion. It has aperture choices in 1/3 stop clicks from f2 to f22 and then you can roll the aperture ring around to “A” for auto mode and the camera now has full control of the aperture just like the SL primes.
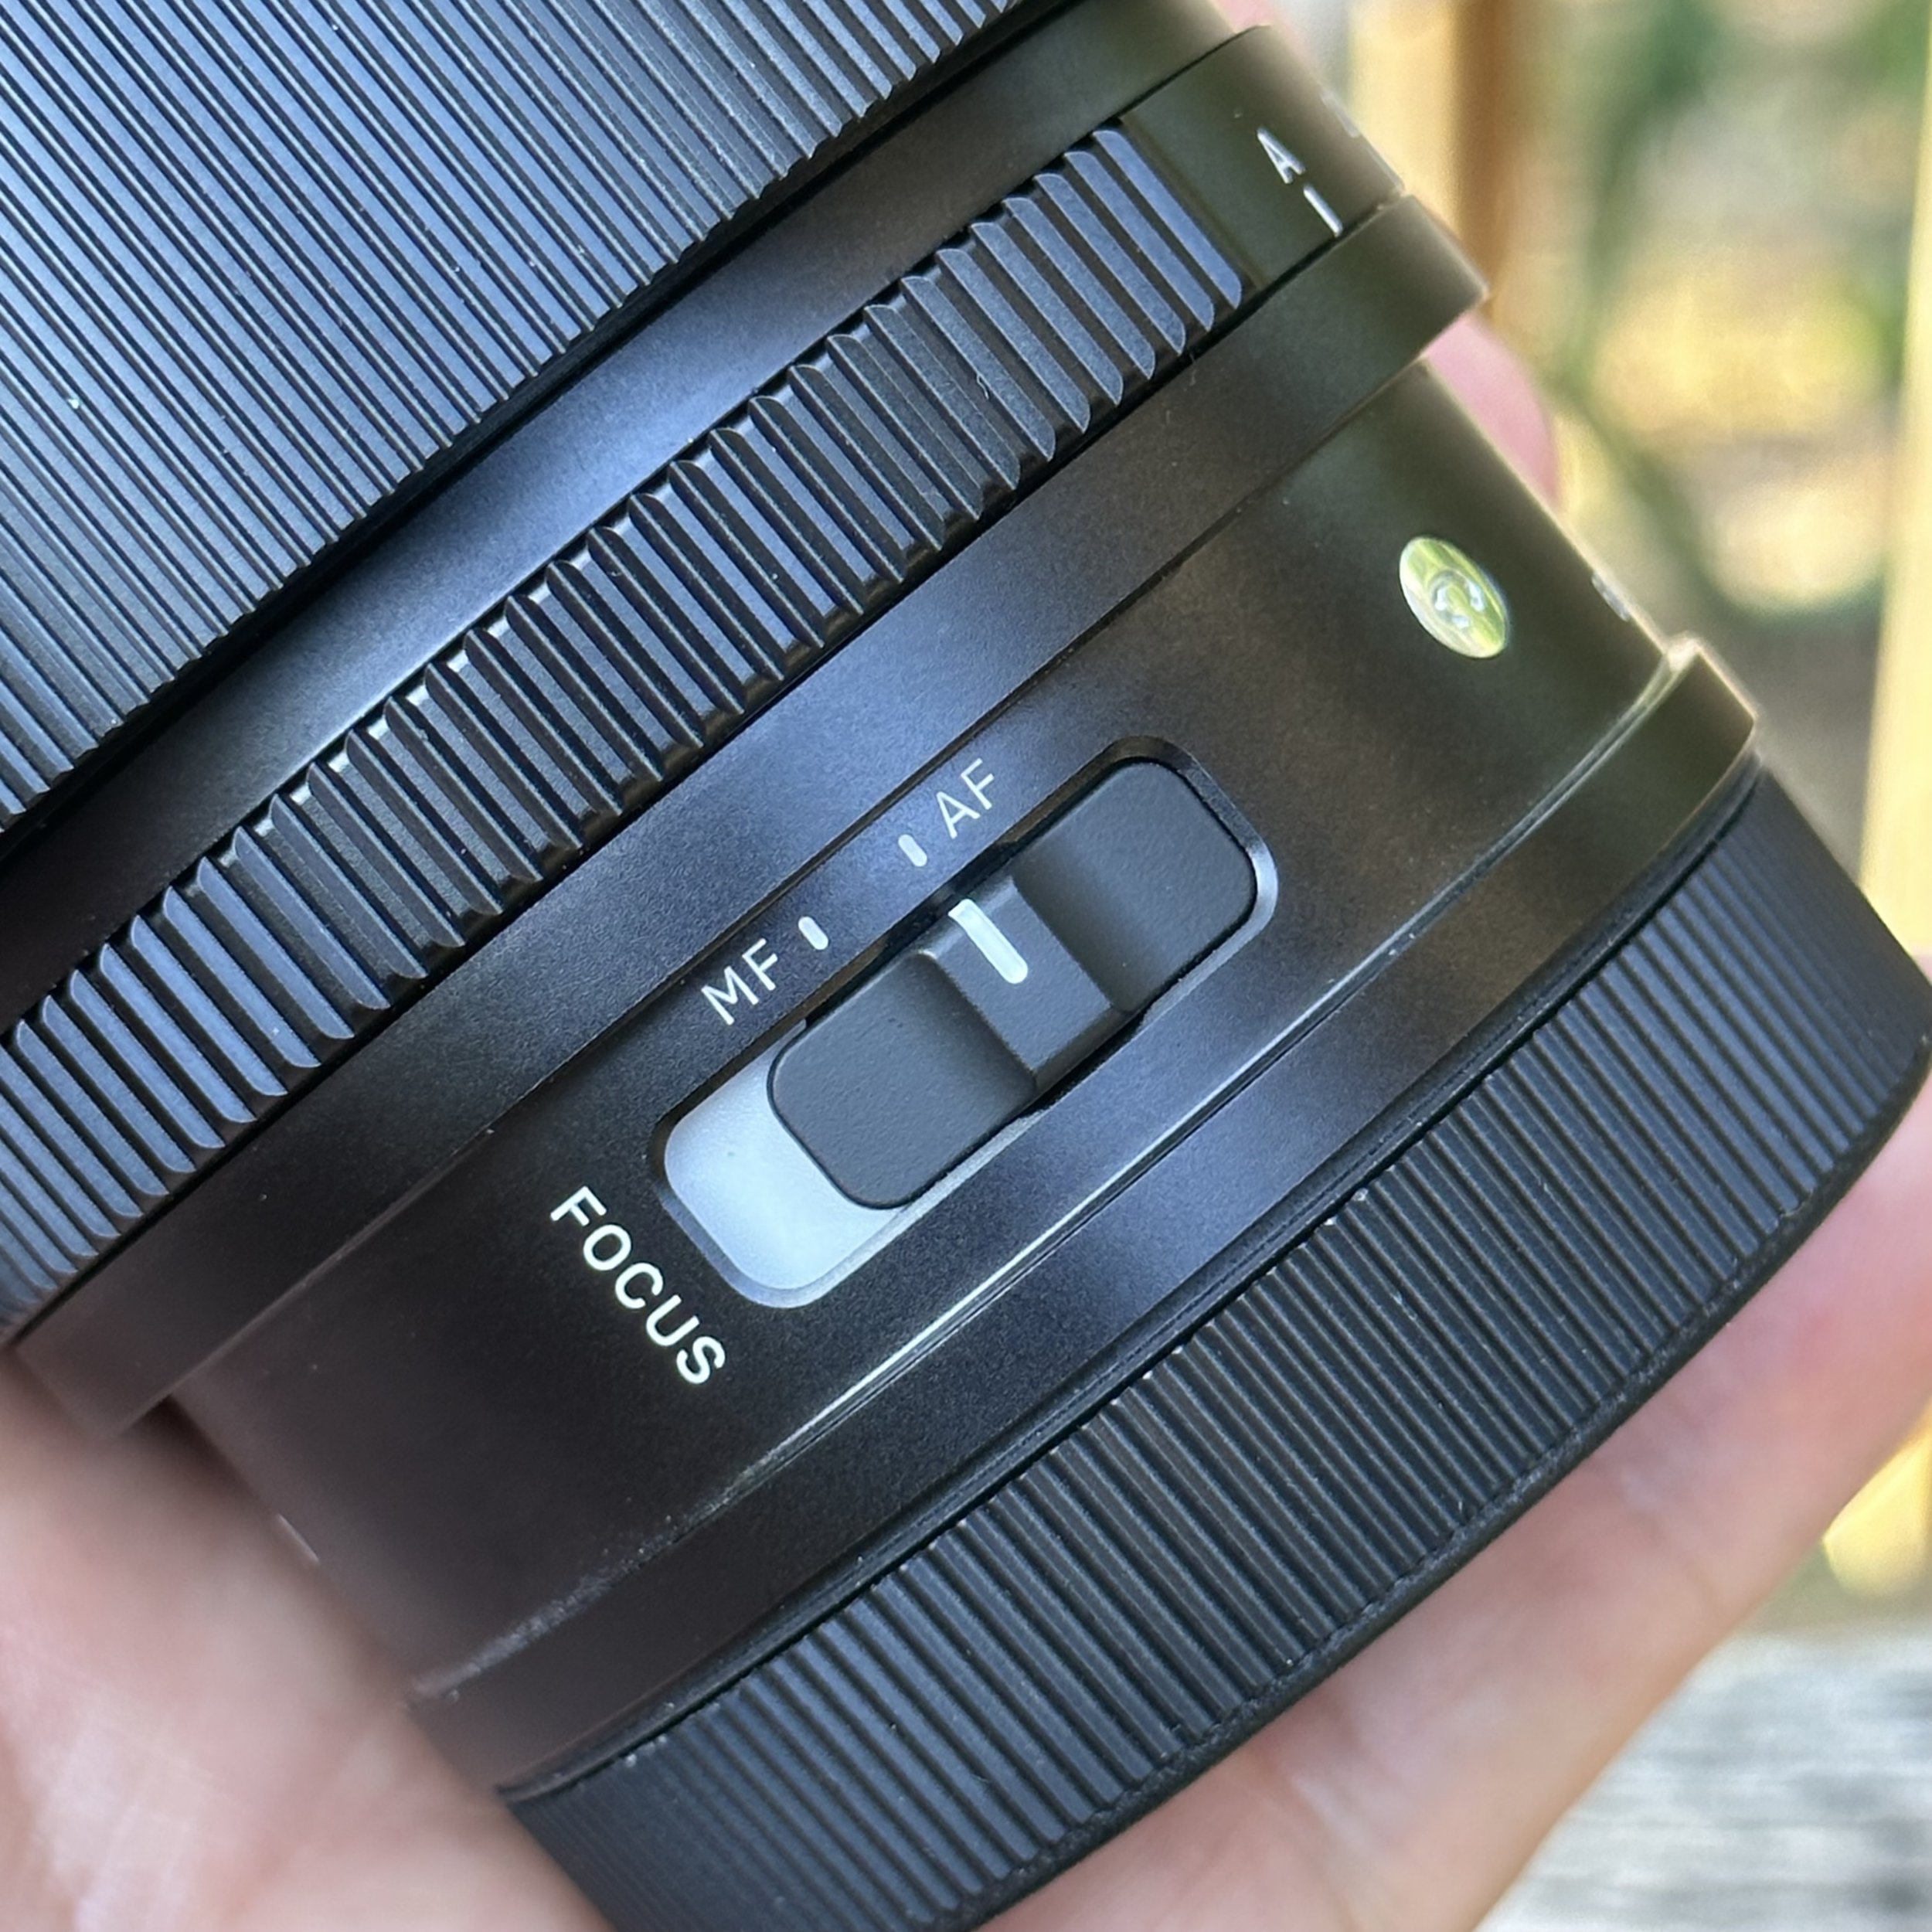
The manual /. auto focus switch is not one of my favorite features, but it works none the less.
The other thing that Sigma does is something I am on the fence about. The manual focus is a switch selection on the lens itself. I dont know why they chose this way to control this function and to be honest, it is not my favorite way of doing this function. It might be that Leica’s firmware prevents Sigma from exploiting manual focus without it. I really don’t know why, but the focus ring is an encoder design which means it is not mechanically connected to the focus helicoid in the lens. One would think this would be how it would be designed if there was a mechanical switch separating the two modes. All that to say my thoughts of this lens are that it is a great lens, especially for the money and you can get them about anywhere. Well done Sigma, well done.
Pros, Cons, and Who Should Buy the Sigma 65mm
Let me break down the good and the not-so-good about this lens:
What I Love (Pros):
Image quality is 98% of Leica: Laser sharp, wonderful rendering, you couldn't tell the difference
Compact size: "Darn thing is tiny" makes the system really portable
Aperture ring with detents: I prefer this over Leica's all-software control
All-metal construction: Feels solid and well-made
Price: $699 vs $4,995 for the Leica equivalent (seven times less!)
Fast autofocus: Fast enough for real use, no complaints
Build quality: Nice fitment, no play in parts, professional feel
65mm focal length: Perfect sweet spot between 50mm and 75mm
What I Don't Love (Cons):
AF/MF switch on lens: I'm on the fence about this vs Leica's software-only approach
Slightly slower AF than native Leica: Not as fast as Leica glass (but still plenty fast!)
Focus ring is encoder design: Not mechanically connected to focus helicoid
No dedicated "Art" line features: This is the DG DN "Contemporary" line, not Art
Who Should Buy This Lens:
Leica SL2 or Panasonic S-series shooters on a budget
Portrait photographers who want 65mm/75mm without spending $5,000
Street photographers who love the 65mm focal length
Anyone building an L-mount kit and prioritizing value over badge
Photographers who appreciate physical aperture rings
People who want Leica-quality images without Leica prices
Who Should Skip This Lens:
People who absolutely need the fastest autofocus for sports
Photographers who already own the Leica 75mm f/2 (obviously!)
Anyone who values brand prestige over practical performance
People who need weather sealing for extreme conditions (Sigma is weather-resistant, not fully sealed like Leica)
Frequently Asked Questions About the Sigma 65mm f/2.0 DG DN
Is the Sigma 65mm f/2.0 really 98% as good as Leica glass?
Yes! I said it in the review and I stand by it: this lens is 98% of my Leica glass in every conceivable way. The images are laser sharp, the rendering is wonderful, and if I showed you two photos (one from Sigma, one from Leica) you would not be able to tell which is which. The Sigma 65mm f/2 costs $699 versus $4,995 for the Leica APO-Summicron-SL 75mm f/2. You're getting 98% of the performance at 14% of the price. Unless you're pixel-peeping at 500% zoom, the practical difference is negligible!
Does the Sigma 65mm work with Leica SL2?
Absolutely! The Sigma 65mm f/2.0 DG DN is made specifically for L-mount, which includes Leica SL, SL2, SL2-S, CL, and Panasonic S-series cameras. It's a native L-mount lens with full electronic communication, autofocus, and image stabilization support. No adapter needed. I've been using it on my Leica SL2 and it works perfectly. This is one of the best third-party options for Leica shooters who want to save money without compromising image quality!
Why 65mm instead of 50mm or 75mm?
65mm is the perfect in-between focal length! It sits right between the standard 50mm and the classic portrait 75mm. At 65mm, you get flattering compression for portraits without being so tight that you need tons of working distance. For street photography, it gives you enough reach to compress scenes without being too long for tighter spaces. Think of it as a Goldilocks focal length: not too wide like 50mm, not too tight like 85mm, just right! Once you use 65mm, you'll understand why it's special.
How is the Sigma 65mm autofocus speed?
The autofocus is fast! I said in the review "it is fast enough to get the shot for me." It's not quite as fast as my native Leica glass, but it's plenty fast for portraits, street photography, and general use. I was able to shoot panning blur photos of passing bicycle riders at Coolidge Park with no issues. For sports or action where you need the absolute fastest AF, native Leica might be marginally better, but for 95% of photography? The Sigma is more than fast enough!
What's the difference between Sigma Contemporary and Art lenses?
The Sigma 65mm f/2.0 DG DN is part of Sigma's "Contemporary" line, which focuses on compact size and portability while maintaining excellent optical quality. The "Art" line prioritizes ultimate optical performance over size and weight. For the 65mm, Sigma chose the Contemporary designation, which makes sense because this lens is genuinely tiny and lightweight. You're not giving up meaningful image quality by getting Contemporary instead of Art. This lens punches way above its weight!
Does the Sigma 65mm have an aperture ring?
Yes, and it's one of my favorite features! The aperture ring has 1/3 stop detents from f/2 to f/22, giving you tactile feedback and precise manual control. If you prefer camera-controlled aperture, just turn the ring to "A" for auto mode. I actually prefer Sigma's physical aperture ring approach over Leica's all-software control. It's faster to adjust and you get physical feedback. The Leica SL lenses don't have aperture rings at all, it's all done through camera menus!
Is the Sigma 65mm sharp?
Laser sharp! I said it in the review and the sample photos prove it. The Sigma 65mm f/2.0 is sharp wide open at f/2, and stopped down to f/4 or f/5.6 it's incredibly sharp across the entire frame. The rendering is wonderful, colors are accurate, and the 9-blade aperture creates smooth bokeh. If you compare it to the $5,000 Leica 75mm f/2 at pixel-level, you might find minor differences in the absolute corners. But for real-world photography? You won't see a difference. This lens is sharp enough for any professional application!
Should I buy the Sigma 65mm or save up for the Leica 75mm?
Buy the Sigma unless you have $4,300 burning a hole in your pocket! The Leica APO-Summicron-SL 75mm f/2 costs $4,995. The Sigma costs $699. That's a $4,296 difference! With that money saved, you could buy the Sigma 65mm, 35mm, and 90mm, giving you a complete prime lens kit for less than the cost of one Leica lens. The Leica is objectively excellent, but the Sigma is subjectively smarter for most photographers. Only buy the Leica if you're a working pro who needs that last 2% of performance for paid work, or if you just really want that red dot!
How compact is the Sigma 65mm?
It's tiny! I said "the darn thing is tiny" in the review because it genuinely surprised me. At 2.8 inches long and 14.3 ounces, it's significantly more compact than comparable lenses. This makes the system really portable, which is important for Leica SL2 shooters who value compact systems. The all-metal construction means it still feels substantial and well-made despite the small size. It's the perfect travel lens because it doesn't weigh down your bag!
What's the AF/MF switch issue you mentioned?
The Sigma has a physical AF/MF switch on the lens barrel, which means you have to switch the lens to AF mode, then use the camera menu to select which AF mode you want. Leica lenses do everything in software with one step. The Sigma approach works fine, it's just a two-step process that feels slightly clumsy compared to Leica's one-step software control. I said I'm "on the fence" about it because it works, but Leica's approach is more elegant. It's a minor user interface quirk, not a deal-breaker!
Pros, Cons, and Who Should Buy the Sigma 65mm
Thank you for reading my thoughts on the Sigma 65mm f2 DG DN lens that Hassan loaned me for my Leica SL2. It has been an adventure for me.
Here's my bottom line: The Sigma 65mm f/2.0 DG DN is 98% of Leica glass quality at 14% of the price. That's not hyperbole. That's my honest assessment after extensive use.
Hassan, thank you for trusting me with your beautiful lenses! This 65mm has honestly made me reconsider my lens buying strategy. Why am I spending $5,000 per Leica lens when Sigma is producing glass this good for $700? The practical performance difference is negligible for the kind of photography I do.
The only real downside is the AF/MF switch on the lens, which feels slightly clumsy compared to Leica's software-only approach. But that's a minor user interface quibble, not a deal breaker. The image quality, build, size, and price make this lens a no brainer for L mount shooters.
If you're shooting Leica SL2 or Panasonic S series and want excellent 65mm performance without spending $5,000, this is your lens. Period. Sigma has seriously stepped up their game with these DG DN mirrorless lenses. They're not just "good for the price." They're genuinely excellent, full stop.
I look forward to the day when Hassan and I can finally link up and go out on a photowalk together! Maybe by then I'll have bought my own copy of this lens because honestly? It's earned a permanent spot in my bag…or should I say “on my shelf” lol.
Now get your camera out and go take a picture with it!
Support this website by using these affiliate links to shop on Amazon:
Sigma 65mm f2.0 DG DN Lens L mount
Nikon AF-S FX NIKKOR 105mm f/1.4E ED Lens
Voigtlander Nokton 35mm f/1.4 II
Sandisk 128GB Extreme Pro memory cards
Nikon Zf Full Frame Concept Camera Rumor Discussion
Well here we are. Talking about fictitious cameras again… lol.

Of course this is my satire photo I cobbled together for a concept, I kind of like the aesthetic though.
When I heard this rumor I thought about it and dismissed it almost immediately, but then I started thinking about it more and more and came to realize that I would really like a camera like the rumored Nikon Zf mirrorless retro camera. Let’s take a walk down “Wishful Lane” and cobble together the main features I would like to see in such a camera.
David Saylors Nikon Zf Full Frame Rumor Street Photography Camera Livestream
First off we need to establish something, Nikon is no newcomer to the retro camera space, if anything they are a leader in this space in my opinion. You see, they have already tried this several years ago. The Nikon Df was a full frame DSLR retro styled camera that first came out in late 2013. Here is the problem with the Df, it was ahead of its time. The Df came out at the height of the DSLR period in camera history and nobody wanted to go back in time to the cameras that looked like that… yet. To say it simpler, nobody wanted it…

Reference photo scraped from the internet courtesy of B&H Photo.
The Nikon Df was a really cool camera too, sporting a full frame sensor in a stylish retro body. It was simply just too soon. Fast forward to mid 2017 and Fujifilm launches arguably their most important camera to date…the XT3. Sure the XT1 and XT2 had done fairly well, but this camera propelled them into the Street, Reportage, Lifestyle camera space like a rocket. Everybody had an XT3 at one point, shoot I even used one for several years. It is a great camera.

Another image scraped from the internet for reference.
Fuji had been chumming the waters for several years at this point in the street photography niche and a strong marketing campaign combined with a period in time when youtubers were the main game in town for getting the word out and the XT3 took over this game…for a time. The point had been finally made that the photography world was in fact ready for a retro styled camera.
Next in this story came the Zf-c from Nikon, this little power house of a camera was basically a test run, in my opinion, to see if Nikon had enough market segment clout to pull users from Fujifilm, Olympus and Leica over to their court. They even released it with a retro styled 28mm lens to go with it. Pure genious in my opinion as the 28mm f2.8 Ai-s was one of their best lenses ever made. This has to be the most blatant shot across the bow of Fujifilm in the company’s history… Just look at the two cameras in the comparison below.

Sceen capture from Cameradecision.com, a website that will allow you to compare many cameras.
I grabbed this image above from CameraDecision.com as it has the measurements to show how close they actually are in physical size and appearance. Just look at it and then try to tell me with a straight face this wasn’t a test shot at improving Nikon's street photography market share…lol
You know what though, it worked. Zfc sales soared and the cameras flew off the shelves. People loved the tiny little camera but it wasn’t without its shortcomings. These shortcomings will be what is fixed in the Zf if I am right… You see Leica has already figured it out. The dropped the CL from their lineup entirly due to the fact that people that want crop sensor street cameras simply buy the Fujifilm machines. Fujifilm owns this market outright now. It is common knowledge that if you shoot crop sensor street photos it is probably on a Fuji… So Leica simply leaned into their full frame machines and focused on them more, this proved to be the right move for them too. Nikon is also starting to see this in my opinion and the Zf will be the camera that they use to show it.
The things I am lookng for in the Zf that will make me choose it will be:
24Mp full frame, stacked, BSI sensor - Low light is what I am wanting here.
IBIS - slow shutter speeds are so much easier with good stabilization.
The same battery as the other full frame machines.
Dual card slots - not a deal breaker but overflow is nice.
High quality EVF - A hi-res EVF is important to me.
Released with a set of fast primes like 28mm, 35mm, & 50mm.
A tilting screen is a must. A side swinging (flip out) design is not important though.
Shutterless design like the Z8 & Z9
Weather resistant in the rain.
You will notice that video is not on this list. That is because I don’t think this camera will be used by video enthusiasts and good video specs will not really matter. Sure, give it 4K 30p or some such if you want. That way you can capture the occasional B roll clip of shoot off of a tripod or what have you, but 90 percent of the people that will choose this camera will be choosing it for the stills experience.
I think that if they lean into the stills side of the game on this machine and integrate the external controls from something like an F3, that they will have a solid winner on their hands. I know I would love to have one. I bought the XT3 back in the day because Nikon didn’t have what I wanted. The Zfc was a near miss for me, I almost bought one when my buddy Phil Thach did, but I was able to keep my resolve to hold out for the full frame version…lol.
You see, I already have a crop sensor street camera with my Leica CL, so I just didn’t see the point in another crop sensor machine that didn’t have IBIS. If I buy another APS-c camera it will have IBIS. The tech is there, just look at the Fujiifilm XH2 for instance. The IBIS makes a big difference for me in that I like to shoot with fairly slow shutter speeds to capture motion blur and in low light or even at night. This is why I want the 24MP sensor, the larger photo-sites will make noise control a lot easier for the processor. Also killing shadow noise at the same time. Another point that needs expanding is that I like the EVF in my Leica cameras as I use glasses and with the EVF I can see the camera display7 information as well as the scene exposure and I can focus it to be able to not need to use my glasses. This matters in that if I looked through my glasses, I have to press the lens against the rubber eye cup and this usually has skin oils on it which in turn makes my glasses useless… Hence the reason for being able to focus the viewfinder to my un-aided eye. I simply look directly into the EVF and I can see everything, including image review if needed. I have grown to NEED a good EVF at this point instead of wanting it.
What do you think would make the perfect retro styled camera? Let me know in the comments below!
Test driving the Leica Q2...sorta.
I went for a little stroll in downtown Chattanooga and decided that on this photowalk that I wanted to simulate the Leica Q2 to see if i really wanted on. Photography is a funny thing, some photographers will buy one camera and use it all their life and others will change out lenses and camera bodies numerous times.
If you want to see more photos and some more discussion on the idea, follow this link to the video where I do this walk. Other wise, read on friend!
I went for a little stroll in downtown Chattanooga and decided that on this photowalk that I wanted to simulate the Leica Q2 to see if i really wanted on. Photography is a funny thing, some photographers will buy one camera and use it all their life and others will change out lenses and camera bodies numerous times.
My simulated Leica Q2 for the day: Leica SL2 + Asahi Optical 28mm f/3.5 prime lens. Not as compact as the real Q2, but it's got the same 47MP sensor and 28mm focal length to test the shooting experience!
I am a little of both as I love to play with new gear as well as use gear that has become my favorite kit so to speak. Well, I have the Leica SL2 and I also have a nice little Asahi optical 28mm prime lens that I have an adapter for so I figured I would put this together and see if the shooting experience would be close enough to the Q2 to give me an idea of what it would be like without having to spend 6000$ on it.
Breaking Down the Numbers: Q2 vs My Simulation Setup
Before I headed out for this photowalk, I wanted to understand exactly what I'd be testing. Here's how the Leica Q2 stacks up against my Leica SL2 with a 28mm lens setup.
The Leica Q2 has a 47.3 megapixel full-frame sensor, a fixed 28mm f/1.7 Summilux ASPH lens, weighs about 718 grams (1.58 lbs), measures 130 x 80 x 91.9mm, and costs around $5995. It's got fast contrast-detect autofocus, built-in macro mode (focus down to 17cm), weather sealing, and that famous Leica build quality with brass top and bottom plates.
My simulation setup used the Leica SL2 with a 47 megapixel full-frame sensor (nearly identical to the Q2), an Asahi Optical 28mm f/3.5 prime lens on an adapter, total weight of about 850+ grams with the adapter, much larger body dimensions, and total cost of what I already owned. This setup meant manual focus only, f/3.5 maximum aperture (two stops slower), no macro capability, and definitely not as compact or refined!
The key similarities were the sensor resolution and the 28mm focal length. The key differences were autofocus capability, maximum aperture, size and weight, and overall shooting experience. But for testing whether I'd actually enjoy shooting with a fixed 28mm for street photography? This simulation was close enough to give me real answers!
Shooting street photography in downtown Chattanooga with the SL2 + 28mm combo. I really love those Leica colors - the images just seem more rich in color to me! Maybe it's bias, maybe it's real, but these results have me happy.
I really love those Leica colors for some reason, maybe it is a bias I have towards the brand but to me the images just seem more rich in color. I really love how they turned out though and the idea of the Q2 is a great one for a general street camera. The high megapixel sensor combined with the 28mm lens is a potent street combination as you can see below where I shot the image as a candid just in passing and was able to adjust the composition later in post to get what I was looking for.
Is the Leica Q2 Worth $6000? Let's Do the Math
Here's the question that started this whole experiment: is the Leica Q2 worth $6000? To answer that, I needed to figure out what I'd be paying for versus what I could achieve with gear I already own.
The Leica Q2 at $5995 gets you a complete, ready-to-shoot system! One camera, one lens, no decisions about what to bring. You're paying for that Summilux lens (which would cost $4000+ if sold separately), the compact integrated design, Leica's legendary build quality, and the refined shooting experience. If you shot nothing but 28mm street photography, that's actually pretty reasonable for a professional tool!
My alternative approach using the SL2 I already own plus a vintage 28mm lens (which I picked up for about $150 used) costs essentially nothing additional. I already had the SL2 body, I already had the adapter, I just needed a good 28mm lens. Total additional investment: under $200. The compromise? Manual focus, slower aperture, bulkier setup, and no integrated refinement.
So is the Q2 worth the extra money? If you're starting from scratch and you know you love 28mm, absolutely! The convenience, the autofocus, that f/1.7 aperture, the compact size - those are real benefits worth paying for. But if you already own a camera body with a similar sensor and you can adapt lenses? You can get 80% of the Q2 experience for a fraction of the cost. That's what this test proved to me!

This photo was shot about 10 feet away with the 28mm on a full frame sensor - it looks MUCH further away than it actually is! But through the power of cropping with 47 megapixels, I can make it take on a couple of different looks. This is the original uncropped frame.
This photo was shot about 10 feet away and with the 28mm on a full frame sensor it looks MUCH further away. But through the power of cropping… I can make it take on a couple of different looks as you can see below.

This is a 12 megapixel crop of the original image - still plenty of resolution for web or print! Notice how the tighter crop changes the entire mood? This version has a lonely, almost bleak feeling to it. Same photo, completely different story.

This is a 16 megapixel crop of the original image - a slightly wider crop than the 12MP version above. This one has a warmer, almost restful feel to it. That's the power of 47 megapixels - you can change the entire dynamic of the image with a simple crop!
As you can see I can get two very different feeling images from this single frame. That is kinda powerful to be honest. I mean, you can change the entire dynamic of the image with a simple crop. That is actually liberating to be honest. I mean just look at the two again. One has this lonly, almost bleak feeling to it while the other has a warmer almost restful feel to it. That is really cool to me. So this is a perk of the Leica Q2 in my book.
So what else comes with the Q2 that I didnt have today? Well, autofocus is one, another is larger aperture. This lens is f3.5 which is two full stops slower than the lens on the Q2. This would matter more in low light as I was shooting most of this day at f11 to reduce the need to adjust focus. Range focus at f11 on a 28mm prime is basically 4 feet (1.3 meters) to infinitiy. So it literally was point the camera, press the shutter and the image was in focus. But if I wanted to shoot indoors or in the evening, the f1.7 aperture would be nice to have to keep my ISO down some or be able to raise the shutter speed a little to freeze action better.

What I really liked about the 28mm was that it made me interact with people more! These two guys were walking by and I just asked them if I could grab a quick photo - they were stoked and so was I. The 28mm forces you to get closer if you want the detail, which means you have to actually talk to people. This is helping me overcome my shyness about street photography!
Is the Leica Q2 Right for You? Here's My Honest Assessment
After this simulation experiment, I've got a pretty clear picture of who the Leica Q2 is perfect for and who should probably look elsewhere. Let me break this down based on what I learned!
You should seriously consider the Q2 if you primarily shoot street photography at 28mm, value compact size and don't want to carry multiple lenses, are willing to pay for premium build quality and refinement, want that f/1.7 aperture for low light, love the idea of a one-camera solution for travel, and appreciate Leica's color science and shooting experience.
The Q2 really shines for minimalist photographers who've already decided 28mm is their focal length. If you know you love this field of view and you want the best possible 28mm compact camera, the Q2 is hard to beat! The autofocus, the aperture, the size, the build - it's all there. You're paying a premium, but you're getting a refined tool that just works.
But you should probably skip the Q2 if you already own a high-megapixel full-frame camera (just buy a 28mm lens like I did!), like to switch between different focal lengths regularly, aren't sure if 28mm is your preferred street photography focal length, are on any kind of budget, or want the flexibility of interchangeable lenses for different situations.
For me personally? I do really like the ergonomics of the SL family of camera bodies, so I will keep my SL2 and use a 28mm lens when I want to have the Q2 experience. The simulation proved I'd enjoy the Q2, but it also proved I don't need it! I get most of the benefits with gear I already own, and I get to keep lens flexibility for other types of shooting.
The key is being honest about your actual shooting style versus your aspirational shooting style. Do you really shoot primarily at 28mm, or do you just like the idea of being a minimalist street photographer? If it's the former, the Q2 might be worth every penny. If it's the latter, save your money!
What I really liked about the 28mm was that it made me interact with the people more. The photo above is a great example of this, these two guys were walking by and I just asked them if I could grab a quick photo, they were stoked and so was I. This is honestly a problem I have that I am working to get past. I don’t like bothering people and will walk by potentially great photos simply because I don’t want to bother them. The 28mm forces you to get closer if you want the detail in the photos so I have to get closer to do that. So I think honestly, this is going to have be a perk of the 28mm Summilux lens after all…
All in all, this kit performed really well for me and I think the Leica Q2 would perform equally as well. BUT I do really like the ergonomics of the SL family of camera bodies so for me I will keep my SL2 and use a 28mm lens when I want to have the Q2 experience in a camera. So until next time, get your camera out and go take a photo with it.
Just capturing everyday life…
When I decided to take some time away from youtube and just explore my photography, I didnt know how much fun it would be to just take the camera and an extra battery. It blew my mind to be honest.
Still I found myself starting to look for more interesting photos when I am out and about these days. Something else I have really come to realize is that you cant get the photo if you dont go out with your camera.

Here is an example of what I mean by getting out and shooting more. You are not going to be where the action is if you dont get out and shoot. Just being out in the field greatly increases your chances of getting a photo. That being said, I am the worlds worst at failing to get the shot. I got the one about due to range focus being set on the lens so I didnt need to even bring the camera to my eye. I literally saw it unfolding and just raised the camera and snapped the frame. It is also heavily cropped too so I can get the composition I wanted. That is a luxury of the 47mp sensor on the Leica SL2 that I was using that day, it gives you options.
Here we have a photo I have taken a couple of times now. Every year our hometown has an event in this park and the kids play in the creek is flagrant defiance of the posted sign. It is such a cliche photo that I can’t pass it up. Obvious civil disobedience to signage if a fun photo so if you see one of these scenarios just get your camera out and take the picture. You just might like what you end up with.

Here we have a scene of “small town Americana” that I thought was kinda interesting. These little carnival foodie trucks are a common sight in rural America and I wanted to capture that essence if possible. I am not sure if I was successful but to me it is a cool photo.
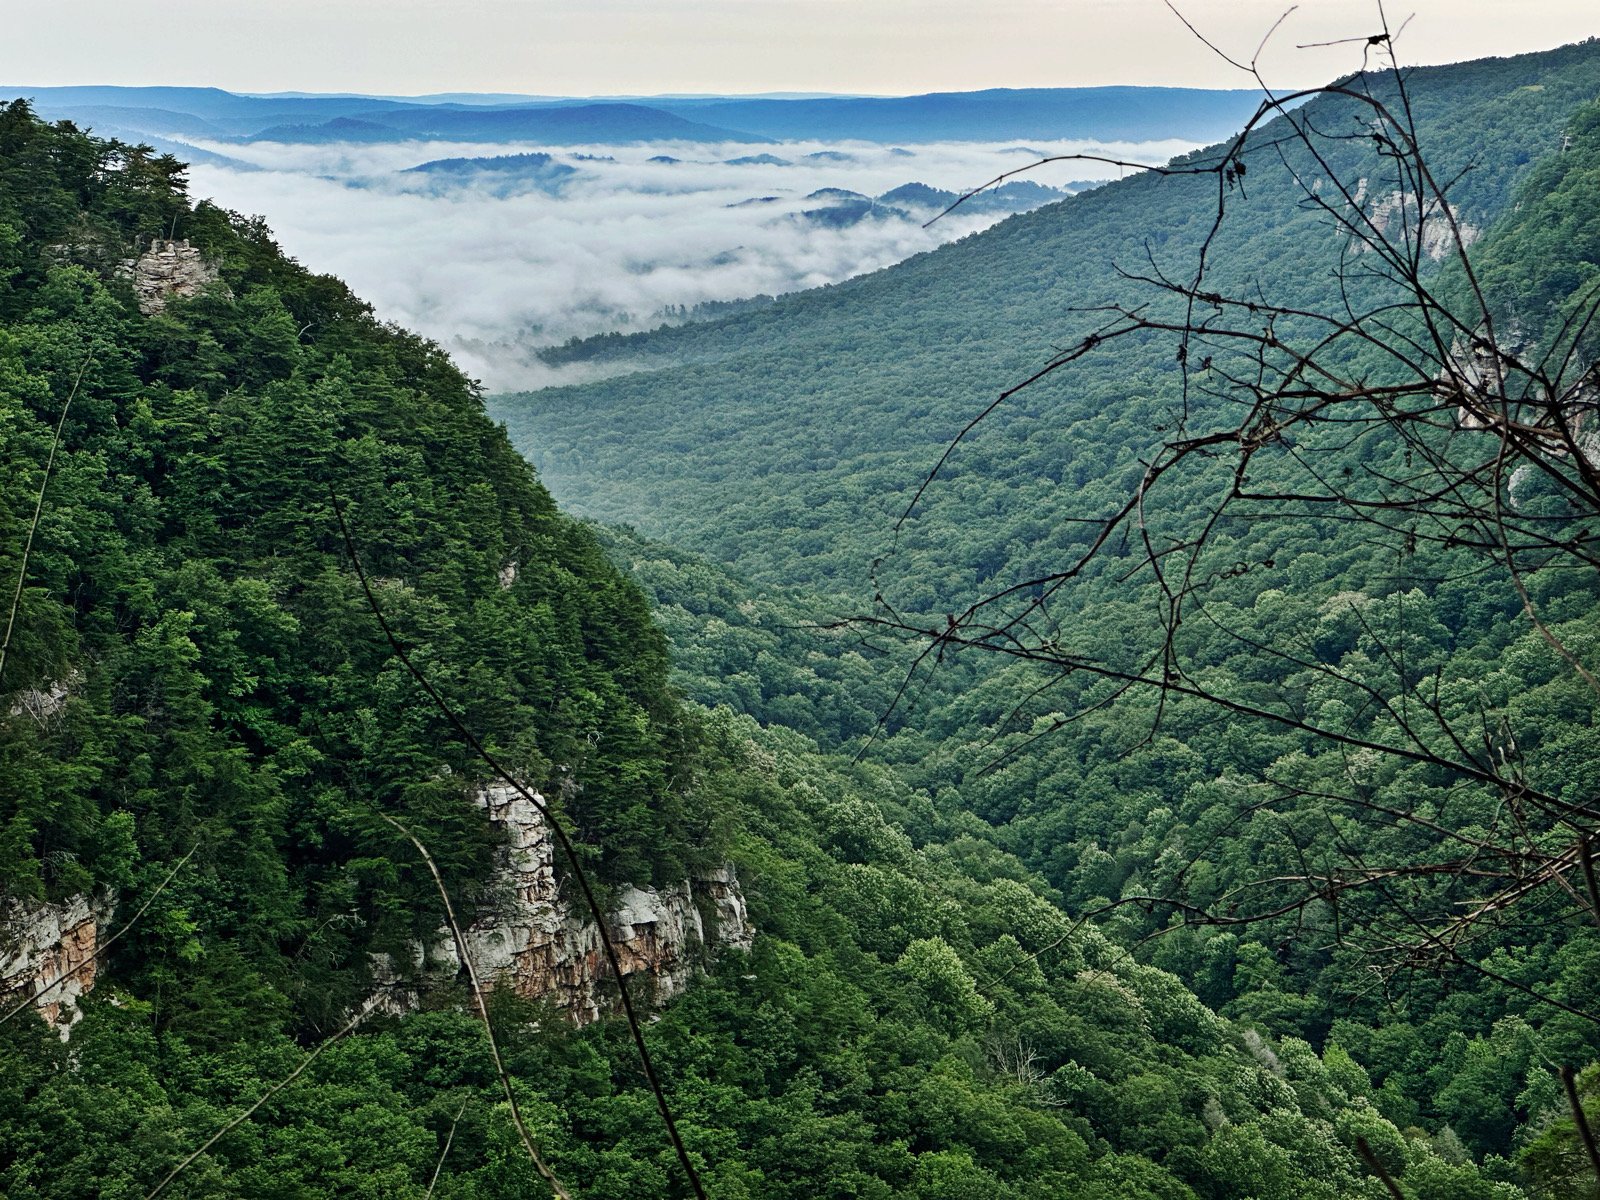
Here I found something interesting when I went to Cloudland Canyon State Park to setup a POTA activation the other morning. A cloud inversion isnt real common until the fall, but conditions were apparently just right. So I grabbed a photo before turning on the radio and now I have this photo.
Here is the last photo I want to talk about. This was a quickie iPhone capture that I saw and just had to get right quick. Use what you have and get the photo, that is the rule of the day. I have come to learn that when you get something like this in your head just go take the photo and be done with it, it will gnaw at you forever if you dont. I think some of the best photos, street or otherwise, come from just capturing everyday life. What do you think?
An updated treatise on my travel camera gear.
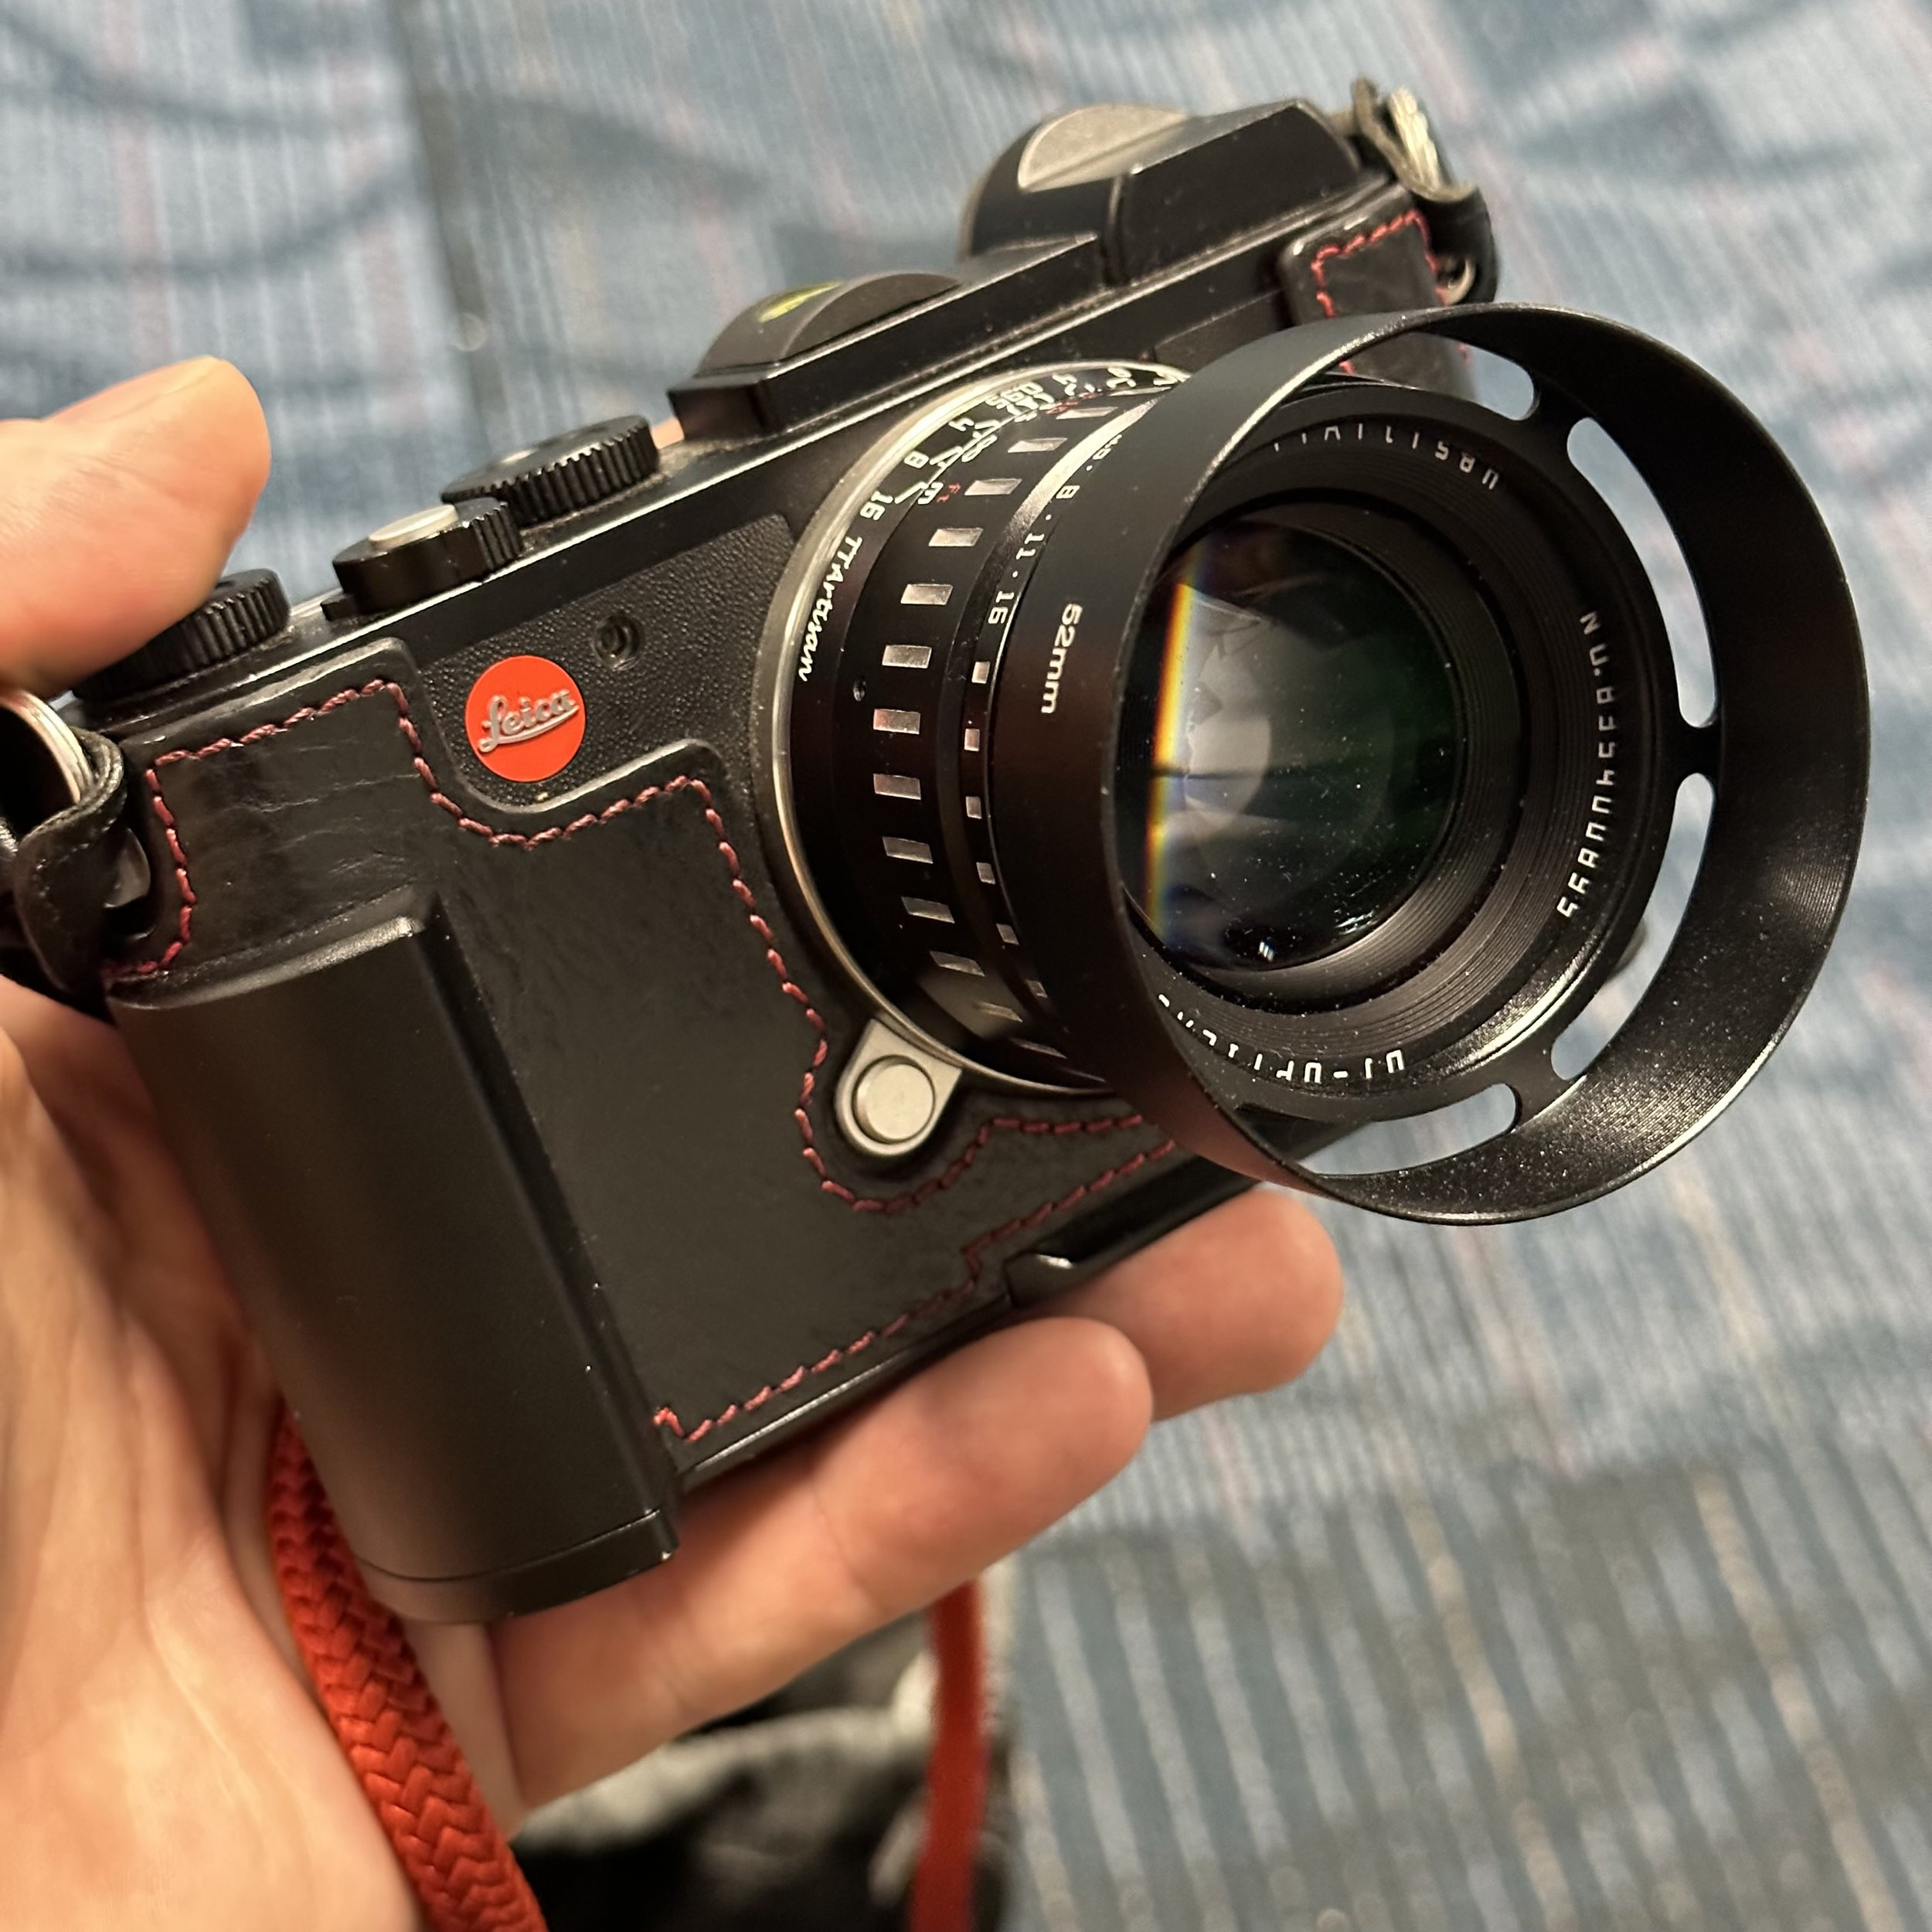
When I wrote the last blog post about flying with cameras gear, I had only considered the airport and airplane overhead space only.
Well, here I am again in a different scenario and this time the kit looks very different. The overarching theme here is apparently that you should tailor the kit to suit the trip. Lol. I have done just that.
For this trip we are being tourists more or less, so the camera kit will reflect that. I am taking the Leica CL and just two prime lenses. The 17mm and the 35mm lenses are perfect for tourist type photography and there is two more reasons for taking two primes over a single zoom… read on to learn why.
When choosing kit for trips now, I start with the premise of the trip. For a long time, I would have these illusions of grandeur and would take all this gear for events that never happened. You see, I dont plan the trips, the wife does so she plans on things the I don’t consider. She will arrange tours and such and I am just too busy with other things to pay much attention. Well, I finally learned and now I dont bring hardly any of that stuff and this makes travel SO much easier. Some types I have encountered are tourist, wildlife, street, and such as that. Once this is nailed down then I choose a camera that best fits that type of trip. Usually between crop sensor and full frame first as this gets me the right camera. For wildlife I prefer my crop sensor Z50 but for architectural purposes I prefer a full frame sensor. Things like street photography can be shot with either but on long days, the little crop sensor Leica CL is a much better choice over the much heavier Leica SL2.
Now that I have a camera picked out, I will decide what is the most likely scenario I will be shooting in and choose a lens for that. Next I will look at what else there is and choose a lens that will work for this as well as loosely backup for the main lens.
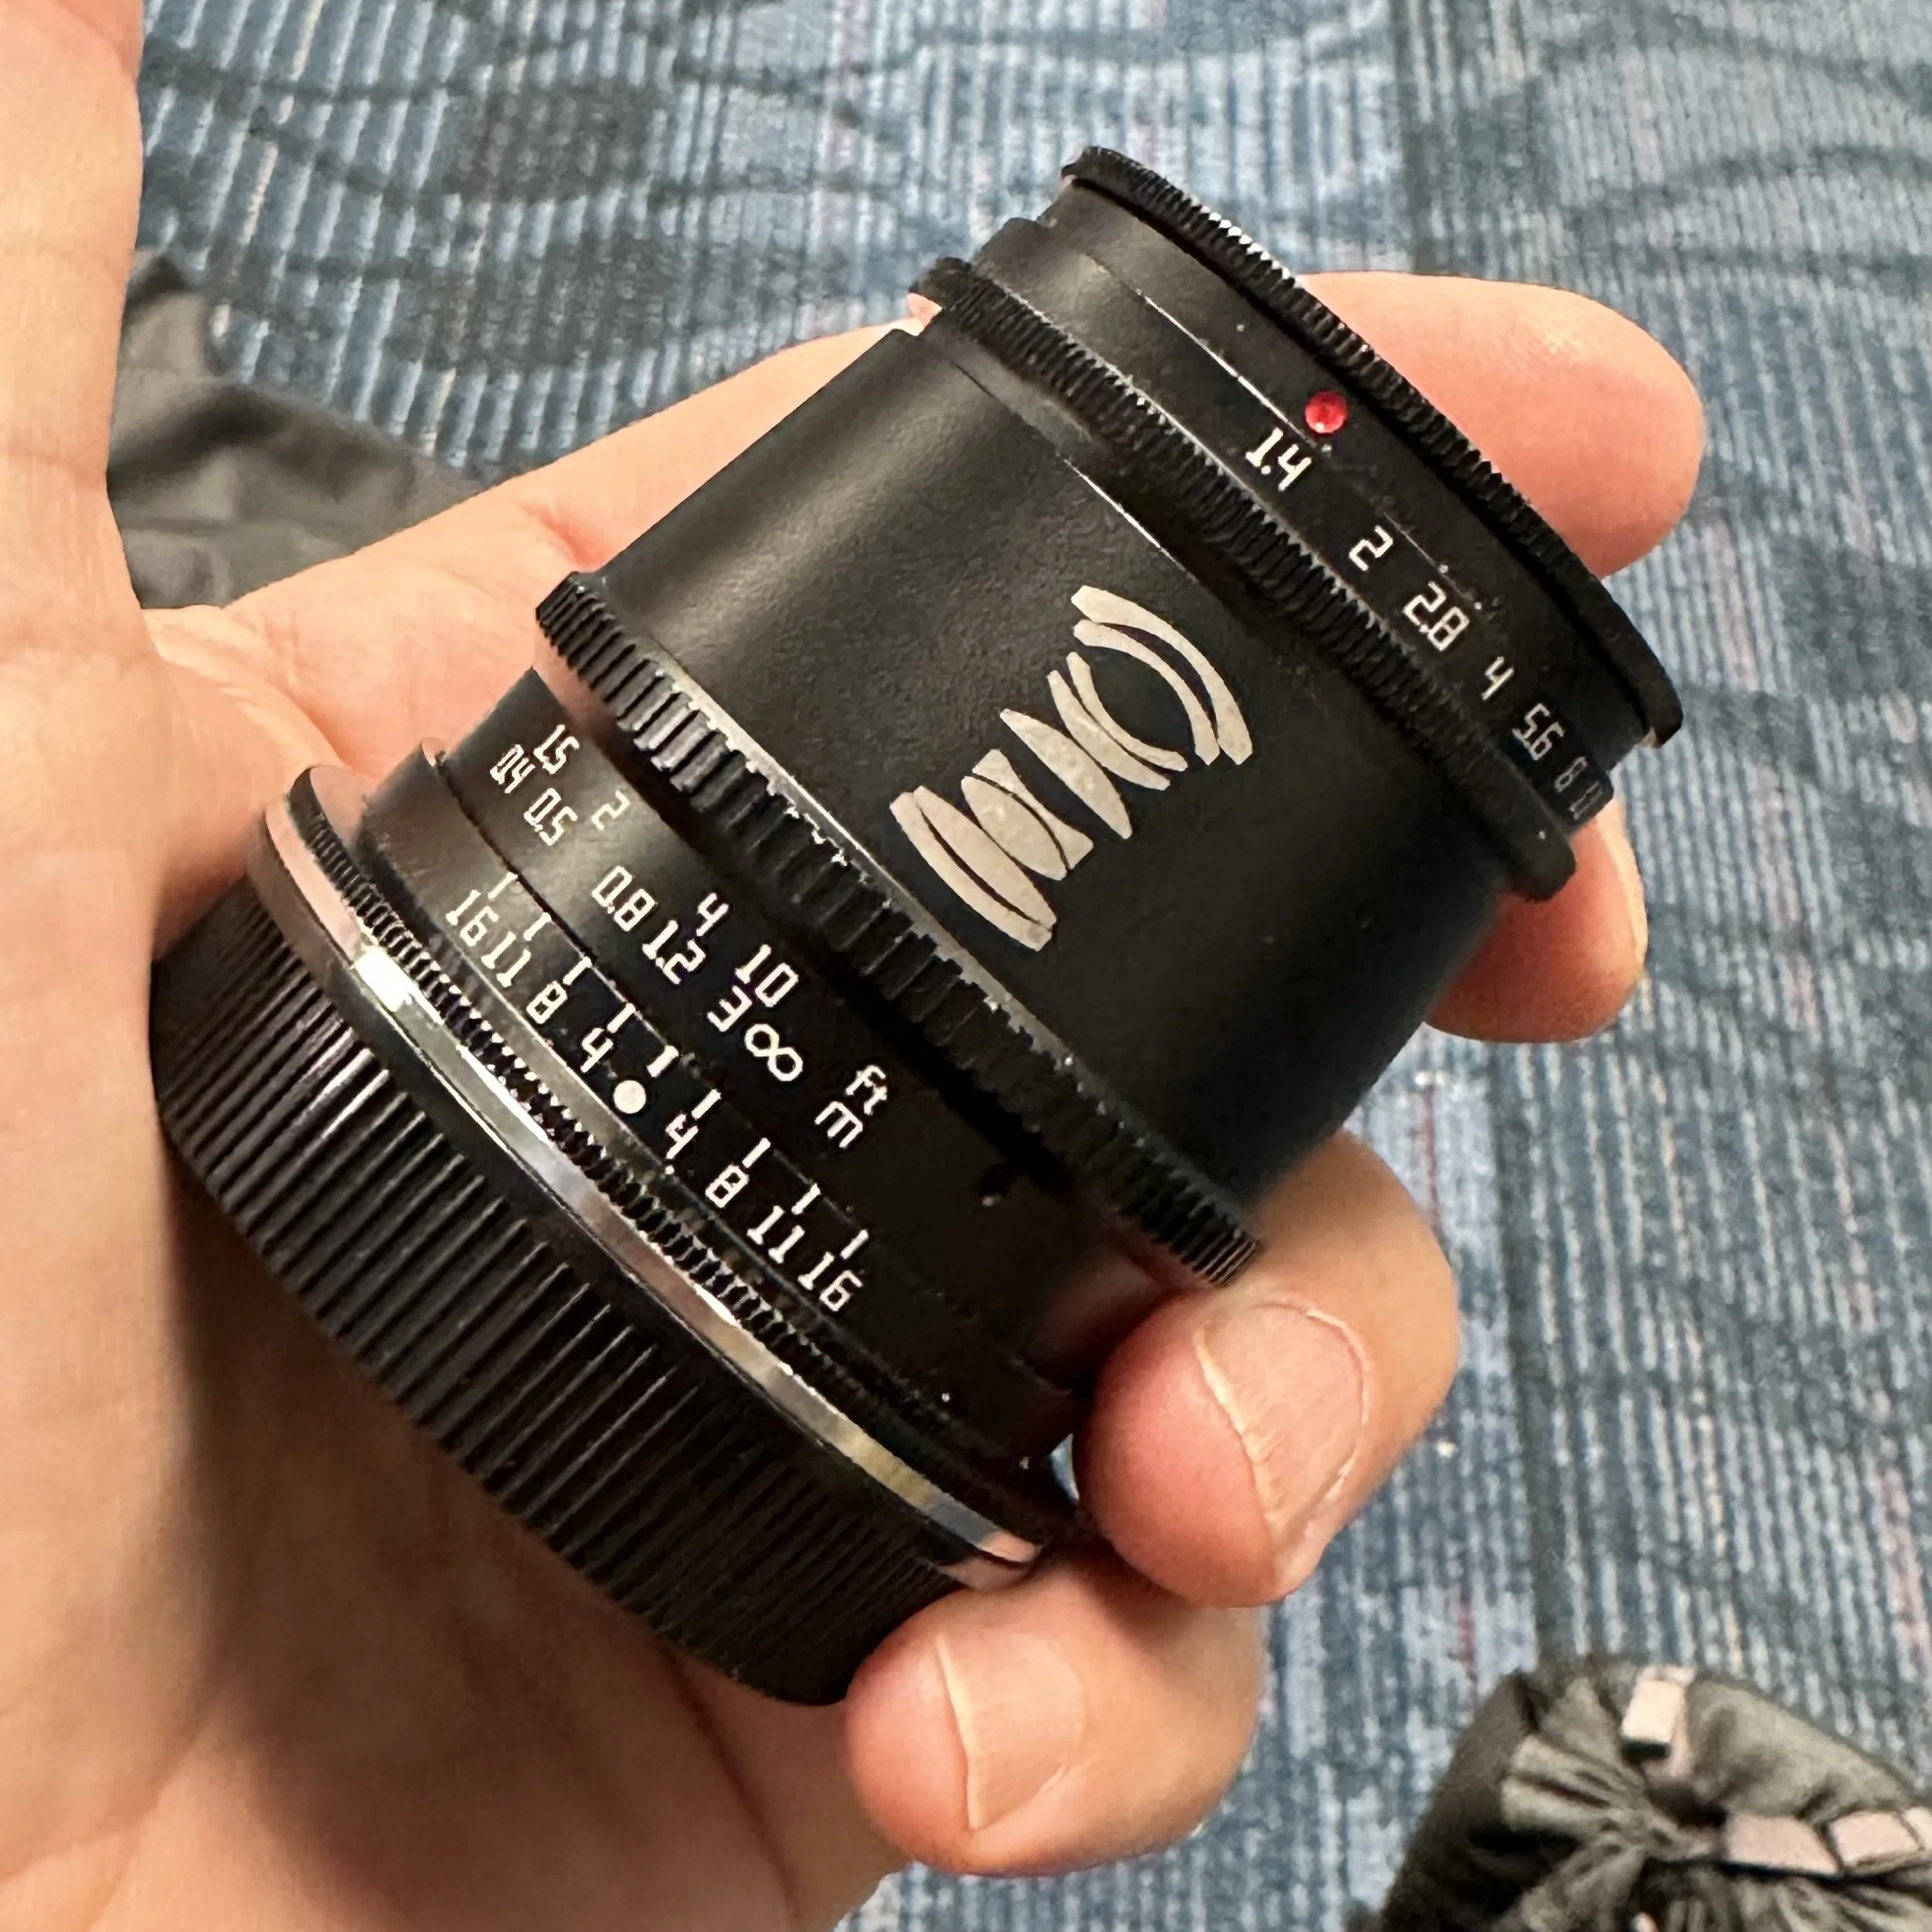
Using this process, I chose the 35mm f0.95 TTArtisan lens as my main lens and the TTArtisan 17mm f1.4 lens as the backup. These are designed for the Leica CL which is a crop sensor camera so the equivalent field of view for these lenses is 50mm and 28mm respectively. These are two VERY useable focal lengths for a travel kit. These will also both work just fine if one or the other gets damaged at some point. I might have to adjust my shooting style a little but the trip is not a loss…
I want to take a moment here to mention TTArtisan and how they are making some amazing lenses for crazy low prices. The quality of all three of the lenses I currently have that they made are just stellar. I have one they gave me as a review sample but I bought the other two on my own. They are great little manual lenses.

Another reason I like using prime lenses for trips is the maximum aperture is much larger than on general purpose zoom lenses. General purpose lenses work great in broad daylight but the lack of large apertures make them less than desirable for me in the evening and early morning.
What this means is I will end up with a really compact kit with this camera and two lenses. These being native L mount lenses also means they are smaller than adapted lenses as well. (This is something that I do regularly and dont sweat it and that is how I know.) Native mounted glass means they are more compact though and that is what I wanted.
Since we are hiking this trip, I wanted to make sure that rain didn’t ruin my camera gear. This is why I put all my camera gear into a dry bag and then put that inside my backpack.

Once inside the dry bag, they are divided into three different lens “dump” bags I used for this trip to organize this gear loadout. These are made by Thinktank Photo and are great for street photography photo walks as you can stick batteries and a spare lens, business cards and lens wipes and such in them and they are still small and lightweight.
I realize now that I desperately need to clean my lens! Will do that asap!!!
Armed with this kit I am ready to take on just about any tourist, street, or even landscape type photo with hood confidence that I will come away with something reasonable. The next blog post in regards to this kit will be a photo spread describing what I found to photograph.
Until next time, get your camera out!!!
Prime lens primer
So you have never used a prime lens before… well let’s change that.

Leica CL with the TTArtisan 35mm f0.95 APS-C prime lens
A prime lens is like a window into another world of photography. They can be had in much larger apertures than zooms usually, they are smaller under most circumstances, and if you get vintage ones…they can produce very unique results.
Another thing that prime lenses are good for is they teach you to compose based on the environment. You have to work within the confines of the focal length which means you will have to either move closer or further away to “zoom” with your feet to get your composition. Sometimes this means not getting a certain shot at all because you would have to stand in the middle of a river to get the composition or something like that. But I rarely run into this problem and once I start seeing in focal length it seems I filter out these problems subconsciously anyway.

Leica CL with the TTArtisan 17mm f1.4 APS-C lens.
You will also learn to see in your chosen focal length over time as well. That is, once you shoot a while with just one focal length… You hear street photographers talk about the 28 or the 35 and they know what the photo is going to look like based on experience.
I will be honest here, it is really liberating to have such a small and potent setup when I run prime lenses. Zoom lenses give you versatility, but I see people that use zoom lenses still carrying a camera bag. This seems overly redundant to me, I use the one lens all day and get out in the environment, but I am not everyone. Some people prefer to have all the options on hand so they can setup and shoot whatever comes their way I guess. Maybe they have missed a opportunity in the past while using a prime and now want the versatility of a zoom to give them better odds in the future should that happen again, I don’t know. Those are some of the speculations I have had, but for me, I just like having something dedicated like the prime brings to the table.
Zoom lenses do serve a purpose though, they are the work horses of the professional photography world. Giving the professional the ability to change focal lengths instantly on demand to fulfill the job at hand. Primes force the professional to move around a lot more to build the composition that the zoom makes short work of. This is important when you are on a clock. Anything that saves time also saves money so zooms have their uses.
So what makes a prime appealing over a zoom? That large aperture and the small size are some of the magic that the zoom lens lacks.

Lenses like the one above with it’s f0.95 maximum aperture can create an effect that nothing else can produce. The “Bokeh” or blurred out background is something that large apertures are well known for. The portrait below is a prime example of the feature. The background was probably 15 feet behind him when I shot this photo.

Primes lenses come into their own when it comes to vintage lenses too. This is where I have found my passion. The old Pentax glass along with the Nikon and early Canon stuff is all phenomenal. I do have some early Leica stuff but the Pentax / Asahi branded glass is just awesome. I also will try about anything to see what the photos are like as well. I have even adapted some glass that should not be able to be adapted like some Argus lenses. I documented that process on my YouTube channel if you want to see how I was able to make that work. Argus had a unusual way to drive the focus on the lens and it posed a challenge to get it to work.

One of my favorite vintage lens brands is Pentax and the Asahi Optical company.
With the advent of the mirrorless camera, we now have a flange distance that is conducive to adapting these vintage lenses to our cameras easily and the electronics in the camera make using these lenses even easier than ever as well. Things like focus magnification and focus peaking as well as exposure preview to see how the image will look before you press the shutter are great for coupling vintage primes to your new shiny mirrorless camera. Some even allow image stabilization via sensor stabilization so you even get that feature with vintage glass sometimes.
So if you have not used prime lenses in the past, I implore you to get a simple one, like the 50mm f1.8 on full frame (affectionately named the “nifty fifty”) or it’s APS-C little brother, the 35mm f1.8 DX (Nikon uses the term DX for their APS-C cameras) and put it on your hobby camera and leave it there for a month. It will either make you hate primes or fall in love with them. For me I got the 35mm f1.8, installed it on my Nikon D7000 and left it for almost a year without removing it. I really loved that lens.
So until next time, get your camera out and go take some photos with it!
How important is the time of day when you shoot a photo?
When you take the photo is just as important as what you photograph
Seems there is all sorts of information out there about what to take pictures of, but no one (other than landscape photographers) talk much about the TIME you take your photo. In this article, I want to explore this a little with a simple location that is right down the road from my apartment and show the difference that just a few hours can make in the mood and feel of a location that is being captured.
The camera of choice with my the Leica CL with the TTArtisan 17mm f1.4 lens shot off of a tripod so shutter speed isn’t a problem. I will be maintaining an ISO of 100 for all photos and an aperture of f11 on all photos, so shutter speed will be what I have to change to keep the exposures to where I like them.
The time of day is something that a lot of people think about a little but really don’t put much effort into the planning of the photo. It takes a good bit of reconnoitering to get the location scouted with the vibe you are wanting in the photo. I see these locations all the time, when I am driving around in the day time and when I see them at night it is a completely different scene. Some people like shooting in the daytime, some like the blue hour or golden hour and some, like me, prefer the night… So seeing a night photo while viewing the scene lit by the sun is a problem. I can get somewhat of a visual based on previous photos I have taken of other locations, but until you see it lit by the street lights and 8’ fluorescent tubes, you just don’t know what you will be getting.
I don’t know why I like shooting at night so much, but I do. The low light and the negative space just do something for me and the photos reflect it.

Ybor City has some interesting light that is only available at night.
I do like some blue hour stuff to add the touch of blue sky to my images at times, but not always. Another perk to shooting at night is that it is cooler in the summer months, with temps being generally lower and the sun in not beating down on me, I am more inclined to stay on a location longer and get better images. Street photos at night are a little tougher as I need larger apertures to keep ISO manageable, and this means focus is a lot more of an issue as depth of field is significantly shallower than in the daytime, but it is manageable if you think about it first.
I normally set focus traps and shoot in burst mode and this will usually net me a sharp photo of a scene at night at even crazy large apertures like f1.4 or f0.95… It just takes a bit of practice and patience.
The gear matters…
The gear you use at night matters just as much as the subject you are shooting. If you have the wrong equipment, you simply won’t get the shot.

Fast glass gives you options.
Take for instance, street photography, this is dynamic and has movement in it. For most human movement, a shutter speed of 1/250 second will freeze action sufficiently. 1/200 in a pinch if the subject isn’t moving too much will net sharp photos. Well, to get a decent exposure, you will need fast glass, shot wide open and will still probably need a fair amount of ISO to compensate.
Now, if you are shooting static subjects like buildings or scenes and motion isn’t an issue, you can just let the shutter stay open until the exposure is good, but once you cross about 10 seconds, humans tend to vanish from the scene… Cars make long lines with their headlights as they drive by and things begin to look different. So you can see it all depends on what you want to capture to drive your gear choices here.

I personally like to have fast glass if possible as this is the most versatile lenses. These lenses can still be stopped down for times when you want deeper depth of field and opened up when you need the extra light gathering power of “fast glass”. So whenever possible, I will always opt for the larger aperture option over the smaller, if just makes sense to me to have that extra optional aperture when needed. The old adage “better to have it and not need it than to need it and not have it” comes to mind…
Water reflections are magical in low light or night photos.
Now that lenses are talked to death, what about the camera? Well, honestly any camera will do. It is the least important part of the equation to be honest. As long as it can be controlled manually for all three major functions, it will do. You see, it must be able to adjust shutter speed, ISO and aperture manually to be able to get creative results at night. The camera running in automatic mode will make choices in these controls that will not be what the photographer wants most of the time. It is guessing and will most likely guess wrong… But just about all reasonable cameras will let you control these functions and this is where it gets good…
The time of day.
Back to the original subject. Here are two photos taken from the same location, with the same camera and lens combination, at two different times of day.

Here we have a daytime scene of a garage.
Here is the same composition at night. Notice the change in mood.

Here is the same scene, but the overhead lights are turned off (different day). This changes the mood even more and gives the scene a different feel. Take a look at the scene below of the Dutch Motel sign I found the other evening. The daytime photo isn’t much to look at, but the night time one has all sorts of interesting features that make it unique and otherworldly since it is distorting time so much with the incredible shutter time of 10 seconds!

The Dutch Morel sign isn’t much to ponder during the day…
1/400 second ISO 100 f8
Once nightfall comes and you slow down the shutter, the magic happens
10 seconds ISO 100 f8
This is just a couple of examples too, there are many others that I have noticed over the years. So if you want a certain feel from an image, the time of day absolutely matters. There are some things that a strobe just won’t overcome and the sun is one especially if you are shooting buildings and not portraits.
So if you want to learn more about low light photography, check out my youtube channel here. David Saylors Youtube Channel.
What does lens focal length do to me psychologically when shooting street photography?
Photography and the human mind…
I have found that when I put on a wide lens, I suddenly loose the fear of getting close to people for some reason. I am still guarded with people and don’t approach a lot of them, but I will still get closer. This is a real struggle for me and I find it even harder due to time constraints that I have to shoot street. I don’t normally get to go shoot street when the large crowds are out and about. I end up being in the areas when there is little to no activity. So for me to get a good candid street photo is pretty special. I don’t get dozens a week like some photogs I see, but maybe one a month…maybe.

17mm APS-C photo on the Leica CL
I find that I like to get two kinds of photos when I shoot wider than 35mm and a different kind of photo when I shoot 35mm or longer. I didn’t even realize it until the other day when I put the 17mm on my Leica CL (like a 28mm on full frame) The 28mm is also what happens to come on the Leica Q series cameras. This particular machine is quite costly and you can’t change the lens either. But for street photography , the 28mm is a great choice and lots of people LOVE the Leica Q2 and Q2 Monochrome just for this reason!
17mm APS-C photo on the Leica CL
When I put the 17mm TTArtisan APS-C lens on the camera I consciously know that the lens is very wide and that I am going to have to get close if I want to fill the frame. Then I fill the frame with images that make me happy for some reason. It is really strange that if you want better photos, sometimes you just have to get closer… Photography is strange, people have all sorts of different ideas about what it is. You know what? They are all correct. Every single one of them. What is that all about? LOL

35mm APS-C photo on the Leica CL
When I put on the 35mm (50mm equivalent) The mindset shifts to scenes with people in them or portraits on the street when I use longer lenses for some reason. It just happens too, I don’t even think about it, I just do it. I start looking for interesting things across the street when running the 35mm or longer lens. I also noticed that I like to compose from different view points too. I will end up shooting from a lower angle with the wide lens and from my eye level with the longer lenses. I think this is because of the viewing angle when I look at the photos in post, but it is a very strong phenomenon.

The Leica CL has become my de-facto street camera with either the 35mm or the 17mm as of late. I really like the form factor of the Leica CL and I also use a grip frame on it. This grip frame is made by LIMS that is currently out of production from everything I have seen. This grip frame is awesome because it has a ARCA SWISS tripod adapter on it and there is an opening for the battery door in the bottom plus it has the grip extension on the right side that makes this basically the perfect street camera for me. I like the form factor of this machine the most, it being very unassuming yet has exceptional image quality, makes this a wonderful little street camera. My only thing I would like better would be to have the Leica Q2 Monochrome as I love monochrome AND the low light power of that camera is phenomenal! But for now, I really want to use the CL all the time.
I say that with a bit of sarcasm, you see as as of late I have really started to embrace color photography more and more and have not shot in monochrome on my digital machines in ages. So the monochrome might not be the best solution for me, but I really like the idea of the low light powerhouse that it is. That is the real appeal for me to be honest about it.

The Leica CL adorned with the TTArtisan 17mm f1.4 APS-C manual lens.
So there you have it, a small treatise on my thoughts about the focal length and what I instinctively shoot with each one. I am odd and I know it, so this is by no means a definitive explanation about anything, but rather just an observation into what I do when I use certain lenses and what kind of gear I tend to lean towards when I go shoot.
Now get your camera out and go take a photo with it!
Tips for Low Light Street Photography in Chattanooga TN
I love low light street photography in Chattanooga, TN because it allows me to capture the city's vibrant and diverse culture in a unique and exciting way. With its diverse architecture, colorful murals, and bustling nightlife, Chattanooga offers endless opportunities for me to experiment with different techniques and styles. In this blog post, I want to share some tips and techniques that I've found helpful for capturing stunning low light street photography in Chattanooga.
First and foremost, it's important to have the right equipment for the job. I always make sure to have a camera with a fast lens and good low light performance. I look for a lens with a wide aperture, ideally f/2.8 or lower, which allows more light to enter the camera and helps me capture sharp, detailed images even in low light conditions. I also prefer to use a full frame camera because it has a larger image sensor, which performs better in low light compared to a crop sensor camera.
In addition to a fast lens and a full frame camera, I find it helpful to invest in a tripod to steady my shots and prevent camera shake. A tripod also allows me to use longer exposures, which can be useful for capturing light trails or blurring movement. If I don't have a tripod with me, I try leaning against a wall or using a lamppost or other stable object to support my camera.

One of the most interesting areas for low light street photography in Chattanooga is the city's historic downtown district. I love exploring this area because it's a mix of Victorian-era mansions, Art Deco buildings, and modern skyscrapers, all lit up at night and surrounded by a lively atmosphere. I always try to find interesting angles and perspectives that highlight the city's unique architecture and history.
Another area I enjoy photographing is the city's growing arts and entertainment scene. From live music venues and breweries to art galleries and theaters, there's always something happening in Chattanooga's nightlife. I love to capture candid moments that showcase the energy and vibrancy of the city's entertainment scene.

In addition to the city's landmarks and nightlife, I always make sure to capture the people of Chattanooga in my low light street photography. I look for interesting characters and personalities, whether they're tourists, locals, or street performers. I use the available light to create mood and atmosphere, whether it's a neon sign or a street lamp. I find that photographing people in these settings adds a layer of depth and humanity to my images, and it helps to tell a story about the city and its inhabitants.

Finally, don't be afraid to experiment and play around with different settings and techniques. Low light street photography can be a creative and rewarding form of photography, and there is no one "right" way to do it. So go out there, get creative, and see what you can capture in the dimly lit streets of Chattanooga or where ever you live.
Until next time, get your camera out and go take a picture with it!
I like fiddling with my camera, do you?

My current street and general photo setup.
Well, there, I said it. I like to fiddle with my camera. Sure, I miss some photos because I am playing with the camera, but to me, that is part of the experience! Getting the photo is a result, but to me the time spent with the camera is as important as the final image.
You see, I am what is referred to as kinesthetic. This means I enjoy engaging with the gear as much as getting the photo, getting to interact with the camera on a deeper level brings me a form of satisfaction and joy that is hard to explain.
I know this goes against the convention of the camera “should disappear” or be so intuitive that you no longer know it is there. This is a bunch of hogwash in my mind. I spent a lot of money on my camera and by golly I want to get my money’s worth out of it!!!

This is my “discrete” film camera! LOL
I have read several of the books on the technical aspect of photography and they all keep saying to get the camera to where it runs almost in automatic so you can “get it out of the way” and focus on getting the shot instead. This is not what brings me joy in photography for some reason. I am just not wired that way. I like to play with the machine and then command it to produce what I ask of it and have it comply. That is a oversimplification, but the point is that I want to have the interaction with the camera as much as getting the photo. I figure it like this too, you get the shot, great, you do your edits say this takes another hour, maybe two if you really want to dial it in. (most people spend way less time than this on the editing process) and then you export it and share it on some website somewhere and wait for the little number to appear by the heart symbol. Then it is basically forgotten and the hunt is on for the next image. I like to get the image I had in my mind, but I ALSO like the interaction with the camera too, it is just fun to mess with it.
I mean, c’mon! Look at my “street photography” rig for crying out loud! All I hear is get a small, unassuming camera like a X100V or a Leica Q2 or some such, and here I was with a Nikon D810 with battery grip and 50mm f1.4 lens or my current rig…the Leica SL2 with 50mm Summicron L…even my film rig is larger than life!!!. HaHa

Back years ago, this was my main goto rig, Nikon D810 with a 50mm f1.4 Nikkor lens.
I do have a smaller camera that I like to use as well, but it is not to “get the camera out of the way” but rather to have a simple camera to grab and have as a backup to my SL2 rig. I have even kitted it out with a focal length lens to simulate the same field of view as my SL2/50mm rig. I do this so the experience using them is similar and I also know pretty much what I am going to be getting when I use them and that they will produce very similar results. It doesn’t allays work out that way, but that is the intention…lol.

This little Leica CL with the 35mm f1.4 M mount lens from Voigtlander makes a great “grab n go” rig.
Something else I have learned is that I like manual mode the best. I once was an aperture priority kind of guy, but I have evolved into a full blown manual shooter now. I just like the fact that the EVF in my camera will show me what the image will be ahead of pressing the shutter and I am able to just dial in the sky till it is blue or up the shadows till I am happy with them. The light meter in the display gives me a point of reference as to how much over or under exposed the image is and I will know then if the highlights are gone or the shadows will be recoverable. most of the time though, I don’t care about either.

My Leica SL2 top display.
As you will notice in this photo, I have set the camera as follows: Manual mode, there is some negative exposure compensation, f8, 1/125 sec shutter, auto ISO at the time (this varies from manual in a static scenario to auto if the light is going to change around constantly), and the rest is “state of the camera” info like both cards are present and set to overflow, there is room for 1937 frames left on the first card, the blue tooth is on so I can connect my phone to the camera, and the battery meter. This is how I run my camera most of the time when I am shooting street photos. Point is, don’t follow conventional wisdom if it doesn’t suit your ideology or normal operational parameters, simplified…you do you. Stop letting other people tell you how to engage in your own hobby. Be like William Eggleston and go against the grain. You are in charge of your life, live it on your terms.
Now, get your camera out and go play with it…I know, I know, I just broke my own advice by telling you what to do, but maybe some of you need a nudge…lol.
Altering the world around us with strobes and a camera...

There is an alter ego that I have and sometimes I have to do things as this other person that dont seem quite so glamorous… This is the job of product photographer. I have a business that makes and sells little devices and I have to take photos of these for the website and then edit them to be “floating” on a white background. This is pretty standard stuff to be honest, not “cool” but still very much needed and important.

Anyway…I also get to do some of the social media photos and on occasion, I will go to the trouble of setting up a light and trying to make something artistic instead of the usual Instagram snapshot.
For product photos, I have bought some studio strobe kits from amazon and these run on wall power and have sync ports to fire them, they also sympathetically fire from a light sensor if you turn that feature on as well. Simple strobe with a power knob and you plug in a sync cable and plug that cable into your camera.
Your camera doesn’t have a sync port you say? No problem, I also use an adapter from Nikon to allow a sync cable to be connected to any camera with a hot shoe on it, which is almost all cameras. So if you want to use a studio strobe and it requires a sync cable, then fear not, I have a solution for you!

I really like to use the sync cable and wall powered strobes as I really dislike batteries and avoid them whenever possible. It just seems that EVERY SINGLE TIME I go to do something with my radio trigger (I have owned several pocket wizards in the past), they would be dead, needing charged batteries. This really is annoying in the commercial setting when time is of the essence and hunting batteries or having to charge them before I can do a project is frustrating to say the least. Hence the sync cable…not batteries and works EVERY TIME…

So this is the photo I got the other day. It was late morning and the machine shop was in full operation. Knowing what I know about strobes and aperture, it was a non-issue though.. I grabbed one of the lights and take it out to the shop floor and rig it to shine down from overhead. I am fortunate in the Sierra thought to grab a photo of the setup for me by the off chance she wanted to see what I got versus what she got. Sierra was blown away by the difference in our images, she had to have the one I captured to show her friends so they would understand why I had such a silly setup just for a photo! LOL.
I wanted a spot where the background was still fairly clear of clutter and we moved a couple of items out of the way to make it a cleaner “in camera” image, but for the most part, you will see in Sierra’s photo that the shop has a lot of stuff sitting everywhere.

To keep the light positioned like that, I just wedged the high leg under a rolling cart that is just outside of frame. This way I could get the light down low and parallel to the floor. This stand is budget and doesn’t have a feature to do this built in. Improvised and got the shot.
I laid down in the floor and manually focused a vintage 75-150mm Pentax zoom lens and got this SOOC photo. I did a few images at different flash powers to get the carbine exposed the way I wanted.

You can see the soft box in the top part of the photo, but since I was going to fade the background to black anyway, it is a non-issue. I next imported the image into GIMP and cropped it to get rid of the excess floor and ceiling, then just painted out the light that was left over. Simple as that. The next step was to take it into my phone and run it through an app I have there called Afterlight. This app allows for several adjustments that I enjoy using, but it also has a framing feature as well and that is my primary desire for the app, so I framed it and then put it on the Gram… Done. You cant see the frame on here because the background is white on this webpage, but on Instagram it shows up just fine, and gives it a very clean appearance.
My takeaway from this whole article is this: you are not tied to the light you see around you. If you have a strobe then all bets are off as to what you can do with your camera. Don’t let yourself get caught up in the mindset that you can only shoot “available light”, that limits you greatly. Build the light in the scene yourself and you will never be beholding to the sun again!
Now get your camera out and go take a picture with it!
Photographing Sacred Harp singings with a Leica/Nikon hybrid system

First, yes, you read that right. I shoot my Sacred Harp singings with a Nikon lens adapted to the Leica SL2. This is for 4 reasons, well maybe 5 but the fifth is trivial in my book.
I really like the images from my Leica SL2 camera plus the interaction with the camera is just plain fun.
I did some experimenting and found that I shoot most of the photos at these events at about 105mm give or take a little.
In my opinion, the Nikon 105mm f2 DC Nikkor lens is one of the finest portrait lenses available in this focal length.
The f2 maximum aperture on the 105mm lens also gives me another stop of light in dimly lit buildings too.
Trivial, but I like to use manual focus, it is part of that interaction with the camera that I just plain enjoy.

Let’s expand on these a little and see if there is someting in here that will help you when you shoot certain events or subjects.
The image quality of the Leica SL2 is hard to beat. The features in that camera that I REALLY like are things like the EVF, the IBIS works better than any other I have ever used, the colors are amazing right out of camera, I can confidently handhold this camera, with a vintage 105mm lens mind you, and shoot at 1 second confidently and get sharp photos. That in itself is s a feat of engineering. The Electronic View Finder is the next reason I love this camera. The EVF has such high resolution that it doesn’t seem like a display but more like a window, it just has to be seen to understand. The 47 megapixel sensor also gives me plenty of image to do some creative cropping to adjust compositions at times to correct for things like having to hurry to get the moment captured and knowing that I can cut a significant amount of the image away and it will still look great is always a bonus. I have really come to understand why people like certain devices when they engage in an activity, if it is the right tool for the job AND you enjoy using it, the product of this will be stellar!
In days gone by I have used an array of cameras and lenses to photograph these singings. Some were large rigs like the Nikon D810 with battery grip and the 70-200mm f2.8 telephoto zoom, and some were small, like the Fuji XT3 with a vintage 55mm f1.8 Asahi Optical prime lens. I looked back over several of these singings and started noticing that I was ending up on the 105mm focal length more and more when I would be using zoom lenses. Now of course this is not possible when using a prime lens, but I was still favoring longer focal lengths instead of wide angle lenses. So I decided to do some experimenting and used my 24-90mm Leica zoom and found that I shot most of the images with the lens racked fully out and wanted to have even more zoom… I even ran this giant lens on the Leica CL once and still found I had most photos at the longer end of the range. So I started using the 105mm and it is the right focal length for capturing the actual song leaders as well as the candid photos in the breaks between sessions as well.
Another reason I really like the 105mm f2 is that it is a stellar lens to pair with the SL2. The performance of this lens is really good with minimal artifacts and it has three features not available on many other lenses (well not on many NEWER lenses). The Defocus Control, an aperture ring AND the large aperture (more on this in a minute). The Defocus Control really is a trivial item to be honest. It only changes the out of focus areas of the photo ever so slightly, but it does add for a smoother background when shooting wide open (which I tend to do for two reasons). I normally set the defocus control to “2B” and just leave it there, this adds a little to the image that is hard for people to describe and it keeps me from having to remember to check it if I go outside on a break or at lunch or the sun starts spilling though the window and I end up stopping down for some reason. You see, if the defocus control is set higher than the aperture on the lens, it does strange things to the photo and it is not appealing, so less is more here.
Aperture is a big deal, just ask anyone who shoots photos indoors, the bigger the better. This is not for those blurry backgrounds either, although this is a byproduct, it is more because the rooms are normally very dimly lit and this helps keep the ISO down below 1Trillion…I normally shoot wide open for this reason alone, but if the building has windows and there is a good bit of light in the room , I will stop down to f4, but that is about it. Actually, I don’t think I have ever deliberately stopped down past f4 indoors ever. There just isn’t enough light…
This is going to be controversial but I like manual focus. I don’t know why exactly. but I like it. It is something to do with the interaction with the equipment, I just enjoy tinkering and this is something to tinker with. The fact that the focus isn’t looking for what I want to grab and then grabbing someone else, is a comforting feeling. The 105mm f2 is also manual aperture, so I get to control that manually too, although I rarely change this for reasons mentioned above. This rig is a fairly heavy system too, with the camera being a pro camera and the lens also being of the pro variety these are built very well and will last a lifetime with minimal maintenance.

All photos in this blog were taken at the 2022 United Sacred Harp Convention at Antioch Baptist Church in Ider, Alabama. These events are usually held at churches and the acoustics are usually really good because of this, but the light is dim…
Another thing I try to do is capture the “atmosphere” of the event as well. This means that I am taking photos of everything, not just the song leaders. I will get photos of the kids playing, people talking, the food tables (this is a rule or something that the photog HAS to get the food tables LOL) so it tells a more complete story than just song leading. A particularly special thing to record is the children and the elderly as these statistically are the ones that will change the most in just a few years. So I really try to get these people photographed so people will be able to remember them more easily. Also something I have learned to photograph at ALL events is ANY candid opportunity that involved emotion. The photo of Cass and Isaac above is a great example of this. These types of photos are honestly very hard to capture unless you spend a lot of time just watching and then you can get them fairly easily. They are fleeting moments and sometimes they are also “built” on a scene that you can predict as you watch it develop. You will learn to get these kinds of photos if you just watch the scene around you for a while.


If you have not found a niche genre of photography for you, I implore you to do some exploration and find something that you like a lot and then get your camera out and do some photos to see if it is your niche.
If you want to learn more about Sacred Harp or you want to try to find a singing to go hear it, follow this link to the FaSoLa.org website.
Chattanooga Street Photography #6

Well, it has been a while since I have done one of these and for a couple of reasons. I wont run down that rabbit hole right now as the subject is street photography.
Well, maybe a little peek into the rabbit hole is needed. I have been active in my street photography but with an emphasis on video content so the street photos for a long time were mediocre…at best. BUT NOW, video production is not my main priority anymore so the attention on my photos can come to the forefront.
With this also comes my styles and preferences as well and I think they show in the photos I have been capturing.

What I have learned is that I dont want photos of people just walking down the street anymore, I want them doing something more. Anything more than just walking is better than …just people walking down the street…

Well, it seems that getting those photos in Chattanooga, during the windows of time that I have, is pretty tough. This hasn’t stopped me from trying though…it has made the process take longer than I thought it would. I see all the “street” photos of people just walking across intersections and down streets, on side walks, crossing the street and so on.

At least this fellow is multi-tasking…and had no clue I was sitting 5 feet away…
I get it, this is all you have sometimes to get, but what story is it telling the viewer? Now, comes the controversial part, are you shooting for others to view your work or are you shooting photos for your own personal pleasure only? If you do both, you end up letting one or the other down. This is my observation at least, and I base my position simply on social media photo sharing sites. People like a certain photo and literally all the Instagram photogs start shooting those kinds of photos so they will get the engagement on their image as well. This is shooting for the viewer and not yourself. If you choose to shoot what you like, it may never get any traction on social media since it is not the current hotness that everyone seems to like. This is shooting for your self, I mean, if you shoot for yourself, do you even share your photos? If you do, why? You see, shooting for yourself is not to please others, so why share them at all? See my point? This is what Vivian Maier did and is a perfect example of shooting for your own pleasure, as far as I know, she never told anyone about her hobby and it wasn’t even uncovered until after her death and someone bought her photos at a yard sale.

I have a sort of combination of both ideas in what I do. I will share some photos, usually not my personal best either, just something to let people know what I am doing more than anything, but most of my images are kept safe at home on my hard drive and are building into projects over time. I have been building up the courage to see if a gallery will want to host them at some point, but to be honest, this is currently a pipe dream in my eyes as most of my images are simply just snapshots and not gallery material.

Recently I have been looking for specific types of images. There are several types, but in these I am looking for things like large prime color photos (like the ice cream vendor above) , negative space images that drive the eye, some urban decay photos, and even some historical images as I have been shooting in the same area long enough to see buildings come and go and how they are used differently over time. It is interesting to see these changes to be honest about it. Like the building pictured below. I grabbed the first photo of it 5 years ago and even then it was basically the front 40 feet of the old building as the rear portion had already been demolished and removed. Last week they finished the job and now the building looks like the bottom photo…

Old hotel across from Choo Choo circa 2017

This is when I knew I had gotten something historical. They were not going to even attempt to save the building at this point.

This what it looks like as of 5 SEPT 2022… Gone…
I have been doing this as a hobby, as a form of therapy, and I just plain enjoy the interaction with the world around me. Because of these things, I have captured a place in time and saved it from fading into obscurity now. This brings a level of satisfaction that I can not describe. This is why I like finding things other than people walking down the street to photograph when I am out…
What is your favorite thing to photograph when you go out on a walk? Let me know in the comments! Also, like this post if you actually liked it, I am thinking this will help get the word out with google, but I am not sure about that…
Anyway, get your camera out and go take a picture with it.