
Micro Nikkor 55mm f/3.5 Review: The Best $50 Vintage Lens for Leica SL2
What if one of the sharpest lenses you could put on your Leica SL2 cost less than $50 and was made in 1976? That's exactly what I discovered when I adapted a vintage Micro Nikkor 55mm f/3.5 to my Leica SL2—and the results genuinely surprised me. This isn't just a macro lens review. It's the story of how a nearly 50-year-old Nikon F-mount lens became one of my favorite walkaround lenses on one of the best modern mirrorless cameras available.
What if one of the sharpest lenses you could put on your Leica SL2 cost less than $50 and was made in 1976? That's exactly what I discovered when I adapted a vintage Micro Nikkor 55mm f/3.5 to my Leica SL2—and the results genuinely surprised me. This isn't just a macro lens review. It's the story of how a nearly 50-year-old Nikon F-mount lens became one of my favorite walkaround lenses on one of the best modern mirrorless cameras available.

The Micro Nikkor 55mm f/3.5 AI variant on the Leica SL2 via F-to-L adapter — an unlikely but exceptional pairing.
Micro Nikkor 55mm f/3.5: What Makes This Vintage Lens Special
I have found over the years that there are a couple of Nikkor lenses in this family that work really well for the task of general purpose photography and this is one of them. This particular copy is an AI variant made somewhere in the late 1976 to early 1977 time frame, so this lens is almost 50 years old—and just look at the image quality it produces. Lens manufacturers were on their A game at this point and Nikon was a force to be reckoned with in this area. This lens isn't even their best macro lens either, which is something that to this day surprises me a little.
What makes the Micro Nikkor special compared to other vintage 50mm lenses is that it was designed for exacting scientific and reproduction photography. That design intent required flat-field sharpness, minimal distortion, and consistent performance from close focus all the way out to infinity. Most vintage 50mm lenses were optimized for portrait distances and can get a little soft or lose contrast at other distances. The Micro Nikkor doesn't play that game—it's sharp everywhere.
It has an external aperture ring that is detented in whole stops, except the very first one where it goes from f/3.5 to f/4 for some reason. Who knows why Nikon did this, but they did, so it is there if you want to use it.
Adapting Nikon F-Mount Lenses to the Leica SL2
Before we get into performance, a quick word on adapting this lens. The Leica SL2 uses the L-mount, and to run Nikon F-mount glass on it you need an F-to-L adapter. I use the Urth version and it works well for fully manual lenses like this one—there's nothing electronic to pass through, so any mechanically precise adapter will do the job. If you want to get fancy, Novoflex makes precision German-engineered adapters that are the gold standard, but they cost considerably more than the budget options and for a manual vintage lens, the results are essentially identical.
What makes the Leica SL2 particularly great for adapted vintage glass is the combination of focus peaking and magnified live view in the EVF. You can dial in focus with real confidence even at close distances, and the IBIS works completely independently of the lens—the camera has no idea what glass is mounted and compensates for shake regardless. This makes lenses that might have been borderline usable in low light suddenly practical for handheld shooting. More on that in a moment.

The external aperture ring with whole-stop detents — classic 1970s Nikon build quality.
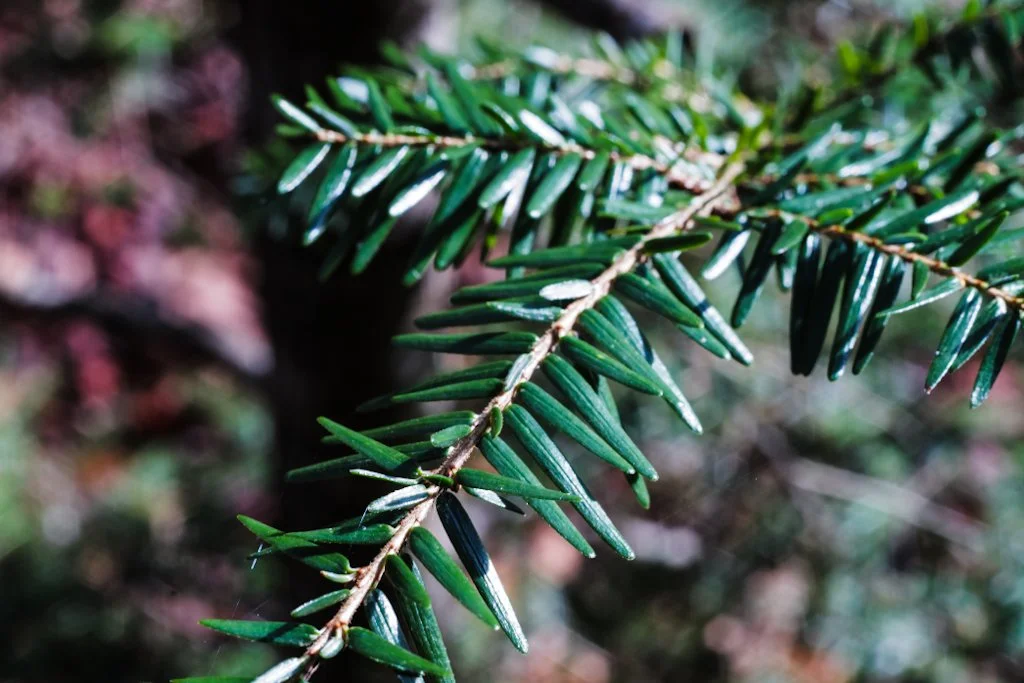
Minimum focus distance is a surprising 9 1/2” from the image plane. So this is right at 4.25 inches in front of the lens when mounted on my Leica SL2 camera. This also gives you a reproduction ratio of 1:2 on the image sensor, that is to say that if you have an object that is 1 inch across in reality, it will be 1/2 inch across the sensor. To get to 1:1 reproduction ratio you need help… The PK-3 extension ring will get you half that distance and to the true 1:1 reproduction ratio at minimum focus distance. All of this is conveniently engraved on the lens barrel for you should you need to look it up in the field… Also notice in these two images that the lens “pumps” air which means it has external focus movement, the lens grows and shrinks when you adjust focus, it is common belief that this is where dust gets into the lens from, when you open the lens fully to minimum focus distance the lens intakes a full charge of air and doesn’t have dust seals to prevent dust from entering the lens mechanism, so you get a little internal dust…
The lens 'pumps' air as it extends to close focus — a common trait of this era of optics.
One last thing to note about this focus mechanism is that the reason I like using these lenses for general purpose photography like travel and such is that as you can see in the above photo, the focus throw from infinity to less than 1 meter is short, so focus is fast with this lens. It also has a range focus scale, but since it is 55mm, the scale is rather small and not easy to use, it will give you rough numbers to work with but that is all.
Enough with all this tech talk, let’s take it for a spin and see what the photos look like on my Leica SL2 mirrorless camera since it has IBIS on the sensor and I can hand hold photos at unheard of shutter speeds with it.
First thing I notice when using this lens is how good it feels in the hand. The location and feel of the controls are literally in the perfect location.
Another thing I noticed was that it is sharp, like incredibly sharp. To this point, it makes sense that it would be this good due to the design intent of the lens but it has a really nice general purpose focus throw too. This lends itself to being a wonderful walk about lens. The following photos were shot on my Leica SL2 using this lens as a walkable lens. I have used another Nikon macro lens before in this same capacity, the 60mm Micro Nikkor once lived on my D810 as a general purpose lens. It works flawlessly in this capacity.
Using the Micro Nikkor 55mm as a Walkaround Lens on Leica SL2
The following photos were shot on my Leica SL2 using this lens as a walkable lens. I have used another Nikon macro lens before in this same capacity—the 60mm Micro Nikkor once lived on my D810 as a general purpose lens and it works flawlessly in that role. The 55mm is similar in character.
For street photography and travel, the 55mm field of view on full frame is about as classic as it gets. You're not cramped like you can be with a 35mm in tight spaces, and you're not zooming in on subjects from far away like you would with 85mm or 105mm. It sits right in the middle of the world as you see it, which makes composition intuitive. The short focus throw means you can adjust focus quickly as subjects move, which is more important for this kind of use than it would be in a controlled macro environment.
Where it struggles a bit is in low light. The f/3.5 maximum aperture isn't going to win any awards for low-light capability compared to fast primes. But combined with the Leica SL2's excellent high-ISO performance and the IBIS, you can push it further than you'd expect—as you'll see in the next section.

Shot handheld at 1/30 second — the Leica SL2's IBIS makes this kind of exposure possible with a vintage manual focus lens.
In the above photo you can see what I love about a camera with stabilization in it. The camera sensor is rock steady so I can capture shutter speeds like in the photo above where I was running something like 1/30 second and some of my water blur shots were 1/4 second!!! Like the one below is a 1/4 second handheld exposure and if you will look, the rocks are crisp and the water has a really nice blur to it. This is at f32 as well so there will be some diffraction in the image from that but all in all, it looks really nice.

Shot handheld at 1/30 second — the Leica SL2's IBIS makes this kind of exposure possible with a vintage manual focus lens.
1/4 second handheld at f/32 — diffraction softens things slightly but the IBIS still produces usable results.
Below is a crop from this image. As you can see, the spider webs are even visible and this is handheld no less! As long as you have some decent light this combination is really nice. When you move to a mirrorless camera body that has IBIS on the sensor, it unlocks so many possibilities with lens / camera combinations. I dont know why hobbyists dont see this sooner but a lot dont.

100% crop showing spider web detail — handheld with IBIS. This lens resolves more than you'd expect for its age and price."
Leica SL2 IBIS + Vintage Glass: A Game-Changing Combination
In the above photo you can see what I love about a camera with stabilization in it. The camera sensor is rock steady so I can capture shutter speeds like in the photo above where I was running something like 1/30 second, and some of my water blur shots were at 1/4 second! The one below is a 1/4 second handheld exposure and if you look, the rocks are crisp and the water has a really nice blur to it. This is at f/32 as well, so there will be some diffraction in the image from that, but all in all it looks really nice.
I don't know why hobbyist photographers don't recognize this sooner, but when you move to a mirrorless camera body that has IBIS on the sensor, it unlocks so many possibilities with vintage lens combinations. You're essentially giving a 50-year-old lens a set of capabilities it was never designed to have. Nikon didn't design this lens to be hand-holdable at 1/4 second—but the Leica SL2 makes it so.
Think about what this means practically. That f/3.5 maximum aperture that looks modest on paper suddenly becomes much more workable. Instead of needing a tripod for anything in shade or indoors, you can hand-hold at much slower shutter speeds and let the IBIS do the work. In a museum, a church, a dimly lit market—anywhere a tripod isn't practical—this combination keeps you shooting. It's the kind of capability that used to require carrying a tripod and a fast prime. Now you can do it with a $50 vintage lens and good technique.
Image Quality: What to Expect from a 50-Year-Old Lens
Below is a crop from one of my sample images. As you can see, the spider webs are even visible and this was handheld. As long as you have some decent light, this combination is really nice.
Let me put some numbers to what you're seeing. The Leica SL2 has a 47 megapixel sensor—a genuinely demanding sensor that will expose any lens weakness. Lesser vintage glass can look acceptable at web resolution but fall apart when you pixel-peep on a sensor this resolute. The Micro Nikkor 55mm f/3.5 doesn't fall apart. Center sharpness is exceptional at every aperture, and corner performance is very good stopped down. The color rendering has that warm, slightly organic character that vintage Nikon glass is known for, which pairs nicely with Leica's color science.
The one area where you see the lens's age is bokeh at close focus distances. When shooting macro-close, out-of-focus areas can look a bit busy—it's not the smooth, creamy blur you'd get from a modern lens optimized for portrait work. But for general photography at normal distances, the rendering is pleasant and natural, never clinical or harsh.
Who Should Buy the Micro Nikkor 55mm f/3.5 for Leica SL2?"
This lens is a fantastic choice for:
The budget-conscious Leica shooter. Leica glass is expensive—there's no way around that. The Micro Nikkor 55mm f/3.5 gives you exceptional optical performance for a fraction of the cost of any L-mount prime. If you're building a kit and want quality glass that doesn't break the bank, vintage adapted lenses like this one are the answer.
Travel photographers who want a dual-purpose lens. One lens that handles landscapes, street photography, and close-up detail shots? That's what this is. Pack light and still have versatility.
Vintage lens enthusiasts. If you enjoy the tactile experience of manual focus and appreciate the history of classic glass, this lens is deeply satisfying to use. It's mechanically solid, beautifully made, and feels like a precision instrument.
Anyone curious about adapted lenses on the SL2. If you haven't explored the world of adapted vintage glass on your Leica SL2, this lens is an inexpensive, low-risk way to discover what IBIS + manual focus vintage glass can do. You might find, as I did, that you love it.
Frequently Asked Questions About the Micro Nikkor 55mm f/3.5
Is the Micro Nikkor 55mm f/3.5 good for general photography (not just macro)?
Yes — and this is the thing most people don't realize about this lens. While it was designed as a macro lens, the Micro Nikkor 55mm f/3.5 is an outstanding general-purpose walkaround lens. The focus throw from infinity to under one meter is short and smooth, making it fast to use in the field. The 55mm focal length gives you a classic "normal" field of view, and the sharpness holds up beautifully at all distances — not just close focus. I've used mine for street photography, travel, landscapes, and waterfall shots, and it handles all of them with ease. The f/3.5 maximum aperture is slower than dedicated portrait lenses, but for anything in decent light, this lens is genuinely excellent.
Can you adapt Nikon F-mount lenses to the Leica SL2?
Yes, and it works very well. The Leica SL2 uses the L-mount, and with an F-to-L mount adapter you can use almost any Nikon F-mount lens on the camera. Since the Micro Nikkor 55mm f/3.5 is a fully manual lens with an external aperture ring, you control the aperture on the lens itself and the camera handles exposure metering in aperture-priority mode. The Leica SL2's focus peaking and magnified live view make manual focusing accurate and enjoyable. There are no electronic connections needed for this vintage lens — it's a fully mechanical pairing that works remarkably well.
Does Leica SL2 IBIS work with adapted vintage lenses?
Yes, and it's one of the best reasons to use vintage glass on the Leica SL2. The 5-axis IBIS works independently of the lens — the camera compensates for camera shake regardless of whether the lens communicates electronically. With the Micro Nikkor 55mm f/3.5, I've successfully hand-held shots at 1/30 second and even 1/4 second, which would be nearly impossible without stabilization. This opens up a whole new world for vintage lens shooters — lenses that were borderline impractical in low light suddenly become viable handheld options. The combination of Leica SL2 IBIS and vintage Nikon glass is genuinely one of my favorite pairings in photography.
What adapter do I need to use Nikon F lenses on the Leica SL2?
You need a Nikon F to Leica L-mount adapter (sometimes listed as "F to L" or "Nikon F to L-mount"). Several brands make these including Urth, K&F Concept, and Novoflex (premium option). For fully manual vintage lenses like the Micro Nikkor 55mm f/3.5, an inexpensive adapter works perfectly well since there are no electronic connections to pass through — you just need a mechanically precise fit. Novoflex is the gold standard for precision, but budget options from Urth or K&F Concept work fine for manual glass.
How sharp is the Micro Nikkor 55mm f/3.5 on a modern mirrorless camera?
Extremely sharp — almost surprisingly so given the lens is nearly 50 years old. The Micro Nikkor 55mm f/3.5 was designed for close-focus scientific and reproduction photography, which required exceptional flat-field sharpness and minimal distortion. Those same qualities make it outstanding on a modern high-resolution sensor like the Leica SL2's 47MP chip. At middle apertures (f/5.6 to f/11) this lens is genuinely difficult to fault. Wide open at f/3.5 it's already very good, and the sharpness only improves as you stop down. The one caveat is that at f/32 you'll see diffraction softening, but that applies to any lens at very small apertures.
What is the PK-3 extension ring for the Micro Nikkor 55mm f/3.5?
The PK-3 extension ring is a Nikon accessory that mounts between the lens and camera body, moving the lens further from the sensor and allowing it to achieve true 1:1 macro magnification. Without the PK-3, the Micro Nikkor 55mm f/3.5 reaches a 1:2 reproduction ratio at minimum focus — meaning a 1-inch subject appears as half an inch on the sensor. With the PK-3 ring, you get 1:1 reproduction, where a 1-inch subject fills 1 inch of sensor. If you need true life-size macro shots, the PK-3 is the answer. Without it, the lens is still excellent for general macro work like flowers, insects, and small objects — just not true 1:1.
Recommended Gear for Adapting Vintage Lenses to Leica SL2
Support this website by shopping through these affiliate links:
Leica M11 Digital Rangefinder Camera
Nikon AF-S FX NIKKOR 105mm f/1.4E ED Lens
Voigtlander Nokton 35mm f/1.4 II
Sandisk 128GB Extreme Pro memory cards
Nikon 50mm f1.8 S Lens for Z mount
So in conclusion...
The Micro Nikkor 55mm f/3.5 is genuinely one of the best bang-for-buck vintage lenses you can adapt to the Leica SL2. For under $50 on the used market, you get a lens that handles macro work beautifully, doubles as a sharp general-purpose walkaround, and—paired with the SL2's IBIS—lets you hand-hold exposures that should be impossible.
Is it perfect? No. The f/3.5 maximum aperture limits your low-light shooting compared to faster primes, and you won't get smooth, creamy bokeh at close focus distances. But for sharpness, color rendering, close-focus capability, and sheer character? This nearly 50-year-old lens punches well above its weight class on a modern mirrorless body.
Get out there and grab one. You won't regret it.
Have you tried adapting vintage Nikon lenses to your mirrorless camera? Drop your experiences in the comments below—I'd love to hear what combinations you're running.
Want more vintage lens reviews and Leica SL2 content? Subscribe to my photography blog for honest, real-world gear testing without the fluff.

Tennessee Fall Color Photography: Finding Colors During Drought
Looking up at the yellow canopy at North Chickamauga Creek WMA, Tennessee. The overcast sky created beautiful soft light filtering through the leaves without harsh shadows. This perspective shows how dense the fall color was in areas where the trees had access to groundwater from the creek.
Well, it sure took long enough, but I finally found a place local to me that had some beautiful fall color photo opportunities.

Looking up at the yellow canopy at North Chickamauga Creek WMA, Tennessee. The overcast sky created beautiful soft light filtering through the leaves without harsh shadows. This perspective shows how dense the fall color was in areas where the trees had access to groundwater from the creek. Just a few hundred yards away from the water, everything was brown and crispy from the drought. The lesson? In dry years, forget the open fields and exposed ridges. Find the water and you'll find the colors! Leica SL2 + Nikkor 28mm f/2.8 AiS handheld.
Tennessee Weather - Fall Color Photography
This is not something I normally have when it is as dry as it has been recently. Let me explain…
I am no scientist but I have stayed in a Holiday Inn before, so here goes. From what I have seen, there are three different scenarios that usually unfold around here in the fall.
The first event is like this, we get plenty of rain in the spring, it dries out a little in the mid summer months and then it starts to rain in late September or early October. This is actually the best possible scenario from what I can tell…
The second scenario is the same as the first one except the rain turns into a thunderstorm storm with heavy rain and usually high winds during peak color season, knocking all the leaves off of the trees.
Then there is option three, this one is where there is rain in the spring but then it is dry for the entirety of summer and fall. This is the type of season we are in now. There has not been enough rain to matter in two months…maybe more. It is so little water that the creek next to my house has no surface water in it as of this writing.
Of the three events, the first one is the preferred for fall color photos as there is sufficient water for the trees to transition normally to their dormant winter state and you get this incredible color display in the fall. This year though, we have event three where everything is a huge tinderbox and the leaves are simply drying out and turning brown then falling off of the trees without passing through their color phase at all…except…in the few places where there is still ground water to water the trees.
Understanding Tennessee's Three Fall Color Scenarios
I mentioned the three fall scenarios briefly, but let me break them down in more detail since understanding these patterns will help you plan your fall photography:
Scenario 1: The Perfect Year (RARE)
What happens:
Spring rains (March-May) give trees plenty of water to grow
Summer (June-August) dries out a little but not too much
Rain returns in late September or early October
Trees get signal to prepare for winter dormancy
Beautiful color transition over 2-3 weeks
Leaves stay on trees long enough to photograph
Photography result:
Incredible color displays everywhere
Colors last for weeks, not days
Can shoot anywhere, not just near water
This is what you see in all the fall color guides!
We get this maybe 1 out of every 4-5 years
Scenario 2: The Stormy Year (FRUSTRATING)
What happens:
Same as Scenario 1 through summer
Rain returns in late September (good!)
But it comes as thunderstorms with heavy rain and high winds
Leaves start to change color (exciting!)
Then a big storm blows through (devastating!)
All the leaves get knocked off before peak color
Photography result:
You get maybe 3-5 days of good color before the storm
Have to act fast when colors appear
After the storm, just bare trees and leaves on the ground
Extremely frustrating if you had plans for the weekend!
This happens maybe 1 out of every 3-4 years
Scenario 3: The Drought Year (CHALLENGING)
What happens:
Rain in spring (so far so good)
Then dry for entire summer and fall (uh oh)
No rain in September or October
Trees are stressed and trying to survive
Leaves dry out and turn brown without color phase
Everything becomes a tinderbox
Exception: Places with groundwater still have colors!
Photography result:
Most locations are brown and crispy, no color
Have to find water sources (creeks, rivers, springs)
Limited locations but concentrated color where water exists
Requires more scouting and research
This is what we had this year (2023)
How to adapt:
Scenario 1: Shoot anywhere, you can't go wrong!
Scenario 2: Have a plan ready, shoot as soon as colors appear
Scenario 3: Follow the water (like I did at North Chickamauga Creek)
The key is recognizing which scenario you're in and adjusting your strategy accordingly. Don't wait for "perfect conditions" that might not come!

A red maple tree standing out in a sea of yellow at North Chickamauga Creek WMA near Soddy Daisy, Tennessee. This was the first scene that greeted me when I started looking for fall colors! After weeks of drought with everything turning brown, finding this color contrast felt like discovering gold. The key during dry years? Follow the water. This gorge has a creek running through it (barely flowing, but still there!), which gave the trees enough water to transition to their fall colors normally. Shot handheld with Leica SL2 + Nikkor 28mm f/2.8 AiS. The overcast light saturated the colors without creating harsh shadows!
Fall Color Photography Secret… Follow the Water
Enter North Chickamauga Creek WMA near Soddy Daisy Tennessee. This is a small WMA (Wildlife Management Area) situated in a gorge next to Mowbray mountain and is a popular spot for the locals to cool off in the summertime in the river. Well, the river is just a brook at this point and is barely moving at all, BUT it is there! If you watch my YouTube video on it you will see what I mean. Even so, there is still enough water to feed the trees so they had a fall color change.
Since I found some colors this year, I now had to figure out what I wanted to use to capture all this color with. I finally settled on my camera being the Leica SL2 as it has a high resolution sensor and several other features that lend itself to being a wonderful landscape photography camera. You see the Leica SL2 is a mirrorless camera so it can be adapted to various vintage lenses really easily and we all know how I love using vintage lenses! So today’s lens of choice for the Leica is the Nikkor 28mm f2.8 AiS. This is one of Nikon’s crowning achievements in lens design as it was as close to optical perfection as they had ever gotten to that point. So naturally I used this lens.
The magic of the Leica SL2 as well is that it has IBIS on the sensor. This basically turns all my vintage lenses into stabilized lenses. I know there are a ton of other cameras that also have these same features but I just like the Leica SL2 for some reason.
Now that the camera setup is settled, next is finding the photo I want. I started out looking for macro level images, vistas and scenes, then I moved in closer to get more detailed image ideas. The first one is shown above of the red maple tree in a sea of yellow. Then I moved to the river bed and found some wonderful colors out in the open.
Looking upstream at North Chickamauga Creek near Soddy Daisy, Tennessee. This is literally what greeted me when I entered the river bottom. Not much water (you can see how low the creek was during this drought!), but the color splash from the trees was incredible! The boulders in the creek bed created great foreground interest, and the overcast sky provided soft, even light that made the colors pop without blown highlights. Shot handheld with Leica SL2 + Nikkor 28mm f/2.8 AiS at f/8. I love the texture and color in this image! So much detail from the rocks to the leaves to the trees. The 28mm wide angle let me include the entire scene from the creek bed up to the canopy. This is why I walked down into the creek rather than shooting from the trail!
This was literally what I was greeted with when I looked upstream from where I entered the river bottom. Not much water, but I got such a color splash from the trees that I didn’t even care. I would have liked for it to not be overcast, but you take what you can get and work with it. I really love this image too, so much texture and color in one image that is is almost overwhelming. I was really starting to embrace the look that the 28mm lens was giving me and then I decided to move upstream to that large boulder you see in the above photo and get a different perspective from that spot.

The valley perspective looking upstream at North Chickamauga Creek WMA, Tennessee. That little smidgen of sky showing the overcast clouds almost makes it otherworldly or something like that! I was blown away with this image when I got it into Lightroom and could see it better. It almost doesn't look real back up in the valley next to the sky. The clouds were epic! Shot handheld from a large boulder I scrambled up to for this perspective. Leica SL2 + Nikkor 28mm f/2.8 AiS, no tripod. The IBIS (in-body image stabilization) let me shoot this at 1/15s handheld and get sharp results. There's something to be said for simplicity - one camera, one lens, no backpack or tripod. Just me and the landscape!
Fall Color Photography and Moody Skies
The little smidgen of sky showing the over cast clouds almost makes it otherworldly or something like that. I was blown away with this image when I got it into Lightroom and was able to see it better. It almost doesn’t look real back up in the valley next to the sky. The clouds were epic! This is also shot hand held with the 28mm lens. What is nice is that it allowed me to be very agile and not have the burden of the back pack and a tripod with me at all. There is something to be said for simplicity…
Frequently Asked Questions About Fall Color Photography in Tennessee
When is peak fall color season in Tennessee?
It depends on where you are in the state! In East Tennessee (mountains), peak fall colors usually hit mid-to-late October. In Middle Tennessee (Chattanooga area and surrounding), you're looking at late October into early November. But here's the thing that most people don't realize: the actual timing depends more on rainfall and temperature than it does on the calendar! If we get a drought like we had this year, the trees just skip the color phase entirely and go straight to brown. If we get too much rain with high winds during peak season, all the leaves get knocked off before you can shoot them. The "perfect" fall color year requires rain in spring, a slightly dry summer, then rain returning in late September or early October. That's when you get the incredible color display that lasts for a couple weeks!
Why do some years have better fall colors than others?
Water! It all comes down to water and how the trees are stressed. I'm no scientist, but I have stayed in a Holiday Inn before, so here goes, lol. Trees need sufficient water to transition normally to their dormant winter state. When they have the right amount of water, they go through that beautiful color change we all love photographing. But when it's too dry (like this year with two months or more of no rain), the leaves just dry out and turn brown without passing through the color phase at all. It's basically a huge tinderbox and the trees are just trying to survive, not put on a show for photographers! That's why you need to find the water sources during dry years. Wherever there's still groundwater feeding the trees (creeks, rivers, springs), those trees will still change color even when everything else is brown.
Where can you find fall colors in Tennessee during a drought?
Follow the water! During dry years like this one, you need to find places where there's still water feeding the trees. Creek beds, river gorges, wildlife management areas near water sources, anywhere with groundwater. For me, North Chickamauga Creek WMA near Soddy Daisy Tennessee saved the day! The creek was barely flowing (just a brook at that point), but there was enough water to keep the trees happy. They had a beautiful fall color change while everything else around the area was brown and crispy. Other good bets: Ocoee River area, any of the gorges in the Cumberland Plateau, state parks with creeks or waterfalls, and anywhere in the Smoky Mountains (they usually have better water retention). Just look for blue on the map and you'll probably find color!
What camera settings work best for fall color photography?
I shot this whole session handheld with the Leica SL2 and Nikkor 28mm f/2.8 AiS lens, so here's what worked for me: aperture priority mode (let the camera pick the shutter speed), probably f/5.6 to f/11 for landscape depth of field, ISO auto (camera adjusted based on light), and I relied heavily on IBIS (in-body image stabilization) since I wasn't using a tripod. For fall colors specifically, you don't want to overexpose or you'll blow out the bright yellows and reds. I tend to expose for the highlights and let the shadows fall where they may, then I can lift them a bit in Lightroom if needed. Shoot RAW so you have flexibility with white balance (overcast days can look weird if you don't adjust). And honestly? Just set it and forget it so you can focus on composition rather than fiddling with settings!
Do you need a tripod for fall color photography?
Not if you have IBIS! I deliberately left the tripod and backpack at the truck because I wanted to be agile and explore without the burden of extra gear. The Leica SL2 has in-body image stabilization which basically turns all my vintage lenses into stabilized lenses. This means I can shoot handheld at slower shutter speeds without camera shake. There's something to be said for simplicity, especially when you're walking a creek bed or scrambling around on boulders like I was doing. That said, if you don't have IBIS or you're shooting in really low light, a tripod will give you sharper images. But for bright overcast days like this? Handheld is totally fine and way more enjoyable!
What's the best lens for fall color photography?
Wide angle! I used the Nikkor 28mm f/2.8 AiS for this session and it was perfect. Wide angle lenses (24mm, 28mm, 35mm) let you include the environment and context around the colors. You can get the creek bed, the trees, the sky, the boulders, everything in one frame. Plus, when you're in a gorge or tight space, a wide lens is the only way to get the whole scene. That said, bring a longer lens too if you want to isolate individual trees or compress distant ridgelines. But if I had to pick just one lens for fall color photography? 28mm is my sweet spot. It's wide enough for landscapes but not so wide that you get too much distortion on the edges.
Is vintage lens photography good for landscape work?
Absolutely! The Nikkor 28mm f/2.8 AiS I used is one of Nikon's crowning achievements in lens design. It was as close to optical perfection as they had ever gotten to that point. Vintage lenses often have character that modern lenses lack (slightly warmer rendering, interesting flare characteristics, smooth bokeh), and they're sharp enough for landscape work when you stop them down to f/5.6 or f/8. The best part? They're cheap! You can get incredible vintage glass for $100-300 that would cost you $1,000+ in a modern equivalent. Just make sure your camera can adapt them (the Leica SL2 is perfect for this with its short flange distance), and you're good to go. Oh, and IBIS makes vintage lenses even better since they don't have built-in stabilization!
What time of day is best for shooting fall colors?
Honestly? Overcast days like I had are actually ideal for fall color photography! Direct sunlight creates harsh shadows and blown highlights on the bright leaves. Overcast light is soft, even, and it lets the colors really saturate without fighting crazy contrast. That said, early morning and late afternoon (golden hour) can be magical if you want warm light on the trees. Avoid midday harsh sun if you can. For this shoot, the overcast clouds were epic and made the colors pop without any harsh shadows. It almost looked otherworldly! So don't skip shooting just because it's cloudy. Embrace it!
How do you compose fall color photos without them looking like every other fall photo?
Great question! I try to find specific elements to anchor the composition rather than just pointing at a bunch of colorful trees. For this session, I looked for: (1) the red maple tree in a sea of yellow (color contrast!), (2) the creek bed with boulders as a leading line through the frame, (3) the valley perspective looking upstream with that little smidgen of sky, and (4) textures and layers (water, rocks, leaves, trees, sky). The key is to have a subject or a story, not just "look, it's colorful!" Find a foreground element, use the colors as supporting cast, and compose with intention. Also, get low! I was walking in the creek bed and scrambling on boulders to get different perspectives. Don't just stand on the trail and shoot at eye level like everyone else!
What are the three fall color scenarios in Tennessee?
From what I've seen, there are three different scenarios that usually unfold around here:
Scenario 1 (BEST): Plenty of rain in spring, dries out a little mid-summer, then rain returns in late September or early October. This gives you incredible color displays that last for weeks! The trees have enough water to transition normally to dormancy and you get the full spectrum of reds, oranges, and yellows.
Scenario 2 (WORST): Same as Scenario 1 except the rain turns into thunderstorms with heavy rain and high winds during peak color season. This knocks all the leaves off the trees before you can photograph them. Super frustrating!
Scenario 3 (CHALLENGING): Rain in spring but then dry for the entirety of summer and fall. This is what we had this year. Everything becomes a huge tinderbox and the leaves simply dry out and turn brown without passing through their color phase at all... except in the few places where there's still groundwater to feed the trees. That's when you have to get creative and find the water!
BONUS QUESTION: What's North Chickamauga Creek WMA like for photography?
North Chickamauga Creek WMA near Soddy Daisy Tennessee is a hidden gem! It's a small Wildlife Management Area situated in a gorge next to Mowbray Mountain. Locals use it to cool off in the river during summertime, but in fall it's perfect for photography! The gorge creates interesting light and the creek provides water for the trees even during drought years. When I shot this, the river was barely moving (just a brook, really), but there was still enough water to feed the trees so they had beautiful fall color change. Easy to access, not too crowded, and if you walk the creek bed you'll find tons of compositions. Just be careful on the rocks, they can be slippery! If you watch my YouTube video about it you'll see what I mean.
So in summary, if you want to find fall colors even when it has been really dry, find the water. Where ever there is water, there will be fall colors. At least that is what I have seen, your mileage may vary.
Support this website by using these affiliate links to shop on Amazon:
Leica M11 Digital Rangefinder Camera
Nikon AF-S FX NIKKOR 105mm f/1.4E ED Lens
Voigtlander Nokton 35mm f/1.4 II
Sandisk 128GB Extreme Pro memory cards