WK4DS Amateur Radio Blog
Search Posts
Ft Pulaski POTA Activation & Noise
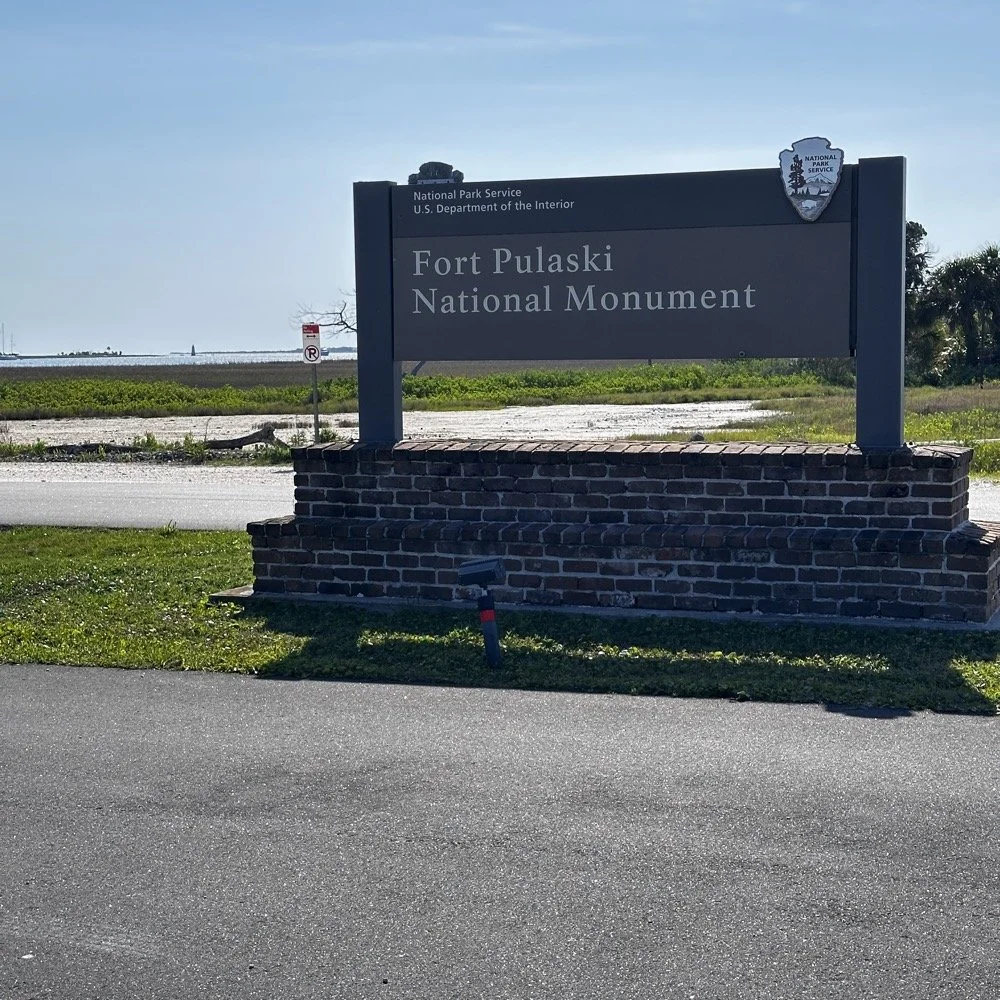
When I went to Tybee Island Georgia recently, I had no idea that I would be within minutes of a POTA park! Ft Pulaski National Monument is park number US-0930 is right outside of town and I was able to get a couple of hours free to ride over and setup a radio to see if I could get my 10 within the window of time I had.
When I went to Tybee Island Georgia recently, I had no idea that I would be within minutes of a POTA park! Ft Pulaski National Monument is park number US-0930 is right outside of town and I was able to get a couple of hours free to ride over and setup a radio to see if I could get my 10 within the window of time I had.
Military POTA park - US-0930 Ft. Pulaski National Monument
When I arrived at the park entrance, I was greeted with a pay station manned by a park employee. The actual fort is across a bridge once you pay the fee…but…there is a loop hole here. You see, the entirety of the park covers way more land than just where the fort is located…way more. The marshland all around the area is also inside the park boundaries. Well, it just so happens that there is about 7 parking spaces OUTSIDE the park entrance! These are for people that want to walk on the footpath that runs along side the road heading out to Tybee Island. The foot path is actually the old railroad bed, but the national park service does a great job of keeping in up for people to ride bicycles and walk on. So I parked in this area for two reasons. One, it is free to park here…and two, it is way faster to setup since I didn’t have to mess with paying to get into the park and then driving to the other side of the bridge to search for a good spot to setup the antenna.
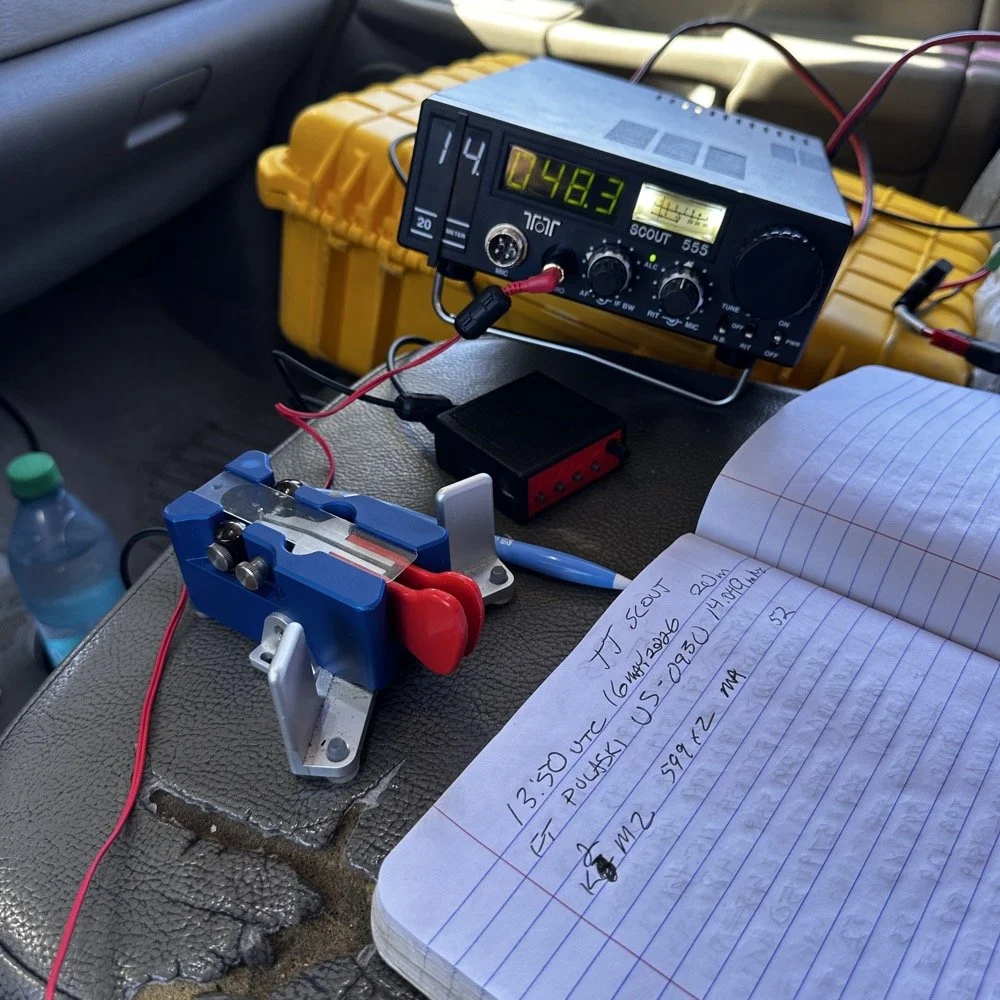
Setting up a temporary POTA radio station
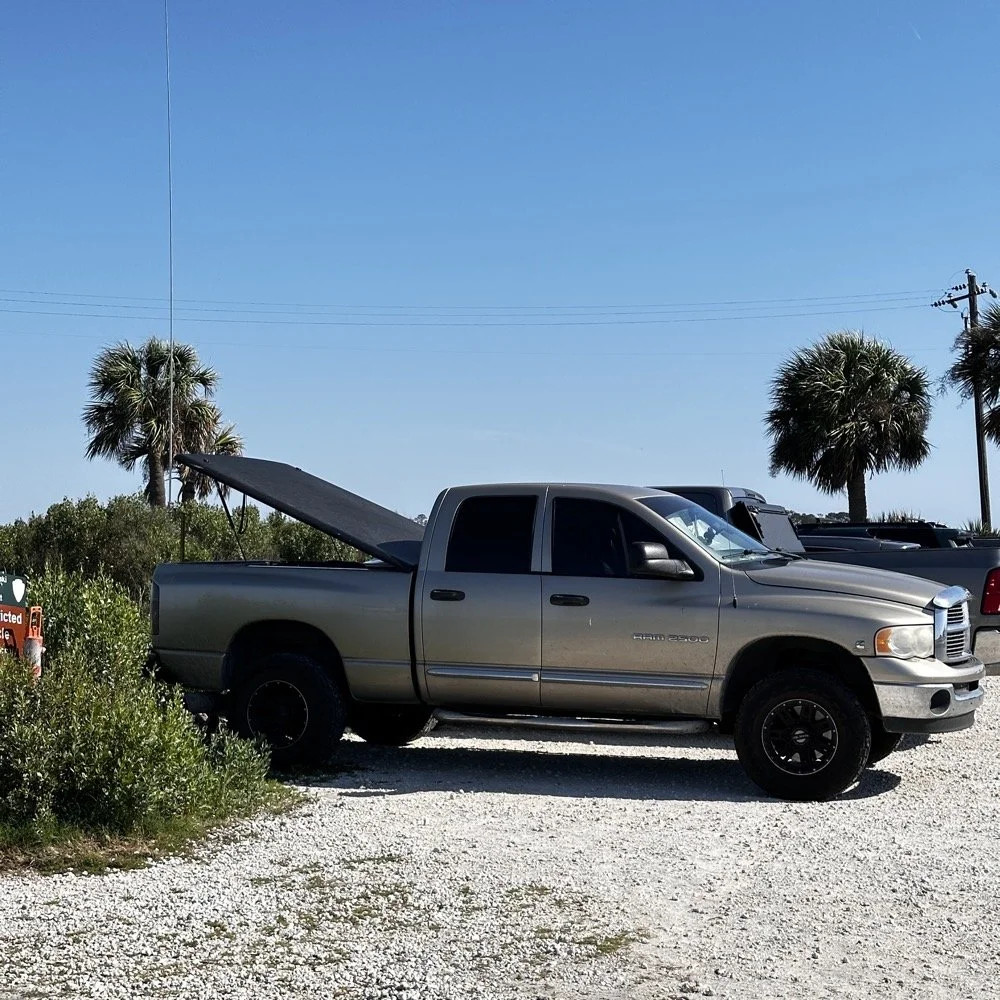
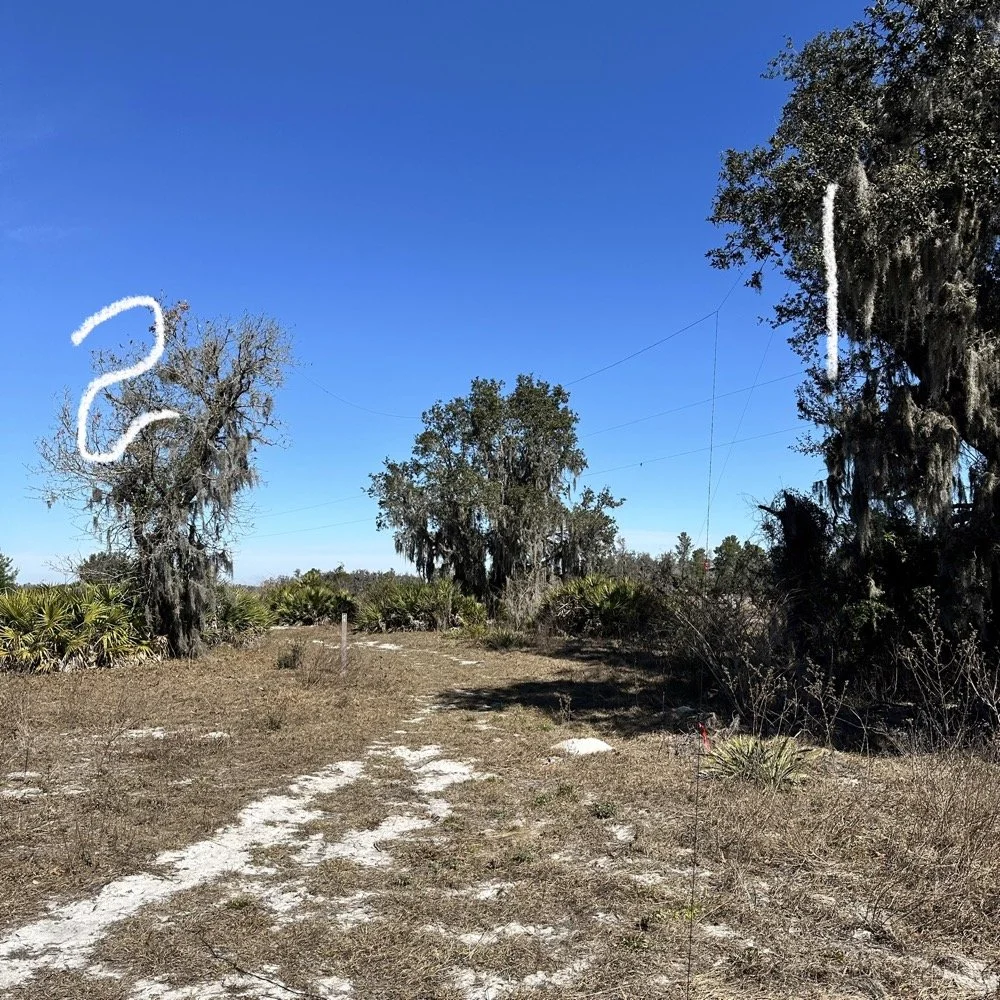
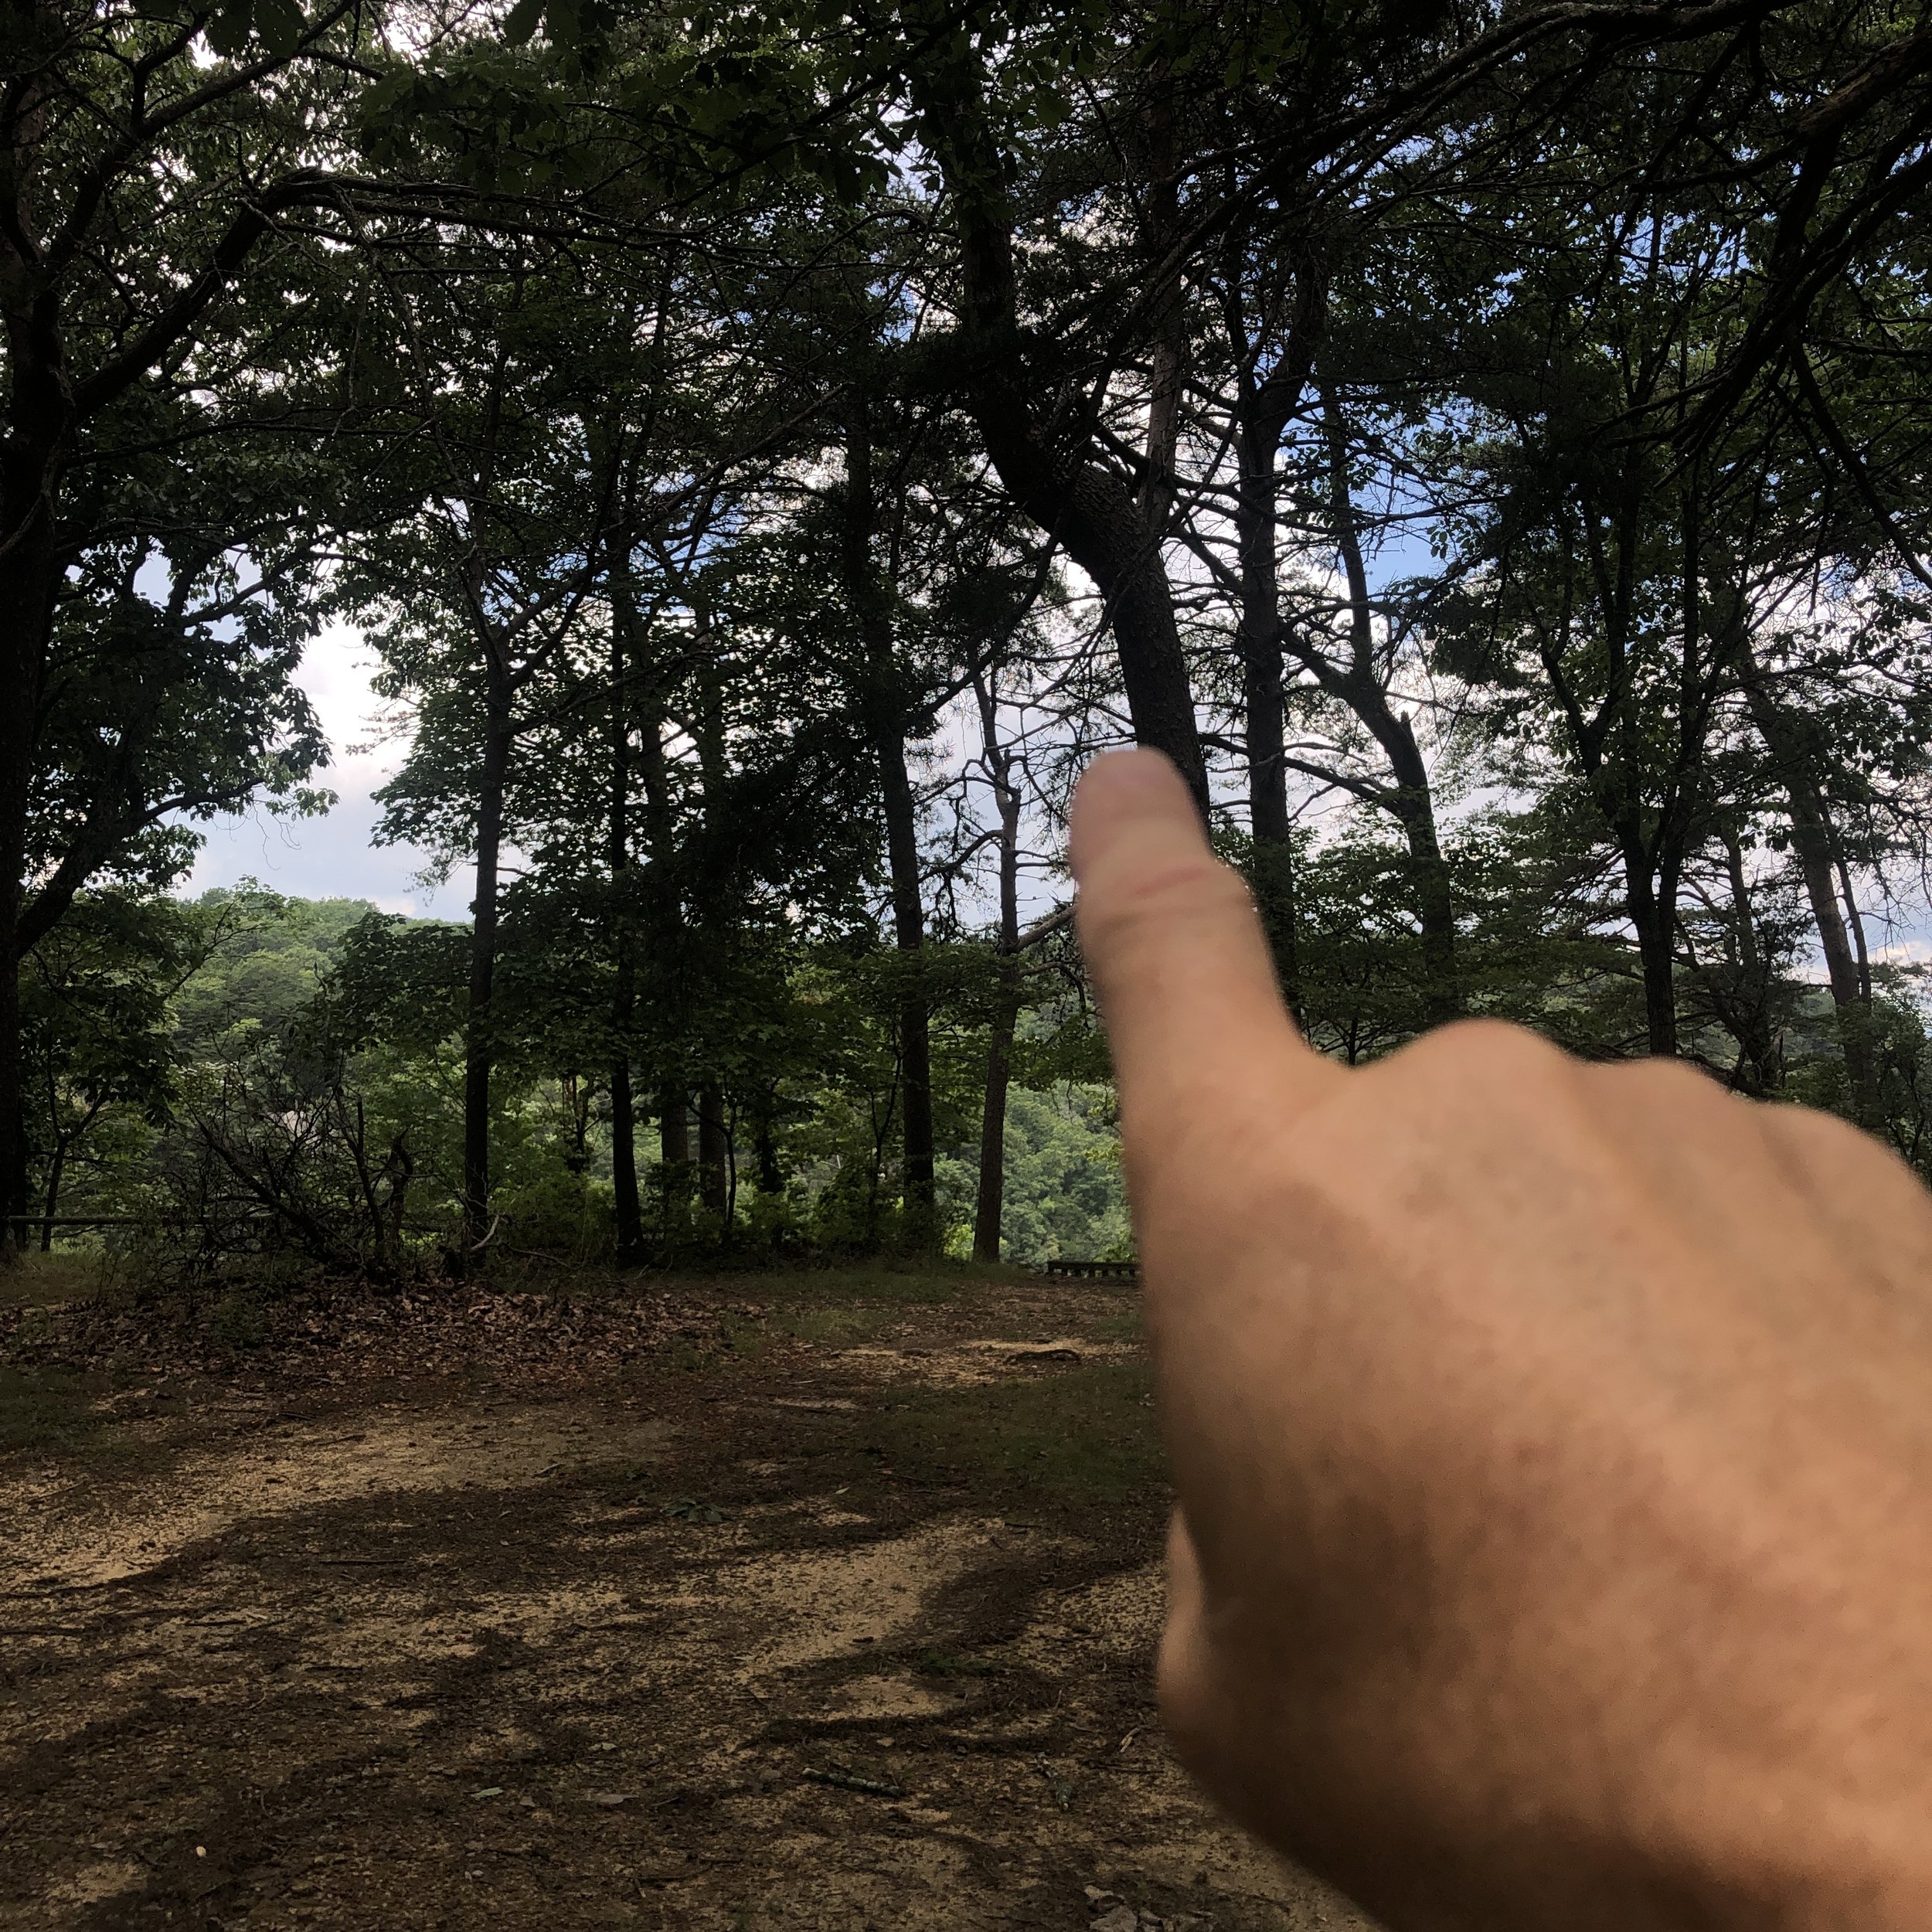
Today I used the 18’ whip and just simply hopped on 20 meters to start with to make sure I got my minimum of ten QSOs in the log before I ran out of time. I had really high hopes for this location too since I am VERY near the ocean here. We all know salt water adds several dB to your signal! haha. See those power lines and that pole in the background? Hold that thought.
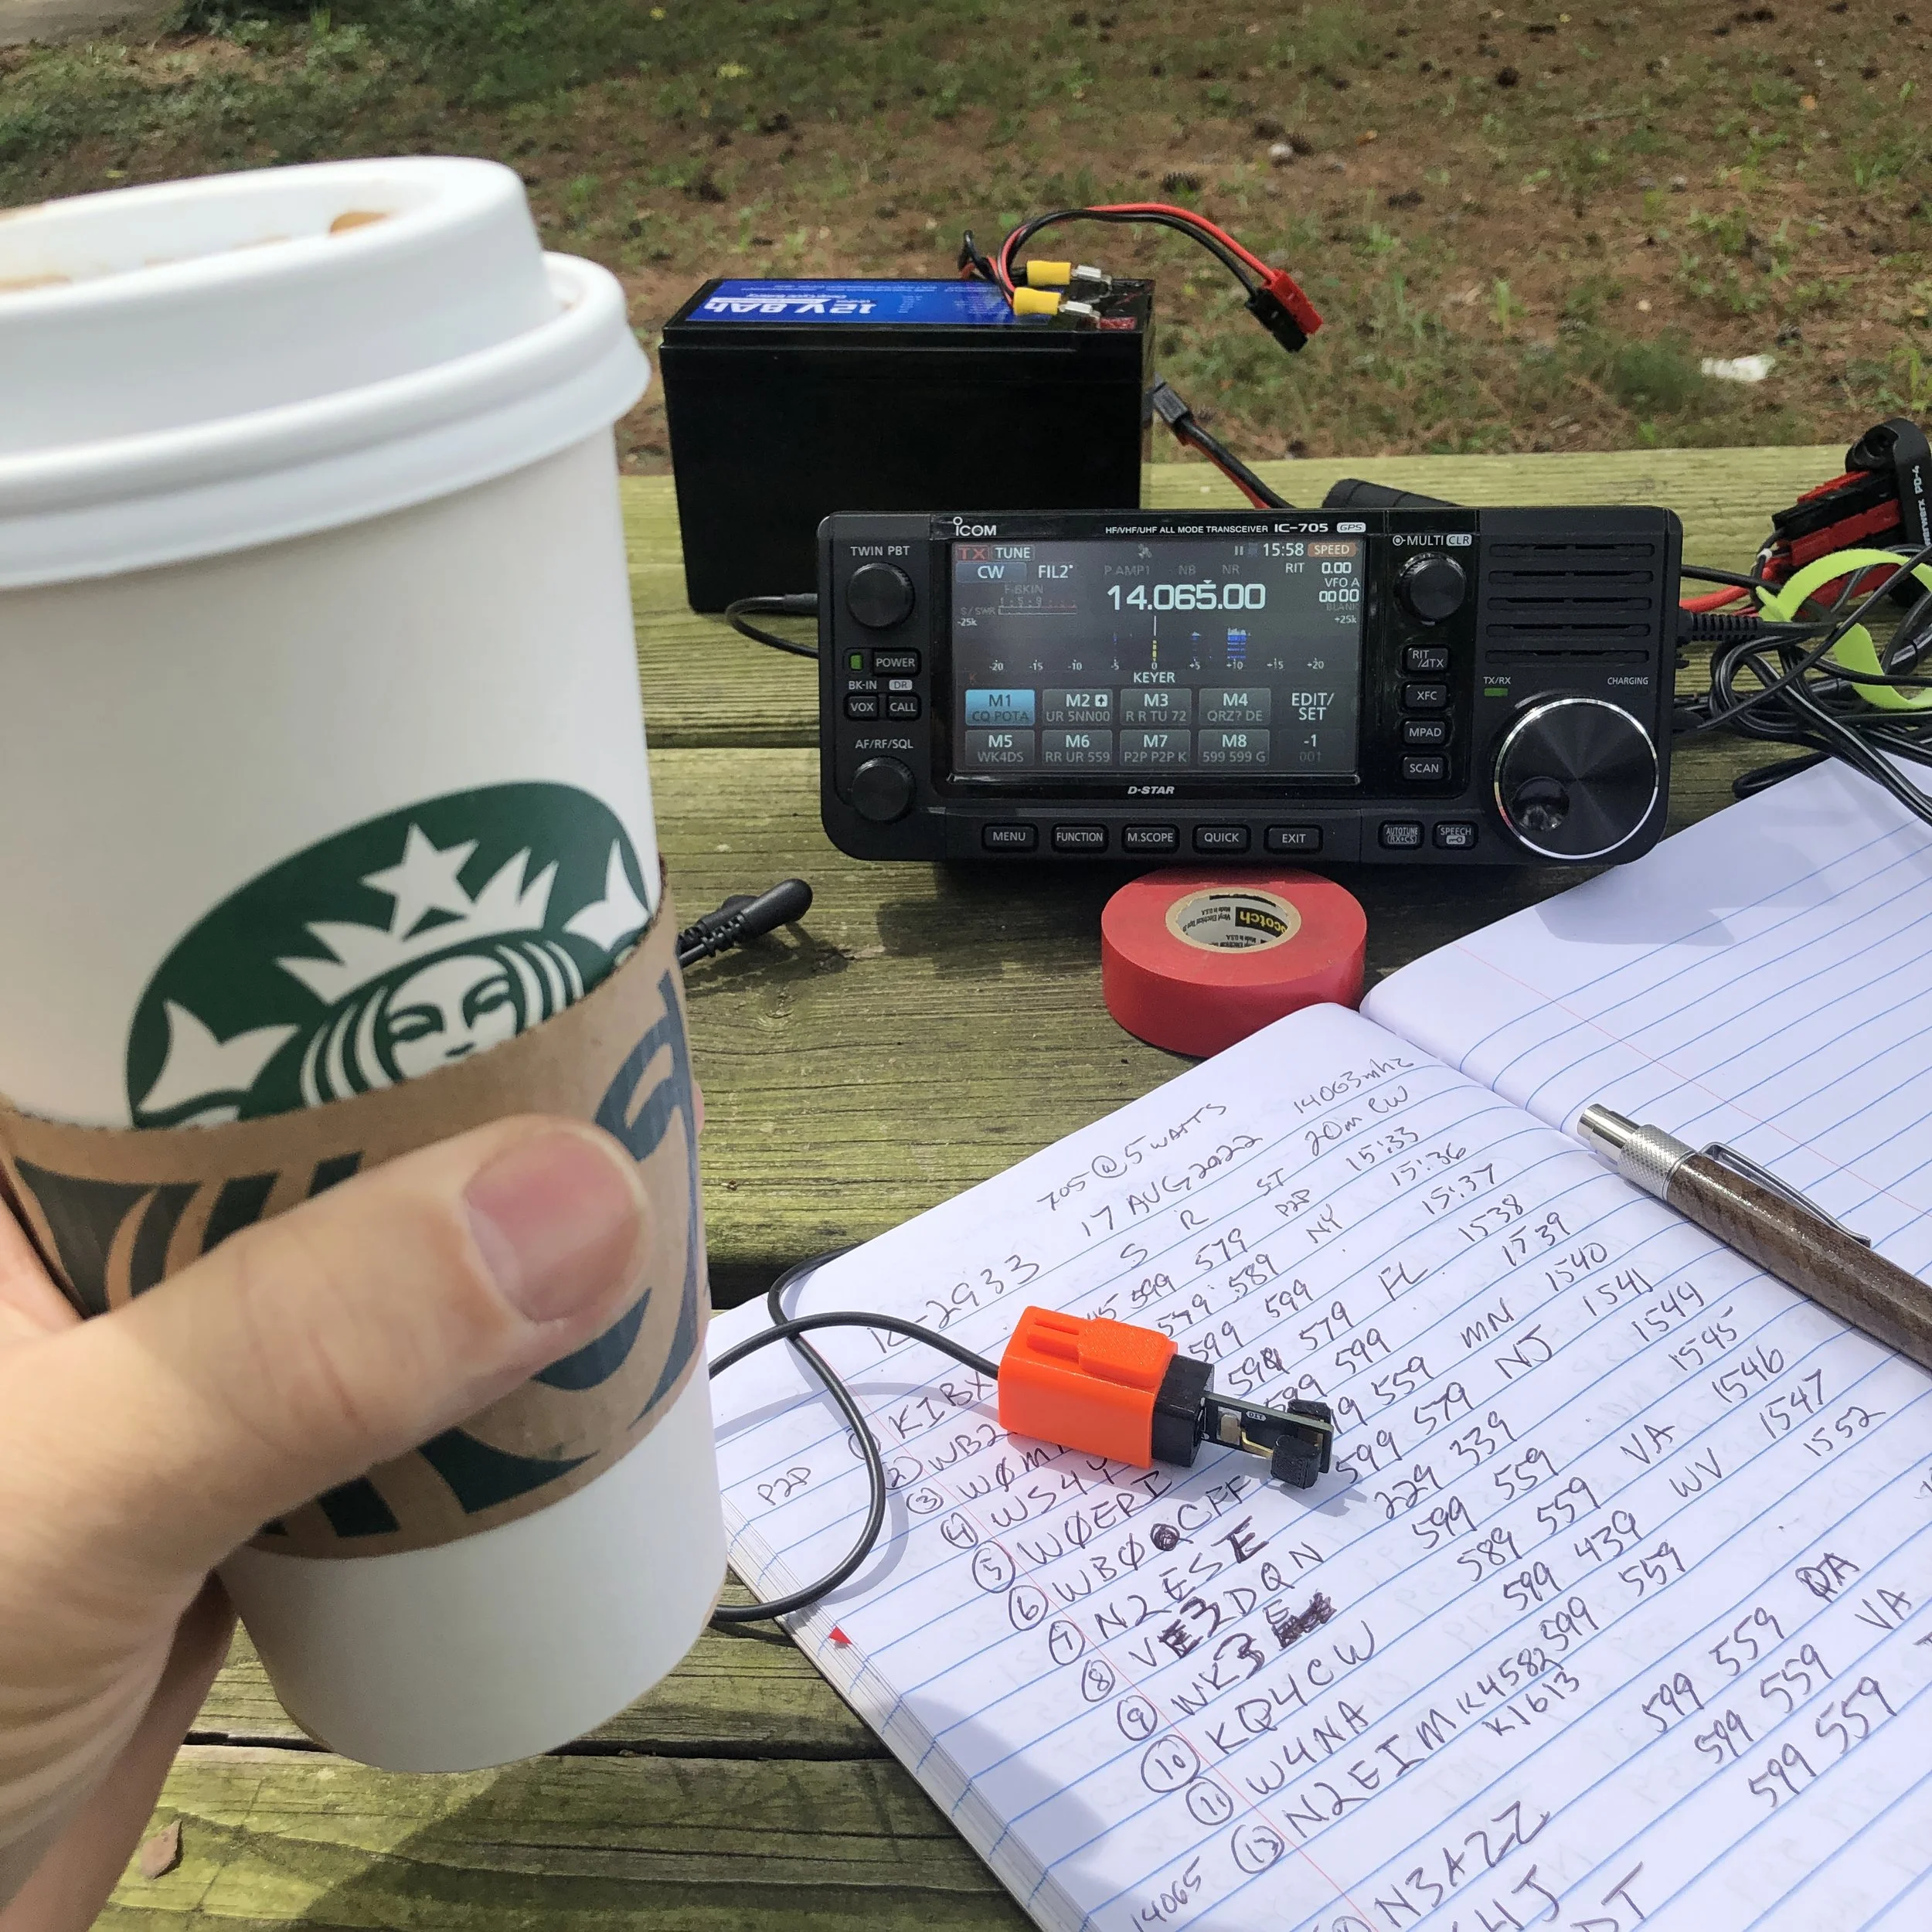
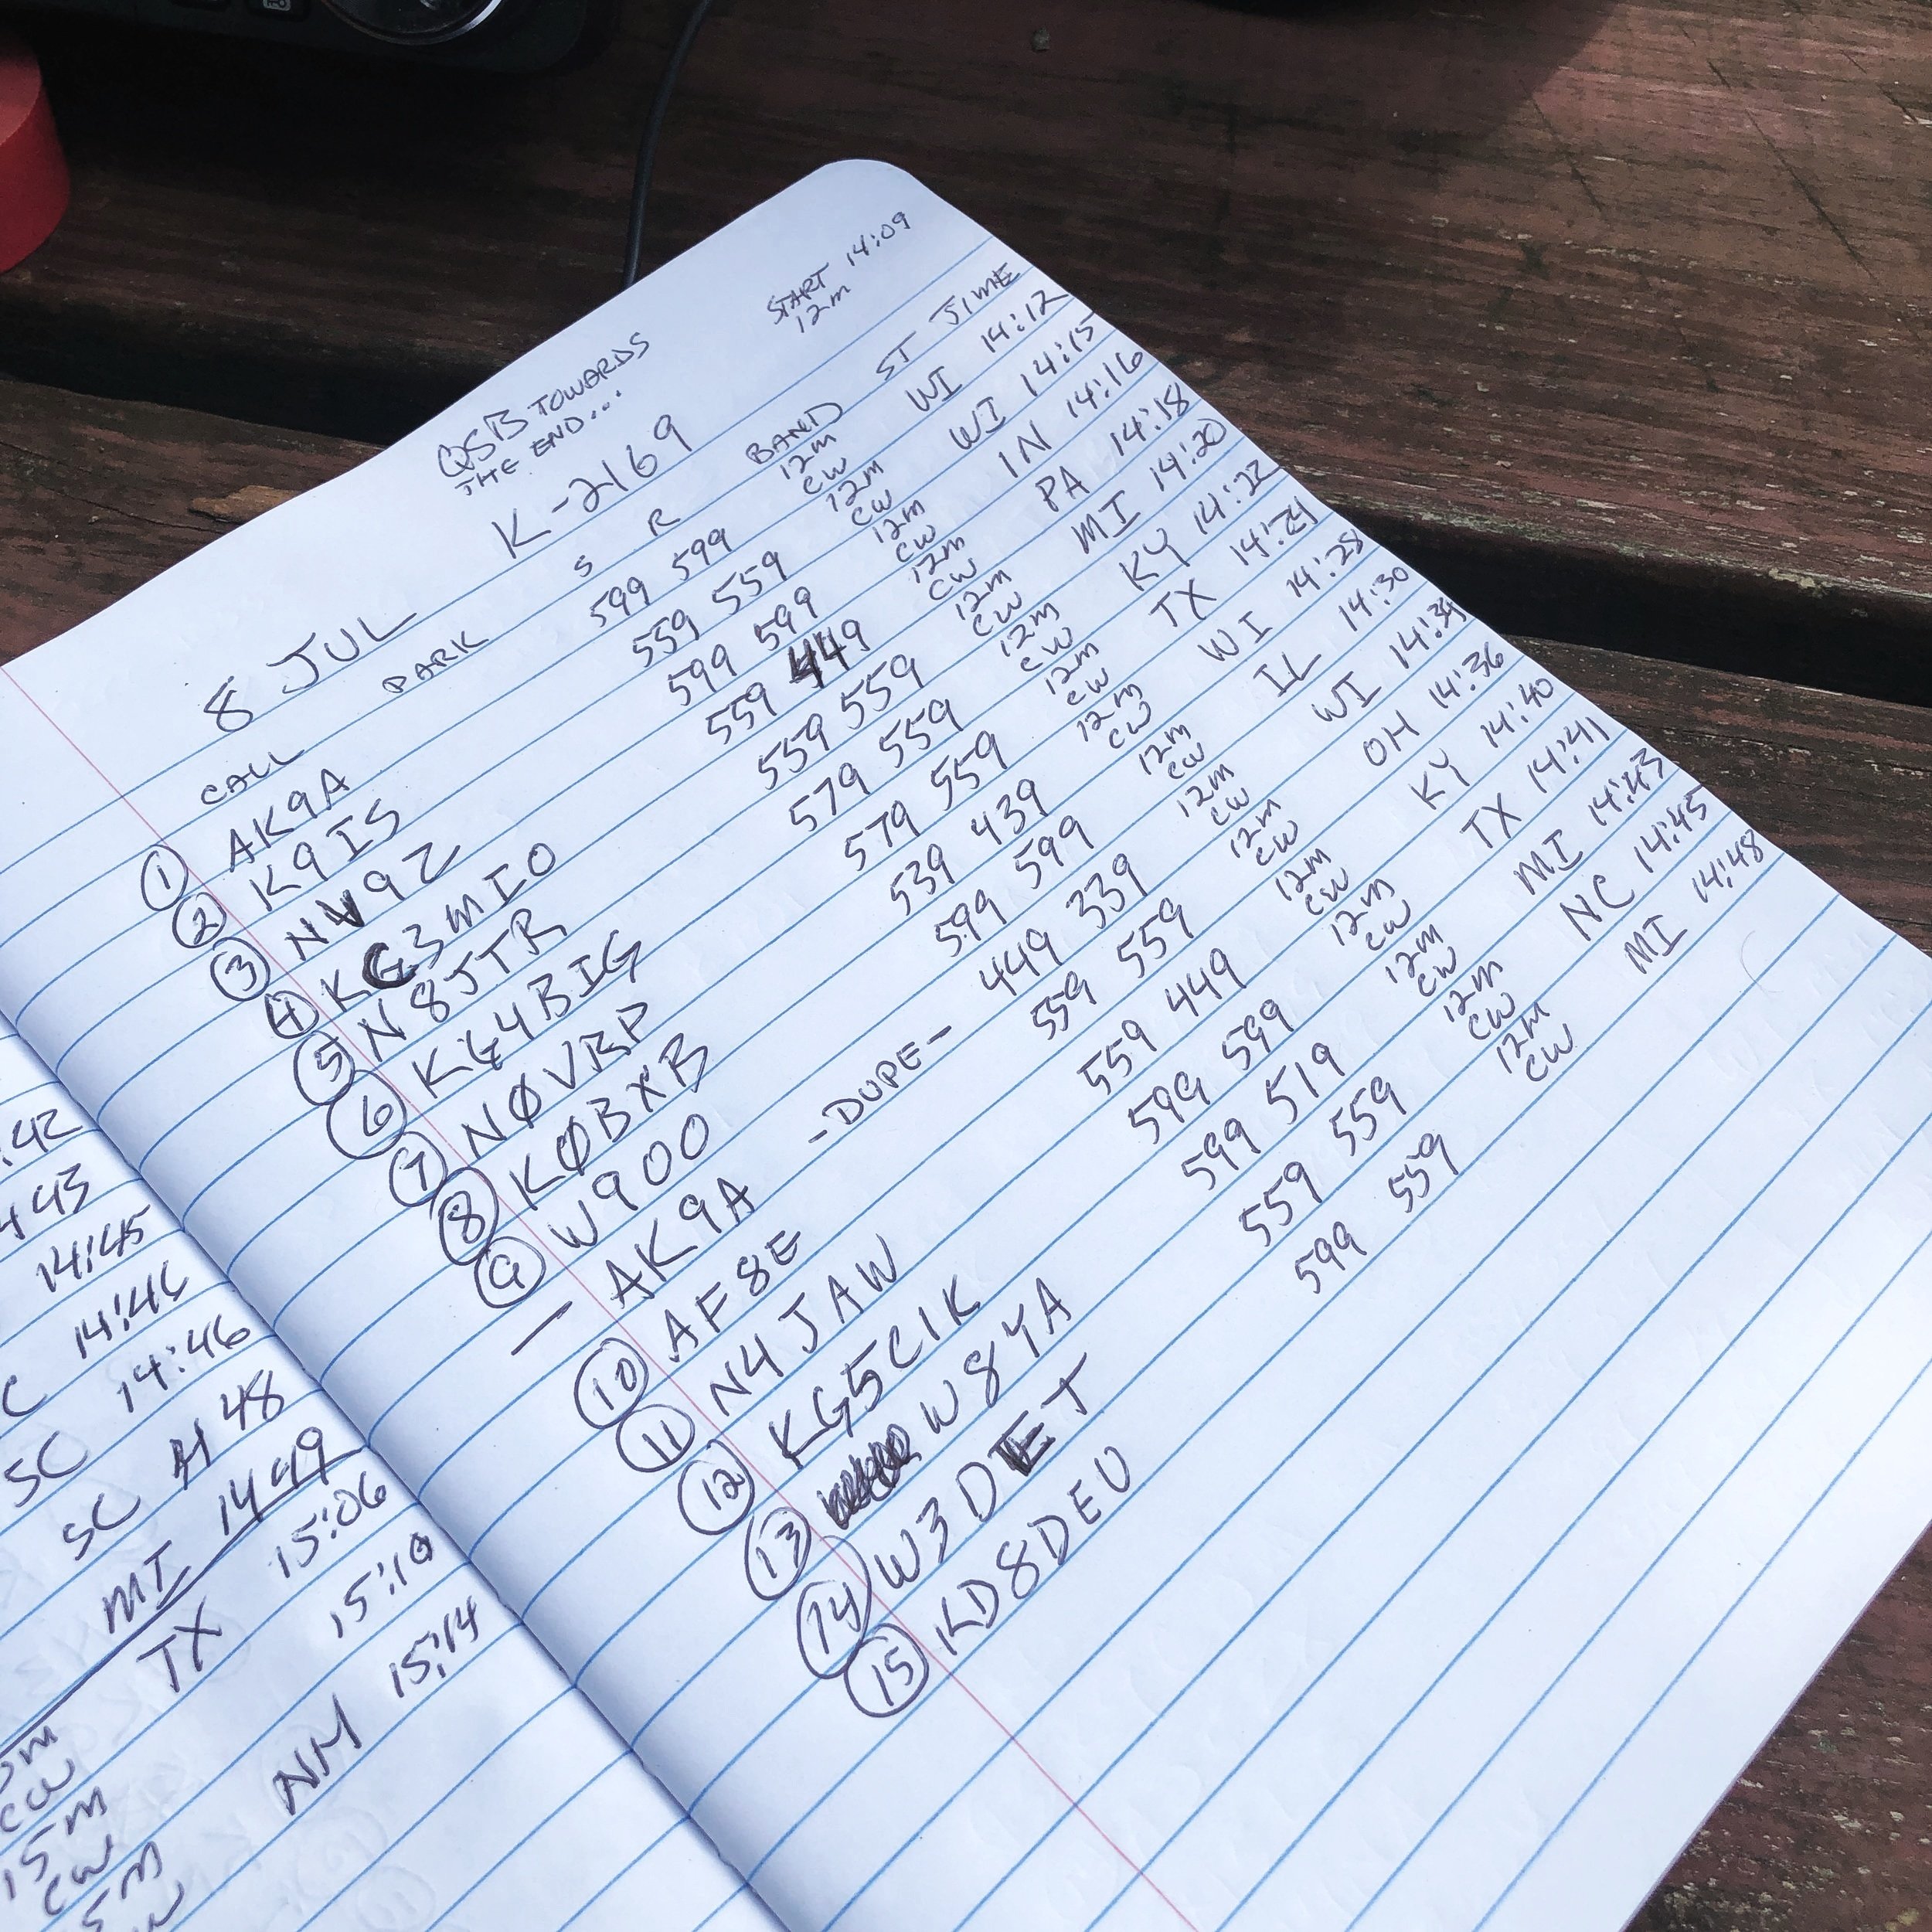
I ran the radio into the cab as usual since I needed the power from the truck to run the radio today. I also didn’t plan on running anything other than the TenTec Scout 555 radio today as I was not sure how long it would take to get the activation in the bag, so I figured I would stick to something I knew would get the job done…CW. It was at this point that I also realized that since I had not planned to activate a park on this short trip that I didn’t bother to bring my logging computer either… dumb, real dumb… It was back to the old reliable paper logbook for this one. I keep a composition notebook in the truck just for this occasion and a couple of pens just in case I forget to bring one of those as well. So I was good to go for logging.
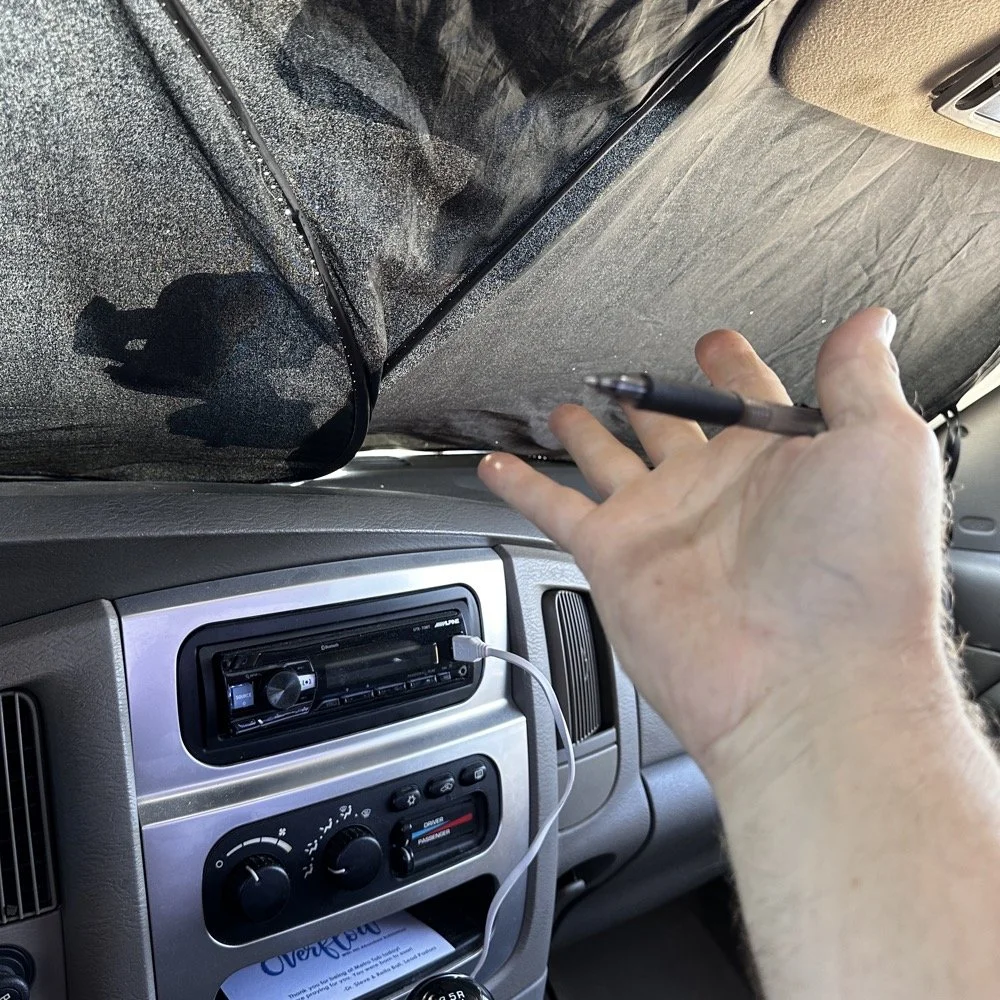
Here is something that a lot of people don’t consider. How to keep the hot sun from baking you alive in your car while activating. I simply put up my window shade and rolled down the windows to let the breeze into the truck and it made it very tolerable. The TenTec Scout 555 amateur transceiver has become one of my all time favorite POTA radios at this point. The simple nature of the design, the excellent CW operation and the novelty of the band modules makes it a lot of fun for me to use. Having the window shade in place made seeing the display on the Scout as well as keeping the heat at bay a good thing.
Below you can see how I transport the radio and some of the band modules that I keep in the case with it. At some point I am going to finish adding the one or two missing from the set as I have quite a few in the house so I just need to do it. Also notice the one special one in the case. That 60 meter band module is special. It is the only one on earth that I am aware of at this point. To learn more about it follow this link to see the blog post series where I build this module out of an 80 meter donor module. I keep this radio in a quality hard case to protect it from dust and impact damage as well as water as you can see the water seal on the lid in the photo as well. I also print “field manuals” for all my radios and keep them in the case. TenTec owners manuals have everything you need to keep the radio going, up to an including alignment procedures and a full set of schematic diagrams. Also in the case is the CW memory keyer and under the radio is assorted cables for connecting the keyer and the power cable as well. Another thing of note is the PL259 to BNC adapter that I keep on the radio. This standardizes all my coax cables for POTA to BNC cables only. I don’t run more than 50 watts on my radios so I can use BNC connectors without problems and these work really well. They are fast to connect and break down and work really well. The only down sides I can find are they lack water proofing, and are fragile to some degree as compared to PL259 connectors.
My CW key for today was the Begali Traveler portable CW key. This dual lever paddle key is one of my favorite keys and stays in the truck at all times now. MY N3ZN key that Tony built stays in the camper and I am working on getting that station up and running soon with an EFHW for 80 meters on it. I am hoping that I will be able to get 40, 20, 15 and 10 without much issue as well with that antenna. I have the transformer built, I just need to hang the wire at this point…anyway, enough with that rabbit hole and back to the activation!
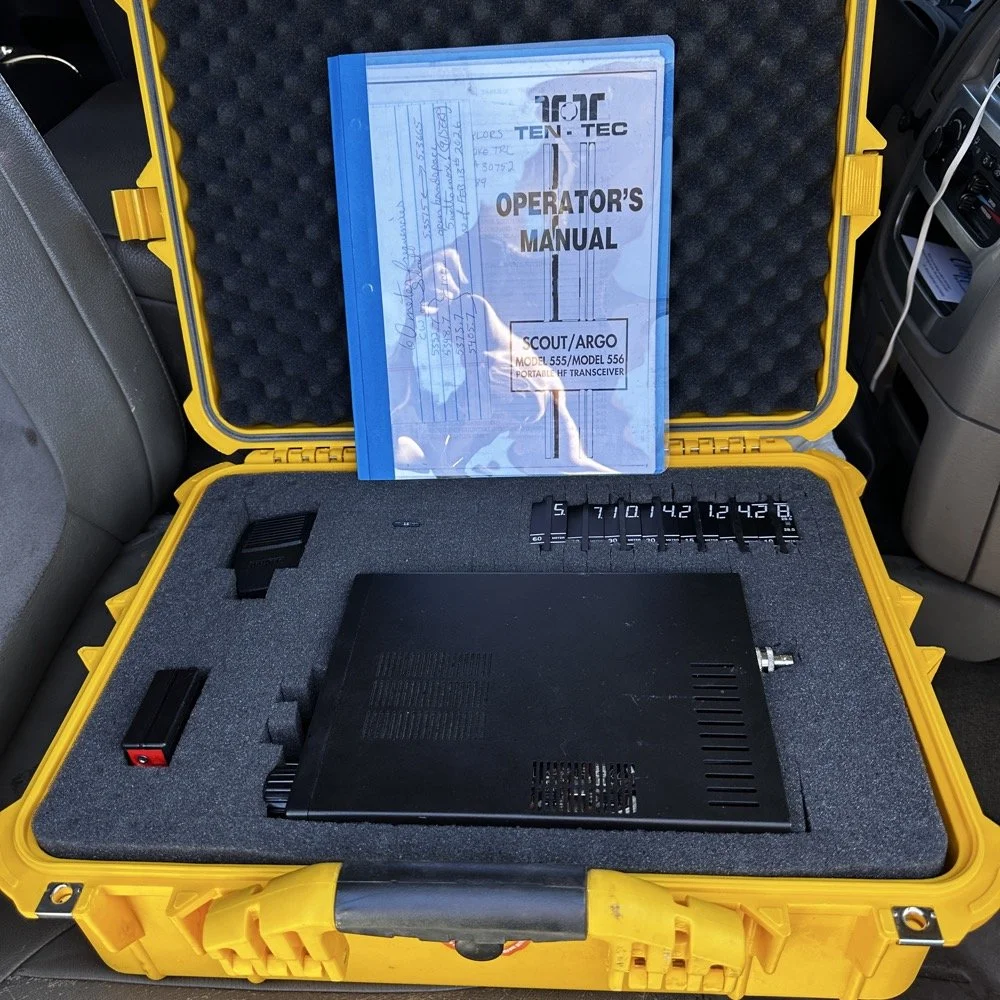
Properly cased TenTec Scout 555 ham radio with hard case.
Solving power line noise on your TenTec Scout 555 ham radio!
The next few photos tell a tale about the power lines you saw earlier in the story. You see, when I powered up the radio, there was this terrible power line noise on the whole band, It was strong too… I was deflated to think that I had went to all this trouble only to be shut down with a bad power line connection nearby… I don’t have an external RF gain control on the radio at all, it is internally controlled by the ALC circuit from what I can tell. So there is no way to remove this noise with RF Gain… The noise was a little over S6 creating a really high noise floor to work with. Then I remembered that this particular radio came equipped with the optional Noise Blanker module installed from the TenTec factory! I flipped the switch and magically the noise just…vanished…
The noise floor dropped a solid 2.5 S units and that made a HUGE difference in my ability to hear weaker stations trying to call me. People will say that an S unit is not a big deal, well it is a big deal when it is measuring band noise! Suddenly stations were coming out of the noise and I could hear them! This was the very first time I have EVER used a Noise Blanker and it actually did the job it was designed to do and help me hear stations on the air.
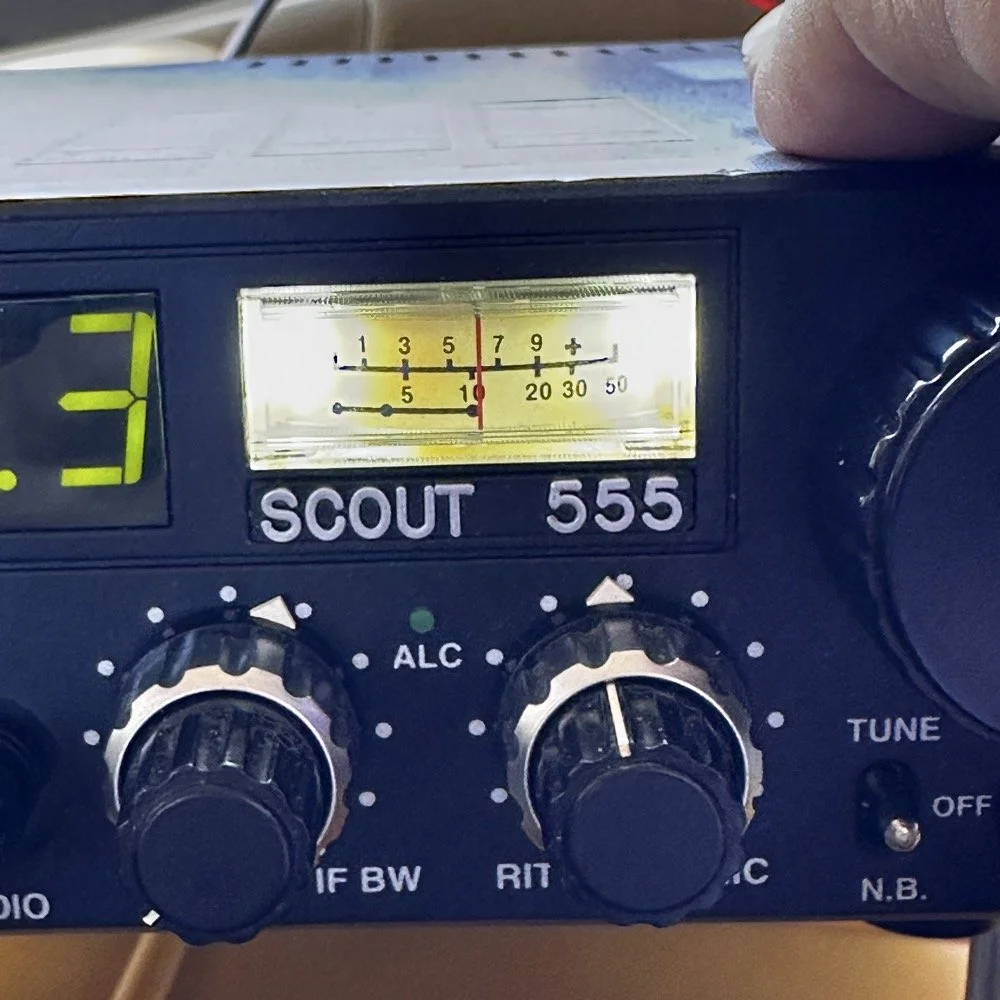
TenTec Scout 555 Radio with Noise Blanker turned off.
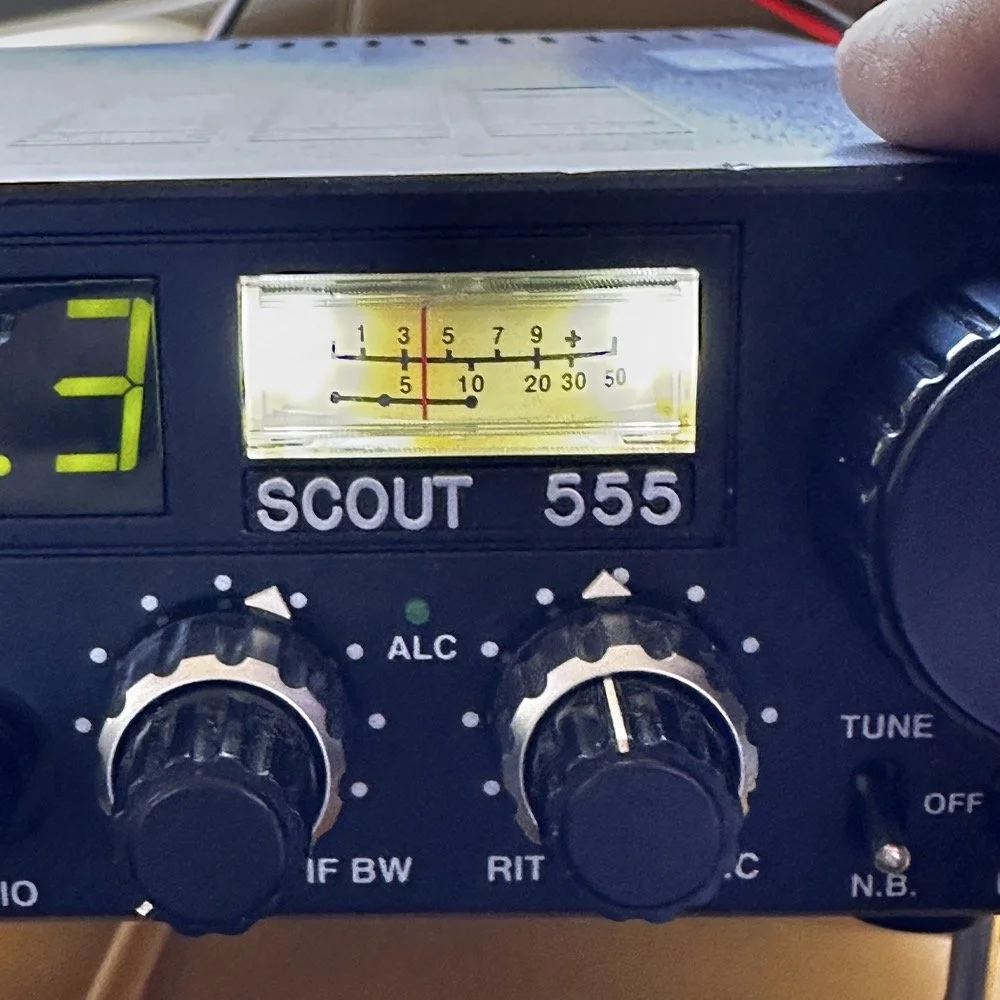
TenTec Scout 555 Radio with Noise Blanker turned on.
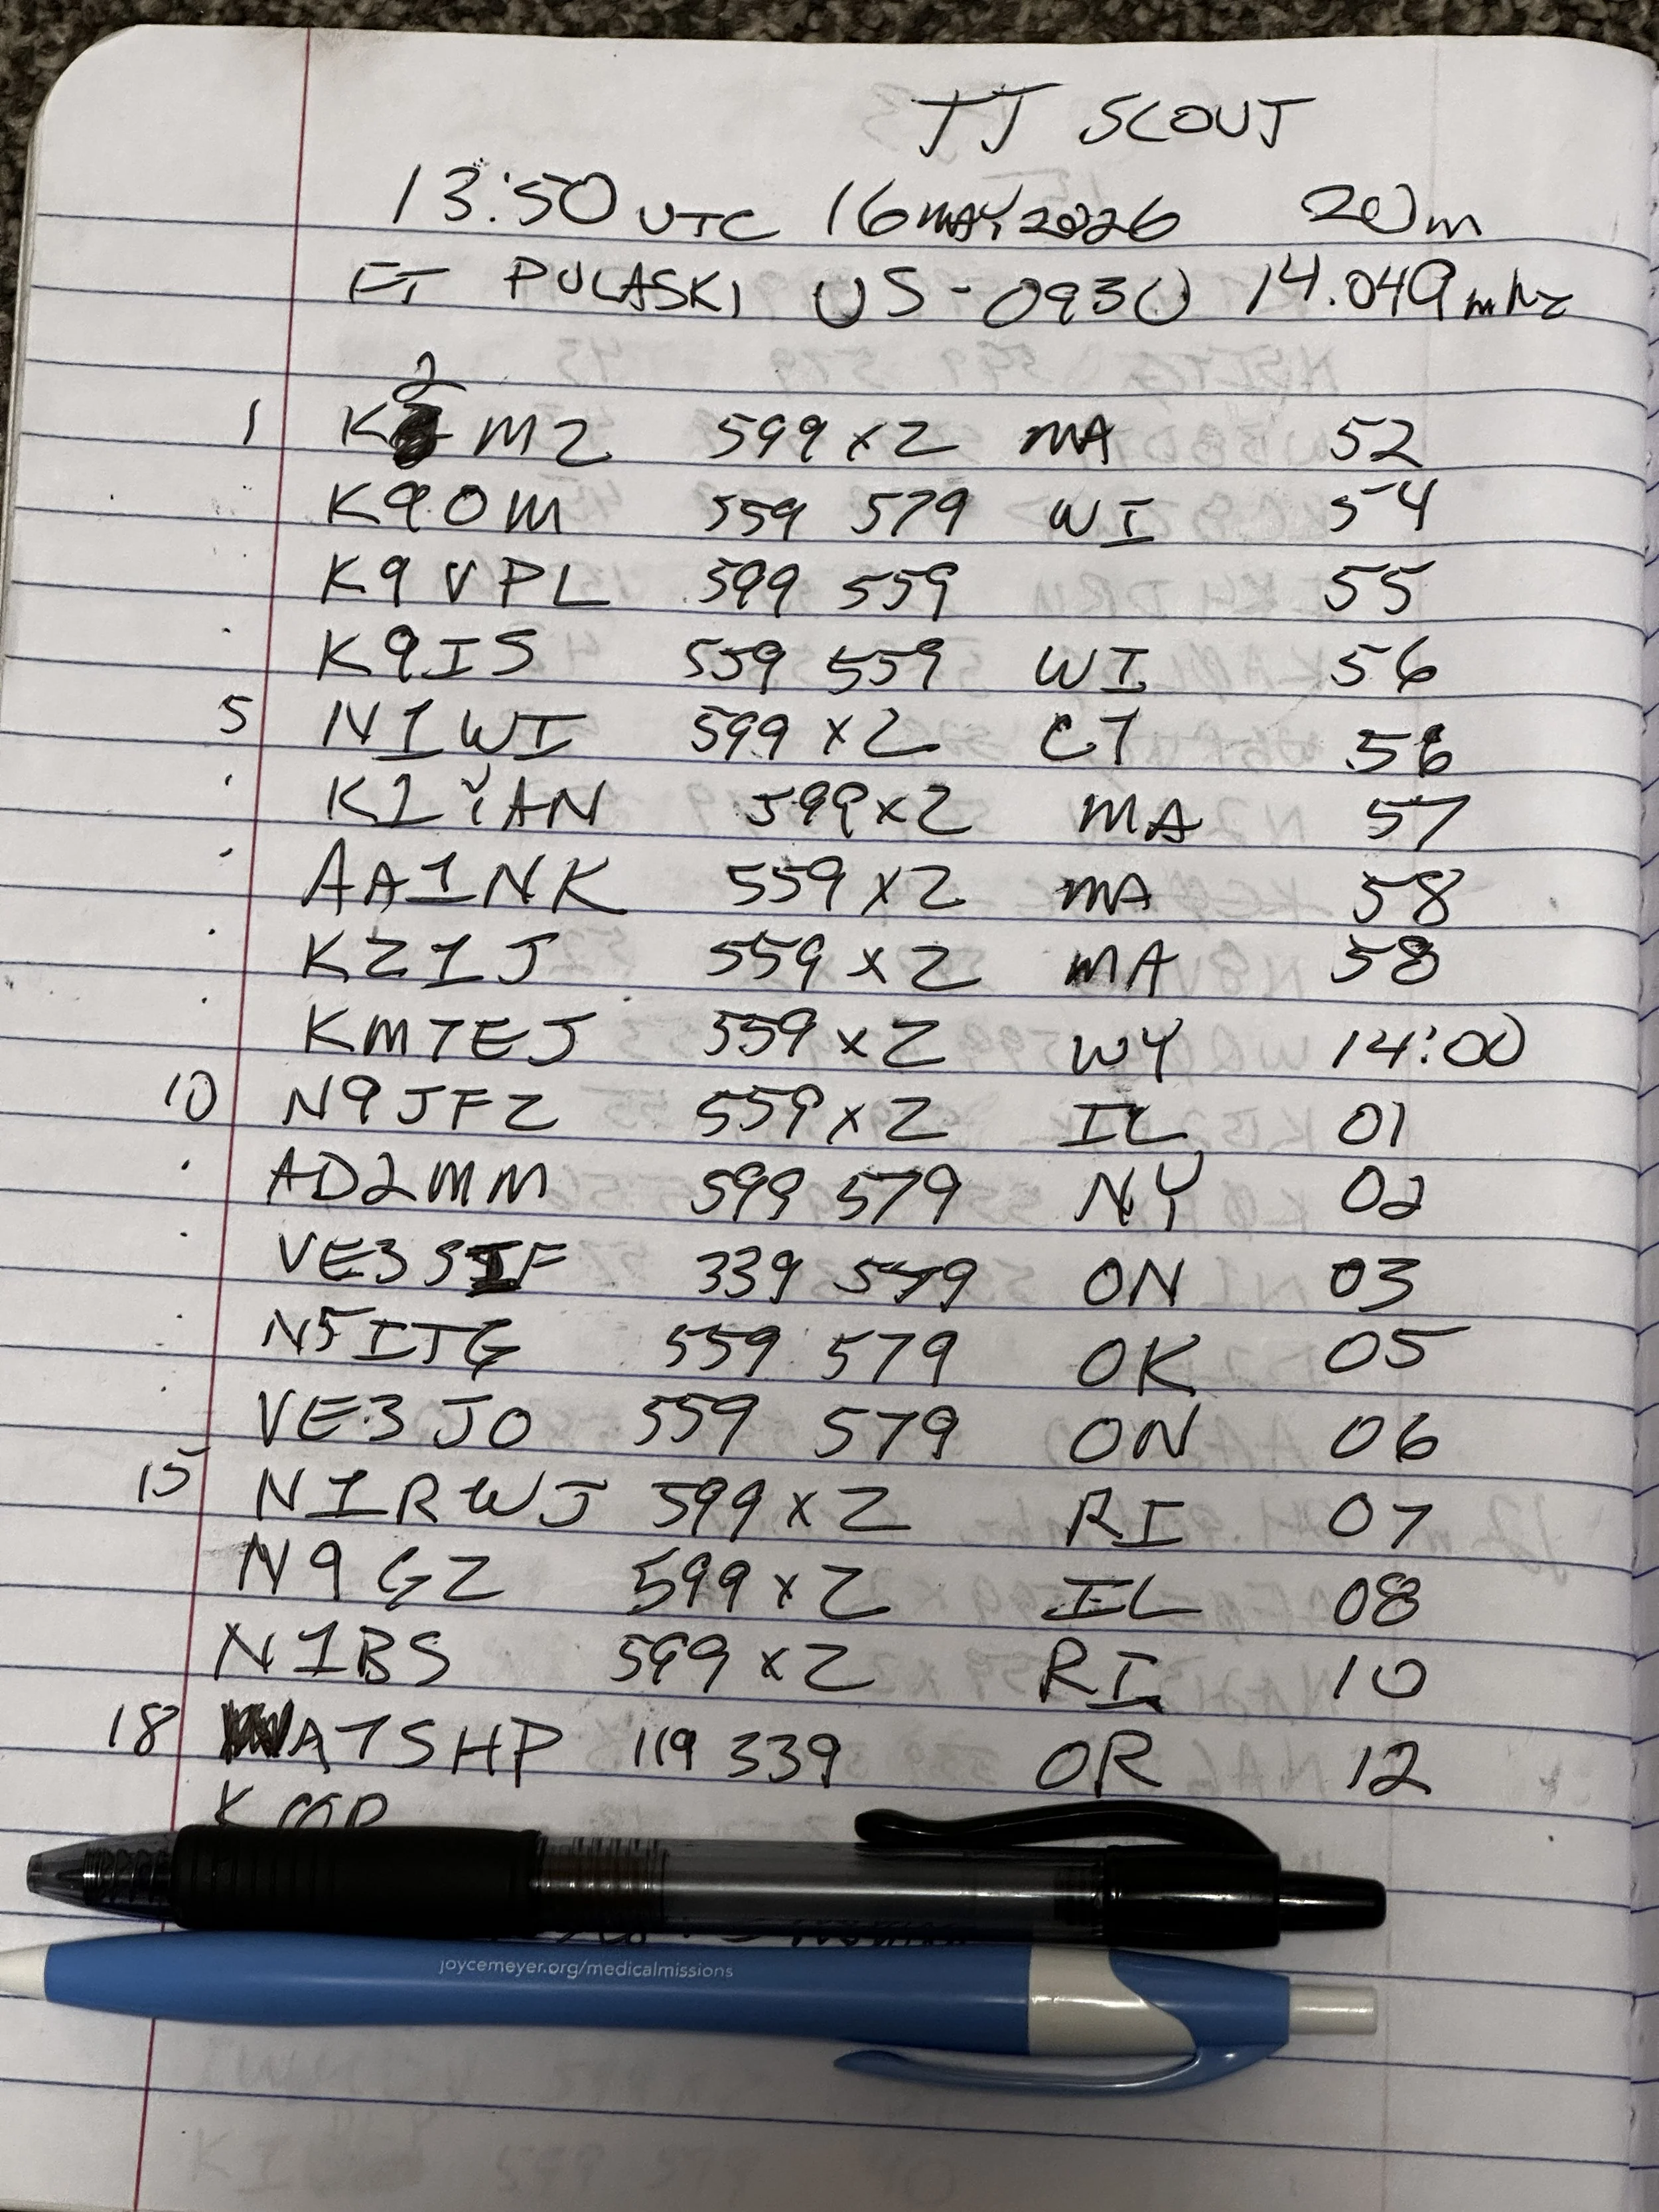
At the end of the day, I had worked 18 contacts, securing my activation and putting several old friends into my log as well. K9IS has been featured in the BLOG a couple of times now and I have many contacts with N1BS as well. It is always great to see callsigns in your log that you recognize. I did attempt 15 and 17 meters before I called it a wrap and packed up but worked exactly zero calls on those bands so I didn’t bother including the page where I just made some band notes and called it quits…lol. Anyway, this is a fun park once you get the noise blanker turned on and I highly recommend it.
Until next time,
73 - WK4DS
You can help support this website by using these Amazon Affiliate Links:
QRP/Portable Radios:
Antennas & Tuning:
CW Equipment:
Power & Accessories:
Organization & Transport:
BONUS ITEMS
Joint POTA Activation with NA2B at Moody Branch: 104 CW Contacts in 4 Hours
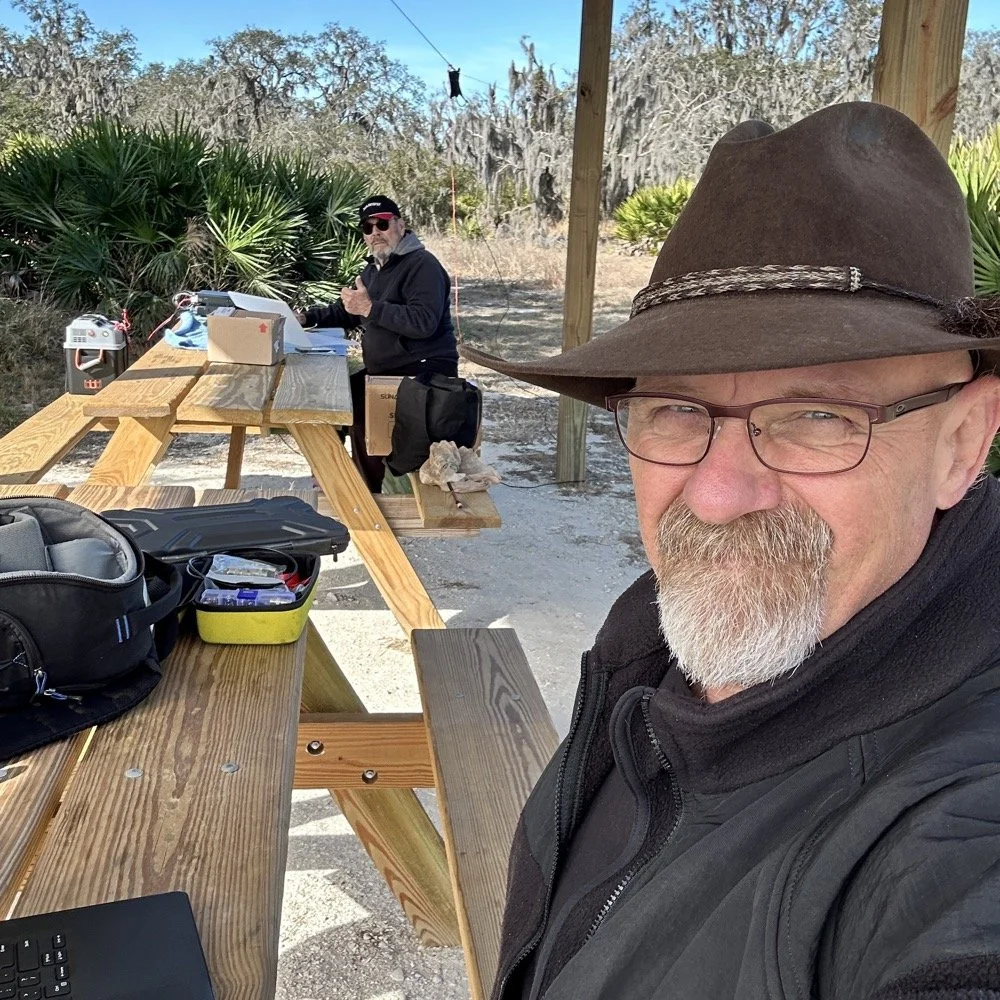
Today I went to a POTA park to meet up with Chas NA2B, another amateur radio operator that lives just down the road from Chito Branch nature Reserve where I have been spending a lot of time here lately. He saw I was at the park on the spot page and simply hopped in the car and drove over for an eyeball QSO and to see if I wanted to meet up with him at some point and setup for an activation.
Today I had the pleasure of meeting Chas NA2B for our first joint POTA activation at Moody Branch Wildlife Management Area (US-6317) in Florida. What started as a chance encounter on the POTA spot page turned into a memorable 4-hour operating session that netted 104 total CW contacts between our two stations.
Today I went to a POTA park to meet up with Chas NA2B, another amateur radio operator that lives just down the road from Chito Branch nature Reserve where I have been spending a lot of time here lately. He saw I was at the park on the spot page and simply hopped in the car and drove over for an eyeball QSO and to see if I wanted to meet up with him at some point and setup for an activation.
This blog post will be an amalgamation of both discussing the activation as well as my new friend.
Planning the Activation
We communicated a good bit over the past week via text to line up a good day, (turns out every day is a good day for Chas…haha) and chose Tuesday as I had some business to attend to on Wednesday and the weather was way warmer than the previous day. The weather actually turned out to be about perfect to be honest about it. We agreed on Moody Branch US-6317 and 9:30 as the start time. We had planned to operate till about 2 if things were going good so on the day of, I load up the truck and head out. It takes about an hour to get there from where i was staying so I stopped and grabbed coffee and snacks along the way. Who doesn’t want a caffeinated CW op on the other end of their QSO???
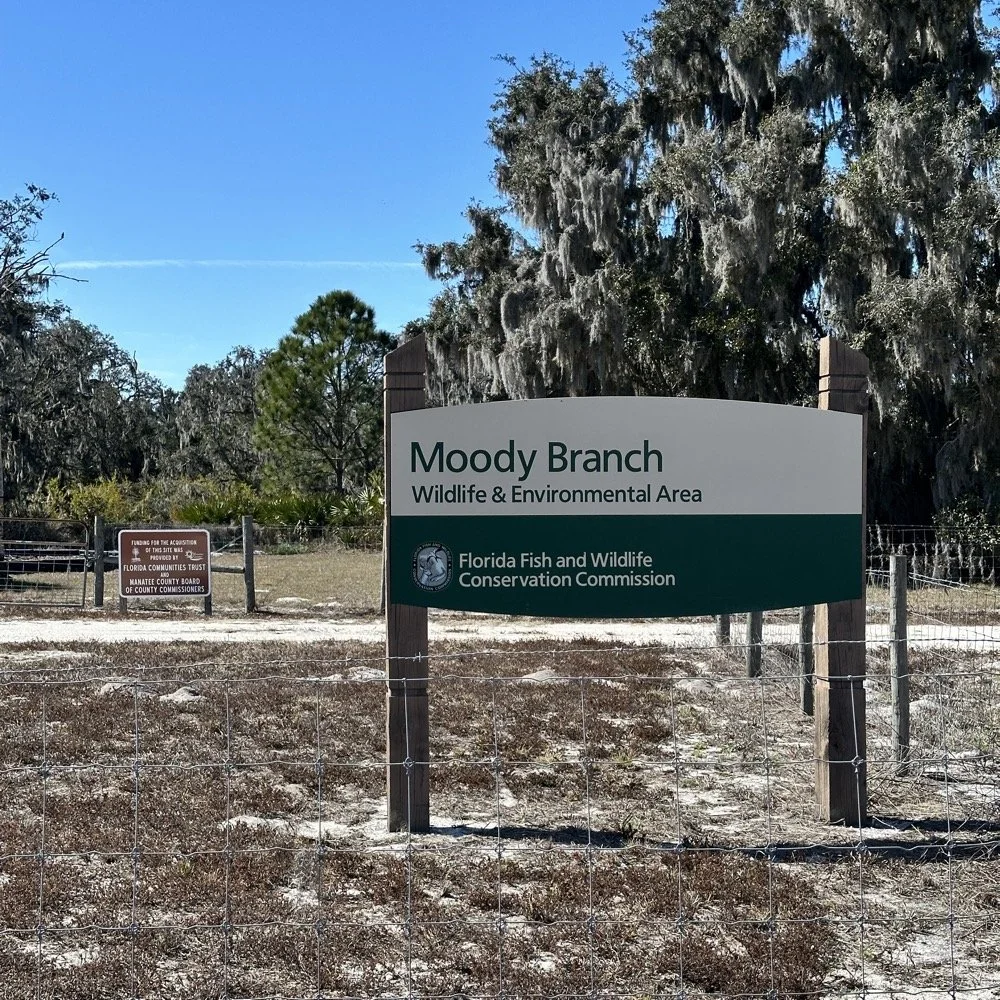
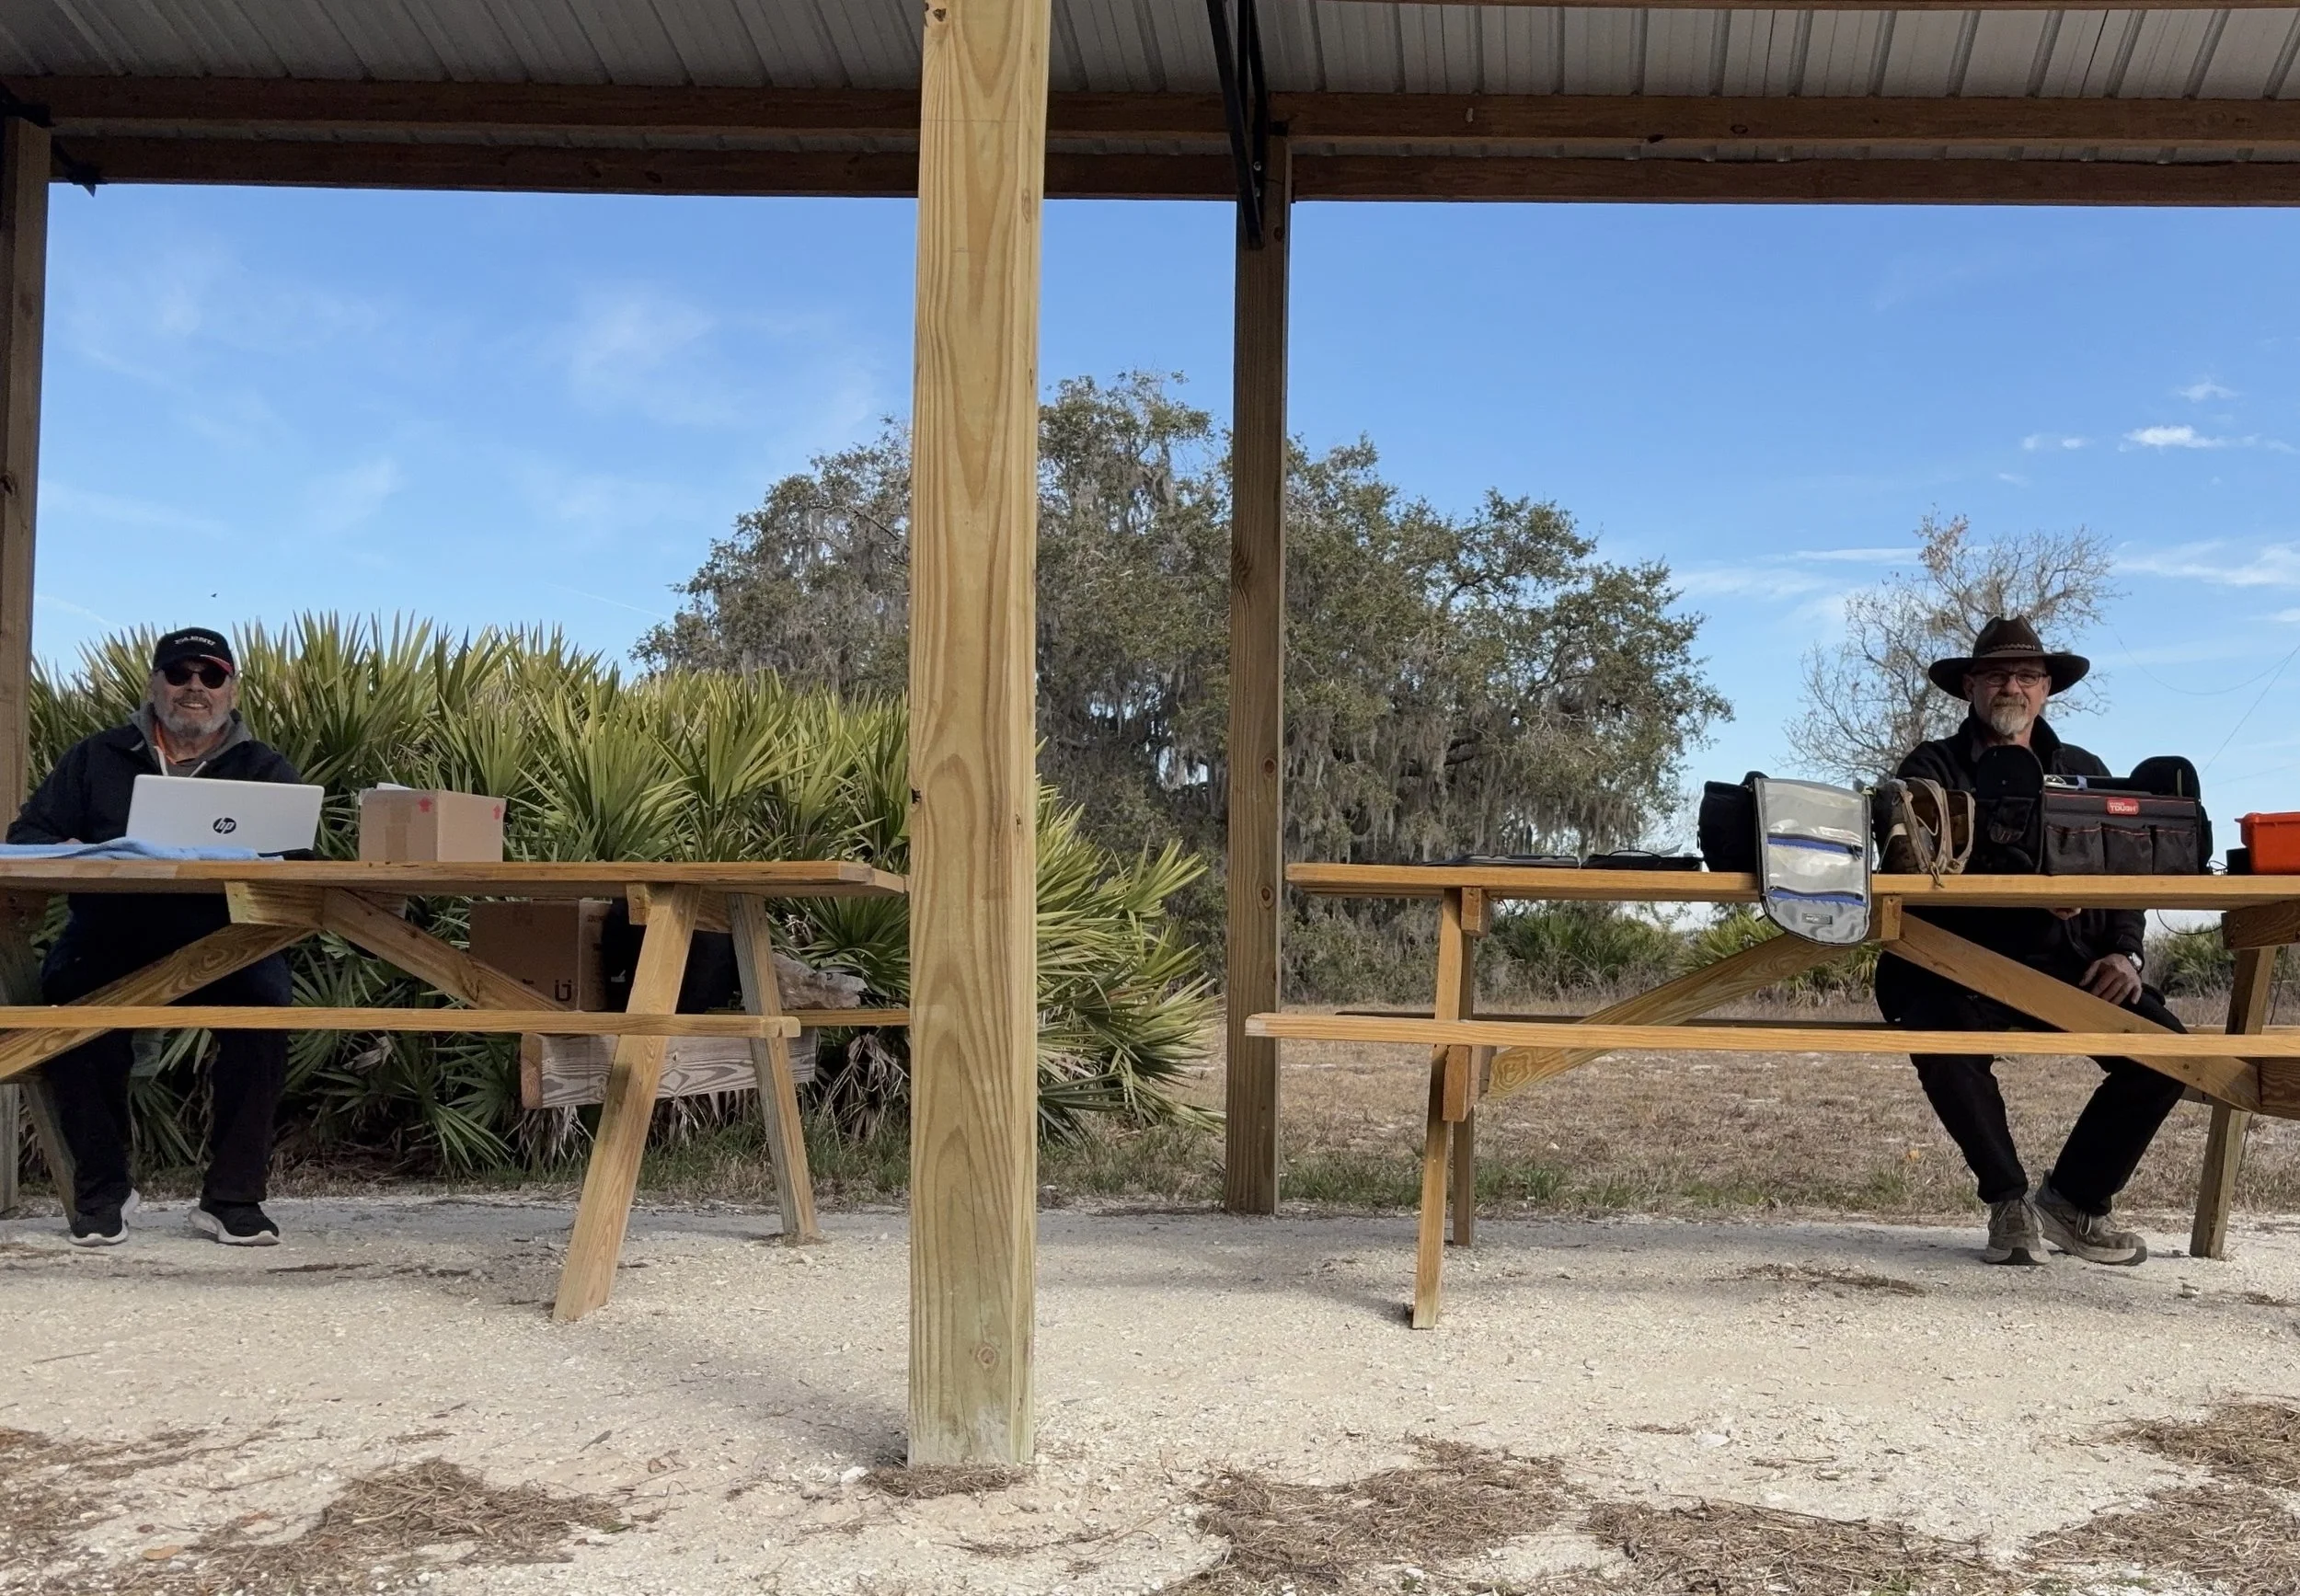
When I get there I am greeted with the standard issue Florida DNR signage and to my amazement there is a pavilion for us to operate from! Now to be fair, Chas had told me about it and the proximity to the parking lot. You see it was literally 15 feet from my truck to the table. Having the table this close allowed for an incredible amount of gear to be brought out. HaHa
Chas had already arrived and was setting up in the back of the pavilion so that I could have the closer spot and access to some really good trees to hang my antenna in. I decided to setup the antenna “properly” by putting the antenna tuner at the antenna instead of at the radio. This should provide better radiation than using the tuner to match the feedline as part of the antenna system. I simply set the case on the ground and set the tuner on top of it and tied the antenna wire to the case itself. The distance was about 50 feet from the table so I had to couple both of my longest coax cables together just to reach the tuner out by the tree.
The Setup: Remote Antenna Tuner Configuration
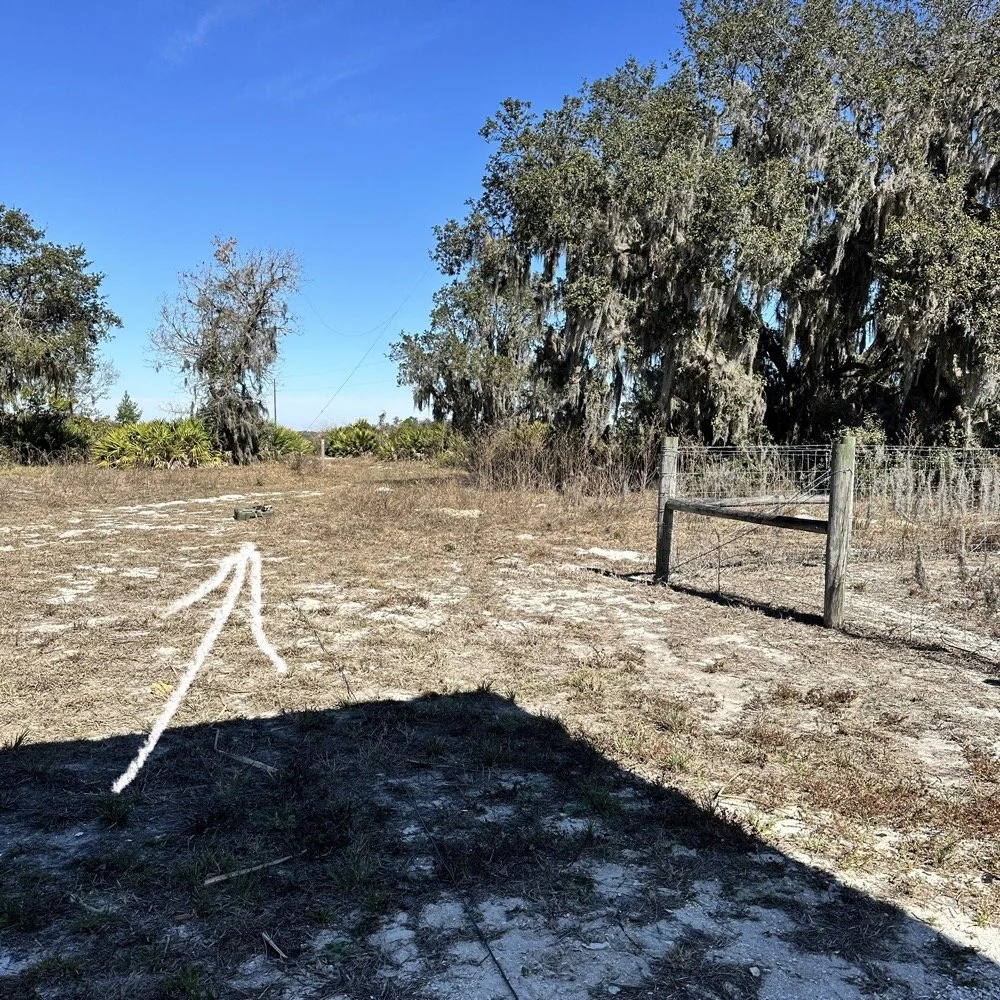
I put the antenna tuner way out here on purpose. The remote tuner setup keeps the feedline from becoming part of the radiator. This is important at it creates a more efficient antenna overall.
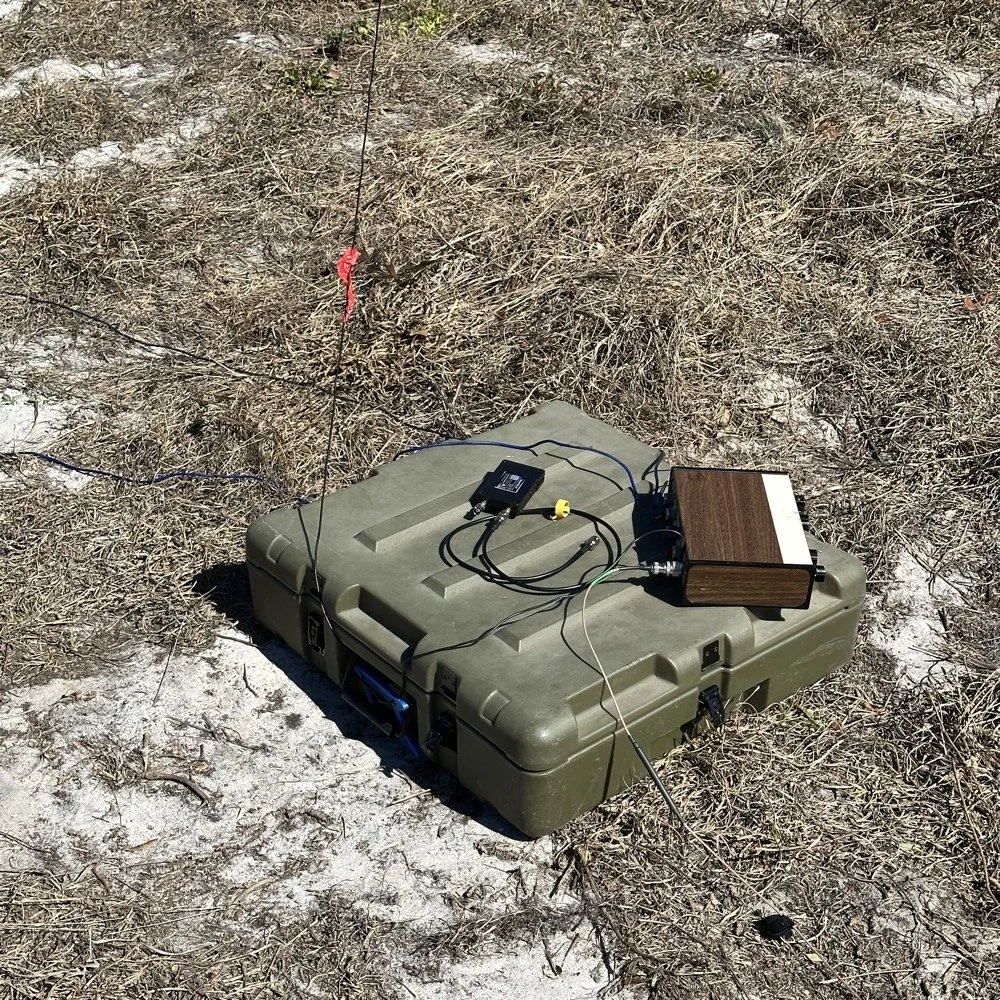
Since it was so far from the table, I just left the nanoVNA with the tuner so it would be nearby when I wanted to make band changes, of which there was many!
I strung the wire up like an inverted L type from tree 1 to tree 2 and tuned it for 40 meters to start with. Today I chose to start there as I was wanting to make contacts on all the bands I could with the Penntek TR-35 QRP radio. I also decided at the outset that I would work bands other than 20 meters today to see what I could come up with. I usually seem to have great luck with all the bands…other than 60 meters so far… haha. I also chose to run 10 watts or less all day too…well except for 40 meters, I ran 40 watts on 40 meters and still only made one FT8 contact there… lol. The band was just too noisy for me to hear anyone.
Equipment: QRP vs. Comfort
I only ran 10 watts or less the rest of the day because I didn’t have my large battery with me that I bring to power the sBitx at full power. I only had my 8 Ah battery and I didn’t want to deplete it early. I also had the 3Ah battery for the TR-35 and used it with that radio, but those were the power sources I was constrained to. This made me have to work a little harder for contacts, but it also made it a lot more fun to get DX stations in the log! I got at least 2 European stations in the log so I know it doesn’t take a ton of power to do it.
WK4DS (left) and NA2B (right) running simultaneous CW pileups on different bands at Moody Branch
Once setup I used two radios, the Penntek TR-35 QRP rig and the HF Signals sBitx V3. Both of these radios are cool in their own respect. I like the sBitx because I can run FT8 without needing to also connect a computer to the radio. The sBitx will internally log the contacts too so I could theoretically do an activation then when I get back home, down load the contact list and reformat it in ADIF and send it to the POTA site. That is kinda cool. The Penntek TR-35 is small, light weight and has a great receiver in it as well as awesome filtering. This little radio has everything you need and nothing you dont.
Above is me and Chas running pile ups on two different bands at once! We were both running CW today and at times I struggled to hear as my side tone and his were the same. I solved this by adjusting the side tone up a little so then mine and his were different ever so slightly and I could hear mine easily again. I think Chas stayed on 20 meters the whole time today. He racked up 61 contacts with the simple wire antenna. What a day in the field!
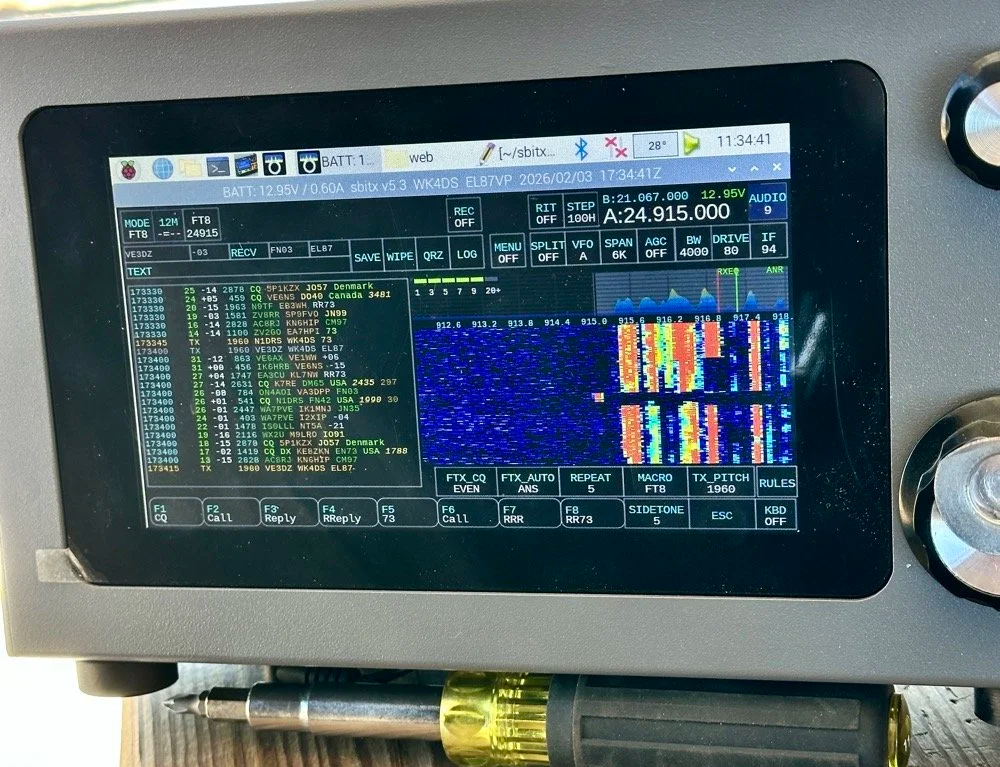
sBitx V3 running FT8 with new color-coded software from the open-source development team
This is what you see with the latest software release from the open source team on Github. This software has been made VERY good by this team of dedicated people and if you want to use this software yourself, just follow this link to JJ’s github page to learn more.
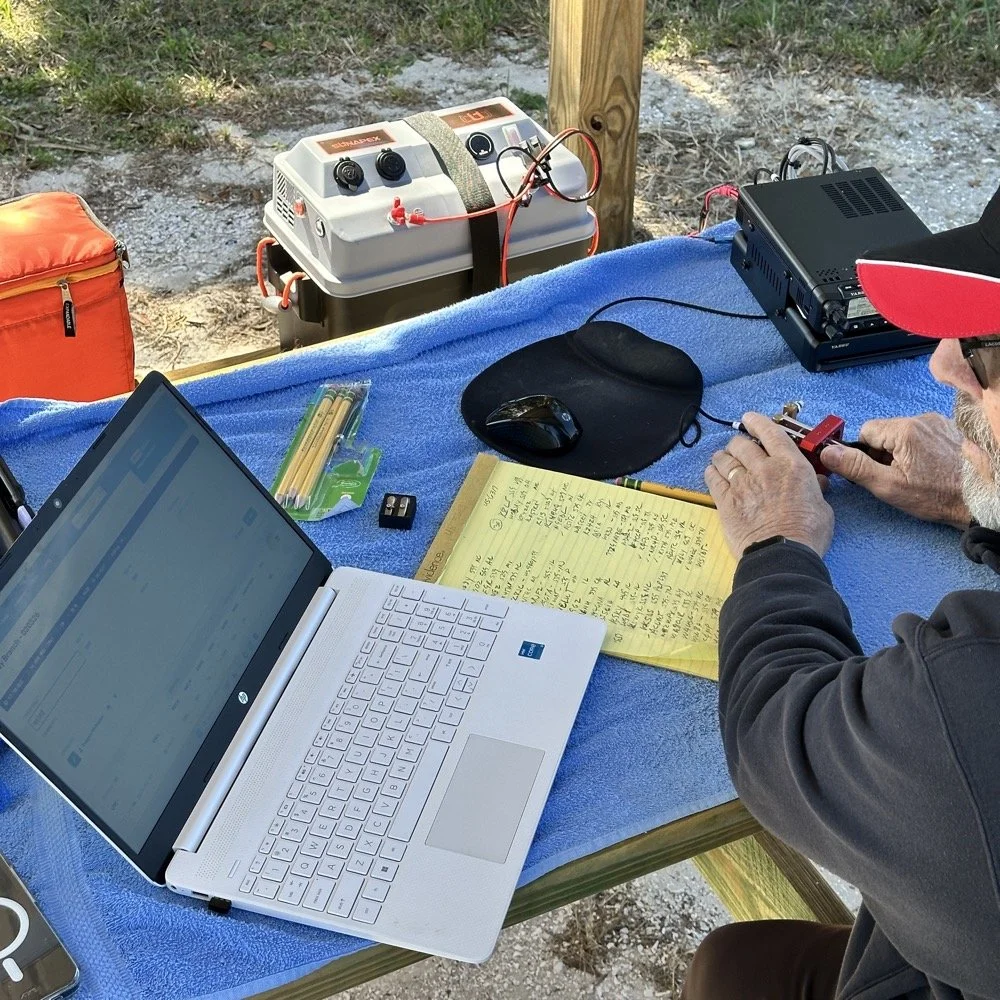
NA2B's minimalist CW station: paper logging, pencils, and a clean operating position
Chas had a really clean operating position today. He had plain pencils, which will ALWAYS work, a pencil sharpener and notebook for log data. He was in a blissful state. I also like the battery pack he has too. If I had brought my 36 Ah battery, I would have brought the Scout 555 out and ran it as well. Maybe forgetting it was a sign that I needed to let that radio rest a little…haha. His station looks so clean though, I was impressed.
My station on the other hand looked like I set off a “ham-grenade” lol… I had the logging computer, the foldable keyboard for the sBitx and the whole Penntek station was just piled in the orange storage case. Along with all that, I also had all sorts of other stuff that isn’t in this photo scattered around the table… It was kinda crazy how much crap I brought out.
Operating Highlights
Chas setup his camera and grabbed this photo of us below for the blog. I like how his station has one box on the table and mine is covered in stuff! HAHA!
I will be honest, it was a lot of fun just hanging out while doing the activation. I do so many of these by myself that I forget that I can have someone with me while I do this.
We didn’t get in a hurry, we just took our time and whatever calls got in the log is what we got. There were a couple of time we both had decent pileups to work through, him more so than me as he had more power and 20 meters typically has more operators on the band. It wasn’t about QSO count…till it was… but all day we just made contacts and played radio.
Right before we finished for the day, I asked Chas how many contacts he had. Chas had 60 calls in the log and I had 38. I told him that we needed to have an even 100 calls between us before we stopped for the day. This total number of QSOs was completely arbitrary, but a cool little milestone none the less so we pushed on for a little longer. We finished the day with 104 total calls in the logs. Win! Chas had 61 as a final count and I ended up with 43! What a day!
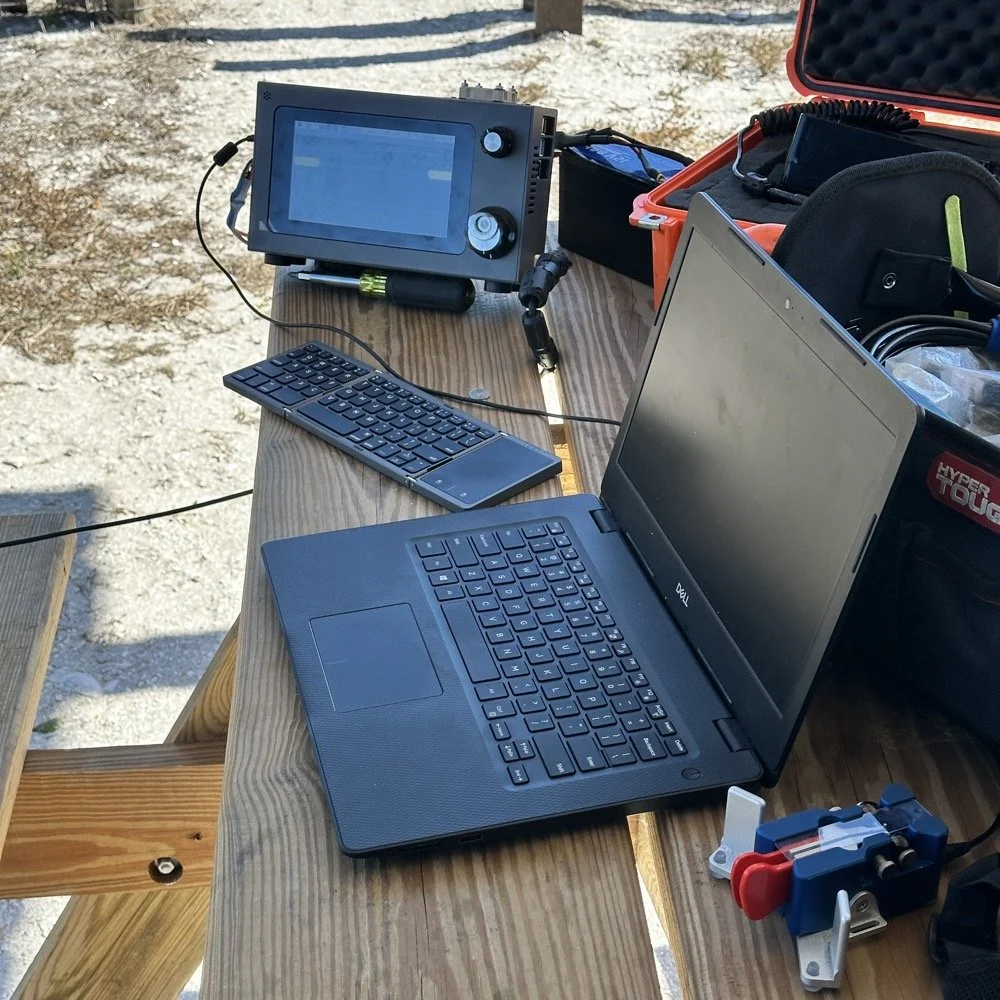
Multi-operator POTA setup at the pavilion - note the contrast in station complexity!
After about 4 or 5 hours of fun and games, we decided to break down and head back to our wives to get some lunch. It was a great day and I am glad I made a new friend as well.
Activation Summary:
- Park: Moody Branch WMA (US-6317)
- Operators: WK4DS & NA2B
- Total Contacts: 104 (43 WK4DS + 61 NA2B)
- Mode: Primarily CW, some FT8
- Bands: 40m, 30m, 20m, 17m, 15m
- Radios: Penntek TR-35 (QRP), HF Signals sBitx V3, Yeasu FT-891
- Power: 10 watts or less (QRP), 40w on 40m, 50 watts on 20m
- Antenna: Inverted L wire antenna with remote tuner, (Chas ran a random wire)
- Duration: 4-5 hours
You can help support this website by using these Amazon Affiliate Links:
QRP/Portable Radios:
Antennas & Tuning:
CW Equipment:
Power & Accessories:
Organization & Transport:
BONUS ITEMS
73
WK4DS - David
A couple of quick activations testing the antennas
The past couple of days have been busy and there was still time for a couple of quick activations along the way.

First stop is the Estelle Trailhead on Crockford Pigeon Mtn WMA (K-3742) over in LaFayette GA while coming home from visiting with my mom. This is actually a new park for me even though it is only 15 miles from home by road… I dont know why, but I have never activated it for some reason. The Estelle parking area is fully within the WMA boundary so it was a simple matter to pull in, get parked out of the road and setup a radio in the shade for a little while. Today saw the Ten Tec Argonaut 5 again as this radio was the one in the truck at the time. It is also one of my favorite HF radios at this point. It only lacks two things to be the perfect radio, an SWR meter and an internal antenna tuner…but I digress.


I said that I setup in the shade, but there really wasn’t much to start with…lol. I did get lucky and a nice cloud moved in after a few minutes and helped keep things cool. I don’t like to let my radios just sit and cook in the sun if I can help it and will go to fairly great lengths to prevent them from getting hot. This is what you see here. The shade was just wide enough to protect most of the radio from direct sun so it didn’t get very hot before the clouds moved in. On top of that the tool bag is shading my battery in this photo too, I didn’t want it to get too hot either…haha.

I started on 15 meters today as I finally have a 15 meter capable radio and antenna too! Well the RBN showed 29dB for me! That is crazy good for someone with 15 watts under their belt into “7” land. But try as I may, there just wasnt that many hunters on 15 meters for some reason. I did get 3 QSOs in the log while on 15 meters so all was not lost. Then I moved down to 17 meters and did quite well there, picking up several more contacts. Then I finished out the activation on 20 meters which is my backup if I need to get my 10 for the activation. 20 never seems to let me down either as I can almost garuntee at least a few contacts there.

So after getting the activation, I wanted to experiment with the antenna system and see how it would work on the drive home. Turns out the 20 meter hamstick without radials has worse SWR than with them, going from 1.15:1 up to 1.7:1. Who would have guessed? LOL. This is not a real problem though as this is still well below what I consider useable SWR. As long as I can stay below 2.5:1 I will operate. That is the upper limit though and I will work on the antenna a good bit to get it down but if nothing helps and I have 2.5:1 SWR, I will try it. The radios can handle anything below 3:1 so I set my personal threshold below that… I know some people wont use their gear if isn’t almost perfectly 1:1, but I have come to realize that it isn’t so important and the signal reports speak for themselves.

On the drive home, I start hearing this REALLY strong signal booming in to the Argonaut 5. The above photo shows what the signal level coming into the radio was 20 over S9, and remember that the Argonaut 5 has a S meter that doesn’t like to give out good signal reports. So I start working on head copy on the drive and finally get that it is W1AW/0 in Colorado and he (or she) is working as a POTA park! So I do what any sane POTA hunter would do, I pull over at the New Salem Firehall and work them mobile! WK4DS/M got into their log!!! WooHoo!!! So at the bottom of the logbook page you will see where I logged the hunter contacts on this trip since I was not at a park when I made these contacts.

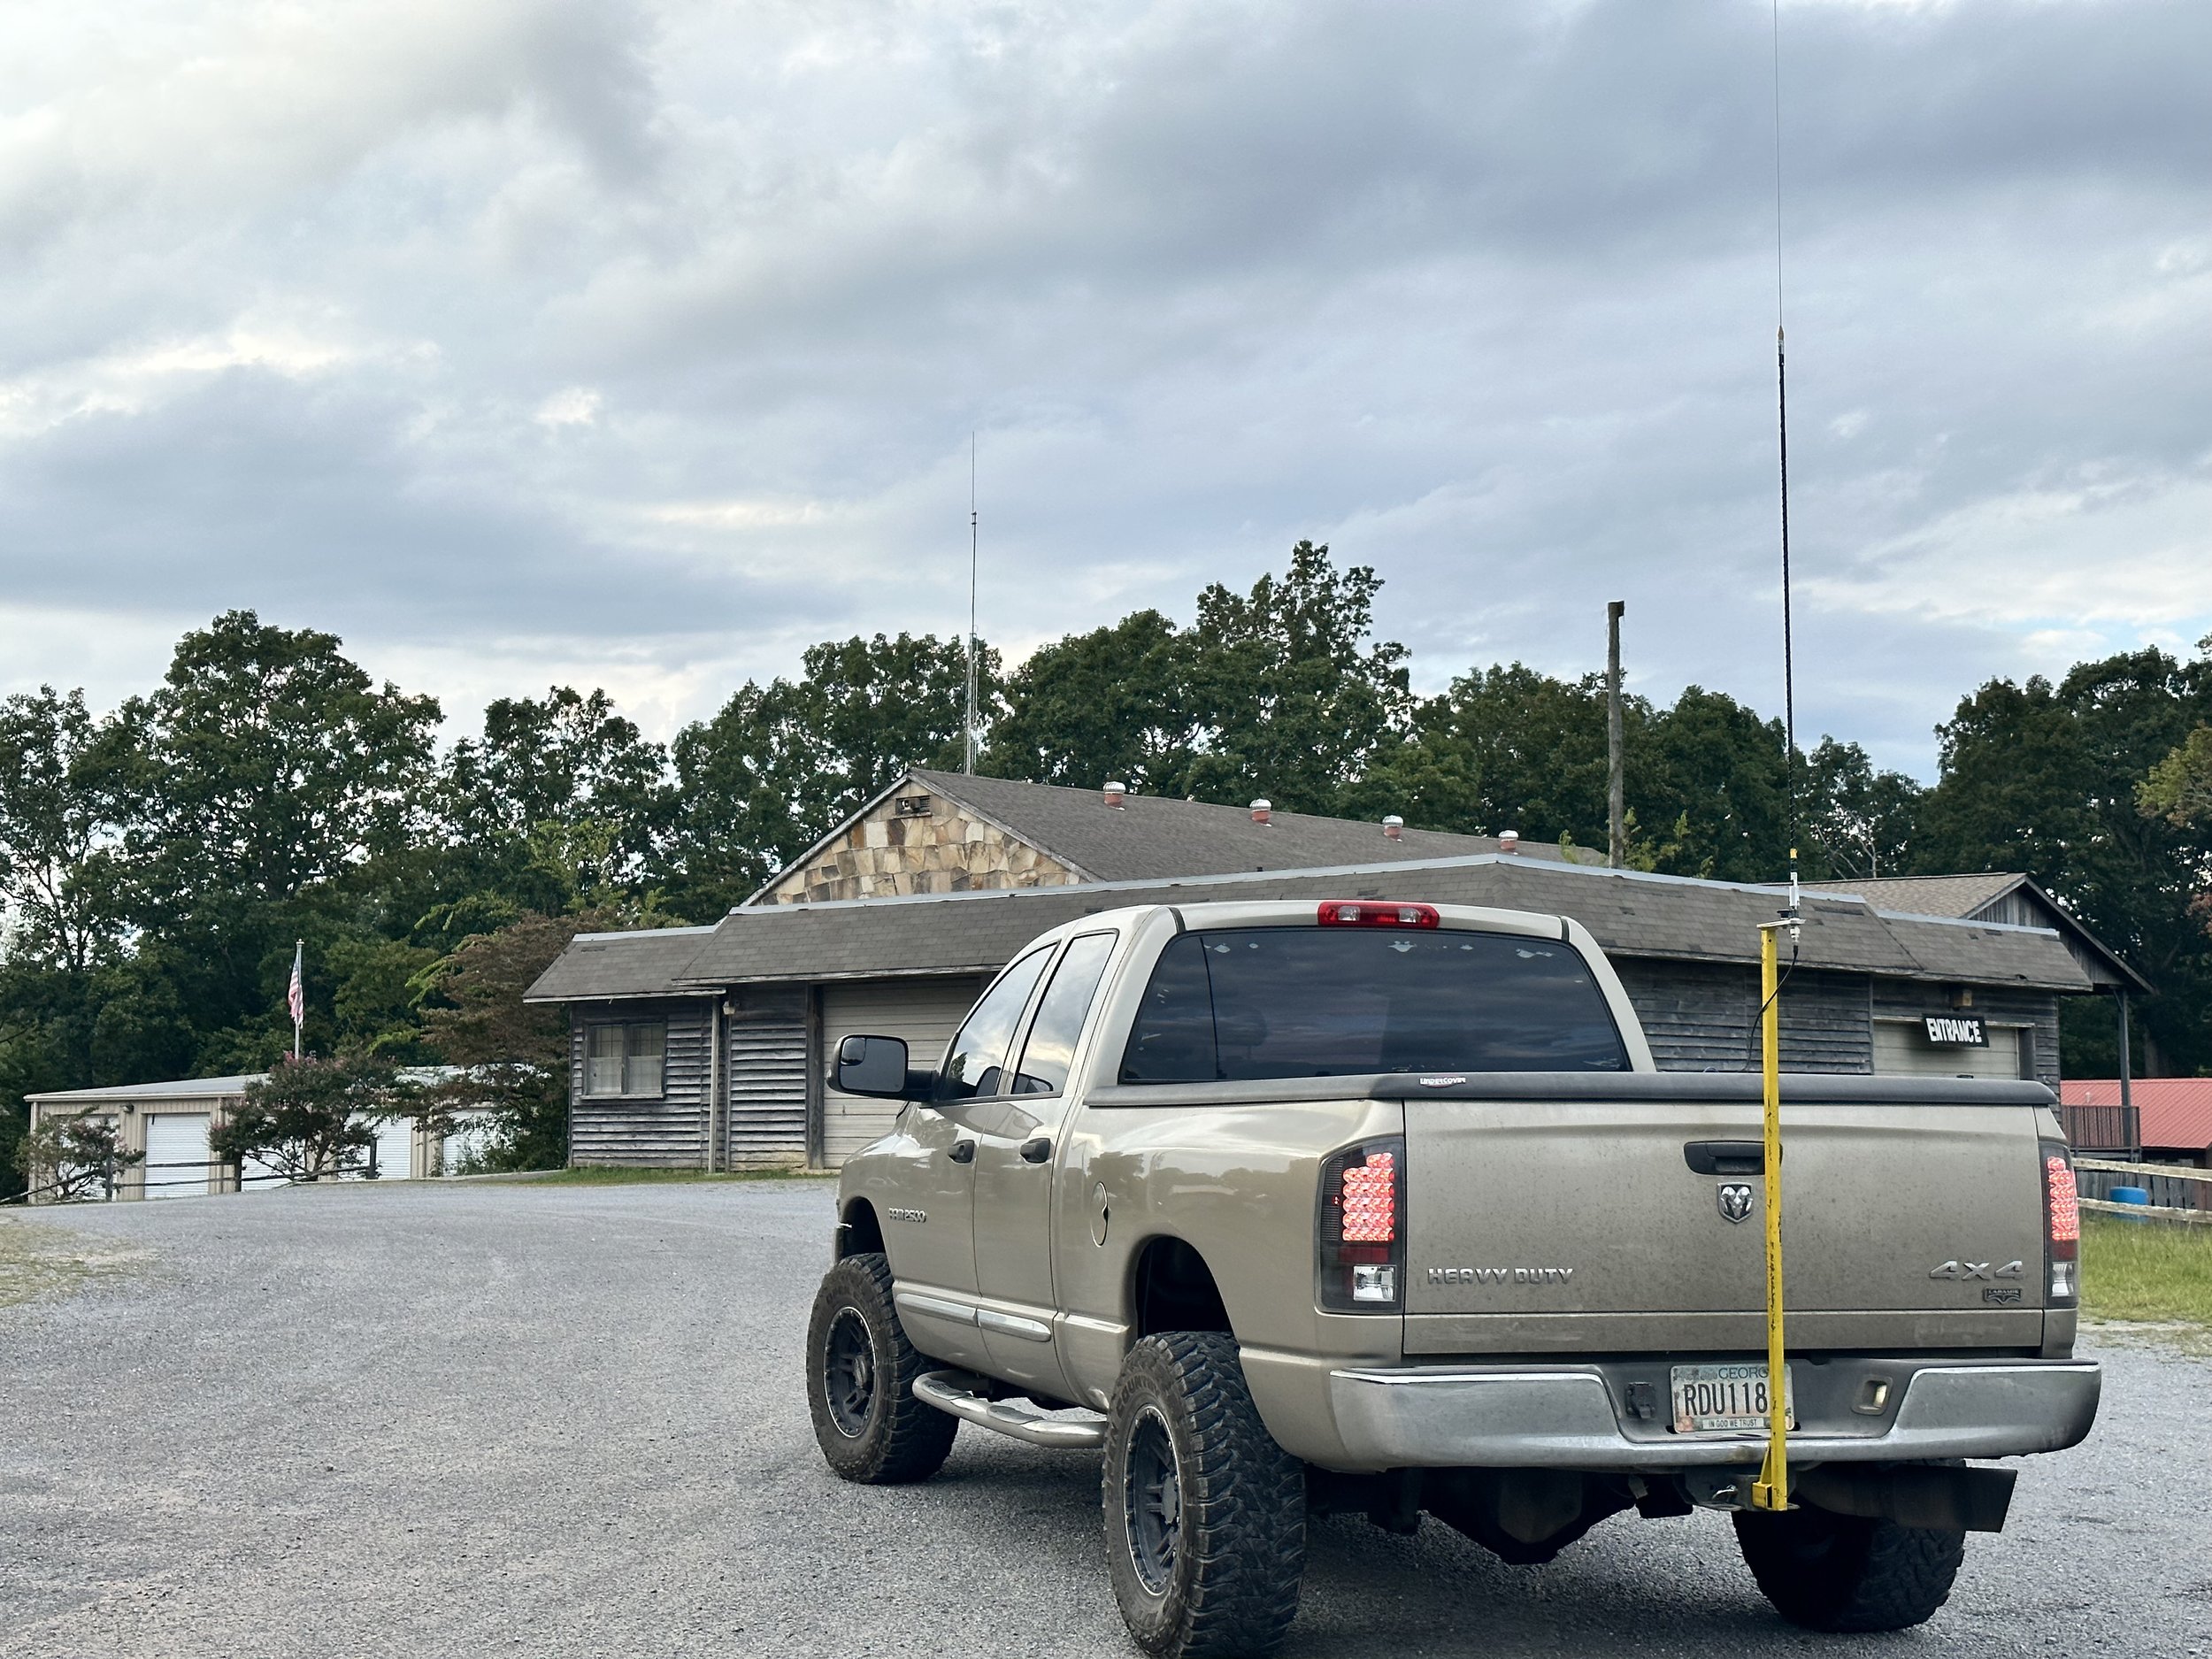
New Salem Firehall parking lot was empty and worked great for getting my hunter contact on the drive home.
As a side note, I finally made the hitch pin (shown below) for my antenna mount so I can use it for the rover program without having to pull it off the truck and stow it between parks. I am working on reducing the setup and breakdown time at each park as I am going to attempt a 10 park rove and this will take planning to make it happen. Things like this can add up on the rove to make it take too long since the drive time from one park to the next will be the biggest time eater of the day. So if I can find simple little things that I can do on each stop to save time, I can make the most of the activation.

I made the main pin that holds the mount, but I simply bought the little pin to lock it in place. Sometimes it is smarter to buy a part rather than spend the time to make it. The main pin was easy enough to make from scrap shafting material. but to make the keeper pin would have taken more than the 3$ it cost in time so I opted to simply buy it instead. To be honest, it would have probably been smarter to buy the main pin too, but I had a scrap piece of round and time available on the lathe so I just carved one out right quick rather than drive to the store to buy one. Another plus is that I could make it like I wanted which included adding the handle to the main side so it is easier to pull when breaking down the system. On top of the pin making, I also opted to add an extra set of holes to the antenna mount so that the pin can be left in for simple POTA activation days where I dont have to pull the pin to simply setup for a single park. This allows me to just stick the mount in the hitch and use it like I have been and take it down when done so I can stow it inside the truck bed when not in use.

The next park I went to a couple of days later is the Chickamauga National Military Park. K-0716. This park lies in two states, so today I opted to activate the Tennessee side of the park. This location is easy to access as it is literally on the side of the road. This is why I like this location and hate it at the same time. The location is called Eagles Nest and is part of the military park completely within the park boundary.


K-0716 presents me with a quandary. This “shack” position makes for a comfortable operating position but the road noise is really bad due to the proximity to the road… I have used headphones here before and that seems like the correct thing to do if I operate here much more. I am going to go ahead and get my repeat offender for activating this park. I am already half way to this award anyway so why not? Ha Ha… Another thing that surprises me is that there are some fairly large trucks to travel up this narrow and winding road to the top of the mountain. Like large d4livery trucks kind of large, I guess it is normal, but it just kind of caught me off guard to see such large trucks going by while I was there.

The radial situation is unique here too, since it is on the shoulder of the road, I have to put both radials on the same side of the truck. Whenever I do this, I always get out the nanoVNA to see what this has done to the SWR plot. As usual, it did affect it but not by much. I was surprised to see that on 15 meters it needed both radials to get a decent SWR before I was happy. So I get it setup, spot myself, start a log in HAMRS and start calling CQ. I finally net a couple of contacts on 15 meters, but there are not many hunters even though the band was open. It did have some fading, but it was fairly strong anyway and could easily support use, but people were not there. So I moved down to 17 meters. Once on 17 meters the RBN (Reverse Beacon Network) picked me up and showed the strongest signal report I have ever seen for one of my activations. 42dB is insane! I have never seen that and this was with 15 watts no less. So people MUST be on this band, right? Well no, it seems that all the people on HF were down on 20 meters having a grand old time without the few of us up on 17 meters. I added 4 more QSOs to the log with one being KJ7DT who followed me down the bands working me on all three on this day. To me this is awesome as it shows the propagation for all three bands was really good as he is in Idaho which is almost 1800 miles from me.

So I finally decide to join in on the fun on 20 meters and QSY down with what seemed like the rest of planet earth and secured the activation in short order. Getting Paul - KJ7DT a third time on this day and Keith WI0S twice! Both of these calls have appeared in my log on numerous occasions. These are some very prolific hunters and I just want to thank them for being there to hunt like they do. They are what make activating parks fun. With 13 calls in the log I officially had the activation so I packed up as it was getting close to lunch and the road noise made it very hard to hear as well and headed into Chattanooga to go have lunch with the girls.

The clip board has made a huge difference in operating ease for me. I can now not worry about the wind turning the pages and it gives me a hard surface to work from no matter where I am. This alone helps a ton. As seen here, I am able to lay the keyer and the key on it as well as log. If you still paper log this is a very handy addition to the POTA kit in my book. Yes, I still paper log. I have had too many computers where they crash unexpectant and you have to reboot the machine and wait for it to get back up and running to trust it with my only log of an activation. The paper notebook gives me a durable backup to my phone logbook that I run at the same time.
Side note about how I log… I will run HAMRS in parallel to my paper logs and if the activation is going kinda slow, I can log both at once and keep the electronic log caught up in real time. This is a recent thing brought on by me wanting to not have to set aside time at home just to transcribe the log so I can submit it online. I found that a lot of my activations are slow enough to permit time to log the QSOs while I work the activation and not have to do it at home. So if things speed up and I cant log both the paper and electronic, then I always default to paper and the battery never goes dead in paper logs nor does the app crash… Then when things slow down, I will let the keyer send CQs and I will catch up the electronic log while I am calling so I don’t waste that time just sitting there waiting on an answer. This works really well and I can normally email the log from the park before I leave so when I get home I can simply upload them to the POTA site since it wont let me upload from my phone yet…


Here is something else that a lot of people that don’t do field ops have no idea about. A carrier with a bunch of backup equipment is a must. Everything in this bag has been used on an activation in the last few months in one way or the other. Notice there is power cords and spare coax and three pens are visible on the side, this is something that you quickly learn, things break, pens dry out, you run out of paper, all of this is things you have to prepare for before going to the park and the only way you learn this is from doing it. I can preach to the ends of time but until you have to end your activation because your coax connector came off or the center conductor broke on the coax or your antenna mount breaks, you wont prepare for it as a contingency. That is just how it is…Another really handy tool to have is a Leatherman multitool of some kind, brand isn’t important, what matters is that you have one, I don’t know how many times I have used mine to save the activation some how. Totally worth the price of admission in my book.

QSO maps are awesome, I have KJ7DT in the log on all three bands today so his one pin is actually three. Just like I have WI0S in the log twice so his pin represents two contacts. This is neat to see though as you get a visual idea of what the bands were like on this day. If I studied space weather more then I would be able to corelate the data so that it would be more meaningful, but like this it really doesn’t tell much other than skip distance for the bands I used. That is about it but it is still fun to look at them nonetheless.

So this is what it looks like to activate two parks on two different days and how the setups vary for each one based on the conditions for each location. Next time I will carry headphones for the one by the road so I can hear better. Till then, get your radio out and make some contacts with it!!!!
How about this new tiny CW keyer I bought?

I have been on the hunt for a quality keyer for my Ten Tec Argonaut 5 radio for a long time now. You see, this radio is a bucket list item for me and I finally found one. Well, just like all Ten Tec radios, this one only has a simple keyer, with no memories to record messages like most modern radios today. I really enjoy having message memories to send CQ and even sometimes to send the closing statement at the end for a number of reasons. So enter the external keyer…

So to spoil the outcome right at the start. This keyer is just what the doctor ordered. It worked just exactly like I wanted it to. I love the form factor, the size and especially the functionality. It has so much going on that I had no idea was there, like it has macros… kinda. It has these short hand codes that will call up other memories or repeat information or trigger other functions. One that is really neat is that you can change the keying speed with a command embedded in the memory message, so say your in a contest and you want to send the 599 BK really faster as literally everyone is using this exchange. Then you can add a small command at the beginning to change the speed of the message to say, something like 35WPM, then send the exchange and at the end execute another command to change the speed back to what the knob on the front is set for. This works, I tried it. On top of that, it will do serialized messages too! This little keyer is loaded!


Below is what you get when you buy it. The widget and a slip of paper with the info on where the manual is online. I downloaded the manual and promptly printed it out. The manual is well done, easy to understand and also has the assembly instruction as apparently this can be had in kit form too.


The front of the keyer has 4 buttons and the speed control knob, that’s it. It has everything you need and nothing you dont. Plain as that.
Another thing that I kept going back to was just how small and light it is. It weighs practically nothing and is about the size of a pack of playing cards cut in half… As for the buttons, there are things these do other than record and playback memories. By pressing multiple keys together, you can do all sorts of other things, like go into the menu, or set it for tune up mode where it will send a constant carrier so you can set the tuner for the antenna and so fourth.

The back is even simpler. The sockets are as follows: left to right, The headphone Jack for use as a practice oscillator, the paddle / straight key input, and then the output used for keying the radio. By the way, this thing even auto detects the keying device and sets itself to the right mode for you somehow. That is some serious dark magic right there.

These are the screws you will remove to replace the battery…next year. It is supposed to last that long, we shall see as I plan to use this radio a lot more now that I have a memory keyer for it.

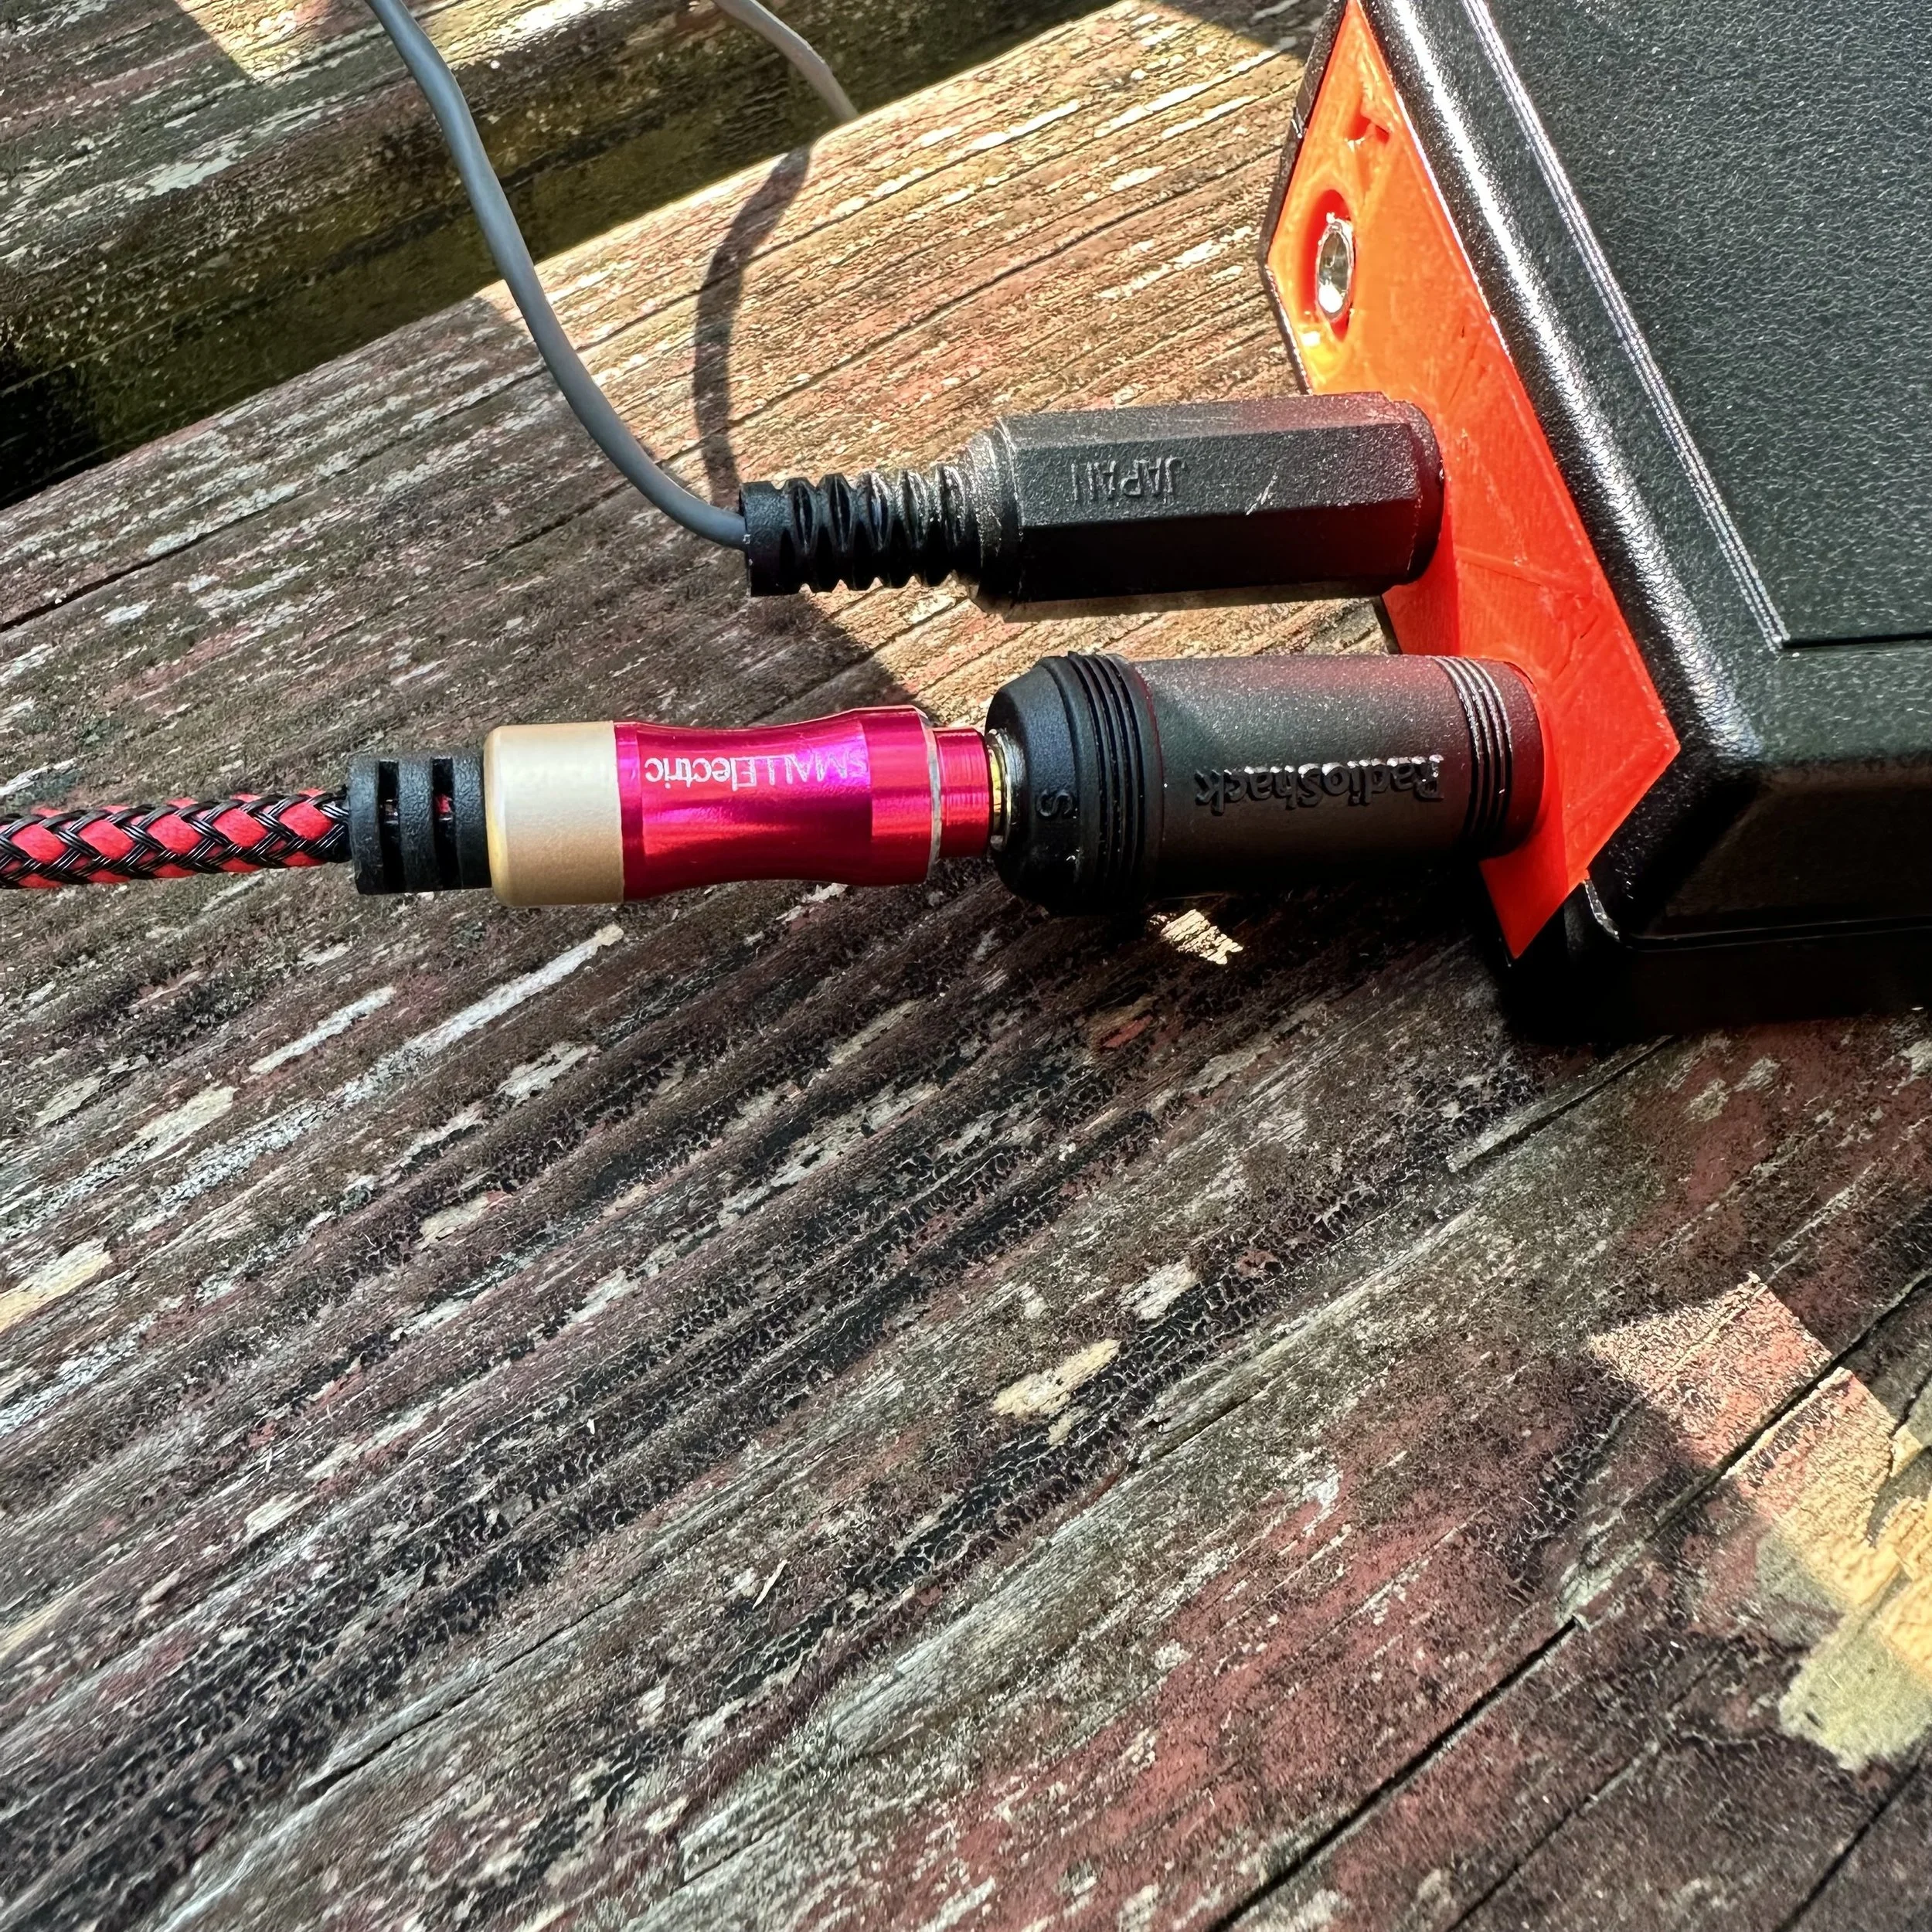
You will see below that I had to adapt the cable going to the Argonaut 5. This is because the output is setup to send to the radio as a straight key. (I am pretty sure my other keyers were the same way and I simply forgot this little fact.) So you have to set your radio to straight key mode and then come up with a 3.5mm mono to 3.5mm mono cable. Well I didn’t have a cable so I used one of my headphone adapters that turns stereo headphones to mono headphones and it went right to work. I will most likely get the right cable pretty soon, but for now this will get me by just fine.
When I had the keyer setup in the shack at home, it performed flawlessly and I was able to get it programmed and used it to chase some DX as well as hunt a bunch of POTA activators before deploying it.
As soon as I got to the park and setup, it went nuts on me. The code had this odd “modulated” kind of thing going on and was unusable. So now what???

Turns out this coax was my problem…well not this coax in particular but the fact that it was so short. You see, the antenna was connected directly to the back of the tuner so the RF was in close proximity to the radio. I speculated that this might be the problem so I got in the support box and found another cable that was longer and spread the radio set out as far as possible. This solved the problem for the most part. I think that some RF choking on the cable going to the radio will help more too.


I also included my common mode choke since this cable is BNC on one end to get rid of that possible problem. This also required me to convert the connector on the radio from SO-239 to BNC.
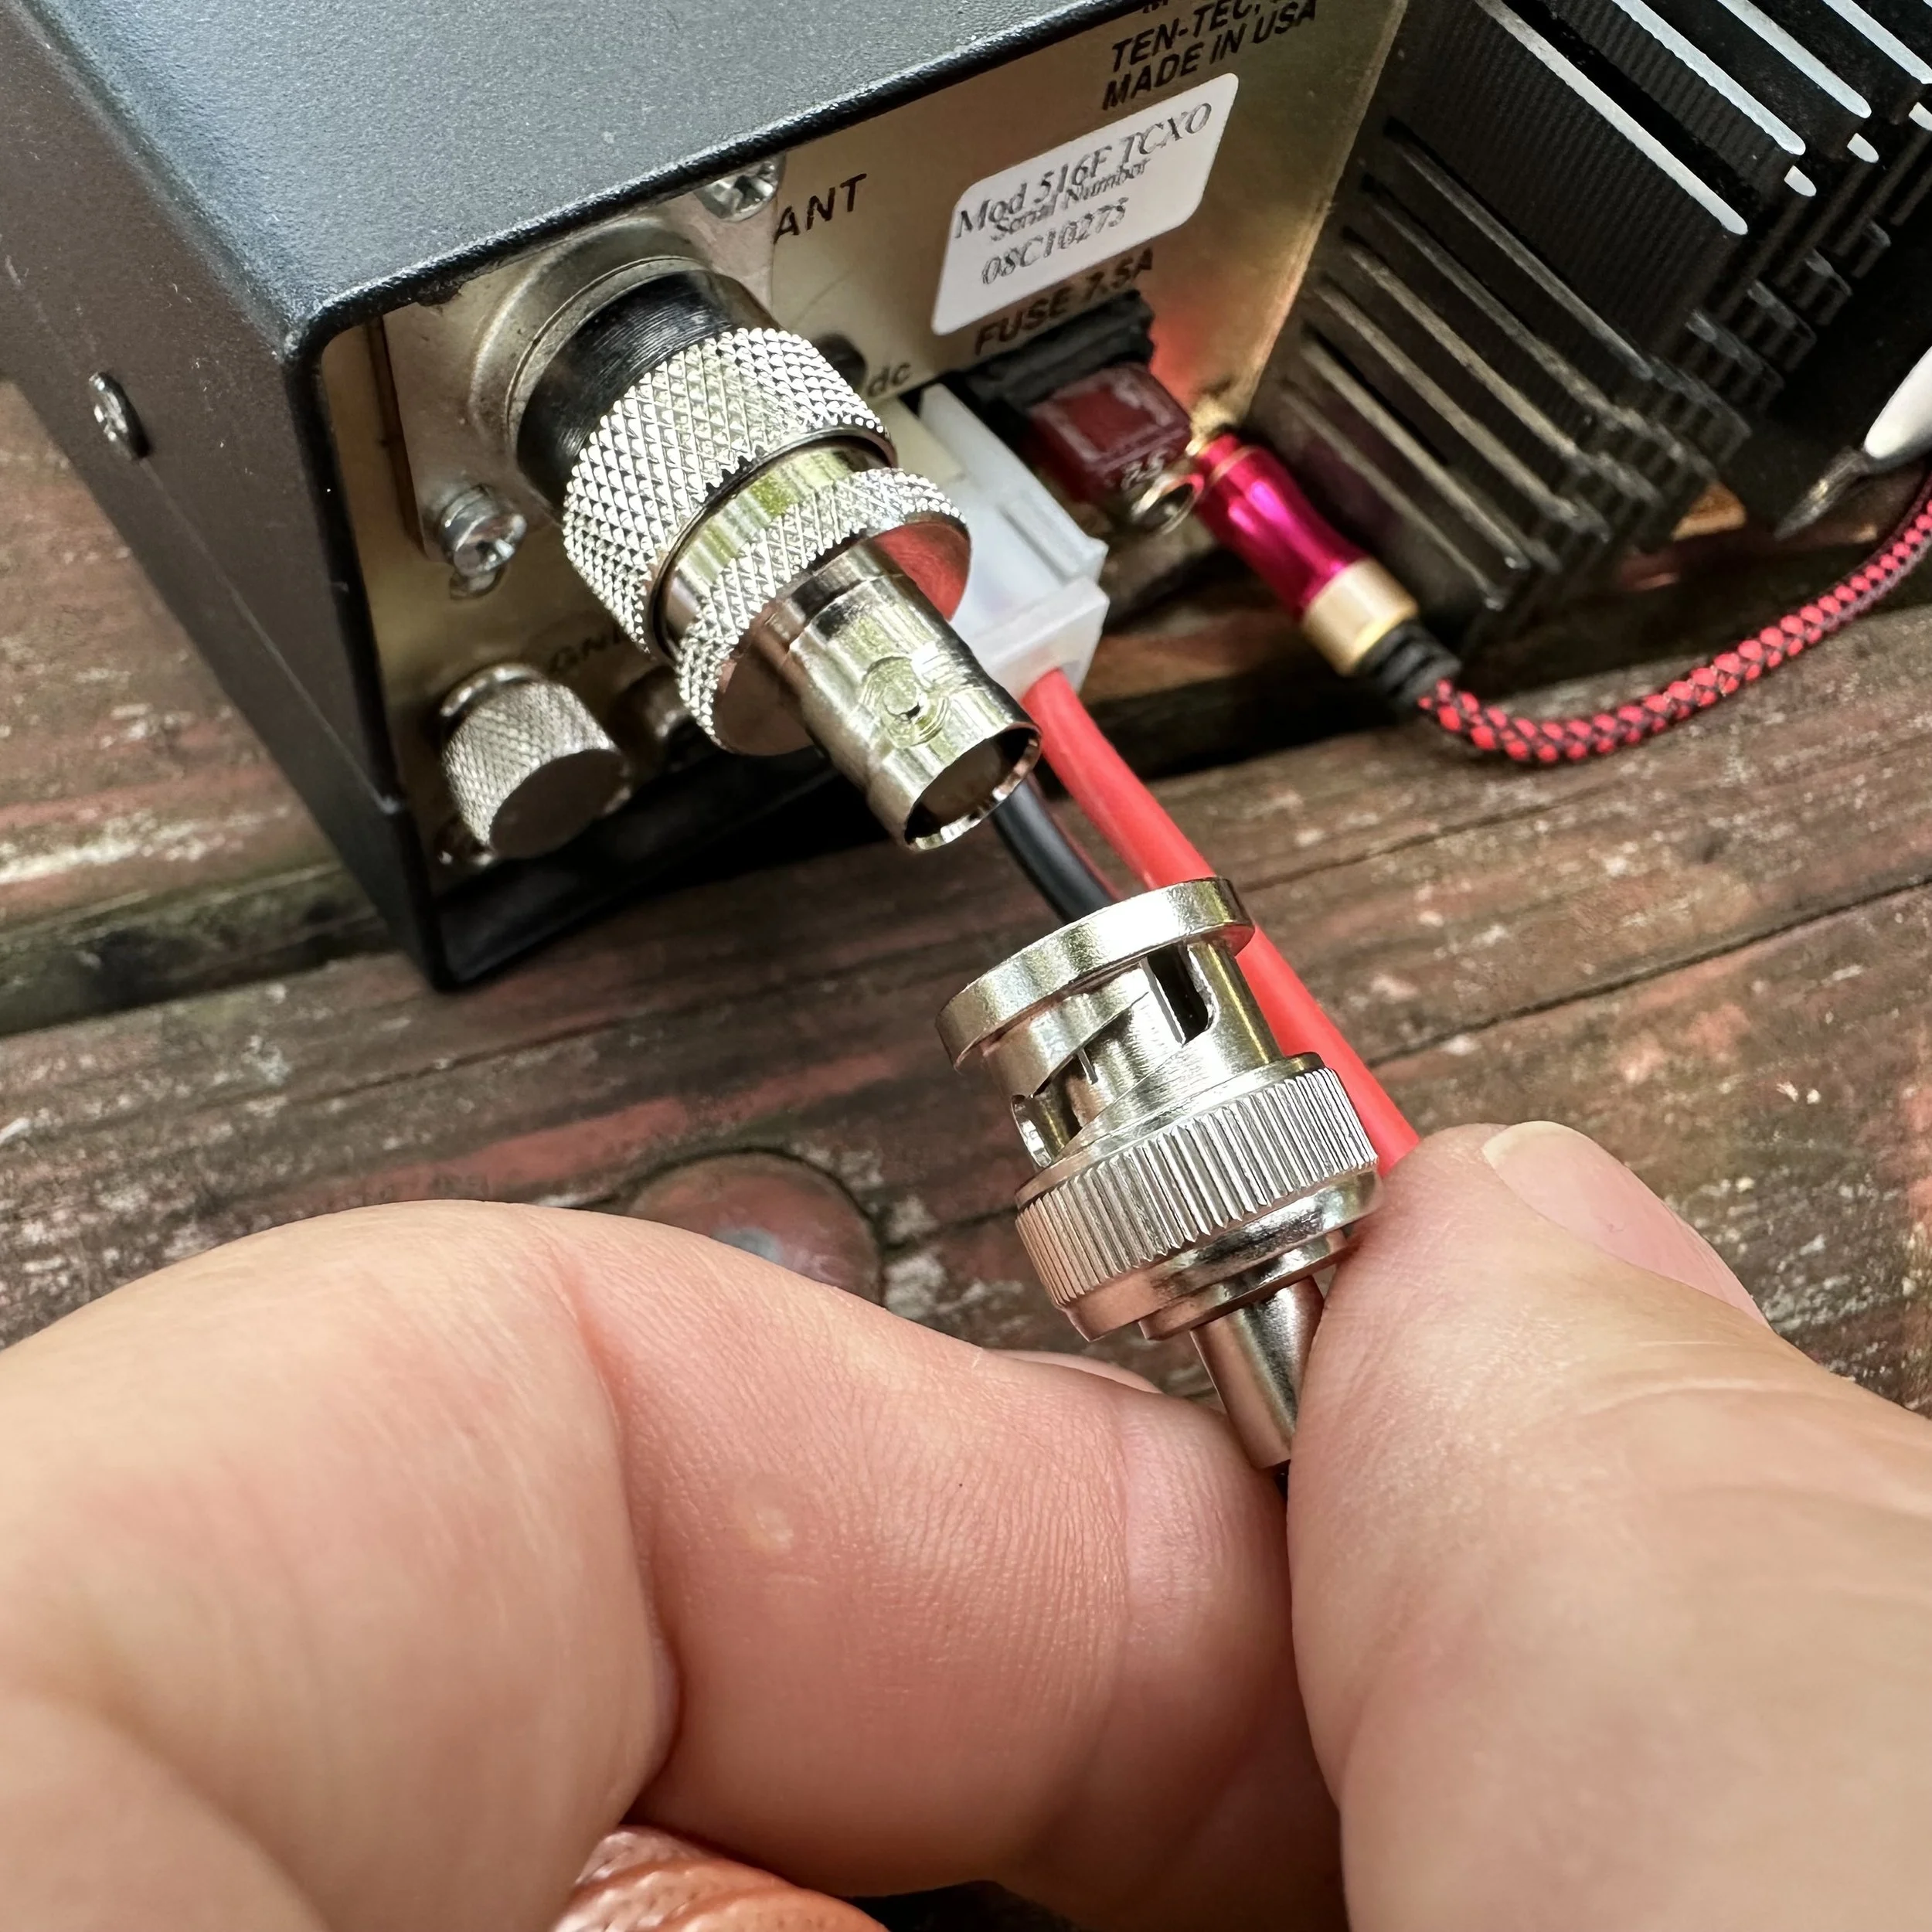
The radio performed very well at this point and I was able to secure an activation pretty easily even though there was heavy fading with the bands on this day. I could literally hear a 599+20dB station fade to almost nothing while copying the simple POTA exchange. It was really bad at times. If you will notice W8LEO is struck through with a 599 signal report, he called me and I never heard him again, he just vanished.


All in all, I am almost done sorting this little machine out and I am confident it will perform wonderfully on the air for many upcoming activations in the future. It is always nice to take a chance on something like this and find out it is much more than you bargained for. If you want one for yourself here is a link to the website and a screenshot of the eBay listing for reference. Hamgadgets.com Thanks and I hope to see you soon.

A super cold (for me) POTA CW ham radio activation
Well today was super cold to me after spending a month in central Florida. It was 29 degrees and the wind was howling at park K-2169 (Cloudland Canyon) back in NW Georgia!!! I didn’t let that stop the ham radio bug in me from getting out in the cold and activating a POTA site!
I thought to grab a selfie to remind me of how dumb I was to get out in this cold weather so maybe I would think better of it in the future…probably not, but it was worth a try. You can see how I have the door open on the truck, I was using it for a wind break to keep the crazy gusting winds from freezing me solid with wind chill. That is why I logged in the back seat instead of on top of the bed cover which is my preferred location if I am using the truck for ops.

The weapon of choice today? The Elecraft K1 (4 band version with 40, 30, 20, &17) My particular machine also has the internal antenna tuner as well. I guess you could say it has everything other than the internal battery. This is my second copy of this tiny machine, but I have had a long love affair with these little radios. I sold the first one and literally missed it the day i shipped it off. It only took me a few years to find another one like the first one and get my little grubby paws on it…this time for keeps. Of all my QRP rigs, I place this one VERY near the top.
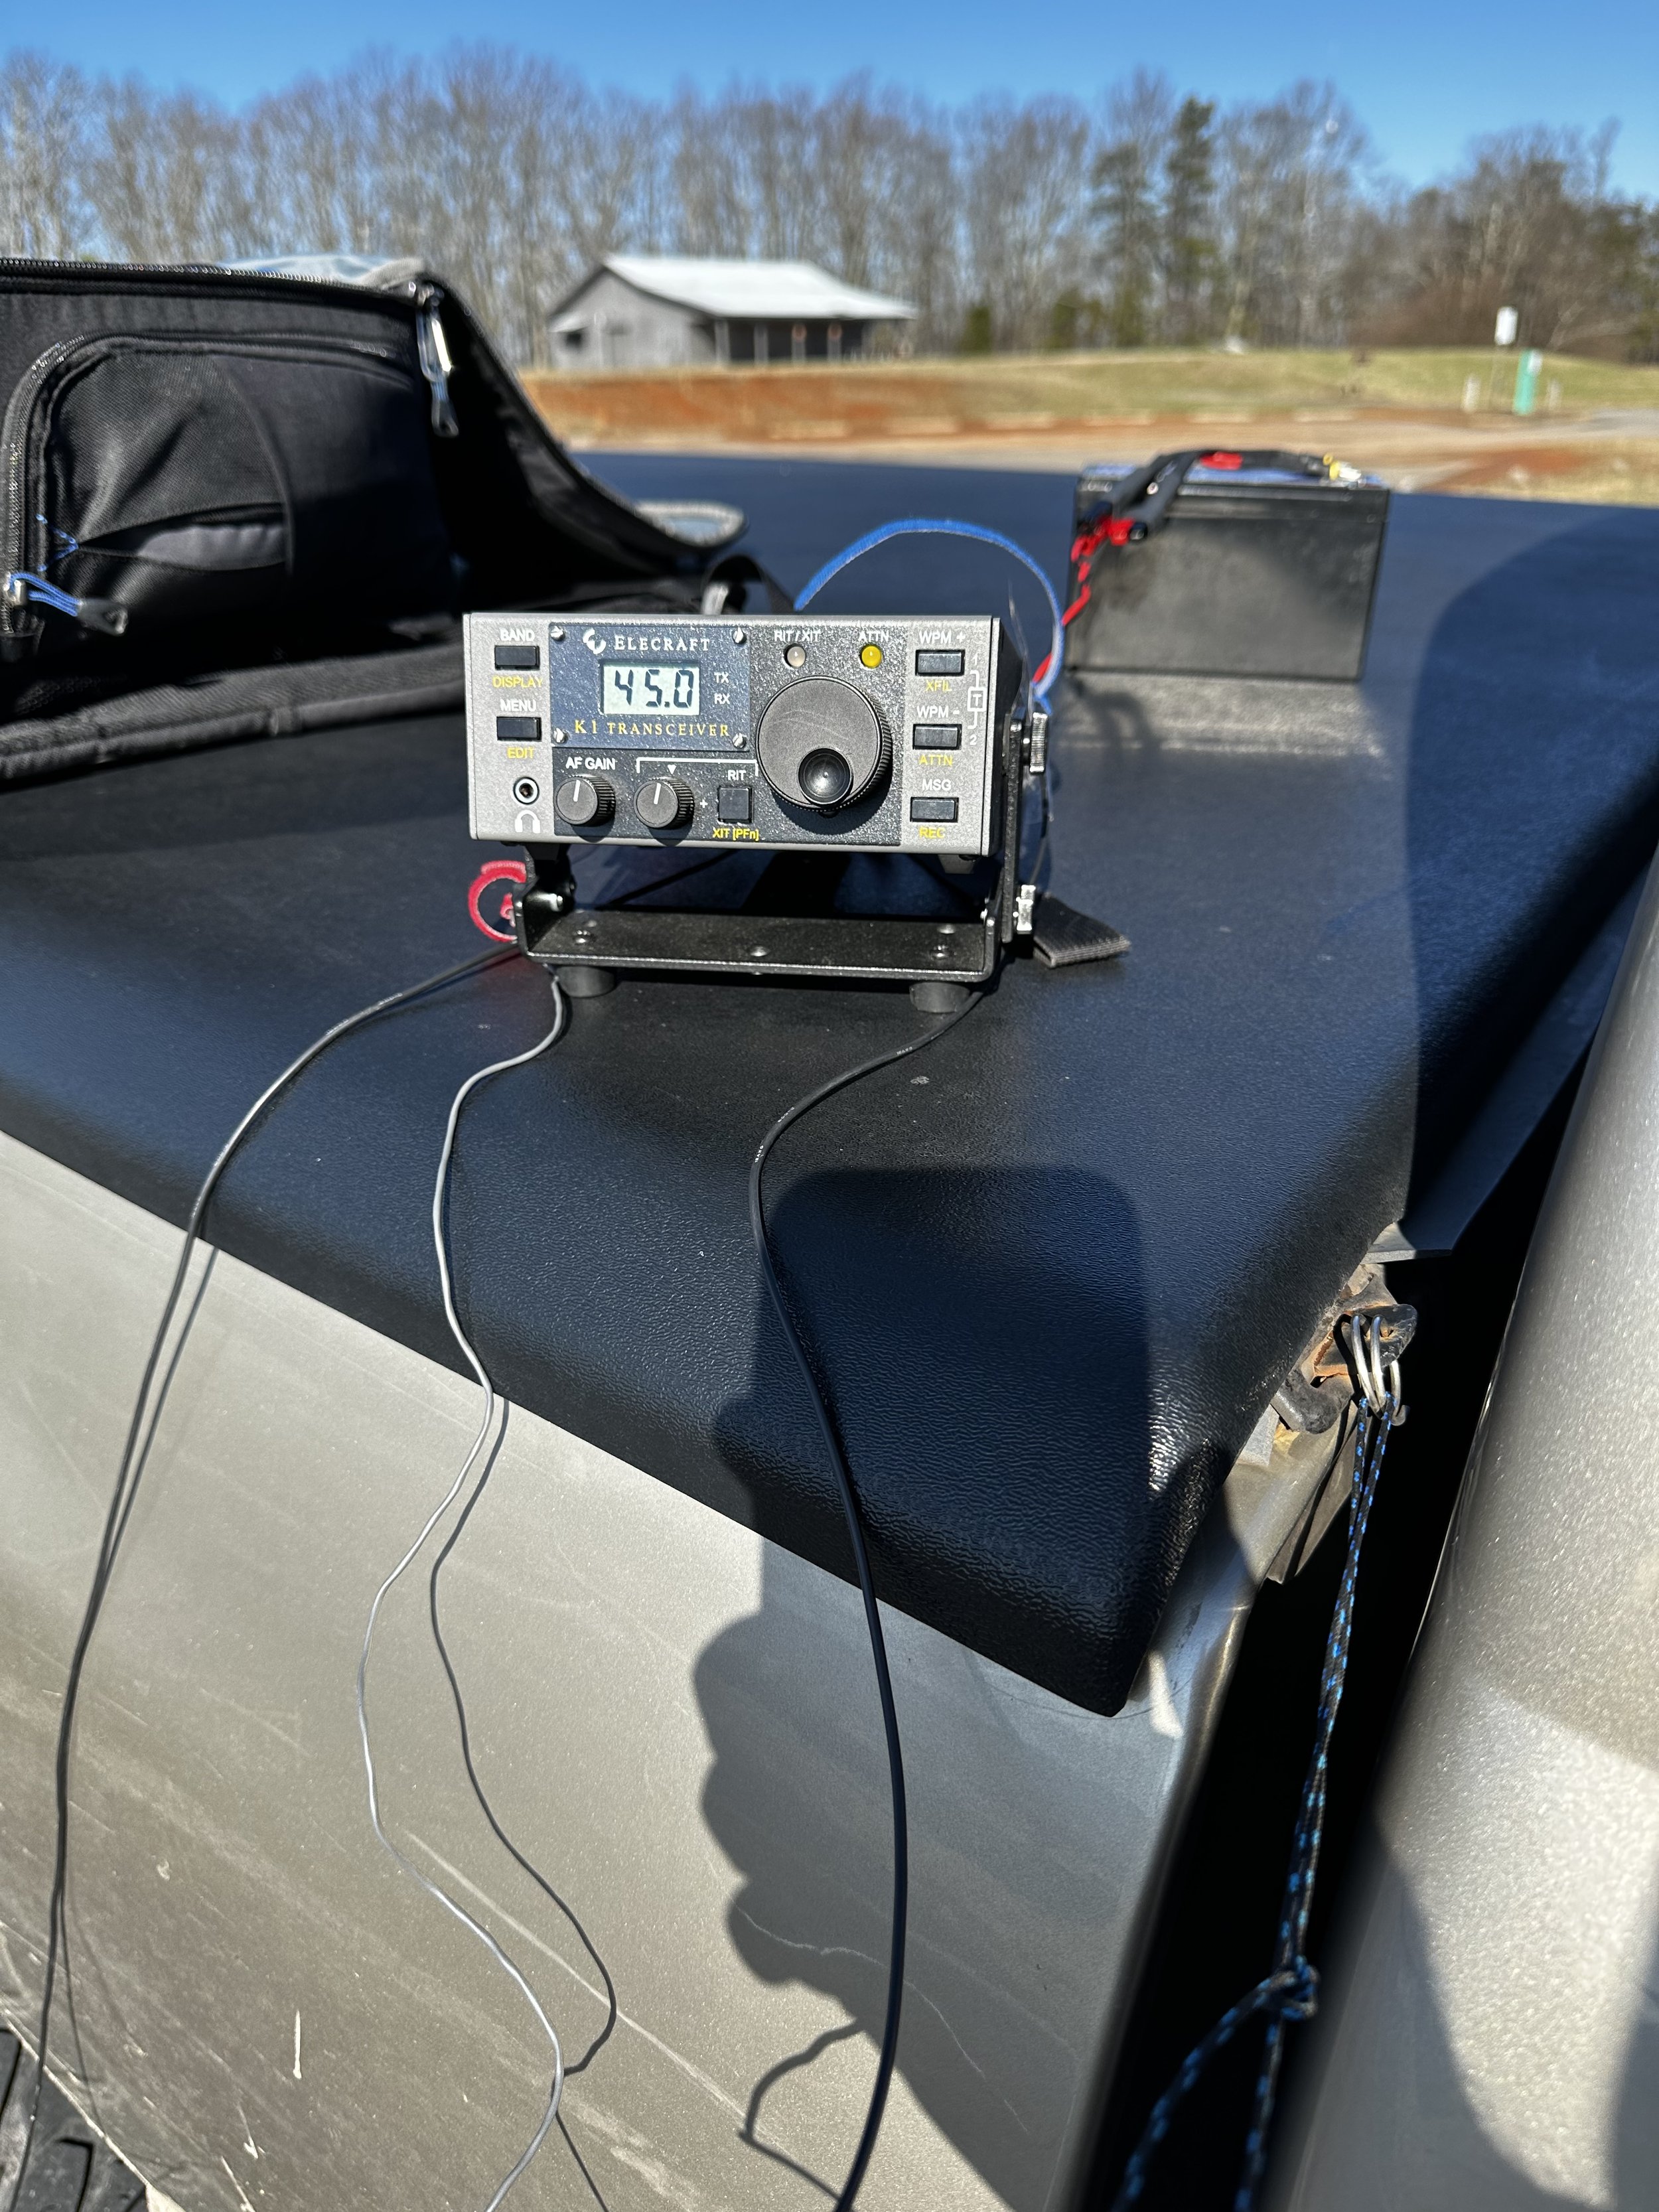
In the photo below we see the Elecraft K1 as seen from the top, I have placed the BNC to screw lug device on the antenna output of the radio and connected the antenna and counter poise directly to the radio with no feedline at all. I did this on purpose to test the system like this for a upcoming project I want to use this radio for in this configuration. This allows me to see how effective it is with a very minimalist rigging. I am wanting the whole thing to be as minimal as possible and still reach the west coast if possible. You see, I have a week in Hawaii and by the time you read this, I should have been there and returned with at least one activation from the Big Island of Hawaii under my belt… only time with tell.

The below photo shows how I took the tension off of the radio with the wire antenna once I strung it up into the tree next to the truck. This is a modified version of a knot we used in the Boyscouts called a taught line hitch. It works REALLY well on tent ropes for tensioning them to the stakes, it also works really well for tying a small cord to the antenna wire to make it to where you can tie it off to something near the radio as well. If you look above at the photo of the front of the radio, you can see the other end of the cord tied to the top cover ring on my bed cover. This end of the cord is tied to the truck with a bowline knot so it can be undone easily when I finish the activation.

Below is the only photo I have ever been able to get of the wire itself and it actually show up in the photo well enough to be meaningful. I threw a line up into the tree and pulled this wire up about 25 feet off the ground with the throw line and it worked really well. I know this is really low for a wire this long, but I was frozen and in a hurry and didnt want to rethrow the line to try and get it higher in the tree. So I used what I had.

OK, so here is the part where I talk about the antenna that I used. This antenna is simply a random wire right at 41 feet long and the counter poise is 13’ long. These are technically not supposed to be resonant on any of the 4 bands I have in this radio, but as it turned out today, the antenna was almost perfect on the 40 meter band with it arranged near the truck body. (it was reacting capacitively with the truck as I could change the SWR by literally moving the counter poise closer or further from the truck. It would also change the resonance of the antenna too, so I used the internal tuner to be safe) I used this to my advantage and worked quite a few 40 meter contacts today. I also cut counter poise wires for the other three bands and plan to set them up and see what the nanoVNA says about them when I have time. Something else I have learned to do over time is to put the wire length flags on the wires. This is simply little pieces of paper with a large number written in sharpie on them and then taped on with a long piece of packing tape to basically laminate them into place. This makes it really easy to know which wires you have without having to guess. All of this wire is high flex, silicone insulated wire and is basically tangle free for the most part, where has this wire been all my life??? Turns out it was on Amazon all along…


Another item I have fallen in love with is these little Velcro cable straps, I don’t know why I didn’t get these sooner, but these things are a wonder of modern technology for wire management and keeping your gear organized. If you have never used them, I highly recommend grabbing a pack of them off of amazon, it will change your life!

So, since I had a way to wander off of 20 meters, wandered I did! I didnt get on 20 meters at all today. Today I stayed on the other three ham radio bands that I could get on and got 16 contacts in about 45 minutes even though it was super cold and I had the power, on the first two QSOs, turned down to 1 watt! Yes, ONE watt! Now, they are only a few hundred miles away to be fair, but still, it is a single solitary watt going the distance here! AA5JF was a little over 200 miles from me and he heard me really well if his signal report is accurate on that little single watt of RF power. The other person (W4EDN) was 265 miles away and I still got a good report. This just goes to show that you don’t need really big guns to have some fun with radio, it is something that even people who can only get small QRP kit rigs and build them can make some contacts. Now, would have I made more with more power? Of course I would, more people could have heard me and I am not contesting that. My point here is people seem to get it in their head that you need 100 watts to be able to have a QSO on HF, when it just ain’t true. Now, I cant speak of phone contacts here as I don’t do very much HF amateur radio on phone modes, I am almost exclusively a CW op…hence the love affair with the K1. So take all that with a grain of Morse code… Once I remembered I was running 1 watt, I noted it at the top of the log and turned up the power to 7 watts (I thoguht I would see how the signal reports changed with 7 times the output power and the log speaks for itself. The first report on each line is what I sent them and the second report is how they heard me. Once I moved to 17 meters I turned the little K1 to 5 watts and left it there for the rest of the activation.

It was easier for me to get some Park to Park QSOs today with the “hunt and pounce” method…but it was more like the “hunt and wait till they can hear me” method actually, all the joking aside, it worked and I got three parks in the log today because of it. I didn’t keep the activation going any longer as I had some chores to do as well as my feet and fingers were getting numb. Numb fingers and toes makes it hard to log and send decent code so I went QRT with 16 QSOs in the logbook for today. All in all, it was a successful trip with me testing all three of the other bands I don’t normally use and the random wire turned out to even be resonant on the 40 meter CW band somehow. What luck! Maybe future me will have written about how my trip to Hawaii was successful and you will see that blogpost in a couple of weeks once I have had time to write it. So till next time, go get your radio out and take it to a part or something.
K-2169 POTA Activation at the very foot of a MOUNTAIN - AAR

So the last two days have been really strange. I tried to activate K-2169 last night to see if I could pull off a late shift activation and it was a miserable failure, zero contacts in 30 minutes straight of sending CQ, literally no replies at all.

The night before when I literally got zero contacts.
I actually swapped out the radio for a spare (the IC-705), it showed activity in the waterfall but no one was able to hear me. I was on top of the mountain at this point too. So I packed up and came back home having had zero luck. You win some, you lose some…
The next day was different though. I only had about an hour to setup, activate and breakdown as we had “family activities” to do later. So I figured this was the chance to test another location I had been looking at for awhile now. The Sitton’s Gulch Trail Head is at the bottom of the canyon and the parking lot is literally buttressed against the bottom of the mountain proper.
To compound the problems, I didn’t want to put my radials out in the way of others if they wanted to park next to me as this lot tends to fill up pretty quick in nice weather. So I ran them both off to the drivers side of the truck to keep them out of the way.

Welcome to the literal foot of Lookout mountain.

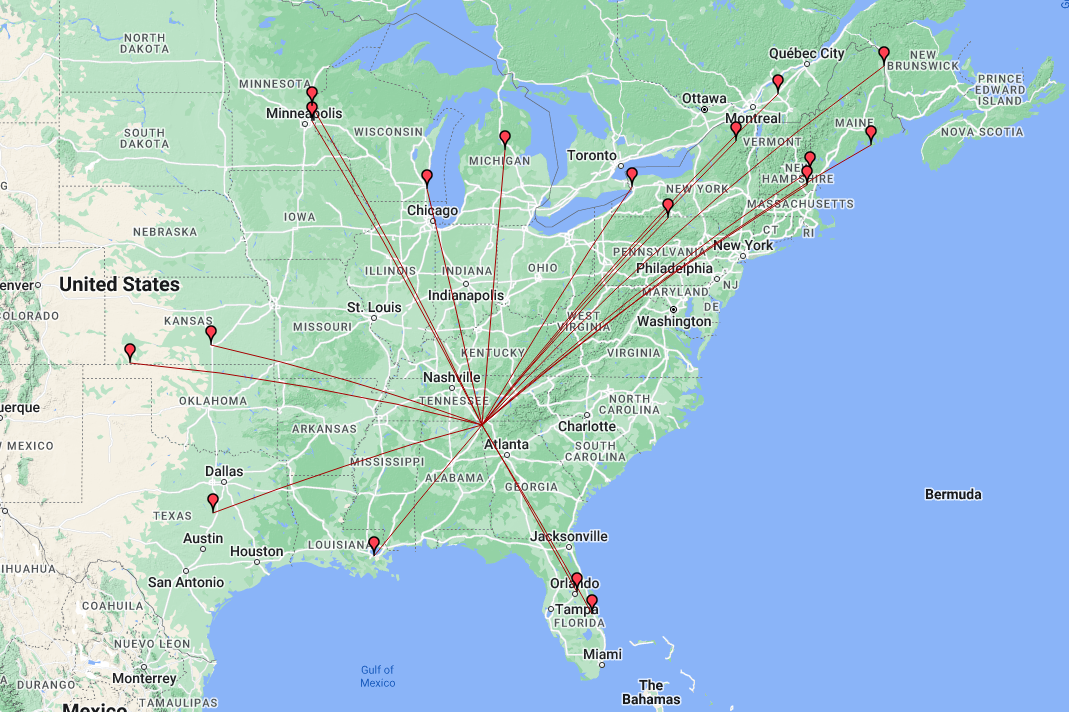
One of the counter poise radials is actually draped over the corner of the truck but it didn’t seem to cause a problem with propagation from what I can tell. The mountain is on the south side of the parking lot proper so I figured I wouldn’t hear anything to the south at all, but I was surprised to see the map showing some stations on the dark side of the operation position, these guys must have incredible stations to hear my QRP signal into a compromised antenna with a literal mountain blocking our signals! My hat goes off to these guys!
The bulk of the contacts are from a predictable direction though, since Lookout mtn is part of the Appalachian mountain chain, most of the contacts are to the north east which is the direction that is clear of the mountain. It has a decent clearing to the west as well from this location as Sand mtn is about 2 miles away and it is fairly short too, only about 700 feet tall, so I was able to get out to Kansas and Minnesota pretty easy too. As you can see in the photos, I am in the forest surrounded by trees too, so I am happy with my little activation considering all the limitations imposed on it today.
The radio for today’s adventure is the Penntek TR-35 and the more I use it, the better I like it. The RIT is for CW sidetone adjustment. This was a trick I found in a forum post and thought it was really clever. If the other station is low on tone, turn the RIT down till they sound like you want, if they are high turn it up till they sound good to you, it works REALLY well and I wished I could remember the HAM that gave me this idea as I would credit them with it…if they do I will edit the post and add it here. I am running 5 watts on 20 meters today because I am using the “Truck-tenna” for the sake of time.
When I got on the air to start with, I was the only POTA station on 20 meters, and there was only one other when I went QRT an half hour later. The band was open too as the RBN (Reverse Beacon Network) was spotting me regularly.


Those are not outhouses in the photo. This area is home to a local cave system called Case Cave and those are changing rooms for the cavers when they come out of the cave. It is a really huge cave system and if you want to explore it, you need to contact the park and line up a time when someone with the key, will meet you and open it for you, it is locked to protect the uninitiated from getting themselves killed…
I am pretty sure I have not shown the counter poise weights on the wires really well yet. This is a simple system that works super well for keeping the radials extended and not having to drive in stakes to do it, I simply straighten the wire at the end when it is taught and walk away, it is that simple, the wire keeper is simply a piece of plastic with three holes drilled in it to thread the speaker wire through, it doesn’t slip at all. The weights run about 2 pounds or so and that seems to be plenty to keep a 16’ radial in place so far. I have not tried heavy winds yet, so the jury is out on that one.


Not sure what is going on here, this is the hiking trail and just below the camera is a huge gate across the road… lol. I thought it was funny with the irony of it being in a spot where you literally cant park. Maybe it is from a time when you could drive up the trail to the cave? I don’t know…
If you enjoy the blog I would appreciate a like and a comment if you have one. Thank you for your time and get out there and warm up the ionosphere!
72
David
WK4DS
I used Modern Digital Modes and I have mixed feelings.

Well, it finally happened. KV9L helped me setup my computer at home to work some digital modes with my IC-705. It turns out that all I needed to connect my IC-705 to my desktop PC was a simple USB cable! It also took a significant amount of “know how” from my buddy Aaron to get them talking to each other as well. The two modes that I have played with so far as FT4 and FT8. These seem to be the current hotness in digital modes with FT8 clearly winning in popularity as the “watering hole” for it on 20 meters has dozens of stations on the air pretty much 24/7. The FT4 area can go long periods of time with no one there at all. Just to see if I like this idea, I have just wired the 705 up temporary on the shack bench with wires running this way and that… Once I decide if I want to keep this up or not, I will put all those pesky wires away…but till then!

All I needed was a USB cable that was in the storage bin 3 feet away…lol.
I will be honest though, I am kind of stuck in the past. I really like the kinesthetic feel of working with my gear and once setup, these new digital modes are pretty hands off. I was blown away at how far I could hear stations that are not even perceptible to the ear when using the “main two” modes (SSB & CW).
I was hearing stations from all over the world on my simple vertical antenna. Here comes some of the problems though. They either wouldn’t answer or couldn’t hear me when I would click on them. That isn’t to say that I didn’t make any contacts but it is not as easy as I was thinking it would be. Often I would choose a station to answer just to have them continue to call CQ.
Another thing I learned was that there is a good bit of waiting… Actually, there is a lot of waiting… it takes 15 seconds on FT8 to send one message, in one direction, and another 15 to send the reply. A typical QSO is 4 messages(as best as I can figure) from each person so a full two minutes to finish one QSO. This doesn’t sound like a long time till you are sitting there watching the QSO happen in real time. It goes a little as follows: they call CQ, you call them for a QSO, they don’t hear you the first time as you started transmitting in the middle of a cycle, so they call CQ again, then your message is repeated, they accept your call and send signal report, you send signal report back, they acknowledge and 73, you close with 73…all automatically. Each one of these is a full 15 seconds of waiting since the computer is handling everything for you. If the band is crowded and noisy or you are like me, running QRP power, the exchange can take multiple attempts to complete each stage (all of this is also automated), running the total time up even further.

Here is an example of a QSO I had with KP4PUA in Puerto Rico and notice we had to send signal reports twice to complete the QSO, This took a full 2 minutes to exchange this simple contact.
Another thing that happens is they give up after three of four attempts at the QSO. Burning a full 5 minutes or more just ATTEMPTING to complete a QSO. So I tried several times and made maybe a dozen QSO contacts over the past couple of days. This ends up being very frustrating and to be honest…boring… for a CW op who is used to things happening differently. I found myself picking a callsign for my computer to attempt to call and then leaving it to make the QSO and going for snacks, water, or even a bathroom call and just checking for the complete QSO window when I returned. It is a fully automated process and requires nothing from you other than to click the ok button and choose another callsign.

A typical window layout for FT8 (pictured) or FT4. Click on the screenshot to goto the WSJT-x webstie to learn more about it.
I can see the value in It though, as it takes very little energy and lots of stations can fill the same bandspace as a single SSB QSO. I mean a lot, like dozens or maybe more as shown in the waterfall above. All of those little yellow squares are exchanges happening and they are taking about 100hz of bandspace and they can also duplex and share the bandspace at the same time…from what I can tell. So it has merit, just not for an old CW op like myself.
Now to be honest, FT4 is more my speed as it took half the time to send each message. Waiting 7 1/2 seconds seems like a trivial amount of time difference, but it does seem to pass be faster than the 15 seconds of FT8 for some reason… Like disproportionately faster. Even though there is only 7 1/2 seconds difference, it just seems like it is 4 times faster for some reason, it must be a mental block or something, but that is how I see it. I have been letting it run on FT4 while I typed up this blog post and actually made a few QSOs while I have been here. Not many as FT4 is not as popular as FT8 for some reason and there are not as many people using this mode.
So who do I think this mode of operation is for? That is a great question. I would guide the new ham to it, as once setup, it is very simple to operate and you don’t have to worry about “mic fright” as it is literally point and click. Another group that would be well served right away is the younger generation as they are accustomed to this type of interface and for them, it would “just make sense” for them as they are used to using computers all their lives. Another group would be the person that has been injured or incapacitated in some way that prevents them from using the usual modes, as long as they can drive a mouse, they can get on the air. Shoot, if you just like using digital modes, then it is there for you! There are others of course, my point is that I am not bashing digital modes here, I have just found it wasn’t what I expected and that it isn’t really for me…at this time. I hope to be able to add a computer to my activation gear list at some point and that should enable me to add digital modes to my activation tool kit. I carry a microphone now, but rarely use it, and that needs to change… I really enjoy quietly sitting in the park working CW though, so I am torn… lol. Anyway, till then I will keep using my little QRP radios and having a grand ole time. If you have not gotten out and activated a park, I highly recommend it. I am going to write up what I pack for an activation, and that is my style, and share that with you soon.
If you want to learn more about Parks on the Air. Click this link or the photo below.

Me working the OG digital mode…CW on my tiny N6ARA paddles
Ham Radio Activation for POTA at Park K-2169

Well today started out like any other day… hahaha I always wanted to start a story like that…Anyway…
So this day did start out like any other day actually, but it would turn out to be a very different ending. I had a few hours to be able to activate a park and decided to grab my bag and head over to K-2169 for an activation. I had planned on staying a few hours and maybe doing as many bands as I could. When I got to the park they were running an excavator near my usual spot, so I went to the top of the hill where my other good location is and found them mowing the grass with riding lawnmowers!!! ha ha. Figuring that the excavator was quieter than lawnmowers I went back to the first location and started setting up my station. It was at this point that I realized that I might not get an activation today,
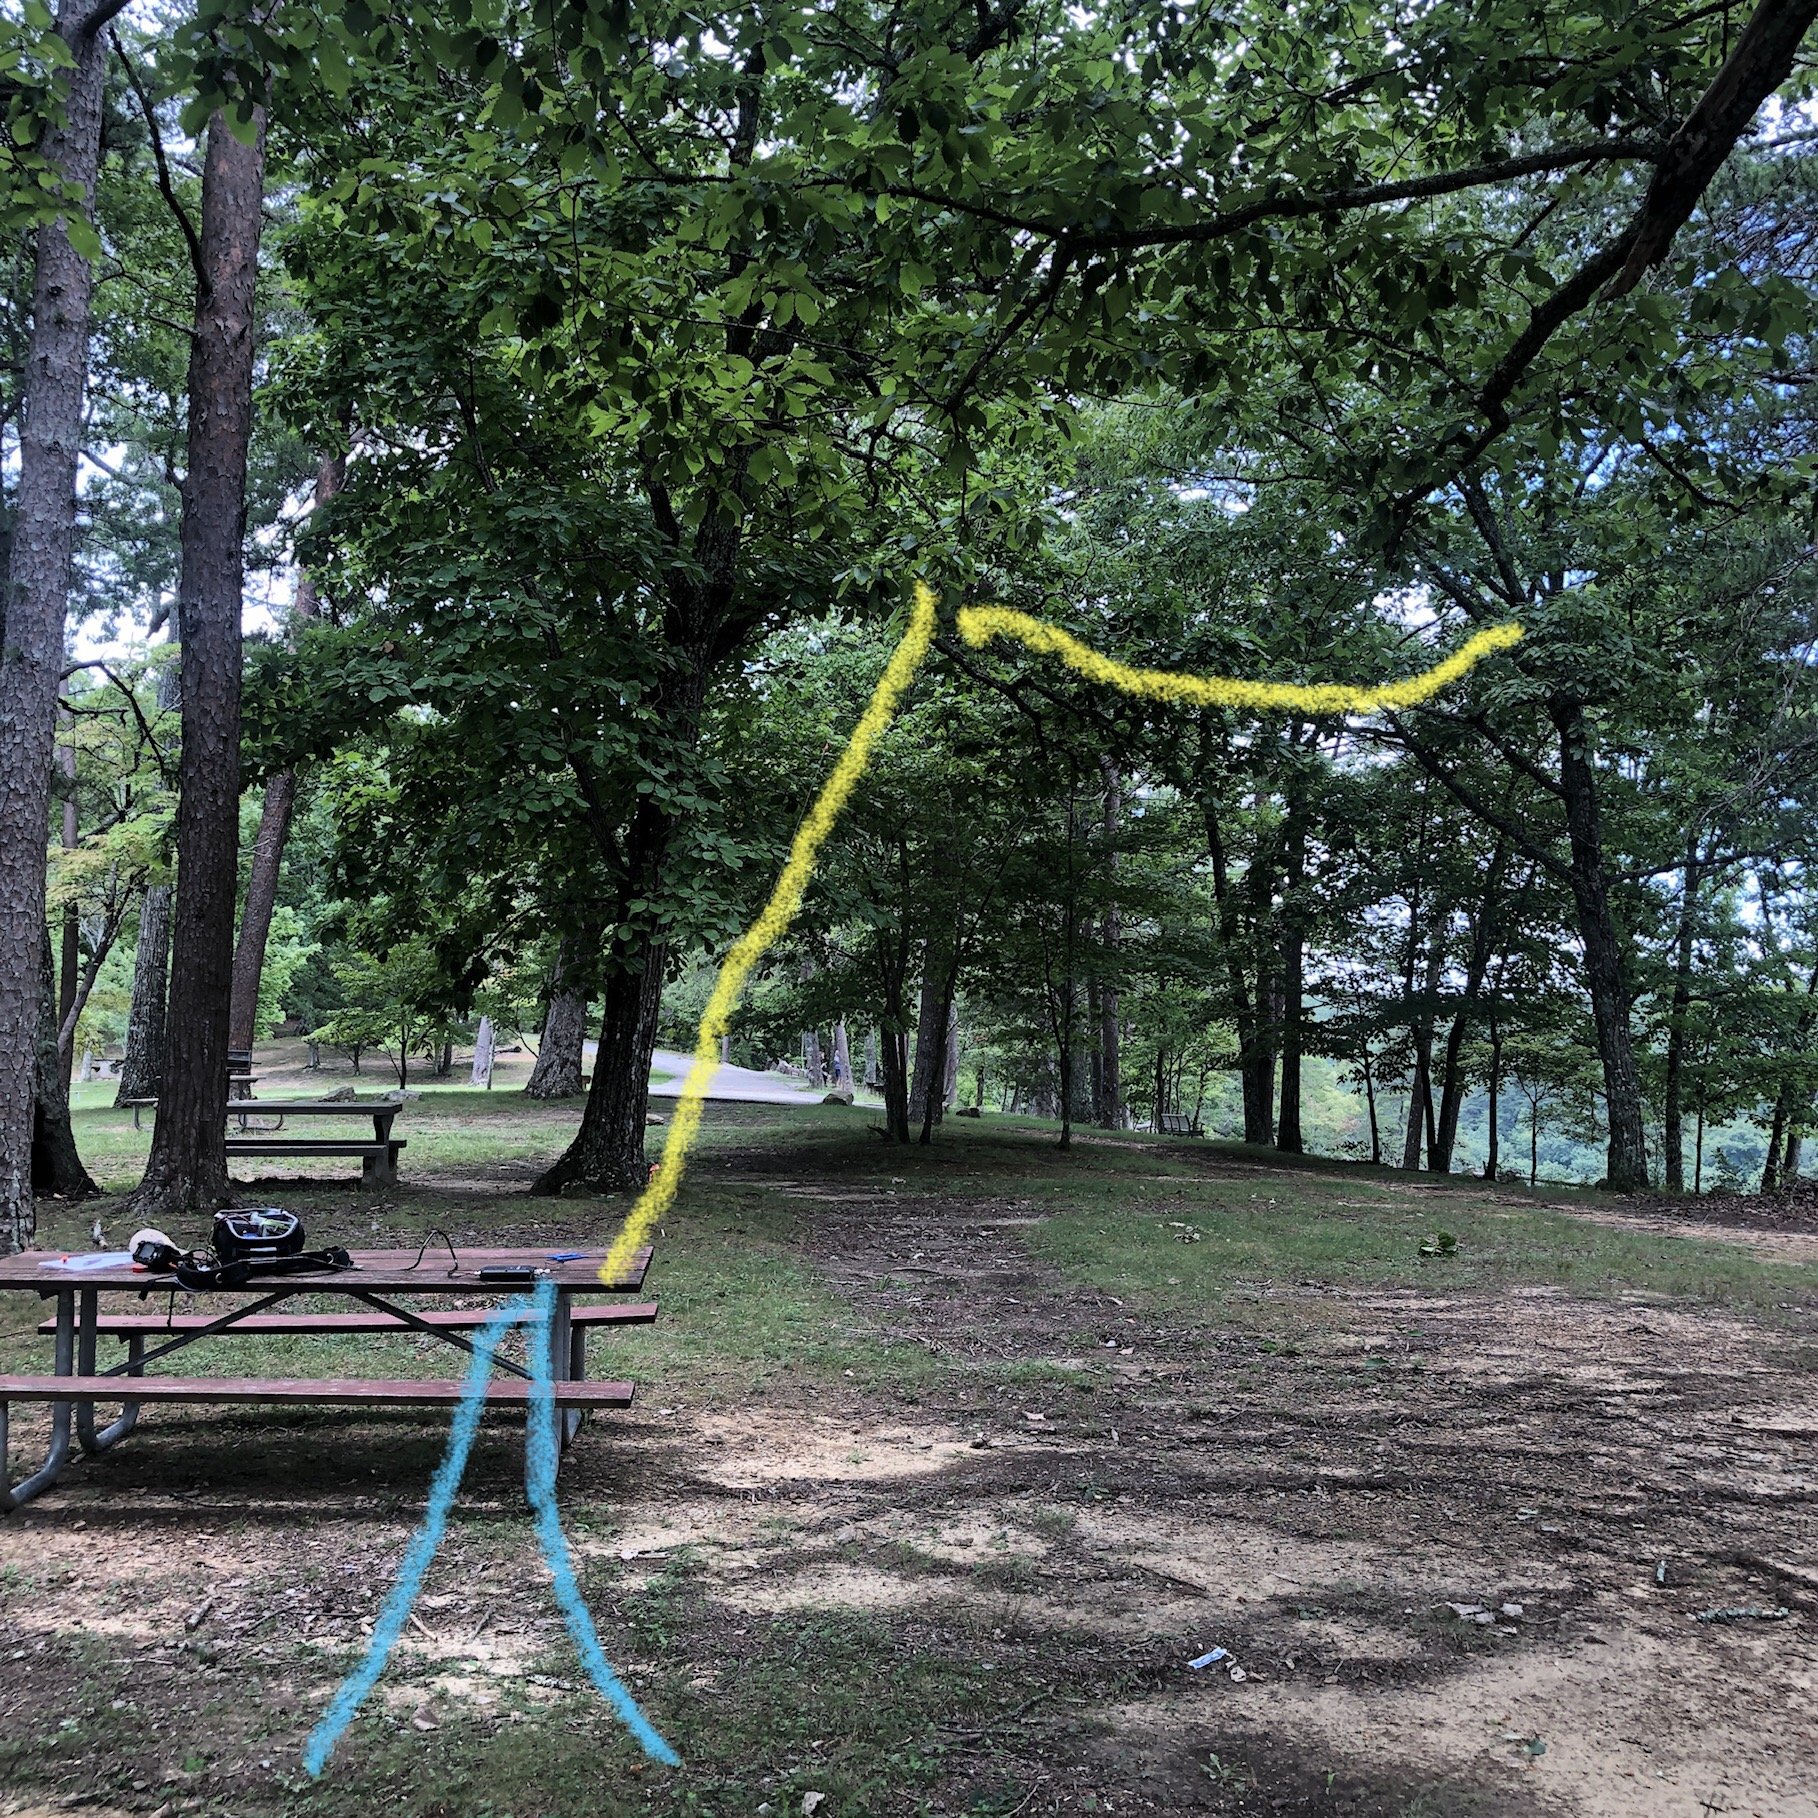
The yellow line approximated the radiator and the two blue lines are the counterpoises. This is a 65’ EFHW wire antenna.
You see the pop-up storm clouds had started to roll in and thunder was in the distance. This normally doesn’t happen till later in the afternoon but just for me, the clouds made an exception I guess. I was halfway through setting up the antenna when I started hearing thunder in the far southern edges of the sky. Upon receiving this valuable information I hurriedly finished getting the antenna into the tree with a decent elevation, got my radio out and quickly got on the air.
Once again the Lord was on my side and I had good propagation while I was operating my station. There has been a strong solar storm recently and the bands have been in the trashcan so to speak. Taking a quick look at my log shows the band fading in and out slowly over the hour or so I operated today.

Signal reports as bad as 339 and 229 were common at the beginning. at the end the signal reports were more like 599 & 579 regularly with strong signals coming in from far away states.

Today I used my Icom IC-705 with the automatic tuner and hurriedly assembled the system so I could get the activation as quickly as possible. I had even planned out my escape had the rain started to fall while I was operating. I set up my station so that all I had to do was disconnect the long wire antenna from the tuner and could literally put everything in the backpack (kinda like a bucket of sorts) and just carry it all over to the pavilion to get out of the weather. I had planned, that once the rain had passed, I could go and collect my antenna or hook back up the station and finish the activation should I just need a few more contacts to get my ten.


A closer look at the custom knobs I made for my AH-705 tuner as the wing nut on the ground stud is terribly slow and the red plastic knob now lives somewhere inside the inner fender well of my truck… I happen to be a machinist so this was a simple task for me.
Turns out, I did not need to worry about any of that, I had 25 QSOs in short order before the storm clouds really got close to me. The clouds were up overhead by the time I had broke down my station, that was not a problem though since I was already packed and ready to head to the truck. All in all it was a good activation even though I was constantly worried about the impending storm rolling in from the south. I guess the moral to the story is don’t give up just because the weatherman said it is going to rain, we all know how accurate they are!! ha ha.
Looking through the trees towards the front heading my way, and thus cutting my activation short today…
If you enjoy reading these blogs, please consider subscribing and maybe even liking them so I will know what people enjoy reading.
Thank you and 73
de WK4DS
The Elecraft K1 goes out for a POTA activation!

So I finally got my Elecraft K1 out of mothballs and took it for a spin to K-2169 the other day. (I actually have already used it once before but had put it back in favor of the IC-705 as it has more widgets and such.. Anyway, I finally just bit the bullet and took it with me to my favorite shady location at K-2169 and setup for some “on air” fun.
The one thing I like about the K1 is that it has an internal antenna tuner installed. This simplifies the set up and breakdown of the radio at the location by eliminating the entire external antenna tuner connection series of events.


I am running two 10’ counter poises at this time, mainly because I have them and it seems to help to have both connected. I want to run my VNA over them to see what it looks like with one and then two at some point.
This one simple thing alone saves me an easy five minutes of set up time. So it was fun for that fact alone but the other things that make the K-1 unique are that it is such a simple radio to operate as well. I like that the VFO works really well and the radio has enough controls to do everything you need while on an activation and nothing more.

Another thing that I like about the K-1 is that the headphone jack is wired for stereo headphones from the factory. This seems like a trivial thing but with the 705 and the TR 35 they are both factory wired for mono headphones or one ear only listening. This is not what I enjoy using therefore I either have to buy a adapter or figure out some kind of bizarre wiring scheme to get both ears to have signal on those two radios, but on the K1 just works.

I keep my K-1 in the original aluminum briefcase that I have had for over 20 years now. The radio and accessories have fit nicely in it for all of this time. I do carry the 705 backpack kit when I activate with it because the EFHW antenna that I am using is in that bag. Rather than pull stuff from one bag and put it in another I just take both and pull what I need from each one. I do like you using the N6ARA paddle that I have with my 705. It works really really well and I am probably going to get a second one for a spare when I wear this one out.


Yes, I did make that key you see in there. It is made from scrap industrial materials and works exceedingly well to be as simple as it is. I love making some of the things that I use on the air and my keys are one area where I do that. At some point I want to build a radio from scratch, but I have no time right now to dedicate to a project of this magnitude, so I will just stick to the simple stuff and have fun on the air.


Getting back to the activation I was kind of in a hurry that day so I hurriedly threw my throw line over the first large tree branch to get my EFHW in the air and it took me four attempts to get it over that branch which is normally a quick one throw shot for me! ha ha… There goes the whole doing it in a hurry part. Once I got it over that first tree limb then it’s a simple matter of pulling the antenna over that limb re-tying the throw-weight and throwing it into the second tree to pull the final end of the antenna up where this photo shows.

This makes the antenna run about 60° north east when I string it like this but it seems to work really well from this position.
It is no secret that the bands have been terrible lately but I was still able to get 23 contacts in about an hour, maybe a little bit longer, with this activation. This particular activation put me at 19 activations at K2169. I really wanted the Repeat Offender award so I went back the next morning and setup the entire assembly the next day and reworked 14 more contacts to have my 20th activation at Cloudland Canyon State Park. I have been working on this award for quite some time and finally got to the minimum 20 to complete it. Now I think I will start branching out to other nearby parks and activate some of those as well. I will still go to Cloudland Canyon very regularly as it is really close to my home and I can go over there almost any morning for an activation. It is the only park that is within a 30 minute drive of my house that I have available to me. The area I live in is park dense, to a degree, but they are actually spread out somewhat due to the topography of the area.

I am going to wrap up this blog post by saying that if you have not tried parks on the air I would recommend it highly. As well as if you have not tried Morse code, I would recommend that as well. Mainly because both of those are very fun for me… Until next time.
72
David
WK4DS
How high does your antenna need to be?

The sag in the wire makes the center height of the “horizontal” run less than 3’ above the ground and it still worked really well.
So over the past few days I have been thinking about how high does my antenna actually need to be. Turns out it doesn’t have to be very high at all. I have done two park activations in two days time and on both days I never raised the antennas any more than 9 feet off the ground. That’s right! 9 feet max! Almost had them running dead horizontal from the picnic table 65 feet away from me. No throwing the hoist line multiple times to get it in a good spot or even having to throw it at all actually, I just tied it off to a limb that I tossed the end of the line over without even adding the throw weight to it!!! Easy peasy!!!

A quick look at the QSO maps for these two outings shows that the radiation pattern is typical for a low altitude wire antenna. Pretty much omni-directional or a “globe” shaped pattern. Also these tests were done on days that had pretty bad solar activity and the bands were in terrible shape. I think this is why there is not near as many western stations as compared to other activations. Also note the signal reports on the logs and that they were not really bad when the bands would open as I was strictly running 5 watts QRP power also.


The low position creates a very obvious take off angle as the contacts on this outing are almost in a perfect circle around me!!!
So all in all, I would say that if you want to be on the air for a while, go to the trouble of getting the antenna as high as possible. On the other hand, if you want to get a quick activation in on your lunch break or if your doing a RADAR run of some such, it seems that getting the wire up off the ground a couple of feet works good enough to get an activation in less than an hour. I am going to repeat this test in the fall with literally laying the radiator on the ground and I will take my VNA and see what it looks like in all three positions. This helped me to understand that it really doesn’t seem to matter if you cant get your antenna up high enough for proper directional effects.

The end insulator is only about a foot above my hand here and is even under a tree!!!
I strung my antenna almost horizontally from the picnic table on two different park activations at two different parks to see if I would get more or less contacts with a really low antenna and the results are in. Seems that if you cant get your antenna really high up (for the lower bands) that is seems not to matter if it is 20’ high or 3 feet about the hard deck. My logs for the two activations look like any other day when I stress over getting the wire up high into a tree. The only real benefit from getting the wire up really high is it prevents others from tripping over it by not noticing it. This was my only real concern while activating both parks, although I did go at times when I knew that there would be fewer people and at Booker T Washington state park I was literally the only person in the area I was in. I just didn’t want problems during my experiment, so I chose times that would protect park users and my gear and preventing the gear from being a trip hazard as well.
If you don’t have coffee, is it even a legit activation???
The signal reports were cyclic as the band would open and close, but all in all, I was getting good reports even though I was running 5 watts through a tuner as well. I like doing these kinds of experiments as it allows me to see just how bad the setup can get and it will still work… lol. All kidding aside, this worked way better than I thought it would and setup was FAST. I really liked that part about it.
Thanks for reading along, I hope you enjoyed it and if you did, please hit the like button and dont hesitate to leave a comment too. I love comments!!!
72
David - WK4DS
High Temp Activation
Today I went to my favorite park and set up my IC705 radio to work an activation on Park K – 2169. The only difference today that was unusual was the fact that it was in the mid-90s here in Georgia, this usually is not a big deal but when I finally got my radio set up I was in the direct sun. This causes the radio to heat up very quickly and I found myself with a radio that was so hot that I could almost not touch the case in less than 30 minutes. So I moved the radio to inside my backpack to where I could shield it from the Sun as the shade moved closer and closer to my operating position. Eventually the shade got to the end of the table and I was able to get the radio out of the Sun. For the period of time that I was working 17 m I learned that the reverse beacon network was not picking up my CQs and the POTA site was not posting my spots either. These two items combined caused a very long and “quiet” period of 17m operation… HaHa. I finally got 11 contacts on 17 m after considerable time of what seemed like endless calling of CQ. I had my antenna strung high in the tree, probably 25 or 30 feet up, ran up over a large limb on the first tree and horizontally at a slight upward slope to another tree as shown in the graphic I made from the photo I captured. I am still using the N6ARA tiny paddle for my travel key and it works wonderfully to this day. I have done well over 15 activations with this key now and it keeps on working perfectly. Once I moved to the 20 m band the game kind of picked up for me as I was able to make another 24 or so contacts in short order. This being mostly due to the RBN starting to see me and I was able to get the POTA spot to take when I moved to 20. The band would fade in and out some as I was working but for the most part I was able to work contacts about one per minute. It seems like that is the maximum speed that I am able to work a Morse code contacts with the speed I am able to operate (about 20WPM) and with the exchange information I choose to send. All in all, it was a wonderful day to get out and play with my radio and to get an activation in at the same time. My next activation will either be with a Ten Tec Argonaut 5 or my PENNTEK TR–35 radio as I want to try one of those out for an activation soon. I have had the TR-35 for a while now and have only used it a couple of times in the shack at home so far. This is a travesty as it is a wonderful little radio. I hope to take it on trips in the future as it is SO small!!!
If you have not checked out the parks on the air, set up an account with them and look at what they are doing. It is a wonderful program and has lots of activity for the amateur operator. There is usually a mode that is something that you would enjoy doing, that will have people on the air almost all the time. Whether you are into digital, CW, voice, or any other mode that people use on the air there is usually something going on with POTA. I even had two traditional QSO contacts today during my activation, complete with name exchanges, QTH exchanges, and even our rig exchanges. So there is no hard and fast rule as to what information is traded in an exchange but they do normally have a minimum of signal report and usually the hunter will send the state they are residing in (but it isnt required from what I can tell), that is about it, anything else is fair game. If you want to know more about it you can go to the Parks on the Air website to learn lots more about it.
Thank you and 73
WK4DS-David

I started with keeping the battery in the pack but eventually had to also put the radio in it to keep them both out of the direct sun.

ICOM AH-705 Antenna Tuner with my homebrew cable I made for it that has power, coax and control cable all in one bundle.

Antenna ran into the trees with the counterpoises run along the ground underneath them.

The IC-705 is a wonderful little radio that works really well for portable operations.
Not a bad day running 10 watts into an EFHW wire antenna!
10 things to do during the terrible band conditions with amateur radio

Now before we go too far into this blog post you need to know this is satire. I thought that this would be a fun diversion from the frustrations associated with the bands currently in 2022. So if you came to this blog post to get legit tips on operating during poor band conditions then this is probably not the blog post for you. With that out of the way, let’s have some fun.
Let’s get the easy ones out of the way first. Like…
Install a 180’ tower and a 20/40 beam antenna. We all know that a better antenna is the first step to better signal, so why not start there? I mean, isnt this what second mortgages are for?
Locate a 5 kilowatt amp… You will have countless hours of fun running a high current rated 220VAC circuit for it. It could easily double as a coffee table in the corner of the shack or as a nice space heater in the winter months to keep your cat warm.

Beacon mode. Now here is a novel idea. Your radio could be running in beacon mode, calling CQ fruitlessly anyway, and you could be free from sitting at the operating position and could instead do something less valuable… like go mow the yard…or better yet, scope out where you are going to put that tower.
Straighten up the wiring in your shack. Lord knows we could all use some wire management in our lives. So what we all need to do is turn off our perfectly functioning radios and then go around behind them and start messing with all the wiring, I mean, what could possibly go wrong?

Marriage counseling. We are all edgy lately due to the terrible propagation and the frustration with trying to complete QSOs that are normally easy, Instead of getting mad, why not instead take the XYL on a date to her favorite restaurant? You could even take her shopping…I know, I know…that might be too much, but you could try???
Repeaters. Now hear me out, if the bands are this bad, shouldn’t we reconsider what “DX” really is? How about we start working some local DX since it seems that 50 watts on 2 meters can still open a repeater these days.
Alternative QSOs. You can still goto a ham fest and make “eyeball” QSOs with people, don’t forget your QSL cards too, people still like to exchange them. Do these go in the LOTW too???
QRP Radio. We all know how frustrating QRP can be even in the best of band conditions. Since many of us are accustomed to having 100 watts or more at our disposal to make contacts with, why not try using LESS power during these terrible times??? I mean, you could just get it over with up front and not have to wonder why you cant make contact, you know for a fact what the problem is and you have an easy scapegoat?
Kit building. Now is the perfect time to get one of those kits and spend some quality time cussing at the burned fingers from the surface mount devices and heat sensitive ICs that you have to solder…

Read a blog. I think this is a great idea to be honest. You can subscribe to this very blog with a button somewhere on this page and then you will get all the notifications when I publish the next one. Honestly though, take some time to just call CQ if you want, maybe, just maybe someone will answer you…
Thank you for going down this rabbit hole with me for a few minutes to read this little blog, I just had this idea and thought I would share it with you guys and gals and have some fun with it. Leave a comment with what you think should be on this list that I left off. I would love to hear what all of yall think.
73
David
WK4DS
Straying from 20 meters…

In the course of the most ham radio operators career on the air they will find that they spend a lot of their time on the 20 meter band. This is because 20 meters is a very good band for propagation and is almost always open to communications. The problem with a band that is open like 20 meters is that every amateur radio operator that has a HF radio is on 20 m, well at least it seems like that is what is happening…
Another thing about me is that, I really am not into contesting either. This means that the 20 meter band is not available to me on the weekends as there is pretty much a contest every weekend…and for good reason! Contesting is a very popular activity in amateur radio around the world. Although for me, I just am not super into it.
The WARC bands do not get used in contesting so on the weekends I find myself dialing around 17 and 30 meters alot.

The N6ARA Tiny Paddle has really started to grow on me, I like the size and how well is just plain works. it is effortless to send good code with this key. I can highly recommend these is you want a small light weight key for things like SOTA and POTA.
Another thing I like about the WARC (World Amateur Radio Conference) bands is that the 30 meter band is reserved for data modes only. Did I mention my favorite mode is CW and wouldn’t you know it, the powers that be consider morse code a data mode… So I can goto the low end of 30 meters and almost always find someone to chat with. That is something to remember too, the WARC bands are pretty narrow and many modes share them, so sticking to the gentleman’s agreement on where your mode normally operates will go a long way towards being efficient with these small band allocations and making sure we all have room for our modes.

The rig setup is really a lot simpler than this photo makes it look. I wanted to get an overview photo of the whole thing for once to show the relationship of the parts. This rig would look like this if it were on 80 meters or 12 though so this photo isn’t strictly about the WARC bands…
A lot of people do not use the WARC bands very much as they are not the conventional ham bands. I tend to enjoy using these bands as they are normally quieter and less crowded than the conventional bands. Another benefit is that the POTA program also uses these bands as it is not a contest oriented program other than award chasing like any other awards system (Think ARRL W.A.S. or something similar).
On the day that I decided to activate on the 12 meter band I was looking to confirm that it was open to communication and decided to check the 10 meter band to see if it was open. I did this because I couldn’t hear any stations other than someone operating FT8 and had no idea how far away they were. This is a common practice as normally if a higher band has propagation, then the lower one will as well. I found that the 10 meter band had beacons coming into my location in the state of Georgia from California with clear audio and this gave me the confidence I needed to try and activate a park on the 12 m band.
As you can see from the logbook I did get a successful activation on 12 m and it was a lot of fun. There were periods when I did not get a call back from my CQs but, for the most part, they came in fairly steady for the whole time I pursued the activation. This just goes to show that you can get an activation on something other than 20 m if you want to and it also gets the radio warm doing something other than the usual.
Get out there and get on the air.
73
David
WK4DS
Long lost friends in amateur radio
I have been doing POTA (Parks on the Air) for a couple of months now and have started to notice a few call signs that show up in my log more often than not. One of thsee calls is K9IS. Steven has “hunted” me at almost all of my activations, to the point that I now know his name when he calls me. His call sign just kind of “jumps” off the page at me for some reason. I dont know why this happens but it does occasionally. Maybe this time there was another reason???

Here is the dejavu part of the story. I was talking to my buddy across town (KG4WBI) on the repeater one night and we got to talking about the contact I made to Alaska from my jeep on a RCI Ranger 2950 10 meter radio using CW and I wanted to know the output power I was using that day, (Trust me this all ties together at the end) So I remember that I had used that particular QSL card in my WAS card set for my Alaska card, so I dig out the box and start going through the stack to find the Alaska card and what do I stumble across? A QSL CARD FROM K9IS FROM WHEN I HAD MY OLD CALLSIGN OF KG4WBH!!! Seems that day I was playing with my Rockmite 40 I had built and he was using a Ten Tec Argonaut 5. I just recently bought an Argonaut 5 and plan on doing some activations with it using a straight key soon. (Like next week if I can get the cable built). Anyway, this blew my mind that we had made contact so long ago and now we are meeting on the air reguarly to make POTA contacts and we didnt even know it.

I was using a Rockmite 40 that day and it only uses about 500milliwatts of output power, hence the QRPp note.
I reached out to Steven and shared my little discovery with him and we both had a good laugh out of it. Neither one of us had remembered the QSO back in 2003 on April Fool’s day…till I found that card. This is one of the many reasons I like using paper QSL cards. It is fun to me to wax nostalgic and read back through these cards at times. Especially the ones with additional inserts sent with them that had background info about the operator or some cool little tidbit about the local area where they lived. It is a treasure trove of information. You should look into using paper QSL cards if you have not done it before. It isnt for everyone, but at least take a look. If you want to send just select cards on occasion, you can even make simple cards in photoshop for a specific event and just print photos of them, that has worked for me in the past more than once. I even used the discount version of Photoshop… GIMP. Anyway, let’s climb out of that rabbit hole and get back to the original story. HAHA
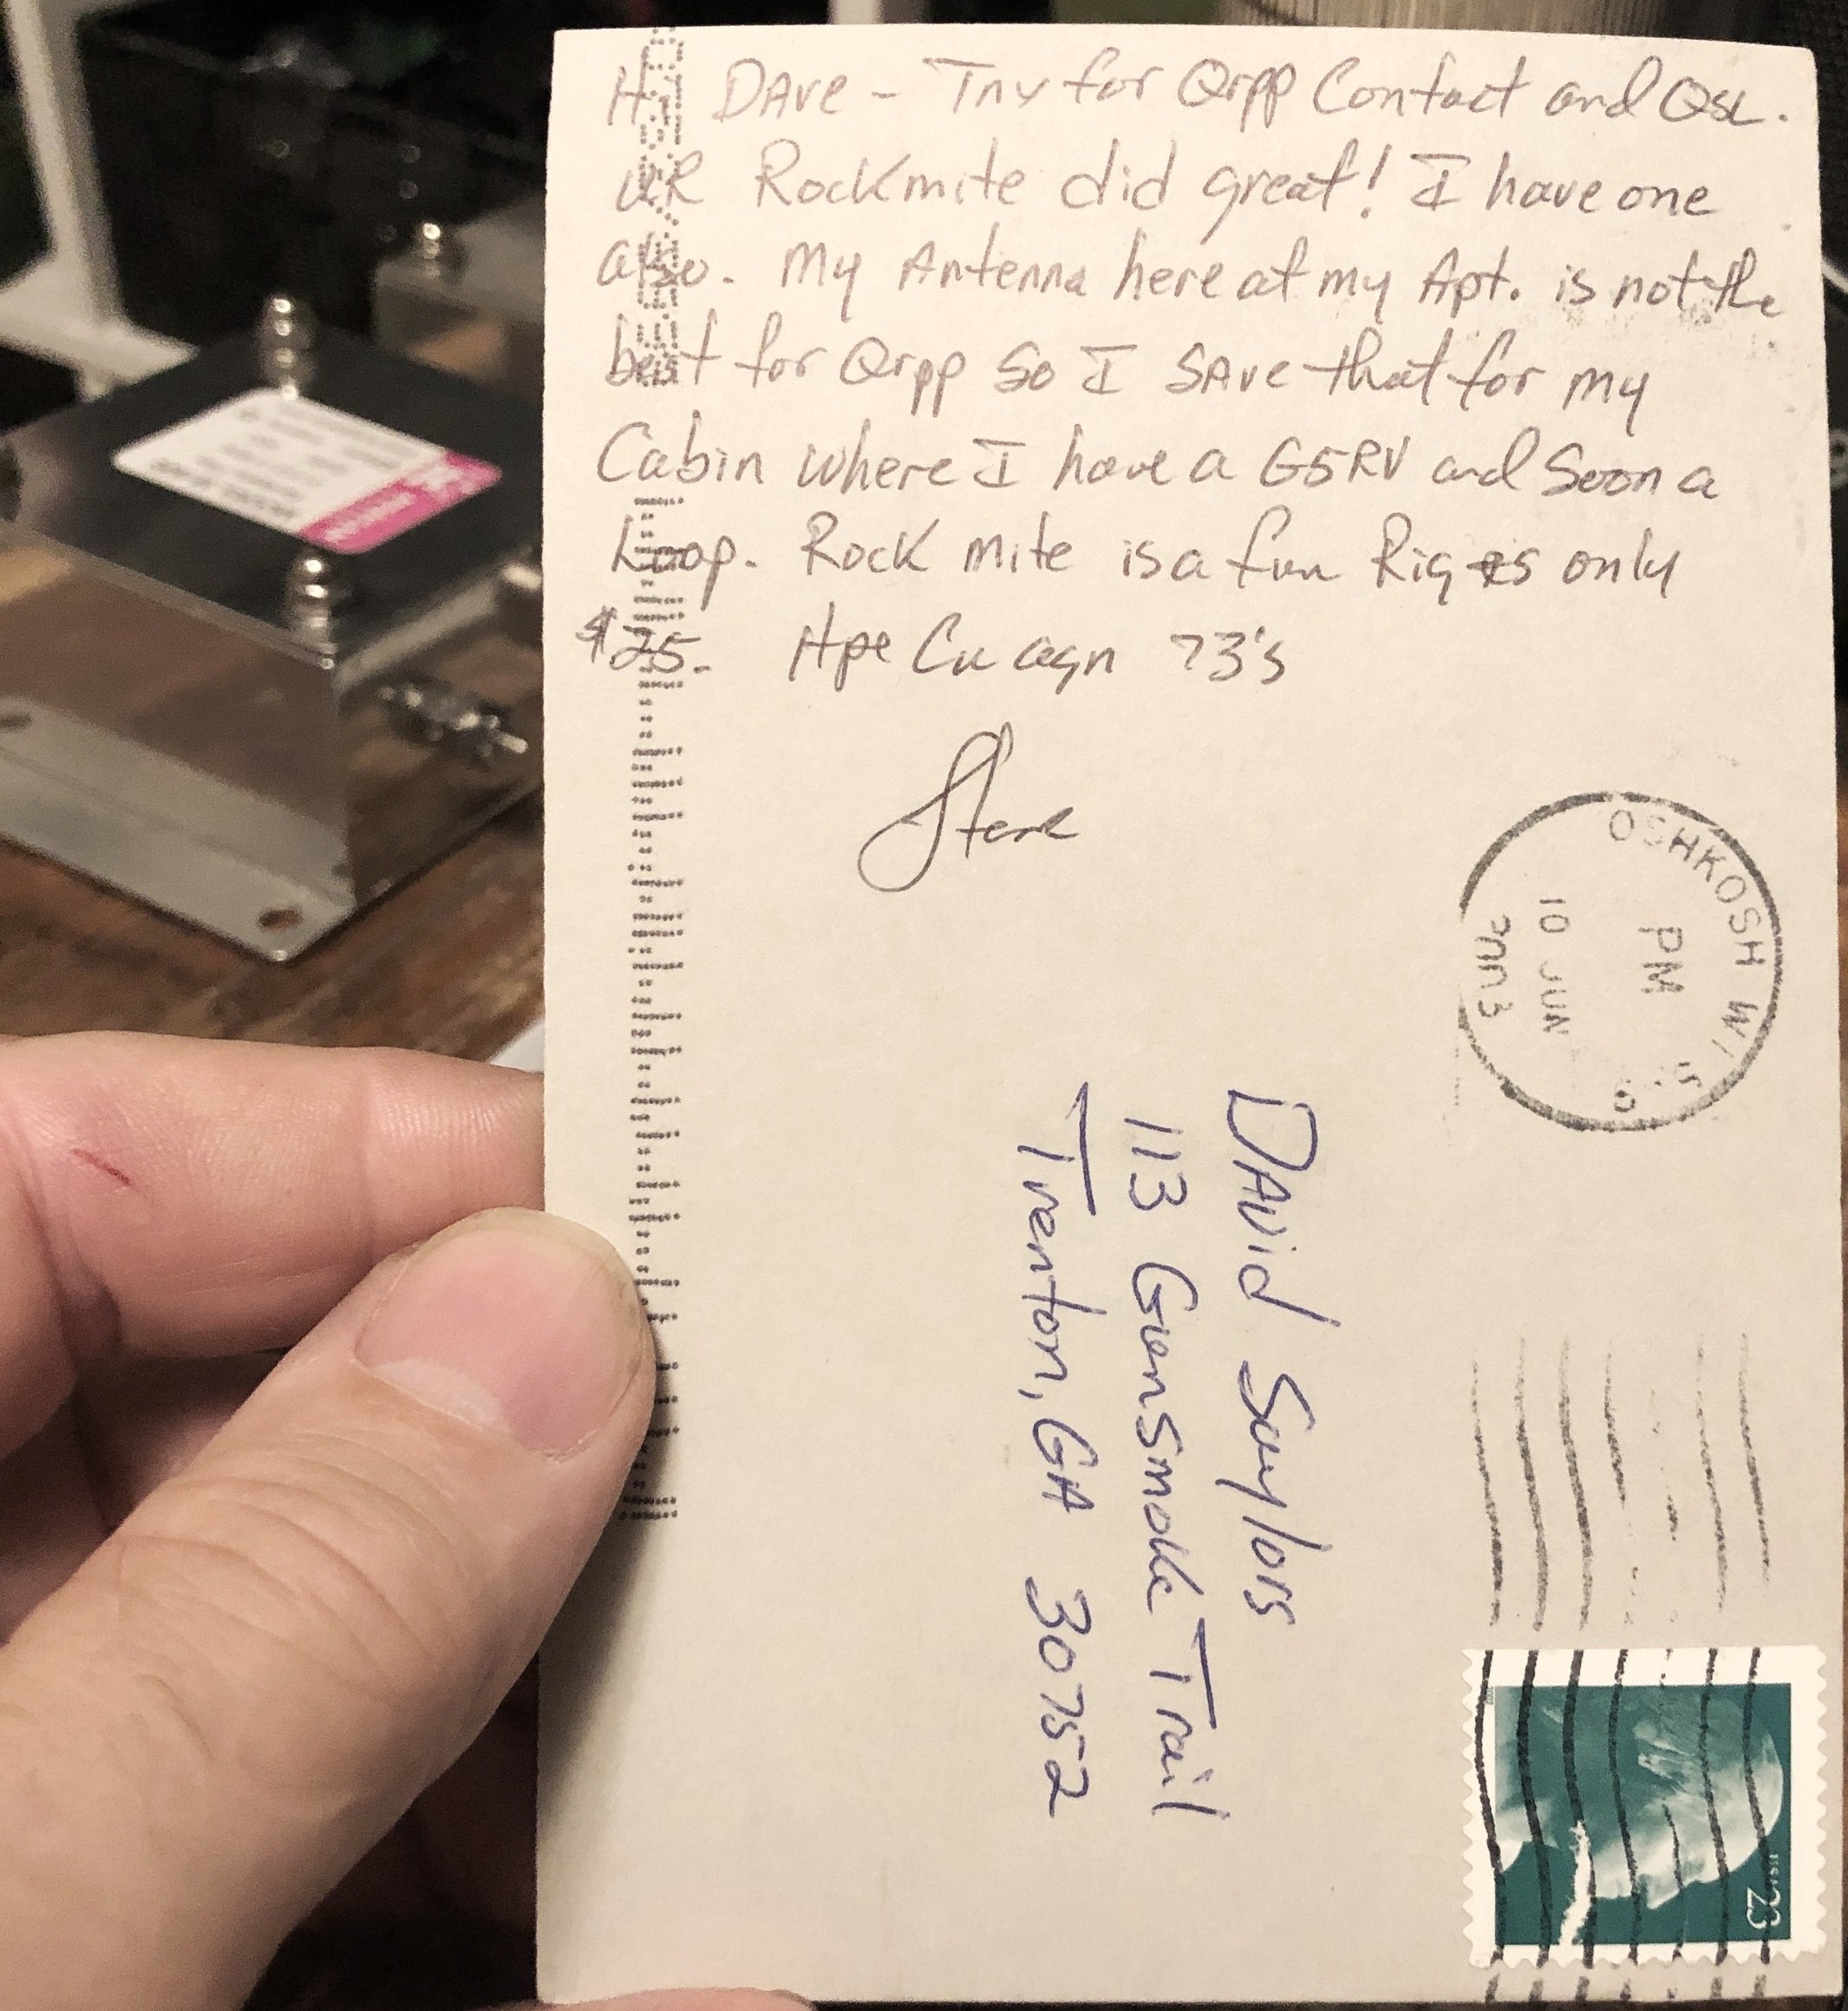
This is why I like paper QSL cards.
PS: By the way, the output power to Alaska that day from a modified 102” stainless steel whip mounted on the back corner of my jeep was just 8 watts. The bands were good to me that day.
PSS: If you noticed, my old callsign and my buddies call sign are sequential. We did this on purpose as we wanted to try to have sequential calls when we decided to get our licenses. I have since acquired a vanity call after getting my Amateur Extra ticket, but Roger still has his original call even though he now has his General.
The WK4DS POTA Hunter Station Amateur Radio (and a little ragchewing too)
What does a simple POTA hunter HF station look like? Just like any other HF station… This is what mine looks like currently. If you haven’t already figured it out, I have a Ten Tec fetish and I don’t care 🤣 The Omni VI+ was a dream rig back when I first got into radio and I could not afford one at that time, but as time went on, I was able to piece together a nice station sans amplifier…for now… and I have really enjoyed using this old girl on the air. I also have the 238 manual tuner in the closet as well waiting on a time when I will need it.


My current station mainly consists of a Ten Tec Omni 6+ with matching power supply and automatic antenna coupler that I run primarily into a vertical antenna I have out in the yard. I still need to finish the installation of my wire antenna in the front yard in the trees so that I will have a second antenna to work with that will complement the station. I also have a splitter worked out to where I can set up and use my QRP radios in the shack easily. This allows me to test the radios and learn how to use them before I go into the field to do an activation. This reduces the stress of figuring out the radio in the field while trying to make contacts.


My current key of choice is the Ten Tec KR 40 keying module, this key is designed to work with their older radios and is able to do all sorts of things other than just keying output. It is an electronic work of art to simply be a key lol. I also have my other regular keys that the radio will operate with since it has a key input and a paddle input on the Omni. Not to be left out I also have a Logickey K3 keyer that I am going to get working as well. This will also make me have memory keying with my Omni since it does not natively have a memory keyer built in.


I am planning on adding a second HF rig to the shack to complement my Omni 6+ so that I can have the Omni calibrated and have a couple of small issues repaired on it and while it is out. Having the second rig makes it to where I will still be able to operate. I am currently searching for one of several radios to fit this position in my shack, such as the Ten Tec Jupiter/Omni 7, the Ten Tec Eagle, the Ten Tec Orion, or even something simple and small like a Kenwood TS 590 or similar. I really want nice filtering as I like to listen to CW on the air regularly and it is very tiring to listen to the bands with a lot of band noise. A radio with good roofing filters or IF filtering makes this a much more pleasurable experience. That is all my ham shack at home has in it to hunt stations with. My current antenna is a 17 m vertical that I can tune all the way down to 40 m and still have a decent signal going out. This is why I want to put a large wire antenna in the front yard. I really want to be able to work the lower bands and the large wire antenna will allow me to do that. Thank you for following along today and if you have not done it yet please subscribe to my blog thank you very much and hope to see you on the air soon. last but not least I have a good old 2 m radio to get on the local repeater and talk Symplex to my local buddies with. Everybody has to have a 2 m rig to get on the repeater ha ha.

73 WK4DS