WK4DS Amateur Radio Blog
Some days are better than expected in spite of band conditions.
Well today the work was grueling and about 3PM, the wife gave me clearance to go do an activation over at K-2169 Cloudland Canyon State Park. So come 4PM I grabbed the log book out of the house and jumped into the truck for a quick activation.

Upon arrival, I was all by myself in the upper parking lot. Wonderful as I can choose any spot I want to keep the sun out of my eyes and back the truck up next to the grass for my counter poise wires. So I deploy the “truck-tenna” as quickly as I can and get in the cab to plug in the TR-35. I got the cab nice and warm with the heater while setting up the antenna and then shut down the truck to keep the noise to a minimum while I activate. I really like my “trick” of having a quiet and warm winter time location for POTA. So for the winter this is how I will roll… lol literally.

The solar data says it wont be a great day for POTA…
So once I got setup, I dialed around on 20 meters a little to scope out the band conditions a little before I started, but it was opened up pretty strong when I dialed through the band. So I went up to the QRP area and found a nice quiet spot, listened for a few minutes while I wrote up my logbook with the usual data for my activation and then made a fatal mistake…I sent a CQ from the keyer memory while I started to log into the POTA website so I could spot myself, but before I could get it open on my iPhone I got an answer! So things are hopping now! LOL I log him then immediately get another call, and this went on for a couple of minutes. So I finally get a chance to spot myself so I can be found on the bands…. waa waa waaaaaa… (The joke is on me here, as I think I could have easily gotten the activation by just calling cq today as good as things were going) But once the spot went up, Dear Lord the gates were opened up! I had a mini-pile up the rest of the time I was able to operate, I literally cleared the pile 1 hour later and went QRT so I could go home.

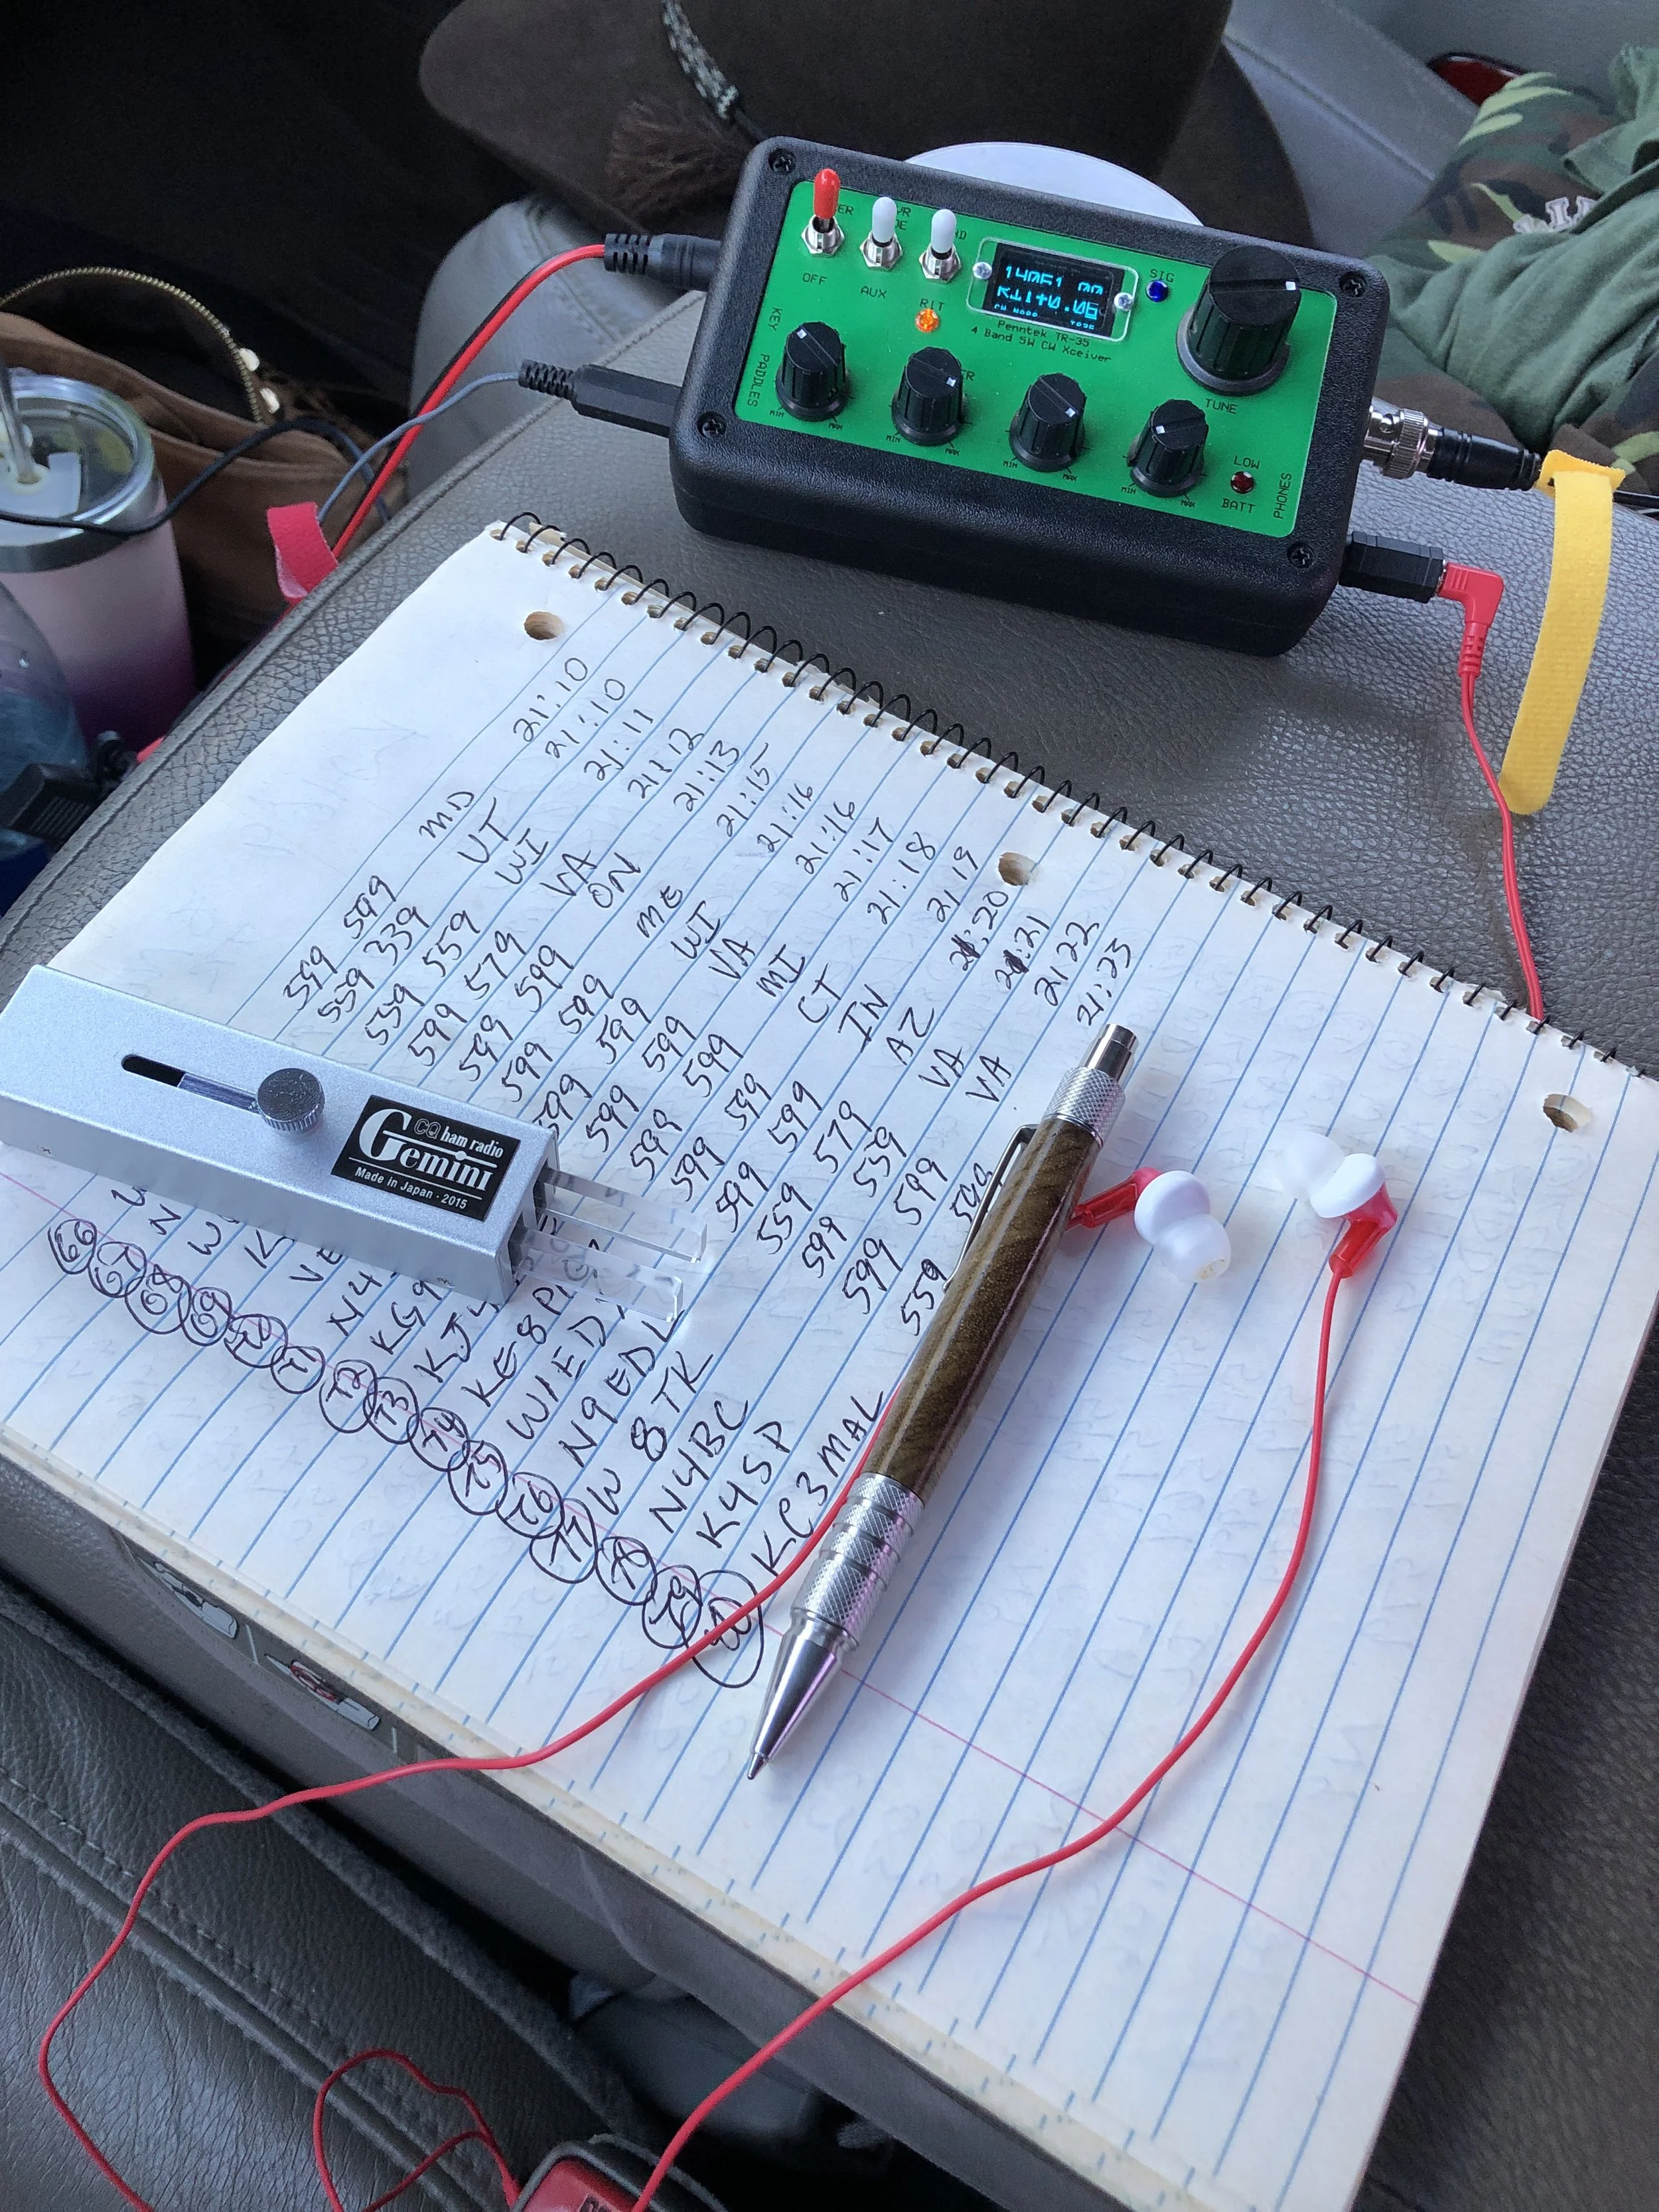
You can tell if I am in a hurry or not by how I write the time next to the QSO, if I have time, I will write the proper time signature, if not then it is just enough data to log it for me.
Some things I took away from this activation are that a 20m hamstick is not able to hear inside about 500 miles, give or take… Just take a look at the map and it is painfully obvious. But yeah, it works WONDERFULLY outside of that zone! My best QSO tonight was to Oregon with WA7RAR using 5 watts at 2064 miles, not quite the 1000 miles per watt that people want, but it was still a good QSO for me! I still have not bought the other hamsticks yet, I am going to be ordering them soon though so we can play with different bands too.

I did have a few minutes where a spammer tried to shut me down, I didn’t even catch it until I copied the call twice and realized they were just pulling my chain sending random letters with just dits… Then they moved on and I went back to filling up the logbook. Also of note is that I learned TODAY that I could add the “stroke” and special designator in HAMRS and it would take it without killing the call sign! I entered my first mobile contact in my log today. I have logged a couple in the past but didn’t know I could enter the mobile designator in HAMRS… Sorry about that to the few ops that I have not given that info to on my logs.

So for future reference, don’t let the solar data tell you that you cant make a contact when things look bad online. Just give it a shot and throw out a CQ and see what happens. So until next time, just get on the air and have some fun!
72
WK4DS
David
The Penntek TR-35 activates POTA K-2169 gloriously!

Click on the image to goto the WA3RNC website to get your very own TR-35 in either kit or factory built versions.
Today started off like most others with some time at work in the morning and then I had a few hours around lunch to do an activation. In addition to the usual activities, I have been using a variety of radios lately to see what I like about each one. Since I had activated most recently with the IC705 (by far my most favorite POTA machine) and so I wanted to use a different radio. I have been using the TR-35 lately in the shack, but wanted more field time with it to see how easy it would be to work with.

33’ wire radiator and two 10’ counterpoises bundles for storage. I love these velcro tie back straps.
So on this outing, I used a 33’ wire “vertical” antenna that I pulled into the tree with my throwline. Once the vertical was up, I laid out both of my counter poise wires (I think they are 10’ each) and for good measure I spaced them into a v pattern for kicks… On my next trip out I plan to see if putting them at 90 degrees to the radiator and 180 degrees from each other helps, it probably does and I have been paying the price all along with my silly V setup I have been using… lol…anyway…

This is a great antenna tuner and still happens to be in production! The new version is a little more streamlined but it is the same internally as this older one.

Back of the antenna tuner is just as busy as the front!
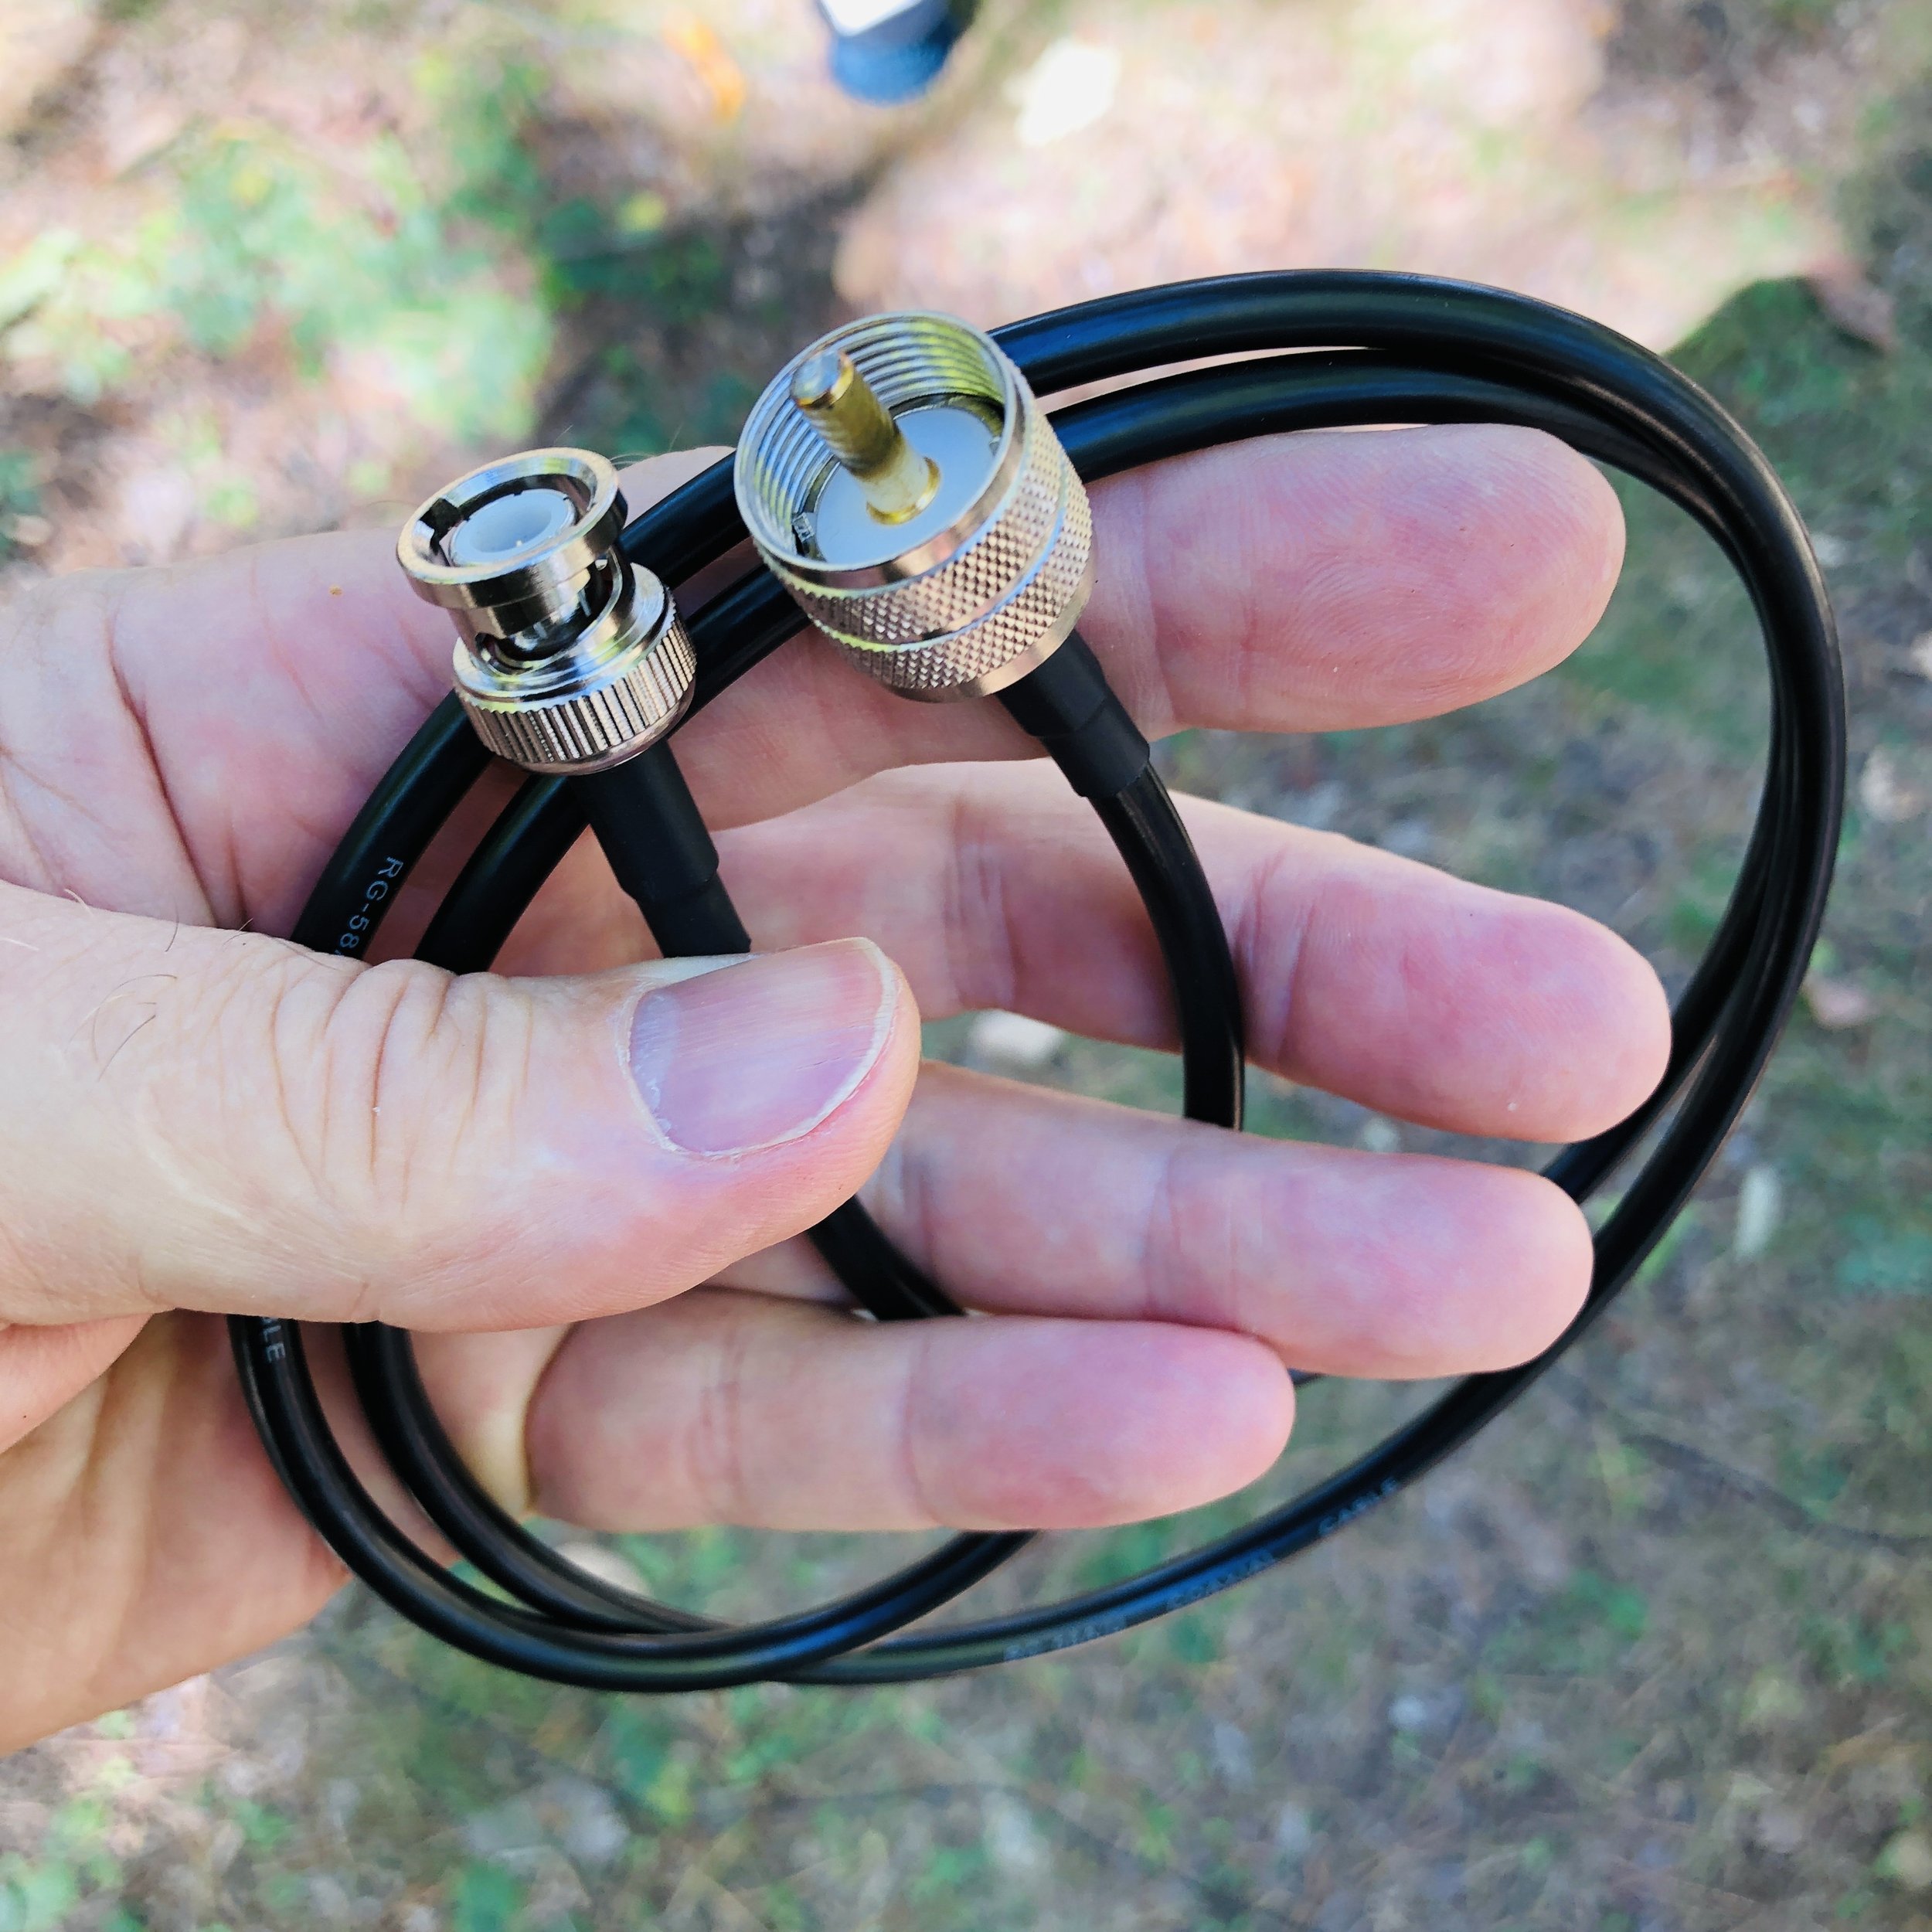
Once the antenna was up, I connected it to my MFJ travel tuner to the random wire lugs on the back of the unit. Then I use a special coaxial cable I bought from Amazon that has a BNC on one end and a PL259 on the other. The antenna tuner uses SO 239 mounts on it so the PL259 couples that end and the other end is natively a BNC on the TR-35, but I have also adapted my nanoVNA to BNC as well for simple tuning. Since my Ten Tec Argonaut 5 is SO 239, I have bought an adapter to convert it to this same system so I can tune the antenna easily on it as well.
This is not my idea, my late friend K4GC Brian was the person that taught me and Roger how to do this. It makes perfect sense when you think about it though so I started doing it once I got the VNA. Otherwise it is this trick of tuning till you hear the noise level peak and that is the best you get. This way works but it is possibly not centered where you need to be. Since the TR-35 doesn’t have an SWR meter, it has lots of protection circuits built in to prevent you from damaging the transmitter from tuning or operating at full power with poorly matched antennas. It has a current protection circuit as well as a thermal protection circuit, if either one activates, you really should check the antenna and see what is wrong, then reset the radio and try again. Alternatively, you could bring an SWR meter with you to get the tuner set as well if you don’t have a nanoVNA…
Amazon is a great place to find these sorts of oddball parts, several of the items in this blog today came from them.
Since everything is now BNC connected, I can quickly pull the cable from the radio, then connect it to the nanoVNA and see the tune on the tuner visually! I run a trace with the smith chart and a trace with a SWR line graph as well, with both of these running at once, it is pretty simple to get the SWR and the impedance really close to what the transmitter likes. Once I get the tuner adjusted to the band I want to use, I simply move the coax back over to the radio and off I go…

BNC is where it’s at with this system…

Here I am tuning for the 17m band, note that the VNA is showing the SWR of 1.541:1 and the impedance is 54.8 ohms and slightly inductive at 18.096mhz. I could dial some more of this out with the tuner, but it becomes a law of diminishing returns at some point with the tuning and this worked just fine. Note also that the SWR is fairly flat in the range I planned to work in also. (the yellow line represents SWR vs. Frequency)
Some things to note about the TR-35 that I noticed. The first one is that the headphone jack is wired from the factory for a mono plug, not the stereo plug that every set of headphone made in the last 30 years uses…why? So you go to Amazon once again and buy this little adapter to convert your normal headphones to a mono plug… You can go into the radio and change this on the circuit board, and the instructions even detail this mod, but you have to risk damage to the radio and it is a lengthy tear down and assembly process to get the board out of the case. Lot’s of chances to break something important if you asked me…so the adapter it is… Another thing I cant seem to master is the keyer programming. It is a simple operation to input the message into the keyer, but upon playback, it has odd spacing and sounds disjointed for some reason, I have tried slowing down the keyer speed to no avail, I will figure it out at some point, but for now, I don’t have that one working right. To put it plainly, it just sounds wrong on playback, like I was saying, it could be my sending is causing it, but I have not figured it out as of this writing. I have seen videos of it working as advertised so I am confident I can get it to work…eventually.

Amazon…they have literally everything at this point.
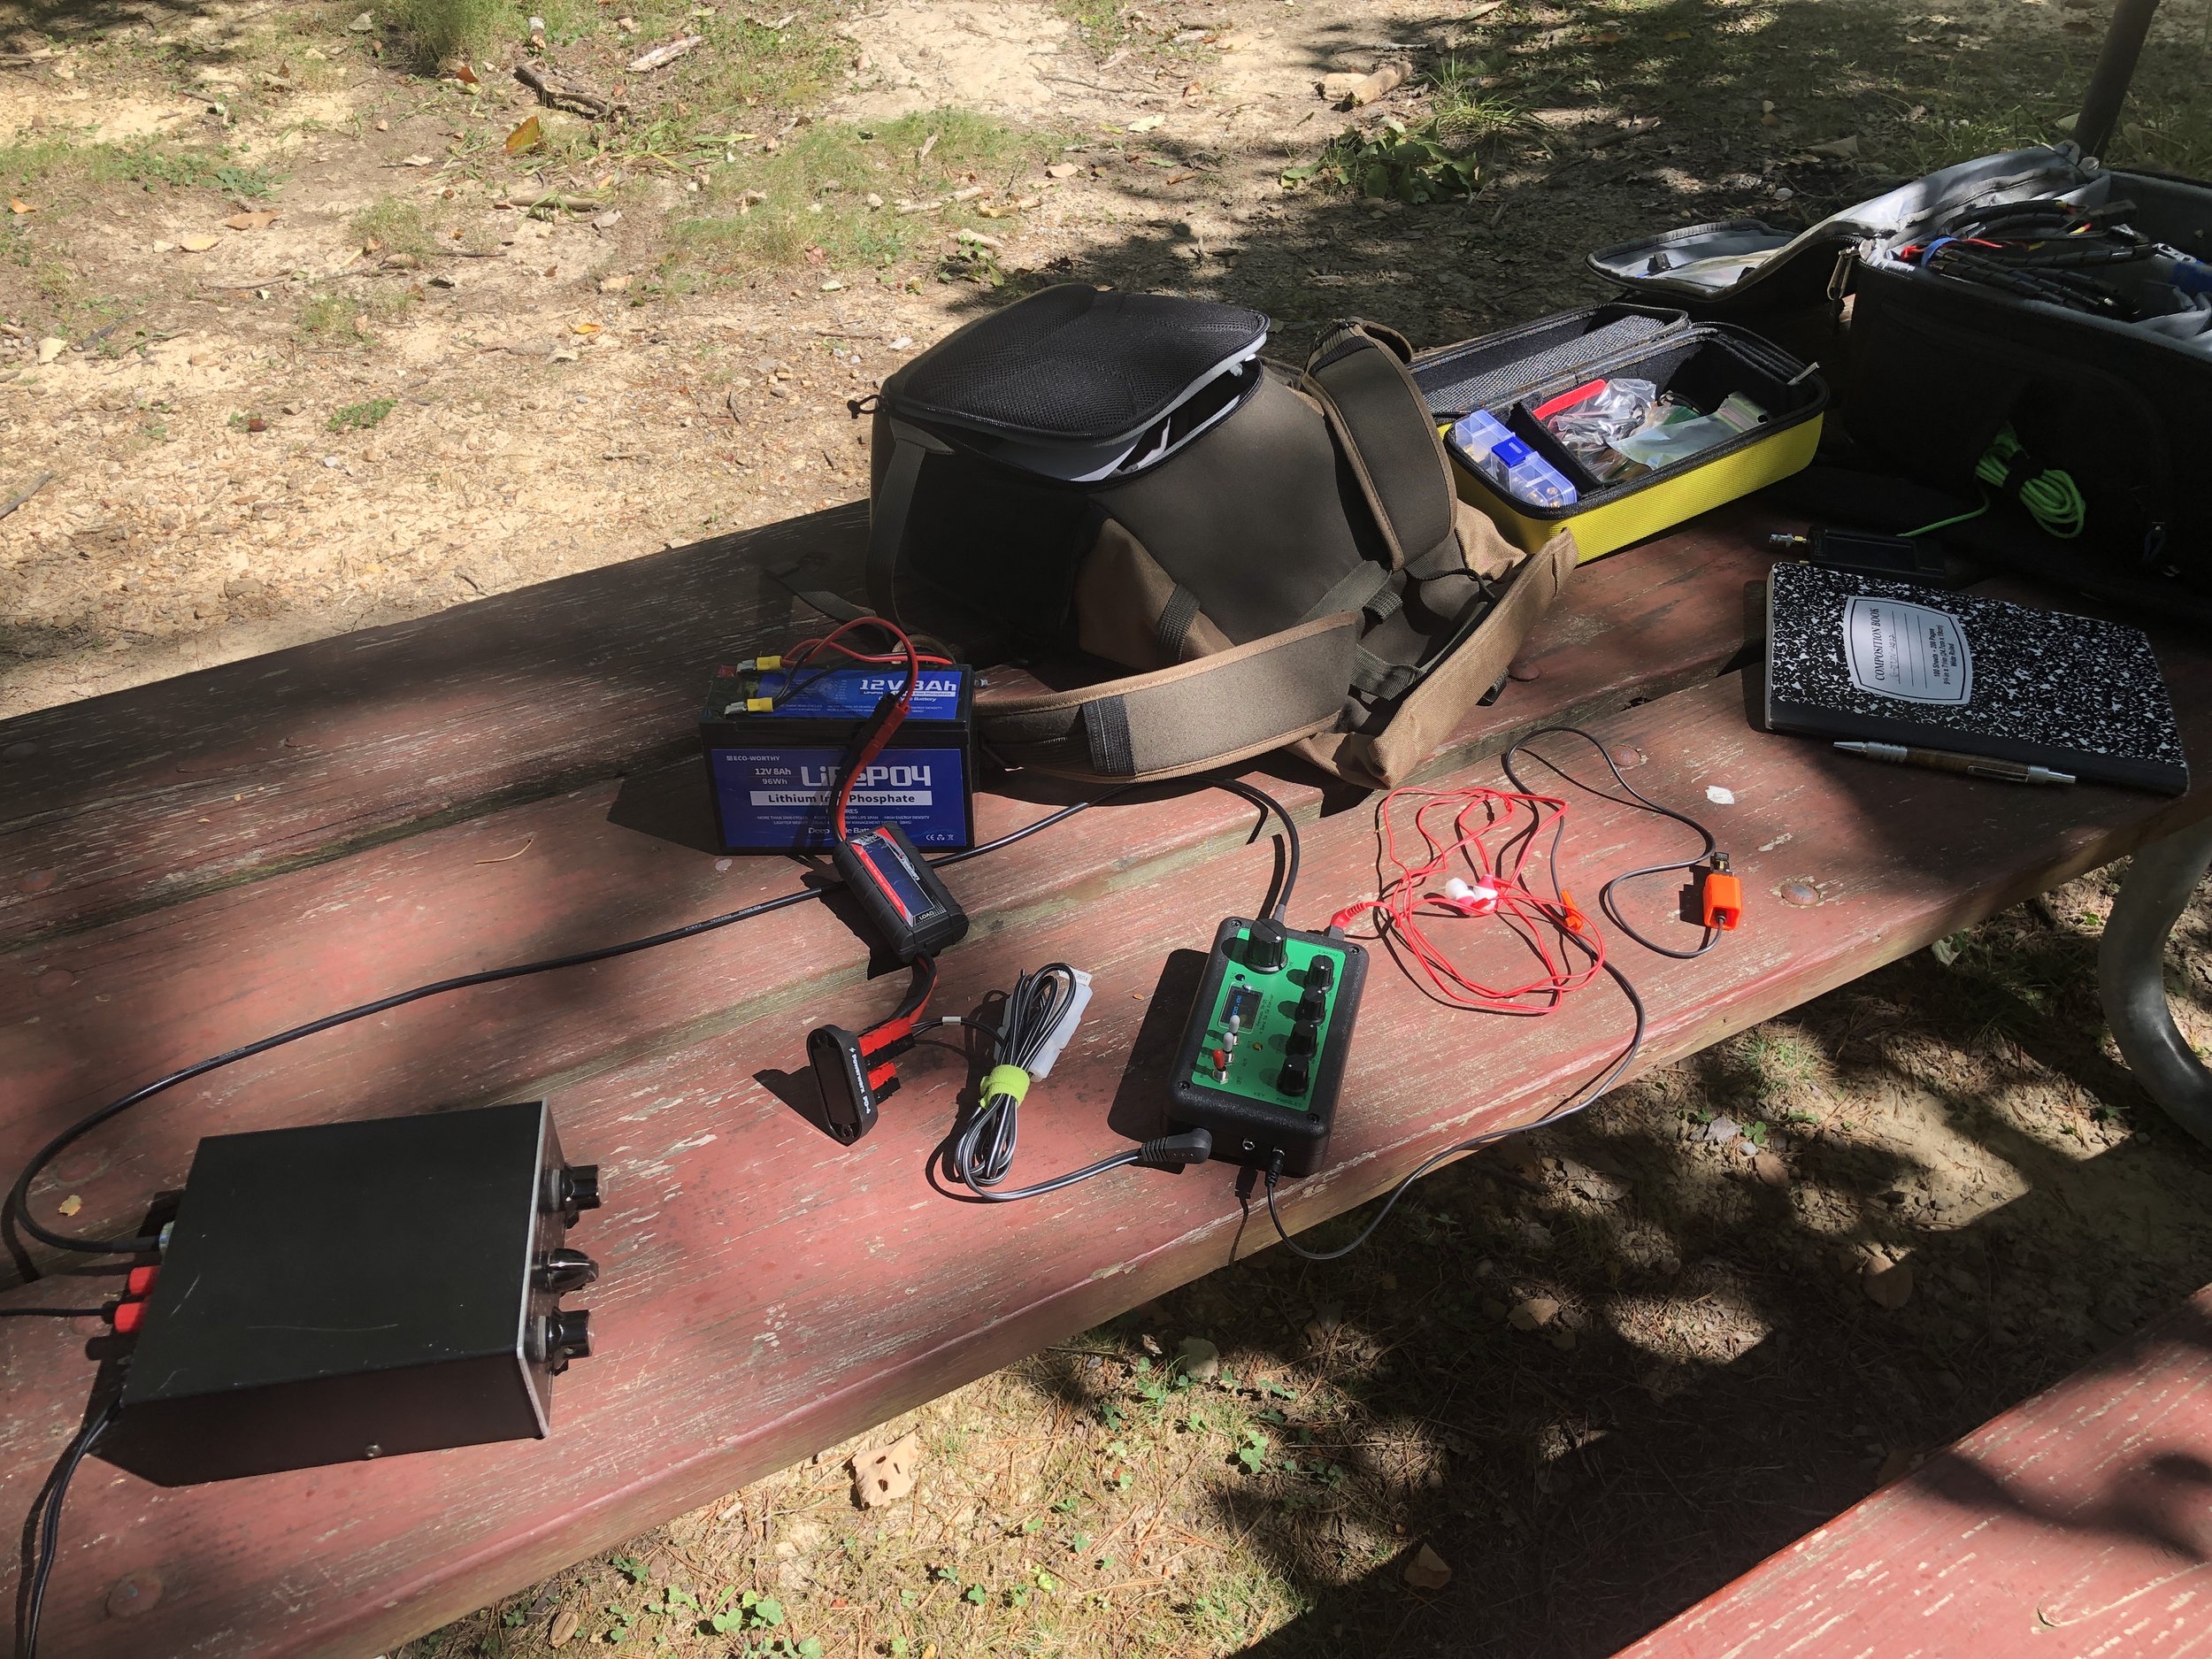
I powered it with my battery I use for my 705 activations, actually lots of the accessories I used came out of the 705 kit today for this activation. But I found this battery is way overkill for the TR-35, so I plan to get a smaller one for the travel battery to build the kit with. Probably something in the 4 or 5Ah range instead will be fine. I am also going to eliminate the voltmeter inline for the travel rig too, just a cable with power-poles on one end, the 2.1mm plug on the other and a fuse in line with the power. It pulls 5 watts wide open, does it really need 14 gauge wire??? Lol. I actually used the power cord for my IC-705 to power this radio today, the connector worked just fine. But I will make a cord just for this rig to go in the kit.

I am also still using the N6ARA tiny 3D printed paddle that I bought a while back(also from the 705 kit today) this is a device that although I like it, it has some problems that I have found. For one, it is really small and I didn’t take that into account when I bought it. It is available in a couple bigger sizes and I should have gotten one of those. This one is in my mind, one that should be a backup or a SOTA paddle or something like that as it’s main advantages are that it is light and small. What I have found from using it regularly is that is gets dirty contacts and you have to mess with it some and clean the contacts before it will send right once it gets some age on it. This is because it is plain copper/brass contacts (pc board with a brass arm on the “levers”) and they tarnish in a matter of days to the point it wont send properly till I clean them. I am looking into three solutions here, a nice travel key like the Begali travel paddle, make my own travel key, or buy a used small foot print paddle off the boards. I am actually leaning towards the Begali for now to give me time to design a key I can share with the world as well as for my personal use. Anyway, who doesn’t like a nice Begali key?

My N6ARA tiny paddle… I love this little key.
I have an alternative reason for working with this radio so much as well. I am going to be doing some traveling in the coming weeks and months and I want to take a radio that is not too large so it is easy to pack and carry around and such. This means smaller is better and the TR-35 is my physically smallest radio. This means it gets the nod based on size and now it also gets points for performance. Even if I cant figure out how to program the memory right. 😂
The kit will fit into one of several of my camera bags that I currently have so I don’t have to purchase a new bag to carry it in. I have found that camera bags work really well for QRP radios too, they just fit really well into old camera bags for some reason. By the way, I didn’t think of this idea either. I got this idea from my cohort KV9L who did this for his FT8 rig and I straight stole the idea from him. LOL.
Parts everywhere today! I took the IC-705 bag to “rob” all the support gear from so it would be a simple deployment and I have not built out the TR-35 go bag kit as of yet either…

I really like the aesthetic of the TR-35 as it has everything you need and nothing you dont. It really is an incredible little radio. I didnt build mine from a kit, I bought mine factory built and aligned so I could get on the air sooner.

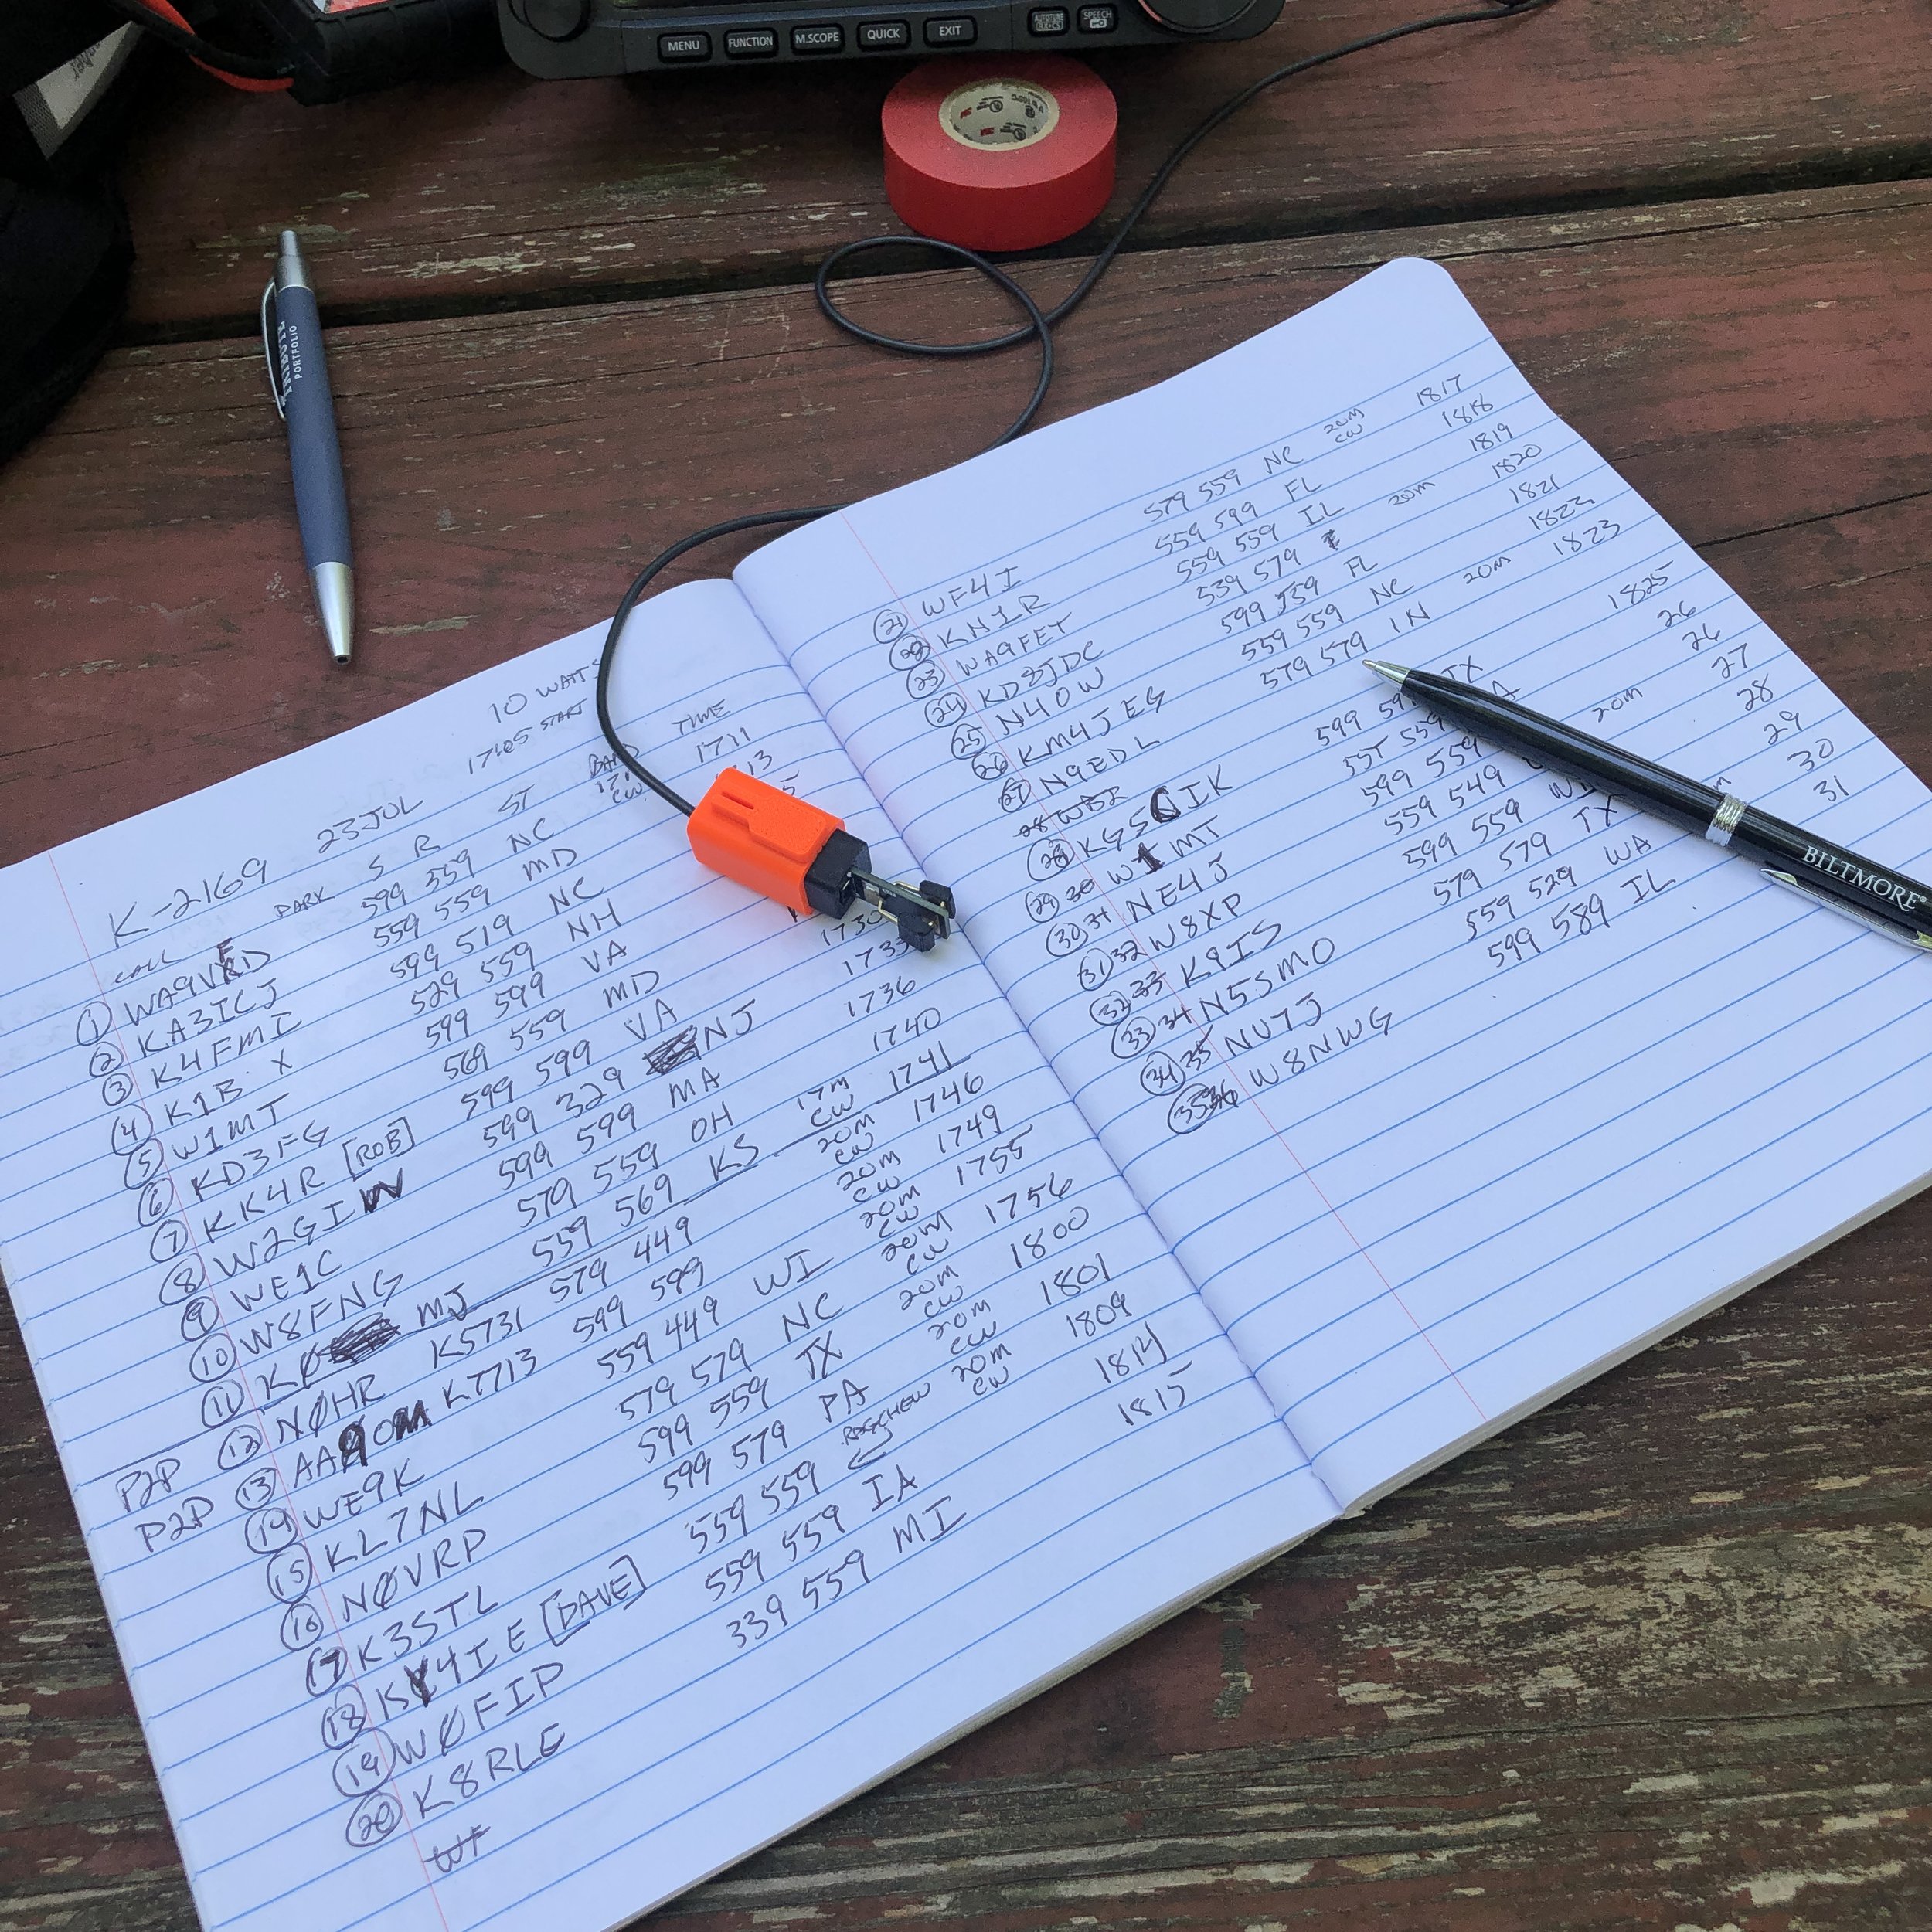
1 hour on the air netted two pages of QSOs! That is awesome for me!
Logbook looks good with a good spread of contacts today with several from Canada in the log for a change. I usually only get one or maybe two Canadians and today I think there are at least four! This was with only about an hour on the air too. That is really good for me since I run QRP power. The map below shows how far 5 watts into a wire vertical will reach with a little understanding of how to use it. All in all I really like the TR-35 from Penntek, it a great little QRP radio that fits into what I enjoy doing in amateur radio, low power CW operating…

So if you have not done it yet, please like this blog post and if you have a RSS feed, you can sign up there too. I really appreciate your reading along today and if you have not done it yet, get your gear out!!!
Thanks and 73
David - WK4DS
Wormsloe State Historic Area POTA AAR

This is still the driveway for the original family that still lives on the property. It is also the entrance to the historic site as well. I could live with this being the driveway to my house, how about you?

Today I had my first taste of a deliberate QRM attempt on my activation. At least that is what I thought it was when it happened. I was operating on 14.061Mhz and all at once there was a station sending endless dashes on top of my activation.
I was telling Teresa what had happened and she asked if I had considered that it could have been someone with a broken key that was not aware or had pushed their paddle up against something and didnt realise it. You know, we are so quick to judge, it did persist long enough though, that I moved up to 14.061.5 to get clear of it and resumed operations unimpeded.
This got me to thinking, we want to think it is some LID just holding down the key to be annoying, but it could have honestly been a legit mistake by a hunter who was on freq and might have had to goto the door for something and in their haste to get up, they slid the logbook over against the key and since they might have also been wearing headphones, they couldnt hear it sending non-stop dashes over the air. I mean, it could happen…maybe. It could also just as easily have been someone who has a sked on that freq every day at that time and they dont want to move for some reason. We have no real way of knowing unless they tell us.
With CW, this is much harder to decipher since you normally dont hear music or some other non-sense on frequency. It will be a “ditter”or something like that. I still made my activation today with 23 QSOs in the log before going QRT and doing some sight seeing with the wife.

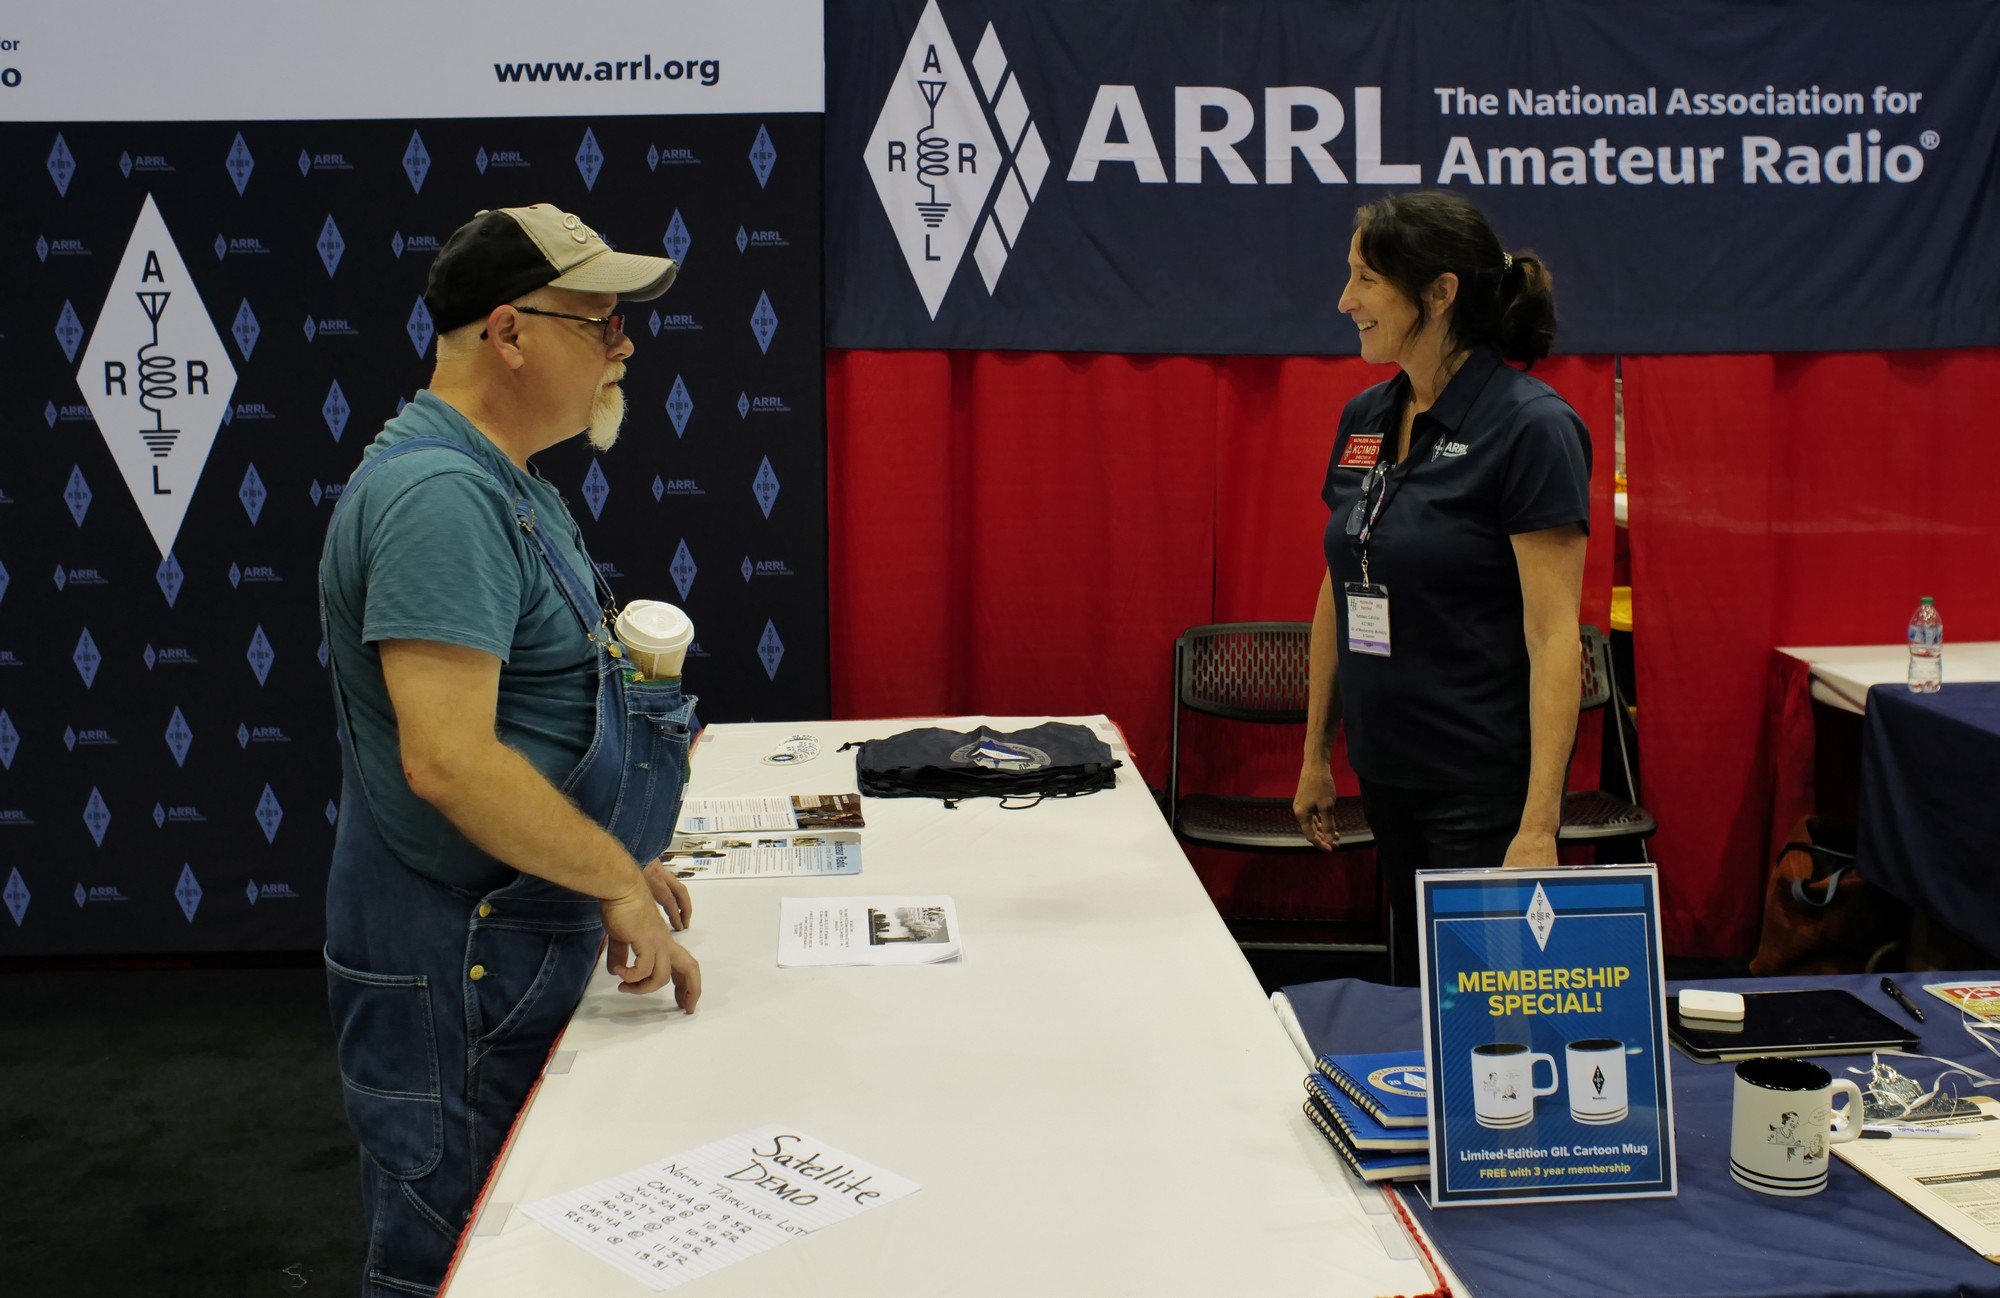
I am starting to enjoy activating different parks, it is interesting when you see different people and they ask what you are doing. I talked with a couple of different park employees and they were very positive when I showed them what I was doing and how my rig was basically a zero impact setup. One actually joked that I should take a look at THEIR radios and see why they cant talk across the park! LOL So word is starting to propagate about our POTA hobby and the response I have gotten so far has been positive. I didn’t think to get a photo with a park ranger for the blog…next time I will remember.

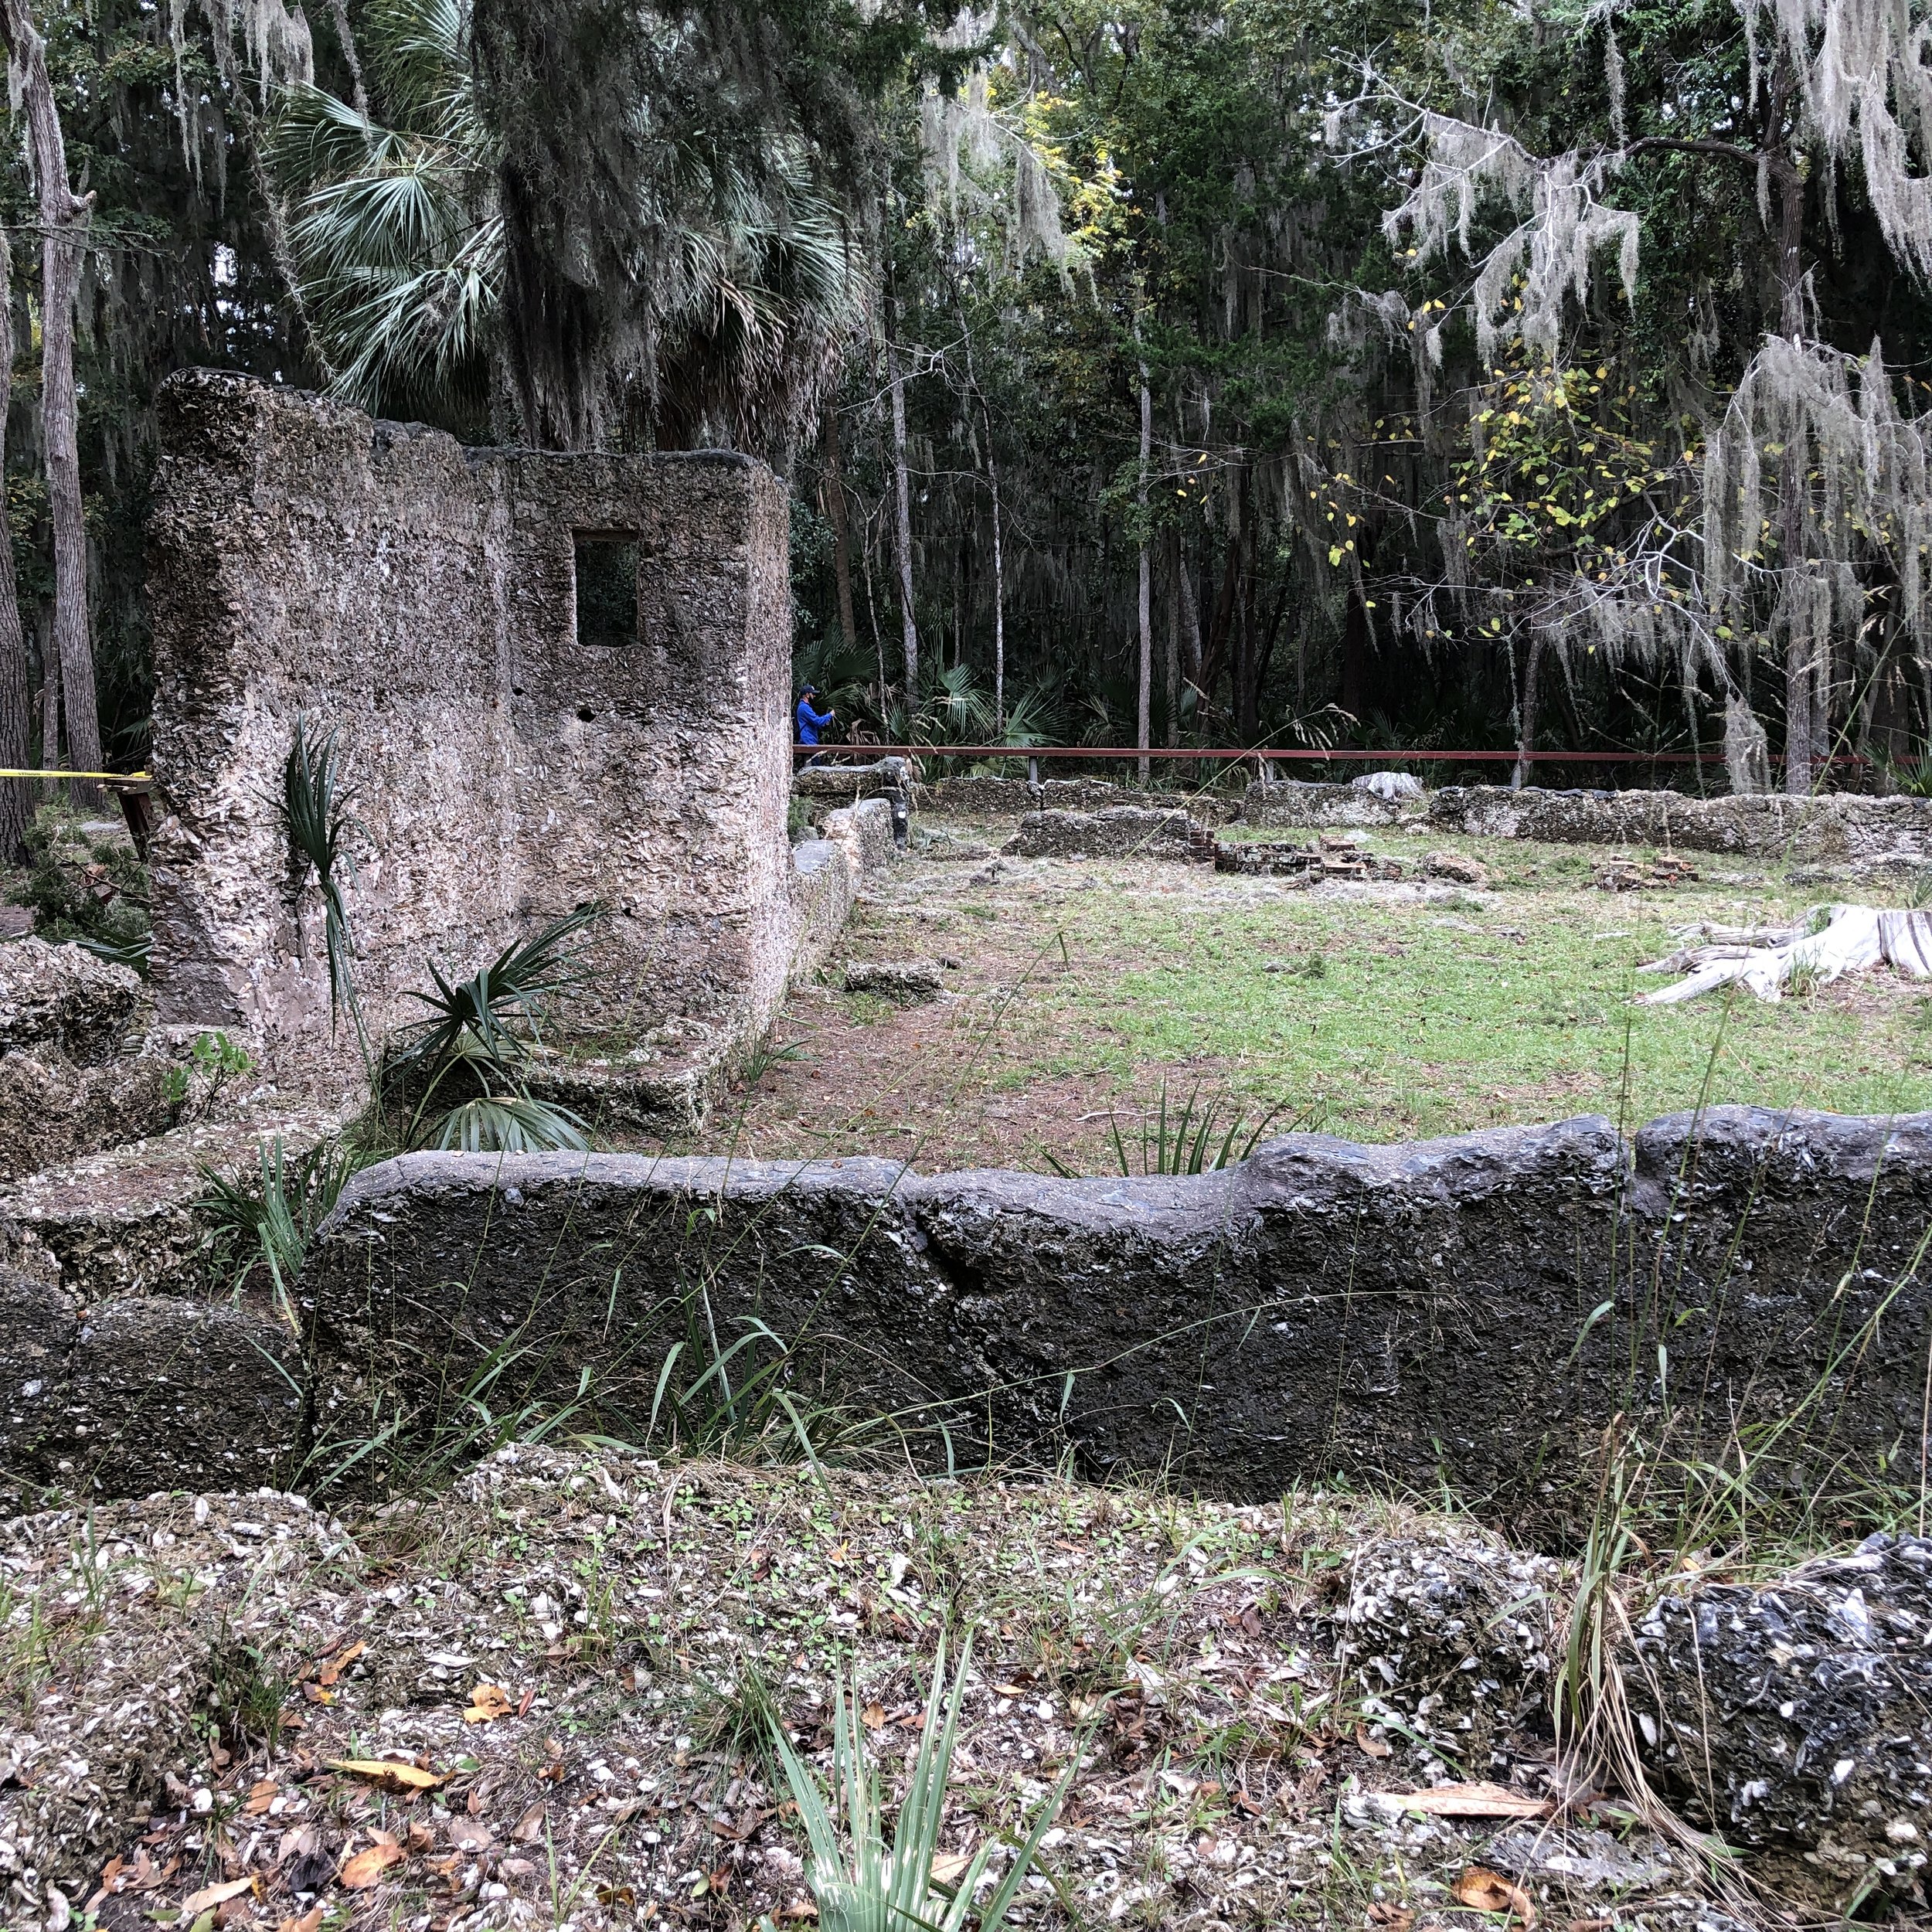
The park has some interesting ruins on site and we walked around and saw them while we was there. It is a really interesting location if you are in the Savannah area with s radio and some time on your hands, it is worth a look. It does have a day use fee though so be prepared for that if you are going into the area, you part to enter per person.

Anyhow, you can always tell if I am activating the park, just look at what way I am parked in the space. lol. I back into the space so I can use my hamstick with the radials run into the grass. I operated today on the truck rear lid as a table, it worked great. I used the IC-705 and weather worked with me too. I am looking forward to seeing what parks I find myself near in the not to distant future with my radio in the truck… I now find myself looking at the idea of rotting a coax into the cab along the chassis so I only need to deploy the antenna and get back in the truck where it OSS warm…LOL It is always something…

Like this post if you enjoyed it and let me know if you have ever had to work around a problem on the air.
72
WK4DS
David
"Trucktenna" for winter POTA outings with some AAR info about how it works.

The mount is made out of ordinary tube steel, but the top plate is 304 stainless steel as is the counter poise stud and associative hardware so it wont rust if it does get deployed in the rain. Also note that I have added a PL259 to Male BNC so I can use this small QRP Coax cable as well. The cable is from Amazon and is 25’ long. I like it as my QRP transceivers are BNC out put for the most part.
I finally built a mount for my “winter time” antenna setup and have done some testing with it to find out how well it performs.
What I wanted for my winter ops was something that would be pretty simple to deploy as well as worked fairly well, all the while allowing me to stay inside my vehicle where there is a heater. Pretty tall order since all summer I had used a 40m EFHW wire and it had been producing wonderful results for me. Well if you scroll down through the blog you will find a post about the Huntsville Hamfest and at this hamfest, I picked up a 20m HamStick antenna and stuck it in the corner when I got home for a future project… Today I used that antenna.


QSO map showing the region this antenna works with on the 20m band and 5 watts of transmitter power in 2022…
I used it on 20 OCT 2022 to activate Chickamauga National Military Park. The beauty of this setup is that I specifically designed it for use in such parks where you are not allowed to use the trees for antenna supports and in some cases, the park doesn’t even allow spikes/tent stakes to be driven into the ground. I wanted this antenna to be compatible with all those rules should I decide to venture into one of these parks.

The counter poise wires don’t have to be taught, but keeping them pulled out as close to original as possible makes it work really well.
I keep the ends of the counter poise in location with a couple of custom stainless steel weights that I made in my machine shop. They are kept on the wire by a simple 3 hole keeper that the wire is threaded through. This makes everything easy to deploy, I dont currently leave the base in the trailer hitch, but rather store it inside the cab of the truck when not deployed. So assembly goes like this: 1) Insert the yellow mount into the receiver. 2) Screw the hamstick together and then screw it into the mount. 3) unrolled both counter poise wires and put them both under the ground lug on the antenna mount, spread out both counter poise weights to get them taught. 4) install the BNC coax and run it through the window of the truck door and get in the truck. Done. I like this deployment time, especially with the TR-35, as 20meters is a good band for me to get a decent signal out using just 5 watts of power. I have done several other activations with this setup before this day and after and it always performs really well. I am certain that my weights are interacting capacitively with the counter poise wires, but I don’t care because I tuned the system with them in place.

27 OCT trip to K-2169 showing how this setup pulled in almost 40 QSOs in less than 45 minutes at 5 watts!

QSO map for 27 OCT 2022. I like these kinds of days!!!
As evidenced by both QSO maps, this antenna is deaf inside of 500 miles on 20 meters. That one contact in Calhoun GA was most likely ground wave as you can see there is literally no one inside of this circle except for that one QSO. This is why I think a 40m version would be nice, at least I was getting NVIS on my wire antennas on 40 meters, I hope this antenna will too.

The height of the mount it literally just a piece of tube I found in the shop. I didn’t cut it to a certain length, but rather I just wanted it to be above the top of the truck bed…because I liked that idea. I also figured it would help with the ground plane if the antenna was not bedside the metal of the truck body too…
Since I opted to add a counter poise, it required me to tune the antenna. Below you can see the null is on 14040khz and the SWR is fine for me considering the setup. I found that the length of the counter poise is critical to a good SWR null , I settled on 16’ 4 3/4” on one (1/4 wavelength at this frequency) and the other is a little shorter due to a blunder on my part with reading the tape measure wrong… (I saw 164.75” and my mind converted the numbers to be 16’ 4 3/4” and I happily lopped off the wire this long (13’ 8 3/4”) and threw the cut piece over next to the other and noticed it looked MUCH longer… Then I realized what I did. Never to worry much about details like this, I checked and just needed to trim the antenna to get it to frequency. To be honest here, I noticed that the closer that I got the counter poise to 1/2 wavelength the deeper the null got on the SWR plot. When I make the counter poise for the next band I will cut them the same length and see what that does for the plot… Also take a close look at the counter poise wires where I connected them to the base. I have crimped ring tongue connectors on the wires, but then I also added heat shrink tubing as well, this is to reduce the stress on the wire where it meets the crimp connector and prevent the wire from breaking there. These counter poise wires are made from simple speaker wire.

Something I noticed while tuning the antenna, I could move the null up the band by shortening the counter poise wires…for a while. At a certain point though, the SWR null went up drastically and was un-waivered by anything I attempted to do…except adding back the counter poise wires. The length of the counterpoise wires is very important… So once I got that sorted out and the antenna tuned like you see, I was happy to test it with an outing. First test on each outing was to sweep it with the VNA to make sure nothing had changed from tuning it to setting it up in the field. I am happy to report that it worked perfectly. This antenna works so well that I am going to make a counter poise for 40 meters and another one for either 17 or 15 so I can switch bands. For now, I will just add the other counter poise to the mount and see how the SWR null looks on 20 meter to make sure it isnt causing too much trouble. If not, then I will also look into making a plate to hold more than one hamstick at once and we will see if the non-resonant antennas will cause a problem for the one that is matched to the band. I swept this 20m hamstick across the whole HF band and it only has one null…20 meters, there is no harmonics like the EFHW has…at all. So I am thinking this idea will work and will not require an antenna tuner to switch bands.

I am thinking that the 40 meter kit will be just two more 20 meter counter poise wires to add up to 1/2 wavelngth total… these 16’ wires are already LONG…
The upper lot at K-2169 has plenty of room now and I no longer need a tree to hold up my antenna. This is awesome on so many levels. Another wonderful thing is, if it is threatening rain, my radio will stay dry. If it is windy, I can get out of the wind and if it is cold, I can turn on the heater!!! I hope you like and leave a comment on this post and possibly subscribe to the RSS feed as well so you will always know when the next post drops.
Thank you and 72
de WK4DS (David)
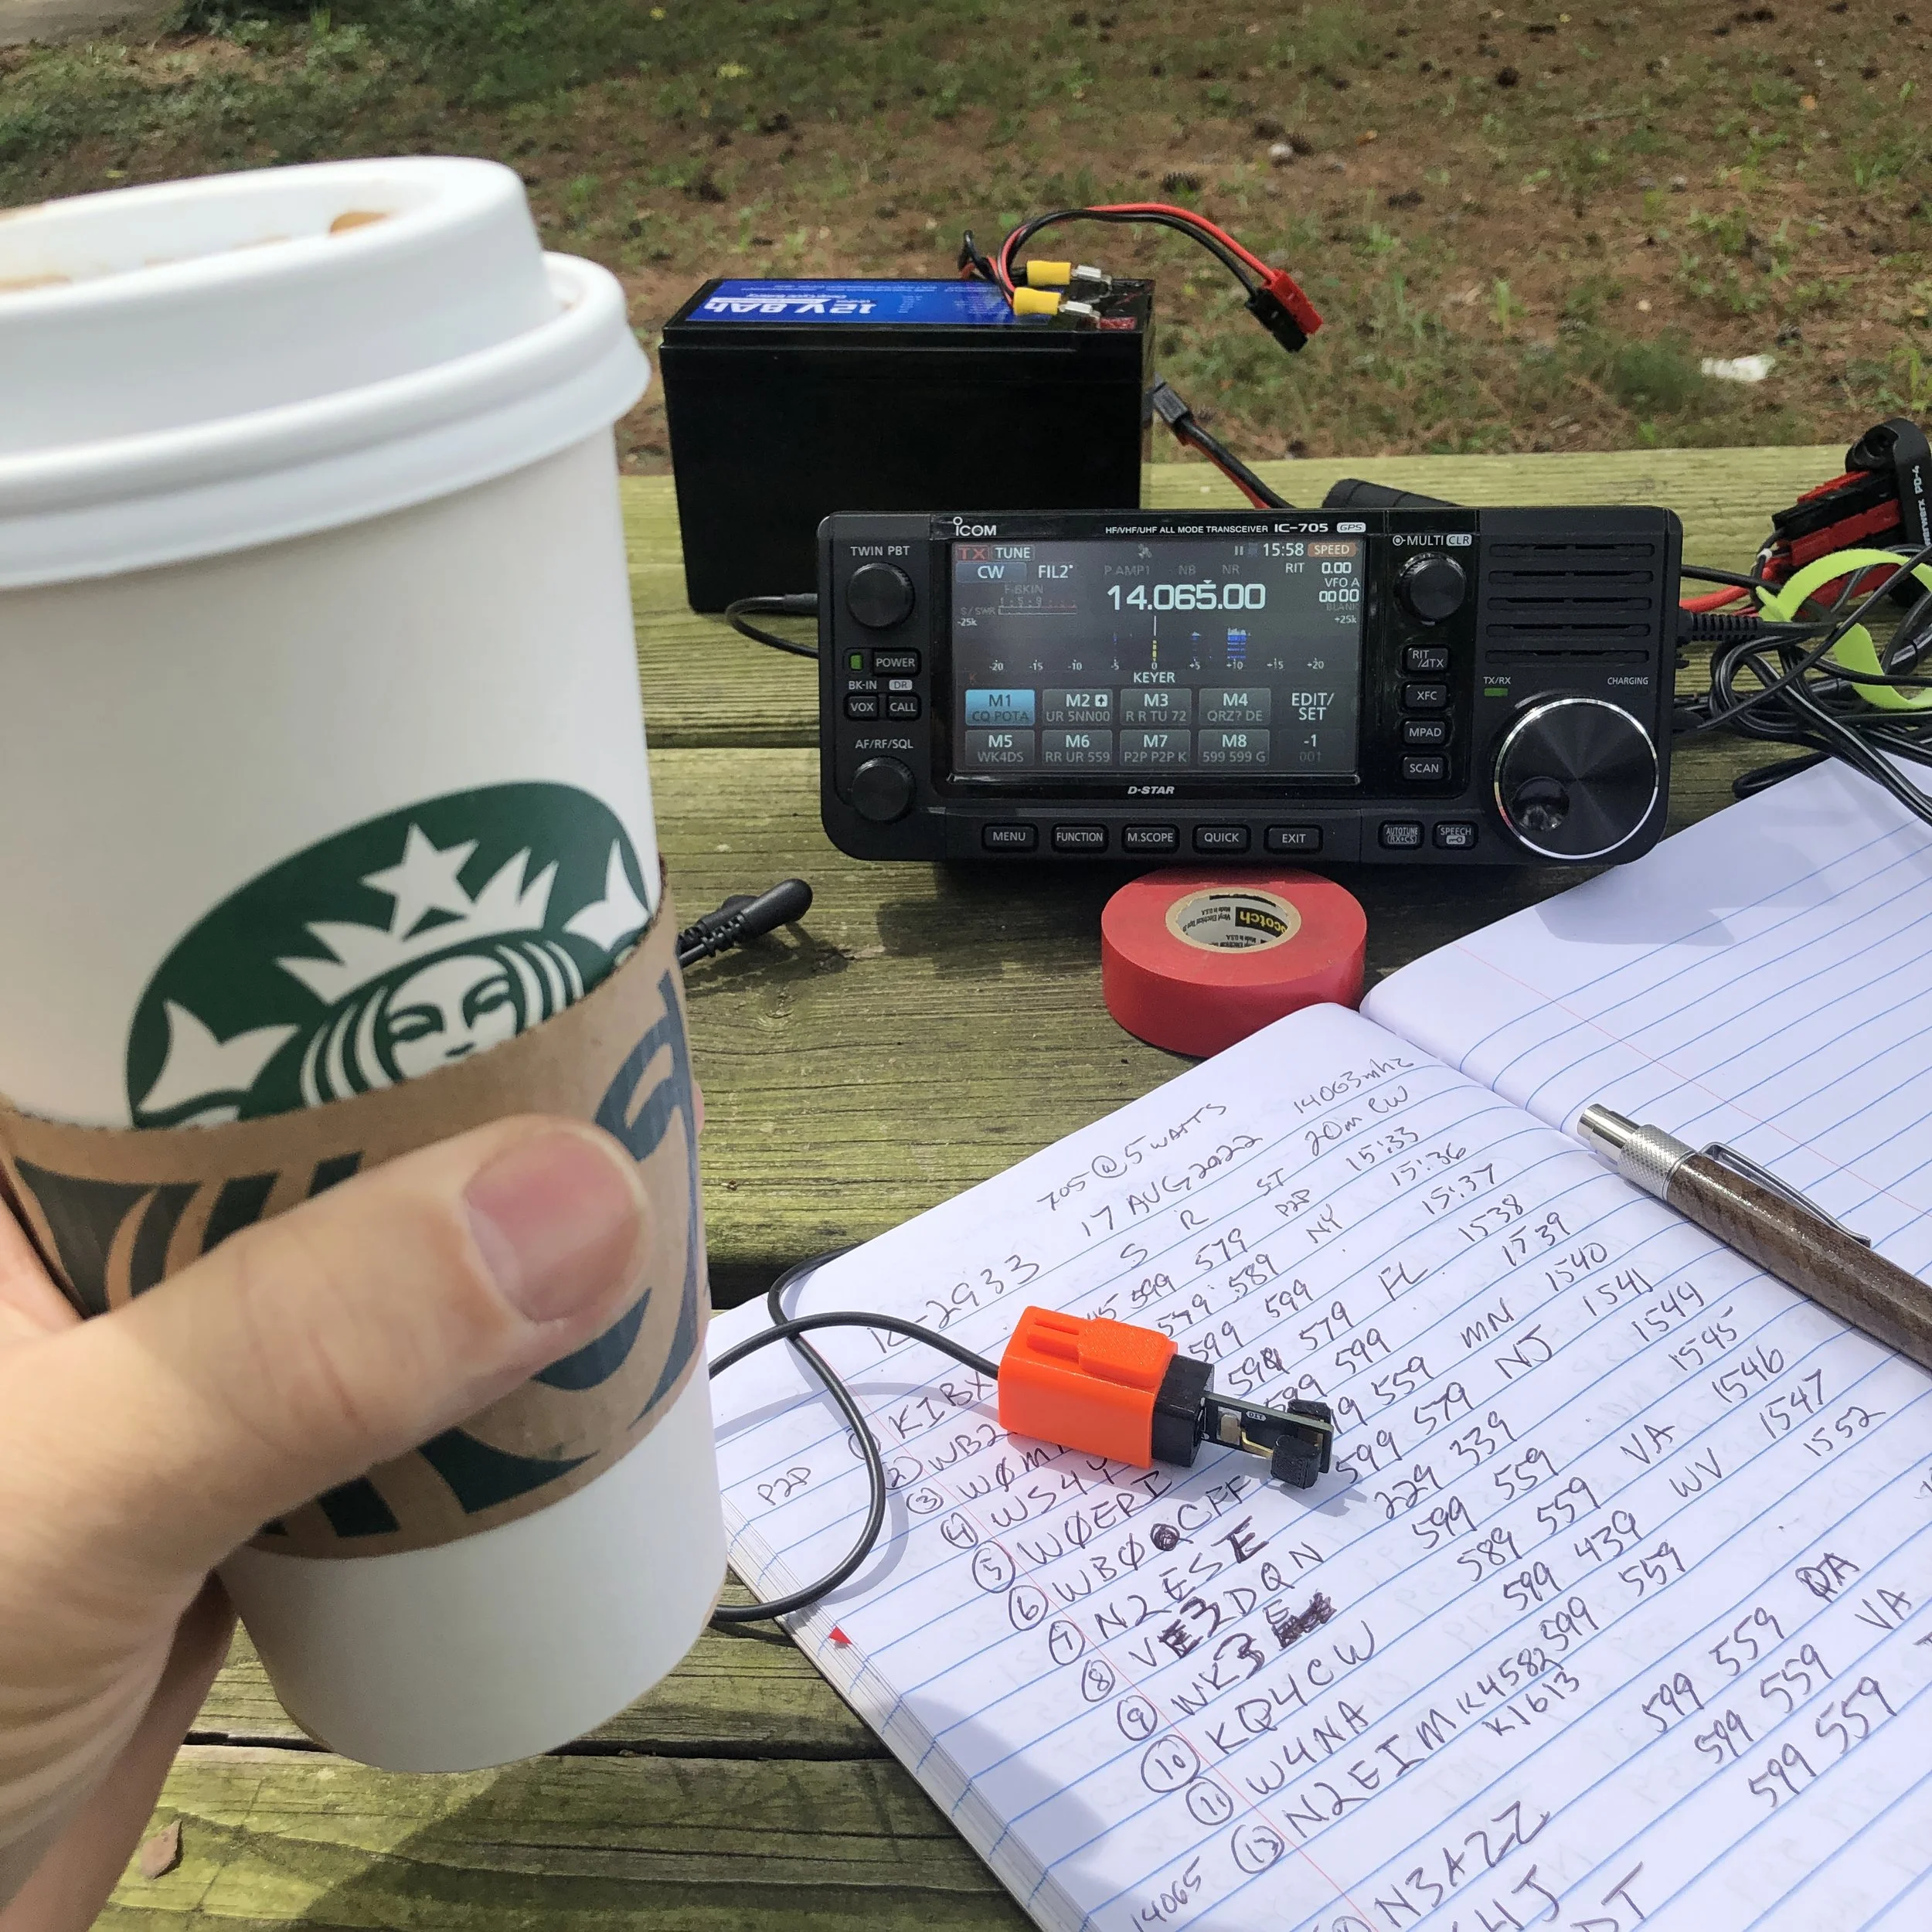
A good day in the field for QRP CW...
This after action report is brought to you by yours truly as I have no sponsors at this time. HiHi Anyway, I went to the local state park for an evening activation and didn’t know what I was in for.
I setup the TR-35 with the “Trucktenna” (I think I will just start calling it that. LoL) and got on the air, but today I thought I would back the power down a little to about 4.5 watts to see if anyone would notice. That is a 10% reduction from my usual output power. Well the QSO speaks for itself.

Seems if the band is open, it really doesnt matter how little power you have, you will have a great time. I am about to build one of the little qrp power meter kits from here:
This way I can accurately set the output power prior to starting a activation and I will know how much it is for sure.


I made 80 QSOs and off I had more time, I think I could have made 100! The TR-35 is turning out to be a great little radio that I enjoy using. Even though it doesn’t do all the stuff that the other radios can do, it just works REALLY well. I can highly recommend it.


I also made up a power cord for my radios when inside the truck since they are all QRP and don’t pull much more than 1 amp max. The power port in my truck is rated for way more than that, so it is good to go. It would be interesting to know just how long those two huge lead acid batteries under the hood would last worth the TR-35…lol

Why do I want to buy so many ham radios???

My main base station. The Omni 6+ is connected to the 500 watt amplifier and the Omni 7 is “barefoot”.
I find myself wanting every radio I see and with a short look through the bios of some ham operators on QRZ.com I am not alone in this.
What is it with this obsession wiht collecting radio gear that us hams must endure? I mean they literally all do the exact same thing…all of them. Yet we want multiples of these radios anyway.
Now, I understand having a base rig that stays at home and can be integrated into several things and it is not simple to break down for portable operations, and also having a radio that can do specific jobs like SOTA or POTA or ARRL Field Day.
This makes sense but why do we want to have two base rigs or three or five or 10 as well as three or four portable radios for POTA as well as mobile radios stacked to the ceiling and we can only use one at a time. LOL.
You see, I am that guy. I have a base station that has two complete radios in it that share an antenna and I also have FOUR, yes FOUR, POTA rigs currently! Four, really? A TenTec Argonaut 5, an ICOM IC-705, an Elecraft K1, and a Penntek TR-35 and I love them all… I just don’t understand the human brain sometimes, why do I want so many radios? I realized this yesterday when the Penntek TR-45L was launched, I REALLY like this new radio and found myself wanting one really bad, but then I stopped and let reason talk to me for a minute and realized that my current radios ALL DO THE EXACT SAME THING!!! To add to the problem, one of the radios is the Penntek TR-35 for crying out loud!!!! LOL!!! Compound that with the fact that I have yet to use it for a field activation and my wanting the new radio is just lunacy… So how do I combat this? Well, the first thing is to get out these radios and take a long hard look at them and decide if I really want to own these radios or the new one. I personally have also set a limit on the quantity of radios I will own as well…apparently there is an exemption for POTA rigs…but I digress. Another thing I have implemented as of late is a rule of balance. This is where I have to remove something if I want to add something. By doing this I keep the stack a little more reasonable and I can recoup some of the money needed for the new radio from the sale of the old one I am letting go to make room.

The POTA rigs are starting to pile up!
Some will say it is because each radio has a feel to it and some radios have character to them and to this I say they are right! I also understand that once you find the radio that you like the most, keep it and the second most favorite as well and then get rid of the rest of them! LOL. Are they really bringing you joy just sitting either on a shelf or worse…in a box under the bed!!!
You see having multiple radios like me doesn’t benefit the amateur operator in any way other than collecting. If you enjoy collecting radios then by all means, buy as many as you want, but remember if you are not collecting radios then what is the point of buying so many? Of course this is my opinion and this is not a rule in any way, shape, or form, but I do have reason in the thought process. What else could we buy with the money we spent on all of these radios had we not bought them?
I also dabble in the hobby of photography and that hobby is no different from Amateur Radio in that the most appealing or “sexy “part of the system is the central piece which is the radio here and in photography it is the camera body. These are universally wanted by the users of each hobby respectively. Photographers will have gear acquisition syndrome (G.A.S.) and make joking videos about it on YouTube because it is such a problem. It is a real thing as companies spend dumptruck loads of money on targeted marketing to tell you that you need to upgrade to the newest widget or risk falling behind in technology. That is how they get you!!! LOL!!! They prey on your GAS problem!!!
So how do we solve for this? I honesty don’t have the universal answer. For me it took about 40 years of buying too much stuff for a hobby and as you see above with the stack of POTA rigs, I am not there yet… I do know that I am starting to recognize it though and I am working towards scaling back the stack of cases so that I have room for other things in my shack. I hope this helps some of you out there to realize the same thing I realized and that you can do other things instead of buying the newest radio. Anyway, now that we have all did some self reflection, reach over and turn on that radio next to you and see who you can find on it.
73
David - WK4DS
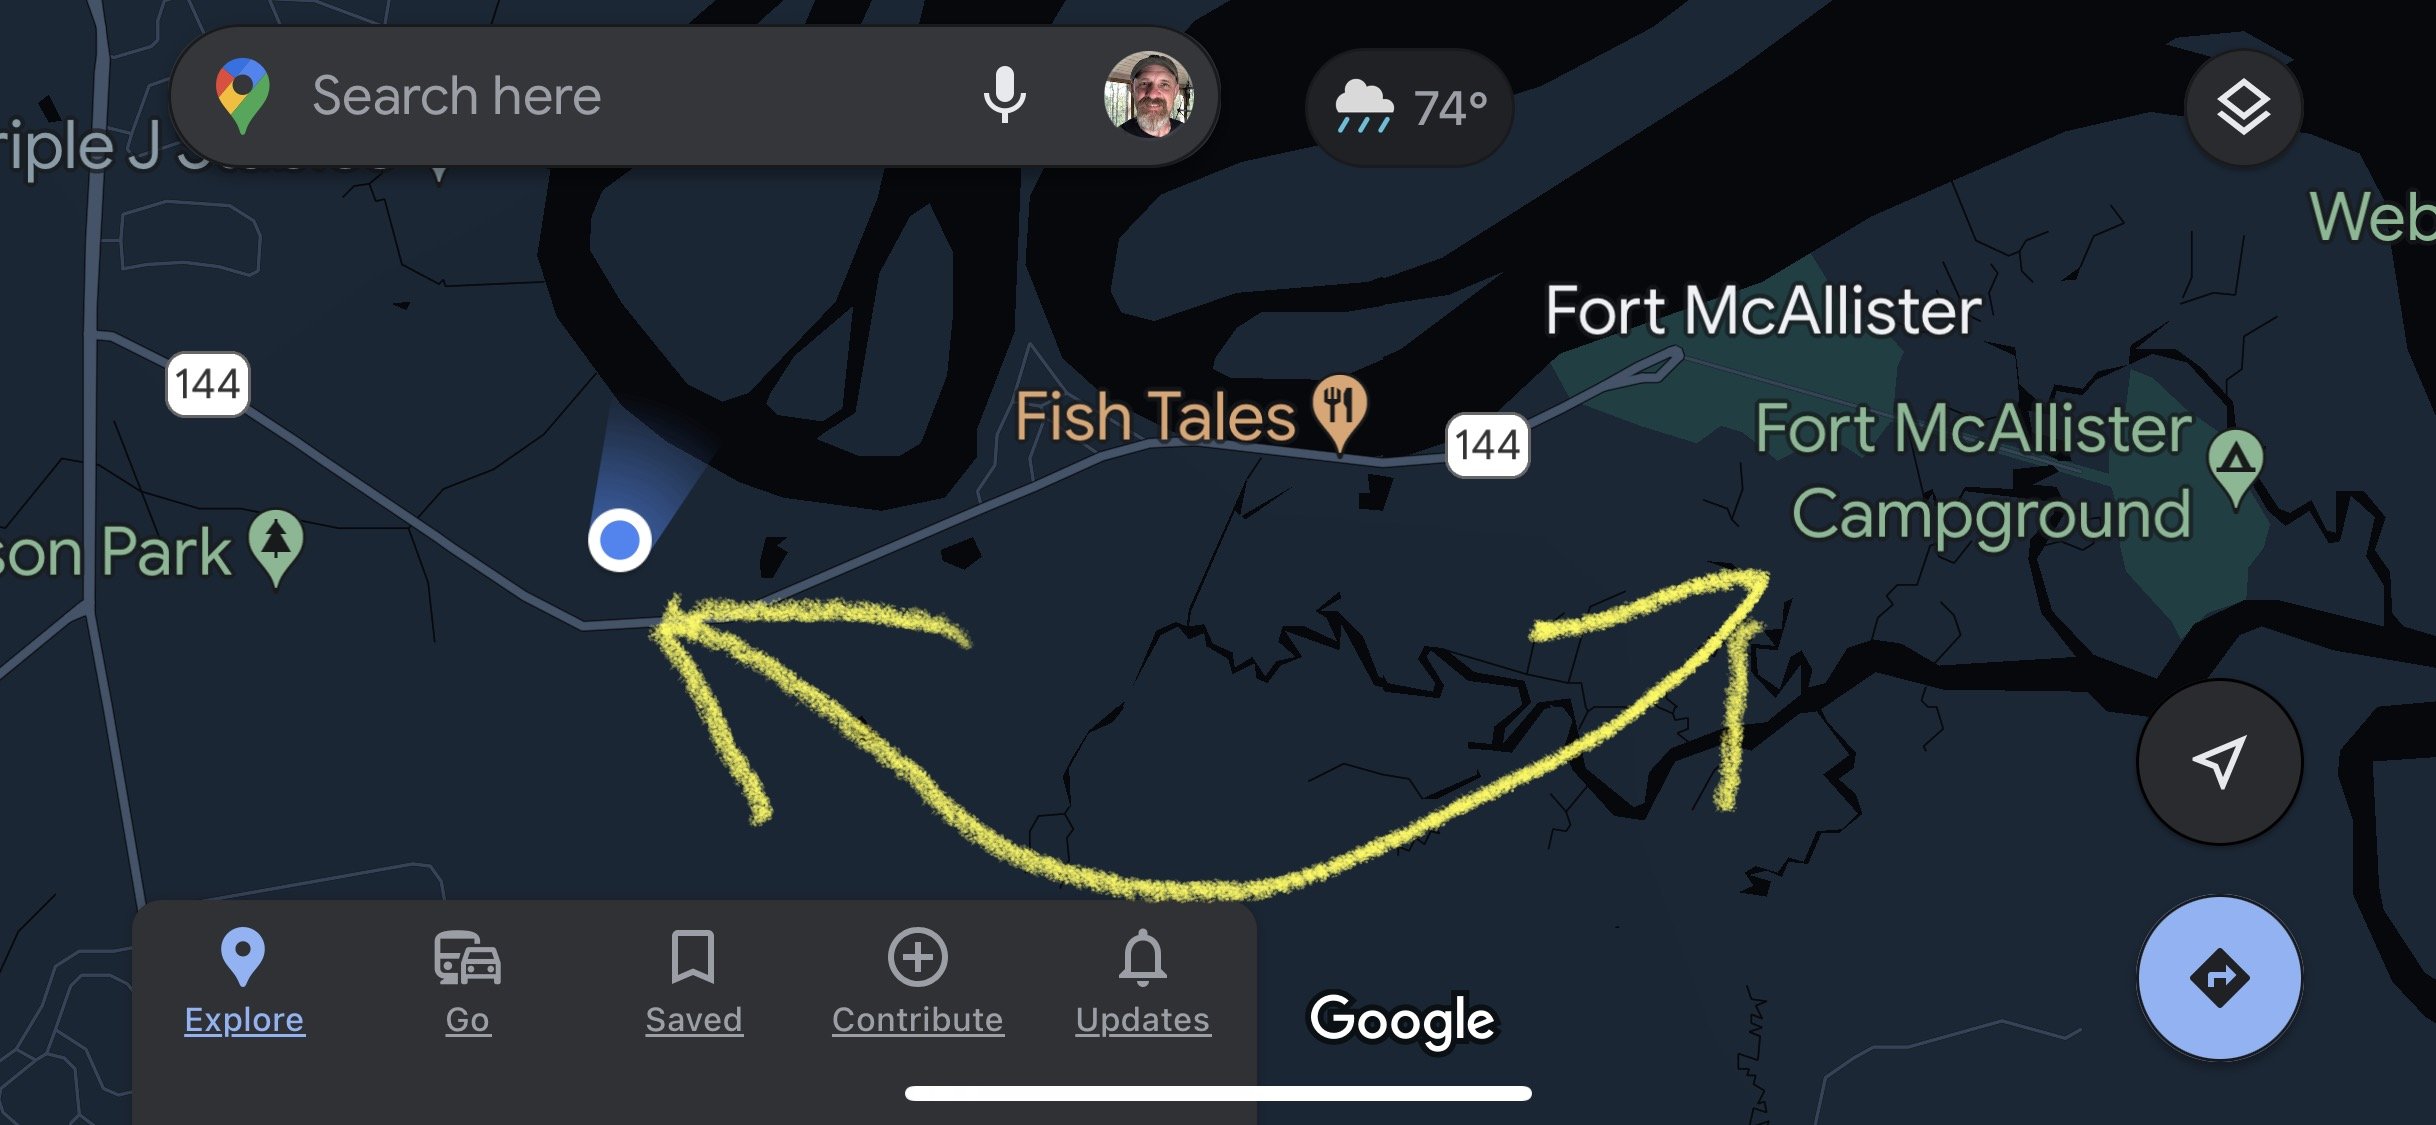
Quickie activation of K-2175 (Fort McAllister State Historic Site)

I got an opportunity to activate a state park a long way from home. I went to Savannah GA on business and we stayed in an airBNB. Well, this BNB was just two short miles from a designated POTA site, how could I let THAT slip through my fingers?!?! Sometimes the best experience is the spontaneous one.

I had brought a couple of radios (TR-35 & IC-705) and antennas (40m EFHW kit and a 20m Hamstick) with me with the hopes of setting up on the beach one day for a little while, so I chose my IC-705 and the 20 meter hamstick antenna as these are the fastest to deploy. I only had an hour or so and wanted to maximize my time on the radio.
Fort McAllister is a tiny park and has a campground in a gated area. It is well kept and has a museum on site. The museum was closed by the time I got done playing on the radio so I can’t speak for it, but it was nice on the outside…
Did I mention that it was raining due to a tropical storm? Yeah, it was. Alot. So to keep the rain out of my BNC connections I fabricated a drip cover to keep the rain at bay for the time I was going to be activating the park.

What your looking at is a bag with both ends cut out from a pack of peanuts. Lol. I slid it over the connector and then taped it on with electrical tape for my temporary seal. It worked long enough to get the activation in without my SWR getting crazy so it must have done the job.
I also pretty much had the whole park to myself since it was raining. This was awesome as nobody was there to trip over my antenna and I could pick the best place to setup.


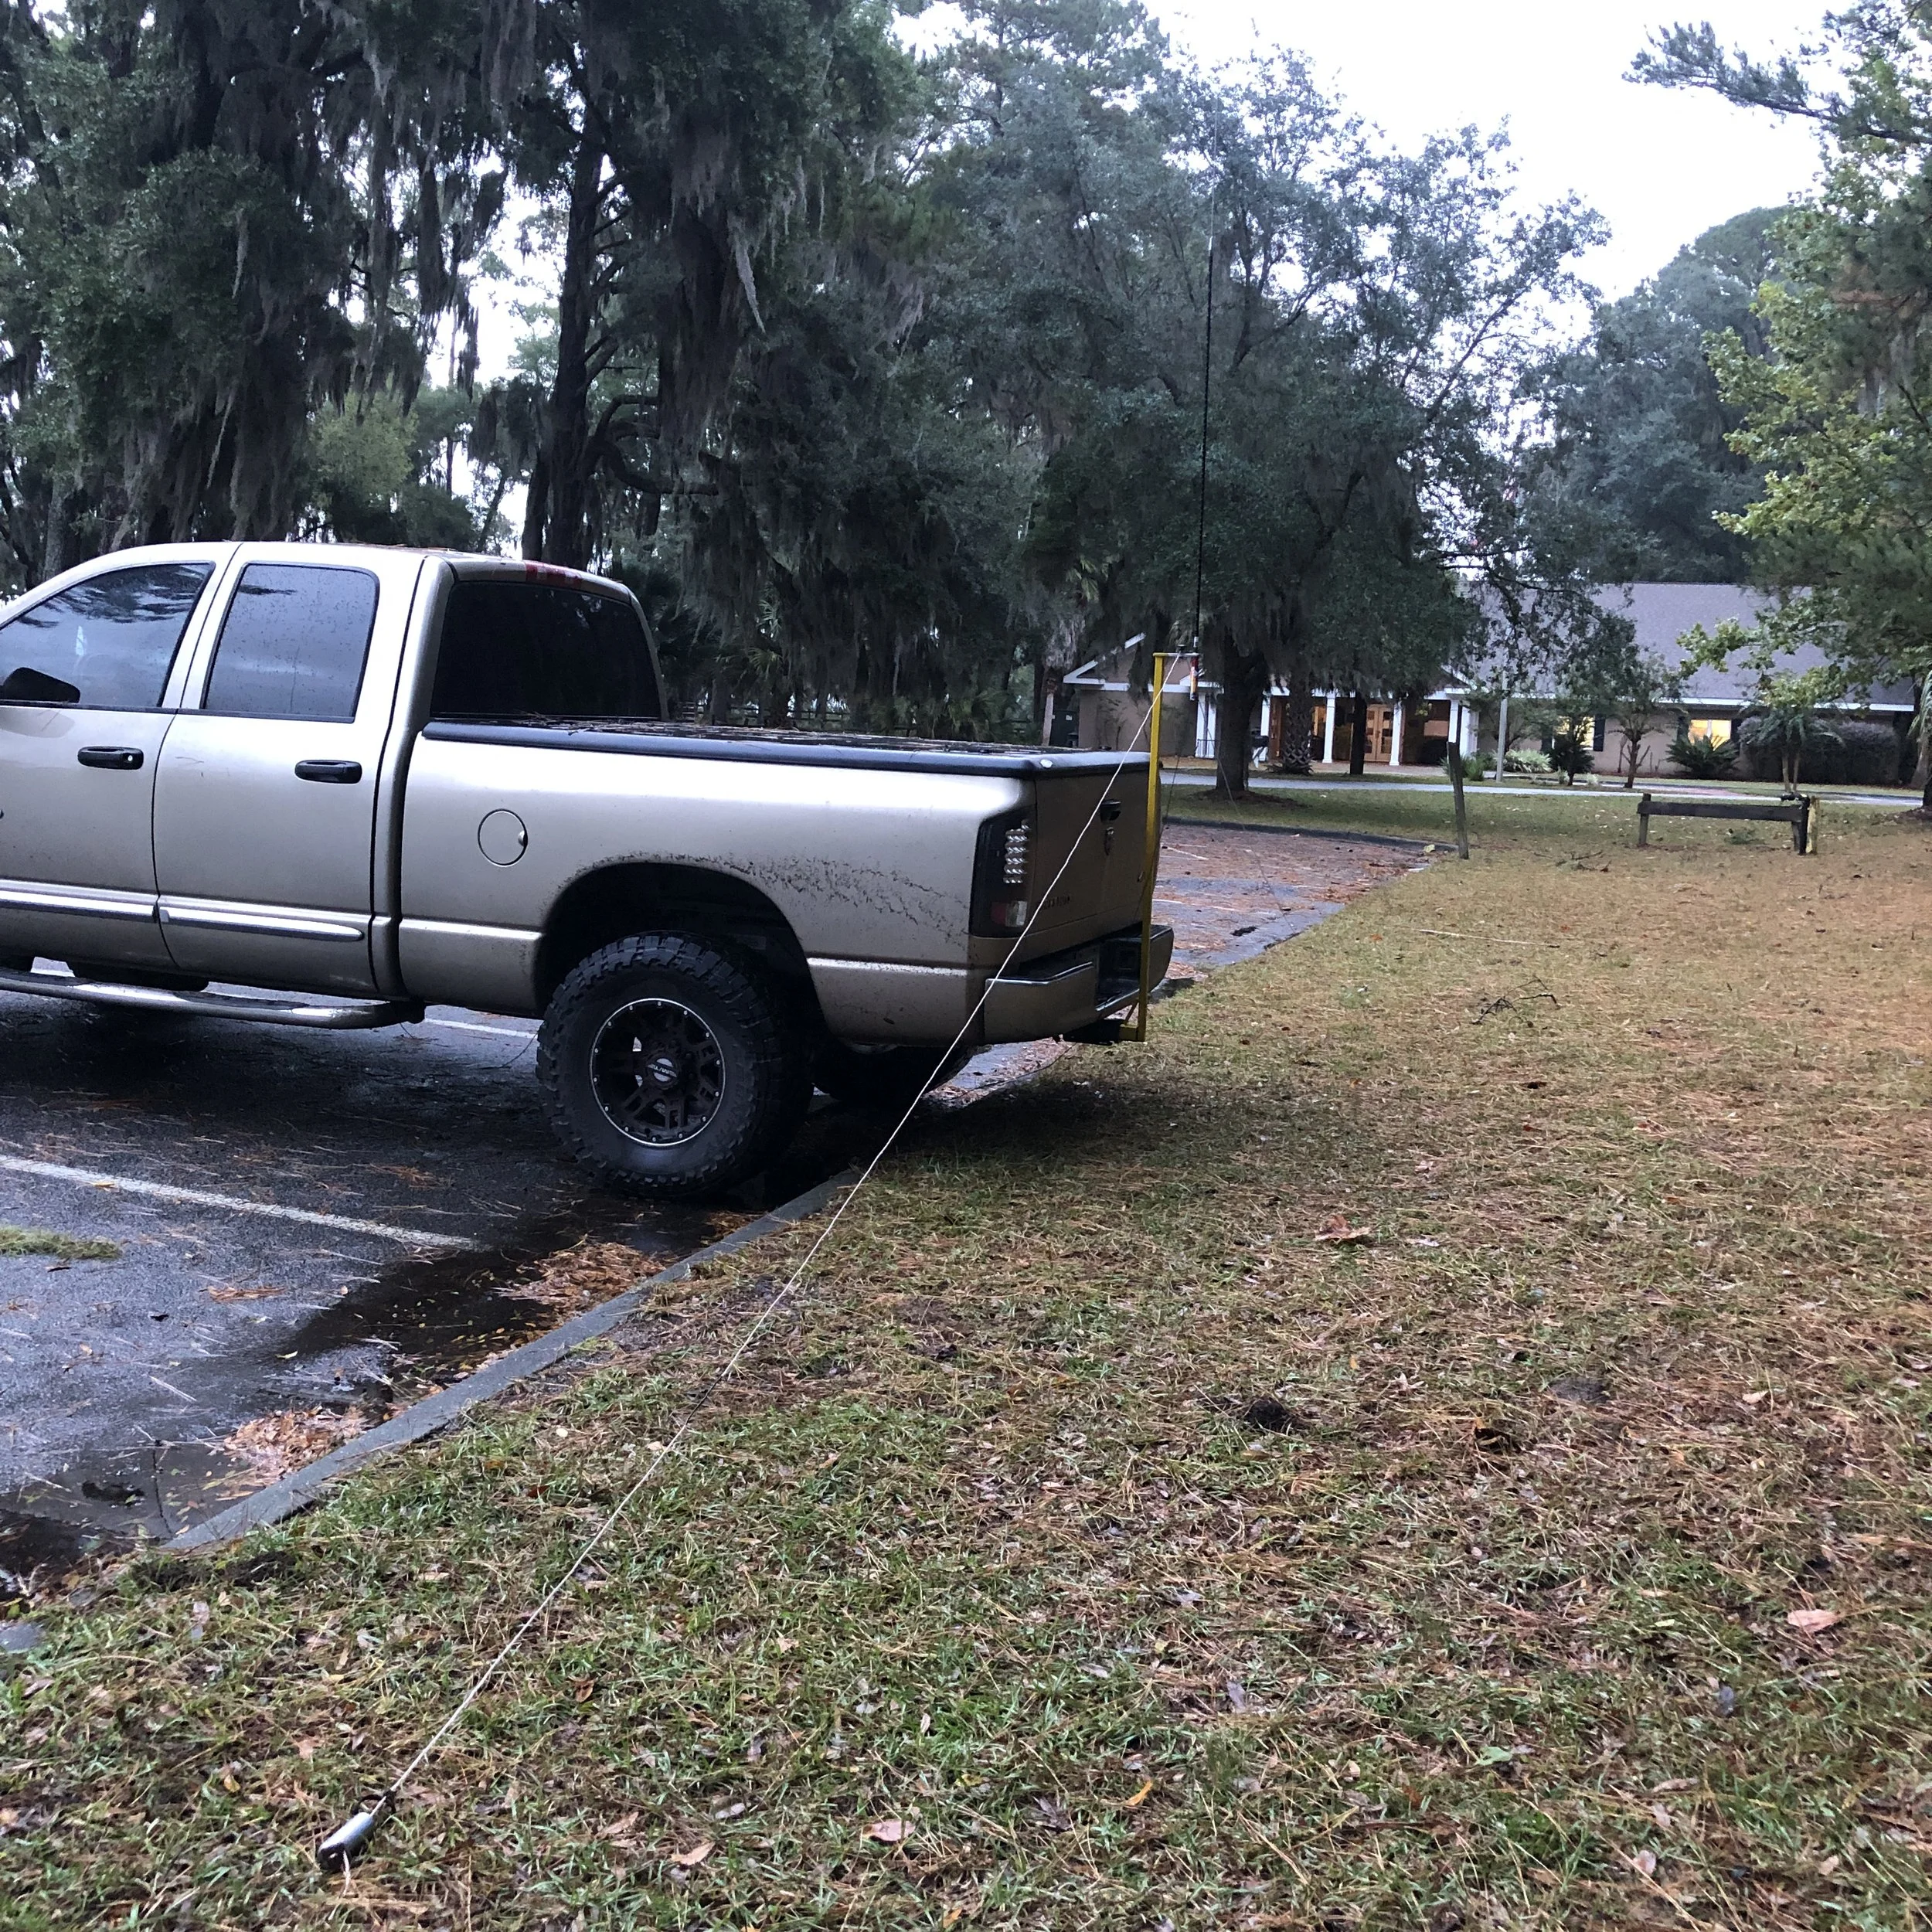
What you see is one of the two counter poise wires held in position by a stainless steel weight at the end. This worked way better than I thought it would to be quite honest. This rig goes up in just a couple of minutes and requires zero tools. Quite literally two minutes and the coax is at the radio. Propagation is good too, just look at the qso chart below. It is on 20 meters with 5watts so there nearest contact is about 425 mile to Nashville TN. If I ever get the 40 meter version put together, I should get some closer stuff, at least that is the idea. Lol.

Although not as compact as the TR-35 I have been using, the IC-705 has a mountain of features that the little TR-35 just doesn’t have. Things like 8 message memories, an SWR meter, a output power meter, and tons of modes the other little rig just can’t do. I also like it since it is super easy to just operate with. It will run on the rear mounted battery but I made up a cigarette lighter cord with Anderson Powerpoles on the other end. I just plug my radio into my truck when operating like this and I am off to the races.

It didn’t take long to get a bite either. I started the memory keyer calling cq while I went to enter a spot on the POTA page and immediately got a call back way even before I got the spot up on the site! That was when I knew it was gonna be a good day. I logged 37 QSOs in, right at, 40 minutes, which is awesome! I was basically at a good stopping point when I cleared all the calls and the rain let up and I had made an official activation so I went QRT and packed up to go eat supper.
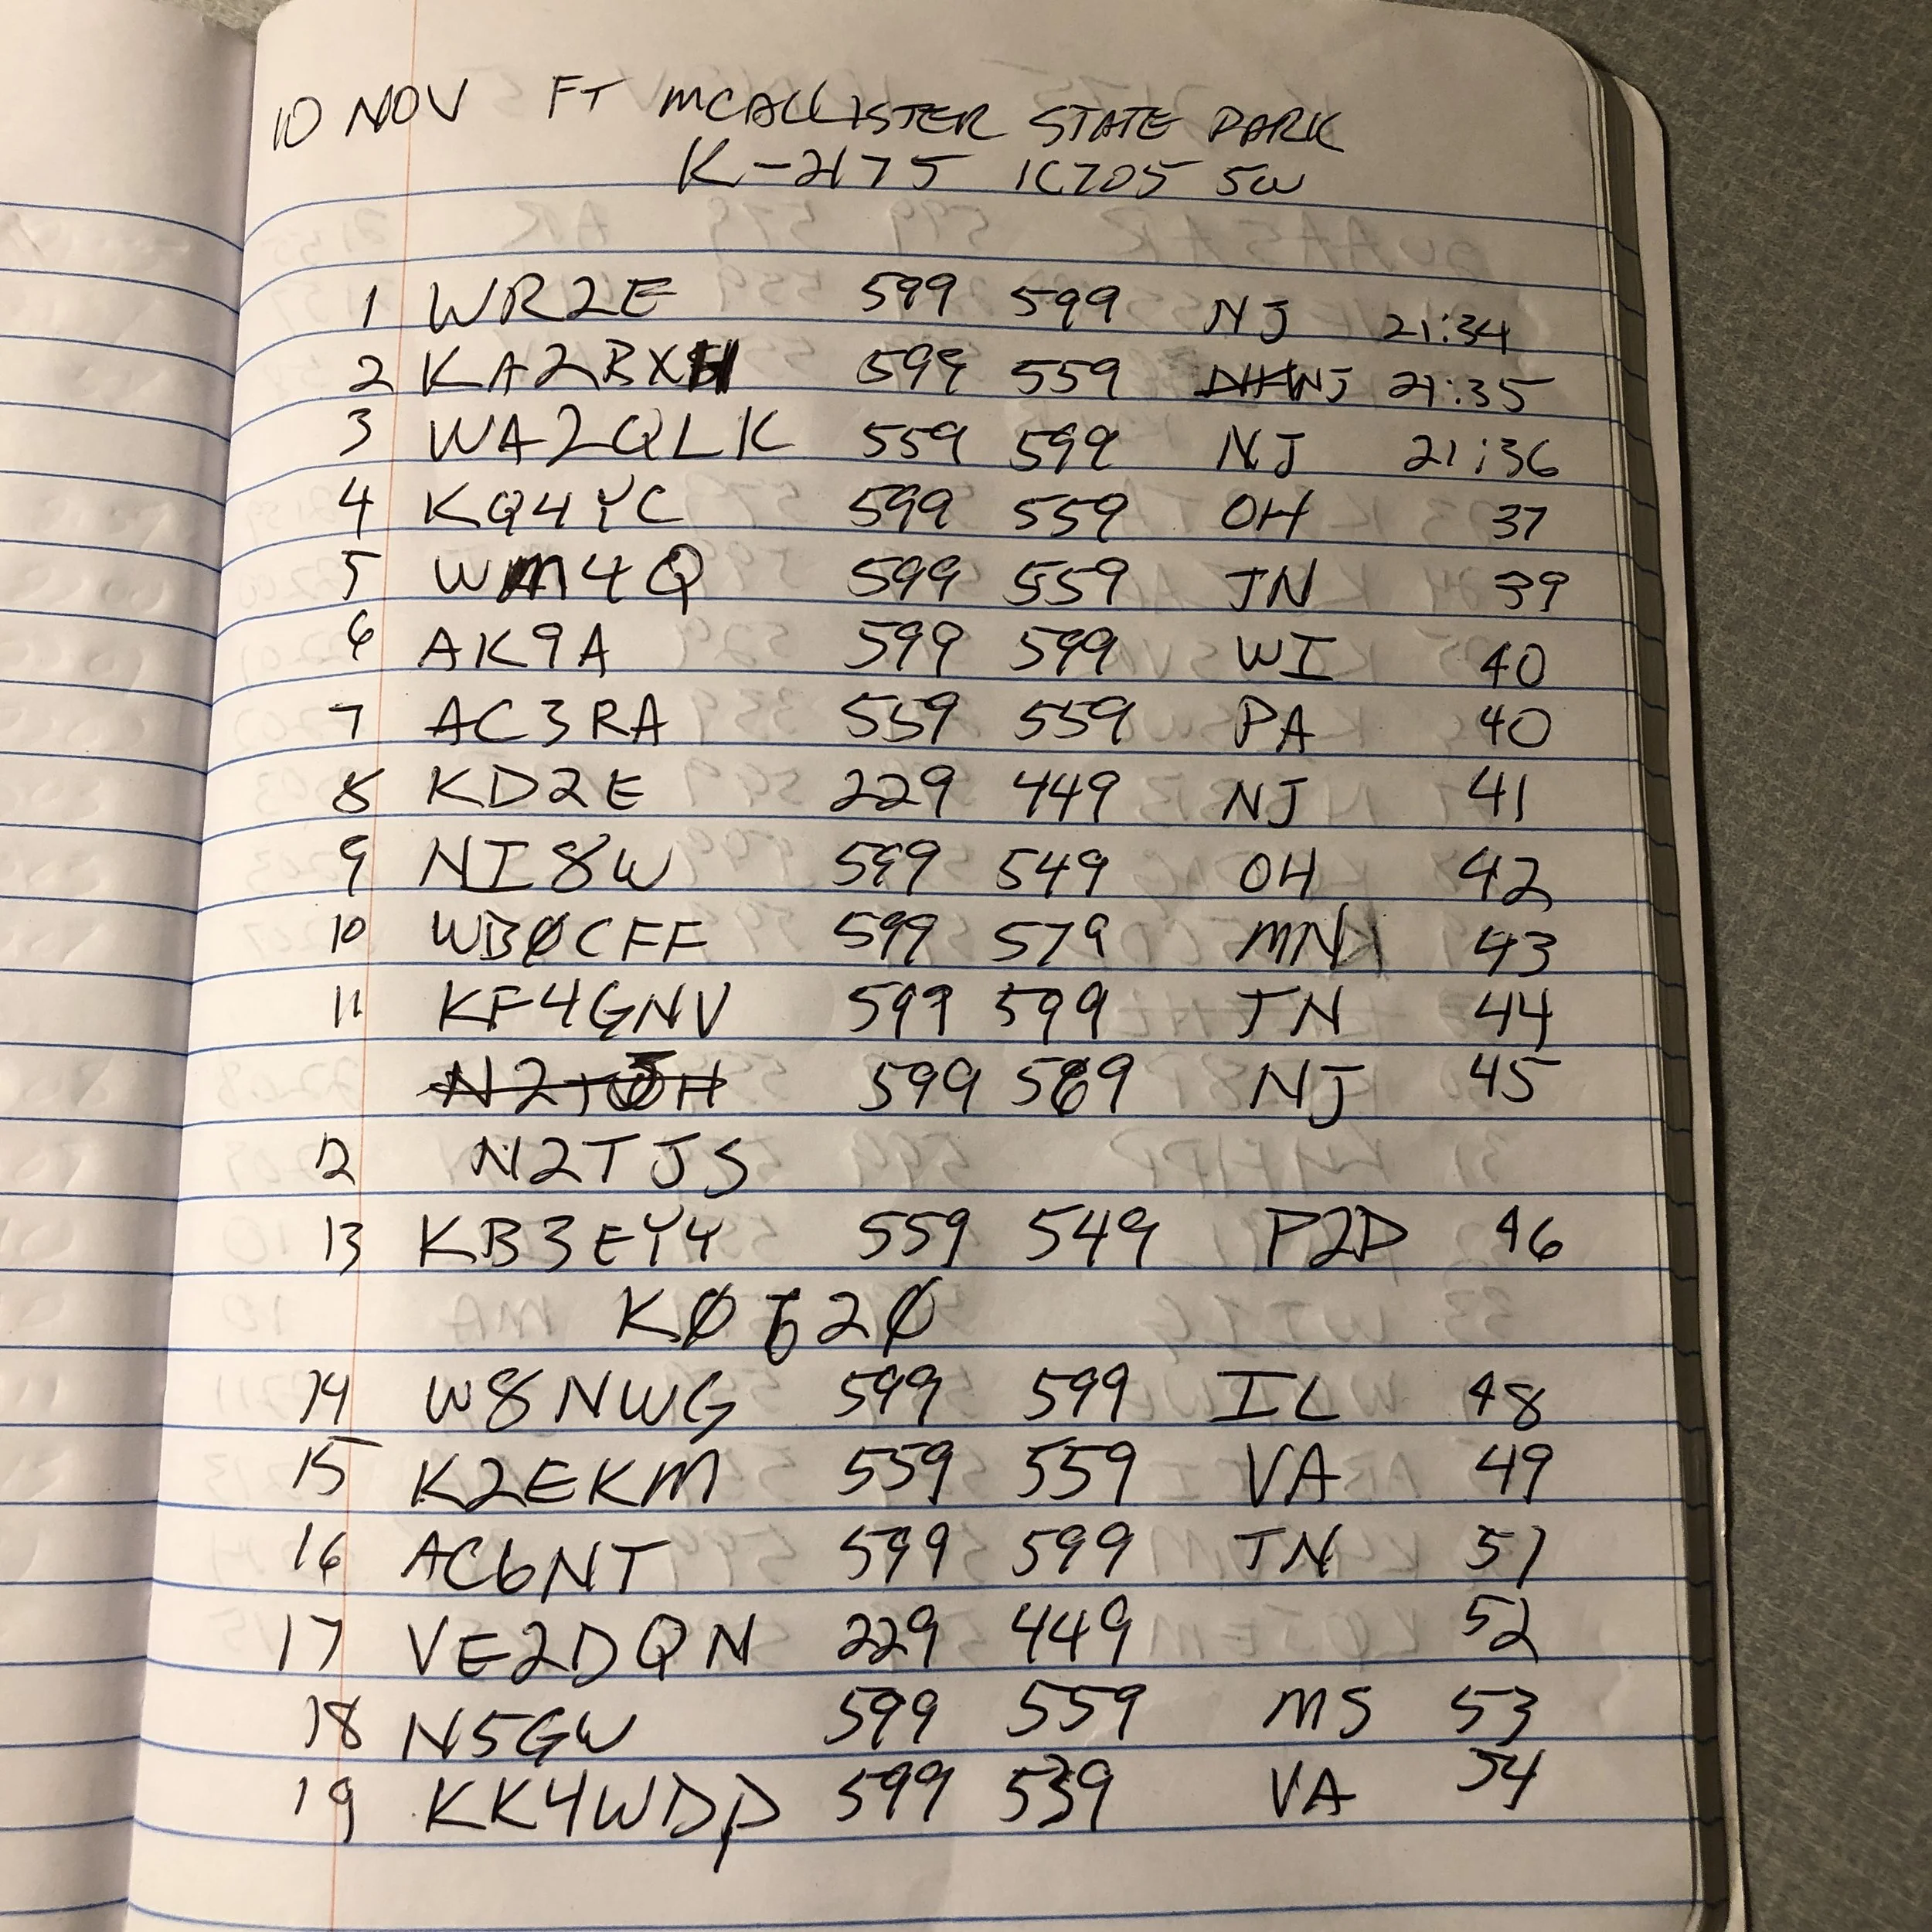

Two pages of QSOs is a good day for me. Thank you to all the hunters out there for listening for my CQ. It was a good outing because of you.
72
WK4DS
David
Simplifying antenna tuning with a manual tuner and a nano VNA on location.
Please note: This is not an instructional presentation on how to use the nanoVNA to tune your antenna, but rather a simple primer on how I deploy mine in the field and why. There are tons of videos on YouTube that will show you how to deploy the VNA in a tuning operation and at some point I will probably do that here, but I wanted to share the idea of USING the VNA to tune the antenna WITH the antenna tuner prior to hitting the transmit key and protecting your radio transmitter finals. With that out of the way, let’s dig in!
Something I have always hated doing is the whole tuning operation and transmitting while I did it. Just screams of poor operating practices to me for some reason. I know it is needed though, so I do it… Till now. You see, some radios don’t have an internal antenna tuner built into them, like my TenTec Argonaut 5. This radio is a joy to use but you either need resonant antennas or a tuner to match the radio to the radiator.
Enter the nano VNA (Vector Network Analyzer)… I found out about these little devices from my friends Aaron and Roger and finally got one for myself. Back in the day, about 15 years ago, these little pocketable widgets would set you back about 20,000$ and were the size of a suitcase! Now, technology has caught up and these things are very affordable (about 50$ US) and are even battery powered so you can take them to the field easily.
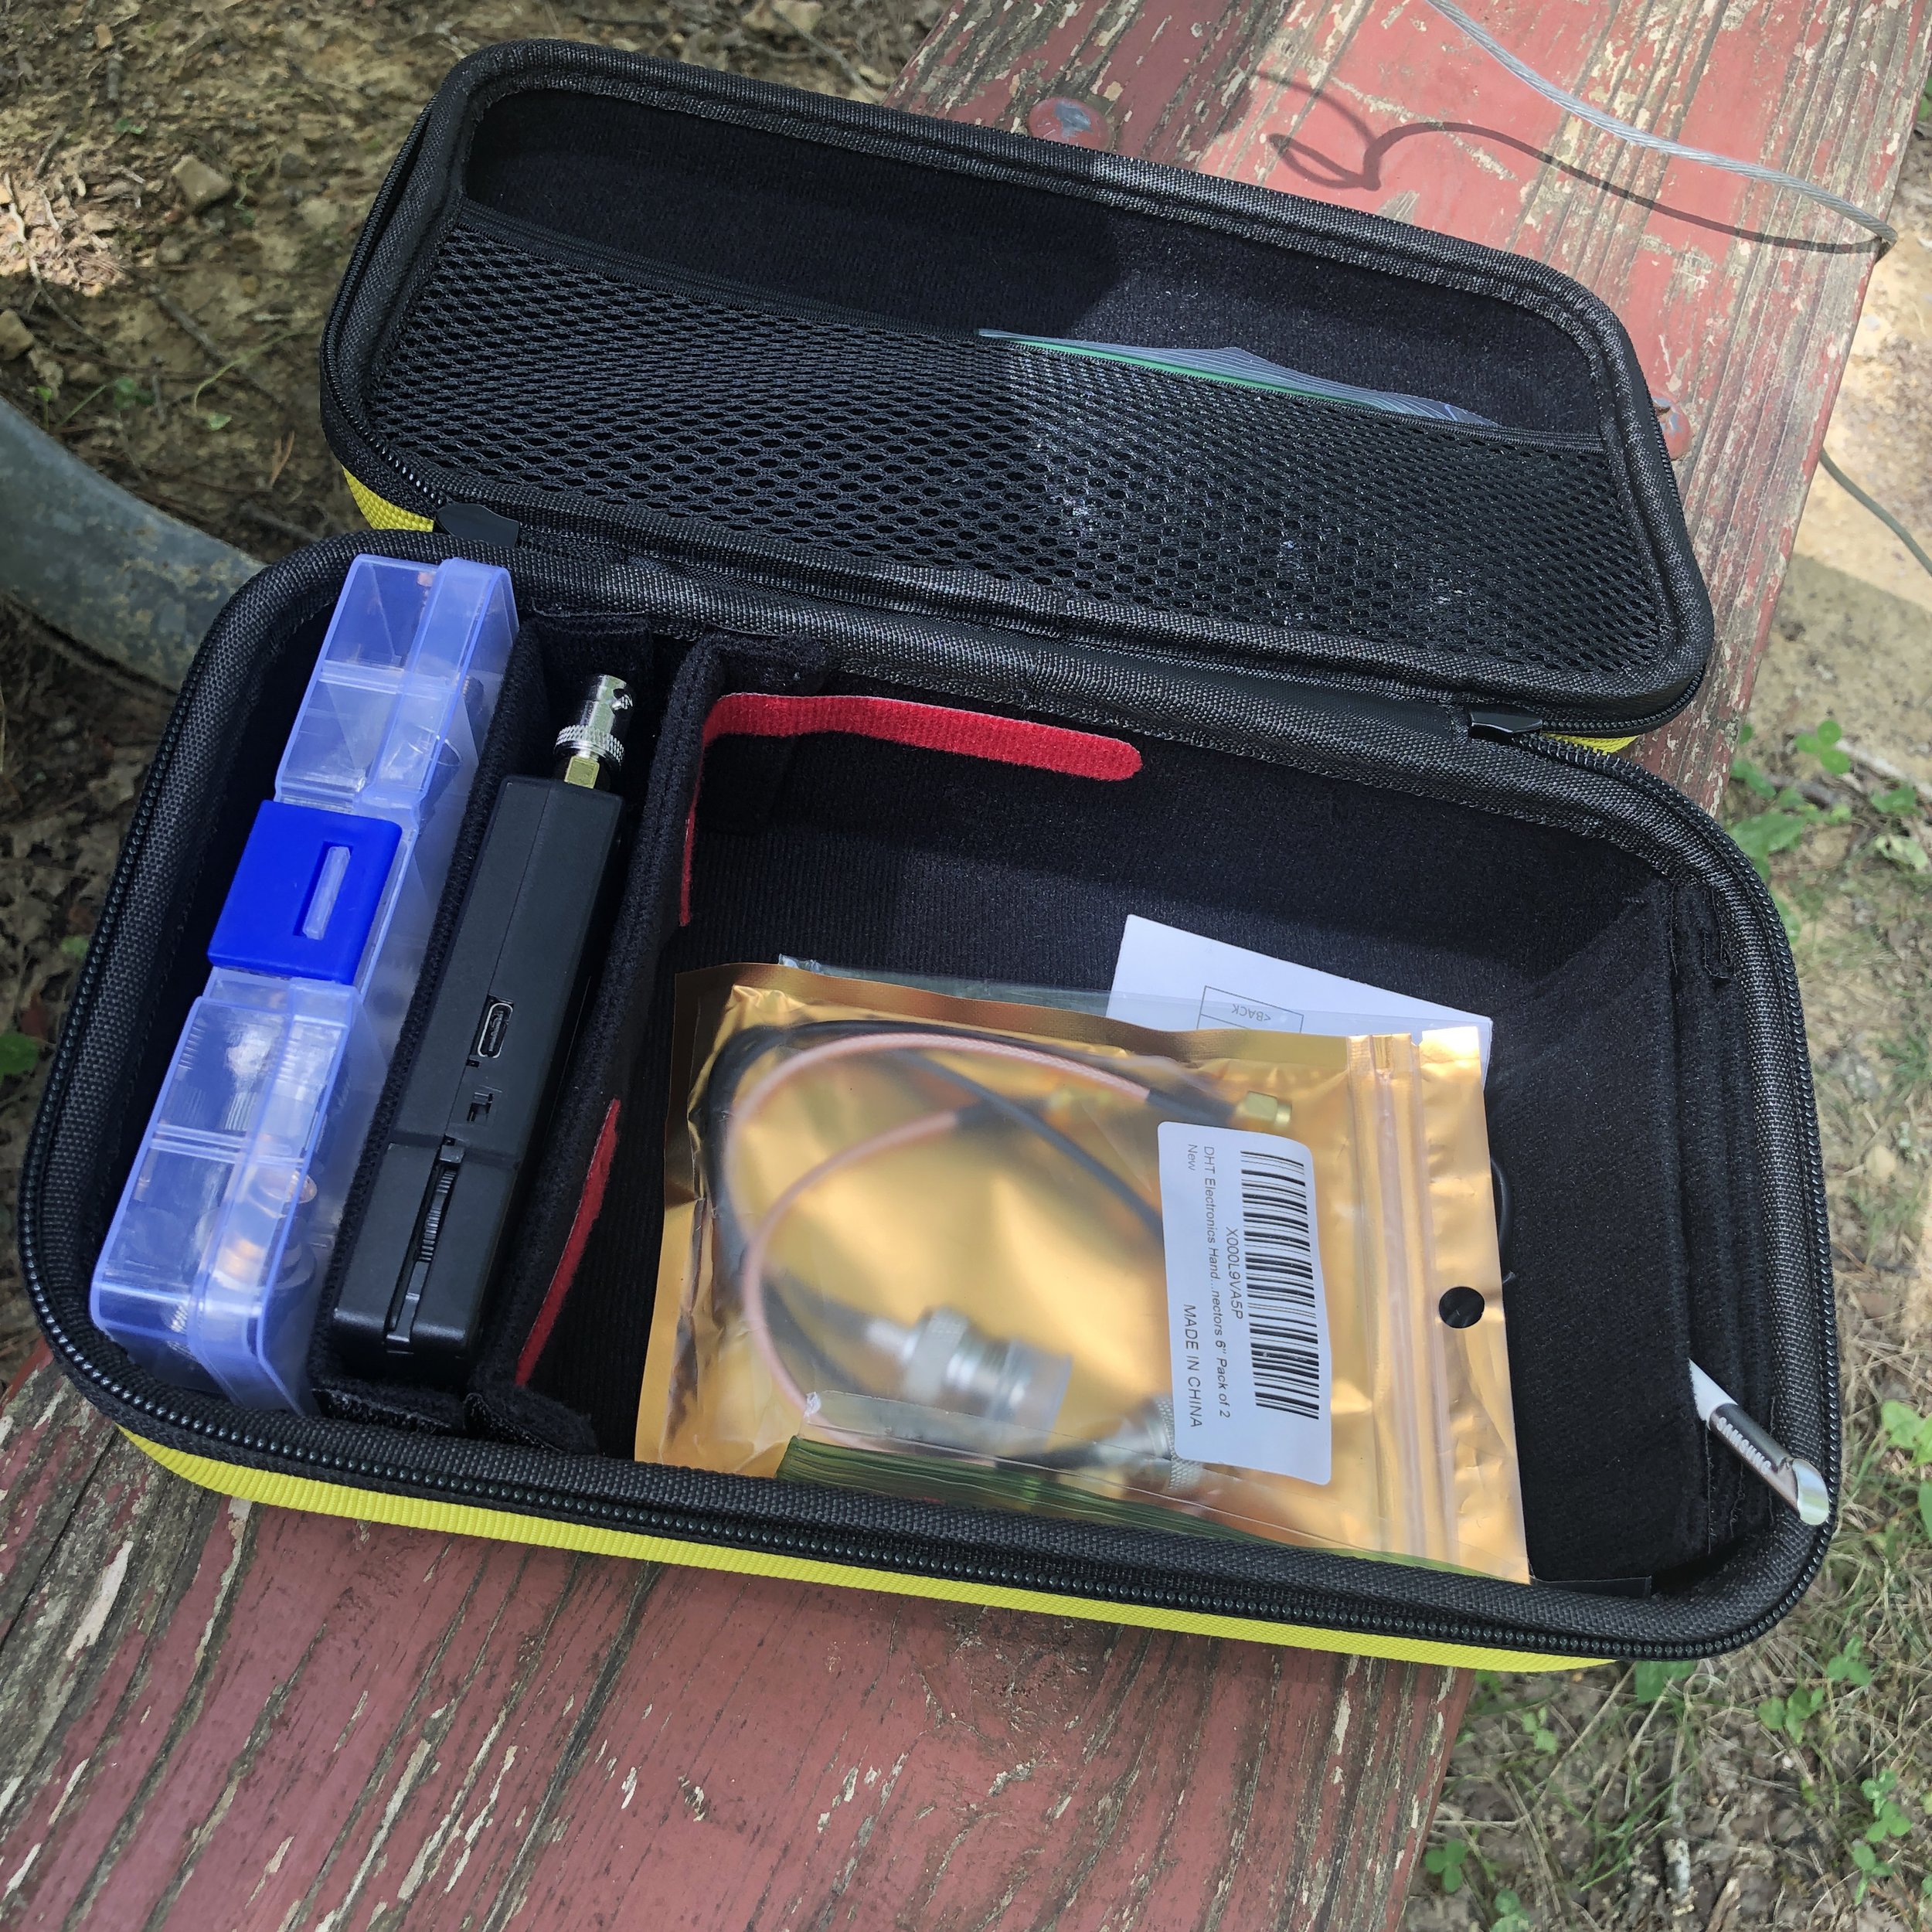
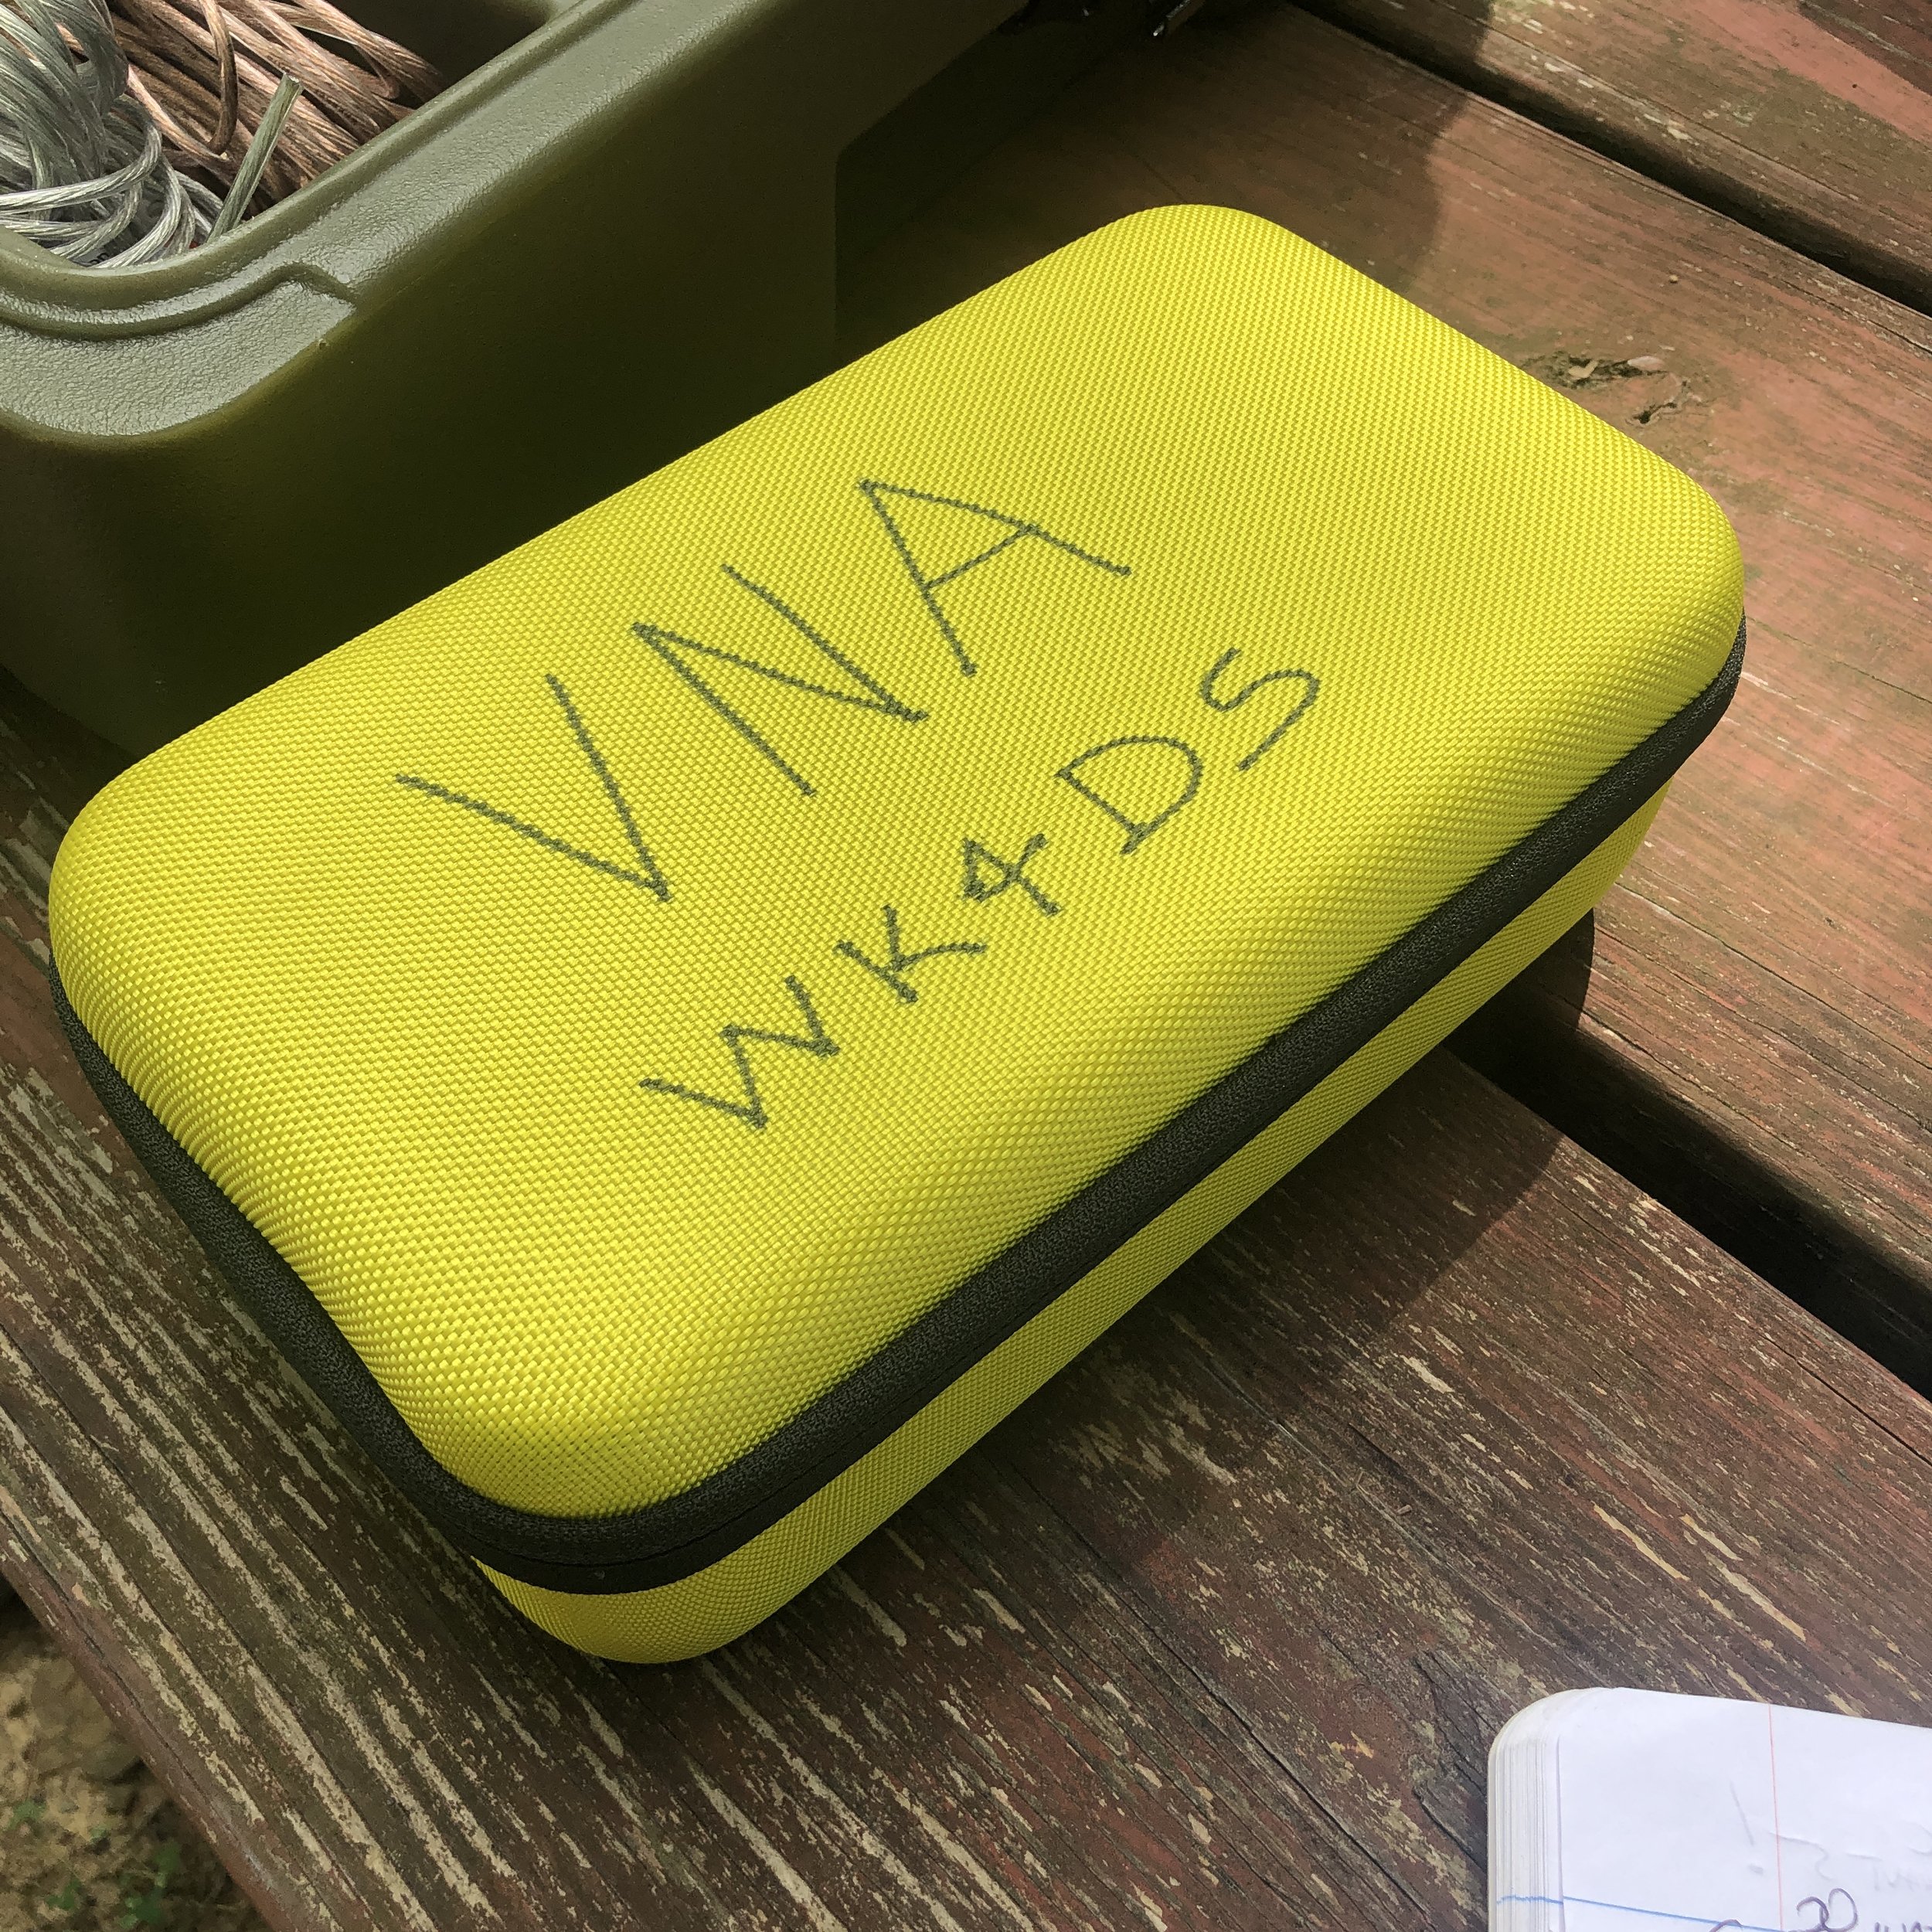
I built this kit for mine with a divider box of adapters (far left in picture), then the nanoVNA is the black device next to that, then the large bin is for cables and such and lastly I have a stylus as it is easier for me to use that than to use the guitar pick looking device that comes with it. This one is recovered from a old Samsung Galaxy Note. I got the case at the Huntsville Hamfest from GigaParts if you want one of them, they probably have them on their website, but I am not sure…
This thing can do all sorts of measurements, but the most often used by me is antenna tuning. If you want to know more about what it can be used for, just search YouTube for nanoVNA and you will get an idea.

In this photo you can see a lot of data being presented on the nanoVNA, such as the frequency range I am testing, two different measurements, one on a smith chart and one on a linear line chart of SWR versus frequency. What the smith chart shows me is a graphical representation of whether the load (antenna) is capacitive or inductive, and what the impendence is at the selected frequency as well. The line graph shows SWR plotted versus frequency and this allows me to maximize the tune for a particular frequency visually, all without risking damage to my radio amplifier section from mismatched impedances or high SWR. The nanoVNA does have a signal generator in it so it is technically transmitting, but it is VERY low energy.

Manual tuners in the past, such as this vintage MFJ 941 worked really well, but are slow and you only get information for the exact frequency you are tuning at (which usually is not the frequency that you are going to use as you dont want to tune up on top of the person calling CQ). This meant long periods of on air transmitting a carrier tone while adjusting the controls on the tuner to add capacitance or inductance to the the antenna to match as best you can so as not to damage the radio.

Radios like this old Ten Tec Argonaut 5 do not have automatic internal antenna tuners in them and even a lot of newer radios don’t have these tuners in them to be honest. These radios either need a tuned antenna that has been built for specific frequencies or a tuner to match the non-resonant antenna to the radio. The nanoVNA allows the operator to tune easily and this happens much faster than on air tuning. Tuning this way also protects the radio in the process. What I really like is that I can see if the bandwidth of good matching SWR to the radio so I know immediately that I can tune the VFO around and not have to retune the antenna while I am on one certain band. Some antennas and some bands don’t play well together and you can see this too… graphically. This allows you to know that on those particular bands, you will need to tune when you leave the safe zone of swr. It is so much more powerful to tune your antenna with this little device.

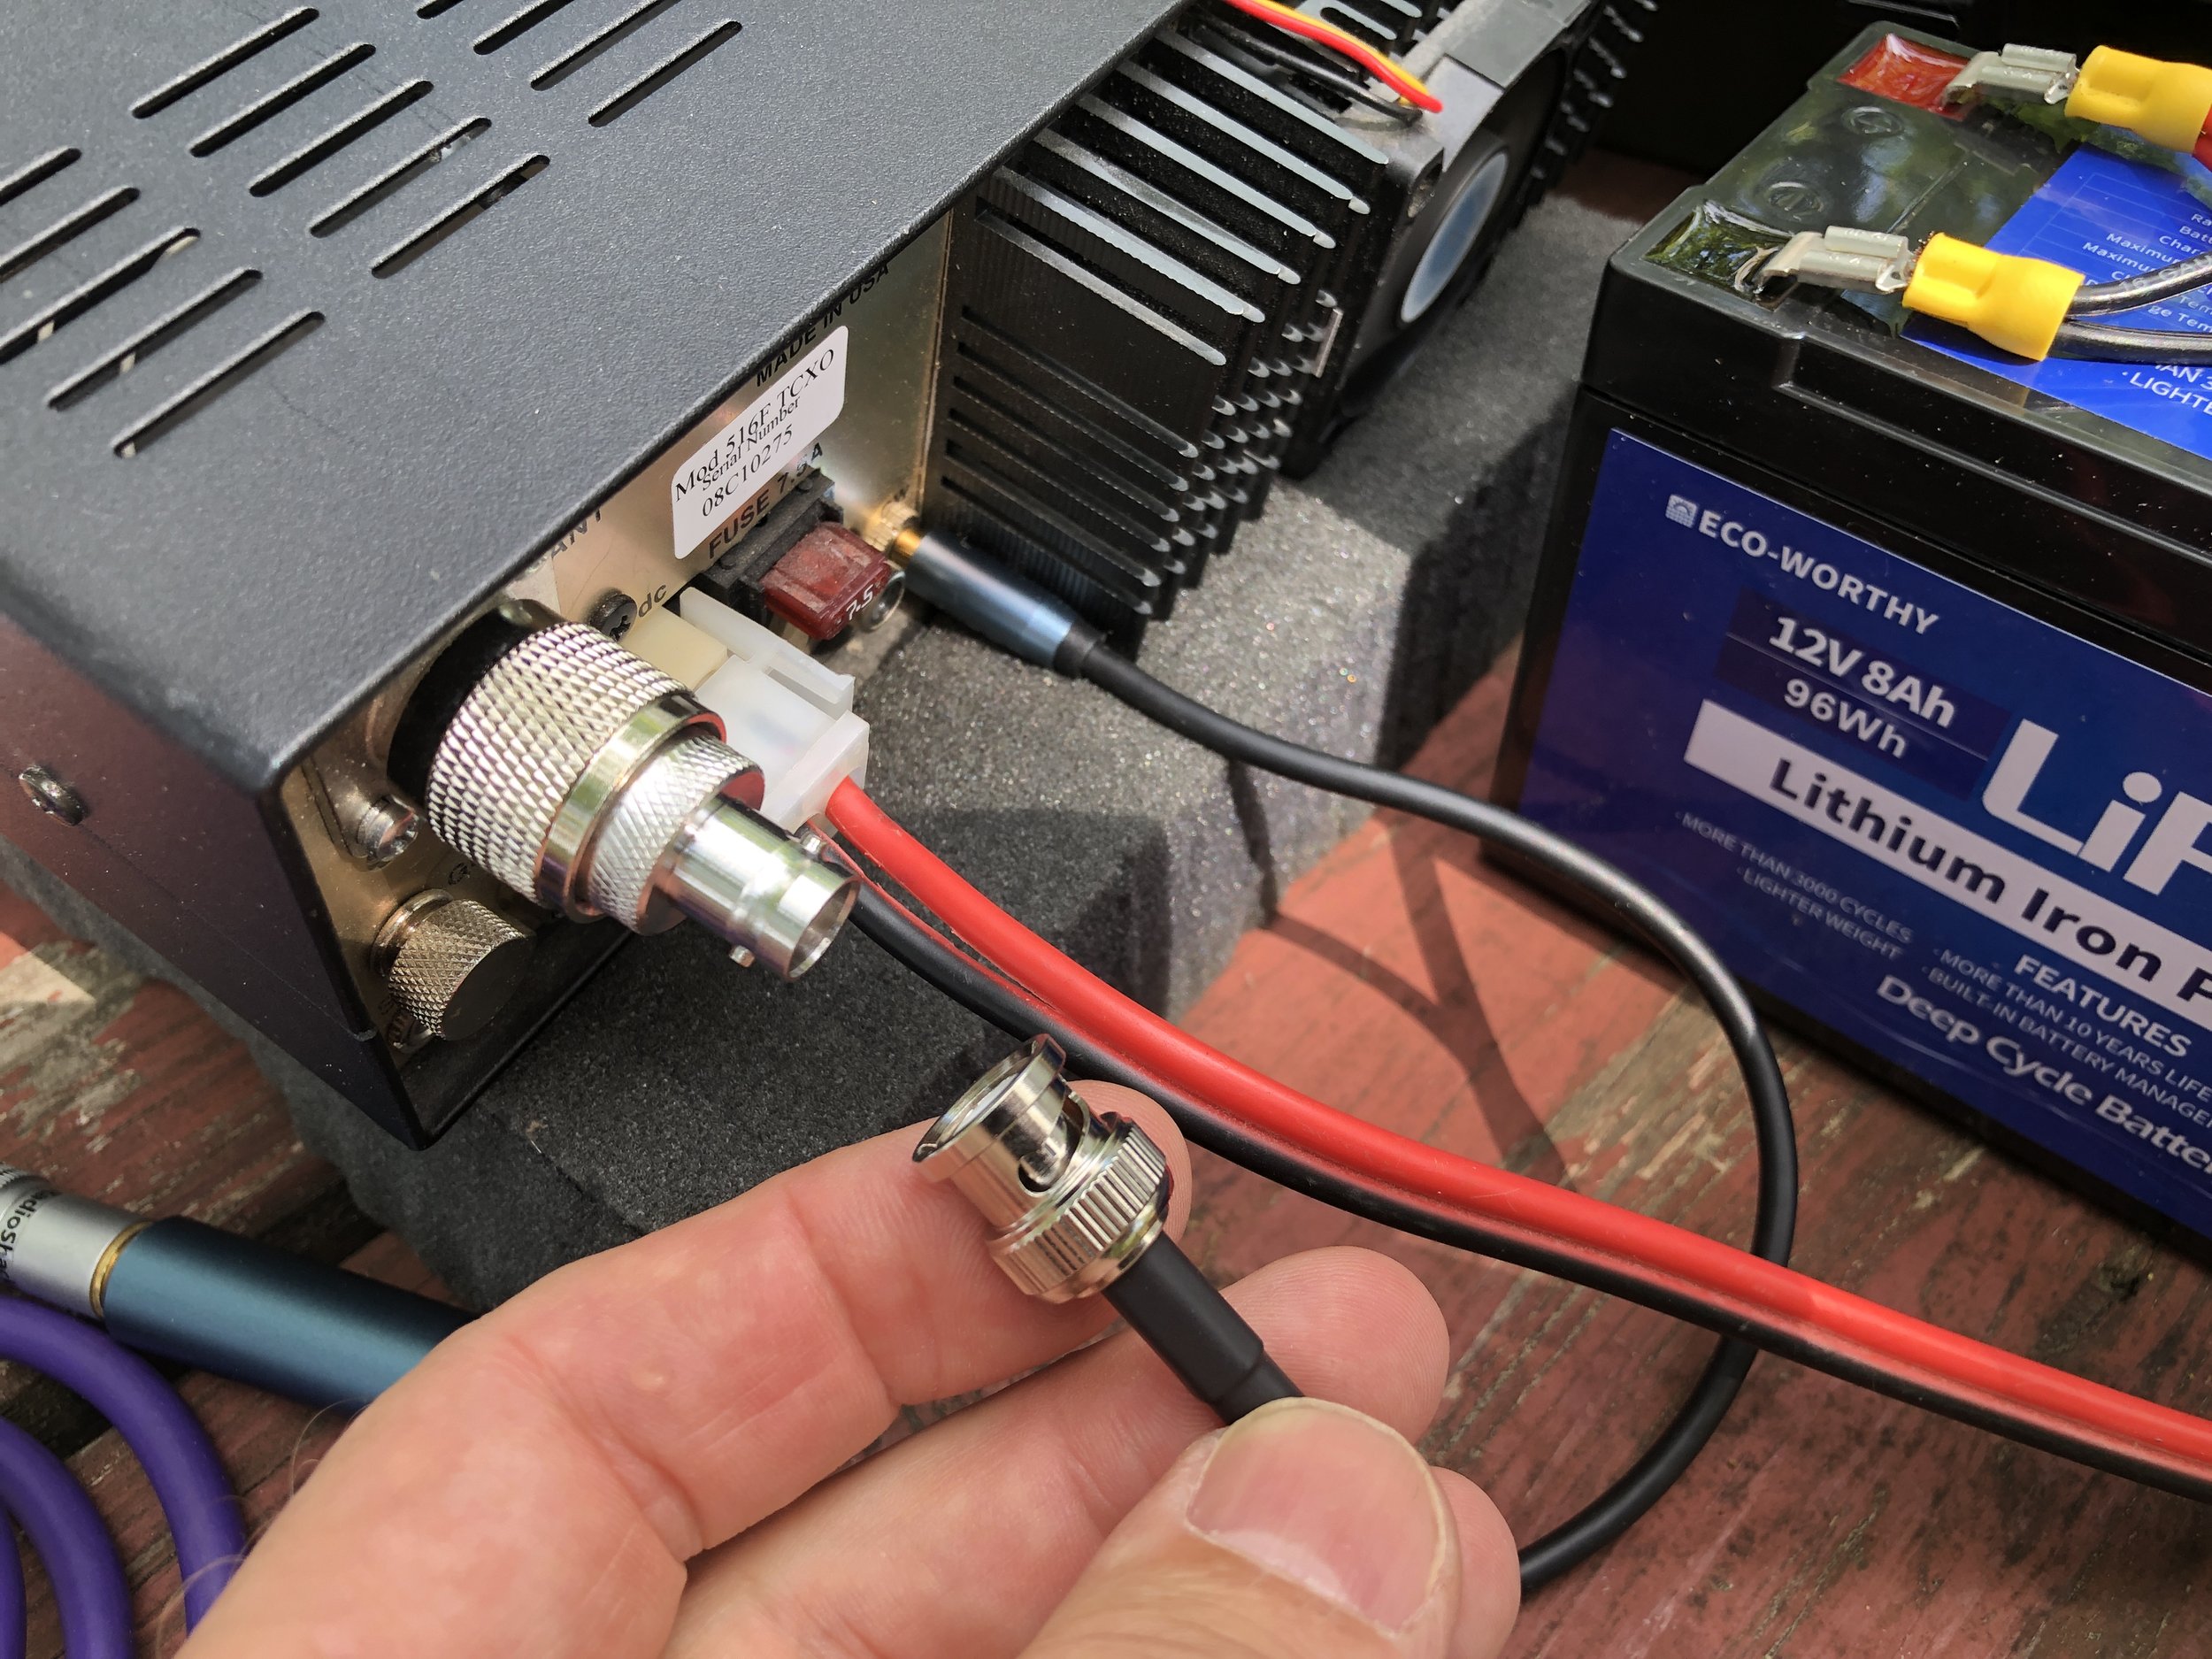
This is the setup I use to be able to easily connect the nanoVNA to the antenna while out on location. The radio comes equipped with SO239 connectors so the antenna has to be screwed on to the radio with a coax cable normally. The modification I made, to make this process super fast, is to add a PL 259 to male BNC adapter. Then I add a SMA to BNC to the nanoVNA and now I can simply and quickly remove the coax from the radio and connect it to the VNA for analysis.
I also made a simple note page to get me close when i go from one band to the other. This way the time to get back to a tight tune is even faster. I also made some notes about how many radials and such. I keep these notes in the case with the radio and tuner.

This has been my biggest blog to date and I really liked writing this one for you. If you have any questions, just drop them in the comments below and we will try to get you an answer as soon as possible. If you think tuning your antenna like this is a good idea, you can find these on Amazon with a simple search. Also, they really are inexpensive. You can also get all of the adapters or accessories on amazon as well. It is all there, all the training you will need can easily be found on YouTube as well, plus some… Now go get on the air!
72
David
WK4DS
My new travel CW key failed on its third POTA outing...

This key was supposed to be my solution to poor performing keys…well, today I was 16 QSOs into a POTA activation and the little key suddenly started “ditting” nonstop. I power down the rig, take a look at the key and find the “dit” lever is pushed over against the contact arm on the key.
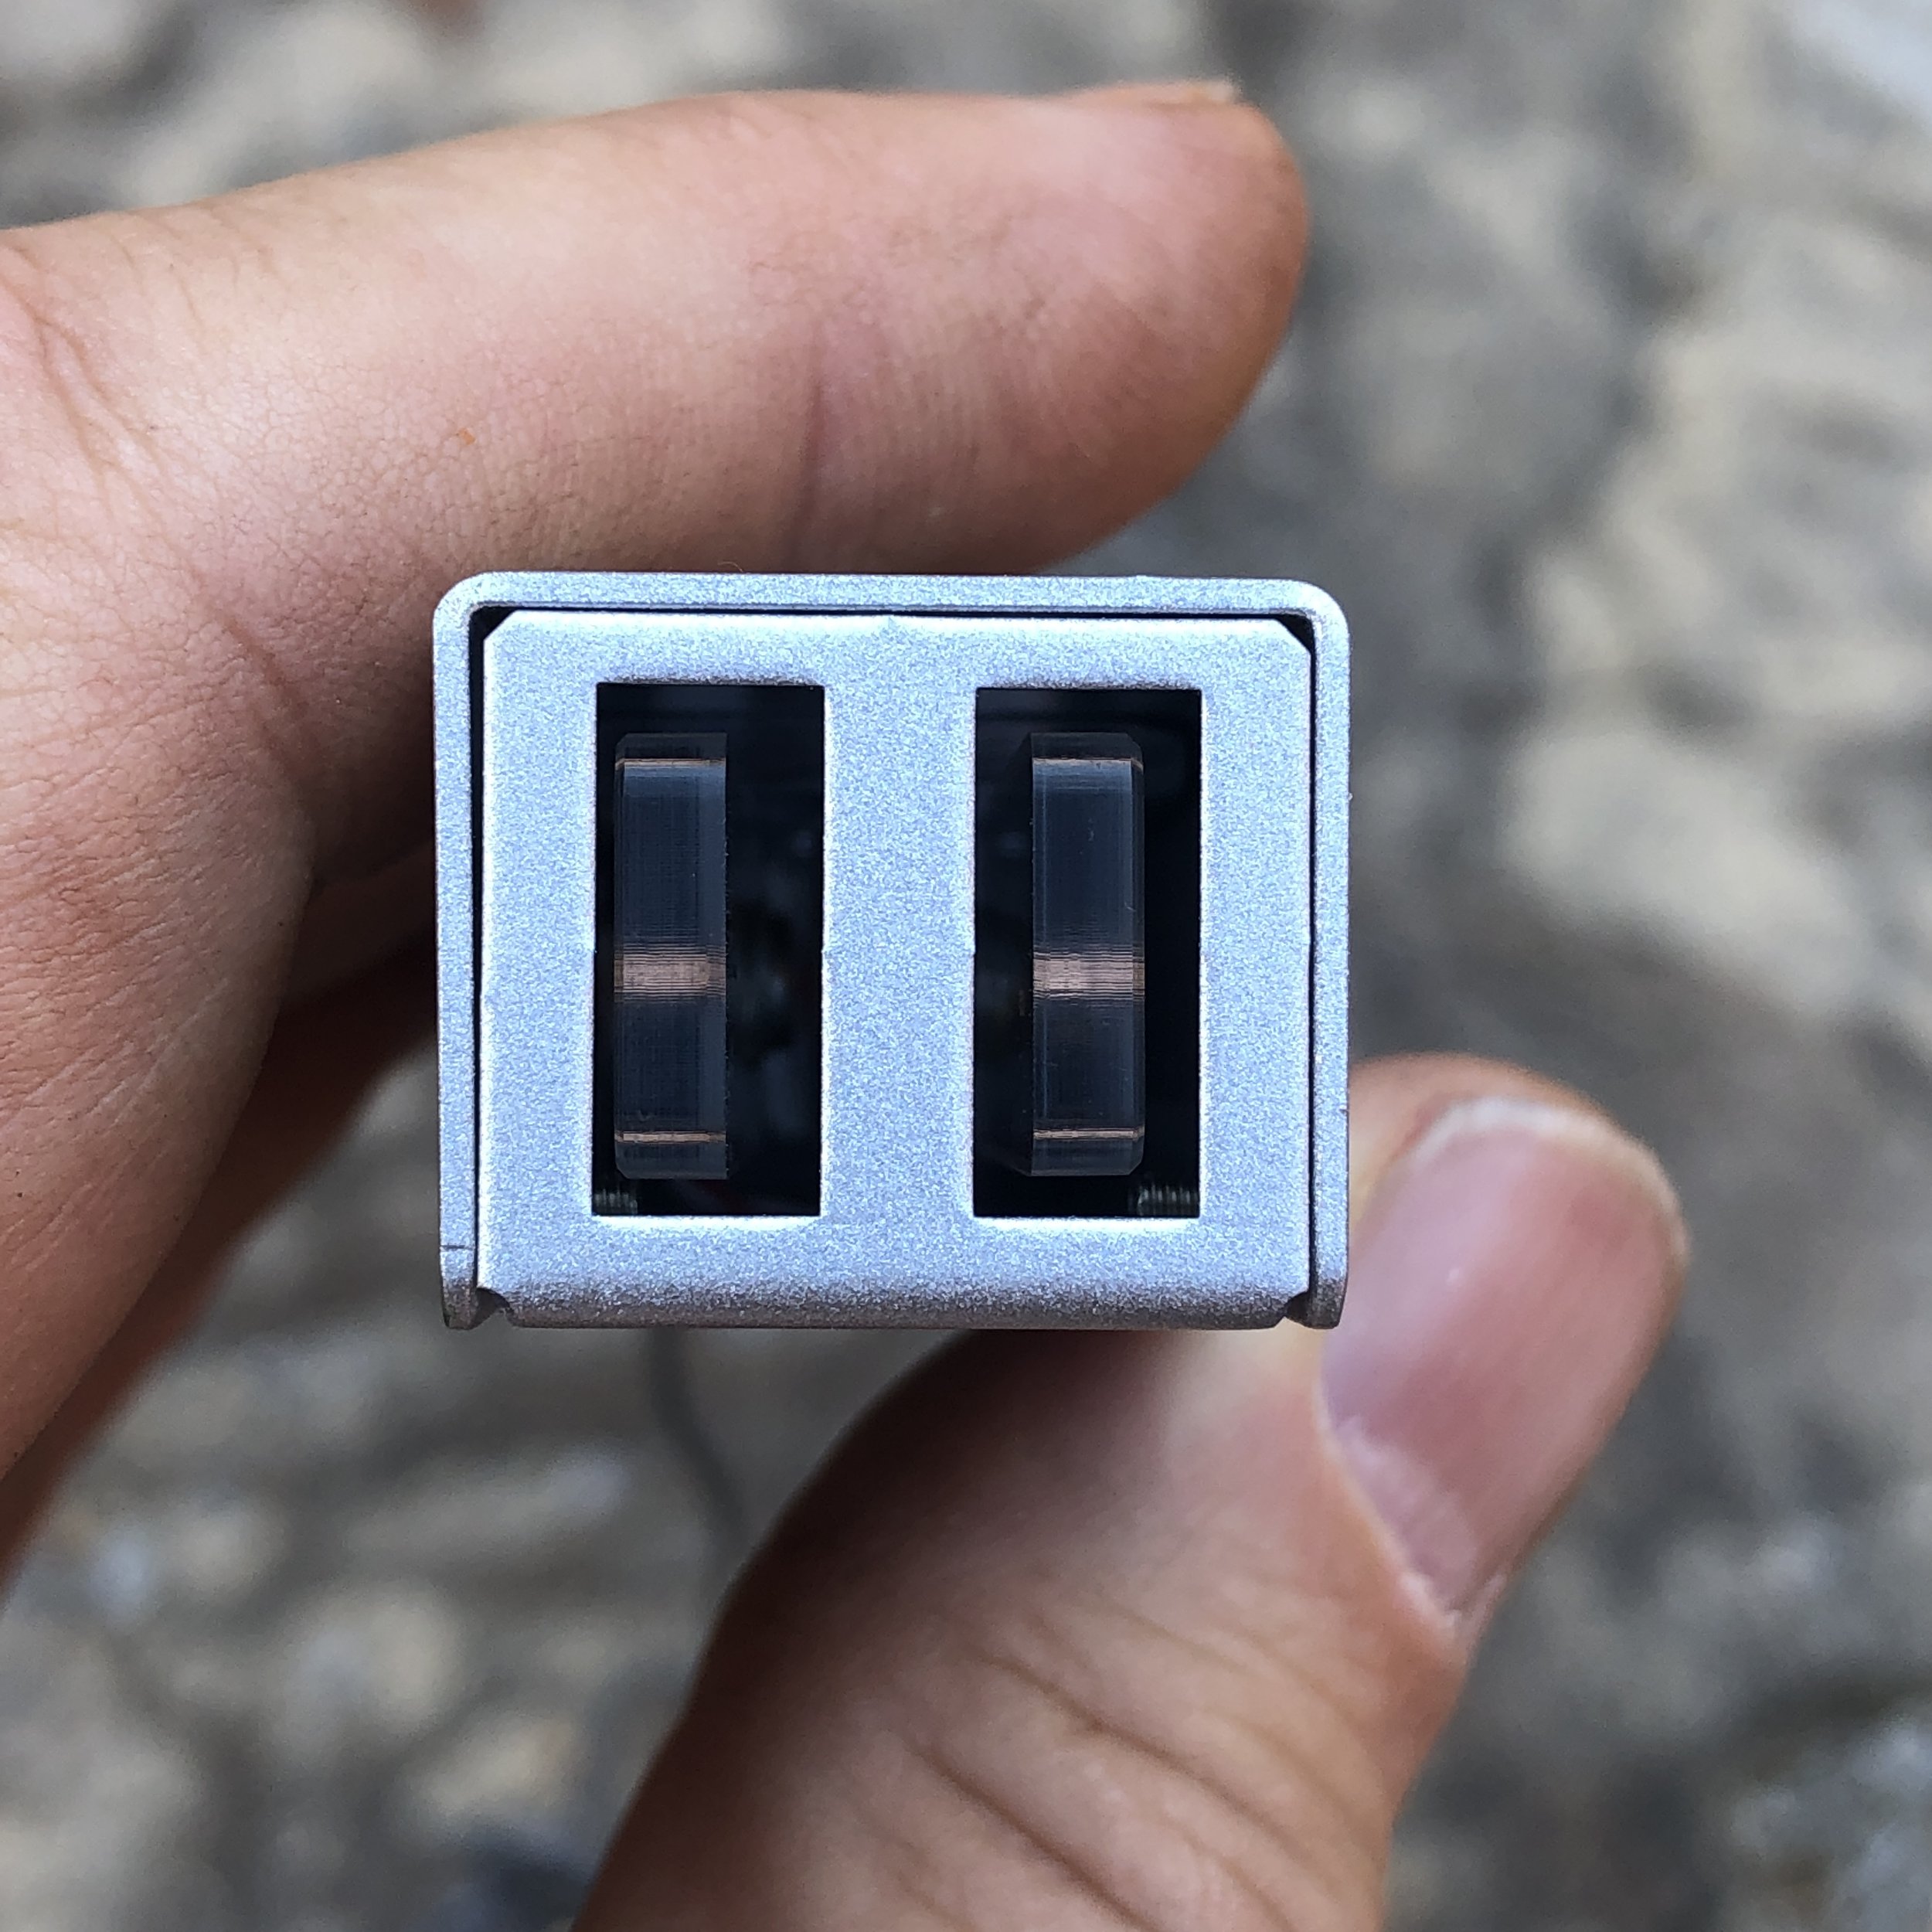
In this photo you can see the “dit” lever shifted to the center.
As you can see below, somehow the lever is off center and not returning anymore. so I shut down the op and packed up to go home and see what happened. I needed to do some other chores as well so I made the decision to take the key home to where I had a better assortment of tools to be able to repair it…if possible.
Once home I took the key down to my workshop and removed the cover assembly to reveal how the key is made. I found a ultra simple design that is efficient and minimalist in nature. This also makes for a clean layout and an easy to trouble shoot system. The lever arms dont have any springs of any kind, but rather the lever arms have been thinned just ahead of the mounting block enough to allow them to flex easily over to the contact arm. Simple and elegant.

Below I am pointing out the contact that is shorted. The key is upside down here, but you can see the contact pad touching the center column. This doesn’t make sense as the arm is not broken nor is anything seemingly out of alignment.. The key worked perfectly up till this point too, so I looked very closely for a crack in the arm, but it isn’t broken at all, in fact it looks perfect.

What I found upon closer inspection is these screws I am pointing out below are in oversized holes drilled in the block. It appears this is done on purpose to allow for centering of the lever arms in the housing once assembled. Simply loosen these two screw and turn the block till both levers are equally spaced from the center contact arm, then retighten the screws and your good to go.

Here is my conclusion. I must have bumped the end of the lever I am pointing at in the photo below, as this is the only way to shift the block off it’s axis. By hitting the end of the paddle arm I could feasibly transfer enough energy to the block to shift it. By just pushing the levers in the normal travel directions it cant do that as the frame has hard stops in place to prevent it from over travailing. So at some point I shifted my key in my hand or bumped it into something in the truck to cause this failure. In other words, I did something to it, I really don’t know what I did, but I must have hit it on something. I works perfectly now as I took it to the QTH and got on the air with it this evening and worked several POTA contacts and I plan to redeploy it on the next outing. Time will tell if I am too rough handed or if this key will become my defacto travel key.


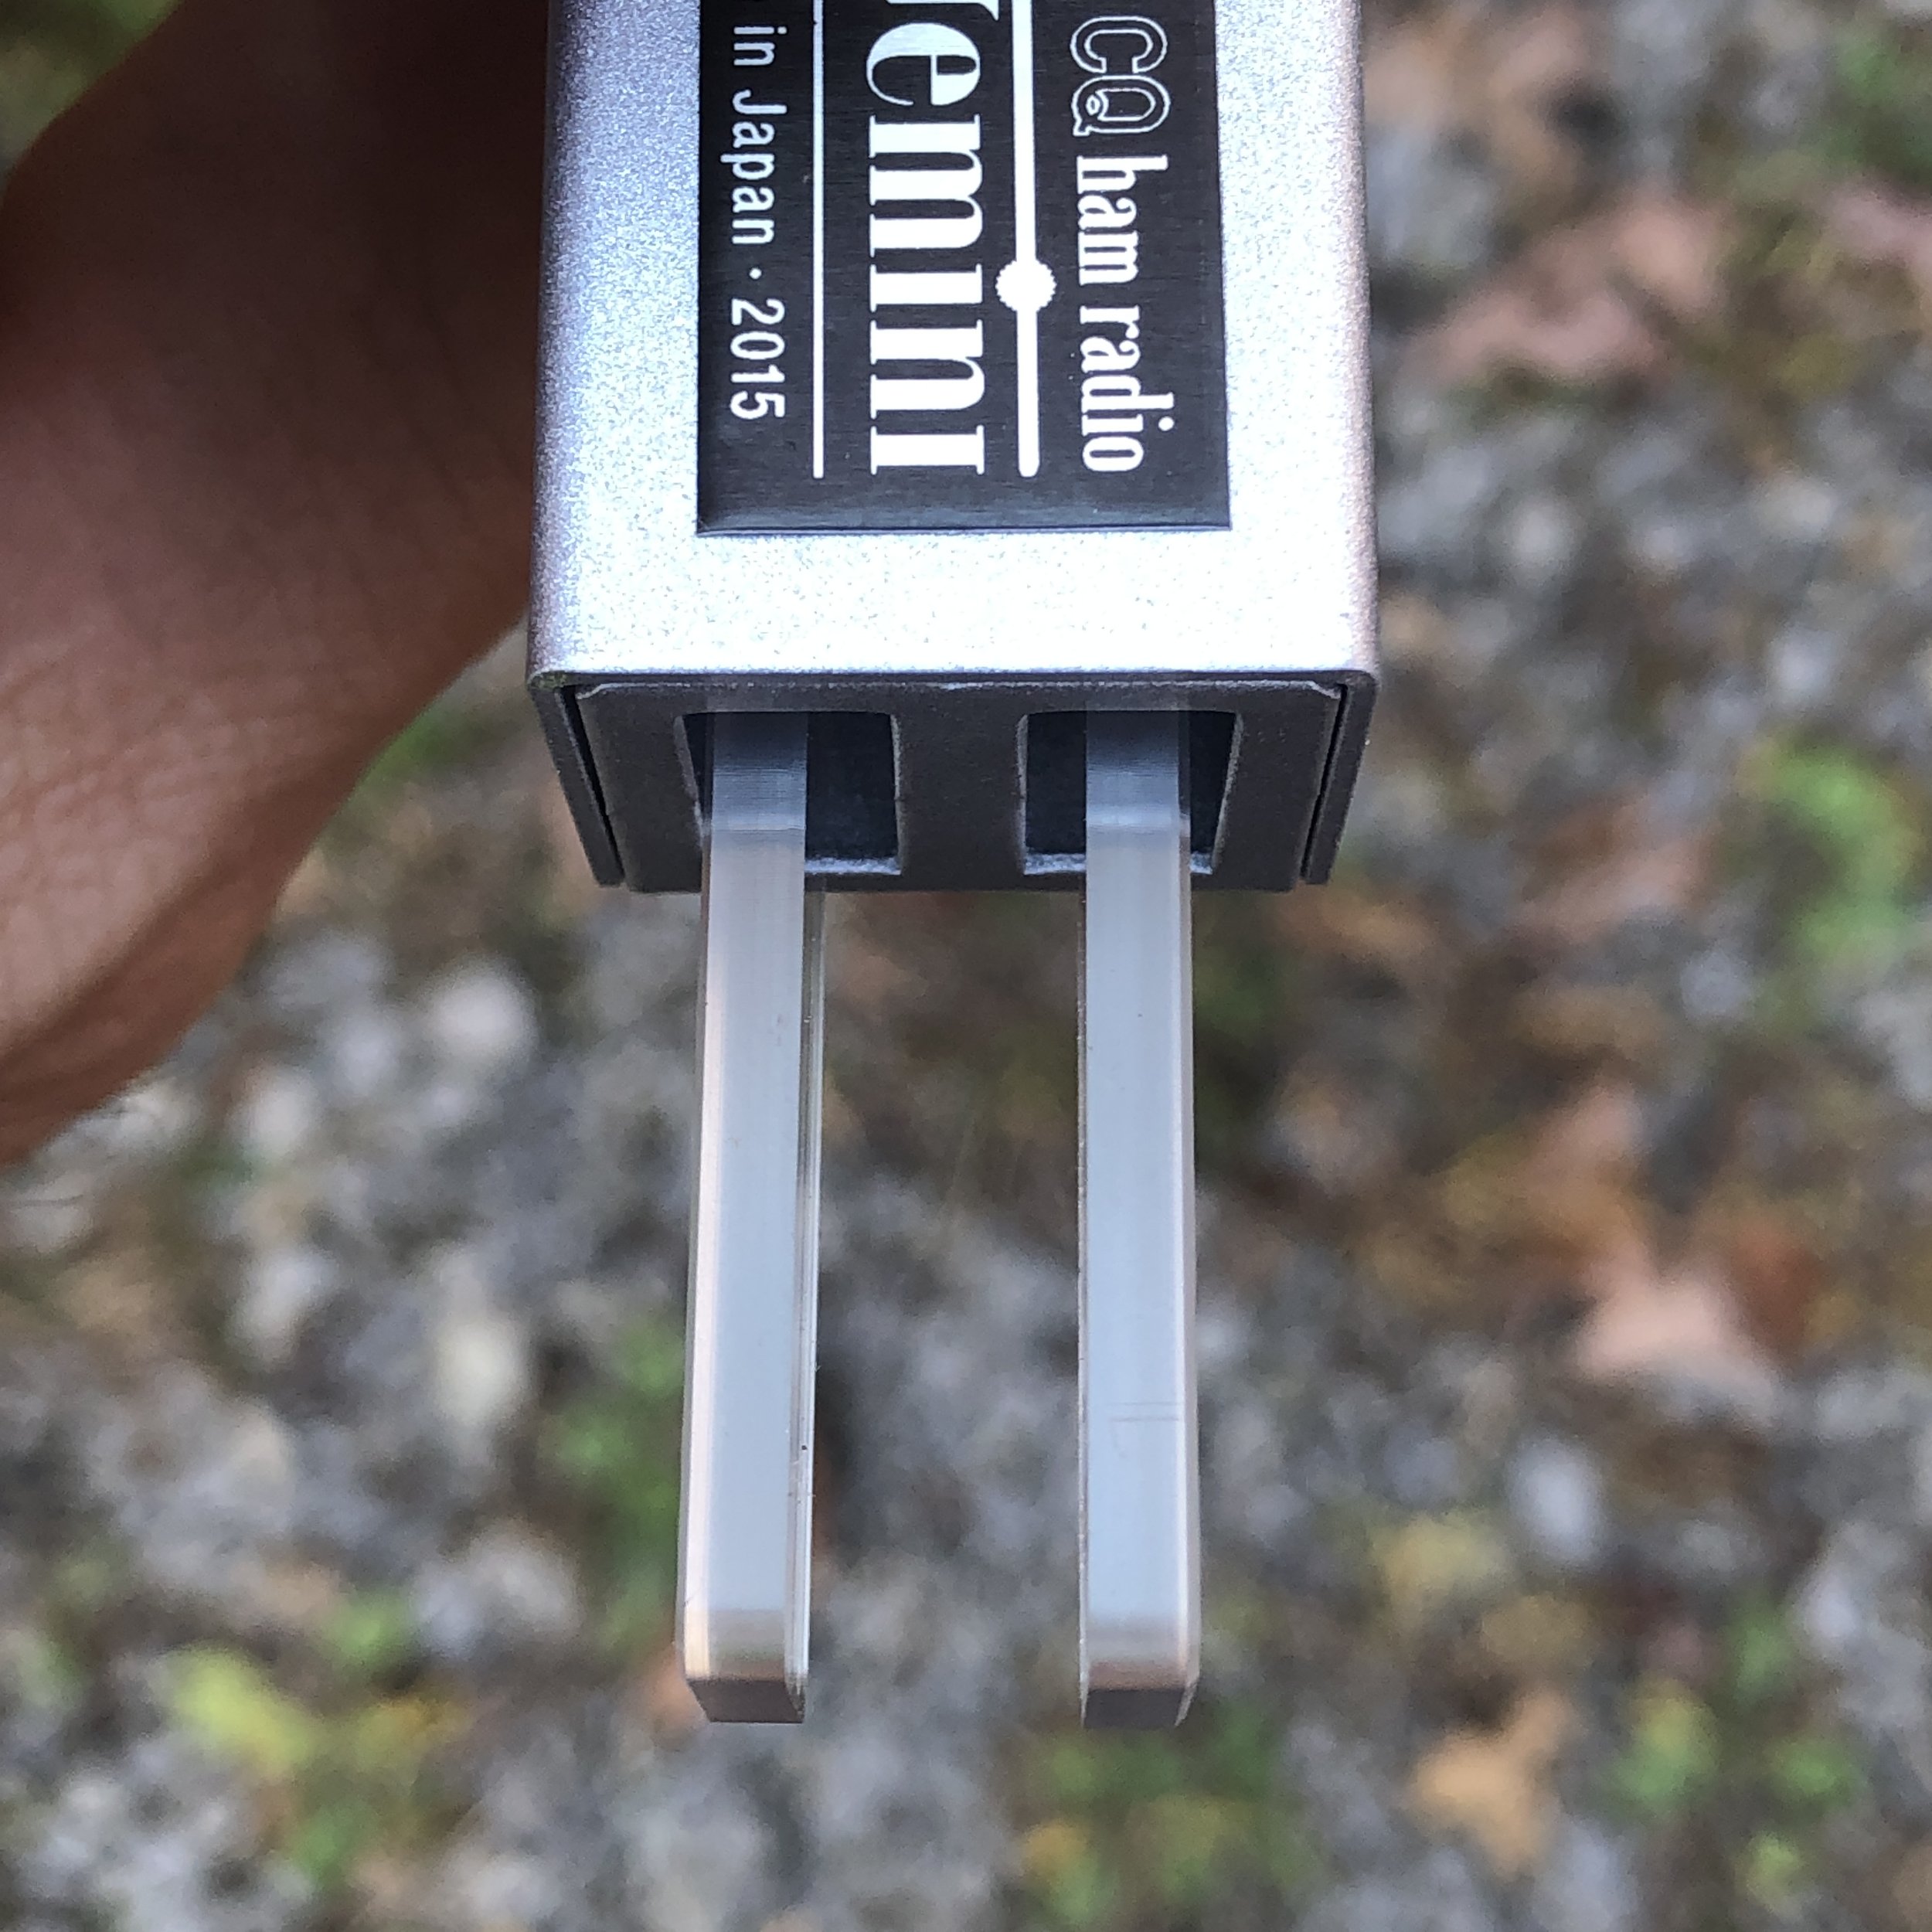
So if you get one of the CQ Gemini keys, just keep in mind that it is a great key and wonderful to use, just be sure to protect the end of the paddle arms from bumping into stuff and it will work for a long time. When stored, this is a non-issue as the paddle is completely inside of the metal housing and cant run into anything. I can still recommend this key for a travel key, I just learned something about it today that I wanted to share with all of ya’ll.
Like and comment on here and let me know that you like my blog posts, it goes along way towards growth of my website and I really apprecitae it.
72
David
WK4DS
I bought a new field paddle key and I have a problem.
I am in a constant search for the perfect paddle for field operations…

Since I have a affinity for Morse code operations, I am constantly looking for the perfect paddle that is easy to hold and is easy to manipulate and sends clean code effortlessly. This is a fairly tall order, as I have a large hand, and typically field paddles are fairly small.

As of late, I have been using this N6ARA tiny key that I bought off of their website and have really been enjoying using it. With the only two drawbacks that I have found so far are the key is too small (I should have chosen a larger case size since they actually offer them) and the contacts tend to tarnish fairly rapidly causing miss sent characters until you rub the tarnish off from use. So I have been looking for a better solution.
The main problem I keep running into is all of the low-cost keys are built very crudely and the contact mechanisms tend to be fairly fragile, failing rapidly in the field.
My first key that I bought was the simple little paddle off of eBay for $23 and it fell apart almost immediately. So I took it home, repaired it, and took it back to the field, only for it to fail again well before I finished a single activation. Giving it one last try, it failed on me a third time in three activations, forming an opinion in my head that this key was not fit for use.

This is a picture I captured off of my phone of the key I actually purchased off of eBay. I can say, with complete honesty, that I would not recommend this key to anyone. Save your money and buy the N6ARA tiny key if you want a small paddle in this form factor, you will end up buying something better anyway because this one will fail almost immediately. I ended up throwing it in the trash because I did not want to give this to someone else for them to get frustrated with attempting to use it. Lesson learned.
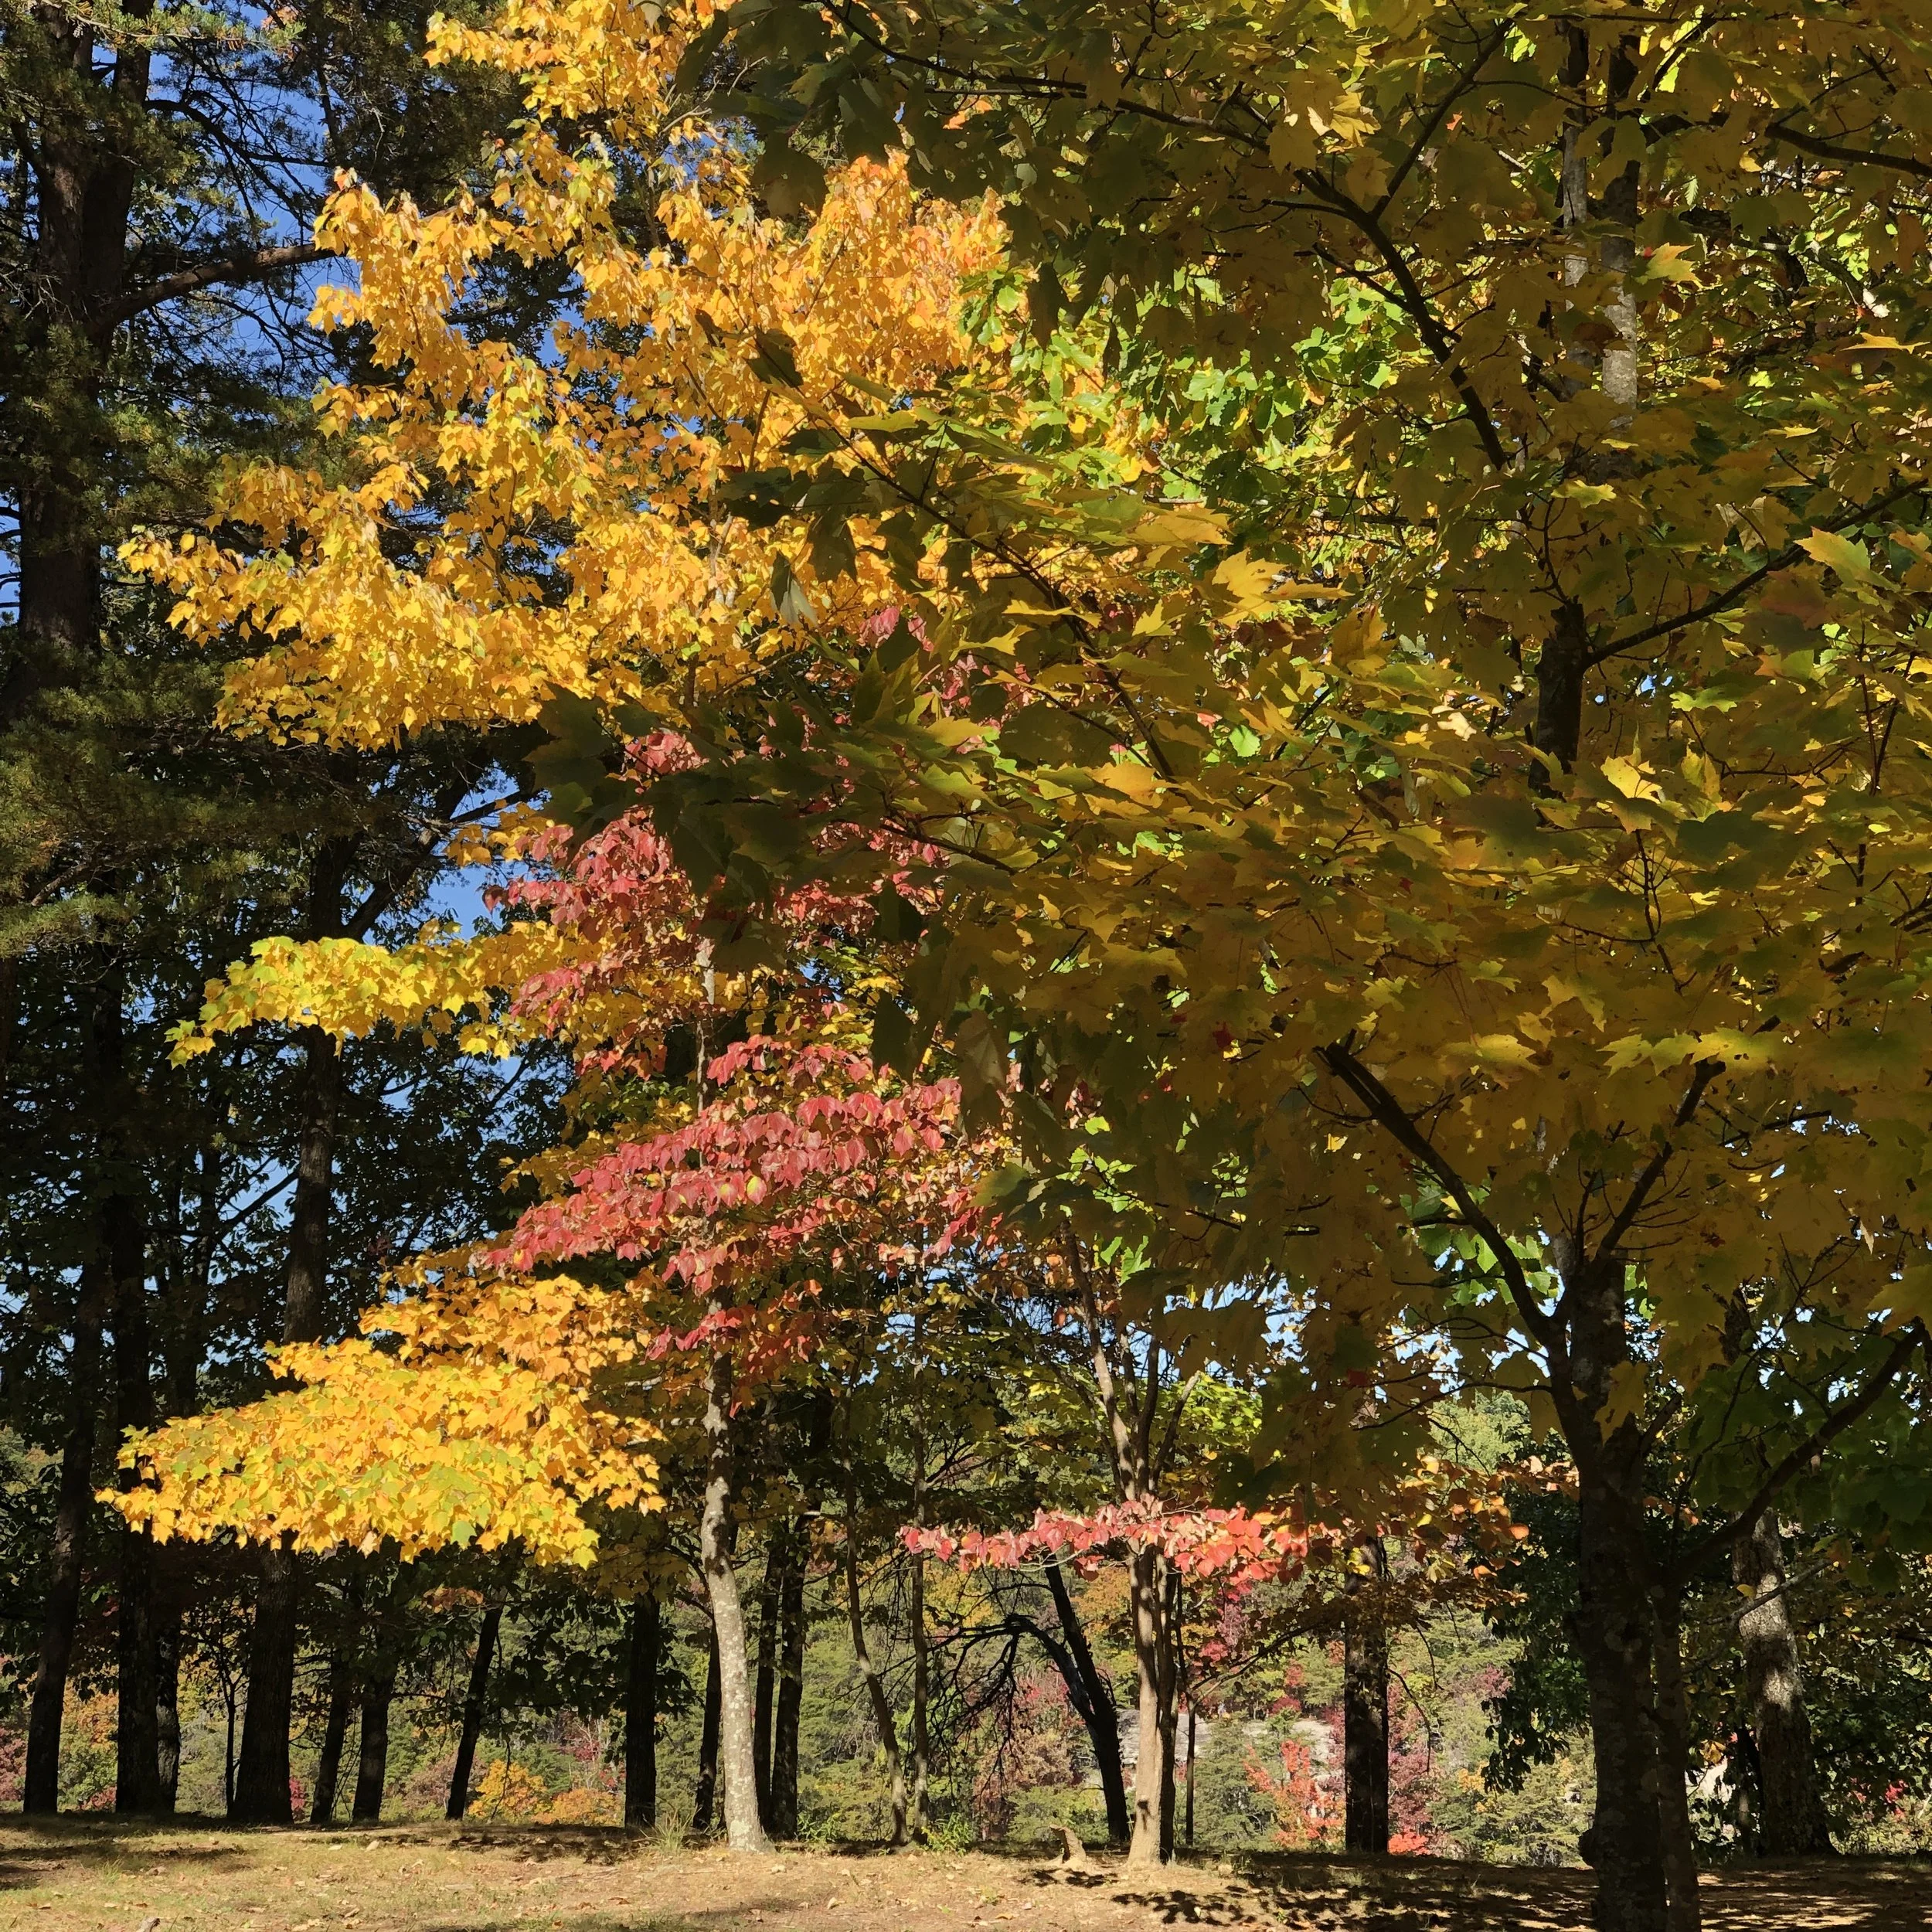
Well, today was the day I tested another key that I bought but this time I actually spent a little bit more money on one and got better quality. As you can see, it was a wonderful fall day with nice crisp, air, and beautiful fall colors! I set up my rig at my usual haunt, which is K-2169 or also known as Cloudland Canyon State Park and got on the air with a 20m vertical half wave, tuner and a couple of counterpoises and ran this into my ICOM IC–705 radio.

What I had done was, I had went ahead and got a CQ Gemini key, also from eBay. This key came from a respected Japanese amateur radio dealer and it was significantly more expensive. I bit the bullet and bought it anyway and had it shipped standard shipping. I bought it on October 5 and was on the air with the key on October 14 and it shipped from Japan! That is service!
First thing that I noticed about the Gemini is that it has significantly more heft to it than the sub-standard keys that I was messing with earlier. It is fairly heavy, and does not slide around on the table, hardly at all, even when using it single-handed.
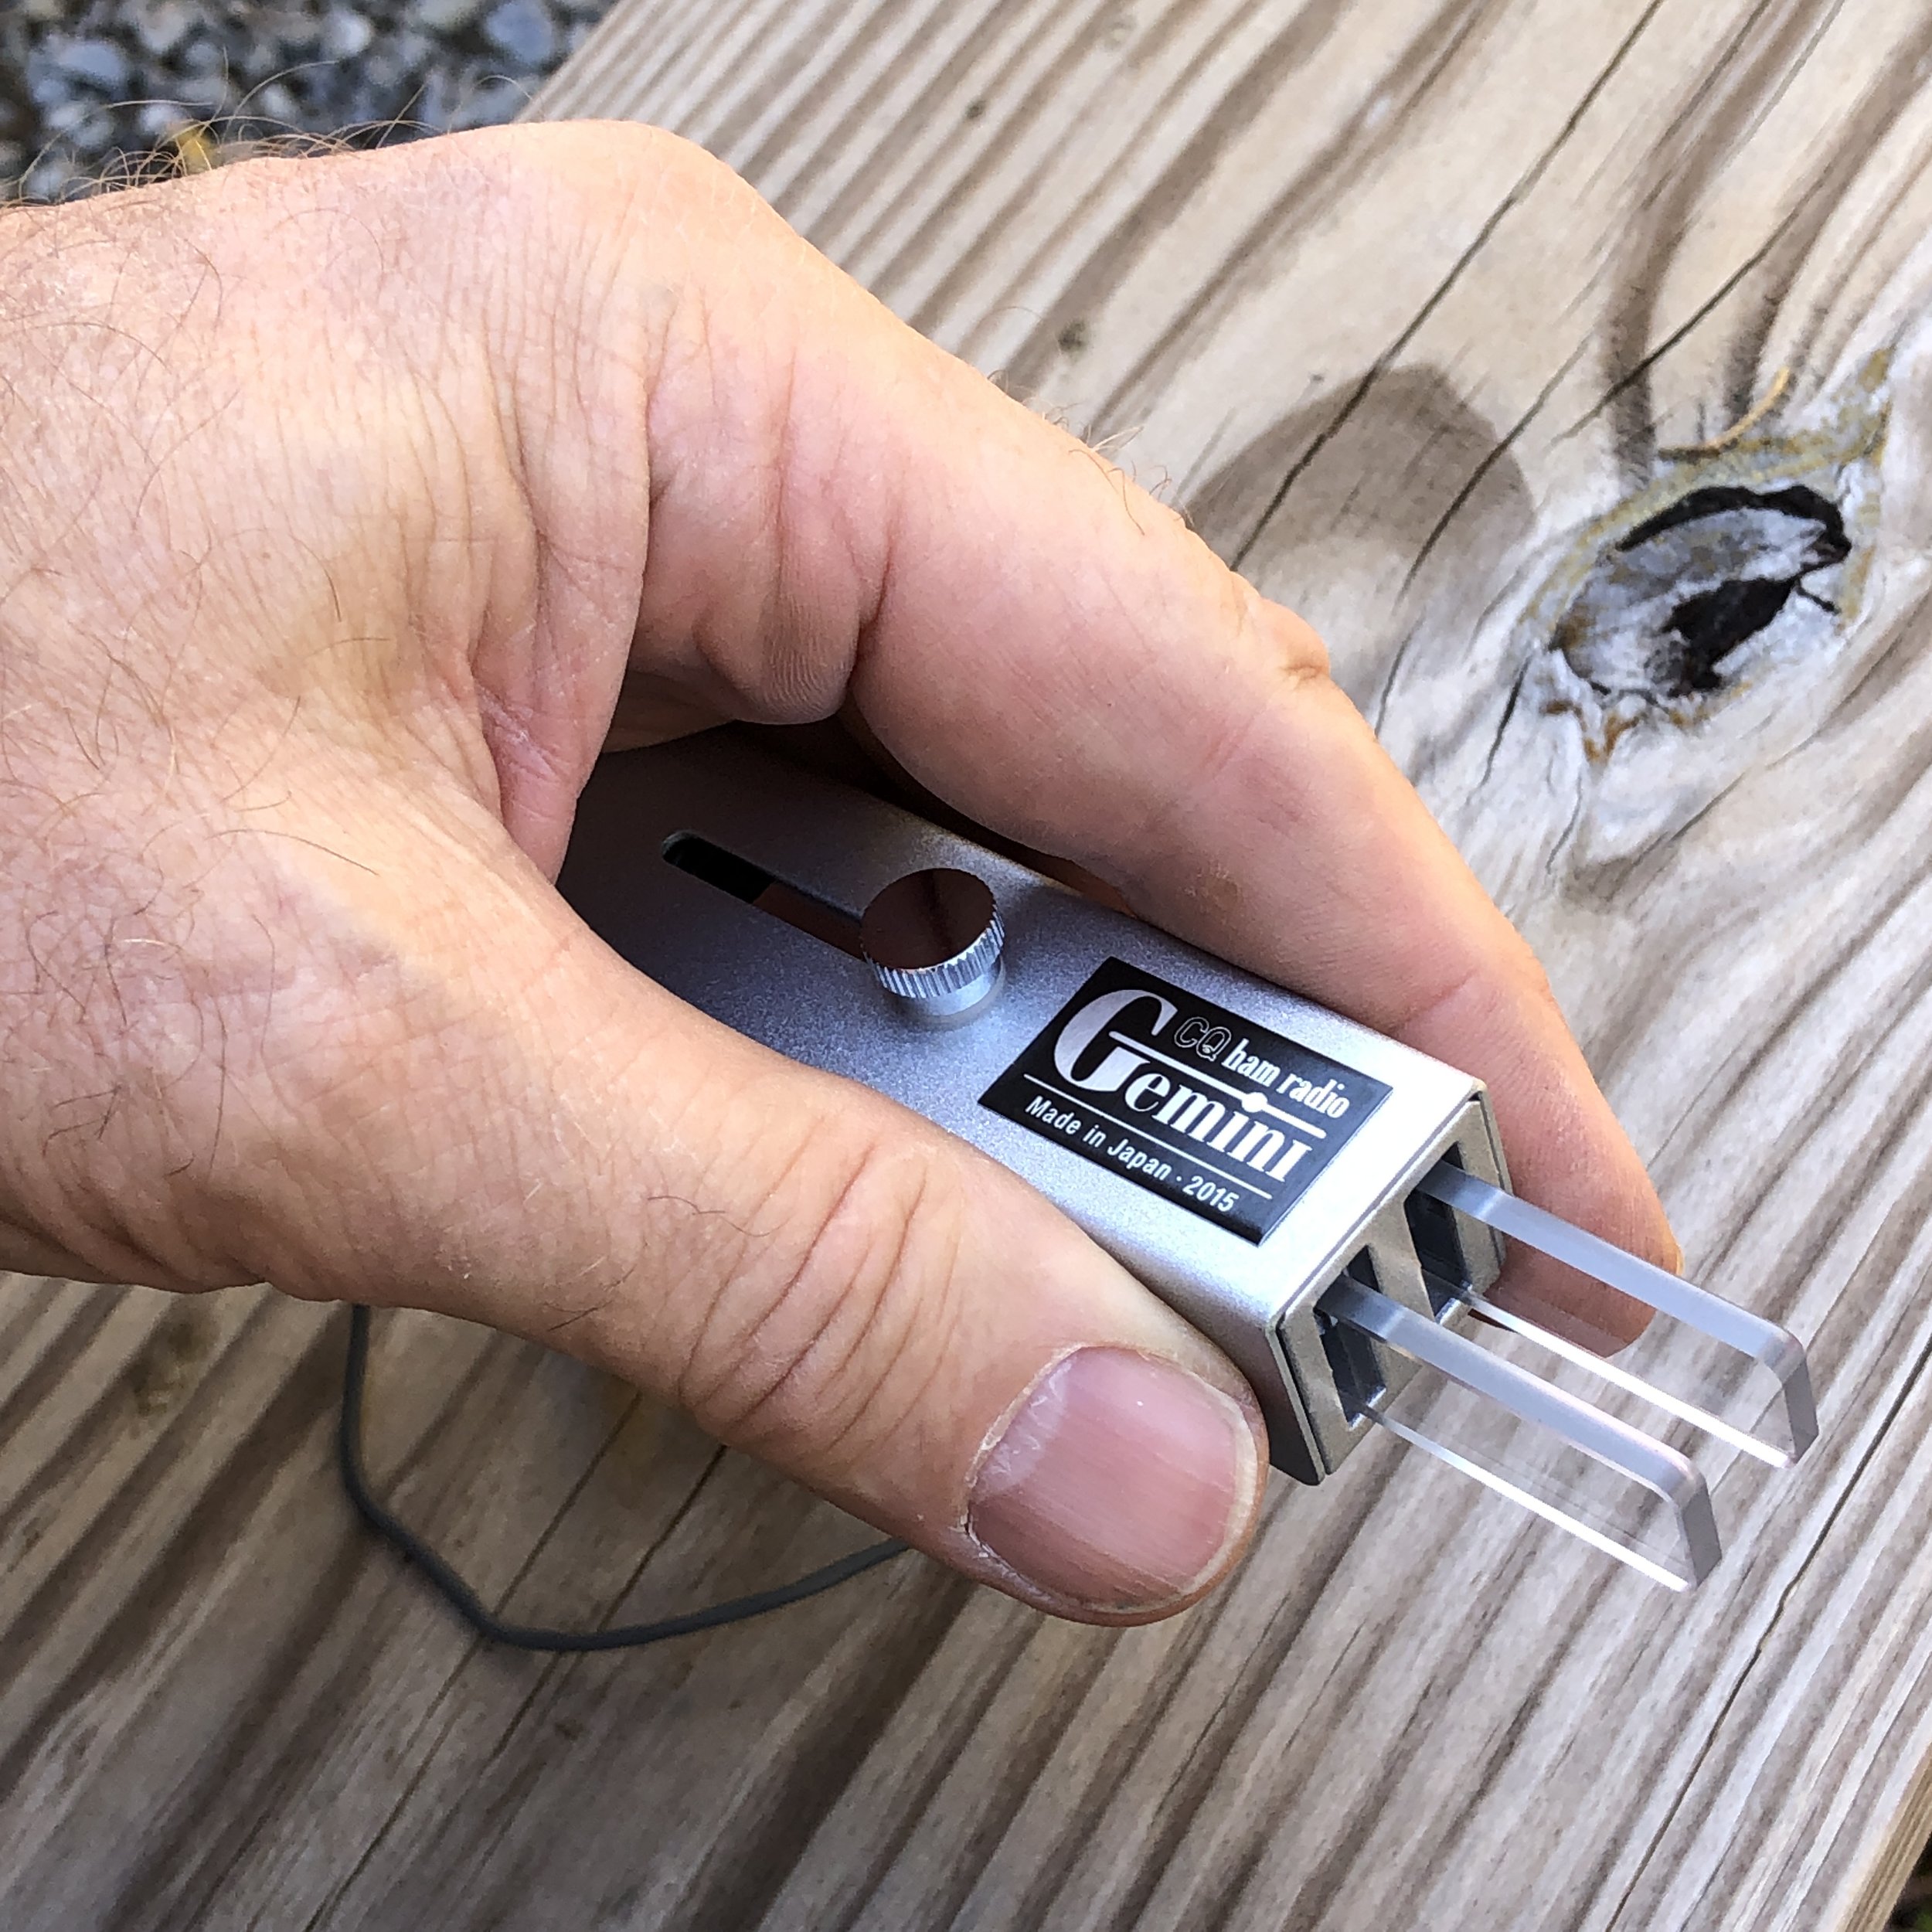
Another thing I noticed about the key is that it fit my hand almost perfectly when I hold it with my left hand so I can send with my right and then also log the contact with my right hand too. Since I am typically holding down the logbook with my hands anyway, this is a very comfortable and natural position to work POTA with for me. I also like the fact that the key comes with a built-in storage container by loosening. The thumb screw on the top you slide the whole key back into the housing, and then snugging the thumb screw down again, and the key is stored internally in the in its own case. This is brilliant as now the key is almost impervious to damage from transport.
As you can see here, it fits perfectly in my go bag for my POTA operations. Only time will tell if the CQ brand key has the durability to hold up to regular use but from the initial uses of the day and at home several times prior to taking it to the field, it looks like it is going to be a winner. I finally have a key that I like to have with me. One thing I did notice that I will most likely change at some point is that the cable is hardwired to the key, I will most likely redesign this to use a socket and a double ended cable so if the cable fails from use, it is a simple cable swap and I am back on the air. If the cable fails right now, the key is down…

I actually think now I will relegate the N6ARA key to my TR-35 radio kit, which is going to become my travel radio set up as it is very small and compact. But that is a story for another day… if you haven’t done it yet, I would appreciate it if you would like this blog post, and if you would like to help support this blog and my YouTube operations you could buy me a cuppa coffee (or a new radio, that would be awesome too 😬👍) through PayPal. You can find the opportunity to do this on this website. I would greatly appreciate it!
Ham Radio Activation for POTA at Park K-2169

Well today started out like any other day… hahaha I always wanted to start a story like that…Anyway…
So this day did start out like any other day actually, but it would turn out to be a very different ending. I had a few hours to be able to activate a park and decided to grab my bag and head over to K-2169 for an activation. I had planned on staying a few hours and maybe doing as many bands as I could. When I got to the park they were running an excavator near my usual spot, so I went to the top of the hill where my other good location is and found them mowing the grass with riding lawnmowers!!! ha ha. Figuring that the excavator was quieter than lawnmowers I went back to the first location and started setting up my station. It was at this point that I realized that I might not get an activation today,
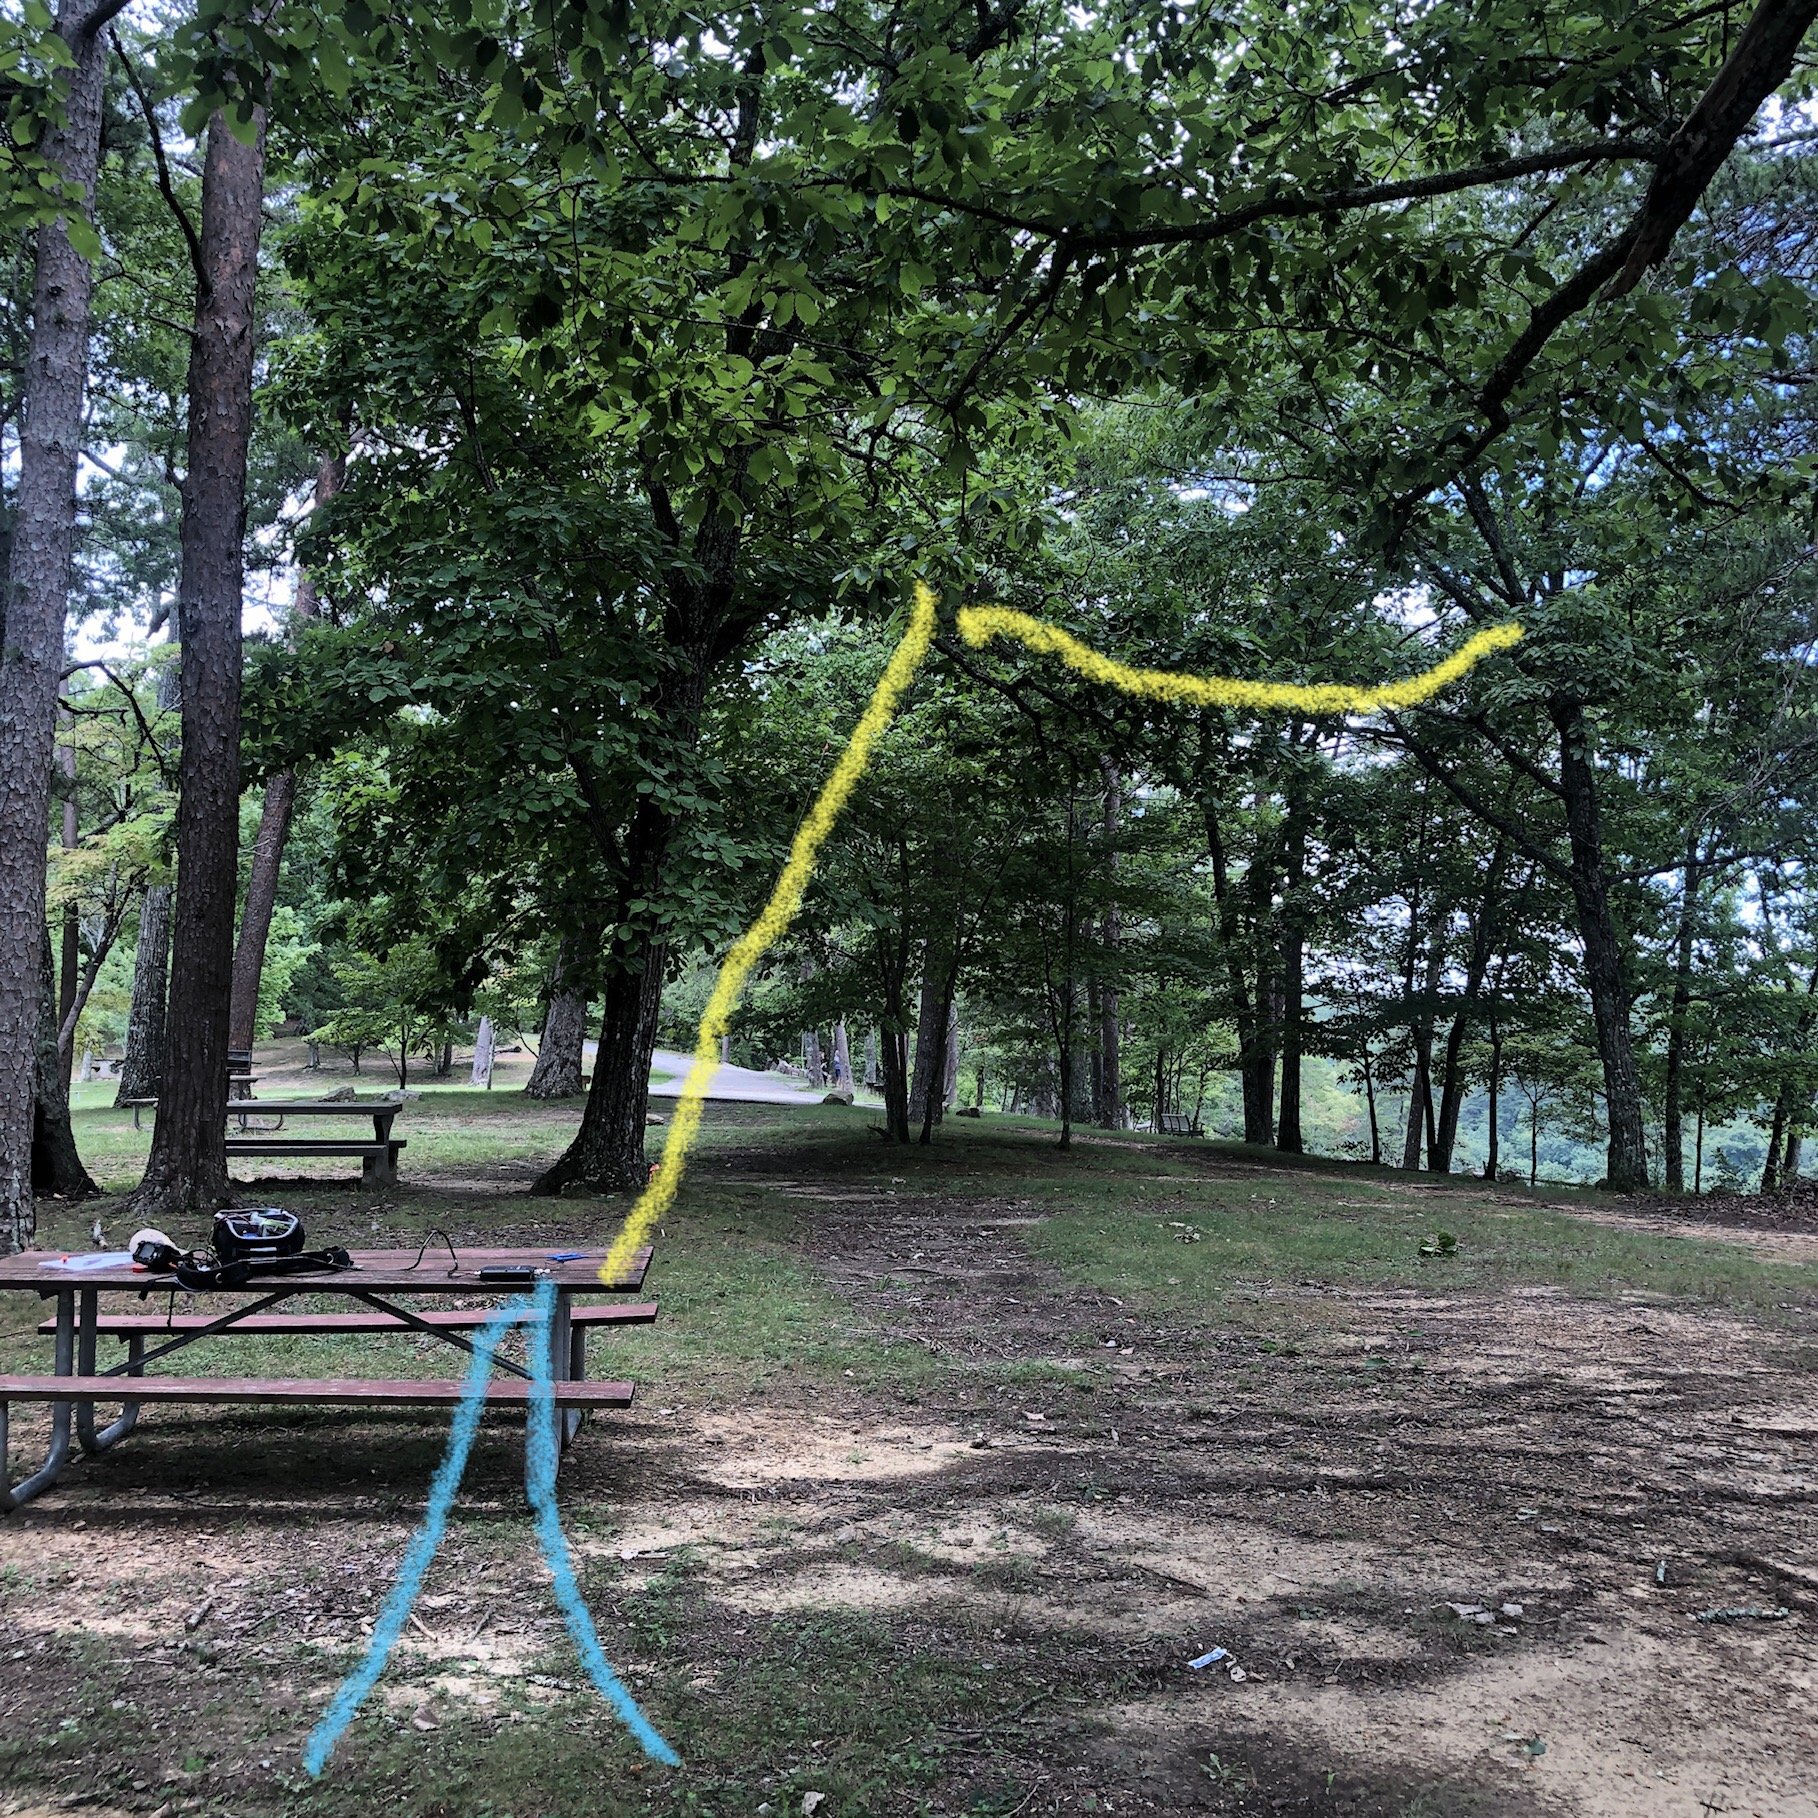
The yellow line approximated the radiator and the two blue lines are the counterpoises. This is a 65’ EFHW wire antenna.
You see the pop-up storm clouds had started to roll in and thunder was in the distance. This normally doesn’t happen till later in the afternoon but just for me, the clouds made an exception I guess. I was halfway through setting up the antenna when I started hearing thunder in the far southern edges of the sky. Upon receiving this valuable information I hurriedly finished getting the antenna into the tree with a decent elevation, got my radio out and quickly got on the air.
Once again the Lord was on my side and I had good propagation while I was operating my station. There has been a strong solar storm recently and the bands have been in the trashcan so to speak. Taking a quick look at my log shows the band fading in and out slowly over the hour or so I operated today.

Signal reports as bad as 339 and 229 were common at the beginning. at the end the signal reports were more like 599 & 579 regularly with strong signals coming in from far away states.

Today I used my Icom IC-705 with the automatic tuner and hurriedly assembled the system so I could get the activation as quickly as possible. I had even planned out my escape had the rain started to fall while I was operating. I set up my station so that all I had to do was disconnect the long wire antenna from the tuner and could literally put everything in the backpack (kinda like a bucket of sorts) and just carry it all over to the pavilion to get out of the weather. I had planned, that once the rain had passed, I could go and collect my antenna or hook back up the station and finish the activation should I just need a few more contacts to get my ten.


A closer look at the custom knobs I made for my AH-705 tuner as the wing nut on the ground stud is terribly slow and the red plastic knob now lives somewhere inside the inner fender well of my truck… I happen to be a machinist so this was a simple task for me.
Turns out, I did not need to worry about any of that, I had 25 QSOs in short order before the storm clouds really got close to me. The clouds were up overhead by the time I had broke down my station, that was not a problem though since I was already packed and ready to head to the truck. All in all it was a good activation even though I was constantly worried about the impending storm rolling in from the south. I guess the moral to the story is don’t give up just because the weatherman said it is going to rain, we all know how accurate they are!! ha ha.
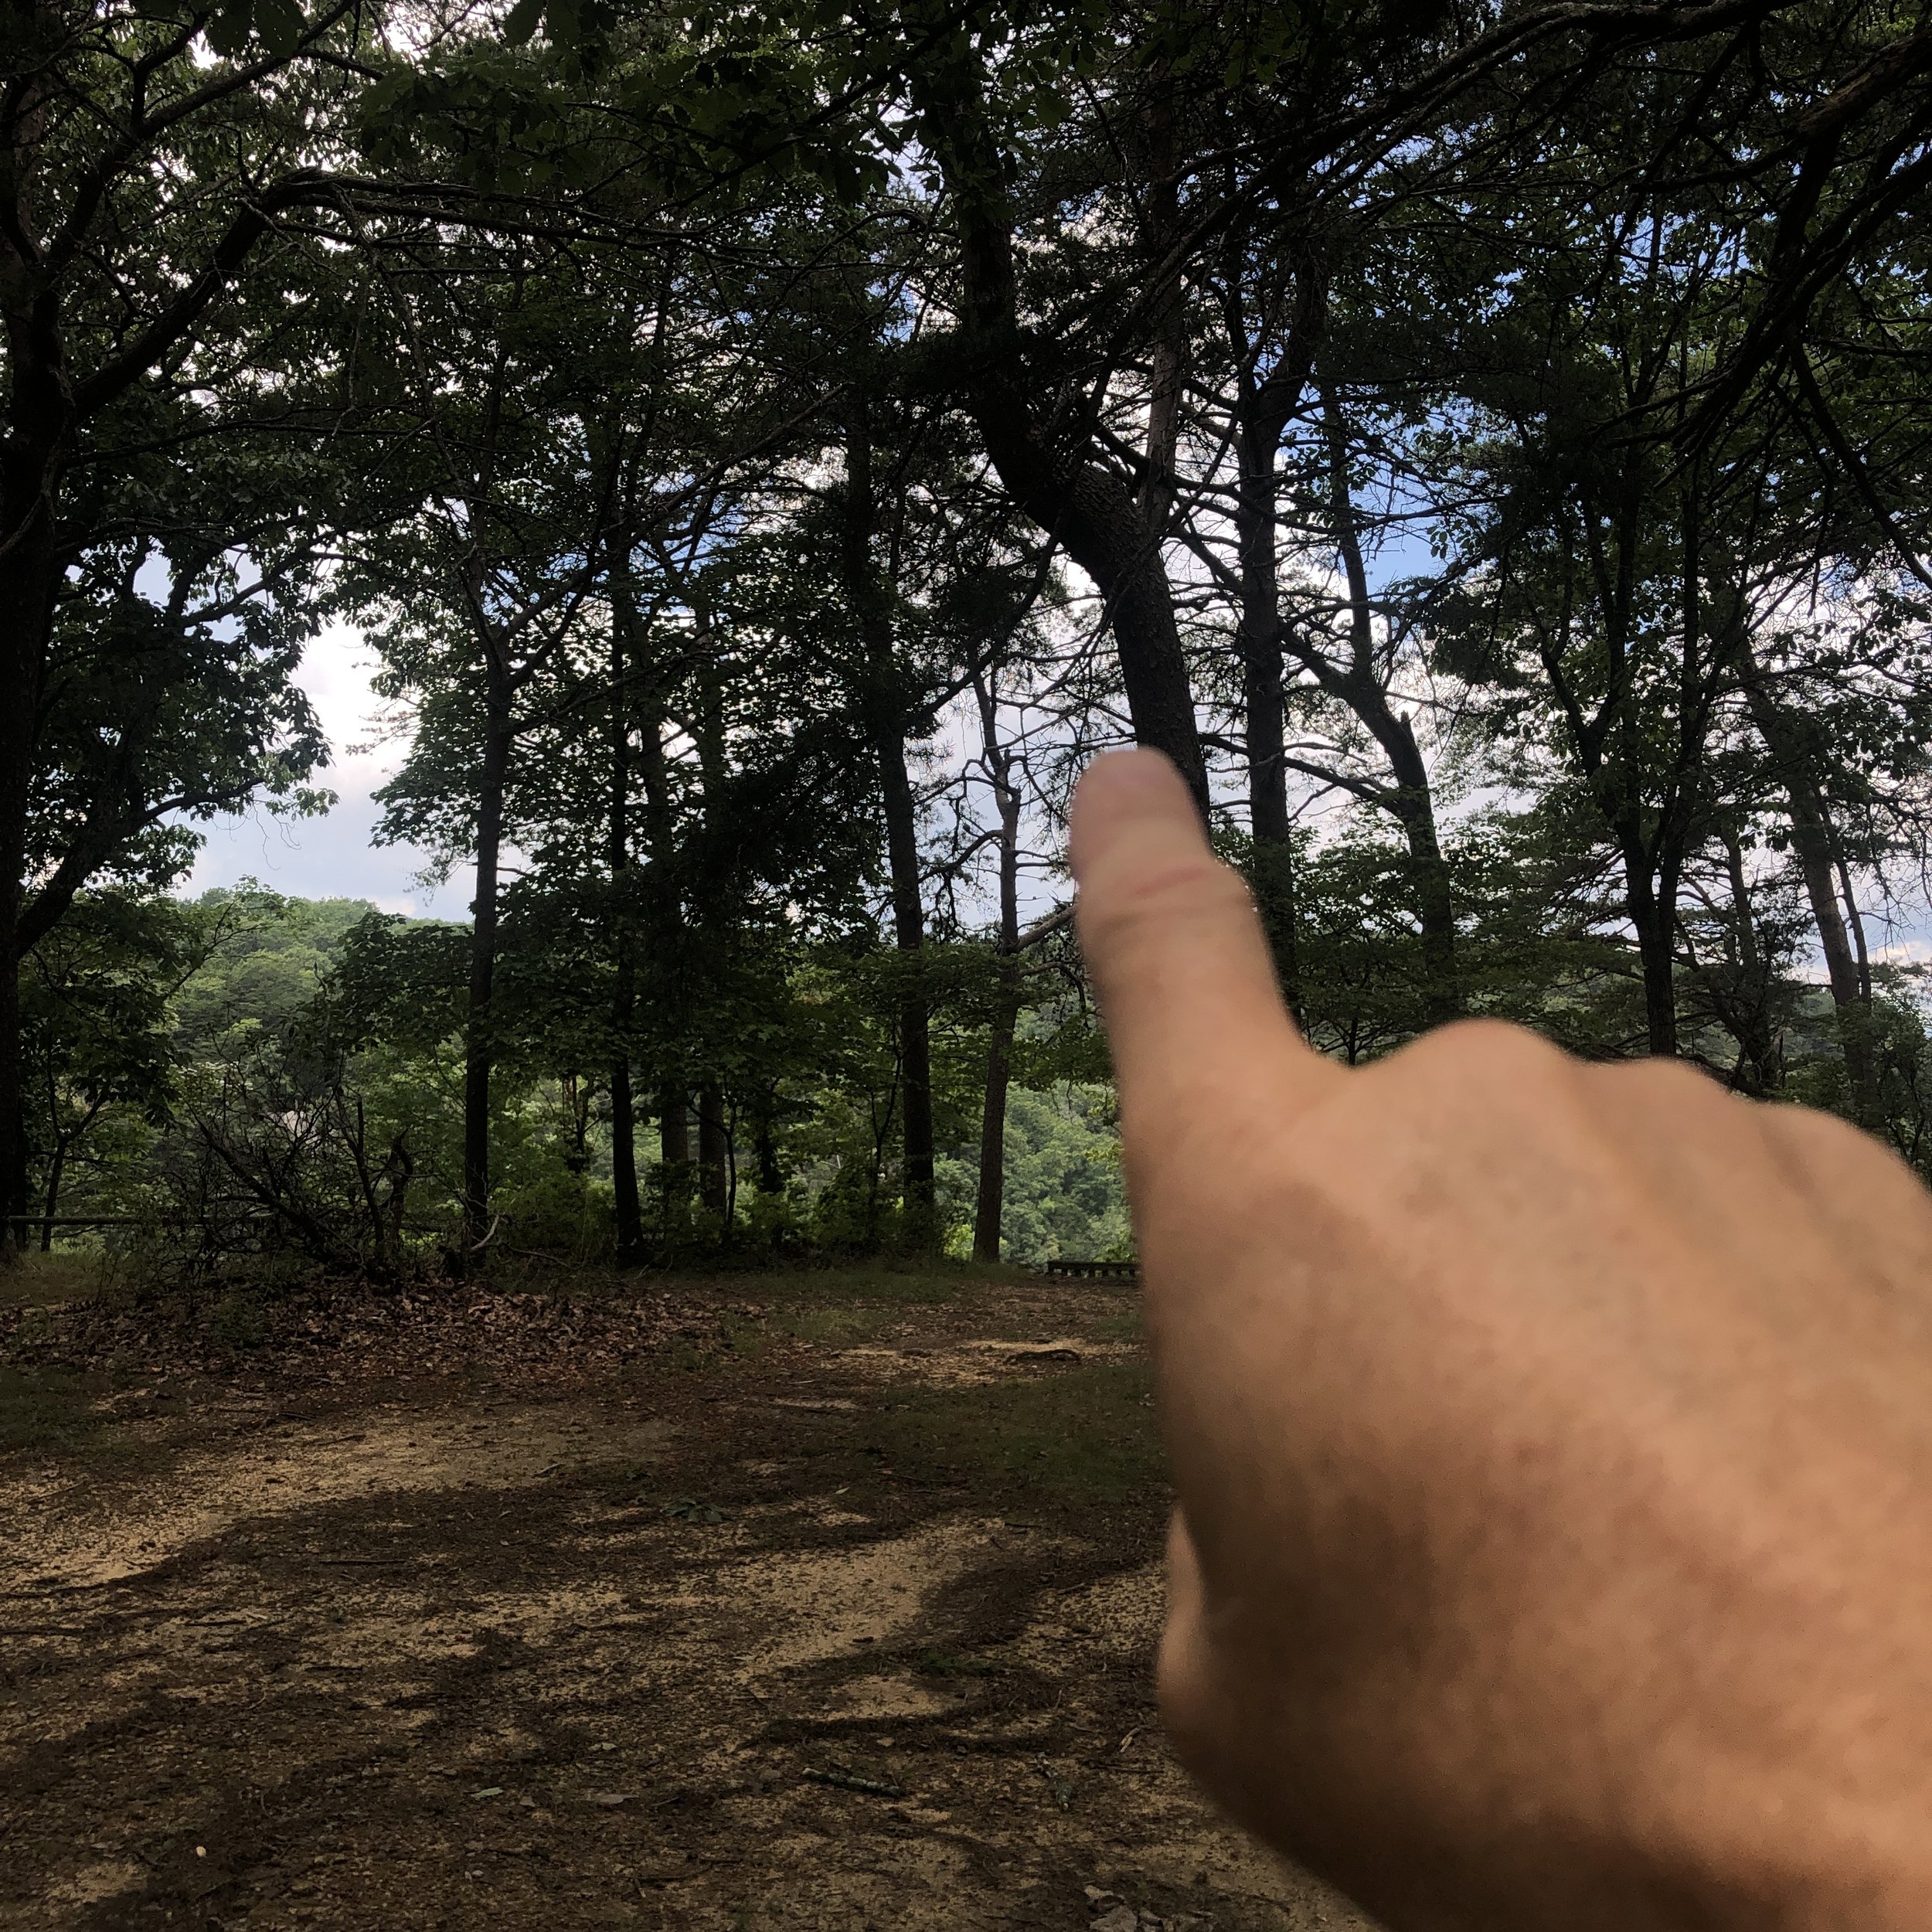
Looking through the trees towards the front heading my way, and thus cutting my activation short today…
If you enjoy reading these blogs, please consider subscribing and maybe even liking them so I will know what people enjoy reading.
Thank you and 73
de WK4DS
QSL Mail call !!!

What have we here? Looks like a letter from the Azores!!! I don’t know why, but I have always enjoyed receiving these letters in the mail, and it brings me a little bit of joy to get them. Every time I see one of these, I get excited, no matter how long I have done this. This is why I still have QSL cards that I send out from time to time as well. The clue that it’s a QSL card is the Amateur Radio call signs on the envelope and typically the foreign postage is another clue as I normally do not write letters to people overseas.

Look at that antenna! No wonder he could hear me with my little paltry 5 watts of transmitter power. Normally, the stations that are overseas that actually will respond to my CQs when I do a POTA activation, are using antennas like this, or something similar and very high-quality receivers because I am transmitting into a compromise antenna with just five watts or maybe even less sometimes.

It never fails to amaze me how economically this postcard can be transported from one location on the globe to another for just a buck or two that astounds me due to the economy involved in moving this piece of paper.
Thanks for tagging along this morning while I drink my cup of coffee and read my cool letter from the Azores and until next time get your radio out and go make some contacts with it.
If you enjoy reading my blogs, please lock them and leave comments and share it around and all the usual things that makes my webpage more successful that would really be appreciate it and thank you!
Stranger (Ham Radio) things... have happened to me lately with QRP.

As you know, I have been active lately with POTA (Parks on the Air) and have been going to the local parks near me and activating them regularly. I occasionally get an anomalous call on a band that I shouldn’t get, (due to my compromised antenna or low transmitter power…or BOTH) but simply chalk it up to them have REALLY good antennas pointed straight at me or a tropospheric duct opening or some such, but let me tell you a story about a man named Dave…(cue the Beverly Hillbilly’s music)

I have gotten calls from Alaska with my poorly arranged and noisy wire antennas in the past and a few from our friends “across the pond” in Europe with my lowly 5 watts of transmitter power, but nothing like what happened on the 27th of August 2022.
On this day, I literally had a window of time that was one hour in length, that’s right, just one hour to setup, get an activation (10 QSOs minimum) and take it all down and stow it away. I could not go to my usual location because it was in the wrong direction and would have put me being late, so Cloudland Canyon was out of the running, I only had one choice really. The only location was the Chickamauga and Chattanooga Military Park as it has two sections, one in Georgia (the Chickamauga half) and one in Tennessee (the Chattanooga half) the Chattanooga portion was literally on my way to my meeting so I started looking at the map to find a suitable location that complied with the POTA rules for an activation.
So I find a location on the west side of Lookout mountain right off the highway and drive to it, only to find that there is nowhere to pull off of the roadway. Upon learning this I start exploring my way around the northern end of Lookout Mountain and found a spot called Eagles Nest with a “pull off” big enough to get my vehicle out of the road safely.

I hurriedly set up my radio on the back of my truck and string the antenna horizontally out through the opening along side the trail and across the sign in the photo literally draping it over the sign and tying it into a tree to maintain the horizontal layout just to get the antenna off of the ground a little bit. Then I quickly threw two of my 10 foot counterpoises out on the ground and tuned the radio with the automatic tuner. I did not get out my external battery to save set up time. Since I was running off of the internal battery in the radio it limits the output power to 5 watts automatically.
As you can see from the logbook entries, I started on 40 m and worked my way up to 20 m. As expected I was getting my more local states on 40 meters such as Kentucky, South Carolina, Alabama, Georgia and the like. Similarly with 20 m I was getting stations a little further away like Arizona , New York and Maine. This is completly normal for me on a POTA outing too. Then… right after I finish with Maine, I here this call sign fading in and out somewhat and could have sworn the first letter was a “Y”! So I had him repeat it a time or two to confirm I had copied it correctly and there it was on the logsheet right in front of me…YC2VOC!

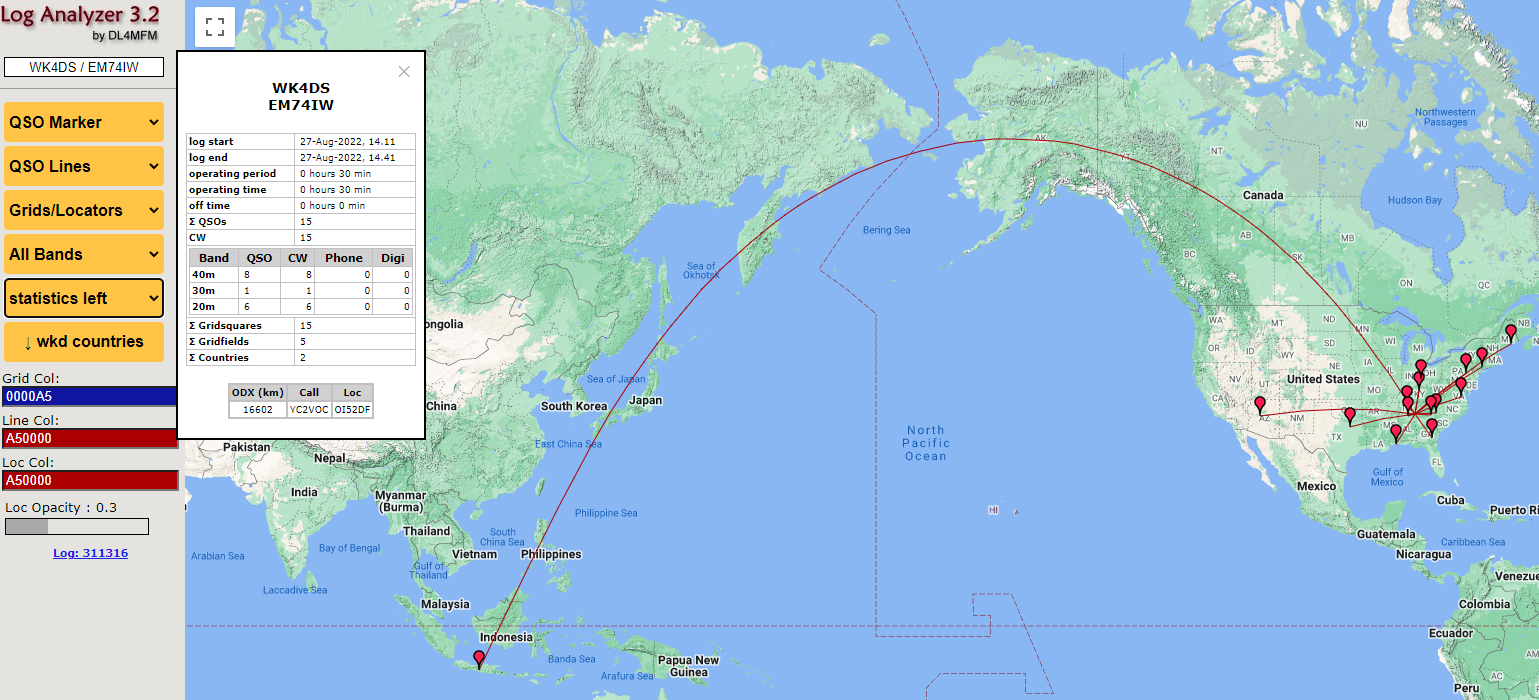
I had no idea at the moment, just how far away he was when we heard each other. So I worked him as a POTA contact and by the last time he had repeated his call, I could hear him pretty well. Still with a little QSB here and there, but I was certain of the call sign at this point. Here I am thinking I am going to hopefully get an activation in with the limited time I have and I get this amazing dx call back from my CQ!!! You see I have never heard that part of the world on my radio before. I don’t have great antennas (if your new to ham radio, it is immensely important to have good antennas to reach the farthest parts of the planet from your location) nor do I have them at elevation for proper gain benefits either. This means I normally hear the US, western Europe and some central America for the most part… I just couldn’t believe my ears that day.
There are numerous places on the web to get the great circle distance like I have here, this one is part of Log Analyzer 3.2. This maths out to about 500 milliwatts per 1000 miles or better said, 2063 miles per watt! . The conditions were just right between him and I that day to make it work with only 5 watts of output power on my end.

I want to say thank you to Galih for working with me that day to get the contact in the logs and tell all of yall reading this blog, that if you get out and turn on the radio, you just might have a conversation with someone in Indonesia!
The Elecraft K1 goes out for a POTA activation!

So I finally got my Elecraft K1 out of mothballs and took it for a spin to K-2169 the other day. (I actually have already used it once before but had put it back in favor of the IC-705 as it has more widgets and such.. Anyway, I finally just bit the bullet and took it with me to my favorite shady location at K-2169 and setup for some “on air” fun.
The one thing I like about the K1 is that it has an internal antenna tuner installed. This simplifies the set up and breakdown of the radio at the location by eliminating the entire external antenna tuner connection series of events.


I am running two 10’ counter poises at this time, mainly because I have them and it seems to help to have both connected. I want to run my VNA over them to see what it looks like with one and then two at some point.
This one simple thing alone saves me an easy five minutes of set up time. So it was fun for that fact alone but the other things that make the K-1 unique are that it is such a simple radio to operate as well. I like that the VFO works really well and the radio has enough controls to do everything you need while on an activation and nothing more.

Another thing that I like about the K-1 is that the headphone jack is wired for stereo headphones from the factory. This seems like a trivial thing but with the 705 and the TR 35 they are both factory wired for mono headphones or one ear only listening. This is not what I enjoy using therefore I either have to buy a adapter or figure out some kind of bizarre wiring scheme to get both ears to have signal on those two radios, but on the K1 just works.

I keep my K-1 in the original aluminum briefcase that I have had for over 20 years now. The radio and accessories have fit nicely in it for all of this time. I do carry the 705 backpack kit when I activate with it because the EFHW antenna that I am using is in that bag. Rather than pull stuff from one bag and put it in another I just take both and pull what I need from each one. I do like you using the N6ARA paddle that I have with my 705. It works really really well and I am probably going to get a second one for a spare when I wear this one out.


Yes, I did make that key you see in there. It is made from scrap industrial materials and works exceedingly well to be as simple as it is. I love making some of the things that I use on the air and my keys are one area where I do that. At some point I want to build a radio from scratch, but I have no time right now to dedicate to a project of this magnitude, so I will just stick to the simple stuff and have fun on the air.


Getting back to the activation I was kind of in a hurry that day so I hurriedly threw my throw line over the first large tree branch to get my EFHW in the air and it took me four attempts to get it over that branch which is normally a quick one throw shot for me! ha ha… There goes the whole doing it in a hurry part. Once I got it over that first tree limb then it’s a simple matter of pulling the antenna over that limb re-tying the throw-weight and throwing it into the second tree to pull the final end of the antenna up where this photo shows.

This makes the antenna run about 60° north east when I string it like this but it seems to work really well from this position.
It is no secret that the bands have been terrible lately but I was still able to get 23 contacts in about an hour, maybe a little bit longer, with this activation. This particular activation put me at 19 activations at K2169. I really wanted the Repeat Offender award so I went back the next morning and setup the entire assembly the next day and reworked 14 more contacts to have my 20th activation at Cloudland Canyon State Park. I have been working on this award for quite some time and finally got to the minimum 20 to complete it. Now I think I will start branching out to other nearby parks and activate some of those as well. I will still go to Cloudland Canyon very regularly as it is really close to my home and I can go over there almost any morning for an activation. It is the only park that is within a 30 minute drive of my house that I have available to me. The area I live in is park dense, to a degree, but they are actually spread out somewhat due to the topography of the area.

I am going to wrap up this blog post by saying that if you have not tried parks on the air I would recommend it highly. As well as if you have not tried Morse code, I would recommend that as well. Mainly because both of those are very fun for me… Until next time.
72
David
WK4DS
How high does your antenna need to be?

The sag in the wire makes the center height of the “horizontal” run less than 3’ above the ground and it still worked really well.
So over the past few days I have been thinking about how high does my antenna actually need to be. Turns out it doesn’t have to be very high at all. I have done two park activations in two days time and on both days I never raised the antennas any more than 9 feet off the ground. That’s right! 9 feet max! Almost had them running dead horizontal from the picnic table 65 feet away from me. No throwing the hoist line multiple times to get it in a good spot or even having to throw it at all actually, I just tied it off to a limb that I tossed the end of the line over without even adding the throw weight to it!!! Easy peasy!!!

A quick look at the QSO maps for these two outings shows that the radiation pattern is typical for a low altitude wire antenna. Pretty much omni-directional or a “globe” shaped pattern. Also these tests were done on days that had pretty bad solar activity and the bands were in terrible shape. I think this is why there is not near as many western stations as compared to other activations. Also note the signal reports on the logs and that they were not really bad when the bands would open as I was strictly running 5 watts QRP power also.


The low position creates a very obvious take off angle as the contacts on this outing are almost in a perfect circle around me!!!
So all in all, I would say that if you want to be on the air for a while, go to the trouble of getting the antenna as high as possible. On the other hand, if you want to get a quick activation in on your lunch break or if your doing a RADAR run of some such, it seems that getting the wire up off the ground a couple of feet works good enough to get an activation in less than an hour. I am going to repeat this test in the fall with literally laying the radiator on the ground and I will take my VNA and see what it looks like in all three positions. This helped me to understand that it really doesn’t seem to matter if you cant get your antenna up high enough for proper directional effects.

The end insulator is only about a foot above my hand here and is even under a tree!!!
I strung my antenna almost horizontally from the picnic table on two different park activations at two different parks to see if I would get more or less contacts with a really low antenna and the results are in. Seems that if you cant get your antenna really high up (for the lower bands) that is seems not to matter if it is 20’ high or 3 feet about the hard deck. My logs for the two activations look like any other day when I stress over getting the wire up high into a tree. The only real benefit from getting the wire up really high is it prevents others from tripping over it by not noticing it. This was my only real concern while activating both parks, although I did go at times when I knew that there would be fewer people and at Booker T Washington state park I was literally the only person in the area I was in. I just didn’t want problems during my experiment, so I chose times that would protect park users and my gear and preventing the gear from being a trip hazard as well.
If you don’t have coffee, is it even a legit activation???
The signal reports were cyclic as the band would open and close, but all in all, I was getting good reports even though I was running 5 watts through a tuner as well. I like doing these kinds of experiments as it allows me to see just how bad the setup can get and it will still work… lol. All kidding aside, this worked way better than I thought it would and setup was FAST. I really liked that part about it.
Thanks for reading along, I hope you enjoyed it and if you did, please hit the like button and dont hesitate to leave a comment too. I love comments!!!
72
David - WK4DS
Huntsville Hamfest 2022 AAR
So it has come and went again, the Huntsville Hamfest was alive and well this year with a strong showing from major companies as well as a sizeable boneyard! Who doesn’t like a good boneyard?!?

We started our morning by grabbing some coffee in Scottsboro on our way from Trenton and heading over to Huntsville. Since we had paid online we did not have to buy our tickets at the gate and we were able to immediately register, get a pin and go on into the Hamfest. I have to admit, I was a little bit taken aback when we got into the show iteself by seeing all of the vendors that were there. There were so many vendors in new equipment, product manufacturers and the boneyard was unbelievable. It was like I had went back in time 20 years to a hamfest. I have always been more interested in the boneyard than I have in new equipment so we focused most of our time wondering the boneyard looking at things from days gone by and occasionally buying stuff.

This was the second trip to the truck of the day… lol
We bought so much stuff that we had to go get a little red wagon cart out of the truck to haul it all back with. I finally bought an amplifier and a power supply to drive it, as well as a few antenna tuners and some other little odds and ends, OH YEAH! and a 20 meter hamstick for my POTA ops to reduce the kit size if possible on some outings. I don’t even remember what Roger bought other than the STACK of those green hard shell cases from GigaParts! Lol, I think he ended up with 4 of them before he was done! HaHa. He has so many portable radios that he wants to kit out and these are almost perfect right out of the chute. a little work and some closed cell foam and mine will house my Argonaut and all the associated stuff to use it for an activation.
We saw so much cool stuff that it is hard to remember it all. Things like vacuum tubes galore, along with all the panel meters ever made at one table, and if you look close enough, you can even find vintage crystals in a cigar box here and there.


It was a kit builder’s paradise! We found so many parts to build amps and tuners with and there was a table with nothing but little project kits (I failed to get a photo of that though…) .

We grabbed some lightening arrestors as you can never have too many of those… then started looking for cool old Ten Tec stuff. I was actually looking for two very specific things made by Ten Tec back in the day. One was a Hercules II amplifier and the other was the Collins mechanical filters for my Omni 7 radio. If you happen to read this and know where I can at least get the 500hz Collins filter I would really appreciate it.
Here are some of the Ten Tec rigs we found, minus the Pegasus and the Scout that I forgot to grab a photos of…

The mighty Orion 2 contesting rig even made an appearance!


Something else we noticed early on was the incredible number of Ameritron AL-811 amplifiers that was there! It seemed like every other table had one on it. That is an exaggeration of course, but it did seem like every time we looked up we saw another one. We saw so many that it actually became a little running joke between me and Roger.

About 2 o’clock in the afternoon we realized we needed sustenance and grabbed some nutritious options from the snack bar onsite. As an aside, I have realized that I am now officially vegetarian too. At some point I figured out that I am allergic to beef (probably the result of a tick bite), so I decided to join my daughter, who is vegetarian due to medical issues arising from PANDAS, in being vegetarian as well. Something you need to understand here, I hate vegetables. Yeah, I said it. I cant stand vegetable soup or okra or butter beans, just cant stand most vegetables, but I am figuring it out…ever so slowly.
I don’t know what the big deal is with the whole division in the dietary community too, I just don’t order meat and mind my own business…simple. But you see these vegetarians throwing fits over restaurants not offering things compatible with their diets and meat-a-tarians making fun of the herbivores. I just dont get it, but who knows (obviously not me). I just know that if I don’t eat beef, I don’t wake up in the middle of the night with hives head to toe and itching all over for an hour.
Anyway, I got the fries and pretzel and they were quite delicious. Yes, the pretzel has butter on it and it was awesome! (I am not vegan…lol)

Once fueled up, it was back into the fray. Here are a few photos of some of the highlights I saw…


These keys were amazing! If you want a wonderful key built by a ham, this would be one that I would suggest, they were simply subline.


I even found the youtubers. Lol.
At the end of the day, we finally called it a done deal and headed home with our new treasures. All in all it was a great show and if you are within reasonable driving distance, I would say to give it a shot next year, it was well worth our trip this year to say the least. Thanks for following along and I hope you enjoyed the tour!
72
David - WK4DS
High Temp Activation
Today I went to my favorite park and set up my IC705 radio to work an activation on Park K – 2169. The only difference today that was unusual was the fact that it was in the mid-90s here in Georgia, this usually is not a big deal but when I finally got my radio set up I was in the direct sun. This causes the radio to heat up very quickly and I found myself with a radio that was so hot that I could almost not touch the case in less than 30 minutes. So I moved the radio to inside my backpack to where I could shield it from the Sun as the shade moved closer and closer to my operating position. Eventually the shade got to the end of the table and I was able to get the radio out of the Sun. For the period of time that I was working 17 m I learned that the reverse beacon network was not picking up my CQs and the POTA site was not posting my spots either. These two items combined caused a very long and “quiet” period of 17m operation… HaHa. I finally got 11 contacts on 17 m after considerable time of what seemed like endless calling of CQ. I had my antenna strung high in the tree, probably 25 or 30 feet up, ran up over a large limb on the first tree and horizontally at a slight upward slope to another tree as shown in the graphic I made from the photo I captured. I am still using the N6ARA tiny paddle for my travel key and it works wonderfully to this day. I have done well over 15 activations with this key now and it keeps on working perfectly. Once I moved to the 20 m band the game kind of picked up for me as I was able to make another 24 or so contacts in short order. This being mostly due to the RBN starting to see me and I was able to get the POTA spot to take when I moved to 20. The band would fade in and out some as I was working but for the most part I was able to work contacts about one per minute. It seems like that is the maximum speed that I am able to work a Morse code contacts with the speed I am able to operate (about 20WPM) and with the exchange information I choose to send. All in all, it was a wonderful day to get out and play with my radio and to get an activation in at the same time. My next activation will either be with a Ten Tec Argonaut 5 or my PENNTEK TR–35 radio as I want to try one of those out for an activation soon. I have had the TR-35 for a while now and have only used it a couple of times in the shack at home so far. This is a travesty as it is a wonderful little radio. I hope to take it on trips in the future as it is SO small!!!
If you have not checked out the parks on the air, set up an account with them and look at what they are doing. It is a wonderful program and has lots of activity for the amateur operator. There is usually a mode that is something that you would enjoy doing, that will have people on the air almost all the time. Whether you are into digital, CW, voice, or any other mode that people use on the air there is usually something going on with POTA. I even had two traditional QSO contacts today during my activation, complete with name exchanges, QTH exchanges, and even our rig exchanges. So there is no hard and fast rule as to what information is traded in an exchange but they do normally have a minimum of signal report and usually the hunter will send the state they are residing in (but it isnt required from what I can tell), that is about it, anything else is fair game. If you want to know more about it you can go to the Parks on the Air website to learn lots more about it.
Thank you and 73
WK4DS-David

I started with keeping the battery in the pack but eventually had to also put the radio in it to keep them both out of the direct sun.

ICOM AH-705 Antenna Tuner with my homebrew cable I made for it that has power, coax and control cable all in one bundle.

Antenna ran into the trees with the counterpoises run along the ground underneath them.

The IC-705 is a wonderful little radio that works really well for portable operations.
Not a bad day running 10 watts into an EFHW wire antenna!
10 things to do during the terrible band conditions with amateur radio

Now before we go too far into this blog post you need to know this is satire. I thought that this would be a fun diversion from the frustrations associated with the bands currently in 2022. So if you came to this blog post to get legit tips on operating during poor band conditions then this is probably not the blog post for you. With that out of the way, let’s have some fun.
Let’s get the easy ones out of the way first. Like…
Install a 180’ tower and a 20/40 beam antenna. We all know that a better antenna is the first step to better signal, so why not start there? I mean, isnt this what second mortgages are for?
Locate a 5 kilowatt amp… You will have countless hours of fun running a high current rated 220VAC circuit for it. It could easily double as a coffee table in the corner of the shack or as a nice space heater in the winter months to keep your cat warm.

Beacon mode. Now here is a novel idea. Your radio could be running in beacon mode, calling CQ fruitlessly anyway, and you could be free from sitting at the operating position and could instead do something less valuable… like go mow the yard…or better yet, scope out where you are going to put that tower.
Straighten up the wiring in your shack. Lord knows we could all use some wire management in our lives. So what we all need to do is turn off our perfectly functioning radios and then go around behind them and start messing with all the wiring, I mean, what could possibly go wrong?

Marriage counseling. We are all edgy lately due to the terrible propagation and the frustration with trying to complete QSOs that are normally easy, Instead of getting mad, why not instead take the XYL on a date to her favorite restaurant? You could even take her shopping…I know, I know…that might be too much, but you could try???
Repeaters. Now hear me out, if the bands are this bad, shouldn’t we reconsider what “DX” really is? How about we start working some local DX since it seems that 50 watts on 2 meters can still open a repeater these days.
Alternative QSOs. You can still goto a ham fest and make “eyeball” QSOs with people, don’t forget your QSL cards too, people still like to exchange them. Do these go in the LOTW too???
QRP Radio. We all know how frustrating QRP can be even in the best of band conditions. Since many of us are accustomed to having 100 watts or more at our disposal to make contacts with, why not try using LESS power during these terrible times??? I mean, you could just get it over with up front and not have to wonder why you cant make contact, you know for a fact what the problem is and you have an easy scapegoat?
Kit building. Now is the perfect time to get one of those kits and spend some quality time cussing at the burned fingers from the surface mount devices and heat sensitive ICs that you have to solder…

Read a blog. I think this is a great idea to be honest. You can subscribe to this very blog with a button somewhere on this page and then you will get all the notifications when I publish the next one. Honestly though, take some time to just call CQ if you want, maybe, just maybe someone will answer you…
Thank you for going down this rabbit hole with me for a few minutes to read this little blog, I just had this idea and thought I would share it with you guys and gals and have some fun with it. Leave a comment with what you think should be on this list that I left off. I would love to hear what all of yall think.
73
David
WK4DS
Straying from 20 meters…

In the course of the most ham radio operators career on the air they will find that they spend a lot of their time on the 20 meter band. This is because 20 meters is a very good band for propagation and is almost always open to communications. The problem with a band that is open like 20 meters is that every amateur radio operator that has a HF radio is on 20 m, well at least it seems like that is what is happening…
Another thing about me is that, I really am not into contesting either. This means that the 20 meter band is not available to me on the weekends as there is pretty much a contest every weekend…and for good reason! Contesting is a very popular activity in amateur radio around the world. Although for me, I just am not super into it.
The WARC bands do not get used in contesting so on the weekends I find myself dialing around 17 and 30 meters alot.

The N6ARA Tiny Paddle has really started to grow on me, I like the size and how well is just plain works. it is effortless to send good code with this key. I can highly recommend these is you want a small light weight key for things like SOTA and POTA.
Another thing I like about the WARC (World Amateur Radio Conference) bands is that the 30 meter band is reserved for data modes only. Did I mention my favorite mode is CW and wouldn’t you know it, the powers that be consider morse code a data mode… So I can goto the low end of 30 meters and almost always find someone to chat with. That is something to remember too, the WARC bands are pretty narrow and many modes share them, so sticking to the gentleman’s agreement on where your mode normally operates will go a long way towards being efficient with these small band allocations and making sure we all have room for our modes.

The rig setup is really a lot simpler than this photo makes it look. I wanted to get an overview photo of the whole thing for once to show the relationship of the parts. This rig would look like this if it were on 80 meters or 12 though so this photo isn’t strictly about the WARC bands…
A lot of people do not use the WARC bands very much as they are not the conventional ham bands. I tend to enjoy using these bands as they are normally quieter and less crowded than the conventional bands. Another benefit is that the POTA program also uses these bands as it is not a contest oriented program other than award chasing like any other awards system (Think ARRL W.A.S. or something similar).
On the day that I decided to activate on the 12 meter band I was looking to confirm that it was open to communication and decided to check the 10 meter band to see if it was open. I did this because I couldn’t hear any stations other than someone operating FT8 and had no idea how far away they were. This is a common practice as normally if a higher band has propagation, then the lower one will as well. I found that the 10 meter band had beacons coming into my location in the state of Georgia from California with clear audio and this gave me the confidence I needed to try and activate a park on the 12 m band.
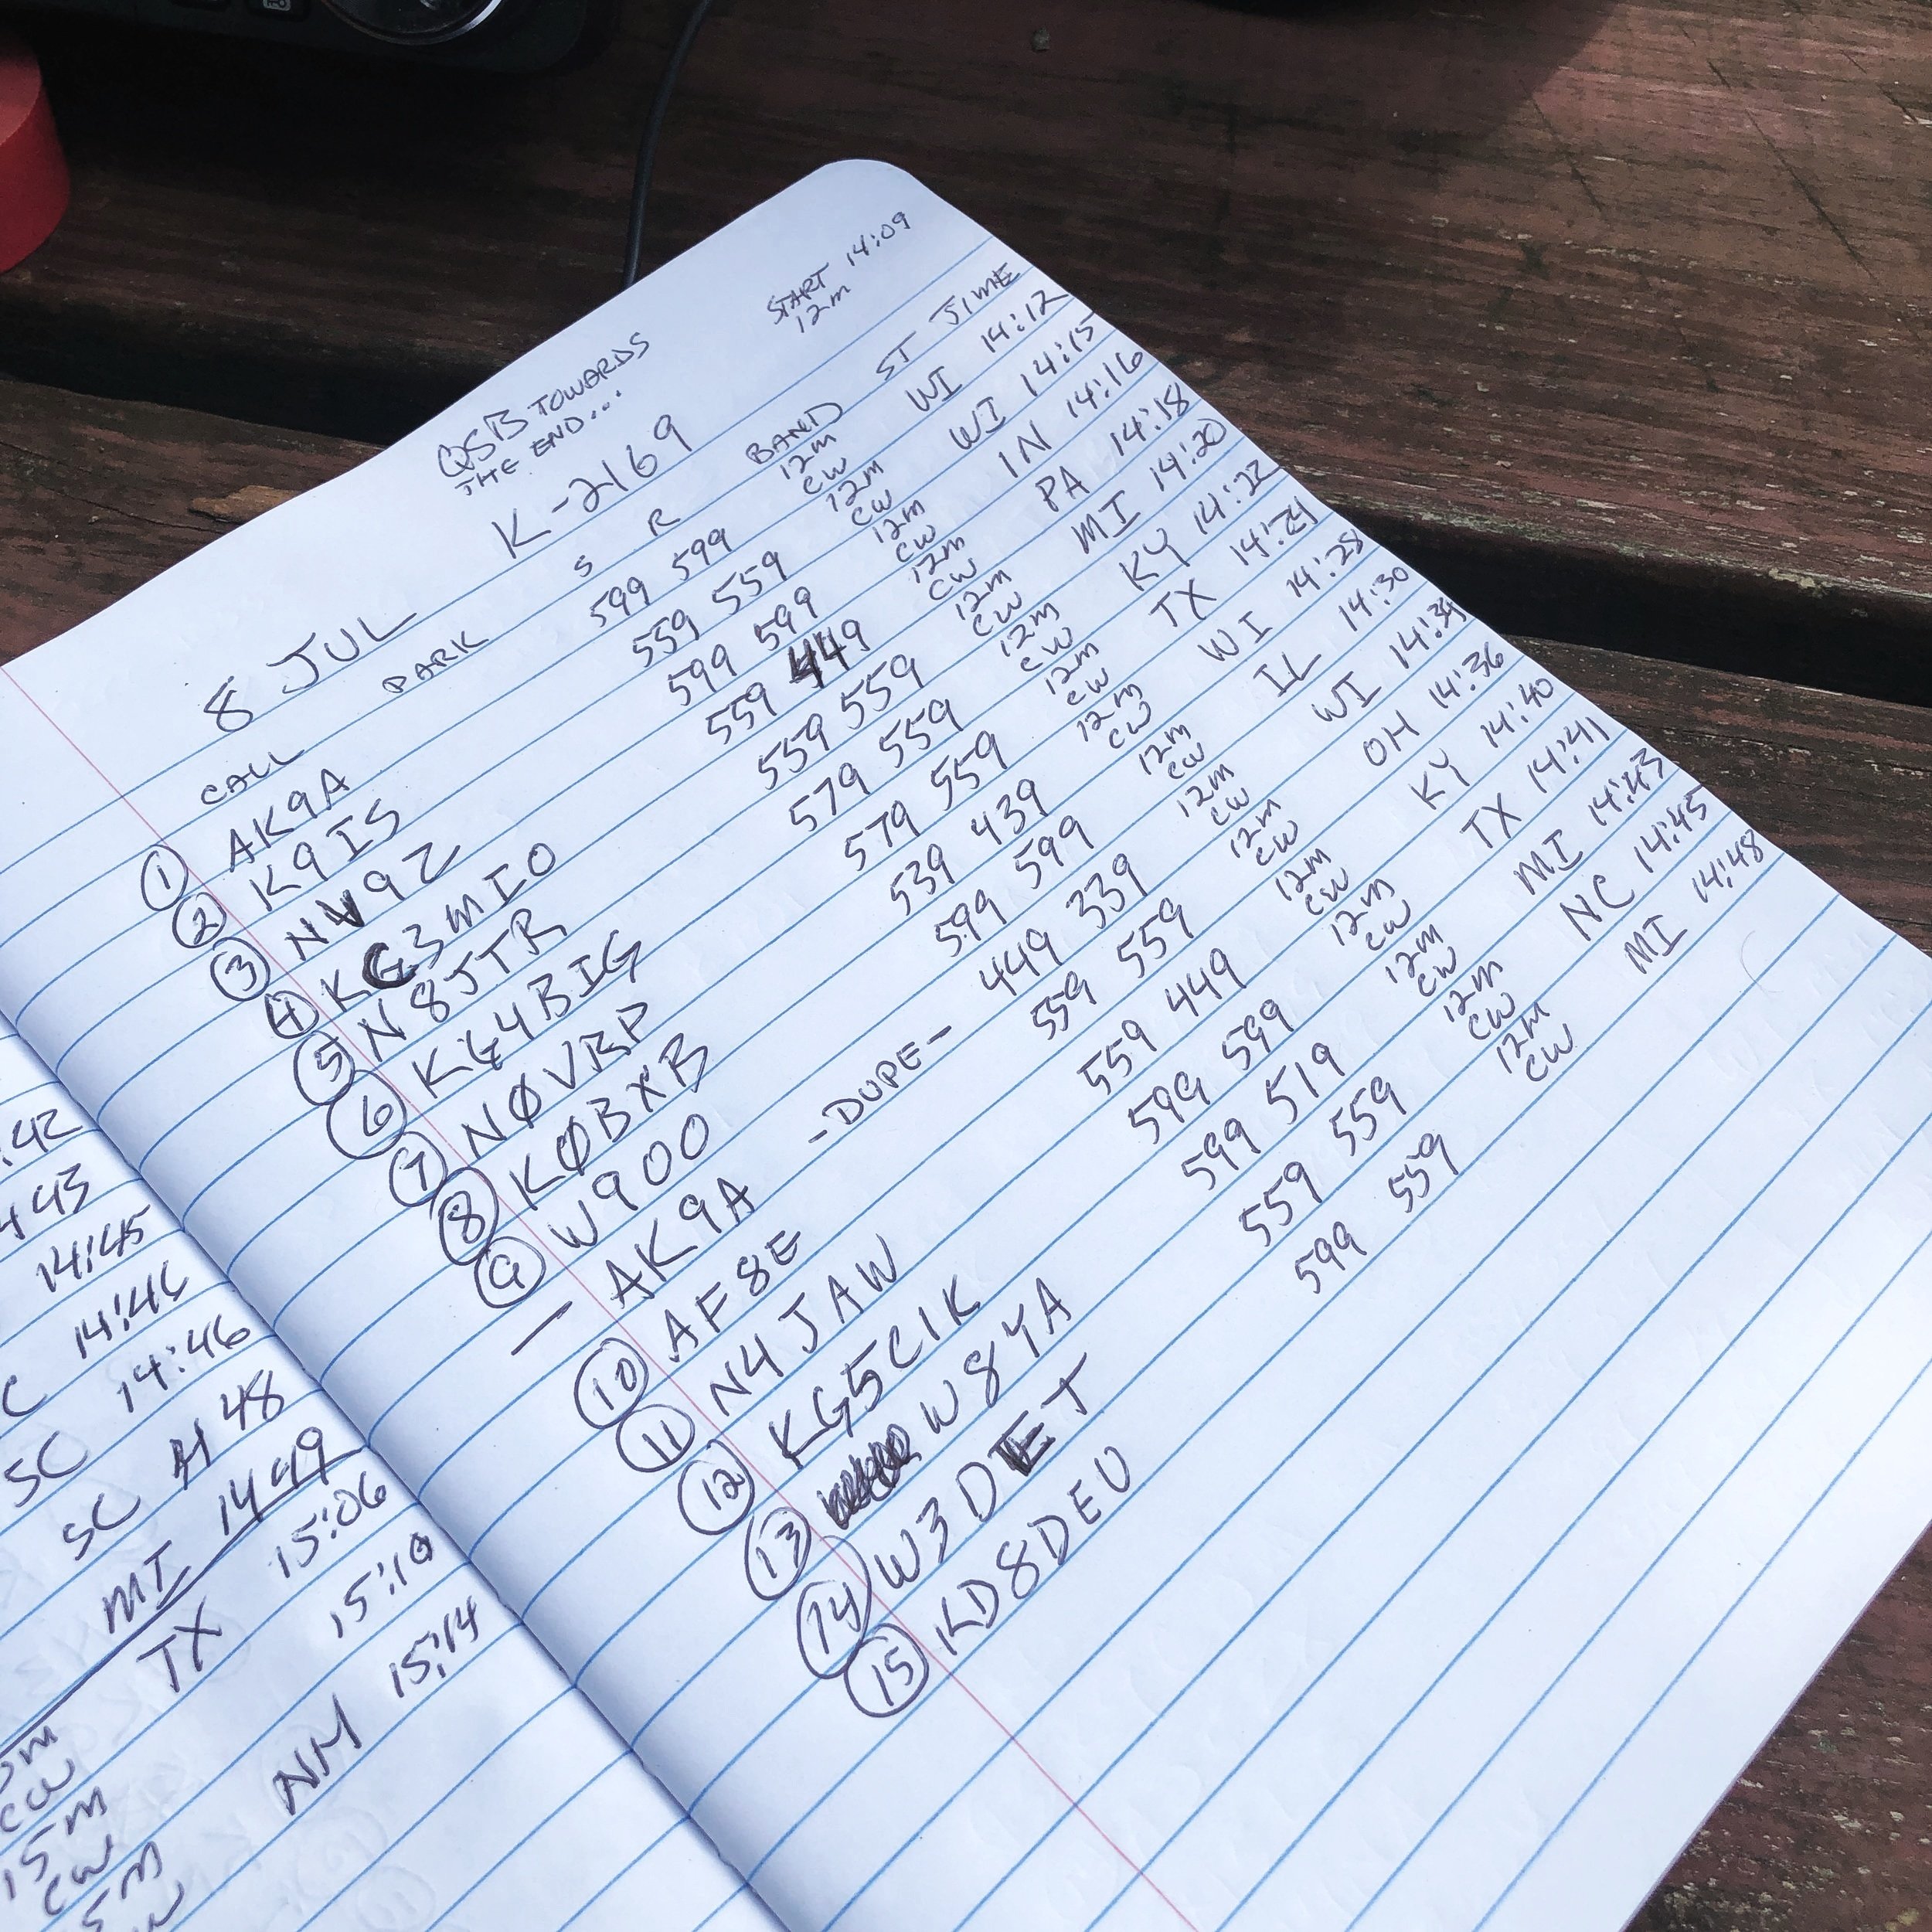
As you can see from the logbook I did get a successful activation on 12 m and it was a lot of fun. There were periods when I did not get a call back from my CQs but, for the most part, they came in fairly steady for the whole time I pursued the activation. This just goes to show that you can get an activation on something other than 20 m if you want to and it also gets the radio warm doing something other than the usual.
Get out there and get on the air.
73
David
WK4DS
Long lost friends in amateur radio
I have been doing POTA (Parks on the Air) for a couple of months now and have started to notice a few call signs that show up in my log more often than not. One of thsee calls is K9IS. Steven has “hunted” me at almost all of my activations, to the point that I now know his name when he calls me. His call sign just kind of “jumps” off the page at me for some reason. I dont know why this happens but it does occasionally. Maybe this time there was another reason???

Here is the dejavu part of the story. I was talking to my buddy across town (KG4WBI) on the repeater one night and we got to talking about the contact I made to Alaska from my jeep on a RCI Ranger 2950 10 meter radio using CW and I wanted to know the output power I was using that day, (Trust me this all ties together at the end) So I remember that I had used that particular QSL card in my WAS card set for my Alaska card, so I dig out the box and start going through the stack to find the Alaska card and what do I stumble across? A QSL CARD FROM K9IS FROM WHEN I HAD MY OLD CALLSIGN OF KG4WBH!!! Seems that day I was playing with my Rockmite 40 I had built and he was using a Ten Tec Argonaut 5. I just recently bought an Argonaut 5 and plan on doing some activations with it using a straight key soon. (Like next week if I can get the cable built). Anyway, this blew my mind that we had made contact so long ago and now we are meeting on the air reguarly to make POTA contacts and we didnt even know it.

I was using a Rockmite 40 that day and it only uses about 500milliwatts of output power, hence the QRPp note.
I reached out to Steven and shared my little discovery with him and we both had a good laugh out of it. Neither one of us had remembered the QSO back in 2003 on April Fool’s day…till I found that card. This is one of the many reasons I like using paper QSL cards. It is fun to me to wax nostalgic and read back through these cards at times. Especially the ones with additional inserts sent with them that had background info about the operator or some cool little tidbit about the local area where they lived. It is a treasure trove of information. You should look into using paper QSL cards if you have not done it before. It isnt for everyone, but at least take a look. If you want to send just select cards on occasion, you can even make simple cards in photoshop for a specific event and just print photos of them, that has worked for me in the past more than once. I even used the discount version of Photoshop… GIMP. Anyway, let’s climb out of that rabbit hole and get back to the original story. HAHA
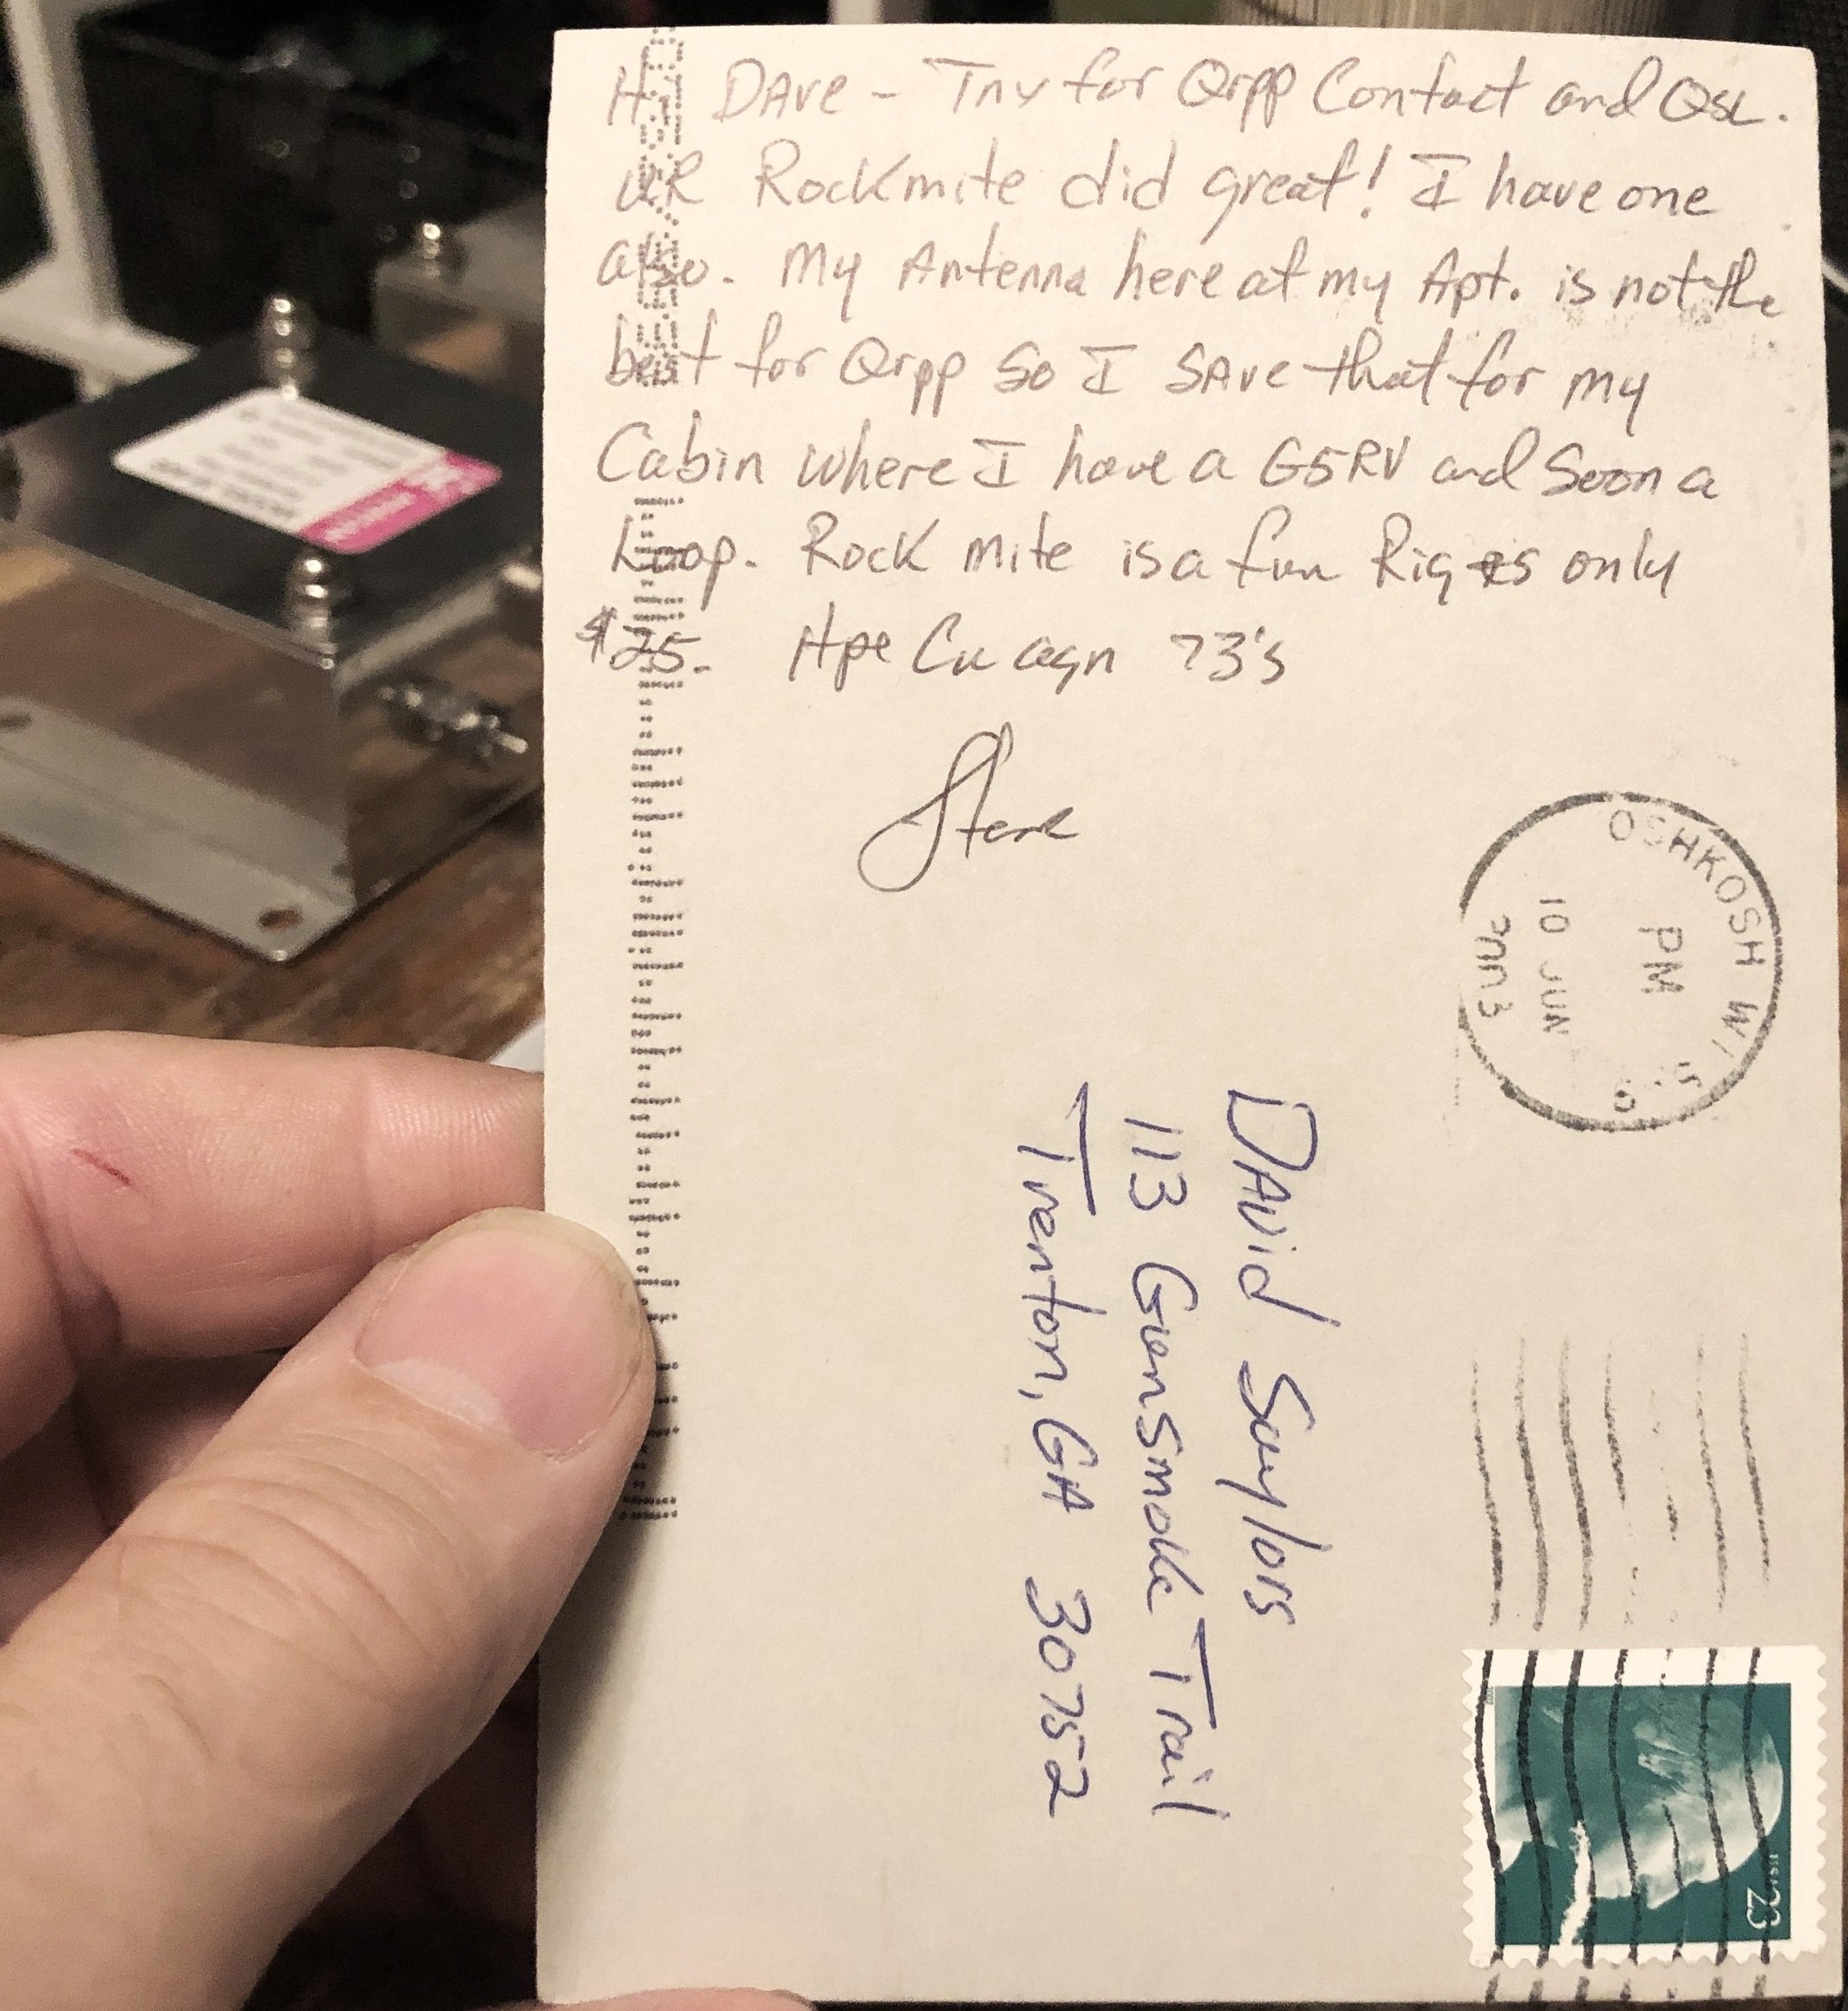
This is why I like paper QSL cards.
PS: By the way, the output power to Alaska that day from a modified 102” stainless steel whip mounted on the back corner of my jeep was just 8 watts. The bands were good to me that day.
PSS: If you noticed, my old callsign and my buddies call sign are sequential. We did this on purpose as we wanted to try to have sequential calls when we decided to get our licenses. I have since acquired a vanity call after getting my Amateur Extra ticket, but Roger still has his original call even though he now has his General.