WK4DS Amateur Radio Blog
Search Posts
Sharing the fun with some kids
Today my and Josh (KS4JM) went down to the local library in Trenton GA to setup some ham radio gear and share it with some interested young people that were in a homeschool group. I left early as I wanted to have time to setup a station if possible. I wanted to setup outside the library as this would allow me to make use of HF and hopefully show them CW as well as some digital modes. When I get down there I look around and there really isnt any trees that would work well for a wire antenna and I didn’t want to drive my truck into the yard of the library…but…
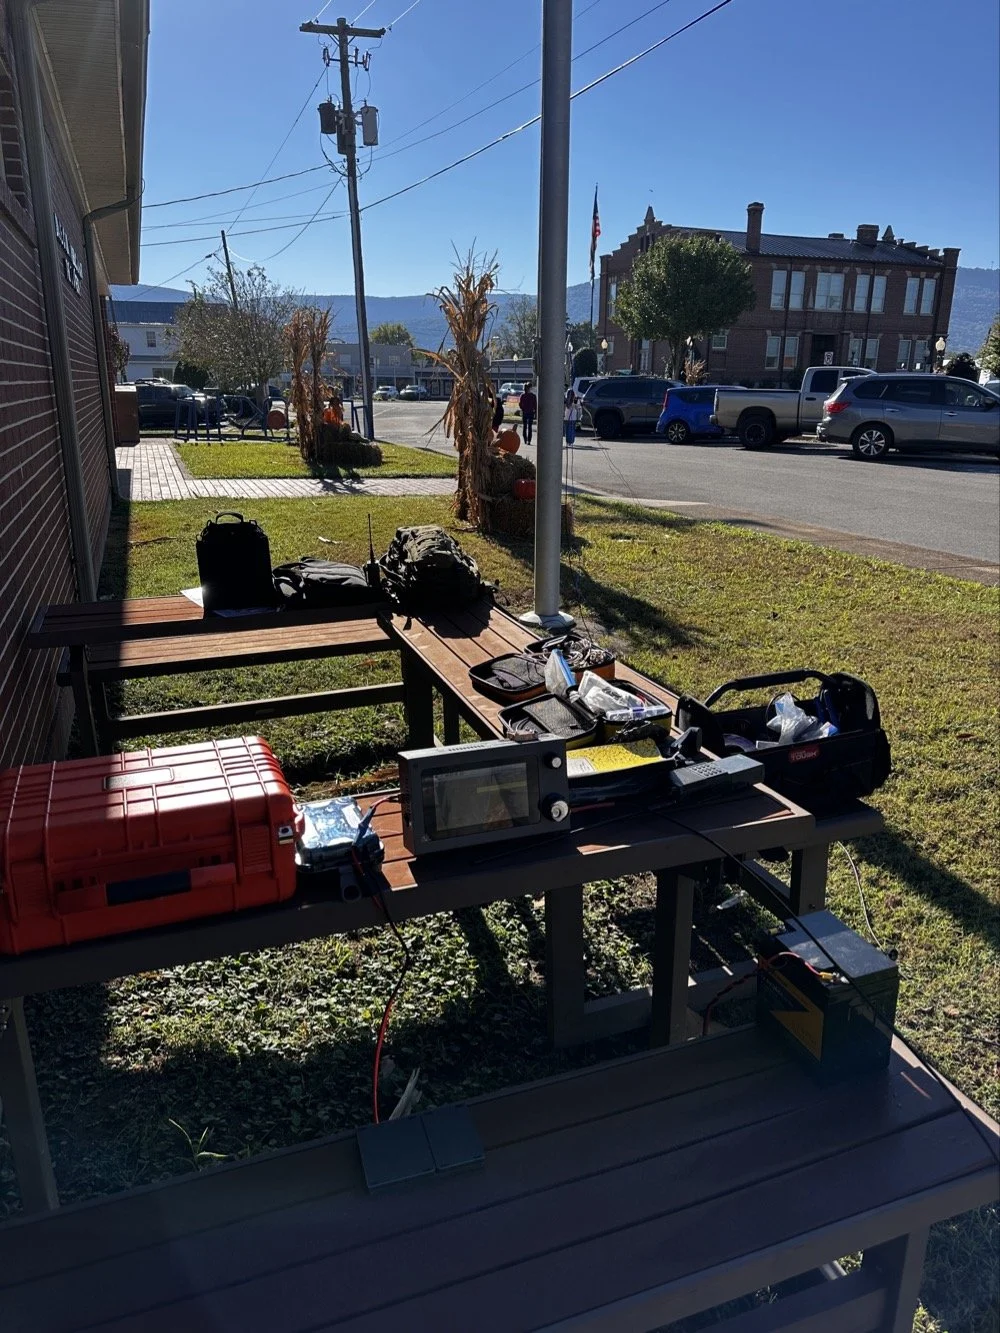
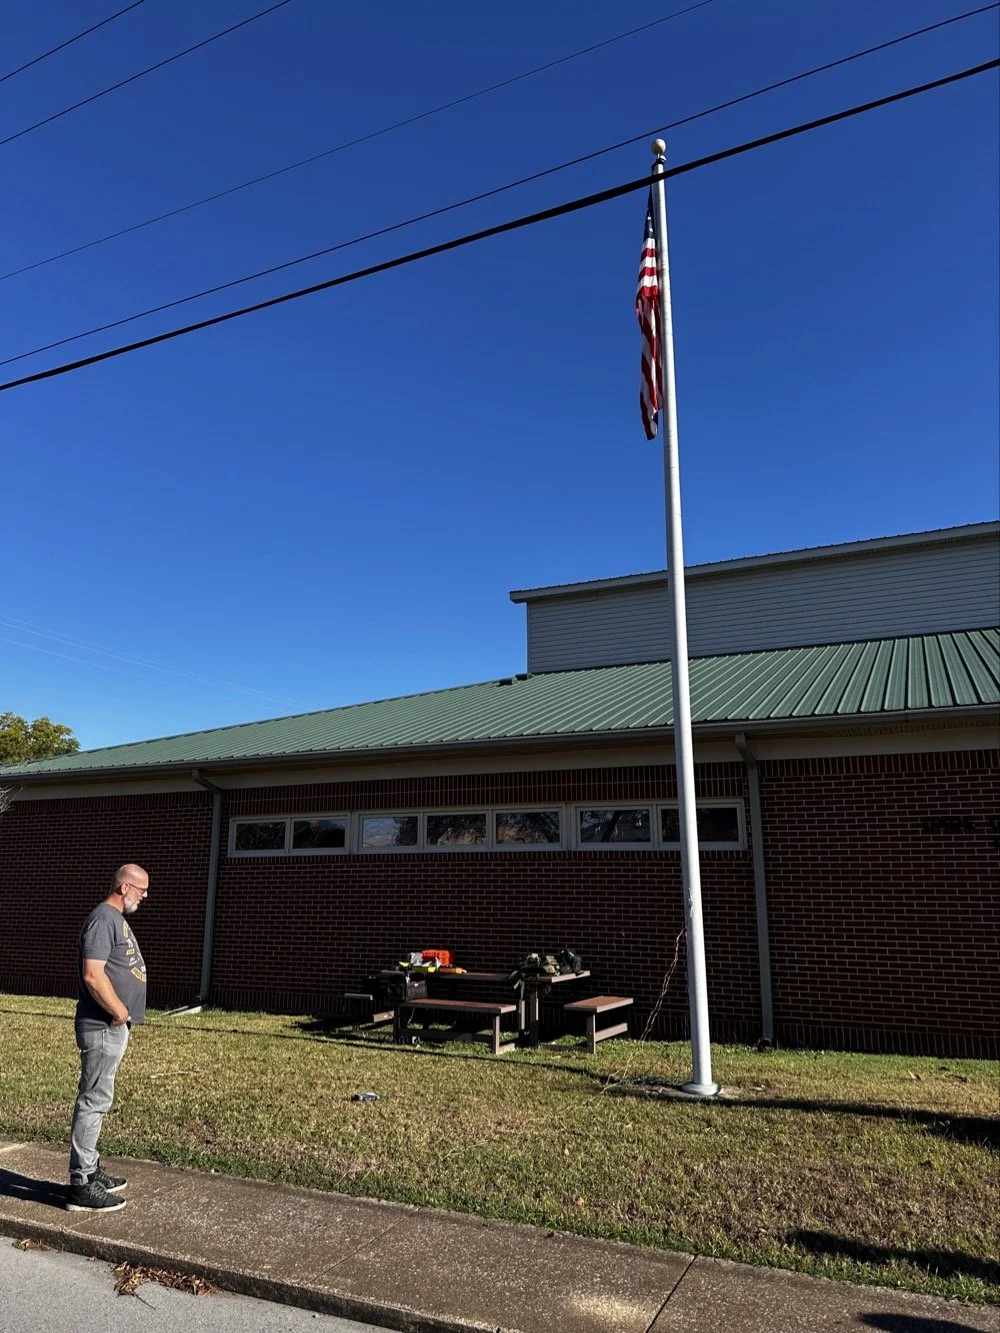
…as you can see, I saw what I hoped would work for a vertical antenna to use on HF. In the top photo, Josh is marveling at my cobbled together mess of wire that made quite a few HF contacts today… The first thing I did was get out all my gear and pile it on the table next to the building. What respecting ham would come to a demo and not bring WAY too much gear with them??? HaHa. So I basically dragged out all my usual POTA stuff along with a few other odds and ends to show the kids. More on that in a minute, right now lets get back to setting up an antenna in the front yard.
I measured the flag pole with my iPhone and it said it was just over 28’ tall, this led me to believe I was looking at a 30’ vertical antenna if I could isolate earth from the radio ground… This also was made easier since I was running on battery power today and the negative post of the battery was not grounded. Next step was to come up with a way to connect the antenna to the pole. This turned out to be easier than I though initially. I simply took a BNC to binding post adapter, attached a short piece of wire to it and then tied the other end of the short wire to the lower rope cleat on the pole. To get a counter poise, I just grabbed one of my radial pairs from my POTA kit and threw it out in the grass. I tied the radials to the binding post adapter an you get what you see in the photo below.
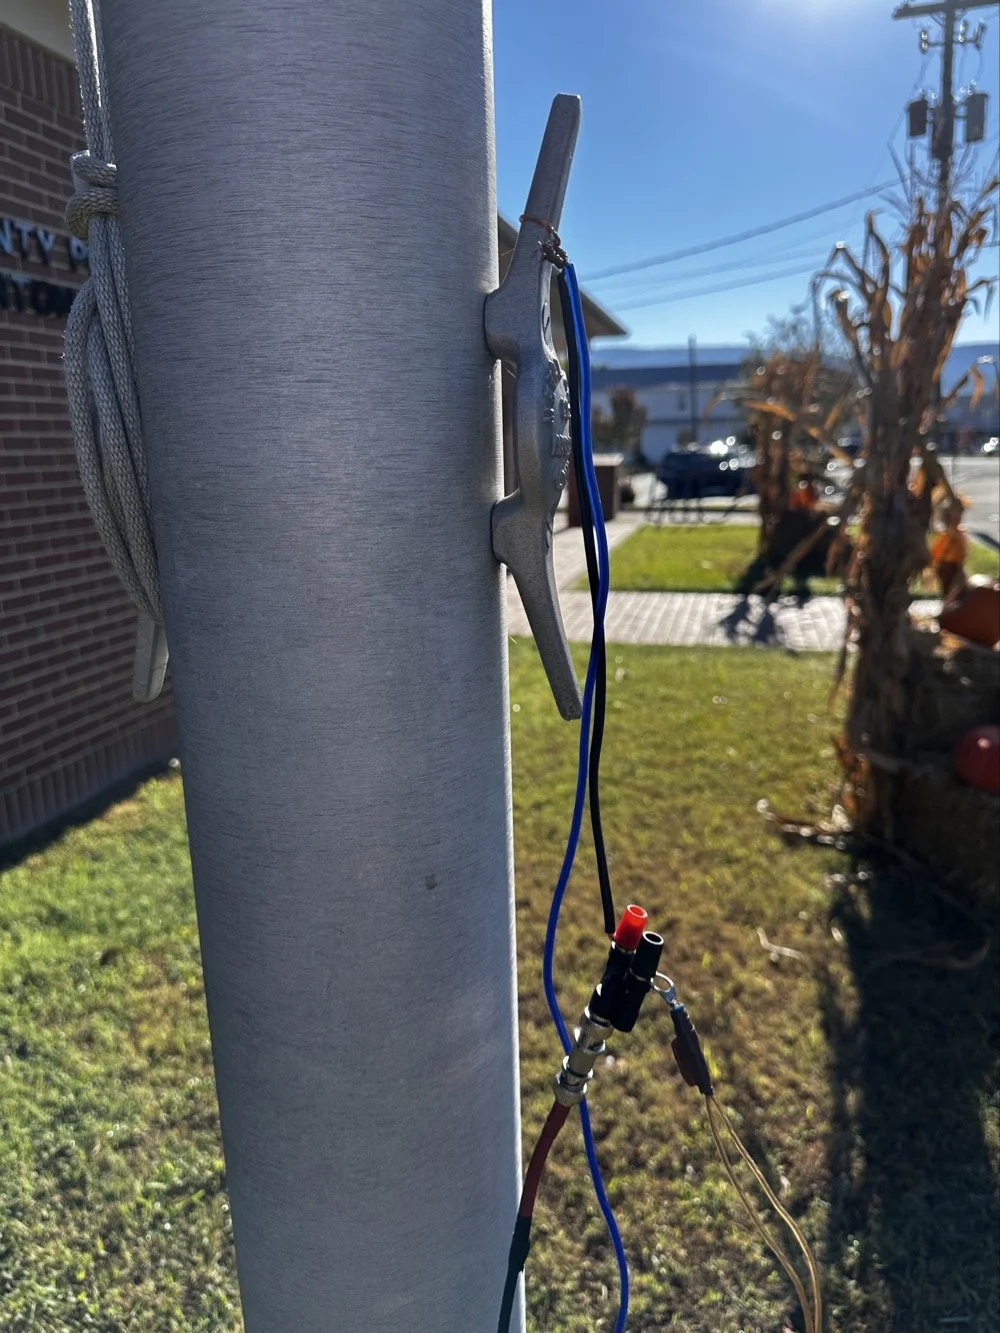
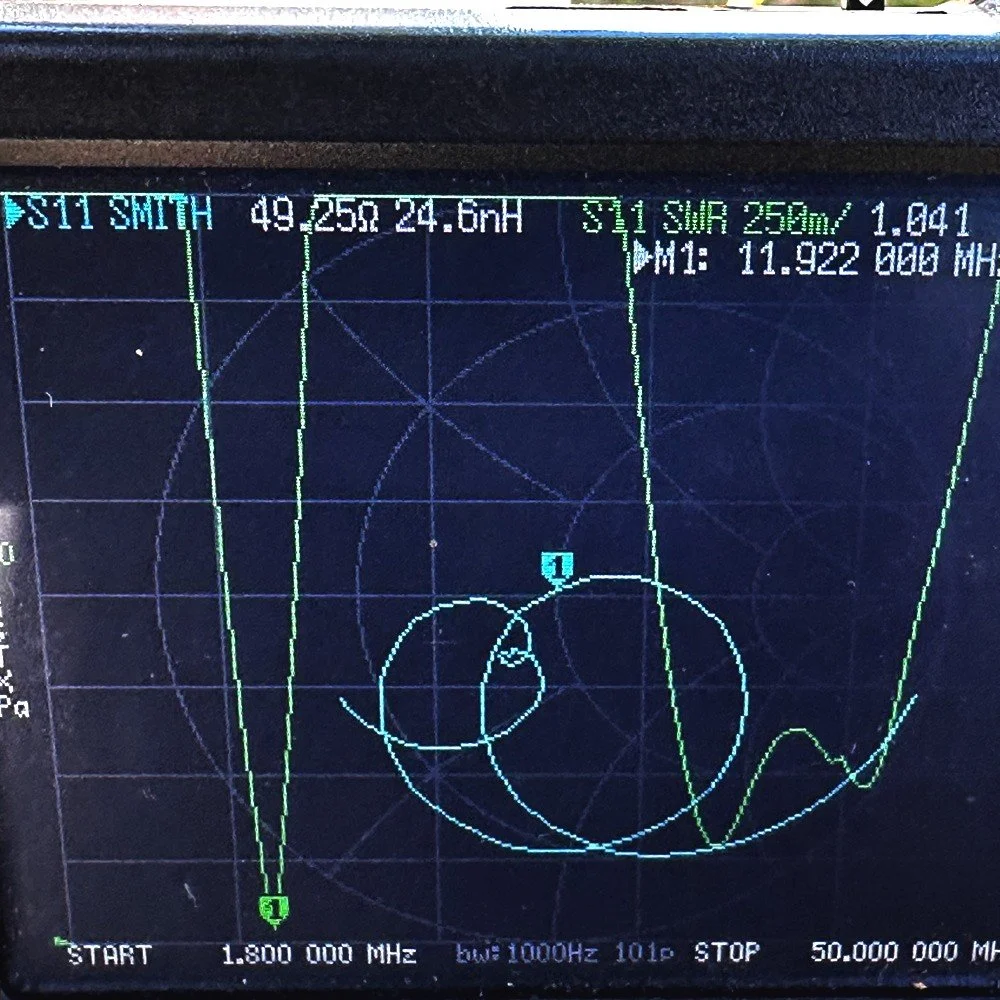
As you can see, it is the least engineered version of a connection that could be done, BUT I was able to connect the nanoVNA to and saw this plot… I set the marker to the bottom of the null to see what it was resonant at with the setup like I had it… IF I could just use this 11.922mhz band space, this would be awesome! Check out the SWR value of 1.041:1 that is incredible to say the least. It also hows that it will work on the higher frequencies between about 32mhz and 41mhz with reasonable SWR. These are also not amateur band spaces, but maybe this area is open to your uses, what ever that is. This would allow someone in an EMCOM role of some sort, could in the least, work out a small problem of two. Alas, I had to operate in the amateur spectrum so this is not an option for me. But this did give me hope. I couldn’t shorten the antenna so it will work on 20 meters, which is what I need to do to get on that band. Instead, I can go the other way and maybe get it to resonate on the 30 meter band instead. Making it longer, electrically, is far easier than shortening a flag pole that is set in concrete… If you will look closely in the above photo, you will see a blue wire also tied to the cleat and running down out of frame, this is the rest of the radiator that I added to make the pole electrically a little longer so it would move the resonant point down to 10.1mhz I failed to get a photo of it when I finally got the wires positioned right but it was about 1.7:1 SWR when I was finished. This is more than fine to work some 30 meter HF so lets get on the air!
Once I had the antenna tuned to the 30 meter band, I set out to get a radio tied to the flag pole to see if anyone could hear me. You see, just because I got it to resonate, doesn’t mean it is a good antenna. After all, a dummy load resistor has a near perfect SWR… To say that I was a little skeptical would be an understatement, but when I turned on the radio, I was pleasantly surprised to hear 30 meters was open AND there were people there! The antenna was working well! Well enough at least. Since Josh had arrived, as you saw in the earlier photo, I wanted to chat with him and catch up, so I found a clear spot on the 30m FT8 space and set out to calling CQ to see what would happen. Well, QSOs is what happened! I made a ton of contacts in a very short time on the FT8 band space. I was shocked that they just kept coming in too, I worked around 10 stations in about an hour. This whole time Josh and I were talking to the kids about the radios, activities and what all we could think of that involved ham radio. The whole time the radio was getting called by stations and it was completing QSOs for me. This is one of the awesome things about FT8 in my book, the semi automatic ability to complete the QSO without having to do a lot of work. It doesn’t hurt to have the ability to work in really poor conditions too. If I can’t hear a station on CW, I can usually spin the dial over to FT8 and make come contacts.
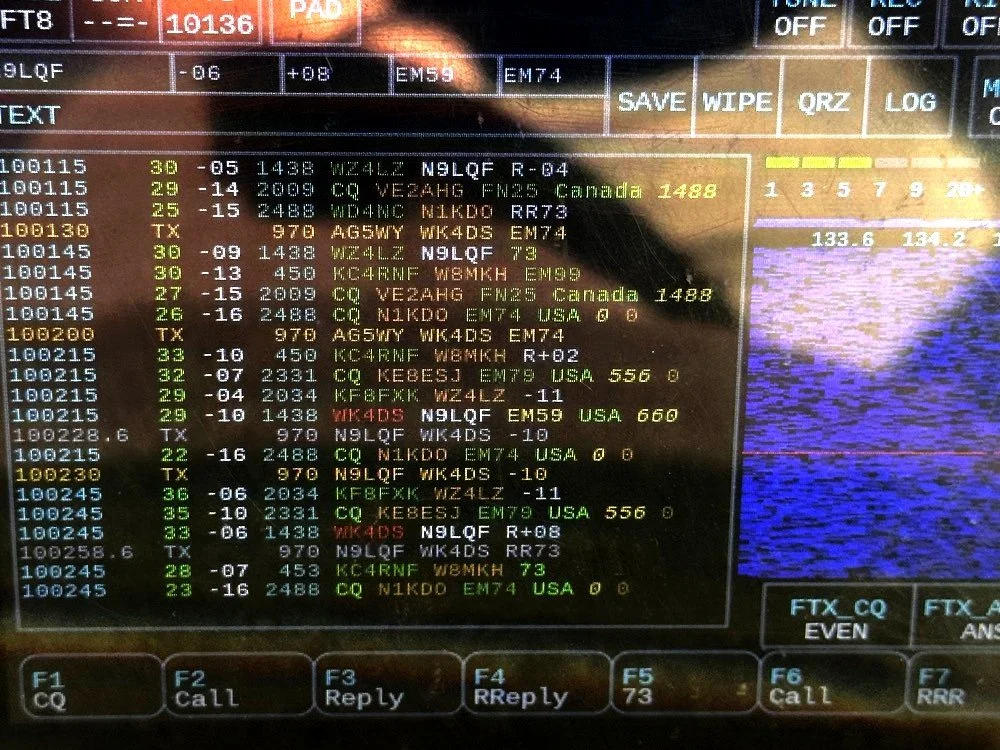
Here you can see where I was calling AG5WY attempting to make a contact with them and get a reply from N9LQF which I was able to log the QSO from instead. I had been calling AG5WY for several cycles with no replies so it is possible that they could not hear me. This was why I switched and worked N9QLF instead. Weak signal modes are awesome. The nice thing about this radio is that it has a touch screen and powered by a Raspberry Pi 4 SBC, so I was able to talk about how the modern radios do things the older radios don’t. I was also able to show them how I could work HF pretty easily and the radio didn’t have to cost 1500$ to do it. I even plugged in my Begali Traveler CW key and worked a POTA activator while they were there. The whole time I am working the contact, Josh is telling them about Field Day and how we have a lot of fun with our club and things like that. He shared a info graphic that shows the amateur band space and explained come of it to the kids.
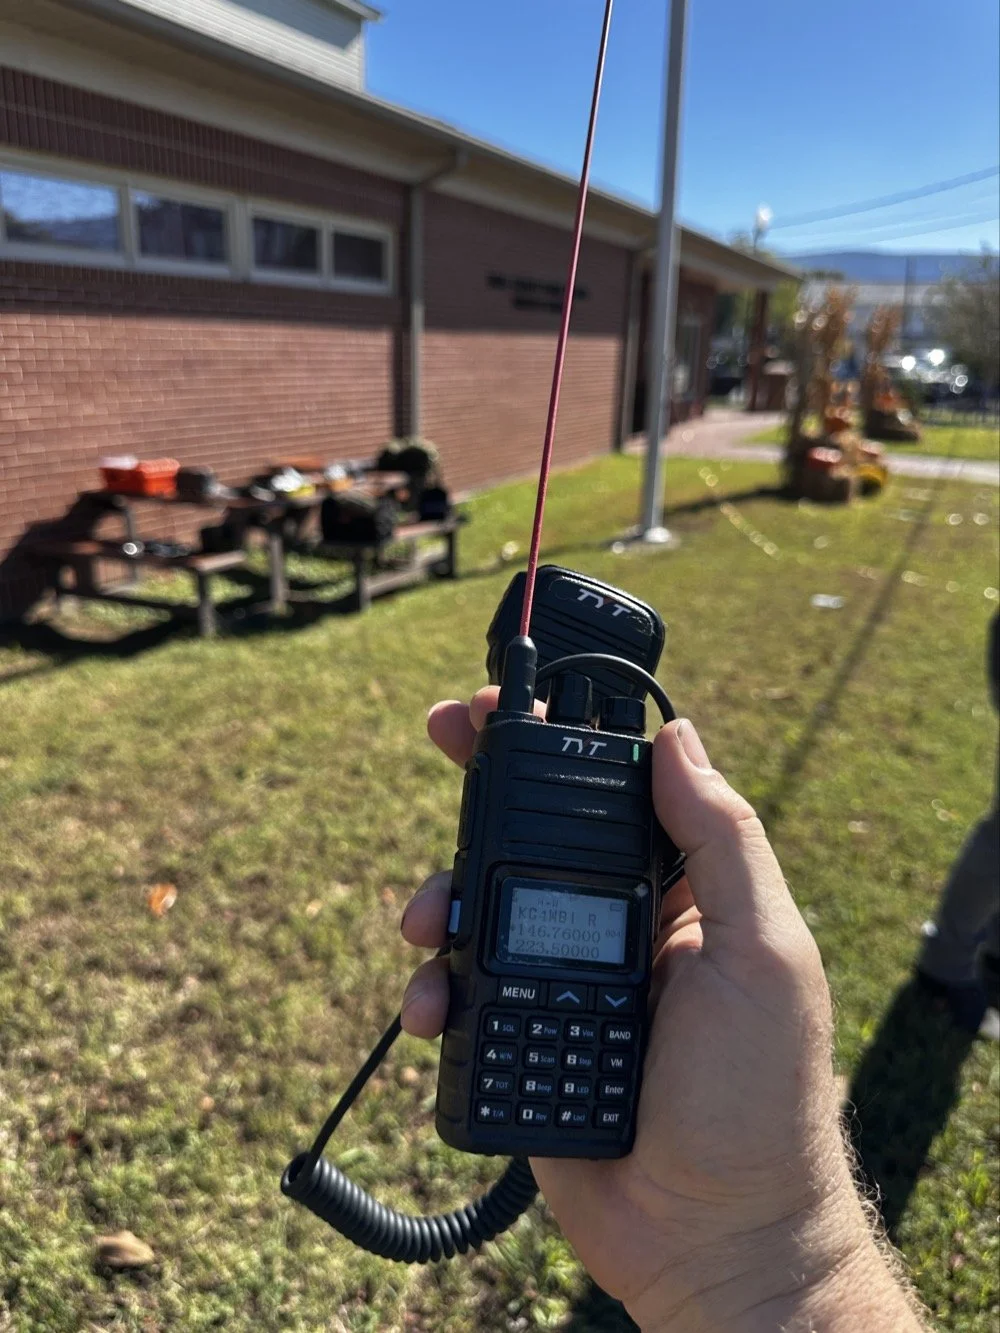
We also showed the kids how a small hand held radio like this TYT I picked up off of amazon can do a lot more than meets the eye since there are repeaters as well as satellites it will reach. Josh brought his “GO” bag kit radio along with his HT and he demonstrated talking through a repeater and how he has found some of the radios to only cost 25 to 30 dollars now days! That is crazy to think that back 20 years ago, a radio like the one in the photo would be between 700 and 1,000 dollars, yet today it is about $75 new. Who would have ever guessed a tri-band radio could be so cheap and work as well as this one does? After about an hour or so, the homeshool group had to go, but we stayed around for a little while longer and talked about things we wanted to do. It was a great morning with a lot of good kids.
If your wondering why there are no photos of the kids, there are two reasons. One, I dont normally publish images of children on my blog and two, I was so busy while they were there that I forgot to ask the parents if it would be ok this time. Figures, but rest assured that they were there and I hope they had as much fun as I did. If you get the chance to do something like this, I highly recommend it.
73
WK4DS - David