WK4DS Amateur Radio Blog
Search Posts
Smith Charts are easy…(The basics of antenna matching.)
When I decided to learn about Smith Charts and how to use them, I had no idea what a giant rabbit hole that was going to be. I have learned so much more since writing that first blog post about them that I wanted to revisit it and share some information with my readers. I love to learn new things and for some reason I have never taken the time (till recently that is…) to learn how to even read a smith chart, much less how to use them to design ANYTHING!
When I decided to learn about Smith Charts and how to use them, I had no idea what a giant rabbit hole that was going to be. I have learned so much more since writing that first blog post about them that I wanted to revisit it and share some information with my readers. I love to learn new things and for some reason I have never taken the time (till recently that is…) to learn how to even read a smith chart, much less how to use them to design ANYTHING!
The nanoVNA: A Vector Network Analyzer for everyone!
I started down this path with looking at antenna data from one of my POTA antennas on the nanoVNA. The nanoVNA is one of those wonders of modern technology that has become accessible to the masses recently. You see, before a few short years ago a VNA (Vector Network Analyzer) would easily run in the 5 figures and some of the nicer ones would break 6 figures. Rohde and Schwarz come to mind here… Even their used ones trade today for thousands of dollars…
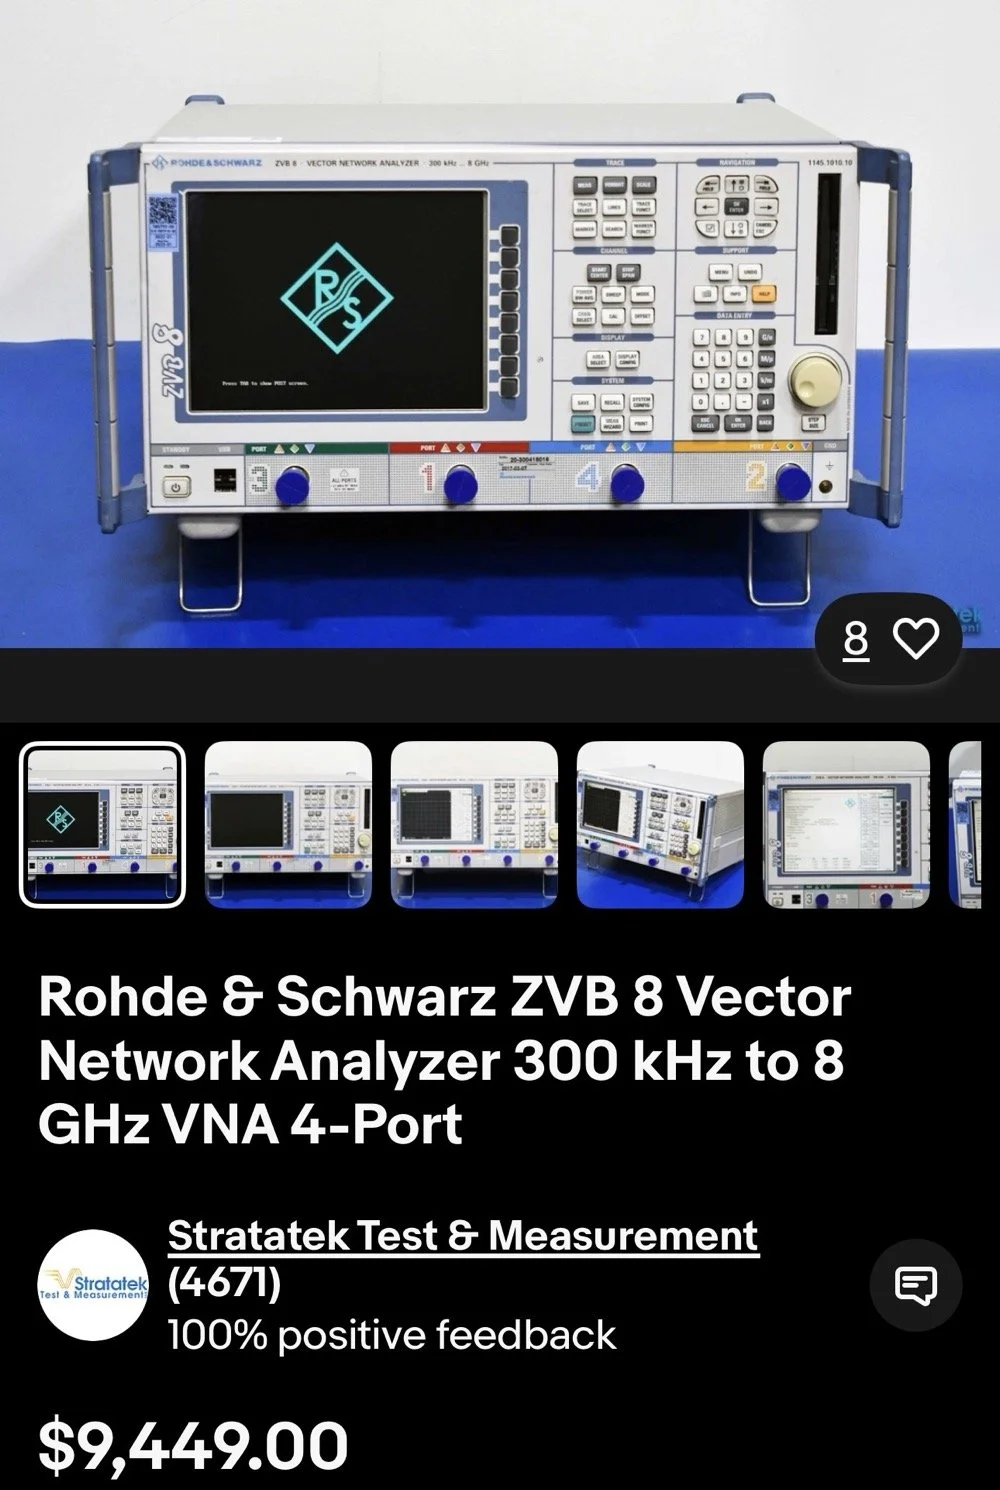
This is the reality of VNAs from just a couple of years ago. 4 and 5 figure prices for used units were common.
The nanoVNA changed all of that. It is small, runs on Linux and is now a single board computer in a tiny battery powered device that will literally sit in the palm of your hand. I have used one for my antenna setups for a couple of years now. I am actually on my second unit as the first one developed a fault and it was so inexpensive that I just bought a new one and threw the old one in the trash. You won’t see that happening with an HP / Agilent VNA!
There is a very good reason I use one for my antenna tuning needs too. The nanoVNA does everything those larger (and more expensive as well) ham radio specific antenna analyzers do that are available. You just have to learn a little more on how to use the nanoVNA. It also will perform functions that the antenna analyzers will not and this is where I love to bring the nanoVNA into the light. It has a smith chart function as well as an S21 input option that most, if not all ham radio antenna analyzers lack. You simply can not sweep filters with a MFJ antenna analyzer, at least not that I am aware of. This is where I found smith charts as I started to want to know what it was showing me on those charts. All of these nanoVNAs have a smith chart function and it is normally “on” when you start them up by default.
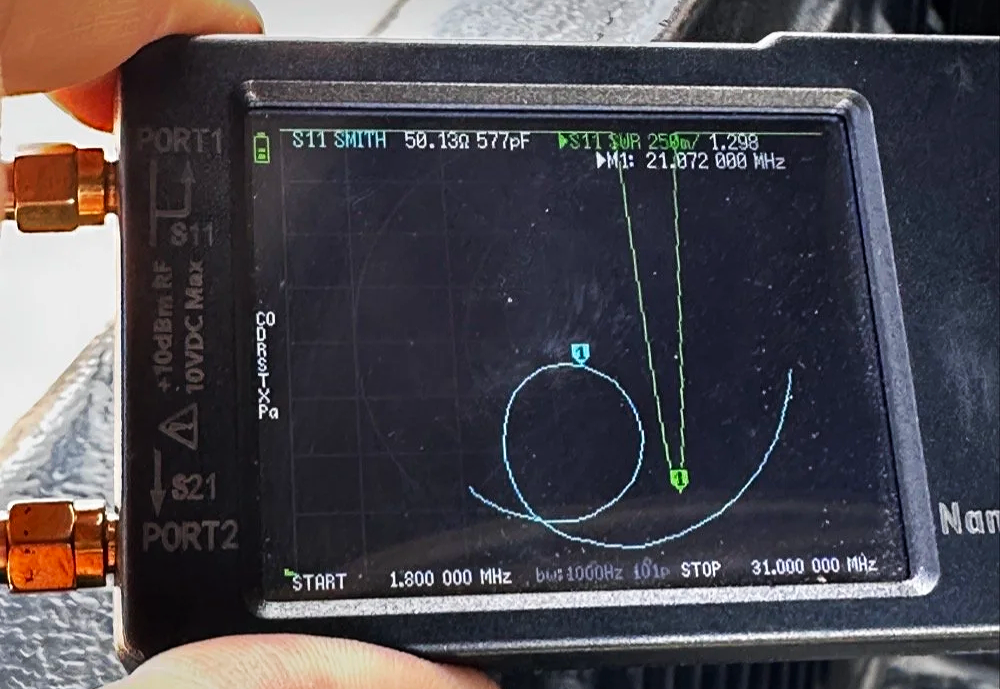
nanoVNA showing the Smith chart upon power up. Notice the diminutive size of the device compared to my fingers!
Smith Charts are NOT Scary…
In the above photo, the light blue trace is the one for the smith chart view. If you look really close, you can just barely make out the circular plot of the smith chart graph and in slight less illumination it does show up better. The light blue curved line represents the plotted values from 1.8 mhz up to 31 mhz (the two values are at the bottom) and you can move a marker along this plot as you go through that frequency range. In this photo I have stopped at 21.072 mhz as I was tuning my telescoping vertical to the 15 meter band to operate CW and FT8. It shows two more pieces of critical information though, the real reactance and the imaginary reactance..yes, imaginary… On these little nanoVNAs it shows up as either inductance (+j value when converted) and capacitance (-j value when converted). This antenna is measuring 50.13 ohms 577pf capacitive. We would need to convert this capacitance to a j value before we can plot it on the smith chart. I will get into that a little later in this article, but for now, this is a great tool if you are wanting to learn how smith charts work and I recommend you get one of these little wonders of technology for yourself and learn how to use it, even more so if you choose to use my link here to get it! As buying it from the link will help me maintain the website and costs you nothing extra.
One of my early attempts at working with a smith chart, it is covered in errors, but this is how you learn…
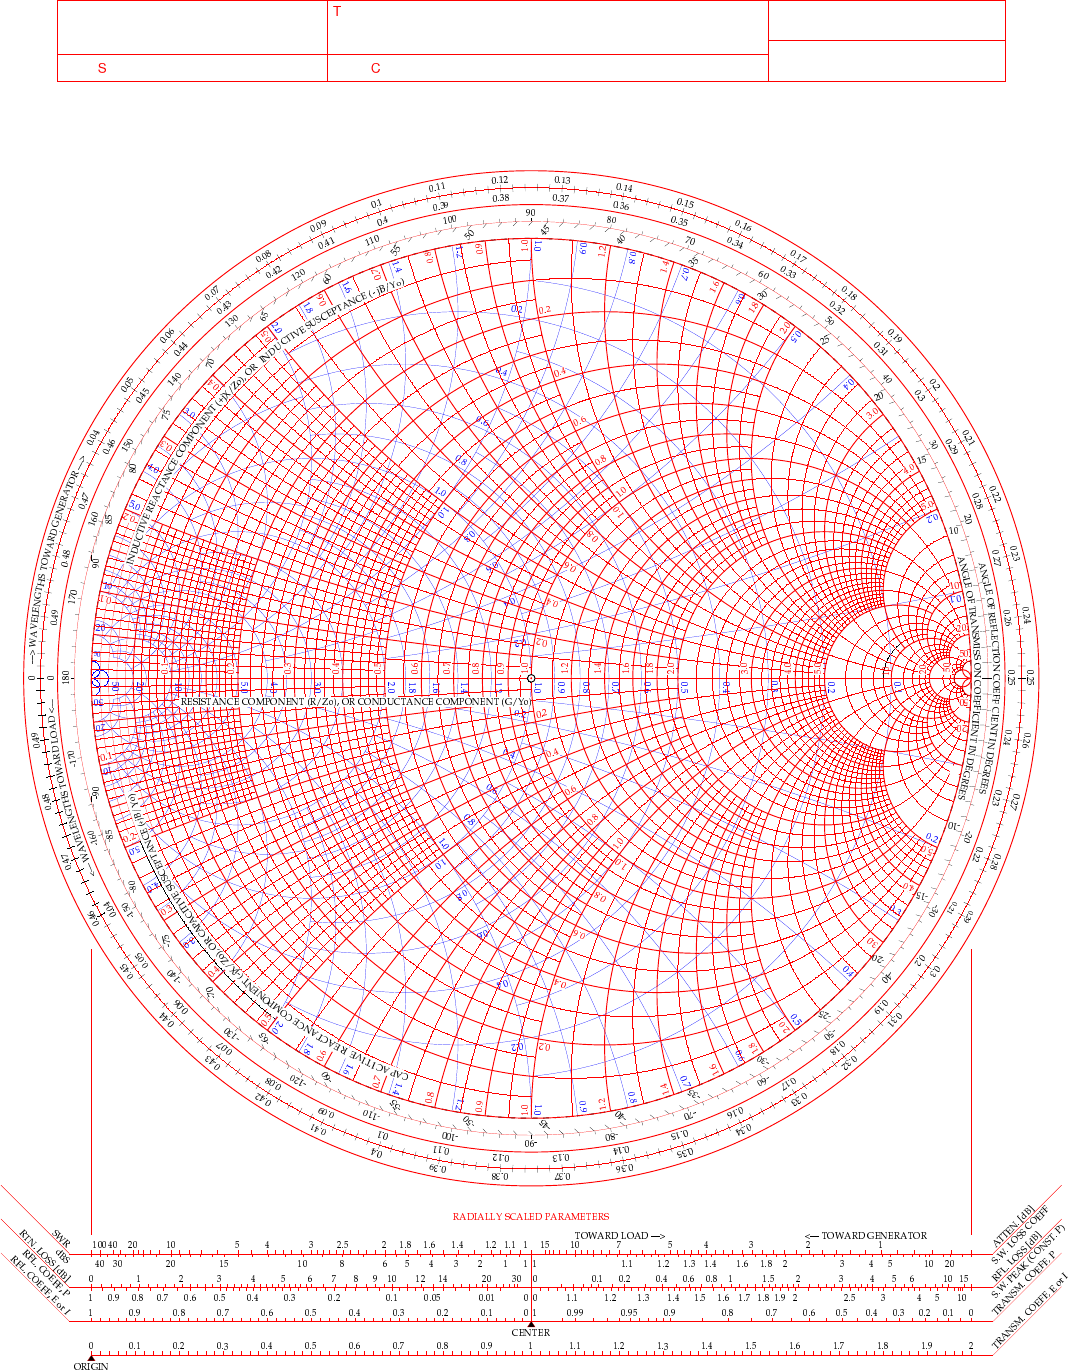
This is a plain, run of the mill smith chart (pictured above). This one shows two graphs in one chart. The red is the impedance graph and the blue one is the admittance graph.
Smith Chart: Understanding some basic concepts
The simple explanation for these two colors are as follows: red lines are series components and the blue are parallel components when you are using the chart for matching impedances between stages of devices. Like between the coax and the antenna as in the example I have drawn above. That is an antenna I use for POTA that I wanted to see what it would take to get it to 50 ohm resistive. (which is the point right in the middle of the chart BTW)
Already, I have given you three tidbits of intel about these charts and we haven’t even drawn on one yet… Another one is that the horizontal line through the middle is pure resistance and you will notice that it doesn’t say 50 ohms at the center, but rather the number 1. The chart is what is called “Normalized”. All this means is that you can assign what ever value you want to the chart and this center point becomes THAT number and all the others are relative to that value. Maybe you had two stages in an amplifier circuit that are 200 ohm impedance and you want to use this chart to match them, then the center is now 200 and you do simple math to get the other numbers from that point. Like the number 2 (moving to the right, remember we are using the red lines right now) will become 400 ohms as a result. Basically all the numbers are multipliers of the center value you assign. It really is that simple.
Fun fact: All the values below the resistive center line are capacitive and all the numbers above the line are inductive. So when you see one of those weird numbers like 117-j68 This is the “complex” impedance…duh, it even looks complex…haha. But to put it on the chart, it has to be what is called “normalized” and this simply means that you divide the first AND the second number by whatever you assigned to the center of the chart. For most ham radio and especially ham radio antenna stuff, this is 50 ohms. So this complex impedance normalized will be 117/50=2.34 AND 68/50=1.36. BUT since it is a negative “j” value it will now read 2.34-j1.36. This can be plotted on the smith chart directly now. The first number is ALWAYS found on the center “resistive” line first.Then after this point is found you find the second number on the perimeter ring as you see in the photo below. The reason I started at the bottom and not the top (which has the same exact numbers) is because it has a negative symbol in front of the letter “j”. If it is negative, it always goes in the bottom half and if it is positive, then it goes in the top half.

Smith chart showing the initial plot for the value 2.34-j1.36 and how to find it.
Then you simply follow the circular lines from each number out to where these two cross and this is your start point on the chart. Now this particular smith chart only shows the impedance curves so you need the second half (which is a literal mirror image of this one laid on top of it and in a different color) to be able to do a parallel → series type solution to solve for this. If we didn’t have the other half of the chart then we would never be able to put a component in parallel with the load as that is what the other half of the chart is for. Right now we can only add series components to get us up to the resistive line, but it will only give us the native resistance we started with and only eliminate the j portion of the value if we did that. It still doesn’t solve for the movement we need to get to 50 ohms resistive. I guess we could add a parallel resistor to lower the value, but that is really lossy option and we don’t want to put a resistor in parallel with our antenna, that is just burning RF and not putting it into the antenna. Remember a 50 ohm dummy load presents a perfect match to the transmitter output, but with radiate very little of that energy out to the world, instead it is turning this energy into heat…
Knowing this, the solution would be to add a “shunt” inductor to move the plot point up on the chart till it intersects the 50 ohm curve on the TOP HALF OF THE CHART. Once it intersects this line, we will add a series capacitor to bring the value back down to the center point, thereby matching the two stages perfectly. If this is clear as mud, then watch the video below for a visual explanation of what I just typed as well.
Add to all the stuff thus far the following tip as well, anytime you want to move the plot point up on the chart, towards the center line or above it, then you will use an inductor. By the same token, when you want to move the plot point down somewhere lower on the chart from where you are, you will use a capacitor. If you move along the red lines of the chart then it will be series with the load for either device (inductor or capacitor), if it follows a blue line then the device will be in parallel with the load. The below video by W2AEW does a really great job showing this visually so if you are a visual learner, this video is for you.
Matching Impedance with a Smith Chart…the easy way…
A good point someone made in one of the tutorials that I either read about or watched a video on said to remember you might need a specific solution for other reasons as well as to match impedance. Most of the time there is at least two ways to solve for these problems. In the example to follow below, I opted for a parallel capacitor and a series inductor, but let’s say you have two amplifier sections and you want to keep the DC voltage separated in the two stages, will then you would use a shunt inductor first then a series capacitor to finish the solution, this would match our impedance as well as block the DC voltage from the first stage as well. You see this is useful in more than one way.
Going back to the first image above of my hand drawn plot. If you will notice I drew a circle on that chart. This is called the Unity circle (for the reactance side) for some reason…. The point here is that no matter where you move the point along this circle the first number will always be 50. (If you used 50 ohms for that center point, from here on out I am going to assign 50 ohms to this value as that is what I use as a ham radio operator). Anywhere along this line, other than where it crosses the horizontal line in the center of the chart, there will be a “j” value added to it. If it is below the horizontal line, it will be negative and above will be positive “j” value. Now, at this point, if you want to use this chart to match a load, this is where the really easy stuff ends. Past this point you will need to use math…I know we have done some division earlier to get the normalized value so we could plot it above, but now we have to start calculating things like reactance and component values and such and as you know, this requires math… So buckle up as we match the 2.34-j1.36 mythical antenna from the second chart above to a 50 ohm transmitter output.
I have a two color chart below to make this happen as we have to use both colors to get it to work. The red dotted line is the arc on the impedance graph (red circles) for the 2.34 resistive value. You can see how I tracked it down into the negative region from the horizontal resistive line (this horizontal line is where you will always start these plots BTW) till it met the -1.36 blue dotted arc (denoted on the lower perimeter in red reactance arcs, you can see the numbers on the lower edge where I started). Yes, these charts are not precise to 5 decimal places, but are useful for ham radio ops and engineers use them for a myriad of other applications other than antenna matching like we are doing here. It will get you close enough to make the system usable and that is the whole point for us anyway. Anyway, these two initial lines meet at the start point of the process, the impedance of the antenna as measured…
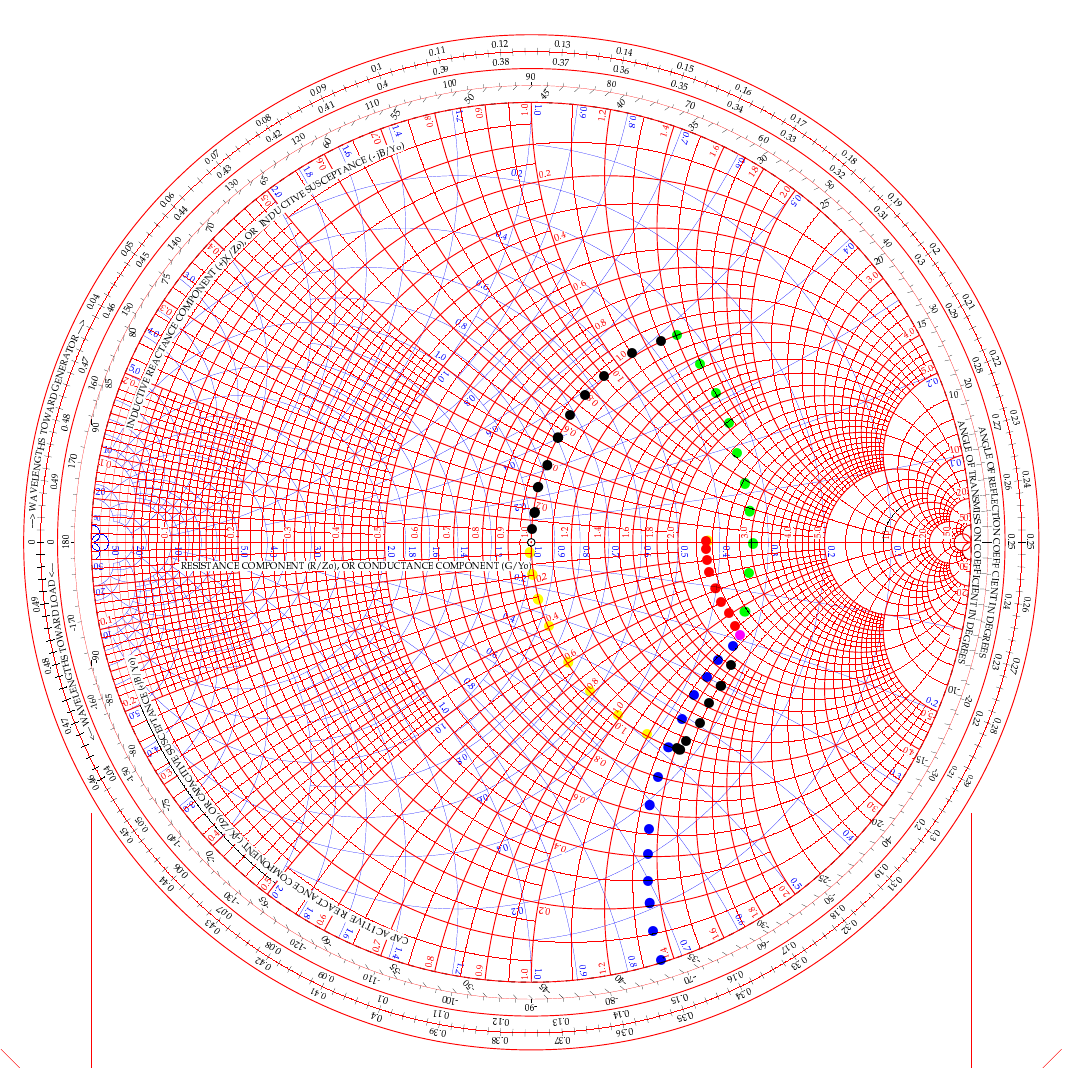
two color smith chart showing two possible ways to solve for L networks to match a transmitter to an antenna.
In the video above, he used the path of going up (like my green dots) and then following the 50 ohm arc back down (black dots from the green intersection point). But he was using a simple circuit built on a SMA connector. For an antenna installation though, it really makes more sense to me to actually follow the black line down from the start point and then follow the yellow line up the 50 ohm arc instead. Let me explain…
If we use the black arc that goes down first and the yellow one back to the center then what that looks like in the real world is a small capacitor from the base of the antenna to ground (this is what the black dotted line is after all). You see the black like is moving DOWN which means it will be a capacitor. We move it down till it meets the “50 ohm” circle so we can add the next part to move the point to the center of the chart. That next part isa series inductor between the base of the antenna and the coax. What us ham radio ops would call a load coil… This makes way more sense to me in this application than the other path which would be a “shunt” inductor or what would be an inductor from the antenna base to ground and then a series capacitor between the base and the coax. This is what would be similar to an L type antenna tuner to be honest but we are planning on using individual components in this lab… You see the yellow line is going UP to the central 50 ohm point, so this means it is an inductor and it is moving along the red lines on the chart which means it will be in series with the antenna.
This is actually really simple to be honest:
Red lines and your “movement” is going down - Series Capacitor
Red lines and your “movement” is going up - Series Inductor
Blue lines and your “movement” is going down - Shunt (Parallel) Capacitor
Blue lines and your “movement” is going up - Shunt (Parallel) Inductor
Do you see the pattern? Tracking up the lines on the chart is always inductors and tracking down on the lines is always capacitive. Like wise, if you use a blue line for your movement the the device will be in parallel and if the color of the line is red then it will be a series part. Now the color codes of my dotted lines above is purely there to make it easier to see what is happening and mean nothing other than that. The colors I am really concerned with are the two colors of the chart itself.
Math with a Smith Chart to match an Antenna
So the math is actually really simple to be honest. If you look at the first arc (the black line moving down) it is read on the blue chart (admittance - which is the opposite of resistance…) as it is moving along the blue circles. it is moving from about .19 to .48 on the blue chart (this is called suseptance, but you really don’t need to know that for this application) as you can see the lines run out to the perimeter where it is marked. This is .29 distance units on the admittance half of the chart. This .29 is the opposite of resistance so we then have to invert it (1 divided by .29), so it is a reactance value that we can use to do the math with, which turns it into 3.449 or as it should read -j3.449 (remember, because it is below the center line of the chart) and this is then multiplied by 50 (the value we assigned to the center point to start with) to get the actual reactance. 3.449 × 50 = 172.45 ohm of capacitive reactance. We now know everything in the formula to turn this into capacitance… since it is the same formula, you just switch out the two values. Super simple to be honest. Xc= 1/(2 x Pi x f x C) is turned into C=1/(2 x Pi x f x Xc) as you can see, we just plug in the numbers and then we get the capacitance. BTW, we are making this for 10 mhz so we can listen to WWV in Ft Collins… haha, why not?
Mathing this first step involved counting on the chart and subtracting the smaller number from the larger, then inverting it since it is on the blue lines (because the blue lines represent the opposite of resistance and we need it to be a resistance value), then multiplying that number by the center assigned value (in this example it is 50 ohms) and we ended up with 172.45 ohms of reactance. Now we turn this into C= 1/(2×3.1415×10e6×172.45) which is C=92.3pf
Once this step is done, we simply run up the red unity circle to the 50 ohm point in the middle and do the same thing but for inductance (since it is moving up on the chart). It looks like it is on about 1.42 on the red lines at the bottom of the chart, just take a look and see what I am talking about… Since it goes all the way up to the horizontal line, we just use this number and multiply it by the center value again (are you noticing a trend here yet?) and we get XL=1.42×50 so XL=71 ohms of reactance The we flip the inductive reactance formula and this time the formula looks a little different since it is XL=2 x Pi x f x L so to get inductance from inductive reactance the formula looks like this L=XL/(2 x Pi x f) so now we know all the numbers for this one too. It looks like this now L= 71/(2×3.1415×10e6) and this equals L=1.13uH of series inductance since this movement happened on the red lines and went UP.
So adding a 92.3pf shunt capacitor from the base of the antenna radiating element to ground (honestly an appropriately sized trimmer cap like a 50-100pf trimmer would be optimal since the calculated size is such an odd value...sure as a bird flies, this is some sort of common size…lol) Next is to insert a base “load” coil between the feedline and the antenna that is 1.13uH in size. This will match our mythical vertical to be resonant with the 10 mhz WWV signal as close to perfect as humans can get it. It SHOULD (if the parts are the right value) move the Smith chart plot to the center point on the chart which the goal for impedance matching.
Clear as mud again, right? HaHa… You can see it seems like a lot, but once you do it a couple of times, it really does get a lot easier to understand. I recommend you watch the video a couple of times and print off a chart from the web to practice on like this one.
Help support his website by using these Amazon Affiliate Links when you shop…
Finally got my sBitx V2 radio…so I went to a park!!!
Quick synopsis is I like it. Read on to see why.
When you see this radio, you think it is like one of the big name machines. It is not. It is actually so much more because of the nature of the project that it comes from.
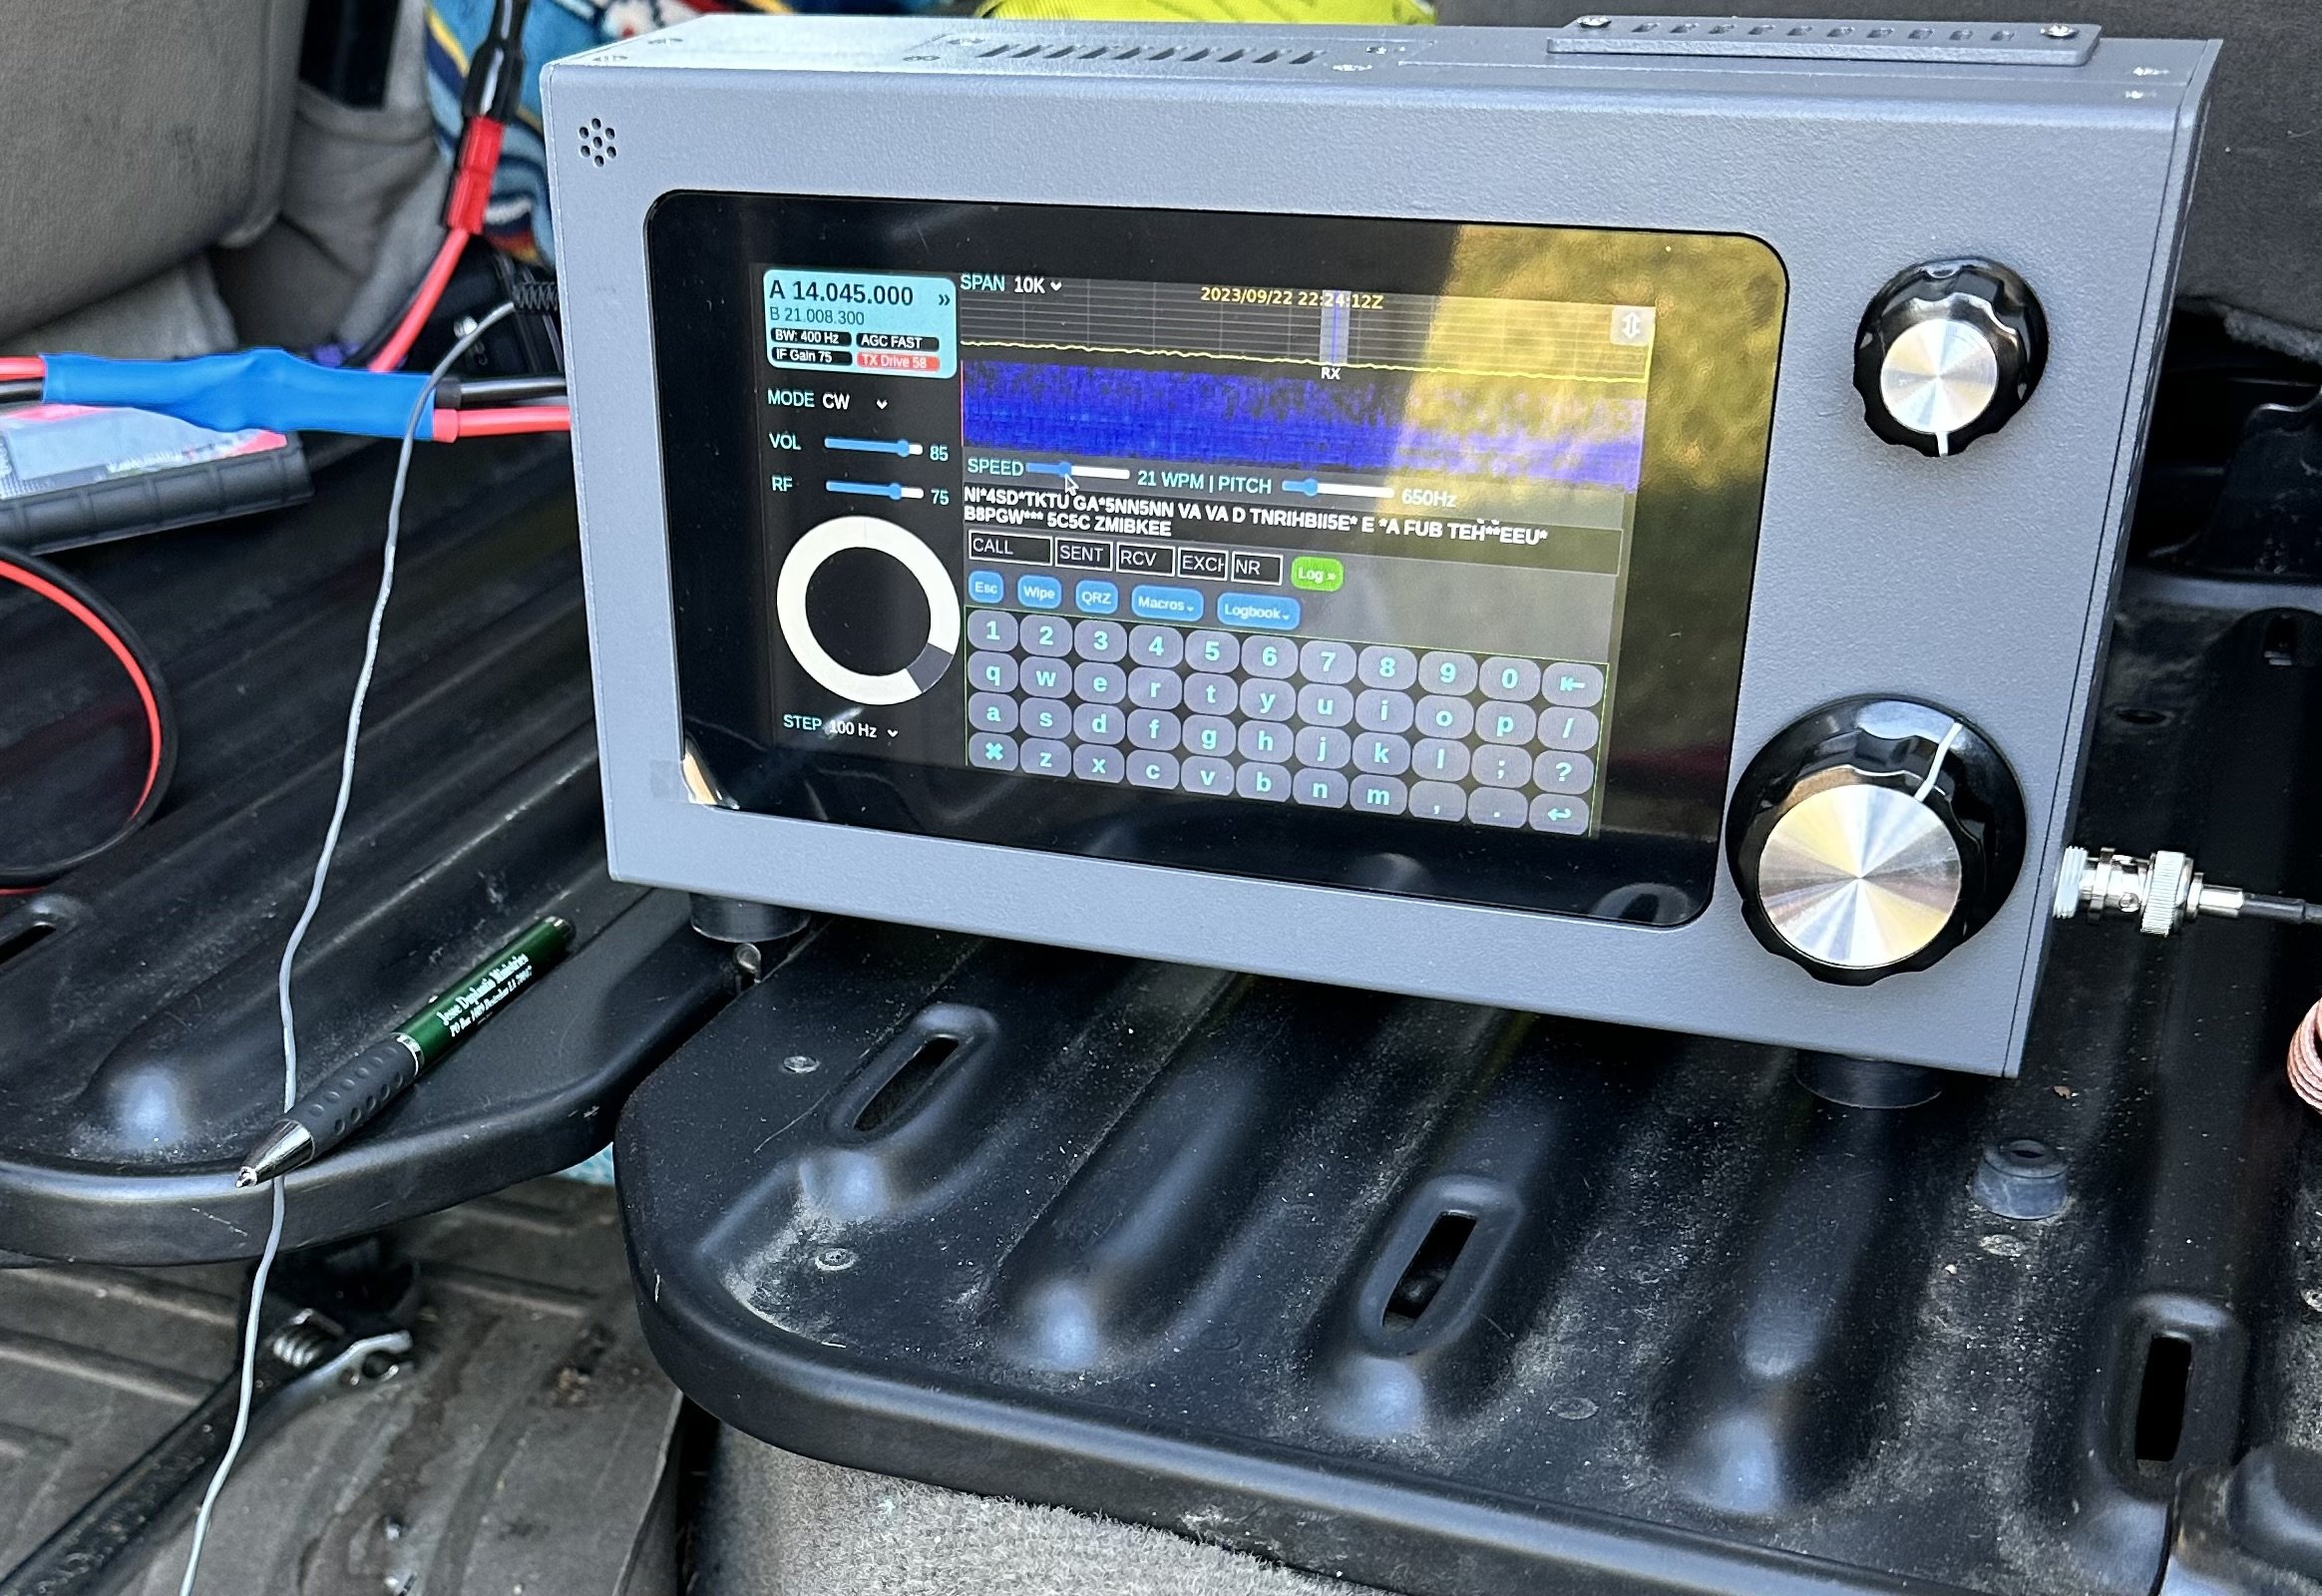
The HF Signals sBitx V2 is an evolution in their radio designs and brings so much to the table that is cant be described in one blog post…well maybe…I can write as much as I want in one post…lol.

The TR-35’s magic is the lack of menus.
The first thing you notice it the lack of buttons or switches like my Penntek TR-35 has on it in the photo above. There are simply two knobs and a display and that is all you are greeted with at first glance.
Well this is a kind of sleight of hand trick as the display is actually a touch screen and almost all of the controls are driven from this display. In fact, what appears to be at AF Gain (volume) knob, is actually like the multi-function knob on my Ten Tec Omni 7 being selectable for an array of things it can control.
Both knobs are also push buttons and the smaller one defaults to volume control if pressed, but the larger (VFO) knob doesnt appear to do anything when pressed, I can not find anything in the literature describing it so it is there for tinkerers from what I gather. You see, this is an open source SDR, this menas you can download the source code and if you are savvy with coding, you can add features or modify how the radio works to suit you. This is the point of the whole project to be quite honest. This radio does work, but it is not as polished as a big brand machine as it is intended for the owner to go inside and play with things, like add circuits or modify existing ones or even write new features to add to the radio outright. You can literally download the schematic and the actual source code from their GitHub… What ever you want to do, this radio is fully “unlocked” so that you can do it.
Enough about the radio in general, how did it do on the first outing to a POTA park? Well, it did really well, I did power it from the truck battery which means I had to setup in the truck somewhere so the power cable would reach the connection I have in the truck. (I finally added a power pole cable inside the truck cable that is fed directly from the batteries so losses are a minimum.
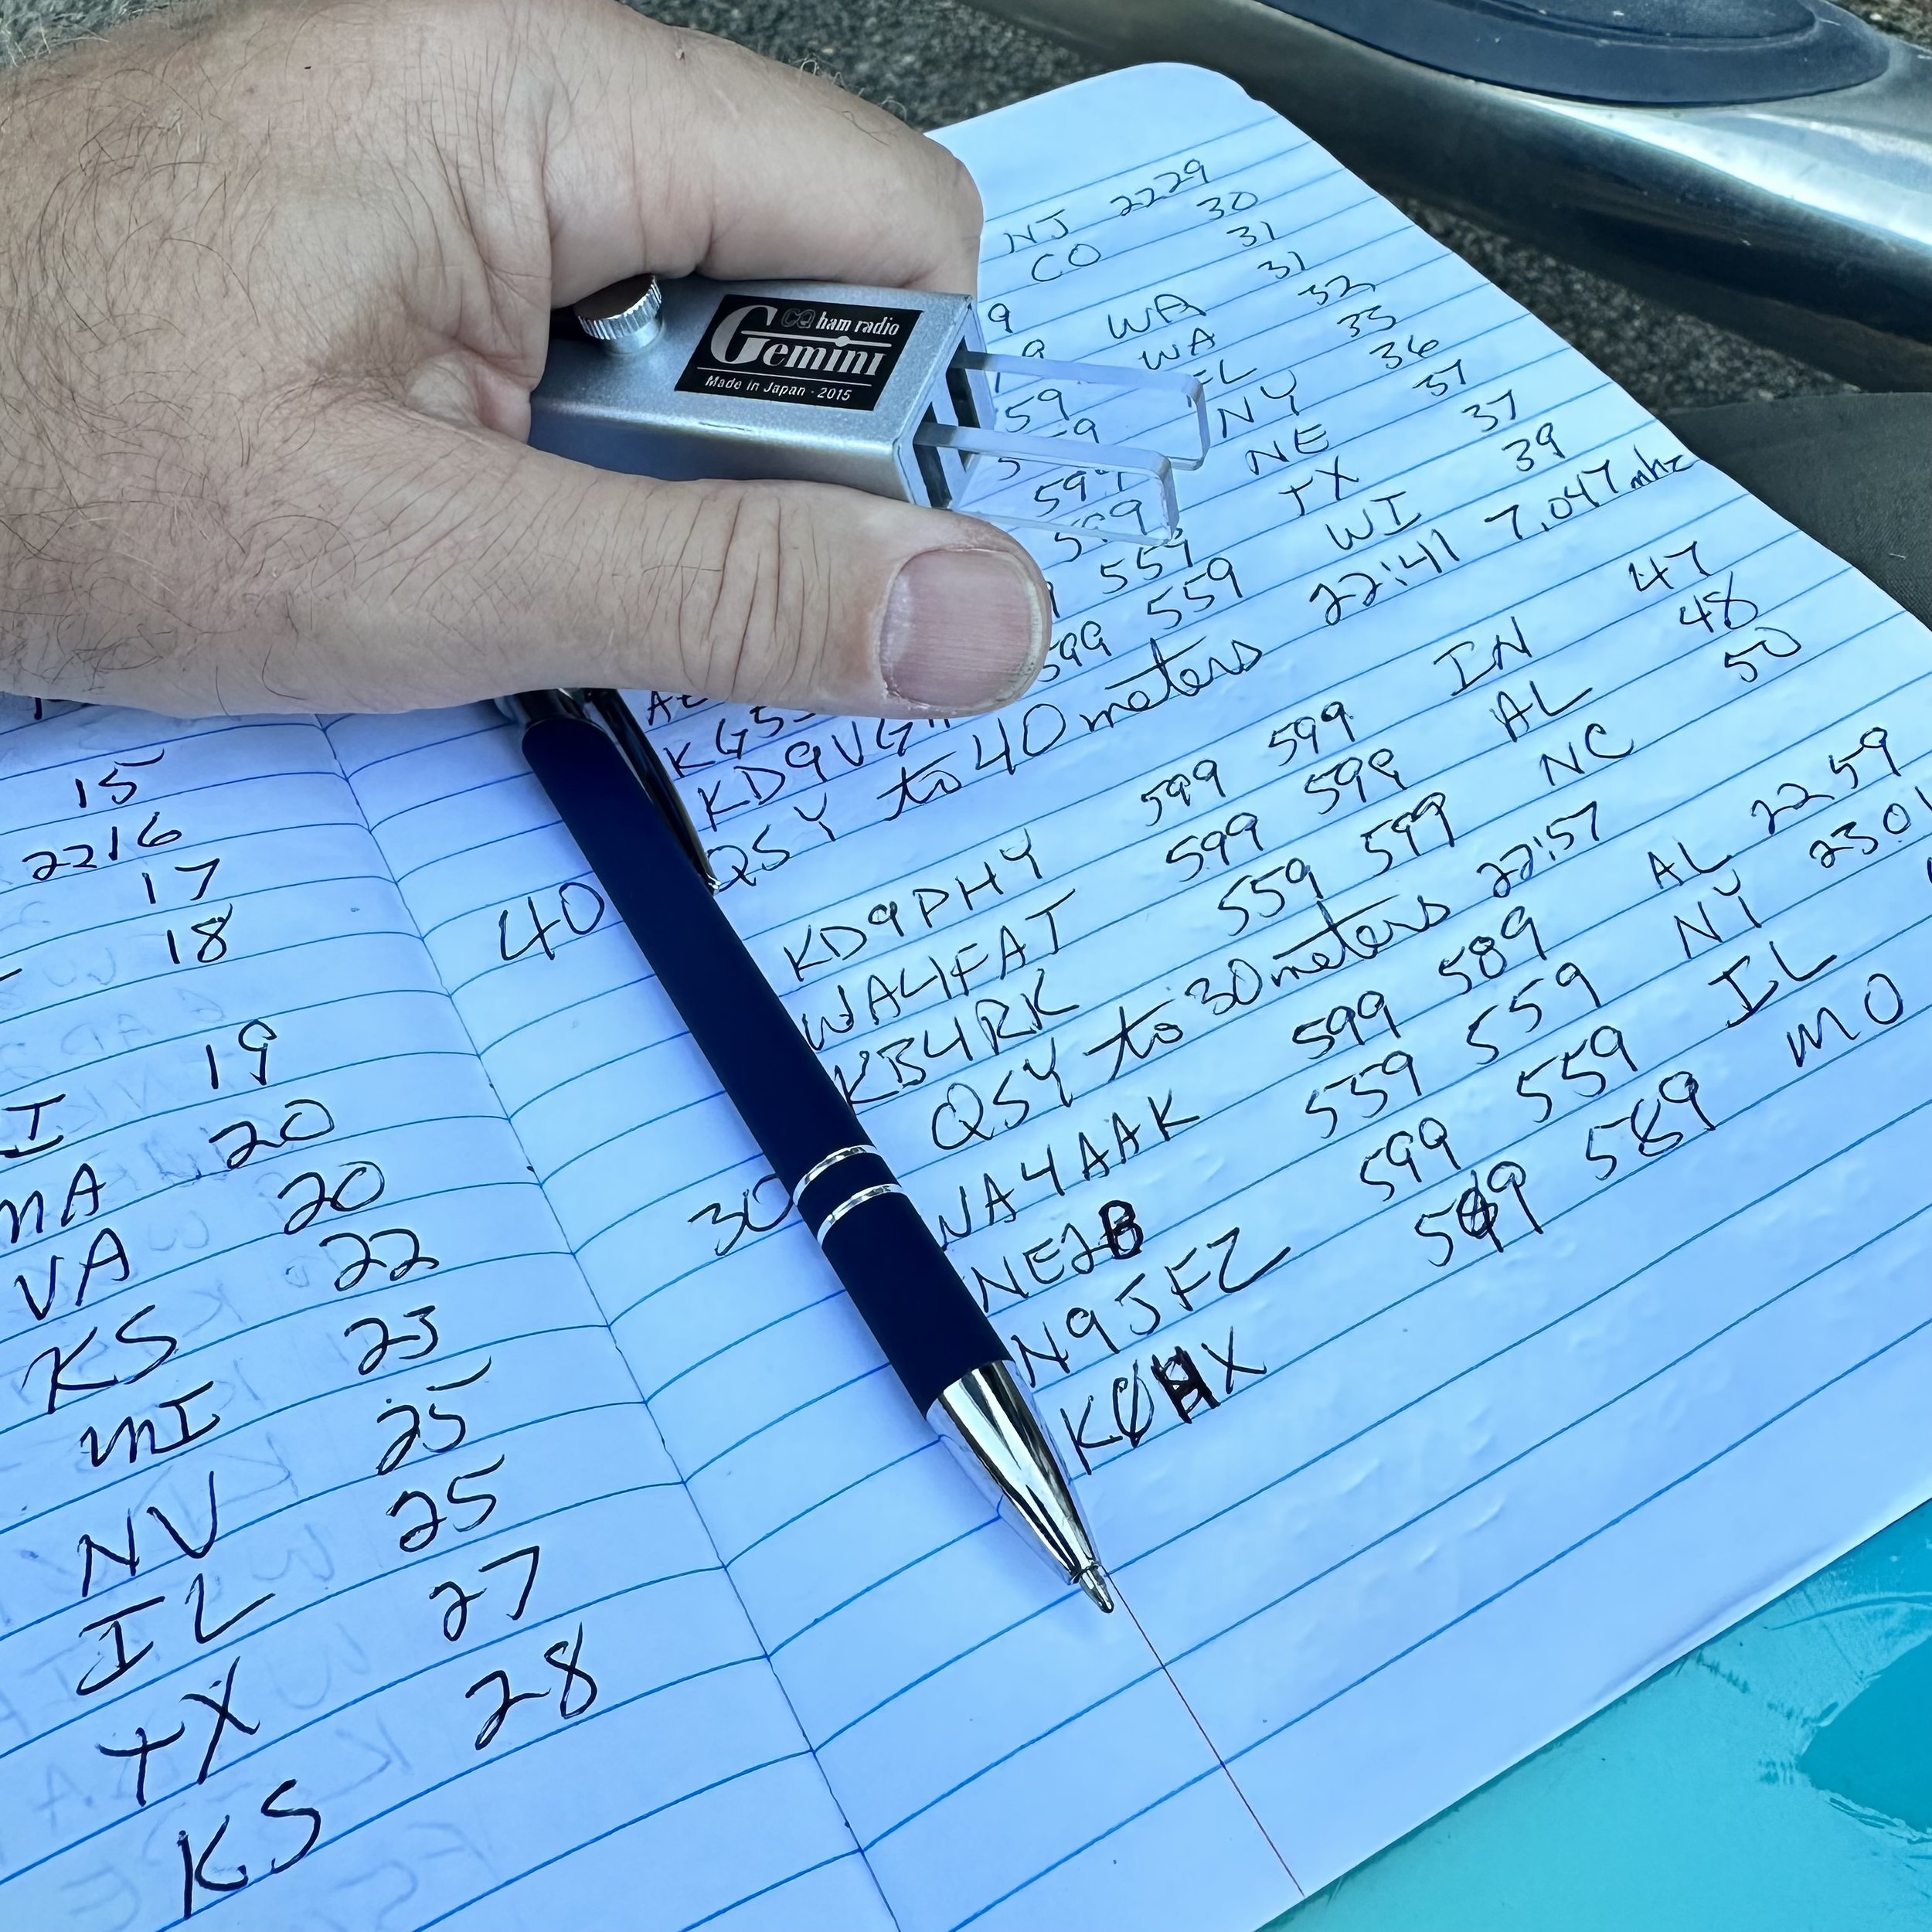
Back to what I was saying, I got to K-2169 and setup in the truck so I have somewhere to sit this time as I planned to stay a while today and didn’t want to have to stand up the whole time. It took me a few minutes to get it all organized, but once I did, everything fit quite well. I wanted to use my N3ZN key, but to be honest, this arrangement literally made it impossible, so I defaulted to the little travel key I have used so much over the last year. I didn’t have a table top that was convenient to setup the other key on and I even tried to sit the N3ZN key on my clipboard, but it was just too difficult and I kept running into problems trying to use it. Hence you see the Gemini cw paddle in my hand for this activation.
Once I settled on the key and radio, I chose 15 meters to get on the air, the band was wide open and even the propagation report said it would do well… Well, FT8 was rocking pretty strong (I tend to use these guys for my beacon report on a band), so I move down into the CW area and start calling CQ…and I call and I call…and nothing. Seems either no one was on the band or they simply could not hear me. It did appear that the band was fading in and out pretty bad though as the RBN would give me a great report one minute and then it would go 3 minutes without a single update. So after what seemed like an eternity on 15 meters, calling CQ with no answers I caved and went down to 17 meters to see what I can scare up.

The hamstick collection at this point. 15 (Green), 17 (Brown), 20 (Yellow), 30 (Blue) & 40 meters (Red) are all represented here (well, 30 meters was on the truck when I took this photo)

So since I had not edited the memories in the sBitx V2 yet for my use, I planned to use the PICO Keyer I picked up a while back, well it worked somewhat, I think it had trouble keying the radio because the radio is looking for contact closure and not a semiconductor so it would work, but it was introducing errors into the code pretty bad. I finally threw in the towel and just used the key the whole time and ran with it. This turned out to work really well though and I really didn’t mind it after all. Once I got home I built a complete set of memories for the keyer complete with all sorts of messages. You get as many memories as you want, they are in sets of twelve, I tested this by copying the CW1 memory and renaming it then I edited the messages and saved it, rebooted the radio (just as a precaution) and the new set of messages were right there in the drop down menu! They are really simple to edit, but you need a keyboard to do it. I didn’t take one with me on this trip hence I didn’t bother with trying till I got back home. If there is demand for it, I will detail how I added a memory and show how to edit the messages and the message names as well.

So I ended up using almost 4 Amp Hours of energy on this activation. Not bad for over 50 contacts in the log. I am happy with that! When I am going to be at the park for a while, I will get all the antennas out and sort them by band like you see below. Well, they are not sorted at this point, but imagine that they are for the story. Then I can change bands quickly and easily as I will lay them near the mount for the truck. The 2” PVC pipe is maxed out too. I don’t think I can get another antenna in it at this point. If you plan to run hamsticks, I recommend that you get some sort of tube to store them in to protect them. They are not very durable in construction so it would be best to try to store them in a way that will make them last.

You see, I know the radio is transmitting as I have been using it at home for the past week or so before taking it to the field. So I get down to 17 meters, find a clear frequency and start calling CQ here. Well things pick up for me here as I get a few answers so I know the radio is in fact working as it should and I didnt do something to it while I had it taken apart… More on that later when I talk about the mods I did to this radio right out of the box.
So after messing around on 17 for a few minutes I hit a dead spot, so I figure it is a good time to QSY down to 20 meters and see what I can find down there. Well, I found all the ham radio ops in the United States and some from across the Atlantic too! I proceed to make over FOURTY contacts in an almost continuous stream in about as many minutes! I was busy! The radio was working great too. At this point, I clear all the callers and decide to try the lower bands for a minute and see what I can do there.

So I hop on 40 meters first as this antenna has consistently been on the upper edge of SWR for my operating preferences, and the sBitx agreed with it showing about 2.1:1 while I was there. Also of note is that the radio self adjusts the output power based on band and SWR from what I can tell. I was running about 20 or so watts on 20 meters and wihtout changing the power setting at all, jumping on 40 meters netted me 9 watts output into the 2.1:1 SWR where on 20 meters I think the SWR was closer to 1.2:1… So I turned up the drive some in an attempt to get the power out consistent across the whole activation. I didnt get it past 15 watts if I remember right… But it was enough to make a few contacts and get some in the log from more local hams as the 20 meter band hops right over the closer states.
Then I finally moved up to 30 meters to see what it could do as well since that was the only antenna I had not tried yet. Well, 30 meters also did not let me down…like 15 meters did… haha. I got it on the band with good SWR and output power and easily made several QSOs on that band to finish up the HF portion of this activation.
The next part is just for fun, but I also recently got a new HT (Handy Talky) radio and was playing with it while out on this day. So I called into the KG4WBI/R 1.25m repeater to see if Roger was monitoring and he was. So then I asked him to switch his radio to VFO and simplex so we could make a 1.25m FM UHF contact. 5 watts was more than enough to make the trip the roughly 3 or so miles it was to his house from my location! So I netted 54 contacts on this day on 5 bands and two modes. I had a great activation and the sBitx pulled quite a long shift on it’s first outing.
Now to discuss some issues I found with the new radio that I am going to look into solving or upgrading. The first one is actually really easy, it needs a fan… or two. The heat sink got SO hot in the two hours I was in the field operating at about 20 to 25 watts. REALLY hot, the whole radio was hot actually and I think this is what made it start doing the next issue..

This is something I noticed after a while, when the radio is getting really warm, it starts to “stutter” in the refresh rate of the screen. I am thinking this is due to thermal throttling of the Raspberry Pi processor in an attempt to prevent sudden death from overheating. I confirmed this was not due to ram overflow by swapping the Pi out with a second one I own that has 8GB of onboard ram and it did it too with minimal use “on the air” back in the shack at home. So my solution is two fold, one is to install a fan on the main heatsink for the power amplifier in the RF deck and a second fan pulling air through the radio chassis where the Pi is located in an attempt to cool the processor as well. I know this will increase current draw from the battery, but I am not concerned with this as my activations normally don’t run over two hours at a time and this limits amp hour usage to usually no more than 3 or 4 amp hours, which even my smaller battery can handle at this time. If adding the fans runs the draw up to 5 amp hours or even 10 in an activation, then I will just take a bigger battery since this is not a backpacking radio in my book. Also, it did work at 25 watts down to 15 watts, depending on band and SWR, for the whole activation. If I were to just turn the power down to 5 watts, it probably wouldn’t get warm enough to matter on the power amplifier considering the size of the heat sink on it. This means I will probably install a small toggle switch to manually cut the power to the fans should I want to run it at true QRP levels in the field. I also plan to wire the fans through a circuit that will automatically turn them on and off as needed to prevent them from just drinking the battery dry when they are not needed. This involves a small temperature sensitive resistor called a thermistor in a voltage divider and a transistor to flow current to the fan. This way if the radio doesn’t get very hot, it wont come on at all. I think I did the math on this device and it will bias the transistor base at about 105F degrees, which is about right for it to protect the electronics. The processor cooling fan could be done the same way (and probably will) but I don’t want this fan to be very large so I am searching for a small 12 VDC fan for this application and also I want to see if I have room to install the processor heatsink, which is not currently installed. This alone will help tremendously, but with long activations the heat will eventually soak the heatsink and we will be right back to square one. This is why I want to add forced air flow to the system…
Even with all the heat buildup, the radio trucked right along and I put over 50 contacts in the log on the first outing! I even got some from overseas in the log!!! It is always good to get some DX in the logbook. I really liked this radio for a station that will be near the truck. The reason for this is that it is fairly large and heavy compared to my other radios, well maybe the Argonaut 5 is similar in weight. This is one of the reasons the Argonaut 5 doesn’t go on activations that stray far from the vehicle too. That guy is heavy, and it is a fairly fragile radio like the sBitx V2. So who knows what I will end up using it for, but for now, it will be one of my POTA radios.


All that aside, the radio works really well for the most part and over time this will be a wonderful little rig to run on activaitons. I plan to get it going on digital modes as well so I can work contacts on FT8, PSK31 and RTTY as well since it does all those modes natively and without the need for an external computer. This was one of the main reasons for getting this radio, I really didn’t want to have to bring an additional computer to the field to do digital modes… Anyway, with all that said, I packed up and on the way out found a few deer wandering around the area and I was able to get a photo of one of them. That was just icing on the cake for a day with so much activity and fun and getting to use my new radio. So until next week, get your radio out and go make a contact with it!

A POTA activation that was incredibly rewarding!!!
When we activate a park we never know what is going to happen.

So today is Labor day here in the USA. This is the first Monday in September set aside for the workers of this country to grill out with their buddies and such as that. So for me that means going out and setting up a POTA activation somewhere. I decided on Cloudland Canyon after deciding that the drive time to other parks would make the activation very short for me and I wanted more time on the air instead. I choose the upper parking lot since I wanted to use my hamstick system instead of rigging to the trees today. The trees I normally use have a lot of traffic today from hikers and I didn’t want them tripping over antenna wires all day so this just made sense. As you can see below, there was plenty of room for me here today…

I don’t know if I have shared this or not, but I have converted all of my hamsticks to this QD system so band changes are fast. It works really well, I do need to retune my antennas though as this did lengthen them a little and now they are all low on the meter for their center frequency… always something to do…lol.

Once installed, these mounts work really well and the tune is very stable, I have not seen it change at all from the numbers on the VNA since adding these QD adapters. So if you think you might want to use hamsticks for POTA, I really like them. Now to be honest, I don’t think I would use them for mobile (in motion on the roadway) use as there is a lot of leverage on this little mount and the spring is not that heavy to me, they might work fine like that and probably have been deployed that way, but for me, this is a site setup tool only.

Another reason for the hamstick setup is the use of the truck for shade during the activation. By strategic positioning of the truck I can leave the doors open with the engine off and not have RFI from the operating parts of the truck to contend with as well as having a natural shade from the sun too. I use this trick a lot when I don’t have a ton of time for an activation and want to operate in inclement weather like rain. Simple and robust, plus the system just works, look at the logbook below and tell me how hamsticks don’t work…

I carry all of the stuff in the photo below in the hard-shell case that I keep the Ten Tec Argonaut 5 in so I don’t have to search for cables or things like my key. It is all in there and I just grab the case and go. This makes life so much simpler for me. Seen in the photo is the Ham-gadgets Pico Keyer and the N3ZN tiny CW key I picked up at the Huntsville Hamfest. Once I get all the parts out of the case I close it up and use it in the passenger seat for the hard surface to place the radio on so it is out of the way while I use the center armrest for logging and sending CW.

Here you can see how simple the connection scheme is when running Hamstick antennas, there is no tuner or interconnecting cables, just the RF choke to the coax, the power cable (I plugged into the truck’s cigarette lighter port today) and the CW key cable and nothing else is needed. Simple is king here and it also makes setup fast. That is another reason I like using CW instead of other digital modes with this radio as well as my other radios to this point. They all need a computer and a sound card to get them to do digital modes (other than CW) and I normally don’t have a ton of time for all that setup and getting it going. CW is on the air really fast, like SSB. You can also see the silent fan mod I did a while back (there is a blog post showing what I did) and I really like this mod as it eliminated the fan noise entirely. I need to make a screen to protect the fan though, that is still a project to be done…

You have seen this view shown below in the past, but I included it today since I got the moon in the photo too… lol. I do like the system I have built for activating a park with a hamstick, it is really fast to deploy and when I do a rove, I simply coil up the counterpoise wires and lay them in the truck bed. pull off the radiator from the QD base and lay it in the bed of the truck too, unplug the coax and coil up the portion to get it inside the truck and I am off to the next park. The antenna mount can ride in the receiver hitch easily enough so it is not an issue. This sounds like a lot but it literally happens in two minutes tops and I am driving to the next park.

Another thing I did today was hook up the inline power meter. Now I don’t remember why it only shows 8.9 watts of output. I had the radio set to 15 watts forward power so I probably took the photo after I let off of the key as the amp hour meter doesn’t clear till you disconnect it from power. I don’t remember if I had it in tune mode or if I was simply sending dashes. But what I was looking for was the total amp hours of use, this tells me if my little 8A/h battery would hold up to a heavy activation. From this meter reading it will. Now remember, this is with the radio set to 15 watts too, so under a normal activation of 5 to 8 watts, this would last for many hours. Today I went for two hours and got 70 contacts in the log and only used 3.68A/h and that makes me much more confident in using the smaller battery for activations now. I had my concerns before but now I don’t. Another point here is that I normally try to add something else to the activation that has to do with information gathering so I also learn something that I didn’t know before, today it was the amp hour info.

So I get to the park and take my time and listen to the bands a few minutes once the rig is installed and decide to start on 40 meters as the noise level was really low today. I get on the air at 13:25 UTC (9:25 local time) and start calling CQ… It didn’t take long to secure the activation and I had not left 40 meters! I don’t get on the lower bands too often as I am not at the park at night when the bands are less noisy so I don’t get the hams in the closer states like Tennessee or Georgia, it was really nice to get some of those states in the log for a change. Hanging out on 15 and 17 meters nets much more distant stations so I have to remember to come back to 40 every once in a while…

I then move to 30 meters for a little while to see what I could do there and work several more people on 30 meters in about ten minutes of operating. 30 meters at this park is a crap shoot to be honest, some days it is quiet and some days it has this intermittent computer noise that just shuts the band down, today the noise was nowhere to be found to my delight!
Then…I…got…on…twenty…
First off, who doesn’t work Bill (K4NYM) if he is booming in to your station and for a Park to Park no less? So I hunted him before setting up on frequency. It took one try, he is an amazing operator and I aspire to operate as efficiently as him some day.

Things take off once I park on a frequency and start calling CQ. I promptly work a page and a half of calls then I get the one you see below. Not one to brush off anyone calling me, I take the time to have a nice QSO with him as he is working on getting on the air with CW and is having to do head copy only…I later learn… So I take the time to write down what he is sending so I can read it and respond when it is my turn. Turns out he is just now getting back active in CW after taking a long hiatus from it and also, he cant see, hence the head copy only. Talk about a person with conviction, he never gave up. I was so glad Justin called me and feel honored he felt confident in me enough to throw his call into the fray of POTA not knowing what would happen. That took guts.


Once we finished our QSO it was back to the POTA game in full swing. I struggled with one thing today more than anything else… stations zero beating me. It never fails, I get two or three stations that due to modern technology, will zero beat me perfectly. This in itself isn’t a problem and is really the most efficient QSO to have in CW, but what happens is that those two or three stations melt together into the one single tone and it is unintelligible. So If I don’t pull you out on the first try, move up or down 30 to 40 hertz, This will make you off frequency enough to sound different and you wont blend with the other stations and I will get you on the first try, this is an old contesting trick and by golly it works, I will have one station that stands out and is clearly definable and the rest is this one huge tone. I never really understood it till I was an activator trying to pull one call out of the mayhem, then I got it. Now when I hunt I leave my XIT or Transmit Incremental Tuning on and set 40 hz high just for this reason.
Once I hit 70 QSOs today I had been on the air for two straight hours so I went QRT and shut down the radio. It was a great activation and I really enjoyed working with a new (relatively speaking) ham on building his CW skills back up to what they were. So till next time get your radio out!!!
72
WK4DS - David
"Trucktenna" for winter POTA outings with some AAR info about how it works.

The mount is made out of ordinary tube steel, but the top plate is 304 stainless steel as is the counter poise stud and associative hardware so it wont rust if it does get deployed in the rain. Also note that I have added a PL259 to Male BNC so I can use this small QRP Coax cable as well. The cable is from Amazon and is 25’ long. I like it as my QRP transceivers are BNC out put for the most part.
I finally built a mount for my “winter time” antenna setup and have done some testing with it to find out how well it performs.
What I wanted for my winter ops was something that would be pretty simple to deploy as well as worked fairly well, all the while allowing me to stay inside my vehicle where there is a heater. Pretty tall order since all summer I had used a 40m EFHW wire and it had been producing wonderful results for me. Well if you scroll down through the blog you will find a post about the Huntsville Hamfest and at this hamfest, I picked up a 20m HamStick antenna and stuck it in the corner when I got home for a future project… Today I used that antenna.


QSO map showing the region this antenna works with on the 20m band and 5 watts of transmitter power in 2022…
I used it on 20 OCT 2022 to activate Chickamauga National Military Park. The beauty of this setup is that I specifically designed it for use in such parks where you are not allowed to use the trees for antenna supports and in some cases, the park doesn’t even allow spikes/tent stakes to be driven into the ground. I wanted this antenna to be compatible with all those rules should I decide to venture into one of these parks.

The counter poise wires don’t have to be taught, but keeping them pulled out as close to original as possible makes it work really well.
I keep the ends of the counter poise in location with a couple of custom stainless steel weights that I made in my machine shop. They are kept on the wire by a simple 3 hole keeper that the wire is threaded through. This makes everything easy to deploy, I dont currently leave the base in the trailer hitch, but rather store it inside the cab of the truck when not deployed. So assembly goes like this: 1) Insert the yellow mount into the receiver. 2) Screw the hamstick together and then screw it into the mount. 3) unrolled both counter poise wires and put them both under the ground lug on the antenna mount, spread out both counter poise weights to get them taught. 4) install the BNC coax and run it through the window of the truck door and get in the truck. Done. I like this deployment time, especially with the TR-35, as 20meters is a good band for me to get a decent signal out using just 5 watts of power. I have done several other activations with this setup before this day and after and it always performs really well. I am certain that my weights are interacting capacitively with the counter poise wires, but I don’t care because I tuned the system with them in place.

27 OCT trip to K-2169 showing how this setup pulled in almost 40 QSOs in less than 45 minutes at 5 watts!

QSO map for 27 OCT 2022. I like these kinds of days!!!
As evidenced by both QSO maps, this antenna is deaf inside of 500 miles on 20 meters. That one contact in Calhoun GA was most likely ground wave as you can see there is literally no one inside of this circle except for that one QSO. This is why I think a 40m version would be nice, at least I was getting NVIS on my wire antennas on 40 meters, I hope this antenna will too.

The height of the mount it literally just a piece of tube I found in the shop. I didn’t cut it to a certain length, but rather I just wanted it to be above the top of the truck bed…because I liked that idea. I also figured it would help with the ground plane if the antenna was not bedside the metal of the truck body too…
Since I opted to add a counter poise, it required me to tune the antenna. Below you can see the null is on 14040khz and the SWR is fine for me considering the setup. I found that the length of the counter poise is critical to a good SWR null , I settled on 16’ 4 3/4” on one (1/4 wavelength at this frequency) and the other is a little shorter due to a blunder on my part with reading the tape measure wrong… (I saw 164.75” and my mind converted the numbers to be 16’ 4 3/4” and I happily lopped off the wire this long (13’ 8 3/4”) and threw the cut piece over next to the other and noticed it looked MUCH longer… Then I realized what I did. Never to worry much about details like this, I checked and just needed to trim the antenna to get it to frequency. To be honest here, I noticed that the closer that I got the counter poise to 1/2 wavelength the deeper the null got on the SWR plot. When I make the counter poise for the next band I will cut them the same length and see what that does for the plot… Also take a close look at the counter poise wires where I connected them to the base. I have crimped ring tongue connectors on the wires, but then I also added heat shrink tubing as well, this is to reduce the stress on the wire where it meets the crimp connector and prevent the wire from breaking there. These counter poise wires are made from simple speaker wire.

Something I noticed while tuning the antenna, I could move the null up the band by shortening the counter poise wires…for a while. At a certain point though, the SWR null went up drastically and was un-waivered by anything I attempted to do…except adding back the counter poise wires. The length of the counterpoise wires is very important… So once I got that sorted out and the antenna tuned like you see, I was happy to test it with an outing. First test on each outing was to sweep it with the VNA to make sure nothing had changed from tuning it to setting it up in the field. I am happy to report that it worked perfectly. This antenna works so well that I am going to make a counter poise for 40 meters and another one for either 17 or 15 so I can switch bands. For now, I will just add the other counter poise to the mount and see how the SWR null looks on 20 meter to make sure it isnt causing too much trouble. If not, then I will also look into making a plate to hold more than one hamstick at once and we will see if the non-resonant antennas will cause a problem for the one that is matched to the band. I swept this 20m hamstick across the whole HF band and it only has one null…20 meters, there is no harmonics like the EFHW has…at all. So I am thinking this idea will work and will not require an antenna tuner to switch bands.

I am thinking that the 40 meter kit will be just two more 20 meter counter poise wires to add up to 1/2 wavelngth total… these 16’ wires are already LONG…
The upper lot at K-2169 has plenty of room now and I no longer need a tree to hold up my antenna. This is awesome on so many levels. Another wonderful thing is, if it is threatening rain, my radio will stay dry. If it is windy, I can get out of the wind and if it is cold, I can turn on the heater!!! I hope you like and leave a comment on this post and possibly subscribe to the RSS feed as well so you will always know when the next post drops.
Thank you and 72
de WK4DS (David)
Simplifying antenna tuning with a manual tuner and a nano VNA on location.
Please note: This is not an instructional presentation on how to use the nanoVNA to tune your antenna, but rather a simple primer on how I deploy mine in the field and why. There are tons of videos on YouTube that will show you how to deploy the VNA in a tuning operation and at some point I will probably do that here, but I wanted to share the idea of USING the VNA to tune the antenna WITH the antenna tuner prior to hitting the transmit key and protecting your radio transmitter finals. With that out of the way, let’s dig in!
Something I have always hated doing is the whole tuning operation and transmitting while I did it. Just screams of poor operating practices to me for some reason. I know it is needed though, so I do it… Till now. You see, some radios don’t have an internal antenna tuner built into them, like my TenTec Argonaut 5. This radio is a joy to use but you either need resonant antennas or a tuner to match the radio to the radiator.
Enter the nano VNA (Vector Network Analyzer)… I found out about these little devices from my friends Aaron and Roger and finally got one for myself. Back in the day, about 15 years ago, these little pocketable widgets would set you back about 20,000$ and were the size of a suitcase! Now, technology has caught up and these things are very affordable (about 50$ US) and are even battery powered so you can take them to the field easily.
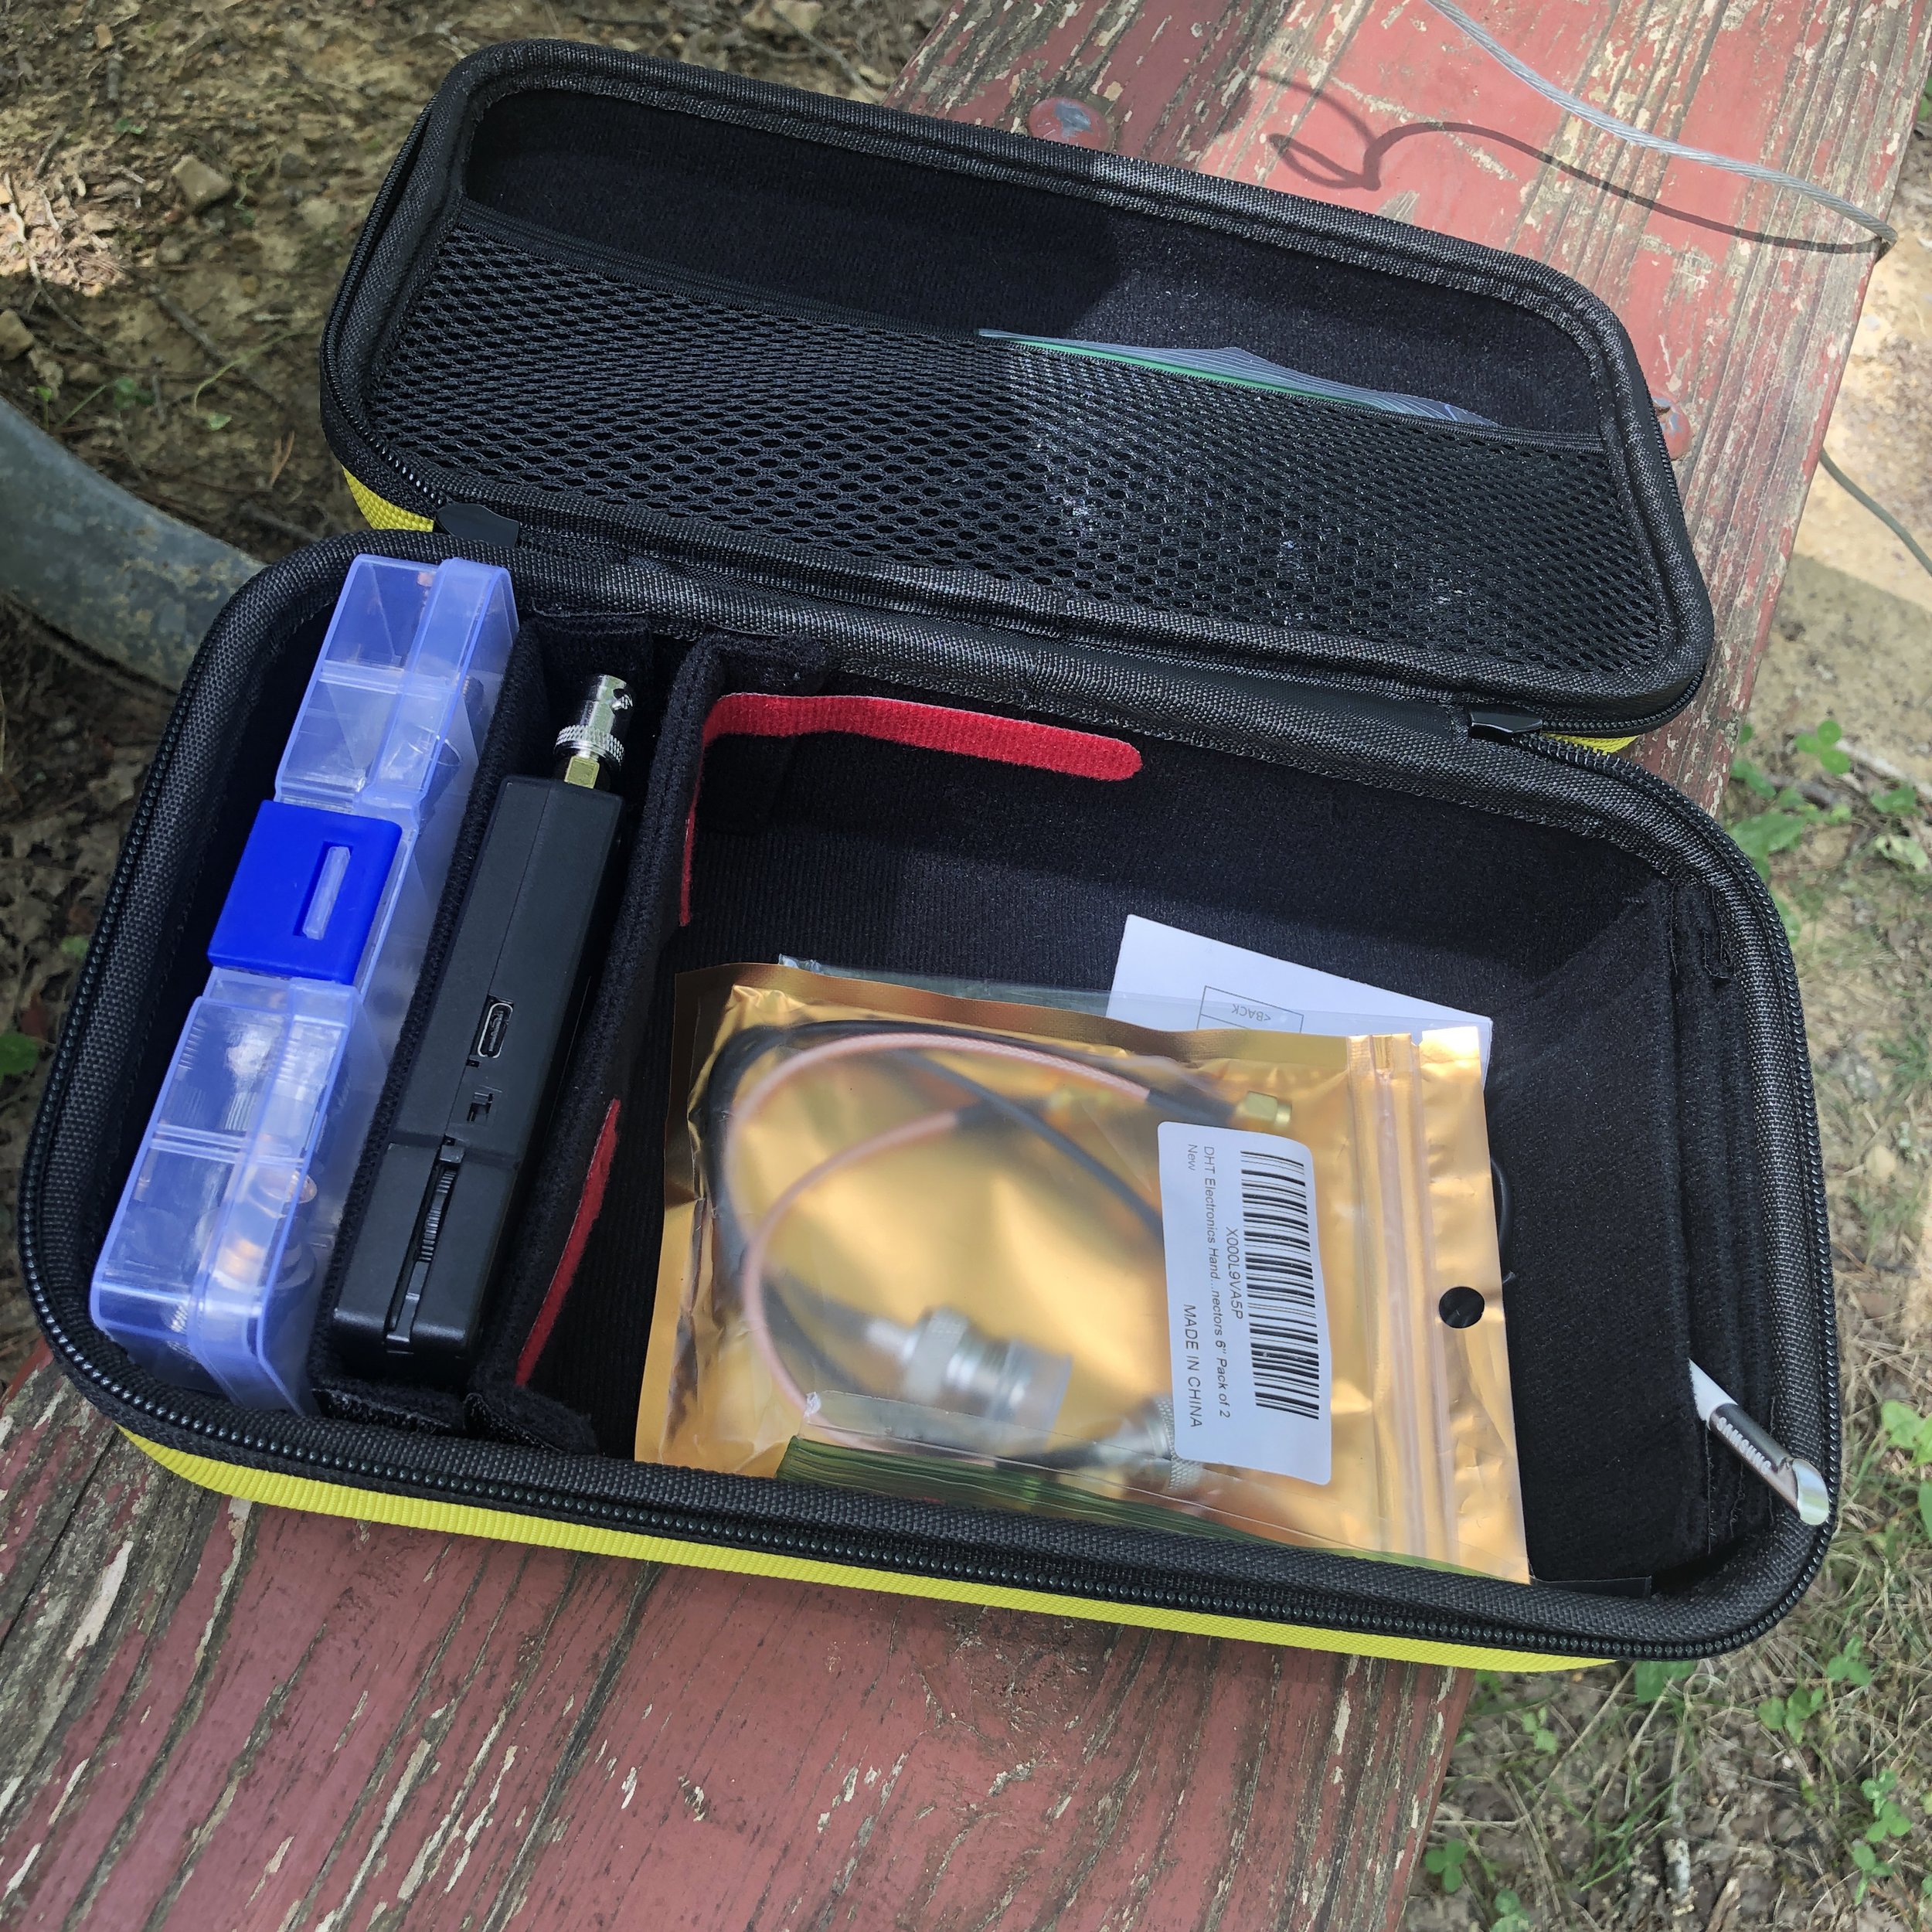
I built this kit for mine with a divider box of adapters (far left in picture), then the nanoVNA is the black device next to that, then the large bin is for cables and such and lastly I have a stylus as it is easier for me to use that than to use the guitar pick looking device that comes with it. This one is recovered from a old Samsung Galaxy Note. I got the case at the Huntsville Hamfest from GigaParts if you want one of them, they probably have them on their website, but I am not sure…
This thing can do all sorts of measurements, but the most often used by me is antenna tuning. If you want to know more about what it can be used for, just search YouTube for nanoVNA and you will get an idea.

In this photo you can see a lot of data being presented on the nanoVNA, such as the frequency range I am testing, two different measurements, one on a smith chart and one on a linear line chart of SWR versus frequency. What the smith chart shows me is a graphical representation of whether the load (antenna) is capacitive or inductive, and what the impendence is at the selected frequency as well. The line graph shows SWR plotted versus frequency and this allows me to maximize the tune for a particular frequency visually, all without risking damage to my radio amplifier section from mismatched impedances or high SWR. The nanoVNA does have a signal generator in it so it is technically transmitting, but it is VERY low energy.

Manual tuners in the past, such as this vintage MFJ 941 worked really well, but are slow and you only get information for the exact frequency you are tuning at (which usually is not the frequency that you are going to use as you dont want to tune up on top of the person calling CQ). This meant long periods of on air transmitting a carrier tone while adjusting the controls on the tuner to add capacitance or inductance to the the antenna to match as best you can so as not to damage the radio.

Radios like this old Ten Tec Argonaut 5 do not have automatic internal antenna tuners in them and even a lot of newer radios don’t have these tuners in them to be honest. These radios either need a tuned antenna that has been built for specific frequencies or a tuner to match the non-resonant antenna to the radio. The nanoVNA allows the operator to tune easily and this happens much faster than on air tuning. Tuning this way also protects the radio in the process. What I really like is that I can see if the bandwidth of good matching SWR to the radio so I know immediately that I can tune the VFO around and not have to retune the antenna while I am on one certain band. Some antennas and some bands don’t play well together and you can see this too… graphically. This allows you to know that on those particular bands, you will need to tune when you leave the safe zone of swr. It is so much more powerful to tune your antenna with this little device.

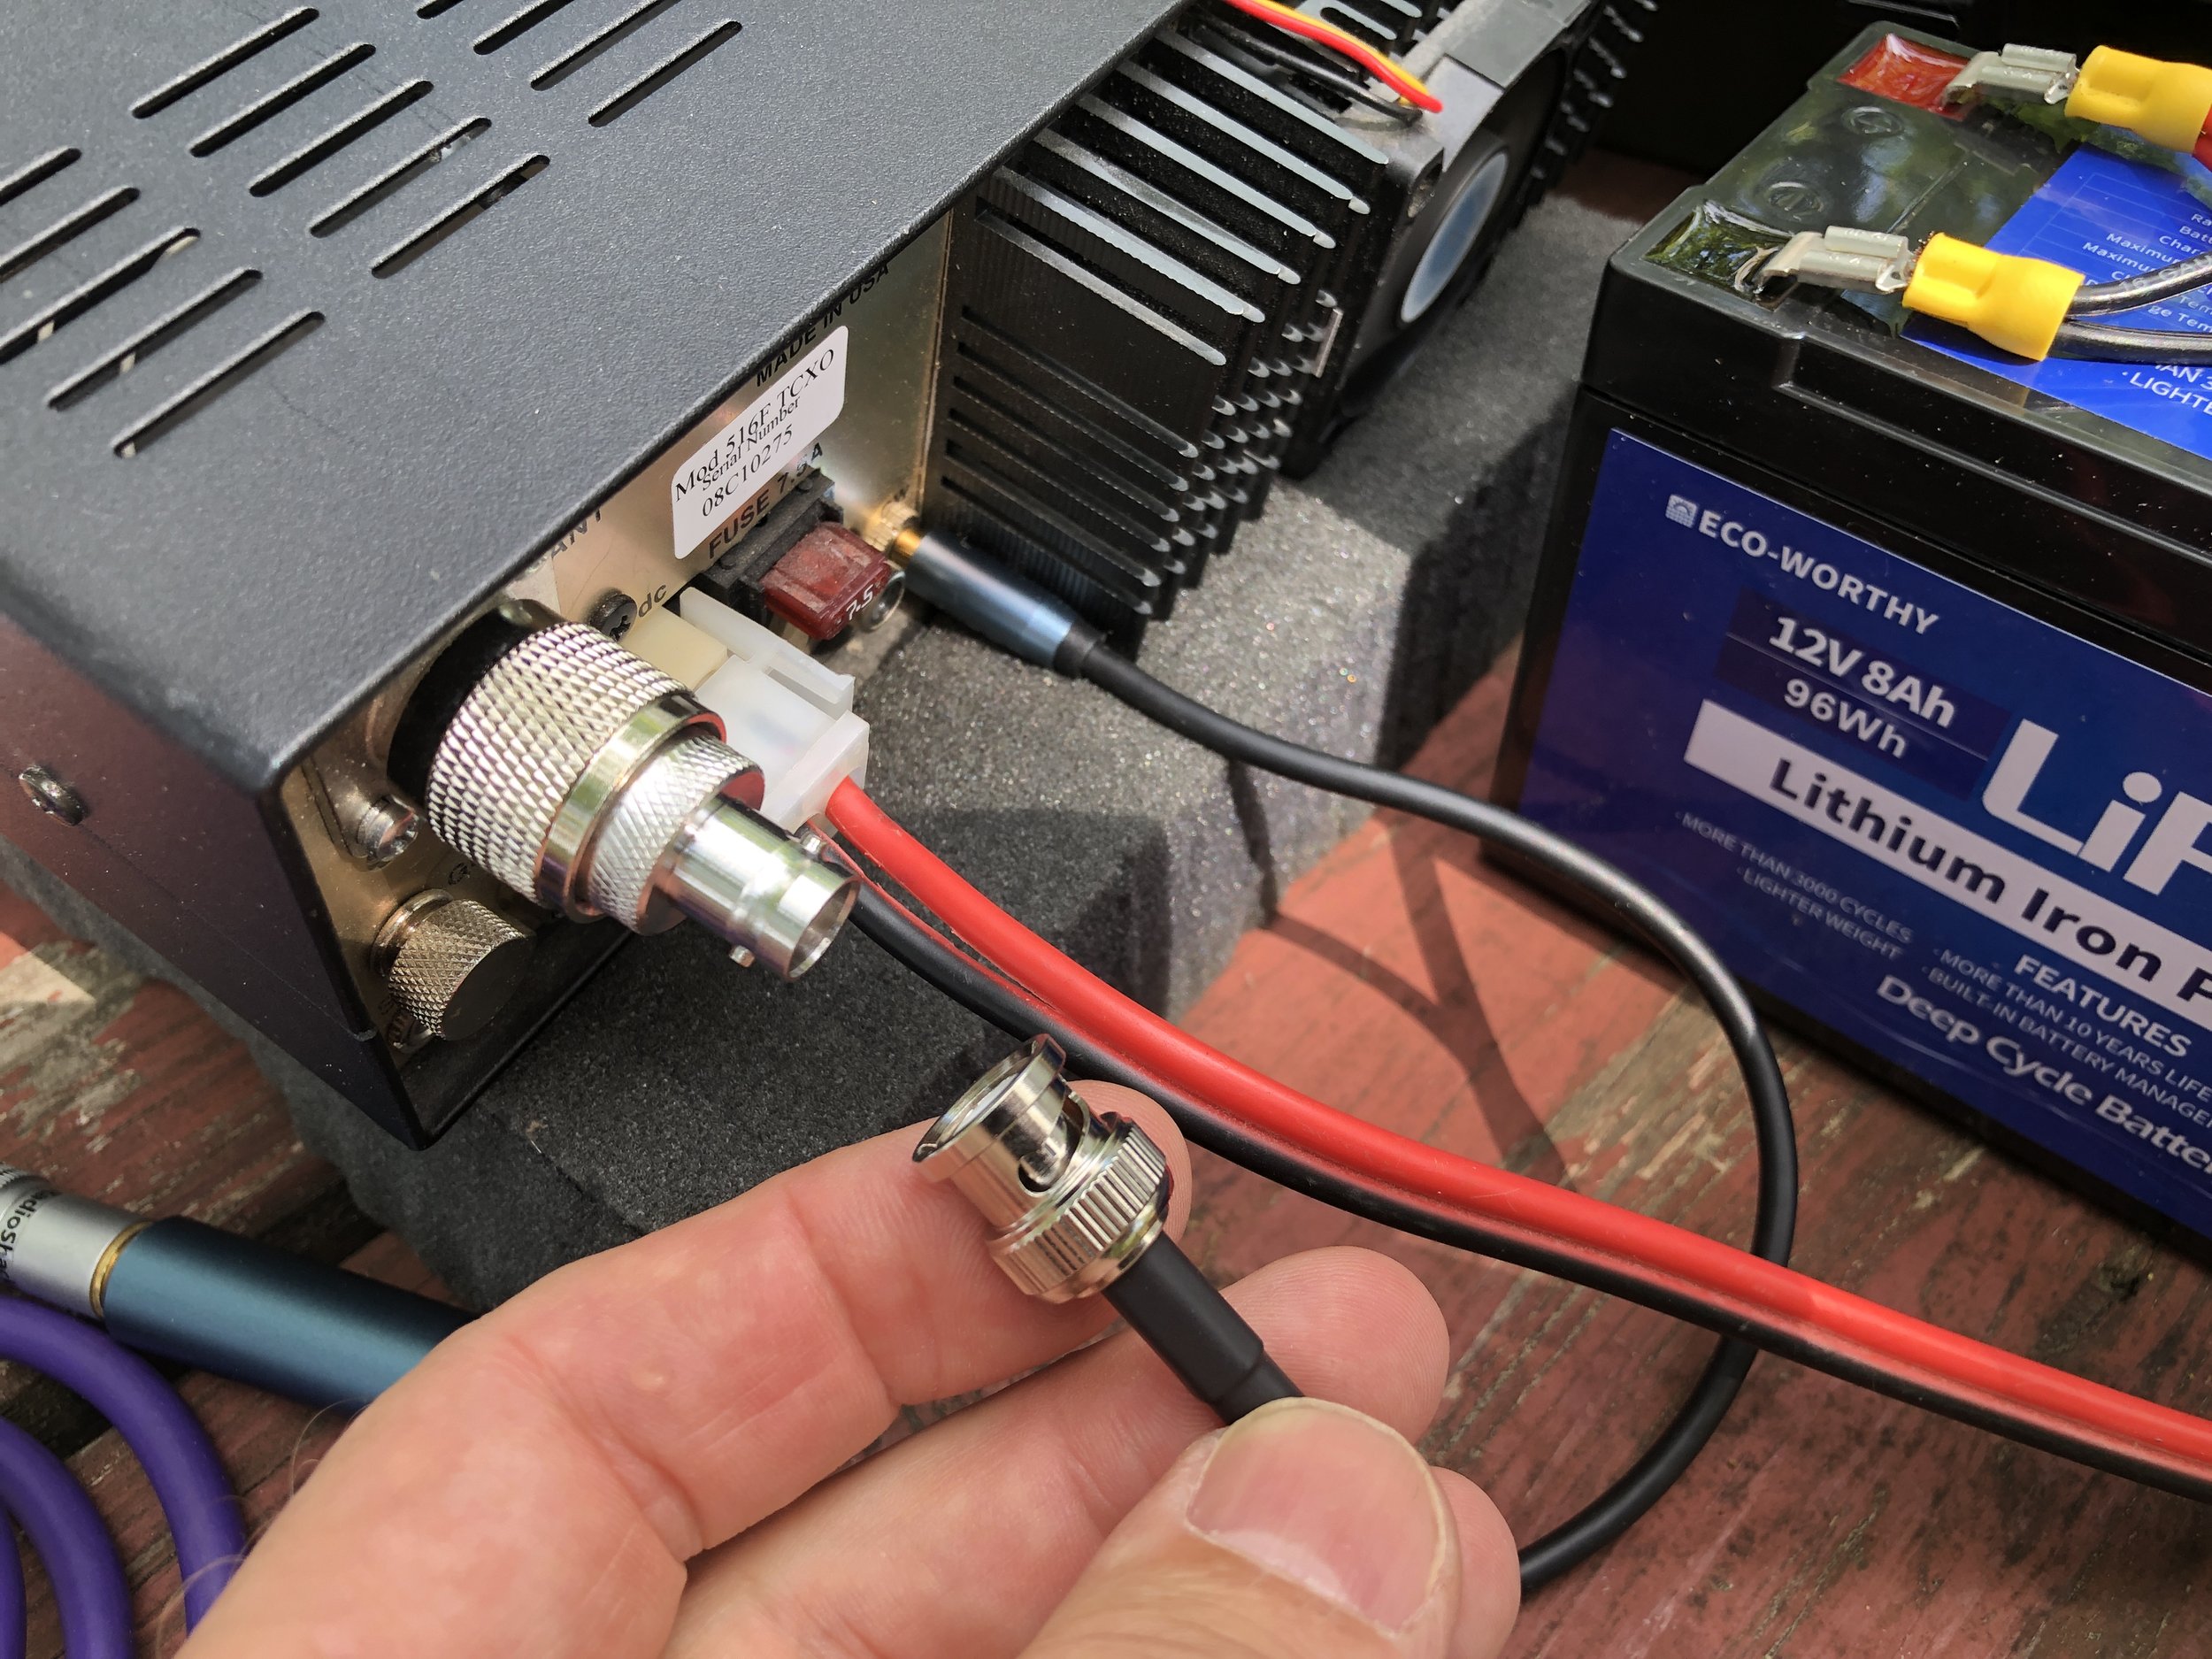
This is the setup I use to be able to easily connect the nanoVNA to the antenna while out on location. The radio comes equipped with SO239 connectors so the antenna has to be screwed on to the radio with a coax cable normally. The modification I made, to make this process super fast, is to add a PL 259 to male BNC adapter. Then I add a SMA to BNC to the nanoVNA and now I can simply and quickly remove the coax from the radio and connect it to the VNA for analysis.
I also made a simple note page to get me close when i go from one band to the other. This way the time to get back to a tight tune is even faster. I also made some notes about how many radials and such. I keep these notes in the case with the radio and tuner.

This has been my biggest blog to date and I really liked writing this one for you. If you have any questions, just drop them in the comments below and we will try to get you an answer as soon as possible. If you think tuning your antenna like this is a good idea, you can find these on Amazon with a simple search. Also, they really are inexpensive. You can also get all of the adapters or accessories on amazon as well. It is all there, all the training you will need can easily be found on YouTube as well, plus some… Now go get on the air!
72
David
WK4DS
Ham Radio Activation for POTA at Park K-2169

Well today started out like any other day… hahaha I always wanted to start a story like that…Anyway…
So this day did start out like any other day actually, but it would turn out to be a very different ending. I had a few hours to be able to activate a park and decided to grab my bag and head over to K-2169 for an activation. I had planned on staying a few hours and maybe doing as many bands as I could. When I got to the park they were running an excavator near my usual spot, so I went to the top of the hill where my other good location is and found them mowing the grass with riding lawnmowers!!! ha ha. Figuring that the excavator was quieter than lawnmowers I went back to the first location and started setting up my station. It was at this point that I realized that I might not get an activation today,
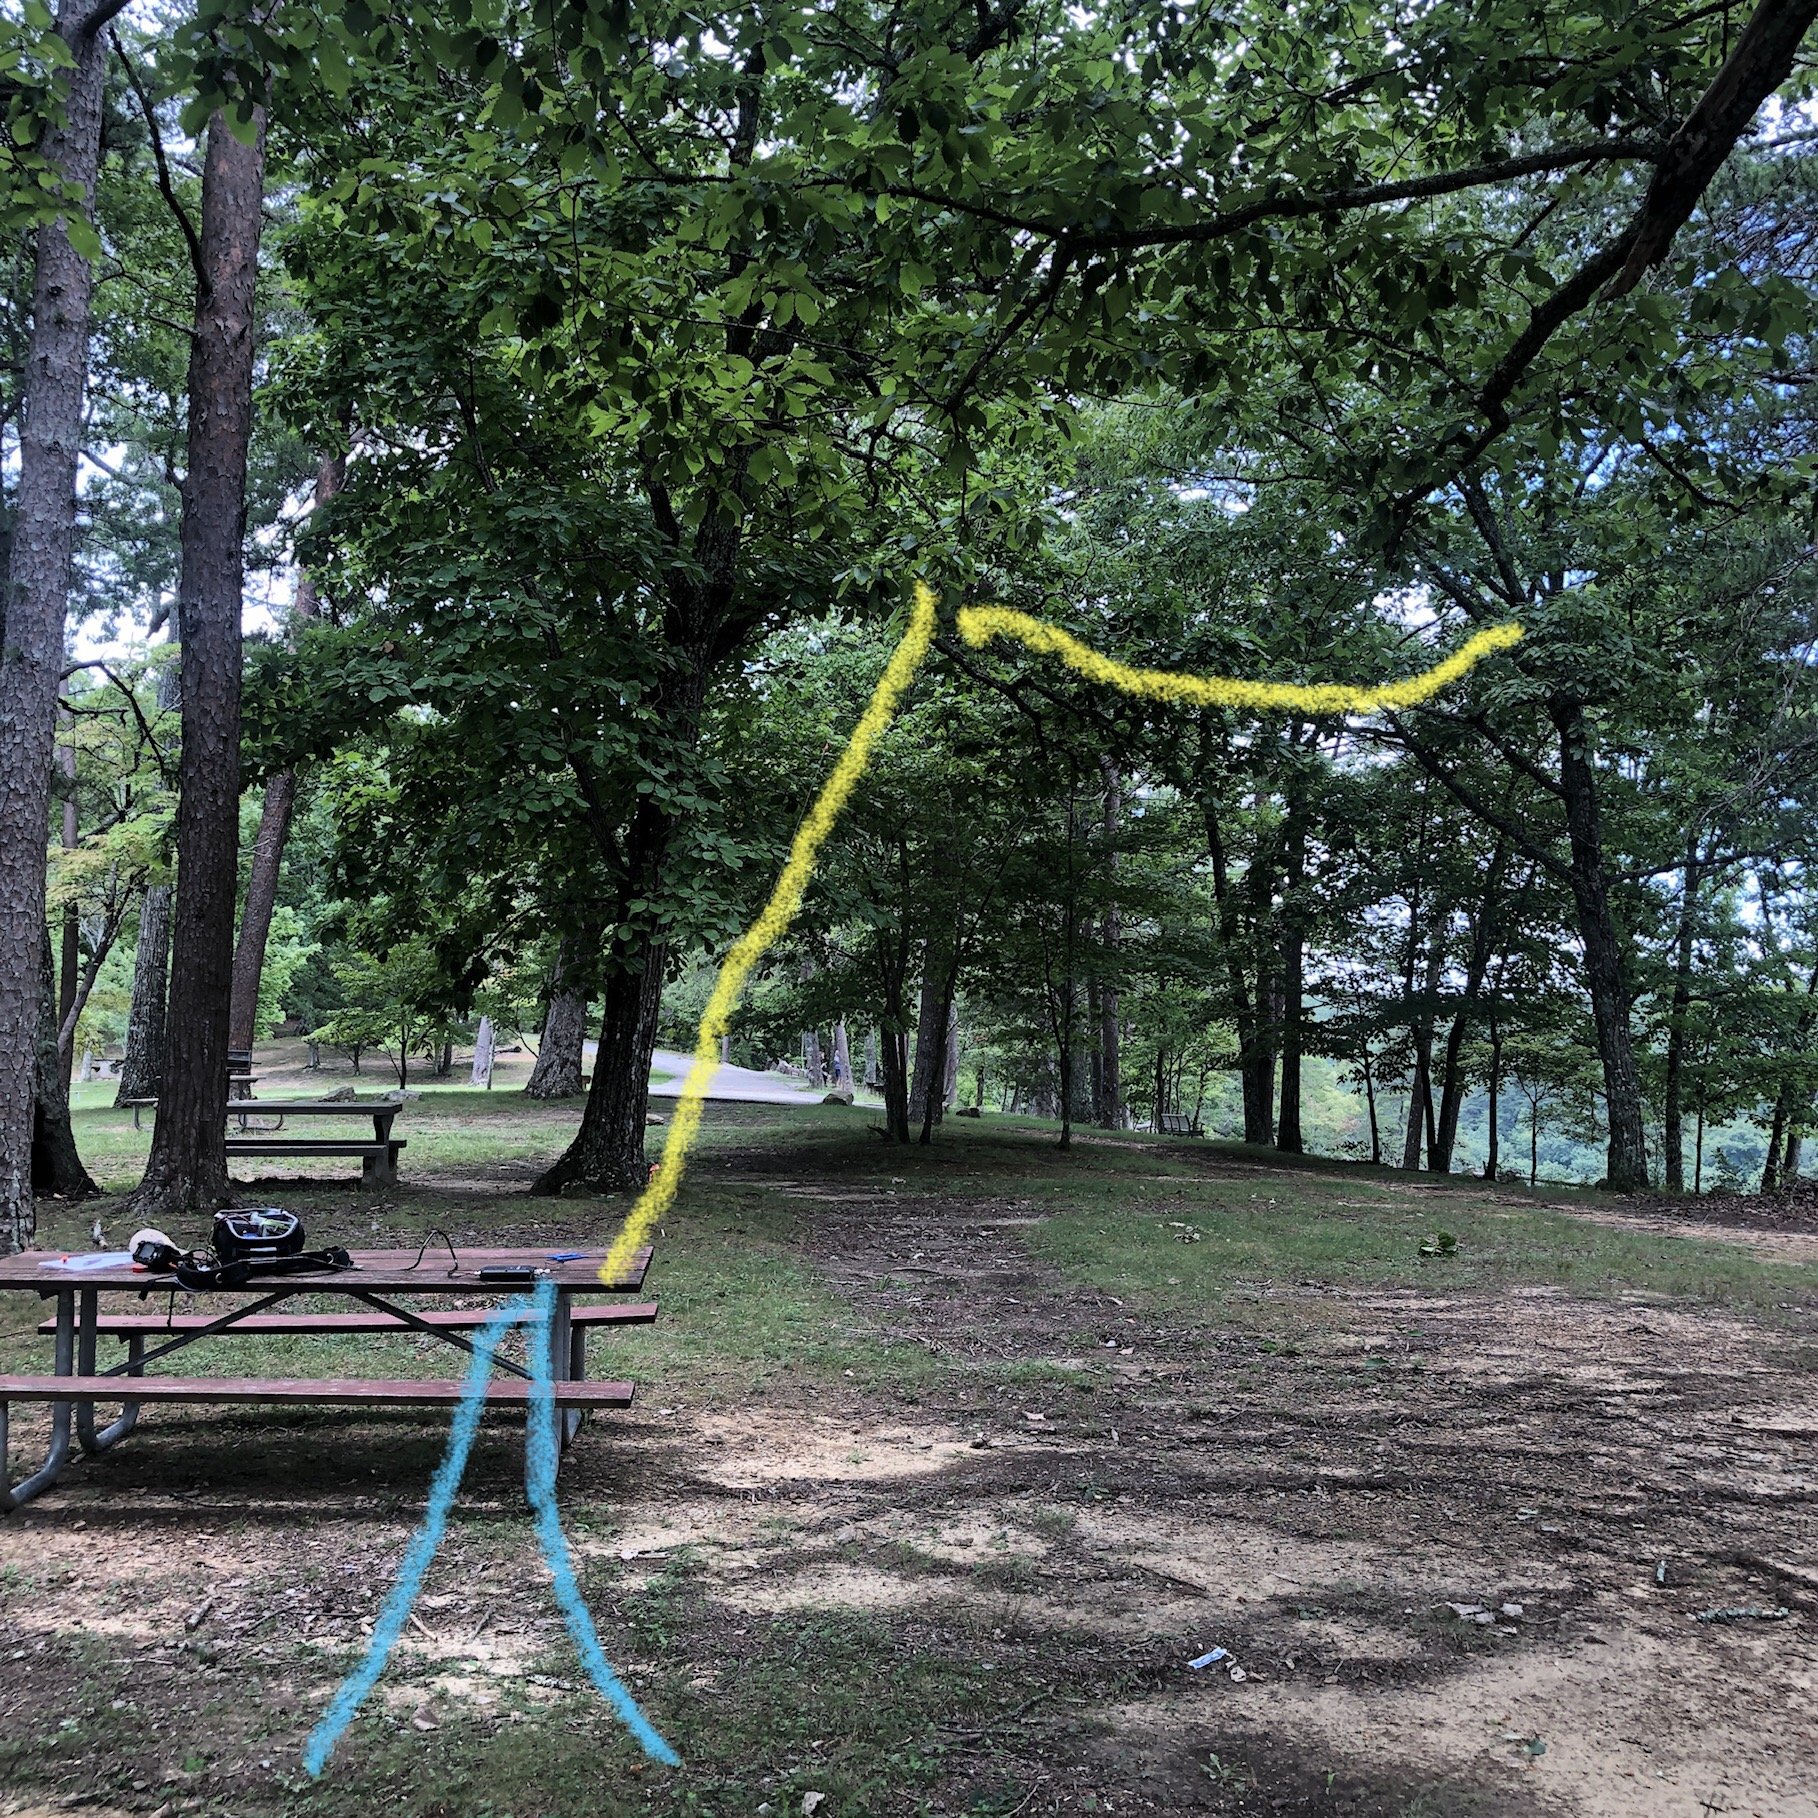
The yellow line approximated the radiator and the two blue lines are the counterpoises. This is a 65’ EFHW wire antenna.
You see the pop-up storm clouds had started to roll in and thunder was in the distance. This normally doesn’t happen till later in the afternoon but just for me, the clouds made an exception I guess. I was halfway through setting up the antenna when I started hearing thunder in the far southern edges of the sky. Upon receiving this valuable information I hurriedly finished getting the antenna into the tree with a decent elevation, got my radio out and quickly got on the air.
Once again the Lord was on my side and I had good propagation while I was operating my station. There has been a strong solar storm recently and the bands have been in the trashcan so to speak. Taking a quick look at my log shows the band fading in and out slowly over the hour or so I operated today.

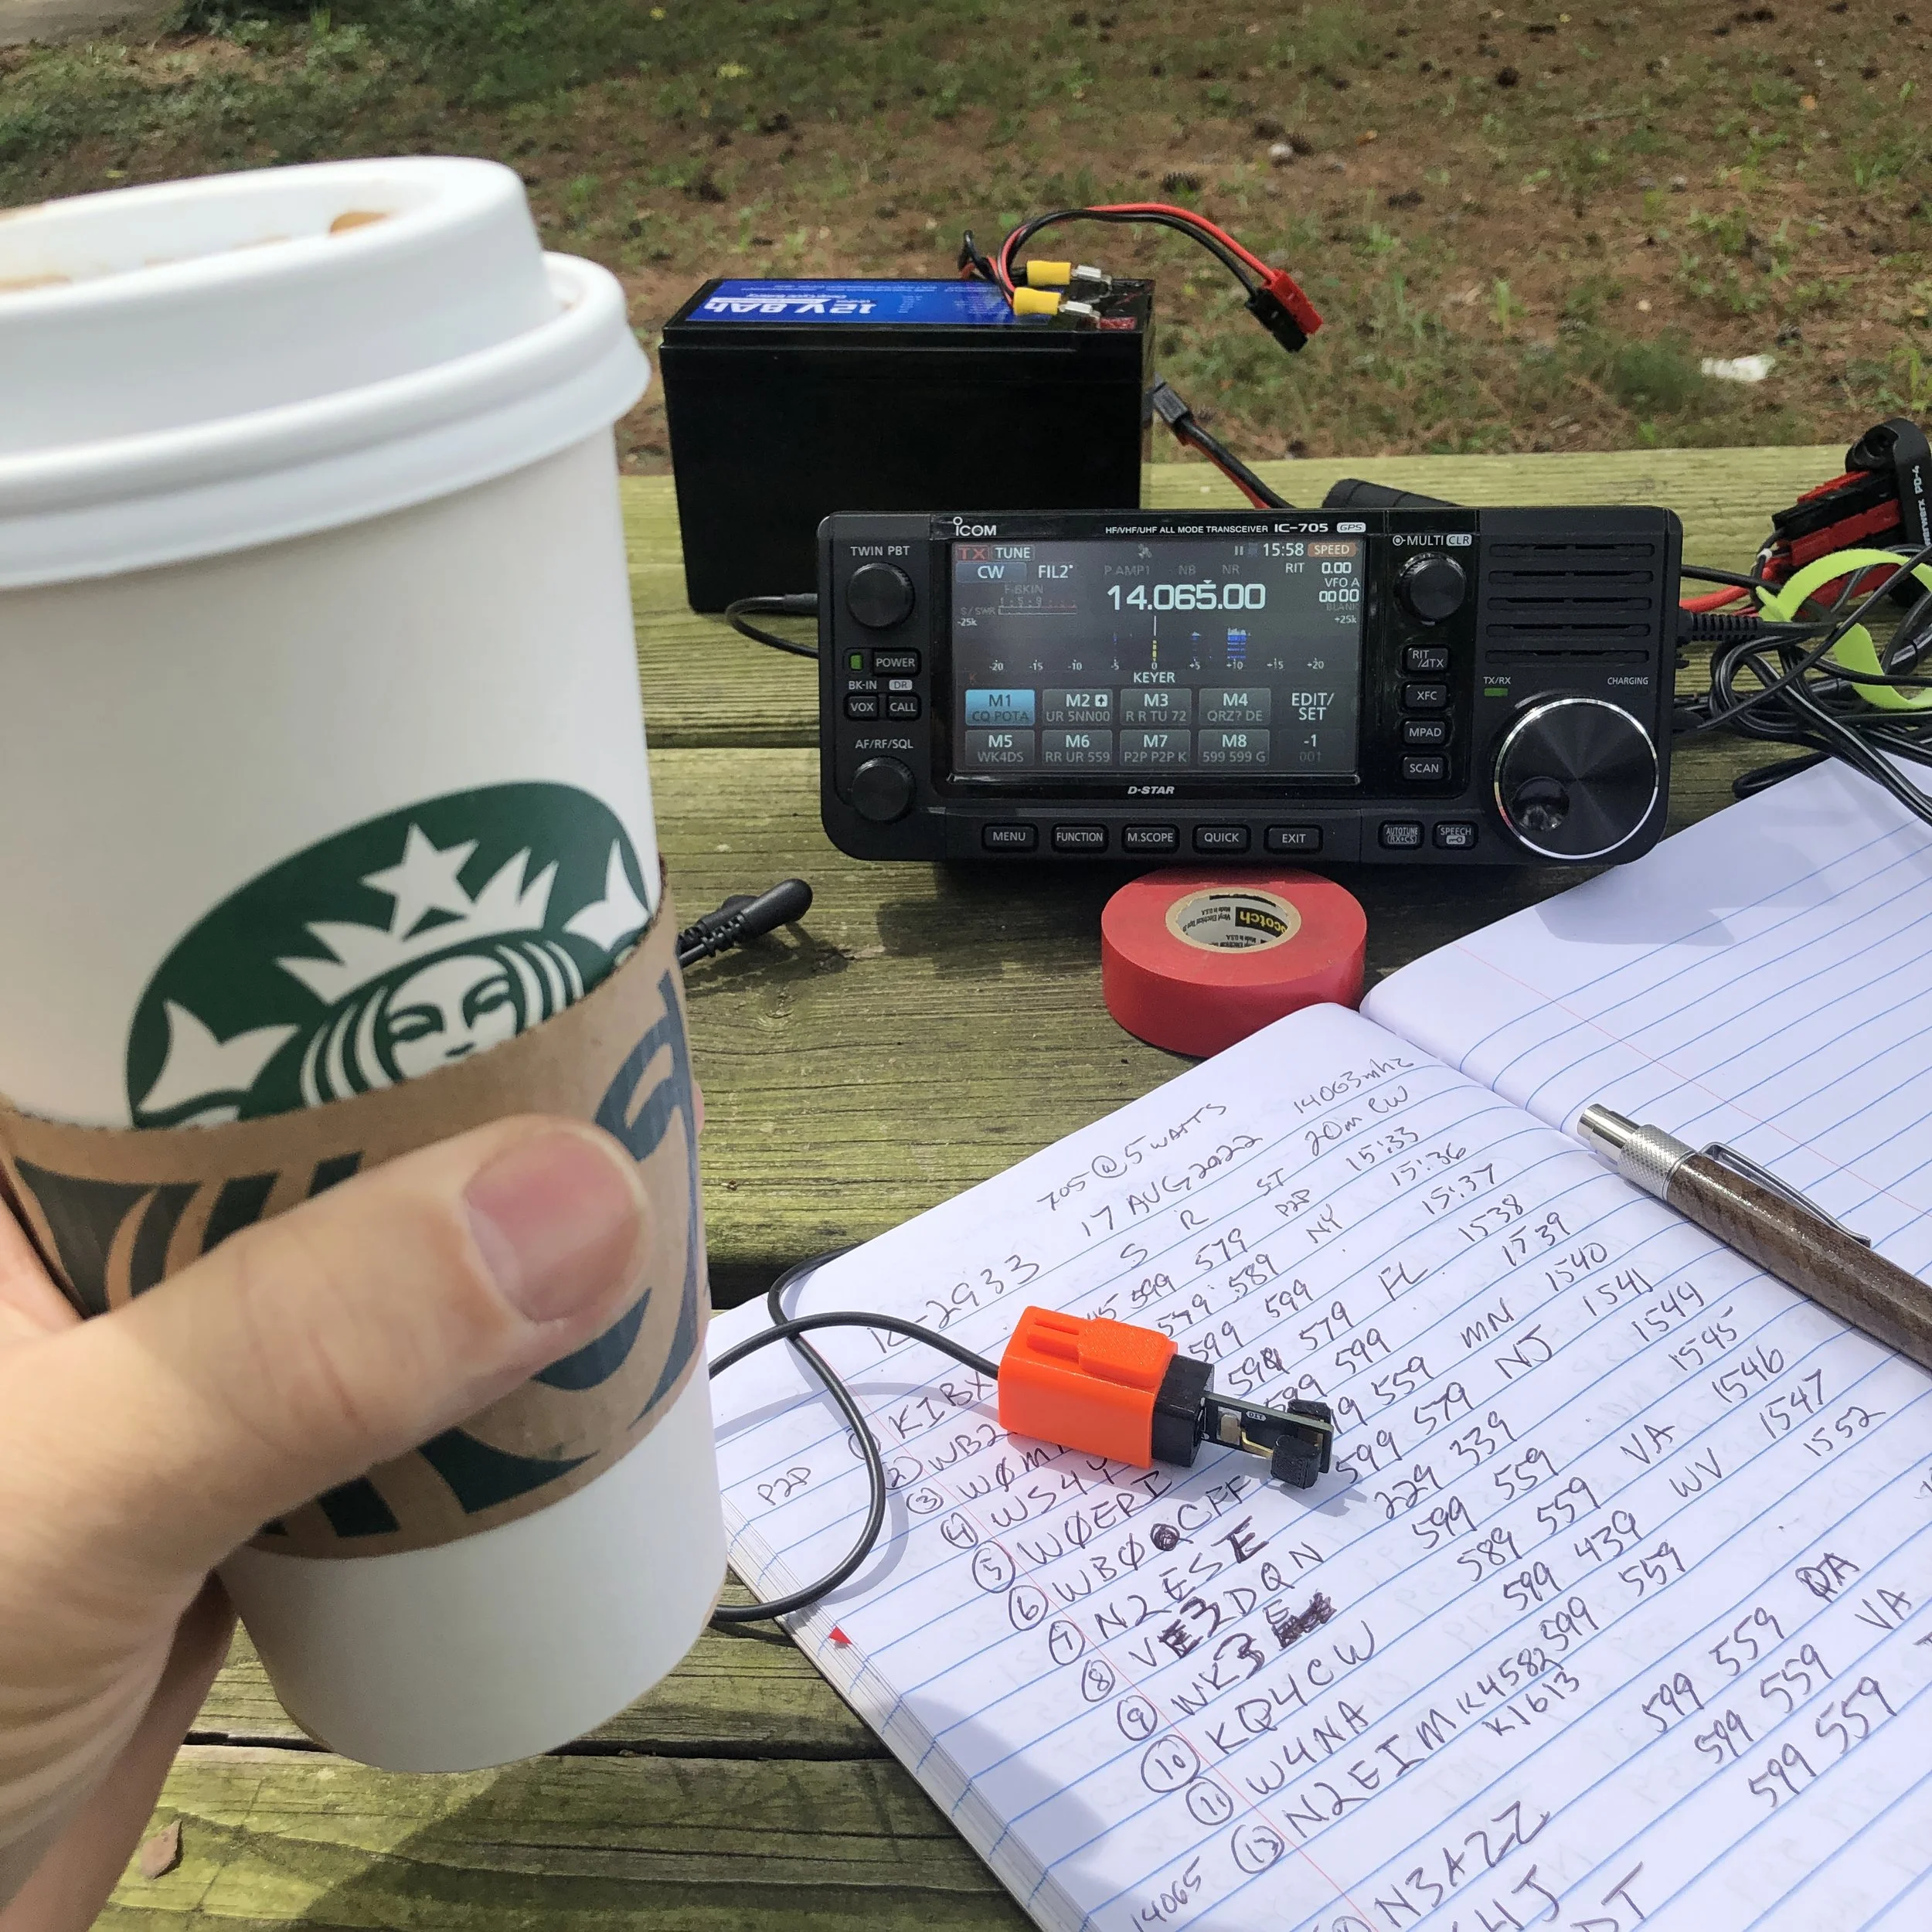
Signal reports as bad as 339 and 229 were common at the beginning. at the end the signal reports were more like 599 & 579 regularly with strong signals coming in from far away states.

Today I used my Icom IC-705 with the automatic tuner and hurriedly assembled the system so I could get the activation as quickly as possible. I had even planned out my escape had the rain started to fall while I was operating. I set up my station so that all I had to do was disconnect the long wire antenna from the tuner and could literally put everything in the backpack (kinda like a bucket of sorts) and just carry it all over to the pavilion to get out of the weather. I had planned, that once the rain had passed, I could go and collect my antenna or hook back up the station and finish the activation should I just need a few more contacts to get my ten.


A closer look at the custom knobs I made for my AH-705 tuner as the wing nut on the ground stud is terribly slow and the red plastic knob now lives somewhere inside the inner fender well of my truck… I happen to be a machinist so this was a simple task for me.
Turns out, I did not need to worry about any of that, I had 25 QSOs in short order before the storm clouds really got close to me. The clouds were up overhead by the time I had broke down my station, that was not a problem though since I was already packed and ready to head to the truck. All in all it was a good activation even though I was constantly worried about the impending storm rolling in from the south. I guess the moral to the story is don’t give up just because the weatherman said it is going to rain, we all know how accurate they are!! ha ha.
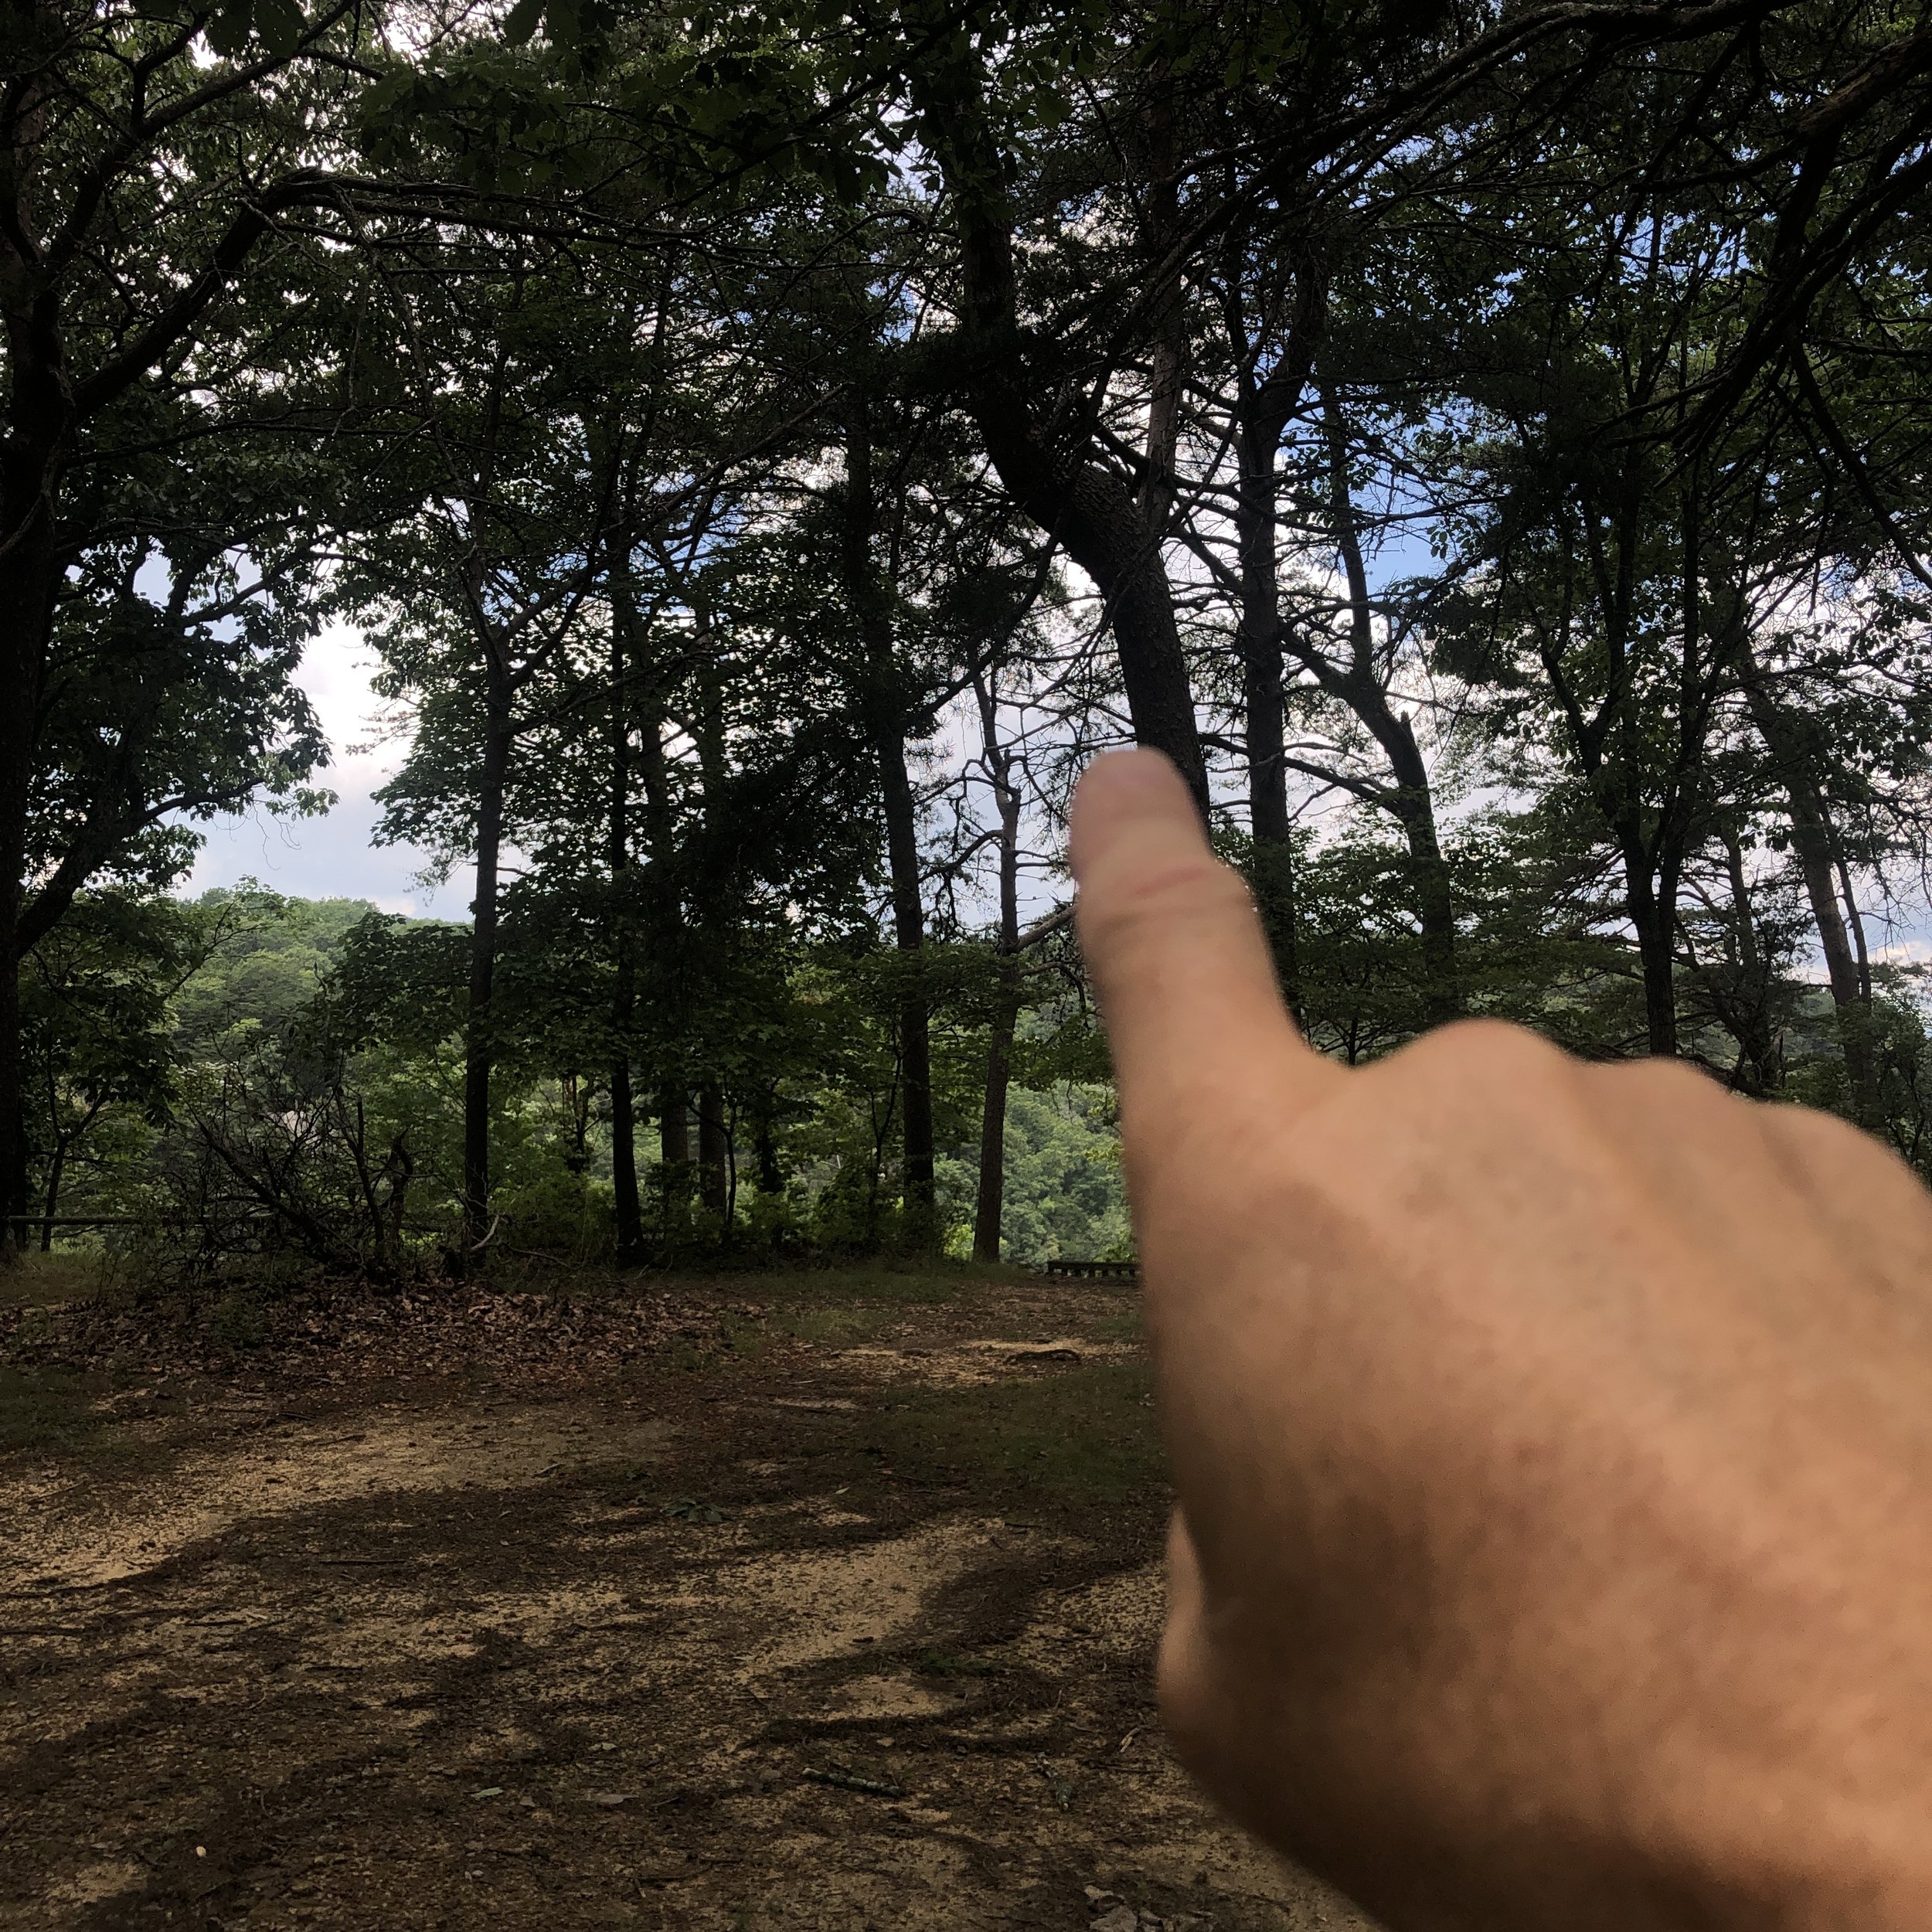
Looking through the trees towards the front heading my way, and thus cutting my activation short today…
If you enjoy reading these blogs, please consider subscribing and maybe even liking them so I will know what people enjoy reading.
Thank you and 73
de WK4DS
The Elecraft K1 goes out for a POTA activation!

So I finally got my Elecraft K1 out of mothballs and took it for a spin to K-2169 the other day. (I actually have already used it once before but had put it back in favor of the IC-705 as it has more widgets and such.. Anyway, I finally just bit the bullet and took it with me to my favorite shady location at K-2169 and setup for some “on air” fun.
The one thing I like about the K1 is that it has an internal antenna tuner installed. This simplifies the set up and breakdown of the radio at the location by eliminating the entire external antenna tuner connection series of events.


I am running two 10’ counter poises at this time, mainly because I have them and it seems to help to have both connected. I want to run my VNA over them to see what it looks like with one and then two at some point.
This one simple thing alone saves me an easy five minutes of set up time. So it was fun for that fact alone but the other things that make the K-1 unique are that it is such a simple radio to operate as well. I like that the VFO works really well and the radio has enough controls to do everything you need while on an activation and nothing more.

Another thing that I like about the K-1 is that the headphone jack is wired for stereo headphones from the factory. This seems like a trivial thing but with the 705 and the TR 35 they are both factory wired for mono headphones or one ear only listening. This is not what I enjoy using therefore I either have to buy a adapter or figure out some kind of bizarre wiring scheme to get both ears to have signal on those two radios, but on the K1 just works.

I keep my K-1 in the original aluminum briefcase that I have had for over 20 years now. The radio and accessories have fit nicely in it for all of this time. I do carry the 705 backpack kit when I activate with it because the EFHW antenna that I am using is in that bag. Rather than pull stuff from one bag and put it in another I just take both and pull what I need from each one. I do like you using the N6ARA paddle that I have with my 705. It works really really well and I am probably going to get a second one for a spare when I wear this one out.


Yes, I did make that key you see in there. It is made from scrap industrial materials and works exceedingly well to be as simple as it is. I love making some of the things that I use on the air and my keys are one area where I do that. At some point I want to build a radio from scratch, but I have no time right now to dedicate to a project of this magnitude, so I will just stick to the simple stuff and have fun on the air.


Getting back to the activation I was kind of in a hurry that day so I hurriedly threw my throw line over the first large tree branch to get my EFHW in the air and it took me four attempts to get it over that branch which is normally a quick one throw shot for me! ha ha… There goes the whole doing it in a hurry part. Once I got it over that first tree limb then it’s a simple matter of pulling the antenna over that limb re-tying the throw-weight and throwing it into the second tree to pull the final end of the antenna up where this photo shows.

This makes the antenna run about 60° north east when I string it like this but it seems to work really well from this position.
It is no secret that the bands have been terrible lately but I was still able to get 23 contacts in about an hour, maybe a little bit longer, with this activation. This particular activation put me at 19 activations at K2169. I really wanted the Repeat Offender award so I went back the next morning and setup the entire assembly the next day and reworked 14 more contacts to have my 20th activation at Cloudland Canyon State Park. I have been working on this award for quite some time and finally got to the minimum 20 to complete it. Now I think I will start branching out to other nearby parks and activate some of those as well. I will still go to Cloudland Canyon very regularly as it is really close to my home and I can go over there almost any morning for an activation. It is the only park that is within a 30 minute drive of my house that I have available to me. The area I live in is park dense, to a degree, but they are actually spread out somewhat due to the topography of the area.

I am going to wrap up this blog post by saying that if you have not tried parks on the air I would recommend it highly. As well as if you have not tried Morse code, I would recommend that as well. Mainly because both of those are very fun for me… Until next time.
72
David
WK4DS
How high does your antenna need to be?

The sag in the wire makes the center height of the “horizontal” run less than 3’ above the ground and it still worked really well.
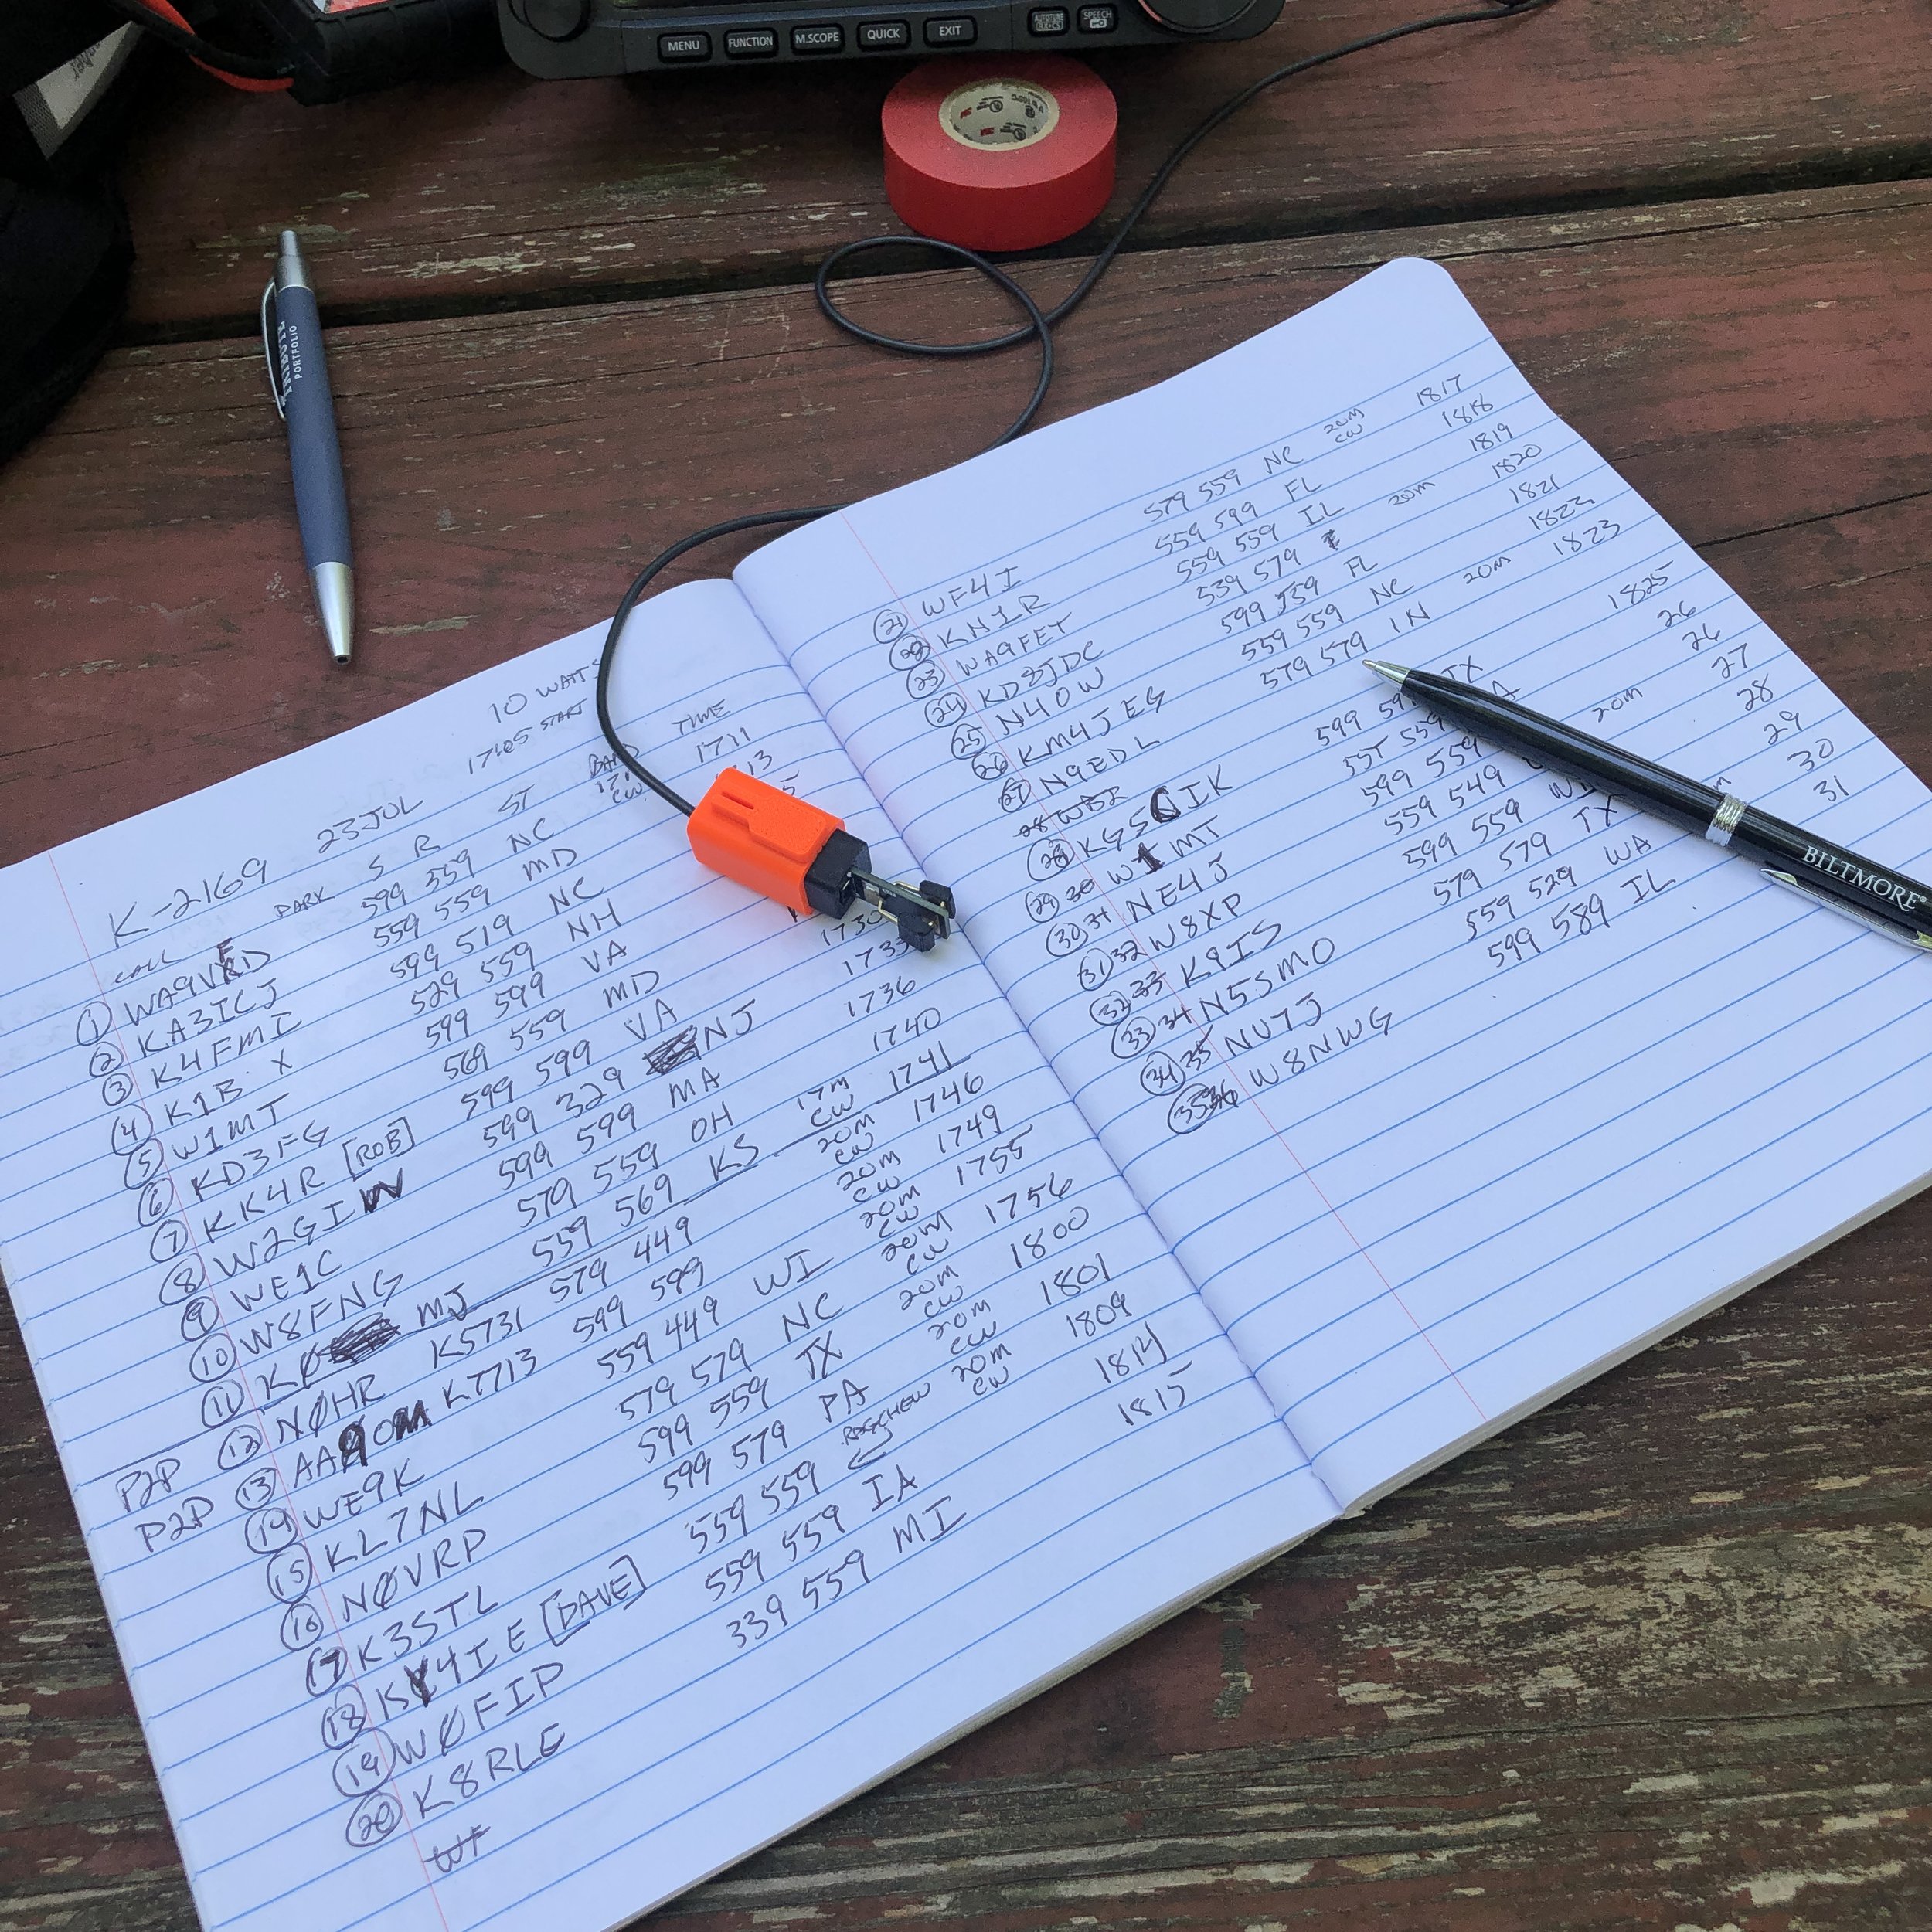
So over the past few days I have been thinking about how high does my antenna actually need to be. Turns out it doesn’t have to be very high at all. I have done two park activations in two days time and on both days I never raised the antennas any more than 9 feet off the ground. That’s right! 9 feet max! Almost had them running dead horizontal from the picnic table 65 feet away from me. No throwing the hoist line multiple times to get it in a good spot or even having to throw it at all actually, I just tied it off to a limb that I tossed the end of the line over without even adding the throw weight to it!!! Easy peasy!!!

A quick look at the QSO maps for these two outings shows that the radiation pattern is typical for a low altitude wire antenna. Pretty much omni-directional or a “globe” shaped pattern. Also these tests were done on days that had pretty bad solar activity and the bands were in terrible shape. I think this is why there is not near as many western stations as compared to other activations. Also note the signal reports on the logs and that they were not really bad when the bands would open as I was strictly running 5 watts QRP power also.


The low position creates a very obvious take off angle as the contacts on this outing are almost in a perfect circle around me!!!
So all in all, I would say that if you want to be on the air for a while, go to the trouble of getting the antenna as high as possible. On the other hand, if you want to get a quick activation in on your lunch break or if your doing a RADAR run of some such, it seems that getting the wire up off the ground a couple of feet works good enough to get an activation in less than an hour. I am going to repeat this test in the fall with literally laying the radiator on the ground and I will take my VNA and see what it looks like in all three positions. This helped me to understand that it really doesn’t seem to matter if you cant get your antenna up high enough for proper directional effects.

The end insulator is only about a foot above my hand here and is even under a tree!!!
I strung my antenna almost horizontally from the picnic table on two different park activations at two different parks to see if I would get more or less contacts with a really low antenna and the results are in. Seems that if you cant get your antenna really high up (for the lower bands) that is seems not to matter if it is 20’ high or 3 feet about the hard deck. My logs for the two activations look like any other day when I stress over getting the wire up high into a tree. The only real benefit from getting the wire up really high is it prevents others from tripping over it by not noticing it. This was my only real concern while activating both parks, although I did go at times when I knew that there would be fewer people and at Booker T Washington state park I was literally the only person in the area I was in. I just didn’t want problems during my experiment, so I chose times that would protect park users and my gear and preventing the gear from being a trip hazard as well.
If you don’t have coffee, is it even a legit activation???
The signal reports were cyclic as the band would open and close, but all in all, I was getting good reports even though I was running 5 watts through a tuner as well. I like doing these kinds of experiments as it allows me to see just how bad the setup can get and it will still work… lol. All kidding aside, this worked way better than I thought it would and setup was FAST. I really liked that part about it.
Thanks for reading along, I hope you enjoyed it and if you did, please hit the like button and dont hesitate to leave a comment too. I love comments!!!
72
David - WK4DS
High Temp Activation
Today I went to my favorite park and set up my IC705 radio to work an activation on Park K – 2169. The only difference today that was unusual was the fact that it was in the mid-90s here in Georgia, this usually is not a big deal but when I finally got my radio set up I was in the direct sun. This causes the radio to heat up very quickly and I found myself with a radio that was so hot that I could almost not touch the case in less than 30 minutes. So I moved the radio to inside my backpack to where I could shield it from the Sun as the shade moved closer and closer to my operating position. Eventually the shade got to the end of the table and I was able to get the radio out of the Sun. For the period of time that I was working 17 m I learned that the reverse beacon network was not picking up my CQs and the POTA site was not posting my spots either. These two items combined caused a very long and “quiet” period of 17m operation… HaHa. I finally got 11 contacts on 17 m after considerable time of what seemed like endless calling of CQ. I had my antenna strung high in the tree, probably 25 or 30 feet up, ran up over a large limb on the first tree and horizontally at a slight upward slope to another tree as shown in the graphic I made from the photo I captured. I am still using the N6ARA tiny paddle for my travel key and it works wonderfully to this day. I have done well over 15 activations with this key now and it keeps on working perfectly. Once I moved to the 20 m band the game kind of picked up for me as I was able to make another 24 or so contacts in short order. This being mostly due to the RBN starting to see me and I was able to get the POTA spot to take when I moved to 20. The band would fade in and out some as I was working but for the most part I was able to work contacts about one per minute. It seems like that is the maximum speed that I am able to work a Morse code contacts with the speed I am able to operate (about 20WPM) and with the exchange information I choose to send. All in all, it was a wonderful day to get out and play with my radio and to get an activation in at the same time. My next activation will either be with a Ten Tec Argonaut 5 or my PENNTEK TR–35 radio as I want to try one of those out for an activation soon. I have had the TR-35 for a while now and have only used it a couple of times in the shack at home so far. This is a travesty as it is a wonderful little radio. I hope to take it on trips in the future as it is SO small!!!
If you have not checked out the parks on the air, set up an account with them and look at what they are doing. It is a wonderful program and has lots of activity for the amateur operator. There is usually a mode that is something that you would enjoy doing, that will have people on the air almost all the time. Whether you are into digital, CW, voice, or any other mode that people use on the air there is usually something going on with POTA. I even had two traditional QSO contacts today during my activation, complete with name exchanges, QTH exchanges, and even our rig exchanges. So there is no hard and fast rule as to what information is traded in an exchange but they do normally have a minimum of signal report and usually the hunter will send the state they are residing in (but it isnt required from what I can tell), that is about it, anything else is fair game. If you want to know more about it you can go to the Parks on the Air website to learn lots more about it.
Thank you and 73
WK4DS-David

I started with keeping the battery in the pack but eventually had to also put the radio in it to keep them both out of the direct sun.

ICOM AH-705 Antenna Tuner with my homebrew cable I made for it that has power, coax and control cable all in one bundle.

Antenna ran into the trees with the counterpoises run along the ground underneath them.

The IC-705 is a wonderful little radio that works really well for portable operations.
Not a bad day running 10 watts into an EFHW wire antenna!
10 things to do during the terrible band conditions with amateur radio

Now before we go too far into this blog post you need to know this is satire. I thought that this would be a fun diversion from the frustrations associated with the bands currently in 2022. So if you came to this blog post to get legit tips on operating during poor band conditions then this is probably not the blog post for you. With that out of the way, let’s have some fun.
Let’s get the easy ones out of the way first. Like…
Install a 180’ tower and a 20/40 beam antenna. We all know that a better antenna is the first step to better signal, so why not start there? I mean, isnt this what second mortgages are for?
Locate a 5 kilowatt amp… You will have countless hours of fun running a high current rated 220VAC circuit for it. It could easily double as a coffee table in the corner of the shack or as a nice space heater in the winter months to keep your cat warm.

Beacon mode. Now here is a novel idea. Your radio could be running in beacon mode, calling CQ fruitlessly anyway, and you could be free from sitting at the operating position and could instead do something less valuable… like go mow the yard…or better yet, scope out where you are going to put that tower.
Straighten up the wiring in your shack. Lord knows we could all use some wire management in our lives. So what we all need to do is turn off our perfectly functioning radios and then go around behind them and start messing with all the wiring, I mean, what could possibly go wrong?

Marriage counseling. We are all edgy lately due to the terrible propagation and the frustration with trying to complete QSOs that are normally easy, Instead of getting mad, why not instead take the XYL on a date to her favorite restaurant? You could even take her shopping…I know, I know…that might be too much, but you could try???
Repeaters. Now hear me out, if the bands are this bad, shouldn’t we reconsider what “DX” really is? How about we start working some local DX since it seems that 50 watts on 2 meters can still open a repeater these days.
Alternative QSOs. You can still goto a ham fest and make “eyeball” QSOs with people, don’t forget your QSL cards too, people still like to exchange them. Do these go in the LOTW too???
QRP Radio. We all know how frustrating QRP can be even in the best of band conditions. Since many of us are accustomed to having 100 watts or more at our disposal to make contacts with, why not try using LESS power during these terrible times??? I mean, you could just get it over with up front and not have to wonder why you cant make contact, you know for a fact what the problem is and you have an easy scapegoat?
Kit building. Now is the perfect time to get one of those kits and spend some quality time cussing at the burned fingers from the surface mount devices and heat sensitive ICs that you have to solder…

Read a blog. I think this is a great idea to be honest. You can subscribe to this very blog with a button somewhere on this page and then you will get all the notifications when I publish the next one. Honestly though, take some time to just call CQ if you want, maybe, just maybe someone will answer you…
Thank you for going down this rabbit hole with me for a few minutes to read this little blog, I just had this idea and thought I would share it with you guys and gals and have some fun with it. Leave a comment with what you think should be on this list that I left off. I would love to hear what all of yall think.
73
David
WK4DS
Straying from 20 meters…

In the course of the most ham radio operators career on the air they will find that they spend a lot of their time on the 20 meter band. This is because 20 meters is a very good band for propagation and is almost always open to communications. The problem with a band that is open like 20 meters is that every amateur radio operator that has a HF radio is on 20 m, well at least it seems like that is what is happening…
Another thing about me is that, I really am not into contesting either. This means that the 20 meter band is not available to me on the weekends as there is pretty much a contest every weekend…and for good reason! Contesting is a very popular activity in amateur radio around the world. Although for me, I just am not super into it.
The WARC bands do not get used in contesting so on the weekends I find myself dialing around 17 and 30 meters alot.

The N6ARA Tiny Paddle has really started to grow on me, I like the size and how well is just plain works. it is effortless to send good code with this key. I can highly recommend these is you want a small light weight key for things like SOTA and POTA.
Another thing I like about the WARC (World Amateur Radio Conference) bands is that the 30 meter band is reserved for data modes only. Did I mention my favorite mode is CW and wouldn’t you know it, the powers that be consider morse code a data mode… So I can goto the low end of 30 meters and almost always find someone to chat with. That is something to remember too, the WARC bands are pretty narrow and many modes share them, so sticking to the gentleman’s agreement on where your mode normally operates will go a long way towards being efficient with these small band allocations and making sure we all have room for our modes.

The rig setup is really a lot simpler than this photo makes it look. I wanted to get an overview photo of the whole thing for once to show the relationship of the parts. This rig would look like this if it were on 80 meters or 12 though so this photo isn’t strictly about the WARC bands…
A lot of people do not use the WARC bands very much as they are not the conventional ham bands. I tend to enjoy using these bands as they are normally quieter and less crowded than the conventional bands. Another benefit is that the POTA program also uses these bands as it is not a contest oriented program other than award chasing like any other awards system (Think ARRL W.A.S. or something similar).
On the day that I decided to activate on the 12 meter band I was looking to confirm that it was open to communication and decided to check the 10 meter band to see if it was open. I did this because I couldn’t hear any stations other than someone operating FT8 and had no idea how far away they were. This is a common practice as normally if a higher band has propagation, then the lower one will as well. I found that the 10 meter band had beacons coming into my location in the state of Georgia from California with clear audio and this gave me the confidence I needed to try and activate a park on the 12 m band.
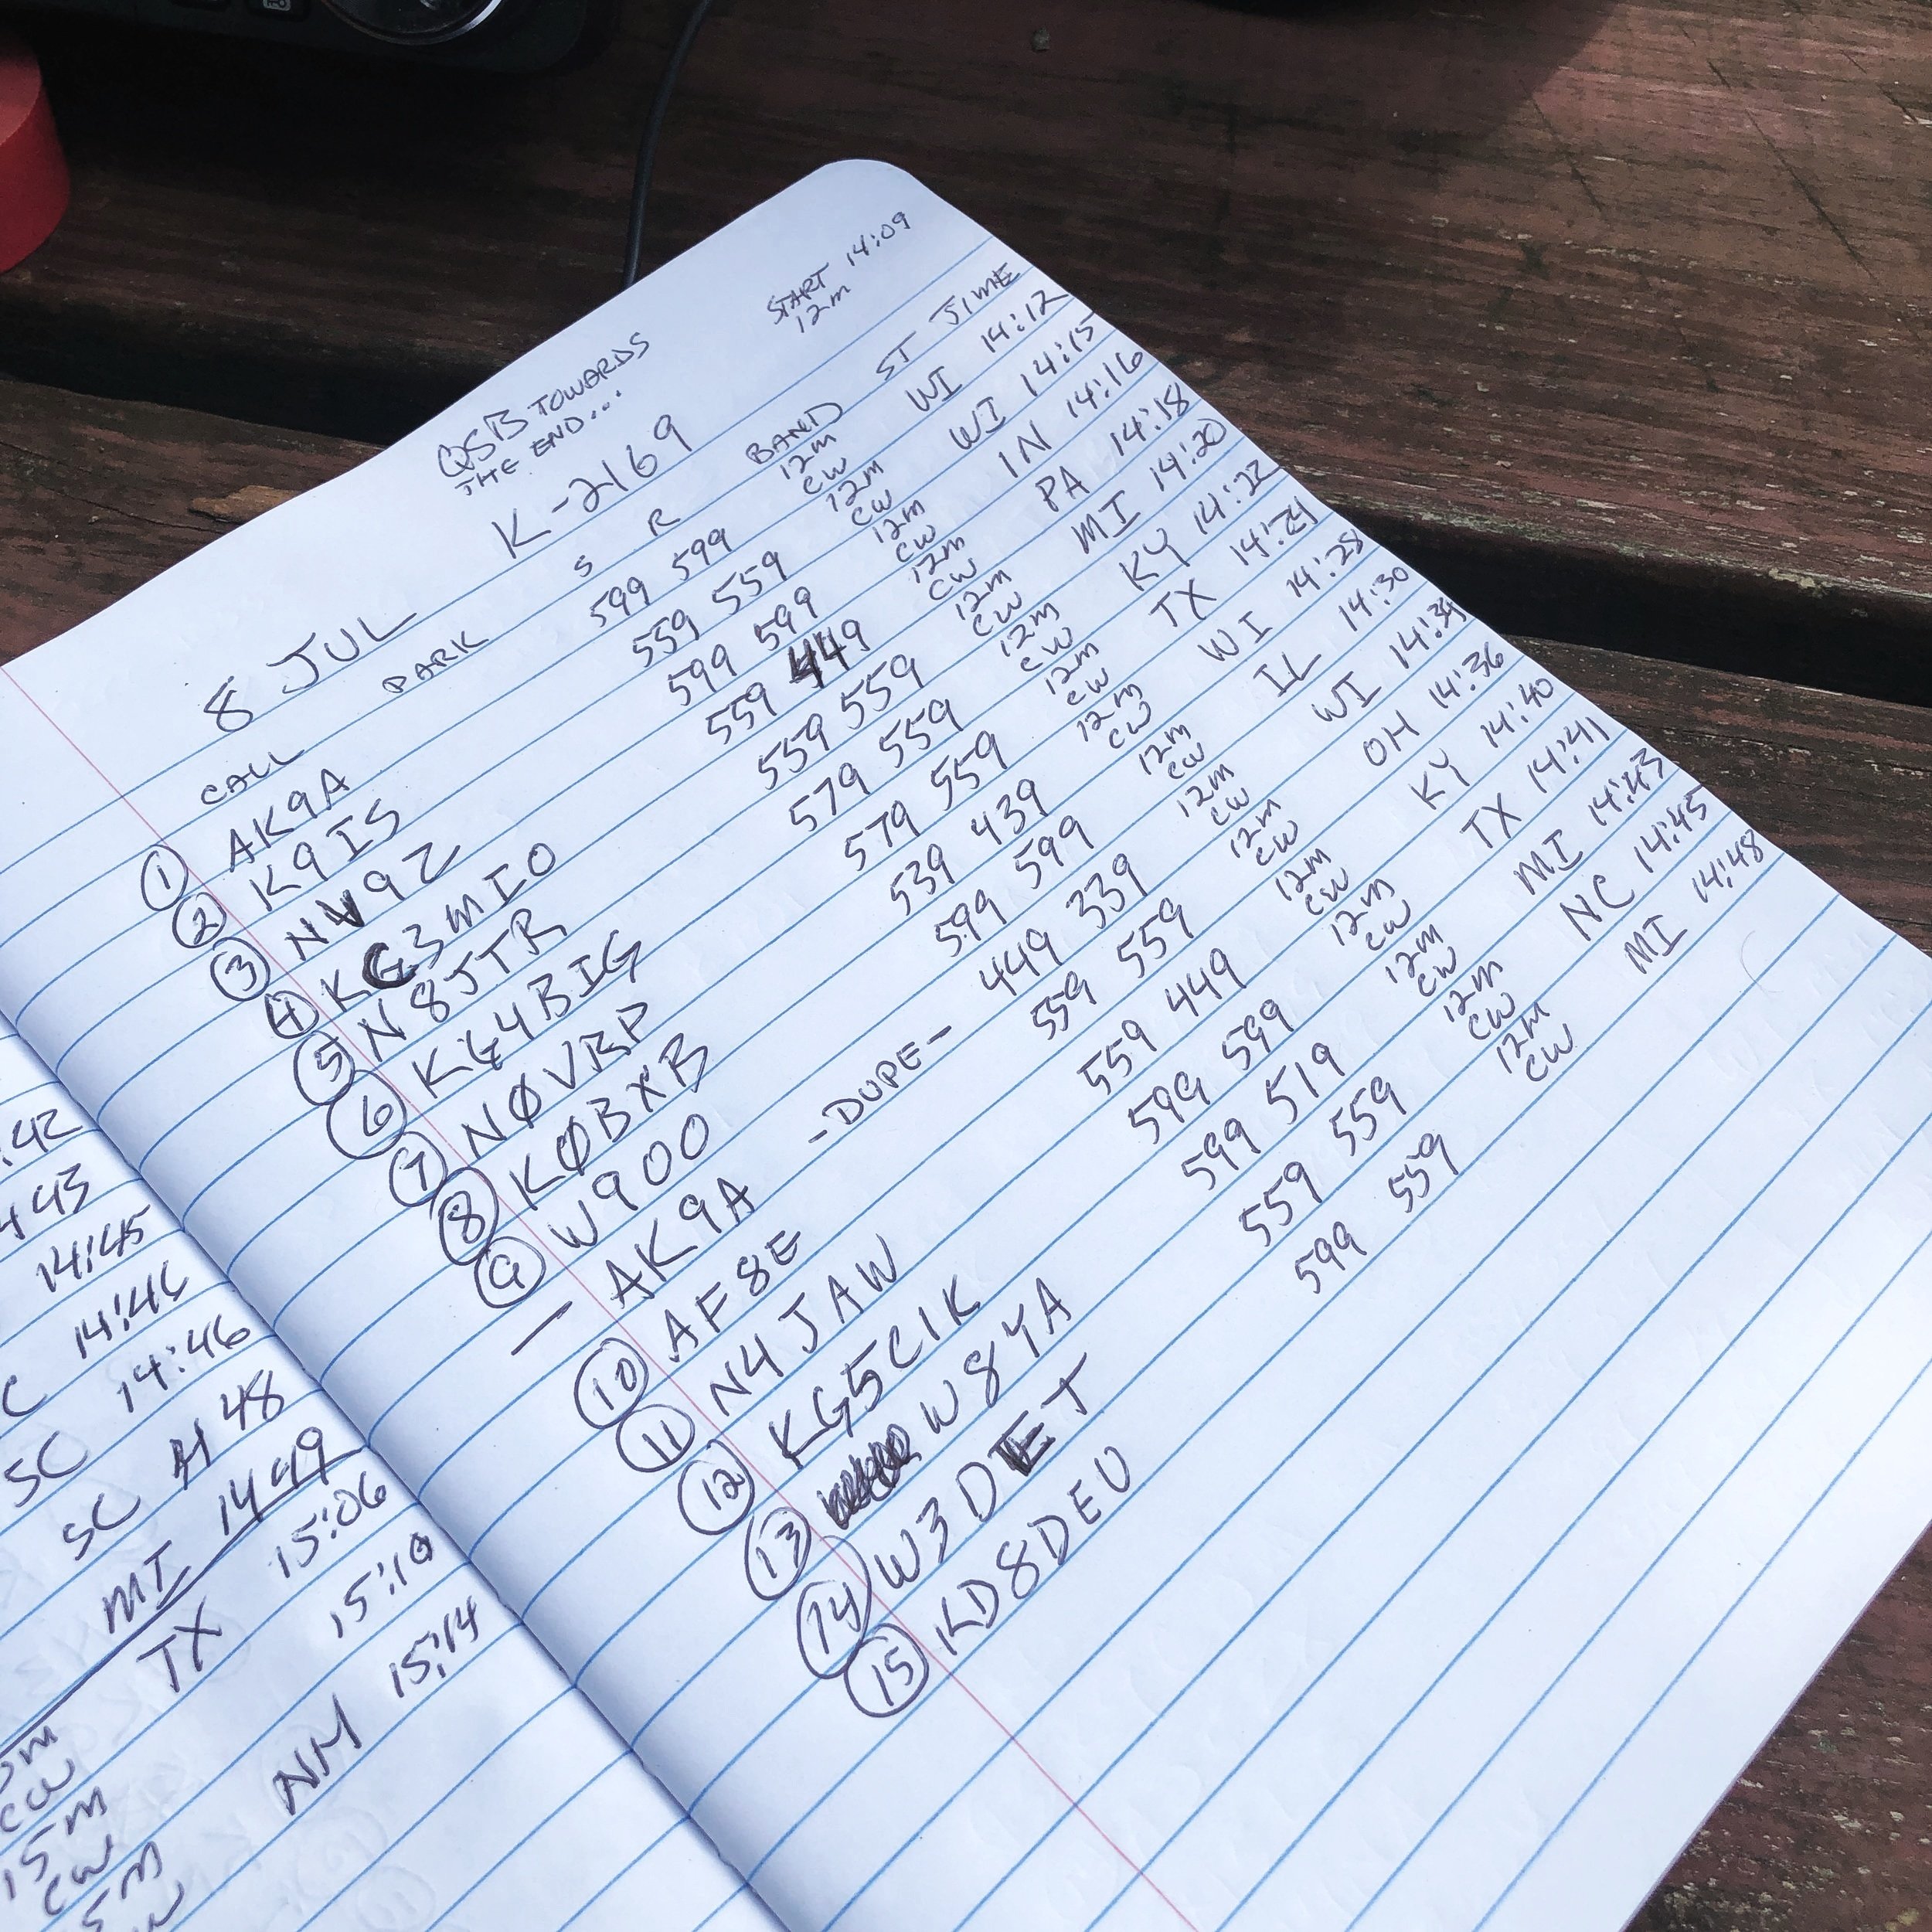
As you can see from the logbook I did get a successful activation on 12 m and it was a lot of fun. There were periods when I did not get a call back from my CQs but, for the most part, they came in fairly steady for the whole time I pursued the activation. This just goes to show that you can get an activation on something other than 20 m if you want to and it also gets the radio warm doing something other than the usual.
Get out there and get on the air.
73
David
WK4DS
Long lost friends in amateur radio
I have been doing POTA (Parks on the Air) for a couple of months now and have started to notice a few call signs that show up in my log more often than not. One of thsee calls is K9IS. Steven has “hunted” me at almost all of my activations, to the point that I now know his name when he calls me. His call sign just kind of “jumps” off the page at me for some reason. I dont know why this happens but it does occasionally. Maybe this time there was another reason???

Here is the dejavu part of the story. I was talking to my buddy across town (KG4WBI) on the repeater one night and we got to talking about the contact I made to Alaska from my jeep on a RCI Ranger 2950 10 meter radio using CW and I wanted to know the output power I was using that day, (Trust me this all ties together at the end) So I remember that I had used that particular QSL card in my WAS card set for my Alaska card, so I dig out the box and start going through the stack to find the Alaska card and what do I stumble across? A QSL CARD FROM K9IS FROM WHEN I HAD MY OLD CALLSIGN OF KG4WBH!!! Seems that day I was playing with my Rockmite 40 I had built and he was using a Ten Tec Argonaut 5. I just recently bought an Argonaut 5 and plan on doing some activations with it using a straight key soon. (Like next week if I can get the cable built). Anyway, this blew my mind that we had made contact so long ago and now we are meeting on the air reguarly to make POTA contacts and we didnt even know it.

I was using a Rockmite 40 that day and it only uses about 500milliwatts of output power, hence the QRPp note.
I reached out to Steven and shared my little discovery with him and we both had a good laugh out of it. Neither one of us had remembered the QSO back in 2003 on April Fool’s day…till I found that card. This is one of the many reasons I like using paper QSL cards. It is fun to me to wax nostalgic and read back through these cards at times. Especially the ones with additional inserts sent with them that had background info about the operator or some cool little tidbit about the local area where they lived. It is a treasure trove of information. You should look into using paper QSL cards if you have not done it before. It isnt for everyone, but at least take a look. If you want to send just select cards on occasion, you can even make simple cards in photoshop for a specific event and just print photos of them, that has worked for me in the past more than once. I even used the discount version of Photoshop… GIMP. Anyway, let’s climb out of that rabbit hole and get back to the original story. HAHA
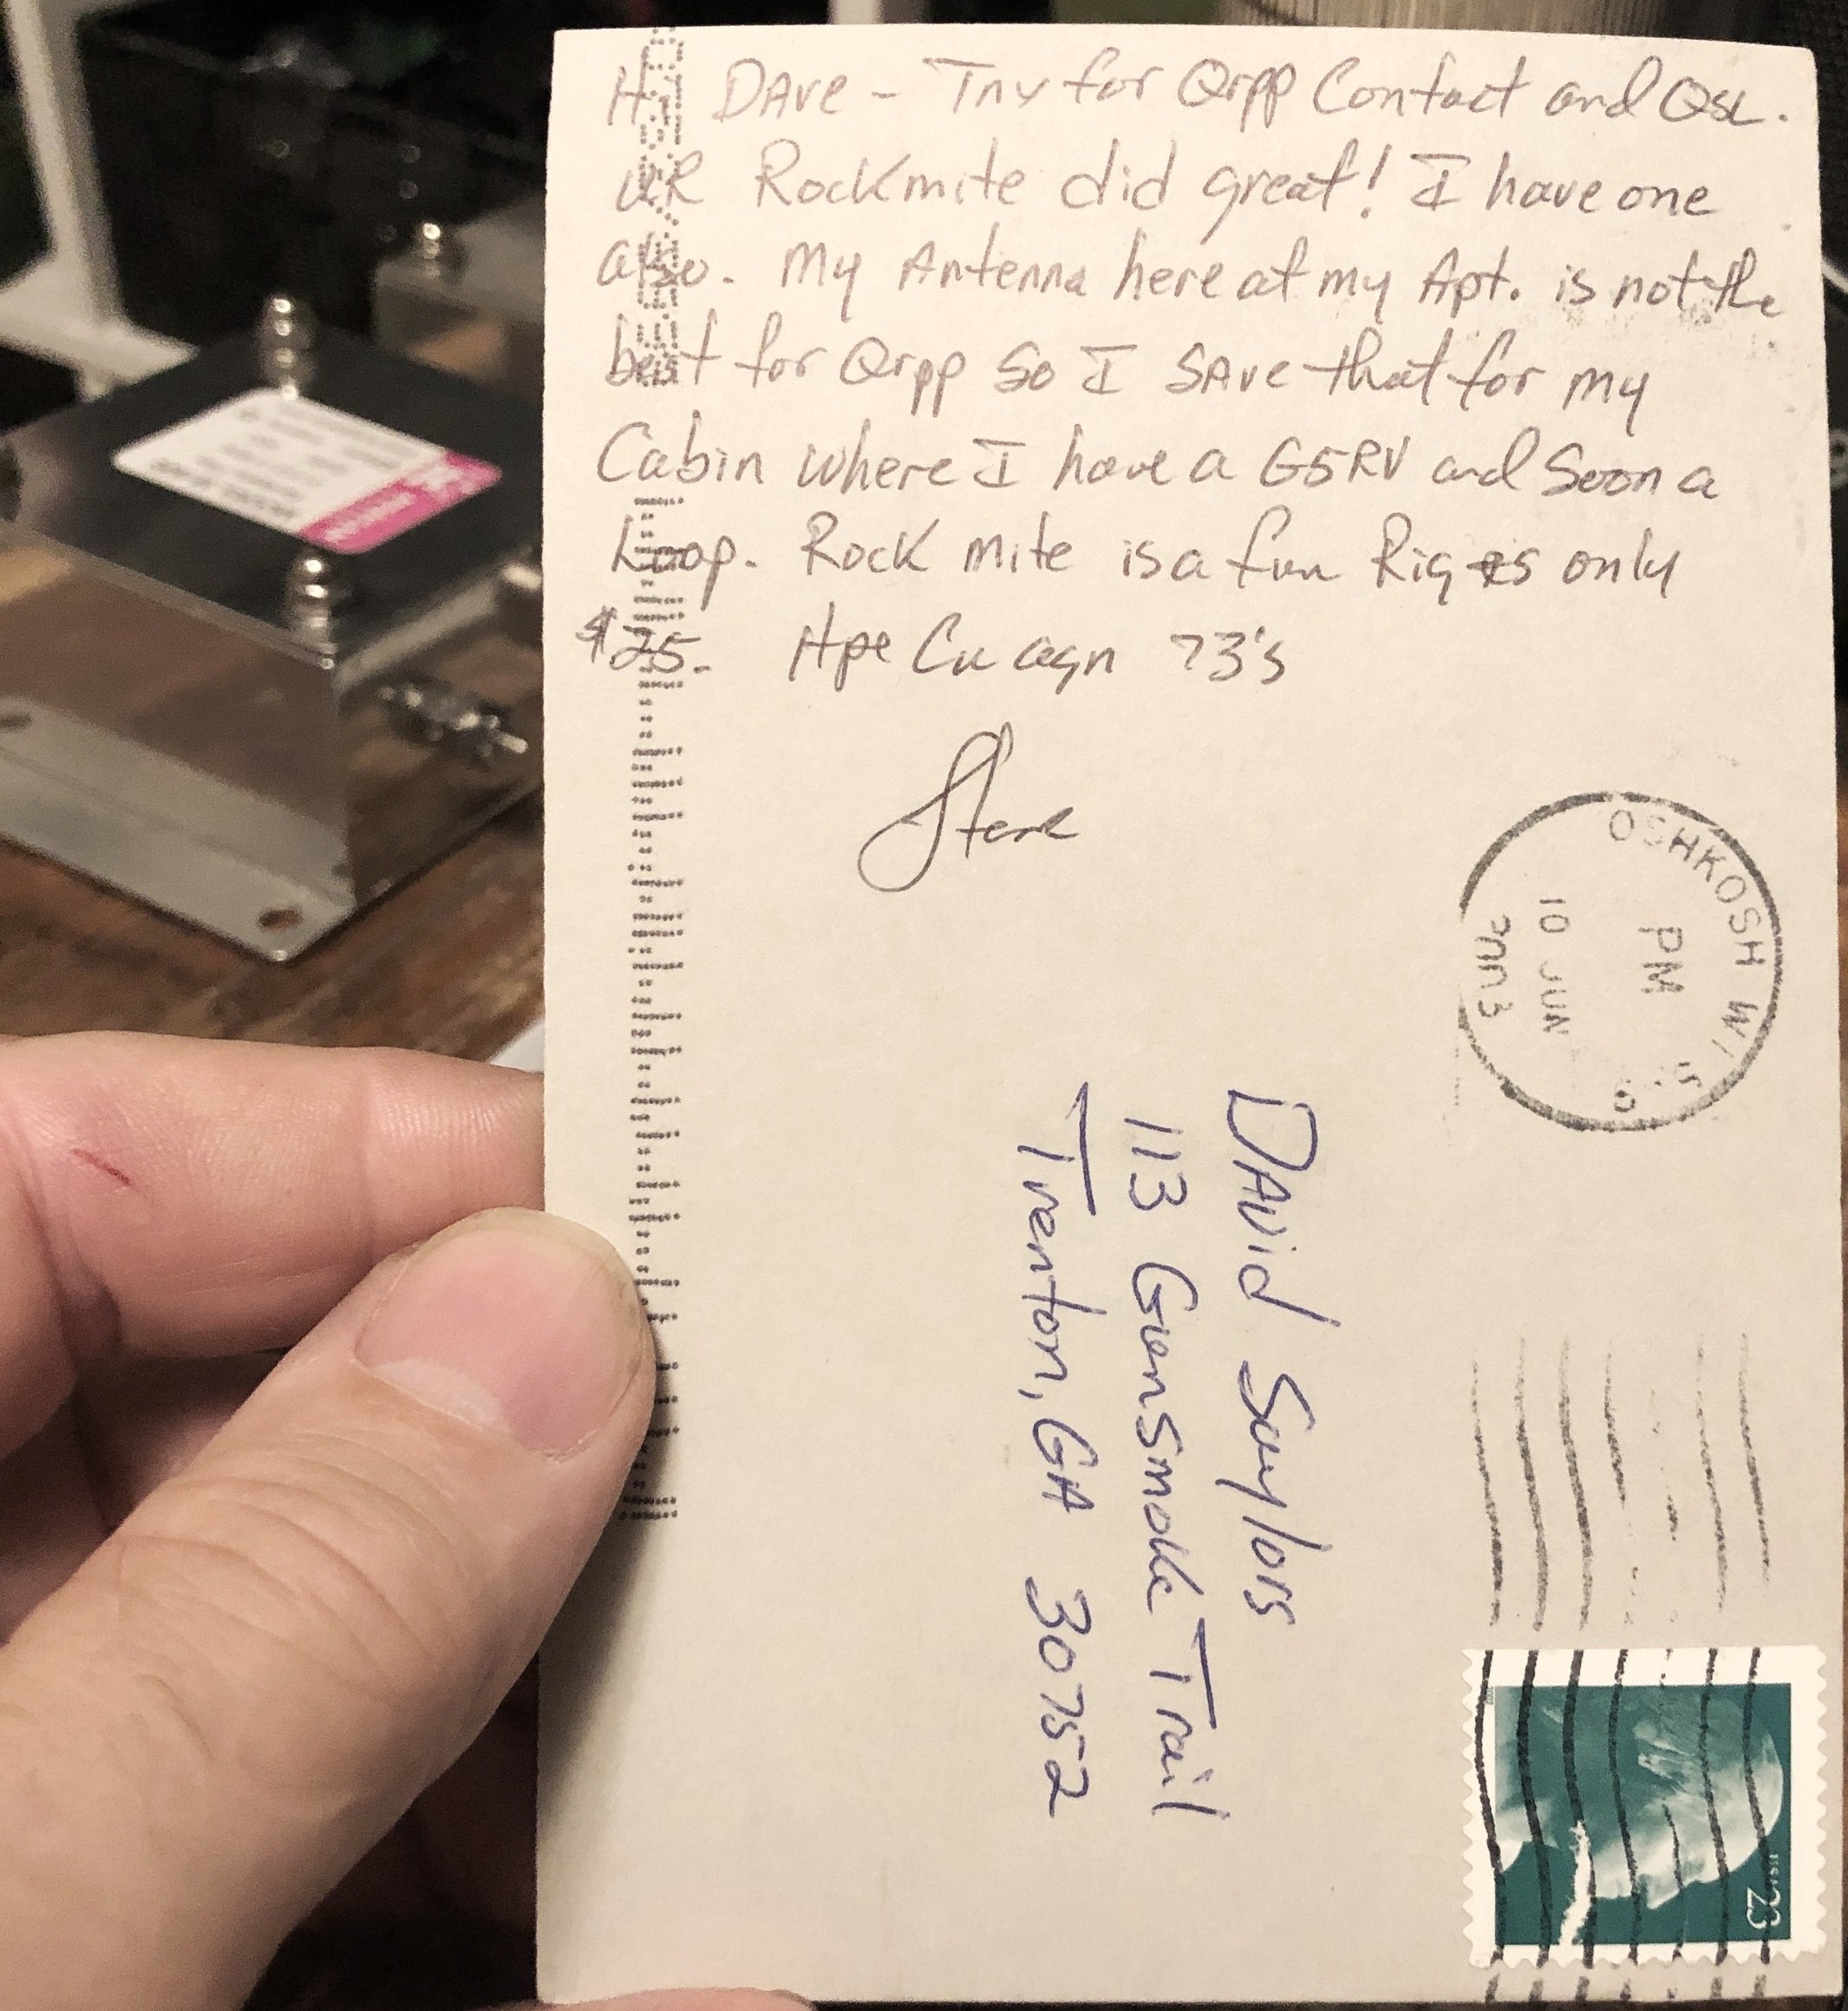
This is why I like paper QSL cards.
PS: By the way, the output power to Alaska that day from a modified 102” stainless steel whip mounted on the back corner of my jeep was just 8 watts. The bands were good to me that day.
PSS: If you noticed, my old callsign and my buddies call sign are sequential. We did this on purpose as we wanted to try to have sequential calls when we decided to get our licenses. I have since acquired a vanity call after getting my Amateur Extra ticket, but Roger still has his original call even though he now has his General.
What have I learned from documenting my antenna position?
The short answer … nothing world changing really.
But honestly I have learned a lot about what it takes to make contact with a QRP radio. The most important part is you setting up the radio and trying to make contact with it. I know this sounds obvious but it is often overlooked as people will look at the band prediction information like the space weather forecast and such and get paralysis through analysis from, this. They will not even bother to turn on their radio. This is a sad result that generates no activity and creates a group of operators that do not operate…
The next best thing I have learned from doing this small experiment is that I was not collecting near enough data to have a informed answer in any way, shape, or form. I was literally only recording my transmitter power, the signal reports (and this is totally subjective and not accurate really), and the antenna direction then generating a QSO map of my contacts from that time. This is not enough information to have any sort of relevant value to even bother with documenting the antenna position or elevation or any of that stuff. What I did learn though is that the antenna elevation and the counterpoise make a large difference and how well the antenna performs if you’re using wire antennas. I would attempt to get the wire as high in the trees as possible and it always seemed that the radio would here and talk much better when I did.

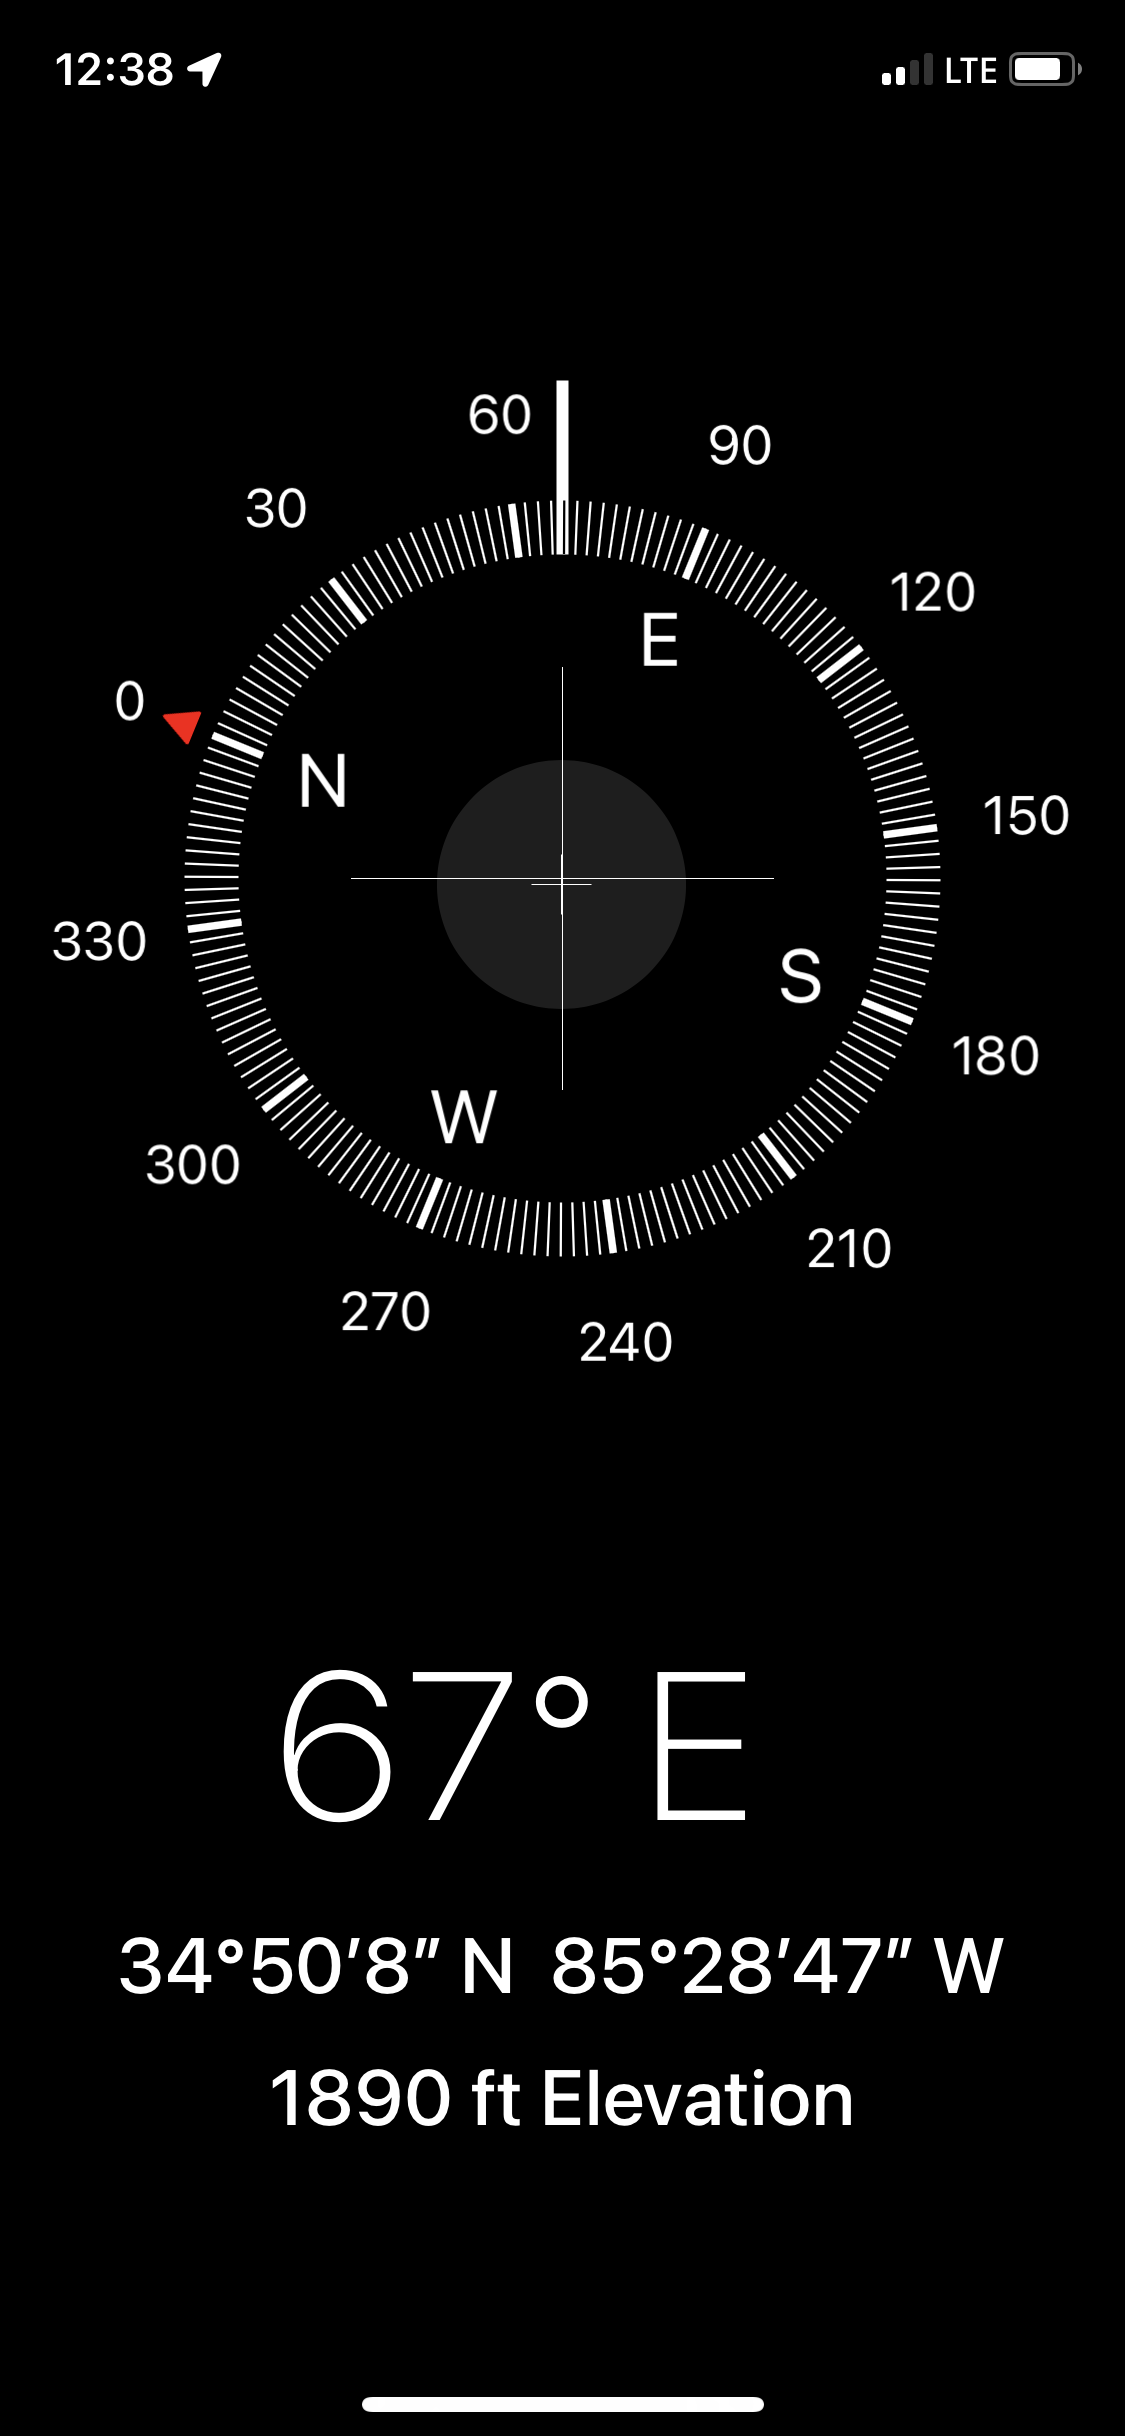
Antenna direction
I posted once on Facebook about this phenomenon of antenna direction and the location of the contacts and a reply was made that I had a omnidirectional contact chart mainly because I was where the radio operators were also at. This was said as a joke but it actually had merit. This actually made a lot of sense. What the charting of my contacts does show is that there is almost 0 NVI (near vertical incident) with wire antennas strung in the trees. Almost all of my QSO contacts are several hundred miles away usually showing that the near vertical incident is almost nonexistent with my wire antennas.
What this has basically taught me is that even if the prediction is for poor band conditions get out and try anyway this will normally result in you at least making a few contacts if not getting an activation in a park or just having a good time in general you don’t have to sweat it too much just get the wire up in a tree put out a counterpoise of some form and the antenna will do its job once you tune it with a tuner. It’s all the better if it is a resident antenna anyway as you do not have to tune this antenna to be able to use it.

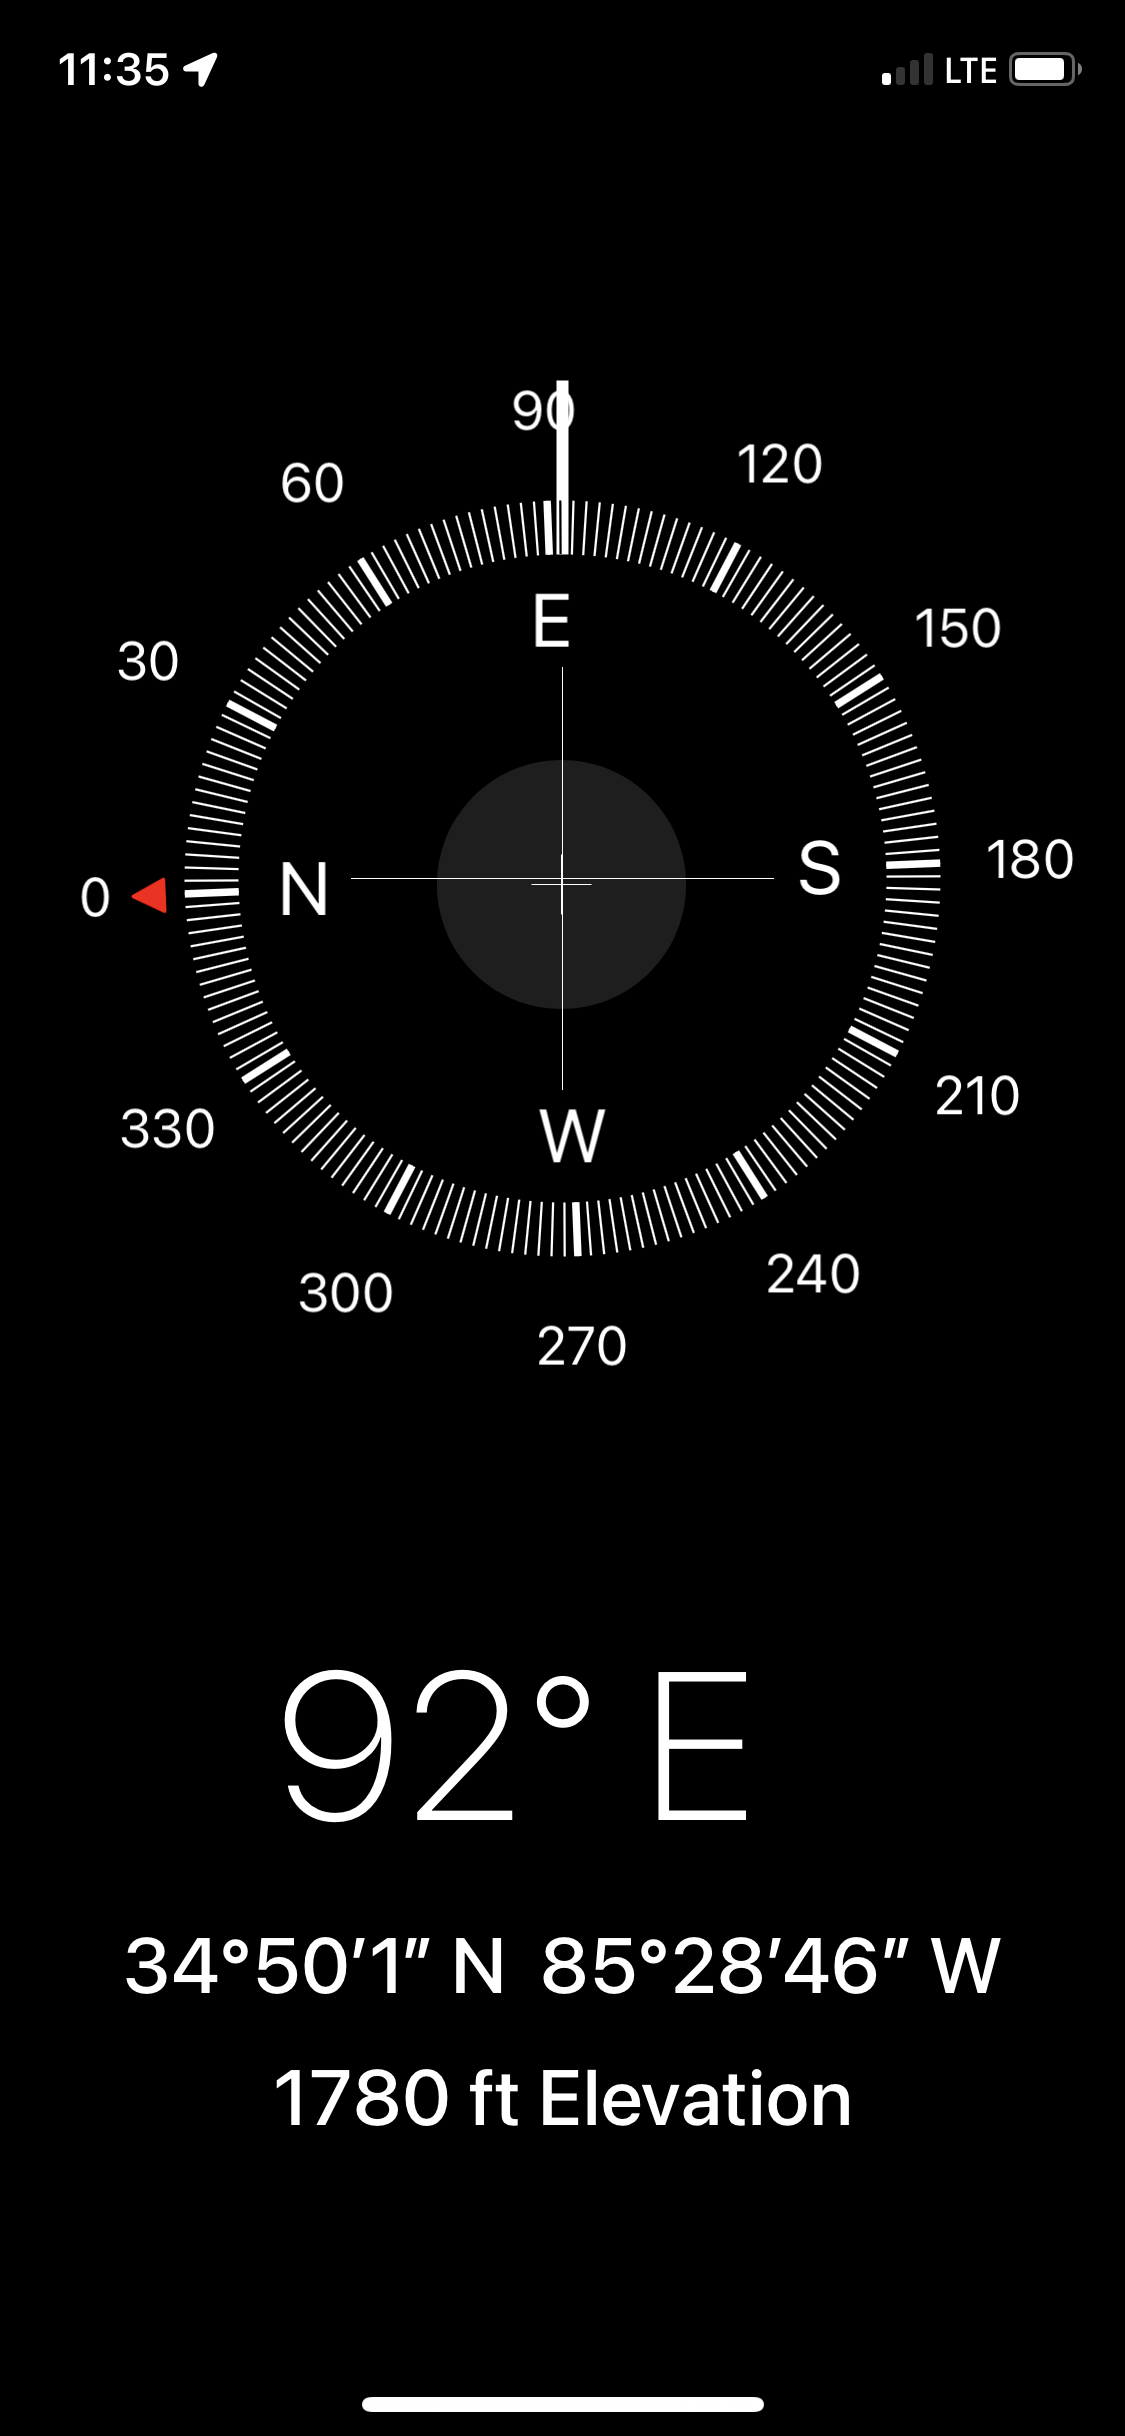
Antenna Direction
Parks on the air is a wonderful activity and I really would recommend you try it out if you have not done it already it is a lot of fun and I get to operate QRP radio in the park and I’ve become the DX! This is something that I have never experienced under normal operating conditions as a US amateur operator. It is literally not something that happens to me normally. So if you want to try out being the “DX” this is an easy way to do it without breaking the bank from having to travel lol
ARRL Amateur Radio Field Day 2022 After Action Report from a CW op.

Well that fateful day has come and went, fun was had, radios were used and new skills were learned.
I want to thank Ms. Dana K4GCA, for hosting us on her property so graciously, this made the whole event feel so much better. You see, this is our first field day without her late husband Brian (K4GC) who passed away unexpectedly last year. We miss Brian dearly and it made this field day even more special to be allowed to operate the site from his back yard.
This was the first year I have been to a field day event in many years. A lot of new faces have came onto the scene since the last time I did field day with the K4SOD amateur radio club. It was good to see old faces as well as the new ones and to put faces to call signs is always a good thing.

Roger KG4WBI brought several radios and antennas and proceeded to build a huge antenna array on a push-up pole to connect his Ten Tec Argonaut to via hamstick dipoles. I had to leave before the system was built completely and go to church for the evening but when I came back I went back over to the site to operate some CW on the air..

Once things got underway, they setup the SSB station in the back workshop and got to work. Ricky W4EMA getting on the air here on Roger’s KG4WBI Alinco DX77T HF rig while Steve KI4WJG waits his turn at the controls. Thanks to KK4IJR Kevin for many of the photos in this article, but somehow we didnt get a single image of him!!! LOL


It is strange how CW will draw a crowd I did not think most people enjoyed it but it was a huge conversation topic the whole time I was trying to work contacts. The guys were truly interested and it surprised me. I was looking around trying to find contacts with the Argonaut but since it only has 5W of output power it was very difficult to get through the band QRM and make a contact. I spent the better part of almost an hour trying to make five contacts, it was very different from the parks on the air style of operating.

I finally gave in and we used Josh’s KN4RTY Yeasu 891 to up the power output and to get through and make some contacts. At this point my confidence was boosted somewhat and I was able to get back on the Argonaut and it’s five watts of output power and make a few more contacts with it before I called it quits at 2:48 in the morning local time(5:48 UTC).


Getting to use the Argonaut was a special treat as those radios have been out of production for many years maybe even decades at this point. Roger had went to the trouble of having this radio professionally tuned, aligned and cleaned so that it would be in pristine operating condition for the night. Ten Tec transceivers are amazing radios especially for the CW operators. They seem to specialize in that type of radio communications with their transceivers. If you really enjoy using CW in my opinion, you really should look at Ten Tec and Elecraft radios, these radios excel at that mode. Now don’t get me wrong, all amateur radios, pretty much, work really well with CW. It is just a subset of all the amateur radio operating modes so don’t think you have to have a certain brand of radio to use CW, I just prefer Ten Tec radios.

I decided to take two different CW keys with me to the field a side. One was my straight key I made some 20 years ago but since we were using it on the Argonaut 2 I had to change the cable to an RCA cable to be able to connect it to the radio. The other key was my serial number 1 “prototype” WK4DS paddle and I love this key greatly so I put it in a waterproof hard shell storage box with some closed cell phone to protect it during travel. These two CW keys are my primary keys that I use when I work outdoors or sometimes indoor operations. I have others as well, but these are my favorites.

My logbook is a mess! I would get the call first then get their exchange info before even calling them, this way i could listen to the exchange and just confirm what I had written down already. This made code copy at such high speeds much easier for me. You see, I am kinda slow at copy right now… lol…

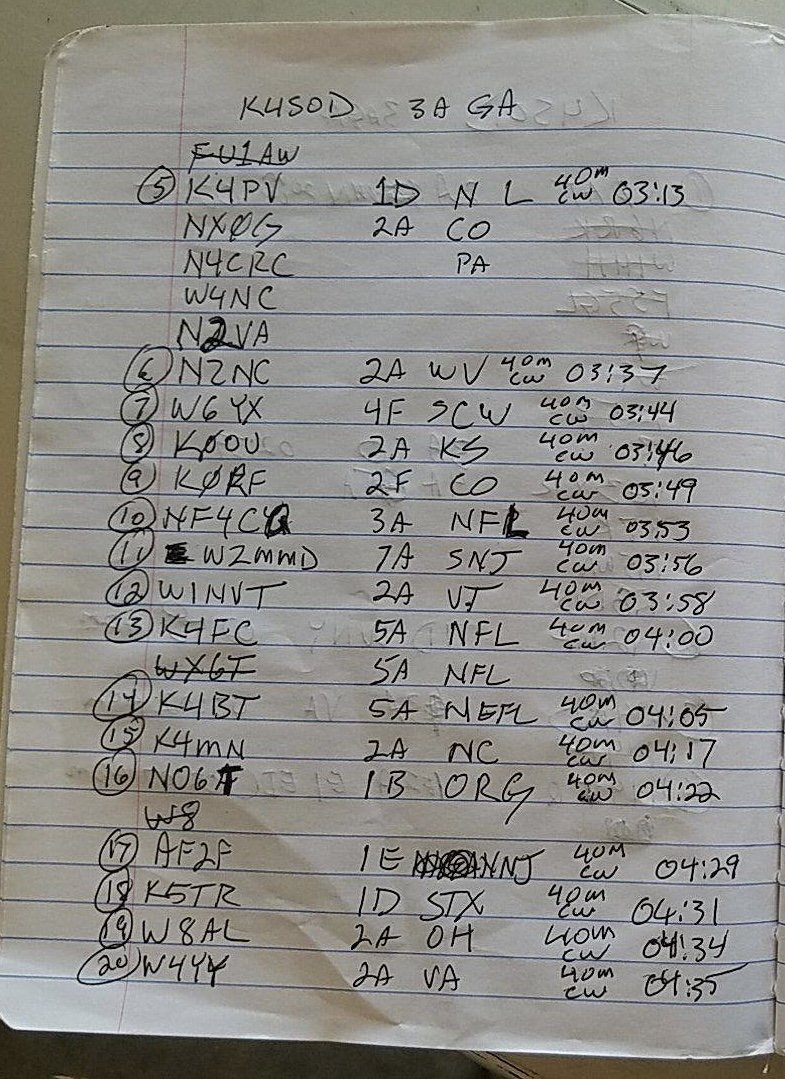

It was a really good time and I really enjoyed meeting with people that I had not seen in a long time it makes me realize how great this community really is. If you have not gotten out and interacted with the local hams in your area I highly recommend it. Until next time get your radio out and go make a contact with it will see you later 73 WK4DS
After Action Report for K-6243 Activation - Learned something new today.
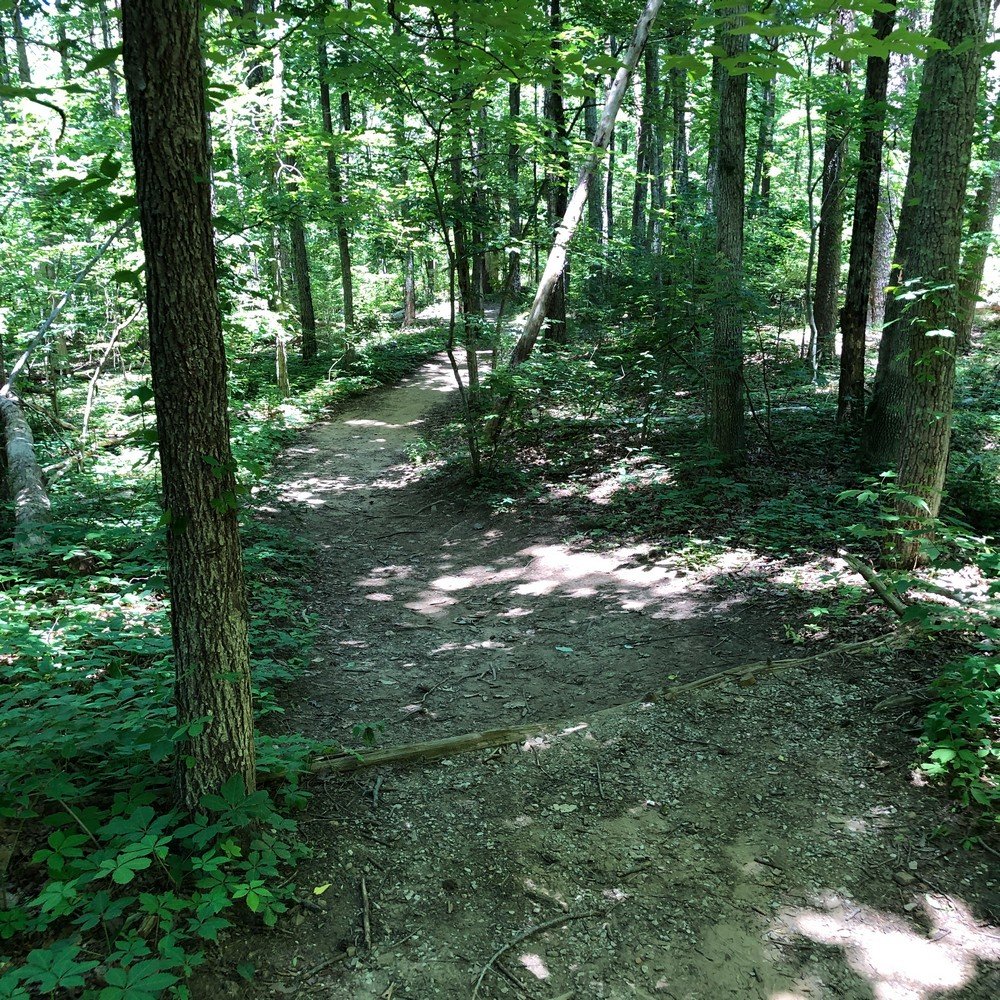
Today was going to be a short activation, in and out and on to my street photography I was planning to do… Well, we all know how the best laid plans go, don’t we? Yeah, I didn’t go shoot street photos at all. lol.

Today was a typical day, I worked till noon, then sneaked away to go do some radio and photography. I grabbed the bag and realized my log book was full so I needed to grab a notebook at the store on the way to the park, that was the first thing that slowed me down. then there was a HUGE traffic jam on the interstate that forced me to take surface streets for half of the drive which basically doubled the drive time. So now I am an hour behind when I planned to start…

The next thing to happen was that the map software took me up to the W road. Which is quite harrowing if you have never driven up it before, there are YouTube videos about it if you want to know more. So I finally get to the parking area, which only has 4 spaces mind you, and there is ONE left! I took that as a sign that things were going to improve and set out searching for a location. I hiked down to the falls and took a couple of photos then started looking for a place to set up the antenna. So this is a wilderness area and not a park, this means that the usual manicured fields with picnic tables were conspicuously missing from this park entirely. Ummmm…. I didn’t bring a chair either. So I end up finding a small log on the side of the trail and a side trail that was off the beaten path somewhat. Another problem I didn’t anticipate was the dense underbrush that was at this location. This one thing alone almost made me just give up and go take photos instead, but I found a small clearing with a tree I could get to near the trail with a high limb so I gave it a shot, got a line up and pulled up the 30’ wire for a radiator since I planned on working 17 and 20 meters only this trip.


Well, I hooked up the radio and laid it on the backpack and got settled in for the pile up I was about to have. I called CQ at 5 watts CW for at least 15 minutes solid without a single hit… at all. Then just as I was about to give up thinking the bands were closed, I get a call from KA3ICJ in North Dakota of all places!!! Still thinking it was the antenna as the signal report was 339 for my signal and he was much louder than that, so I shut down the rig and replace the 30’ wire with the 65’ wire and then use the 30’ for the counter poise. I gave in and turned the radio up to 10 watts too as I wanted to get this activation in so I could go shoot photos too. I noticed a large difference in the band noise this time, tuned up and started calling CQ again. Things were different this time. I started getting called from basically everywhere it seemed, New Jersey to New Mexico then Oklahoma to New Hampshire were all in the log now and in less than 20 minutes of using the longer antenna, I had the activation! With the 10th contact being TI5JON from Costa Rica!!! (He was actually closer than K7LVJ as it turns out who was 3361 kilometers away… lol)

Not long after I got a Canadian VA2YZX who was coming in quite strong. What is neat is that I can look at the logbook and see the band fading in and out from the signal reports. Just take a look at the page and see what I mean. When I hit an hour from when I made the first QSO to the last one, I went QRT and packed up the gear, by this time though, it was time to go meet Teresa (KG4WHE) for Pad Thai…


What are the things I learned from this day?
Things take longer than you think. I left way later than I thought I needed to, not accounting for factors like traffic and stopping for supplies added to my time delay.
Scouting is a good idea before committing to an activation with wanton disregard. Had I done this, I would have known a wire antenna is almost impossible to hang at this location.
Bigger antennas work better, sounds silly but it worked in this instance.
Don’t give up just because your first idea doesn’t work.
Don’t get yourself down if you don’t accomplish everything you wanted to do in a day, it will be alright.
HAVE FUN
As a side note, when I changed from the 30’ to the 65’ wire the tree I was using was too close to make the wire a sloper so I just ran it over the limb (about 25’ up) and back down to about 8’ above grade to a sapling which I tied the rope to. The Antenna was lined up with 32 degrees NE today. See the map below where I overlaid the compass roughly to see what the antenna was doing. This made the wire into an inverted V style random wire of sorts. It seemed to propagate in basically all directions really well for some reason. I need to look into this more. It worked really well.

Thats it for now, 73 and get out there!
de WK4DS
Back to K-2169! I get the luck of the draw and the bands cooperate!

Well, it has been a week since I activated a park so I had a few hours this afternoon and a charged battery, lets POTA!!! So I grab my bag and head over to Cloudland Canyon State Park and my usual spot has people in it and they looked like they were going to stay a while so I went to my second location of choice and it was all clear! Got the antenna up on the first throw this time! The sloper was facing 55 degrees NE to the high end without a single branch near it! I strung out the 20 meter wire for a counterpoise and hooked them to the tuner, antenna done! Cranked up the radio right at 20:00 UTC and I started calling CQ on 12 meters for nearly 15 minutes with zero replies! So I moved down to 15 then to 17 where I pounced on XE1XR in Mexico to start things off right. Not hearing much else, I go to 20 meters and literally find every HAM that has ever turned on a radio! Yeah, 20 was open… so I found me a spot and started calling CQ. I didn’t have good internet today for some reason so I sent my friend KV9L a text and got him to spot me, but then the reverse beacon took over after that I think because in 19 minutes I had garnered 15 QSOs and making this trip a valid activation! Well I didn’t stop there as I still had plenty of time to play radio so i kept calling and you guys kept answering. I logged KG5CIK at 20:51 UTC and moved to 30 meters for a minute to see what I could do there. I ended up with 6 QSOs on 30 meters then hit 17 again but no one was there and then finally back to 20 to finish out the day. Got a couple of park to park QSOs this time as well as K9IS whom I log almost every trip out and CU3AA in the Azores! I am always amazed at what just a few watts of rf can do! That was a good trip for me today, ended up with 37 QSOs in just at 2 hours time. That has to be some sort of record for me, I am sure of it. lol…
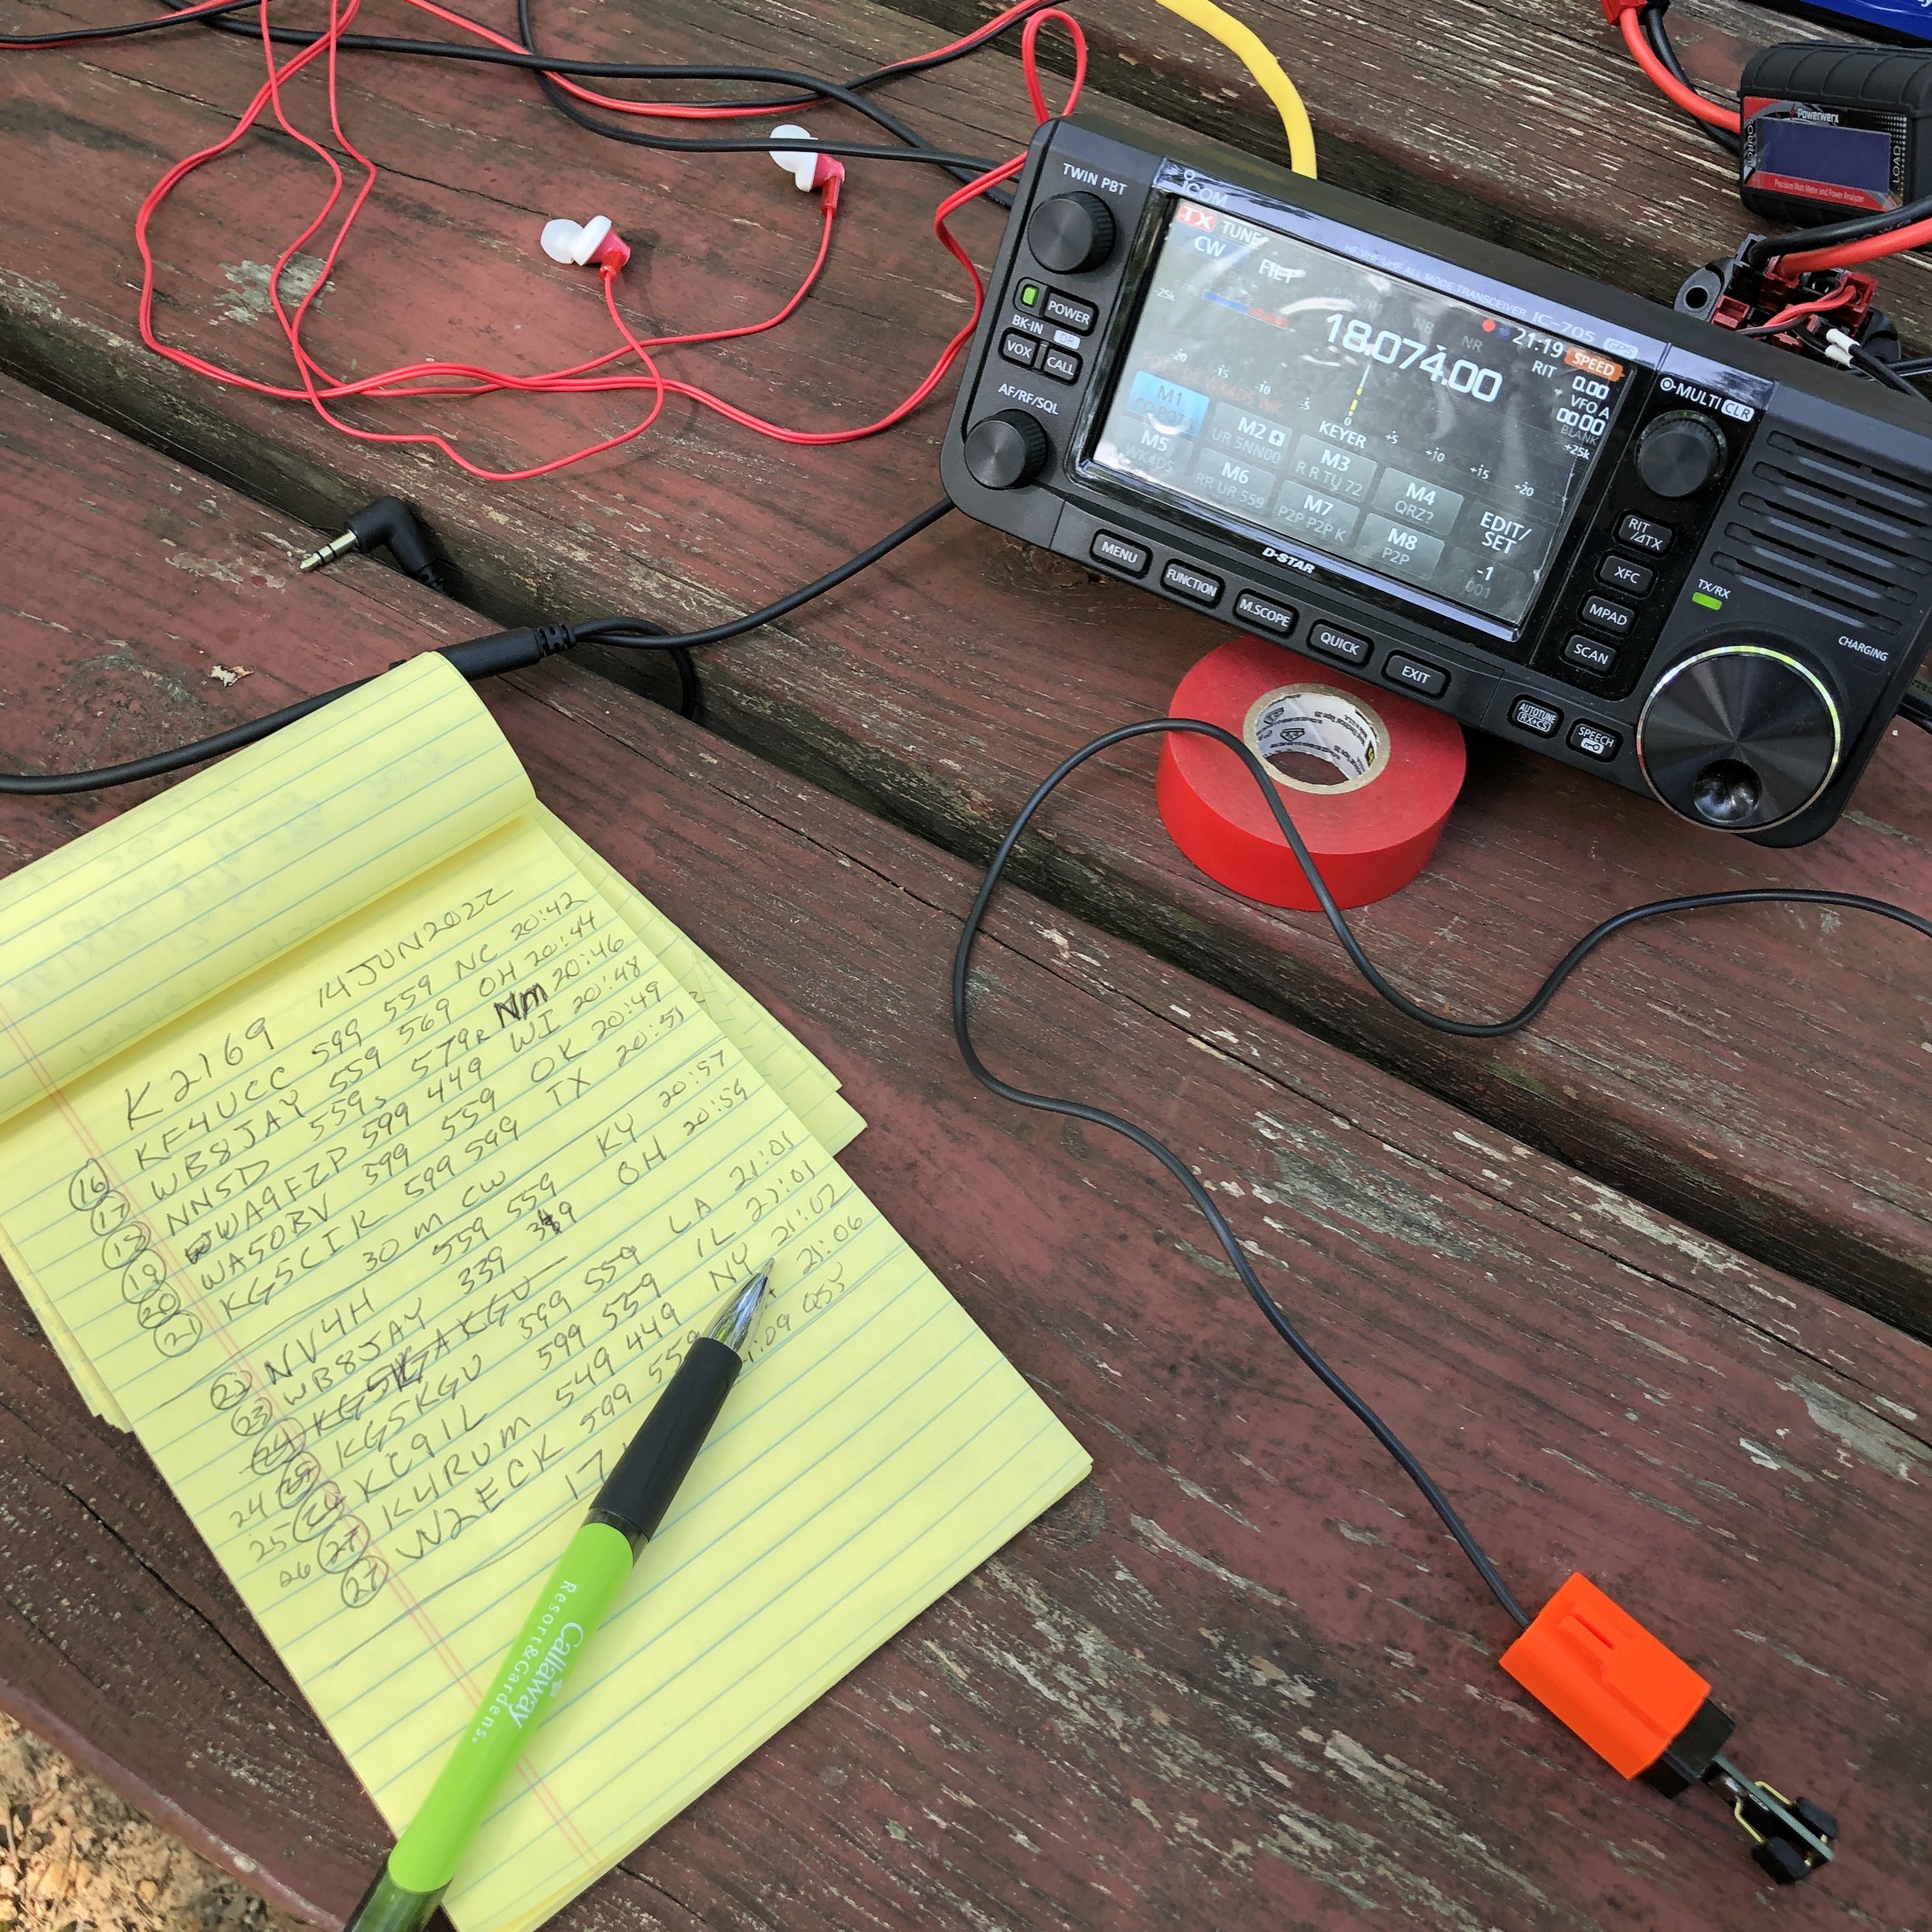
Compass I use is from my iPhone and it works pretty well as it also has a bunch of other data from the location as well. This is the direction the high end of my sloper was facing with it hanging at close to a 30, maybe 35 degree angle. Compare that to the QSO map for propagation reference info. I like this simple kind of research, alot of it is not documented, but I think it is enough to give me an idea of what I can do with the antenna when I string it up.
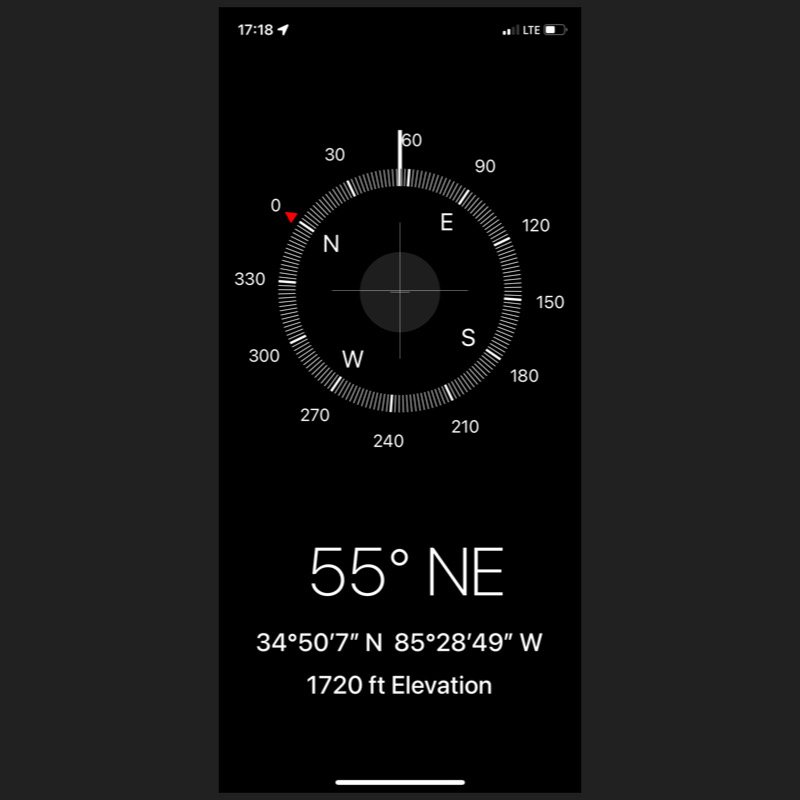
I overlayed the compass onto the qso map to see what it was doing and the results are kinda cool to see visually.

Using this tiny little travel key takes some practice as it is not super easy for me to master, it works really well but it is very small and I am used to large heavy bench keys that sit by themselves and do not require two hands to operate, this is what I am talking about. The key itself performs VERY well. I really like the little guy.

If you will notice, my logbook contains only CW contacts today, this is because of two things, for one, I love using CW. For some reason I have always enjoyed using this mode on the air, even though I am not very good at it… and number two, nobody could hear my calls on SSB today. I think it takes a little more than 10 watts to bust through a pileup… lol. I do get some SSB from time to time and plan to try some RTTY and FT8 as well in the future…once I learn how.
Thanks for your time and 73
de WK4DS
Got something magical in the mail today from my POTA radio time!

When you embark down the road of ham radio you learn a lot of history as part of the journey.. A little piece of that history is QSL cards. QSL cards are super interesting to me as I am pretty sure it is one of the only times that a person involved in an activity will go to the trouble of documenting and sharing that documentation with the other involved party to confirm it happened. A QSL card is usually nothing more then a post card with the contact data on it, sometimes mailed like a post card sometimes in an envelope. Then there are “nicer” cards that will have photos on them, but the ones I REALLY like have personal hand written notes on them. Those are the best to me. If you are active in radio very much on HF at all, you will end up with at least a few of these in your mailbox. The usual courtesy for me is to reply to all cards I get in the mail, I once actively sent cards to all my contacts that I made, but I no longer do that due to the costs involved, but I will always reply to one sent to me…always.

I find it charming to keep this tradition alive, but it can get complicated too, before you throw your card in the mail, be sure to check to see how the other op handles their QSL cards, there are several ways to do it , just so your aware. Most of these are done to help either save time or money and sometimes the DX station will have rules as well as sending a “green-stamp” to offset return postage or an SASE to help them with the expense of sending those exotic cards over seas.
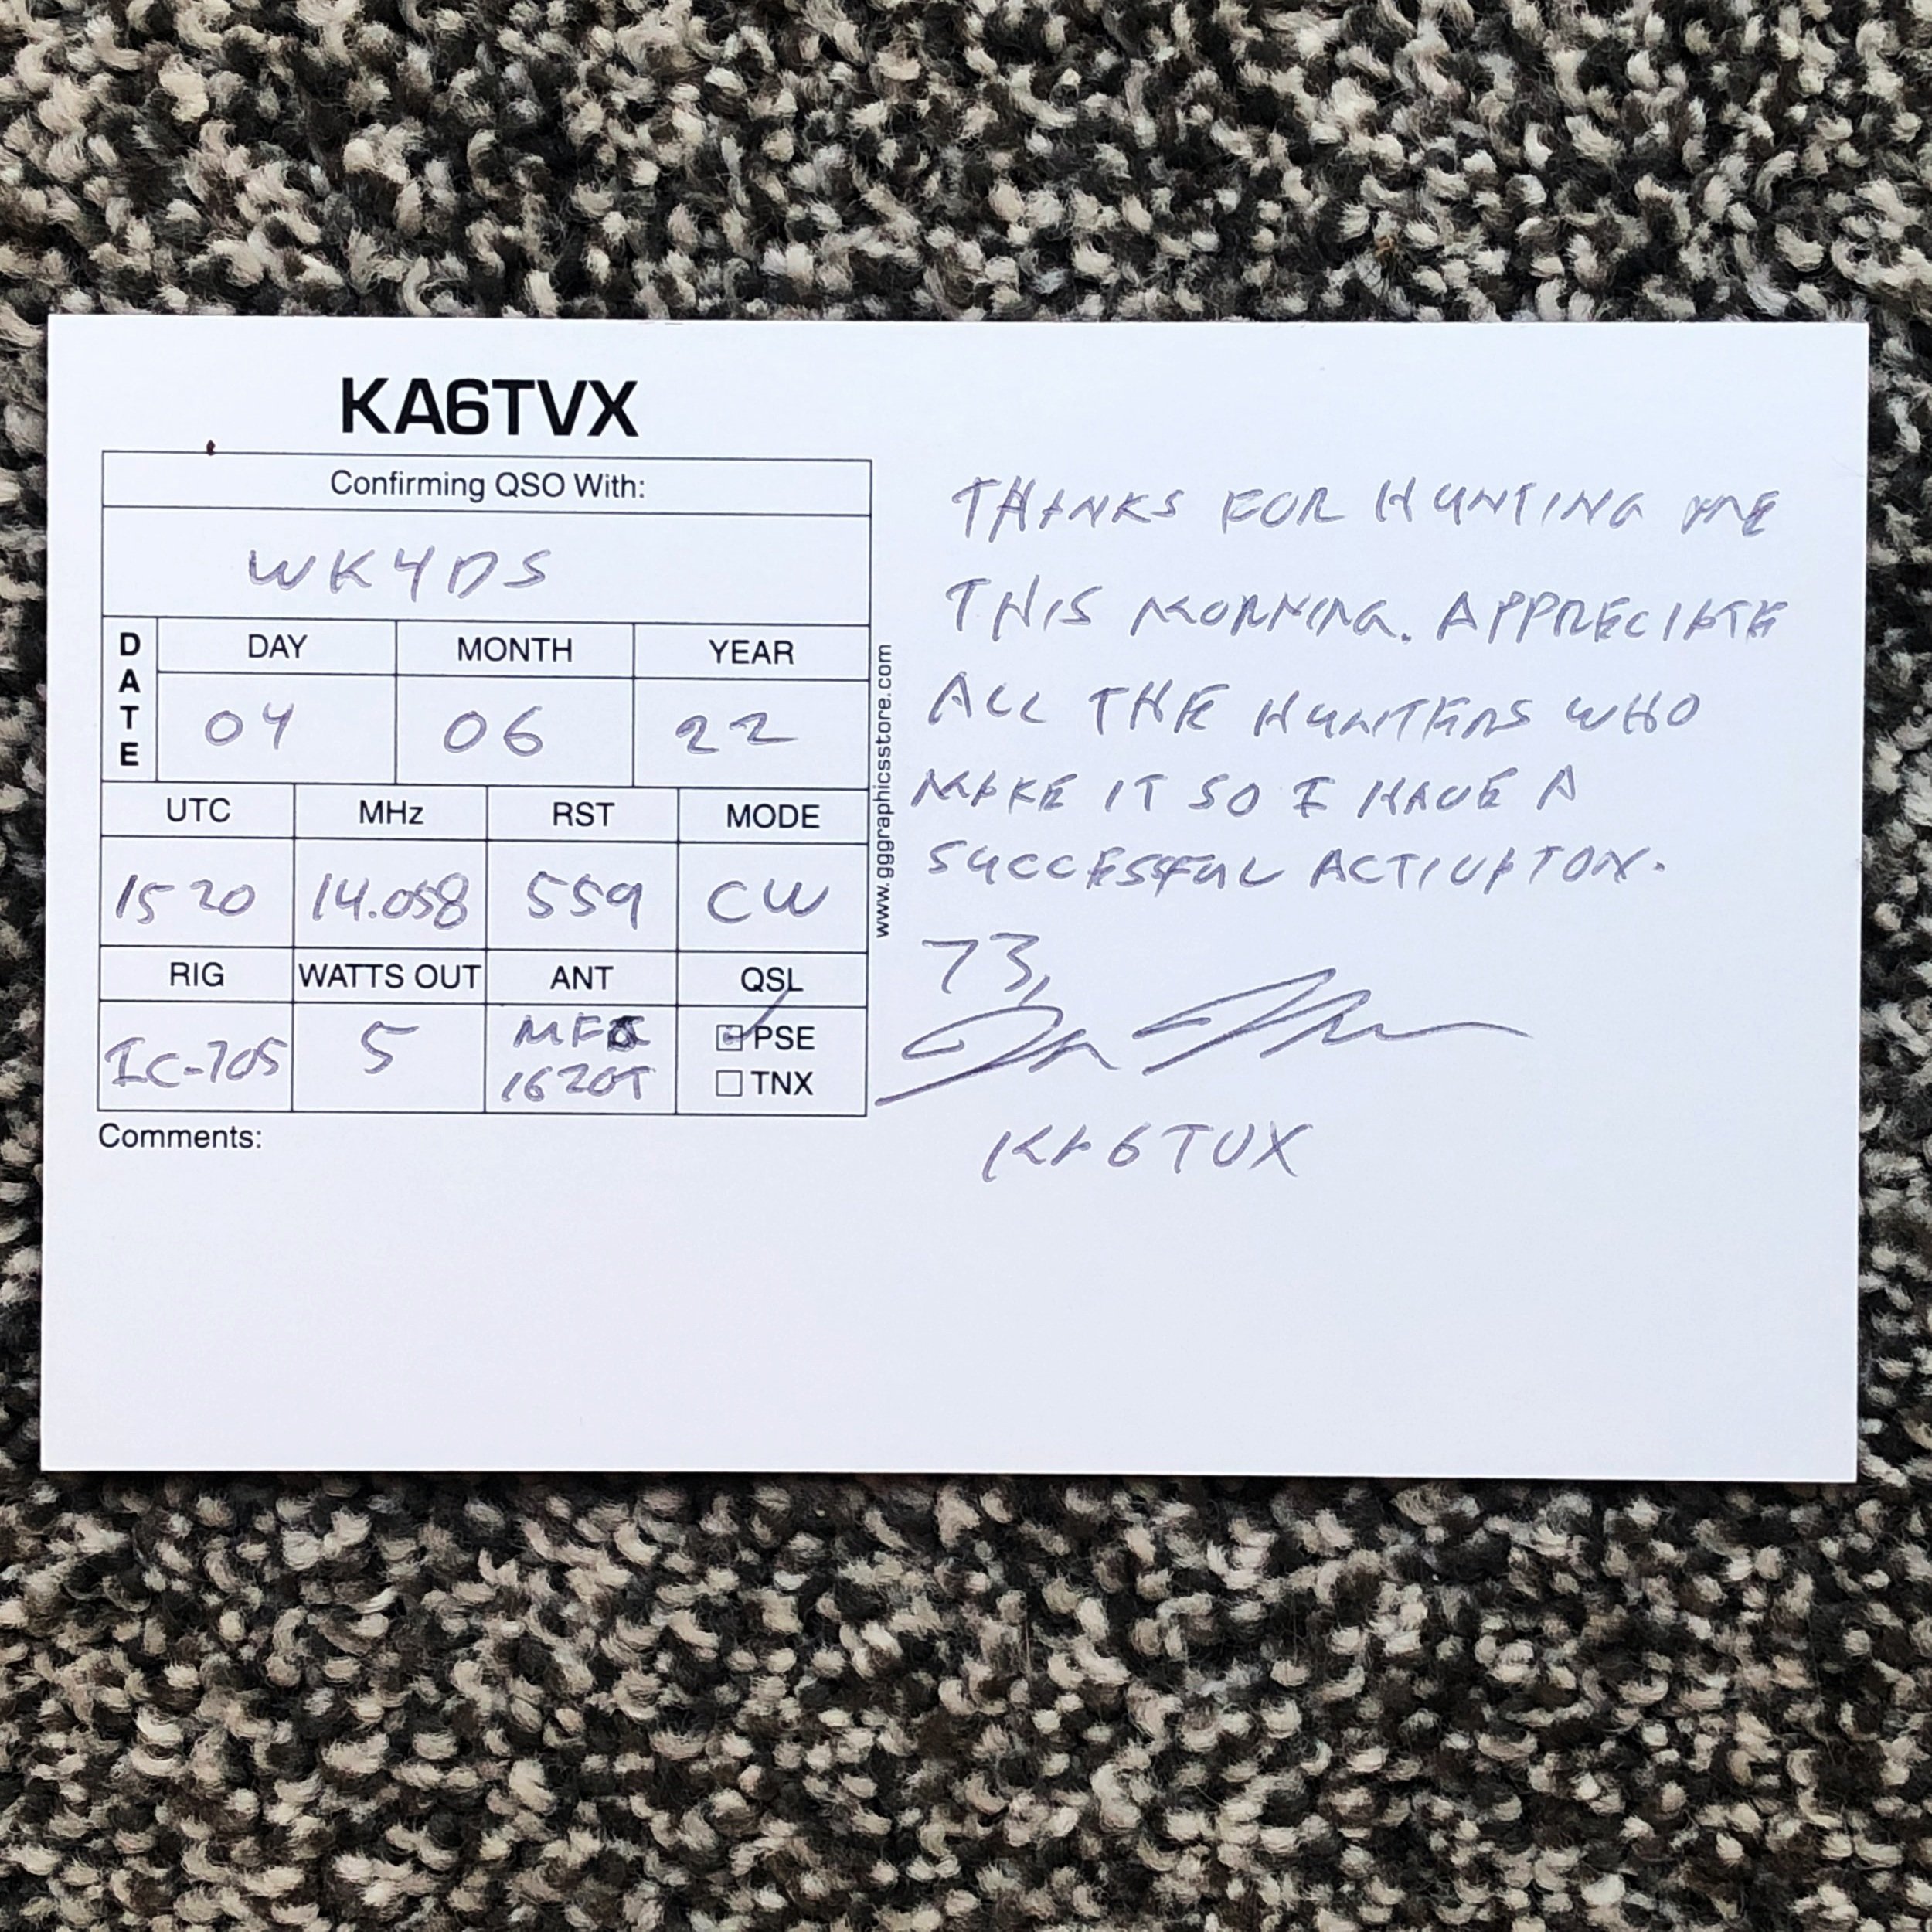
Since I have been out of radio for sometime, I am honestly needing new cards. I think I will go with photo cards this time and not add any special logos so they will translate to all types of radio like voice modes and even digital.

Customizing your QSL cards doesn’t have to be a once and done thing either, I have routinely made custom QSL cards in the past by just doing some photo editing and then printing photos and writing the QSL info on the back. I would always mail these in envelopes as I didn’t want the post office sorting machines abrading the photos. But this is just one way to make the card, you can literally write a letter if you wanted to… The rules are not set in stone here.
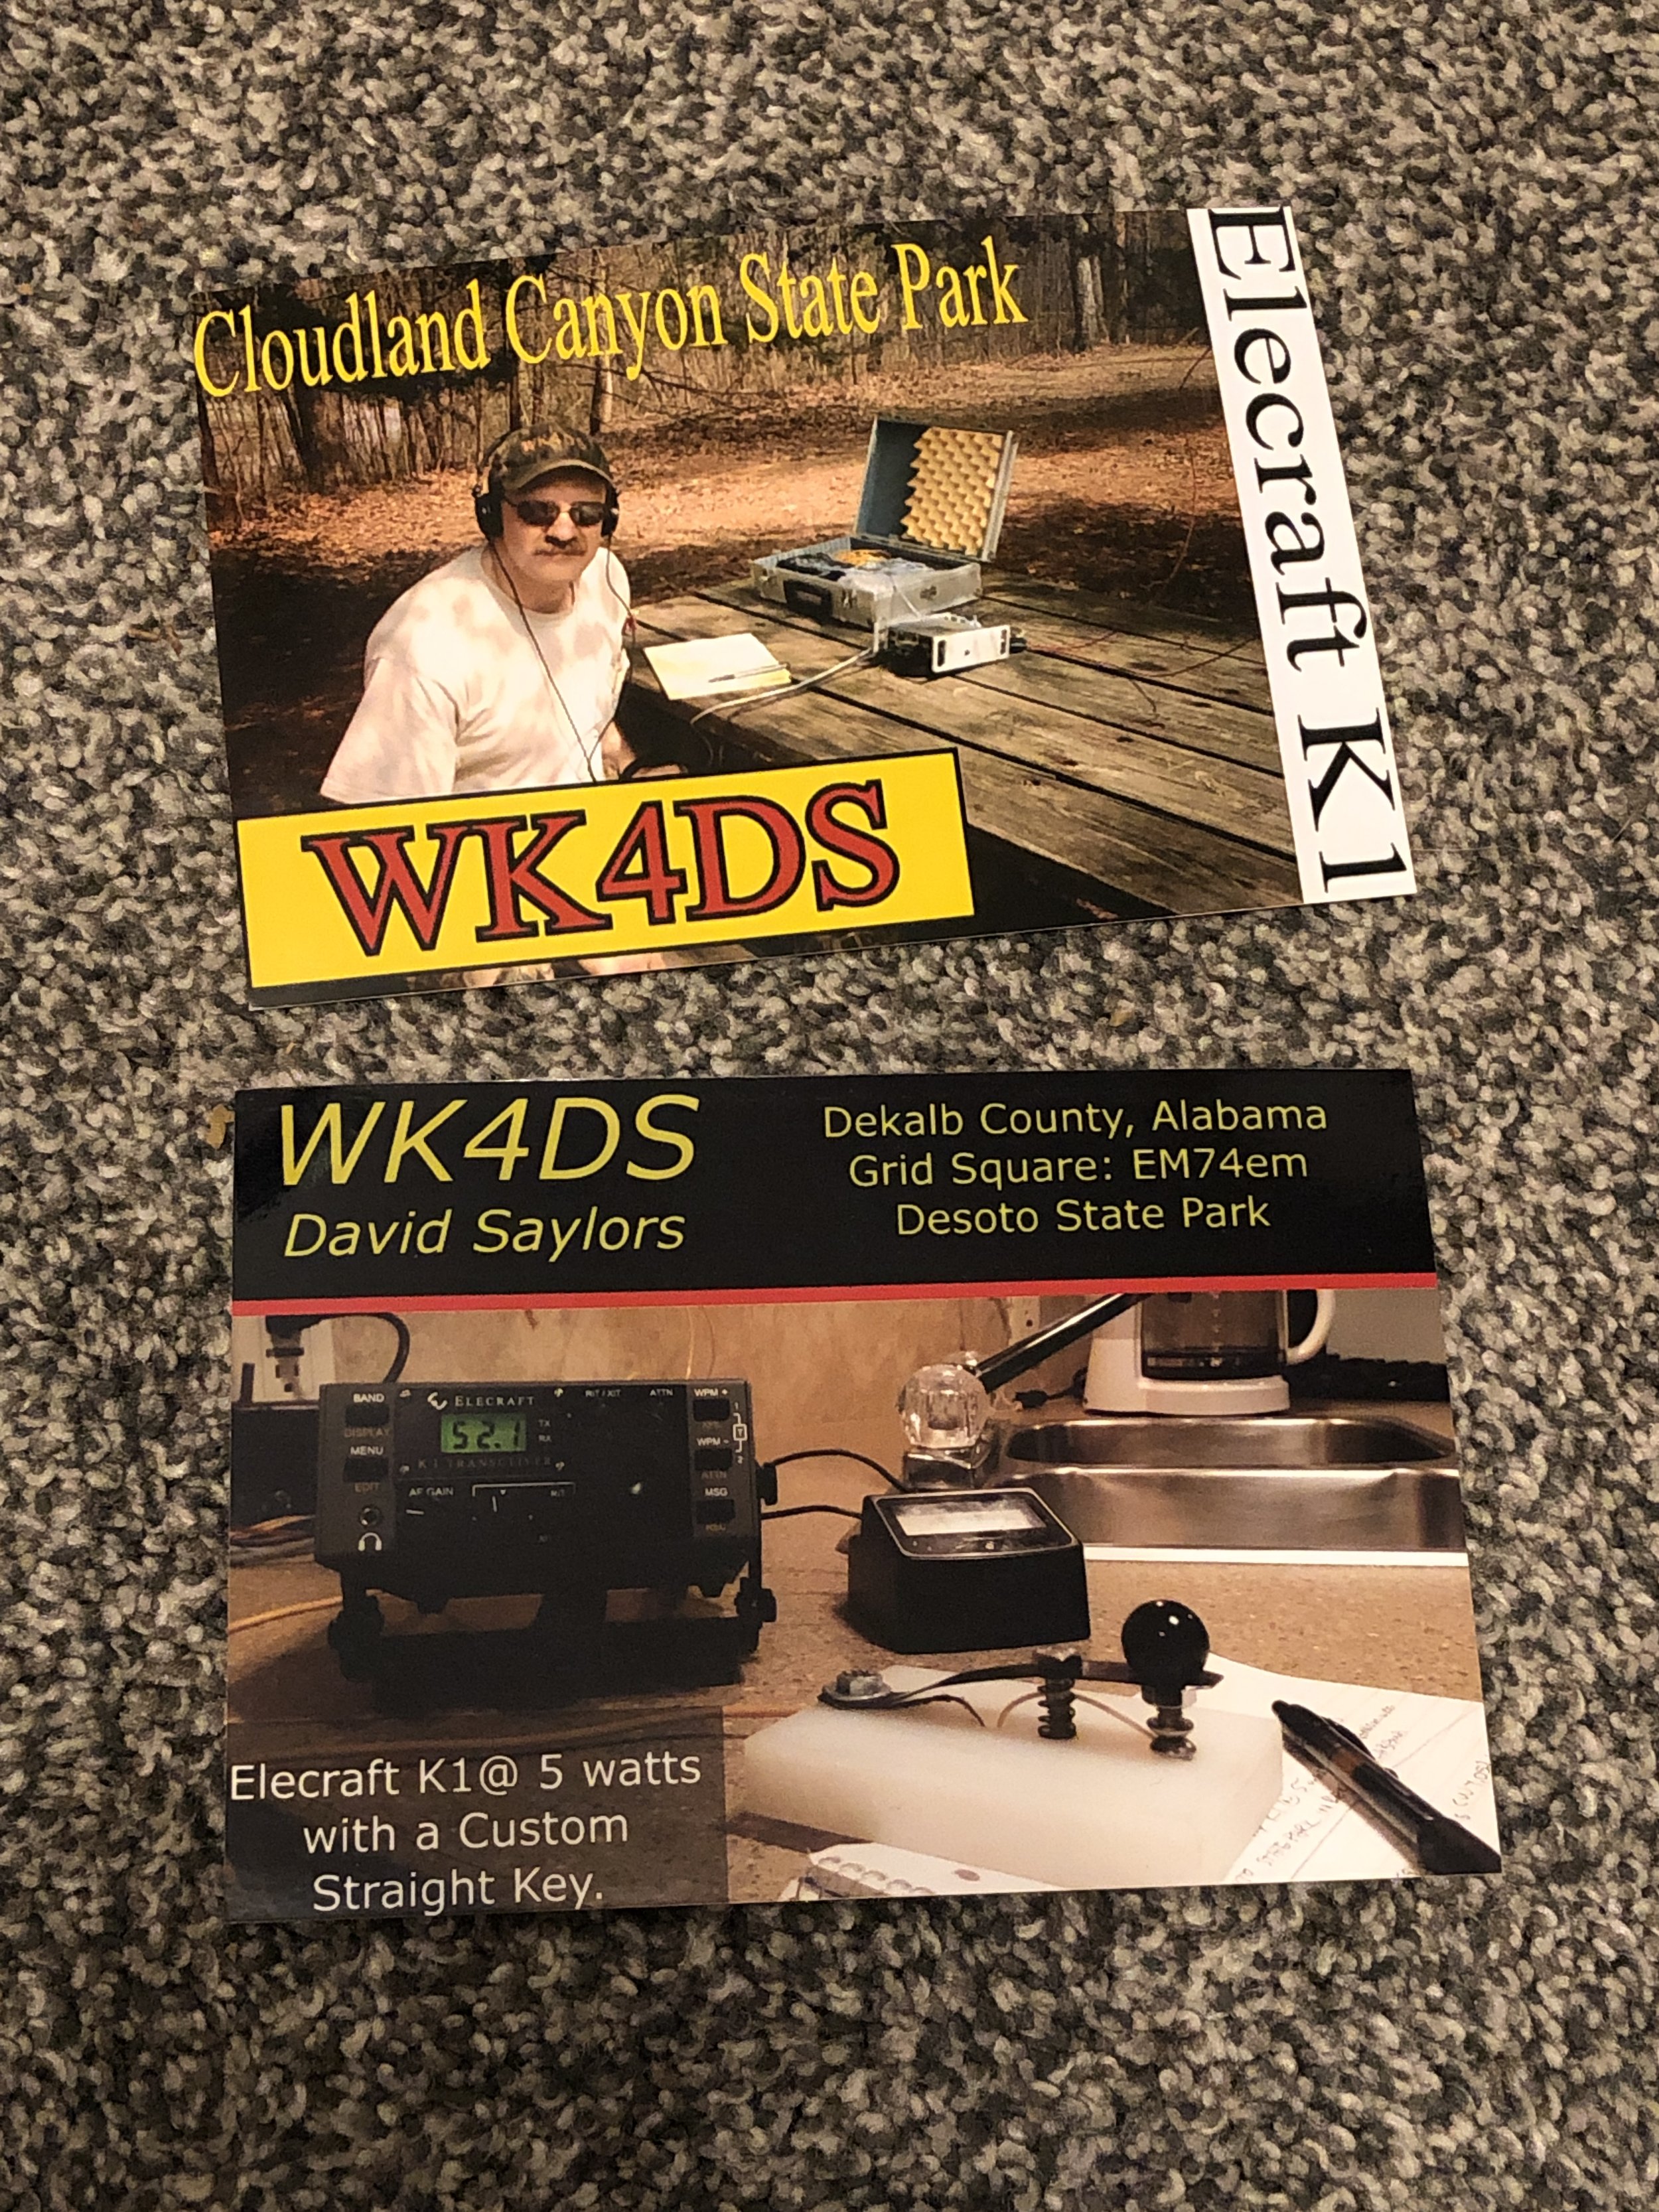
I always enjoyed getting these kind of “shack” info letters, it was always interesting for me to see what the other op was using when we made contact. Sometimes it would be a 10,000$ power house machine and sometimes it would be a homebuilt rockbound radio that cost 25$.

Yes, we had a QSO and he was transmitting with 250 milliwatts! The note about the contact is below.

So I hope if your new to amateur radio that you will consider sending some cards out and going the extra mile and personalizing them as well. Have some fun with it! That is what it is all about anyway!
Tough conditions, dead batteries and a lot of amateur radio fun.
This is a tale of a guy who thinks he is going to get a “quick” POTA activation and then go grab some photos as well… It didn’t go like that…at all.
You see I thought I had this whole Parks On The Air thing dialed in and have even built a little “kit” to activate parks with that I can just grab and go. I am repurposing an old camera bag (a story for another day) and it organizes the QRP rig perfectly for activations. Soooooo, this is how it goes on that fateful day. I have a few hours in the afternoon on June 8th 2022 and tell the wife I am gonna “run” over to Cloudland Canyon state park and get a quick activation and then be back in time for supper with the kids later. I grab said POTA bag, hop in the truck and head over to my spot to activate K-2169.

Well, I should have heeded the warning when I got there I guess as my favorite location on top of the hill was occupied with a group of teens on a day trip from a local school. I circle through the parking lot really slowly surveying the area and decided to park for a bit and see if I could figure something else out when I catch a break! They start packing up to leave!!! So I wait patiently for them to vacate the location I want to use and once clear, I move the truck and grab my gear.

Setup was frustrating this time as I had to throw my line 7 times to get a good location like I wanted (turned out later that really didnt seem to matter, haha). I FINALLY get the line up in the tree and then hook up the radio and we are off to the races! Well, I was off to the races, seems nobody could hear me. It took several minutes of calling CQ to get my first contact. Normally once I get one, then I will end up with at least an activation (10 contacts) within about the next ten minutes. Not this time, it took a full ten minutes to get the next QSO in the log! So then I figure I would go hunting some other parks and I did get one then another! NO! It was a SOTA op that is didnt hear well… lol. Well after that I got my hopes up again as I got a run of 5 in about 25 minutes. As I would be just about to give up and try something else, I would get another one and it would keep me in place a little longer. So I am an hour in and only have 8 contacts at this point, I need 10 for a technical activation, so I REALLY want to get two more before having to shut down the operation. It was at this point that I realized why I was getting the 339 reports…THE REMOTE BATTERY WAS DEAD!!! I’m thinking at this point. Really doofus, your brought a dead battery to an activation??? Well, yeah, I did… So I am now running on the battery that comes with the 705 which will only produce 5 watts output. I can hear stations but they cant hear me… I head over to 30 meters and bag N3VO for the 9th QSO in the log, it is basically time to break down the rig, but I need one more contact to have an activation, so I go back to 20 meters and switch to SSB, after trying to get through 4 pile ups without no success, I score a park to park on my last QSO of the day and get my 10th contact securing an official activation. This one was close, but I made it, I quickly broke the rig down and headed home…

So if you think you cant make it work, there is almost always a way to do it, even if you have a dead battery and the bands are terrible for QRP and you have to switch modes, you just might get it done.
73
WK4DS