Doosan Lynx CNC Memory Battery Failure: How a DIY Monitor Circuit Caught It
Finally saw this project in action! Today the battery monitor circuit did it’s job and alerted us to a low battery voltage condition on the memory batteries on Lynx 2. The machinist powered up the machine and this came on a few seconds later. What happens internally is as follows. The machine is powered on, then a 2 second times runs out to allow all the voltages to stabilize. Once the timer ends, there is a comparator circuit that compares the battery voltage level to the LM7805 5 volt regulator in a logic NAND gate.
Losing machine parameters on a CNC turning center means hours of downtime and a painful parameter recovery process, assuming you even have a backup. On our Doosan Lynx #2 (in our shop we have two of these machines), we had already lost parameters once before I built and installed a homebrew low voltage monitor circuit on the memory battery bank. Today that circuit did exactly what it was designed to do, and we caught a failing battery before it became a crisis. Here is what triggered the alarm and what I found when I pulled the batteries for testing.
Doosan Lynx memory battery issue…
Today saw this project in action! Today the Doosan Lynx battery monitor circuit did it’s job and alerted us to a low battery voltage condition on the memory batteries on Lynx 2. The machinist powered up the machine and this came on a few seconds later. What happens internally is as follows. The machine is powered on, then a 2 second times runs out to allow all the voltages to stabilize. Once the timer ends, there is a comparator circuit that compares the battery voltage level to the volt regulator in a logic NAND gate. If either input goes low, it will trigger the illuminated sign you see in this photo. After the gate decides the lamp needs to turn on, it fires a opto-isolator which in turn fires an SCR that feeds 12 volts to the LED bank. I chose an SCR because of the “latching” feature it exhibits when powered with DC voltage. All of this is explained in much better detail in the blog post here where I build and install it.

Voltage monitor circuit in “trip” mode showing that the battery bank needs attention.
The next three photos show what each battery measured when out of the machine. You read that right, the FIRST THREE batteries measured these values. This adds up to 3.8011 volts DC for these three batteries. The one that measured .9839 is odd to me as it discharged much faster than the other three batteries. But then again the 4th battery is probably the worst problem to solve. This battery is strange as you will see.
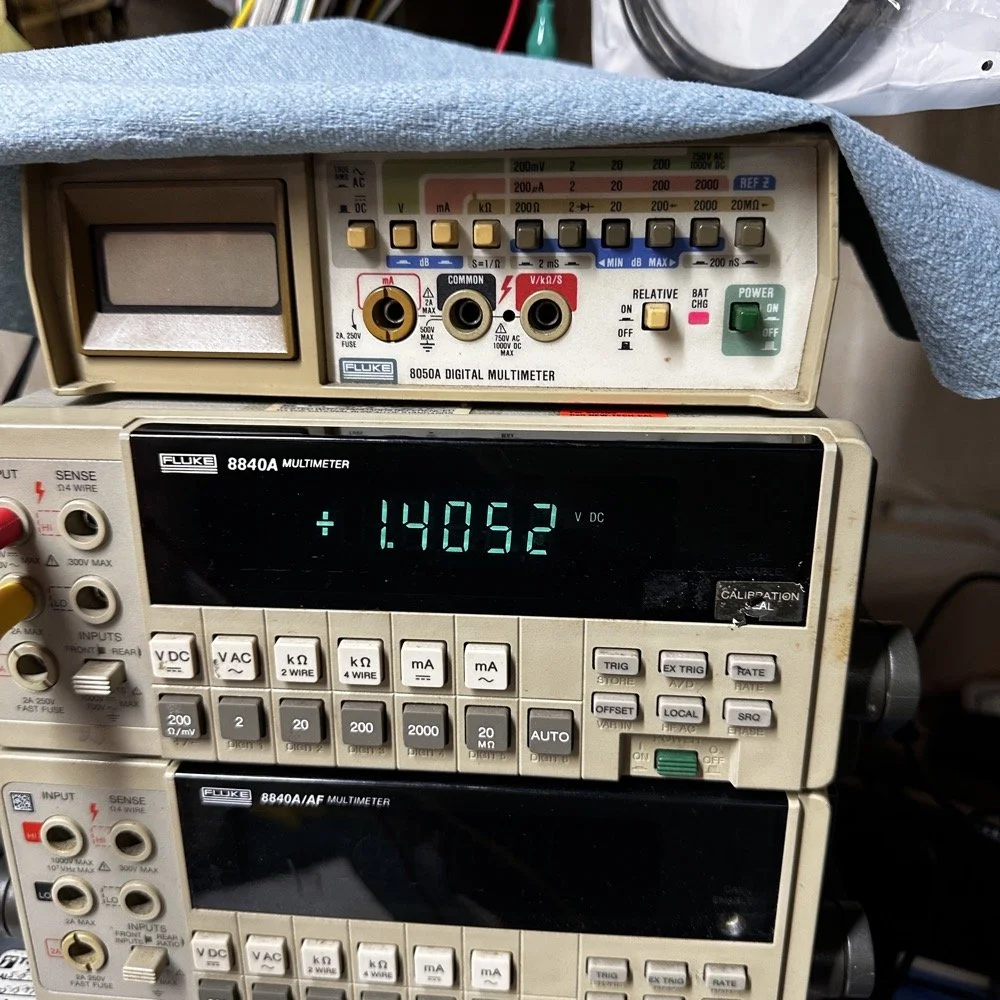
Fluke 8840 precision bench multi-meter showing voltage measurement for the 1st battery.
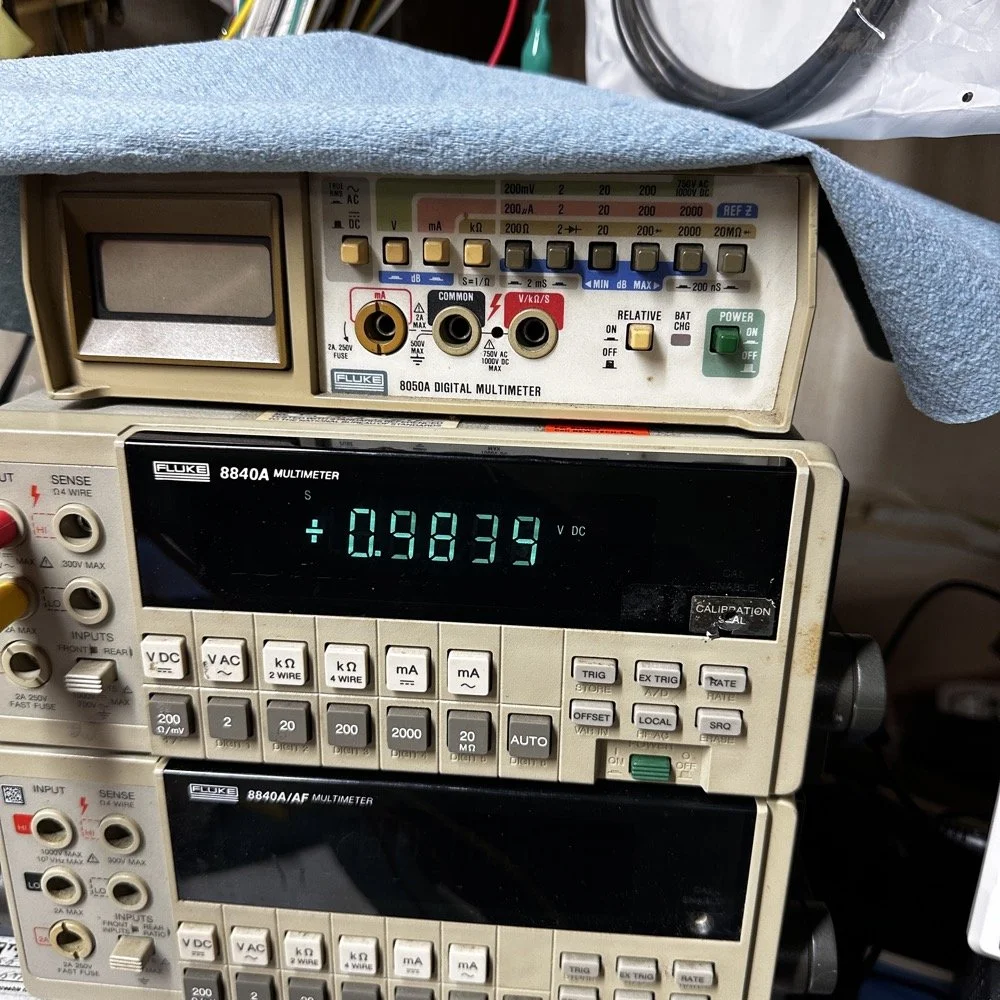
Fluke 8840 precision bench multi-meter showing voltage measurement for the 2nd battery.
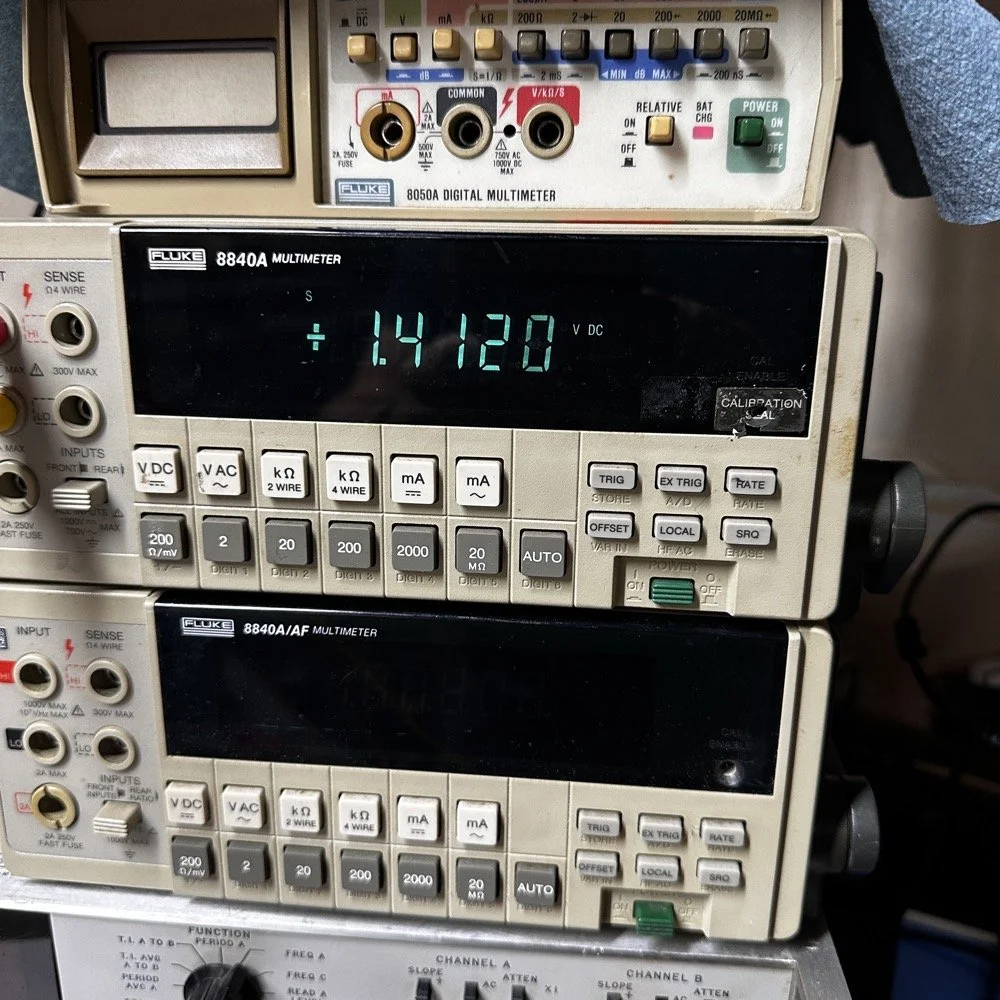
Fluke 8840 precision bench multi-meter showing voltage measurement for the 3rd battery.
Failing Alkaline Battery and Testing to find the Fault
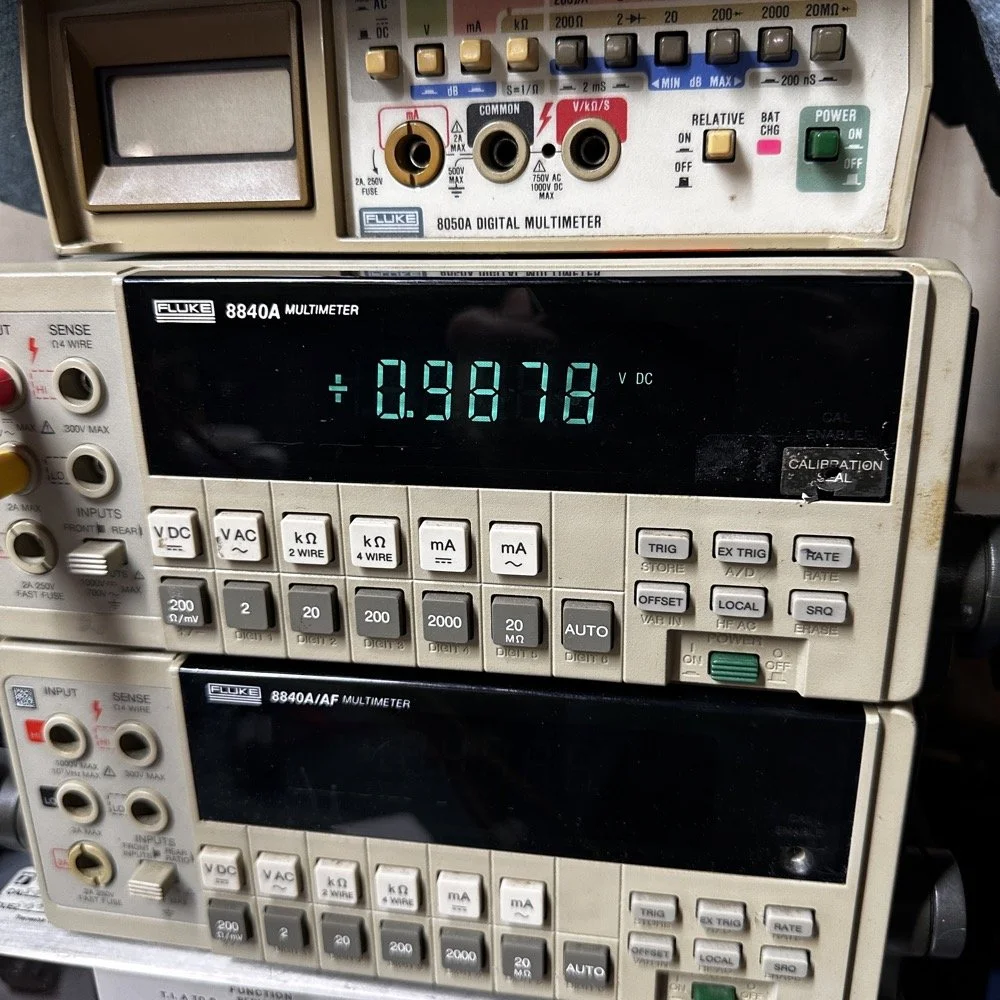
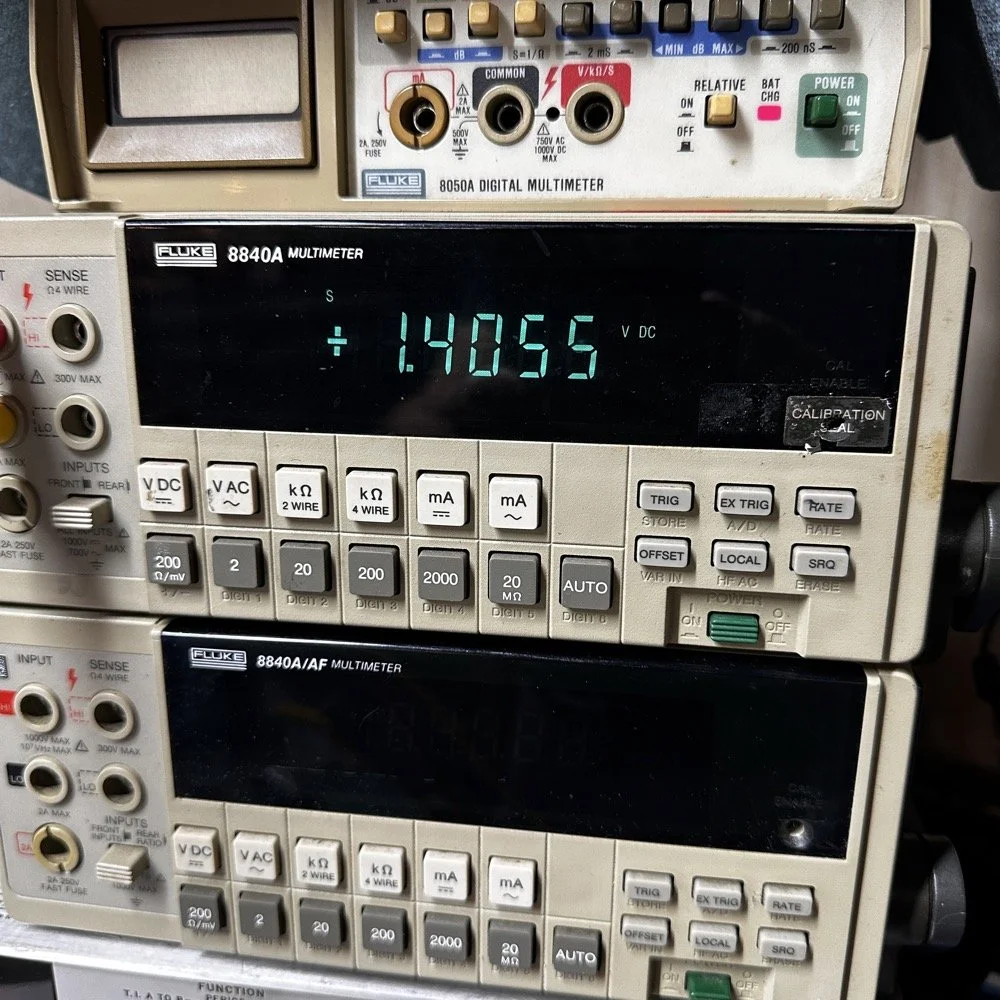
The first photo below is of me applying pressure to the battery. I found that I could apply pressure to the battery diagonally in one direction and get the measurement you see below on the Fluke 8840A Bench Multi-meter. .9878 doesn’t seem all that odd at first, but what it would do is as follows. I could hold this pressure and the longer I held it the lower the voltage went, eventually getting down to .3357 volts. Now, comes the odd part, I could apply pressure diagonally in the opposite direction and the voltage would lock in at the lower value of 1.4055 VDC.
I am fairly certain that this battery was most likely operating at the 1.4055 level when it was installed and when the other one dropped to less than 1 volt, this brought the supply to 5.2066VDC. I had adjusted the level to trip right around 5.3 VDC if memory serves me. It might be between 5.3 VDC and 5.4VDC come to think of it as the adjustment was kind of touchy to be honest. Either way, I think this faulty battery dropped today after power up due to a bad connection INSIDE the battery and this is what triggered the alarm. Crisis averted and the system I put in place to watch these batteries worked exactly as it should and warned us before we lost the machine parameters…again.
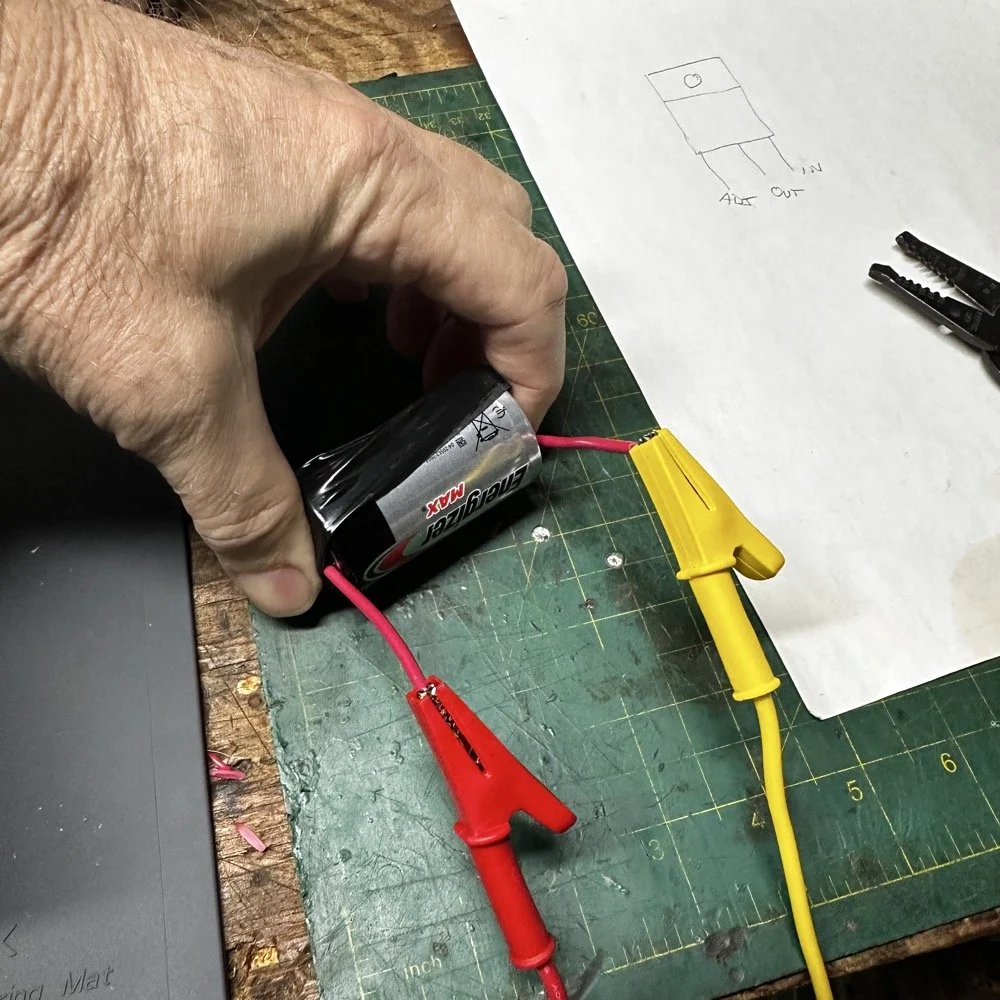
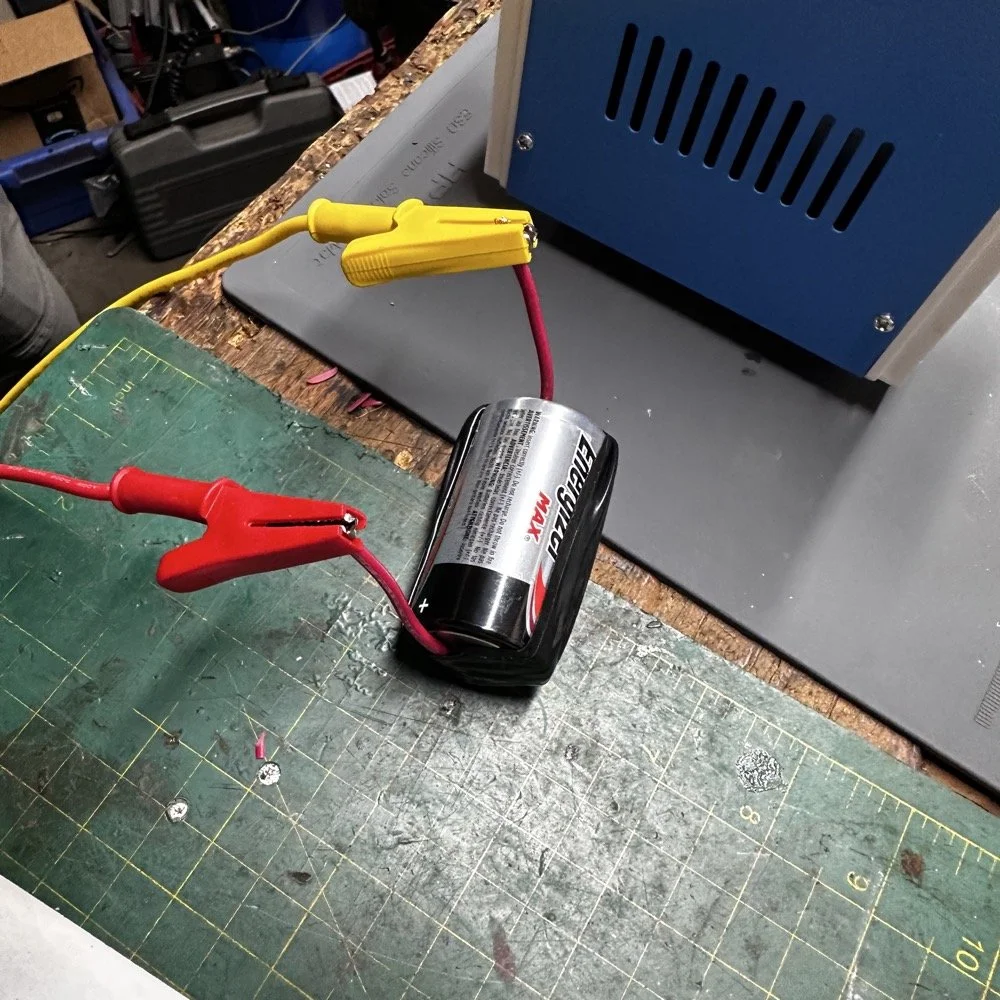
Energizer battery under test in the home lab after the voltage monitor circuit found the battery bank output low.
Fluke 8840 precision bench multi-meter showing the measured voltage on the bad cell with the loose connection in the first direction.
Fluke 8840 precision bench multi-meter showing the measured voltage on the bad cell with the loose connection in the opposite direction.
Battery Monitor proves itself Wrap Up
Apparently the brand or type of battery makes little difference when it comes to these applications. One had a high discharge rate and one had a loose internal connection out of 4 batteries! I guess it goes to show that even the best brands have an off day every once in a while. In closing, I am really happy with how this battery monitor circuit turned out even though I chose a different path to detect the voltage with than the usual Zener diode means and it still worked like I wanted. This also allowed me to work with some simple logic gates as well to see how they can perform in discreet component and well as analog projects too. The blending of digital and analog projects is a lot of fun and a great way to learn more about electronics. Also, these kinds of parts are fairly inexpensive too so you can afford to do some experimenting along the way.
Help support this website by following these affiliate links when you shop at Amazon:
HDS272S Oscilloscope (My Favorite Portable Scope-Meter)
KAIWEETS Smart Multimeter (My meter I keep in the truck)
Kaisi Extra Large Soldering Mat
No Clean Soldering Flux (All flux needs to be cleaned off but I like this best)
See you soon! ~David